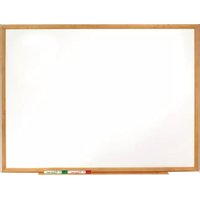
Classic S577 - Whiteboard Quartet - Free user manual and instructions
Find the device manual for free Classic S577 Quartet in PDF.


| Product Type | Whiteboard |
| Brand | Quartet |
| Model | Classic S577 |
| Dimensions (W x H) | 48 x 36 inches |
| Weight | 15 lbs |
| Surface Material | Porcelain enameled steel |
| Frame Material | Aluminum |
| Mounting Type | Wall-mounted (hardware included) |
| Writing Surface | Dry-erase, magnetic |
| Accessories Included | Marker tray, 2 dry-erase markers, eraser |
| Color | White surface, silver frame |
| Surface Finish | Glossy, easy to clean |
| Recommended Cleaner | Dry-erase board cleaner or damp cloth |
| Installation | Requires 2 people, level, drill |
| Warranty | Limited lifetime warranty |
| Use Case | Office, classroom, home |
| Certifications | GREENGUARD Gold certified |
Frequently Asked Questions - Classic S577 Quartet
User questions about Classic S577 Quartet
0 question about this device. Answer the ones you know or ask your own.
Ask a new question about this device
Download the instructions for your Whiteboard in PDF format for free! Find your manual Classic S577 - Quartet and take your electronic device back in hand. On this page are published all the documents necessary for the use of your device. Classic S577 by Quartet.
USER MANUAL Classic S577 Quartet
EURO ALUMINUM FRAME BOARD – Mounting Instructions
*NOTE – For Dry-Erase Boards:
Before mounting board to wall, please refer to instructions in "Accessory Kit" to attach the marker tray to the board frame.

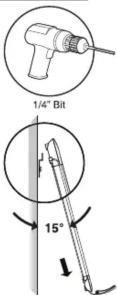

Step 1 Step 2
Determine board location. To position top hanging brackets, mark center hole of hanger 6" from outside edge of board and 1-3/8" down from top of board (A). Drill holes for each hanger in marked locations using a 1/4" drill bit. Tap anchor into hole flush to wall with metal "teeth" firmly embedded. Turn screw clockwise to expand metal legs. Stop when strong resistance is felt and legs are fully expanded.
Turn screw counter-clockwise to remove screw from anchor and re-insert through hanging bracket into wall anchor (B). Tighten firmly. Holding the board at (approx.) 15° angle, place the channel in the back of the frame over the wall hangers. Lower the board so it is flush to the wall (C).

Remove plastic corner caps (D), mark wall through top hole of each corner (E). Remove board from wall and drill holes in marked locations using a 1/4" drill bit. Install wall anchors as indicated in Step #1 (F). Re-hang board and insert screw through plastic corner and into wall anchor. Tighten firmly. Replace corner caps by pressing into place over the screws. (L-Brackets & Truss Head Screws are not required.)
ALUMINUM FRAME BOARD – Mounting Instructions
*NOTE – For Dry-Erase Boards:
Before mounting board to wall, please refer to instructions in "Accessory Kit" to attach the marker tray to the board frame.


Step 1
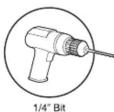
Determine board location. To position top hanging brackets, mark center hole of hanger 6" from outside edge of board and 7/8" down from top of board (A). Drill holes for each hanger in marked locations using a 1/4" drill bit. Tap anchor into hole flush to wall with metal "teeth" firmly embedded. Turn screw clockwise to expand metal legs. Stop when strong resistance is felt and legs are fully expanded.
Turn screw counter-clockwise to remove screw from anchor and re-insert through hanging bracket into wall anchor (B). Tighten firmly. Holding the board at (approx.) 15° angle, place the channel in the back of the frame over the wall hangers. Lower the board so it is flush to the wall (C).
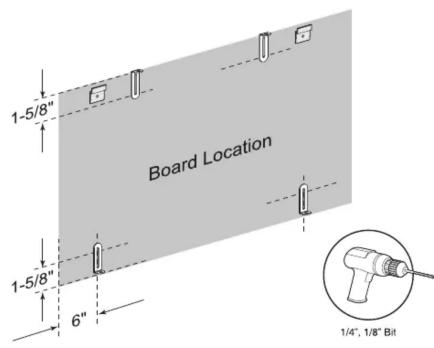

Step 2
To position bottom "L" brackets, mark wall 1-5/8" up from bottom of board 6" from each outside edge (D). To position top "L" brackets, mark wall 1-5/8" down from top of board and a 1/4 of the board width from each outside edge. Drill holes in marked locations using a 1/4" drill bit. Insert wall anchors and mount "L" brackets as indicated in Step #1 (E). Hang board and mark frame through hole in each "L" bracket. Remove board and drill pilot hole at each mark with 1/8" drill bit. Re-hang board and insert #8 x 1/2" truss head screw through each "L" bracket and into pilot hole in frame (F). Tighten firmly.
WOOD FINISH FRAME BOARD – Mounting Instructions
*NOTE – For Dry-Erase Boards:
Before mounting board to wall, please refer to instructions in "Accessory Kit" to attach the marker tray to the board frame.
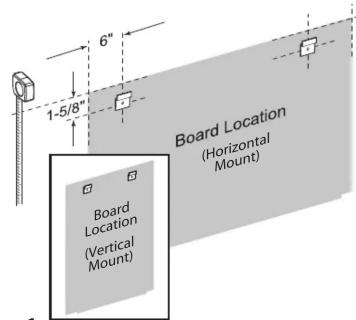


Step 1
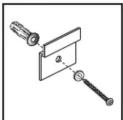
Determine board location. To position top hanging brackets, mark center hole of hanger 6" from outside edge of board and 2-1/4" down from top of board (A). Drill holes for each hanger in marked locations using a 1/4" drill bit. Tap anchor into hole flush to wall with metal "teeth" firmly embedded. Turn screw clockwise to expand metal legs. Stop when strong resistance is felt and legs are fully expanded.
Insert screws through hanging brackets into the wall anchor (B). Tighten firmly. Place the channel in the back of the frame over the wall hangers. Push top of frame down until board is fully engaged on hangers (C).


Step 2
To position bottom "L" brackets, mark wall 2-1/2" up from bottom of board 6" from each outside edge (D). To position top "L" brackets, mark wall 2" down from top of board and a 1/4 of the board width from each outside edge. Drill holes in marked locations using a 1/4" drill bit. Insert wall anchors and mount "L" brackets as indicated in Step #1 (E). Hang board and mark frame through hole in each "L" bracket. Remove board and drill pilot hole at each mark with 1/8" drill bit. Re-hang board and insert #8 x 1/2" truss head screw through each "L" bracket and into pilot hole in frame (F). Tighten firmly.
ACCESSORY PAGE CLIP
- Applies to all boards

Hardware Kit
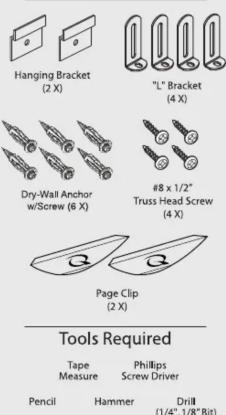

Dry-Erase and Bulletin Board
Installation Instructions

natural_image
Illustration of a flat-screen monitor with a mesh pattern on the screen and a magnified inset showing a circular detail (no text or symbols)
ACCO Brands
300 Tower Parkway
Lincolnshire, IL 60069-3640
www.quartet.com
www.acco.com

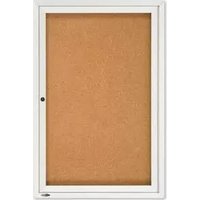
Brand : Quartet
Model : Classic S577
Category : Whiteboard