
WR-057 - Microphone Steren - Free user manual and instructions
Find the device manual for free WR-057 Steren in PDF.


| Product Type | Microphone |
| Brand | Steren |
| Model | WR-057 |
| Type | Dynamic microphone |
| Frequency Response | 50 Hz - 15 kHz |
| Sensitivity | -54 dB ± 3 dB |
| Impedance | 600 ohms |
| Connector | 1/4" (6.35 mm) Jack |
| Cable Length | 3 m (approx) |
| Power | No battery required (passive) |
| Dimensions | 4.5 x 1.5 in (114 x 38 mm) |
| Weight | 0.6 lbs (270 g) |
| Material | Metal body with grille |
| Polar Pattern | Cardioid |
| On/Off Switch | Yes |
| Included Accessories | Microphone, stand adapter, 3m cable |
| Maintenance | Wipe with dry cloth; store in dry place |
| Safety Warnings | Keep away from moisture and extreme temperatures |
| Spare Parts Availability | Not available from manufacturer |
| Repairability | Non-serviceable; replace if defective |
| Warranty | 1 year limited warranty |
Frequently Asked Questions - WR-057 Steren
User questions about WR-057 Steren
0 question about this device. Answer the ones you know or ask your own.
Ask a new question about this device
Download the instructions for your Microphone in PDF format for free! Find your manual WR-057 - Steren and take your electronic device back in hand. On this page are published all the documents necessary for the use of your device. WR-057 by Steren.
USER MANUAL WR-057 Steren
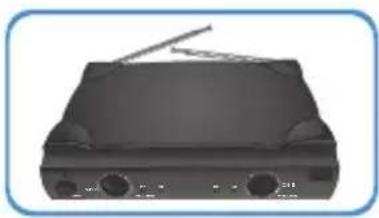
Transmisor VHF
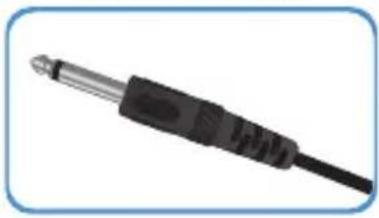
Cable de audio


3. CONTROLES
3.1 Panel frontal

5. CONEXIONES

6.1 Operación

VHF wireless hand, lapel and headset microphone system

Instruction manual
V1110
S4-B
VHF wireless hand, lapel and headset microphone system
WR-057
Thank You
on purchasing your new Steren product.
This manual includes all the feature operations and troubleshooting necessary to install and operate your new VHF wireless hand, lapel and headset microphone system.
Please review this manual thoroughly to ensure proper installation and operation of this product. For support, shopping, and everything new at Steren, visit our website:
www.steren.com
CONTENTS
- FEATURES .8....
- CONTENT 9
- CONTROLS 10
3.1 Front panel 10
3.2 Rear panel 11
3.3 Transmitter 11
3.4 Microphone 12
- BATTERY INSTALLATION 12
- CONNECTIONS 13
- MICROPHONE BASICS 14
6.1 Operations 15
- SPECIFICATIONS 16
IMPORTANT
- Do not use or store the equipment near wet places.
- Clean only with a soft, dry cloth.
- Do not bump or drop the microphone
- Do not use the microphone if it is exposed to direct sun light, extreme heat, dust or moisture.

Do not mix electric and electronics products with domestic garbage.
Help to avoid adverse effects on human health and the environment. Contact your local authority for detailed reports on the collection of electrical and electronic equipment.
SAFETY INSTRUCTIONS
RISK OF SHOCK
CAUTION: To reduce the risk of electric shock, do not remove cover (or back). No user serviceable parts inside. Only refer servicing to qualified service personnel.
WARNING
To reduce the risk of fire or electric shock, do not expose this unit to rain or moisture.
- Read Instructions - All the safety and operating instructions should be read before the appliance is operated.
-
Retain Instructions - The safety and operating instructions should be retained for future reference.
-
Heed Warnings - All warnings on the appliance and in the operating instructions should be adhered to.
-
Follow Instructions - All operating and use instructions should be followed.
-
Attachments - Do not use attachments not recommended by the product manufacturer as they may cause hazards.
-
Water and Moisture - Do not use this unit near water. For example, near a bathtub or in a wet basement and the like.
-
Carts and Stands - The appliance should be used only with a cart or stand that is recommended by the manufacturer.
7 A. An appliance and cart combination should be moved with care. Quick stops, excessive force, and uneven surfaces may cause an overturn.
-
Ventilation - The appliance should be situated so its location does not interfere with its proper ventilation. For example, the appliance should not be situated on a bed, sofa, rug, or similar surface that may block the ventilation slots.
-
Heat - The appliance should be situated away from heat sources such as radiators, heat registers, stoves, or other appliances (including amplifiers) that produce heat.
-
Power Sources - The appliance should be connected to a power supply only of the type described in the operating instructions or as marked on the appliance.
-
Grounding or Polarization - Precautions should be taken so that the grounding or polarization means of an appliance is not defeated.
-
Power-Cord Protection - Power-supply cords should be routed so that they are not likely to be walked on or pinched by items placed upon or against them, paying particular attention to cords at plugs, convenience receptacles, and the point where they exit from the appliance.
-
Cleaning - Unplug this unit from the wall outlet before cleaning. Do not use liquid cleaners or aerosol cleaners. Use a damp cloth for cleaning.
-
Nonuse Periods - The power cord of the appliance should be unplugged from the outlet when left unused for a long period of time.
-
Object and Liquid Entry - Care should be taken so that objects do not fall and liquids are not spilled into the enclosure through openings.
-
Damage Requiring Service - The appliance should be serviced by qualified service personnel when:
A. The power supply cord or plug has been damaged
B. Objects have fallen into the appliance
C. The appliance has been exposed to rain
D. The appliance does not appear to operate normally or exhibits a marked change in performance
E. The appliance has been dropped, or the enclosure damaged.
- Servicing - The user should not attempt to service the appliance beyond that described in the operating instructions. All other servicing should be referred to qualified service personnel.
LISTENING FOR A LIFETIME
Selecting fine audio equipment such as the unit you've just purchased is only the start of your musical enjoyment. Now it's time to consider how you can maximize the fun and excitement your equipment offers.
Sound can be deceiving. Over time your hearing “comfort level” adapts to a higher volume of sound. So what sounds “normal” can actually be loud and harmful to your hearing.
Guard against this by setting your equipment at a safe level BEFORE your hearing adapts.
To establish a safe level:
1.- Start your volume control at a low setting.
2.- Slowly increase the sound until you can hear it comfortably and clearly, and without distortion.
Once you have established a comfortable sound level:
1.- Set the dial and leave it there.
2.- Pay attention to the different levels in various recordings.
1. FEATURES
The VHF wireless microphone system has a wide frequency range to avoid interferences with other devices. The transmitter has gain control, on / off switch, and low battery indicator that will indicate us when to change the battery.
The receiver has on / off switch, independent volume control and luminous power on indicator light and signal reception.
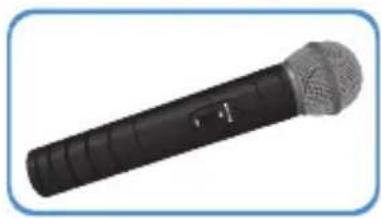
The hand microphone includes on / off switch, low battery indicator and mute.
- Wide frequency range.
- Low battery indicator in hand microphone.
- Independent volume control in the receiver.
- Unbalanced mixed output.
- 40 m maximum range.
2. CONTENT
Upon unpacking the appliance, you should have received the following items:
dc/ac converter

VHF hand microphone
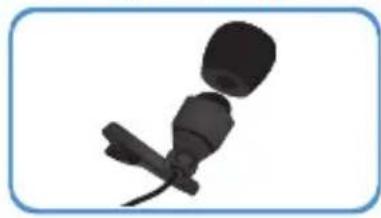
VHF lapel microphoneVHF Receptor

VHF transmitter

VHF headset microphone

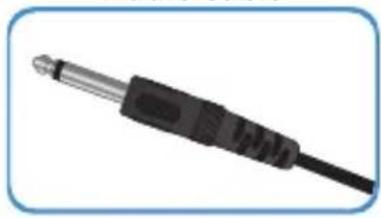
Audio cable
3. CONTROLS
3.1 Front panel

1.- On / Off
2.- Power LED indicator
3. Volume control channel 1
4.- Microphone on LED indicator channel 1
5.- Peak LED indicator channel 1
6. Volume control channel 2
7.- Microphone on LED indicator channel 2
8.- Peak LED indicator channel 2
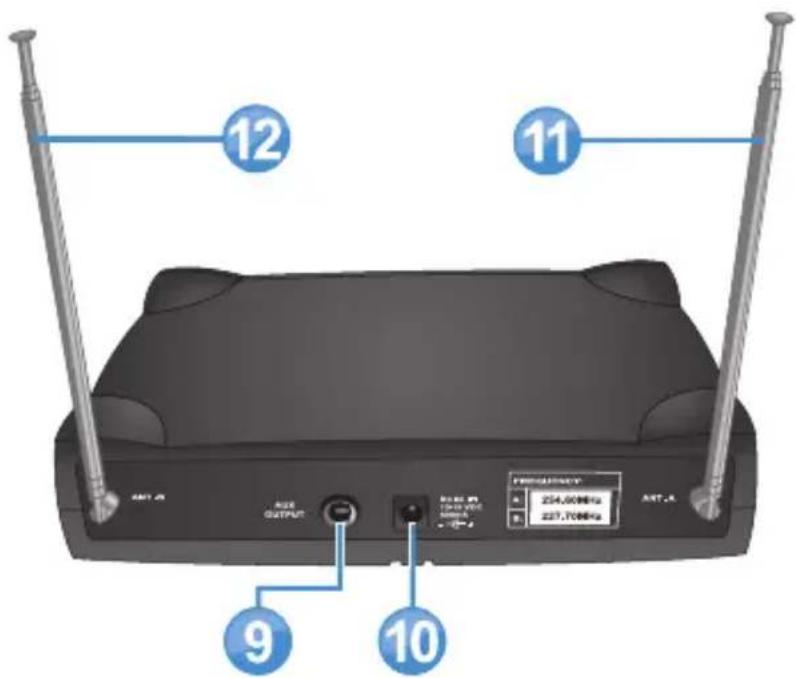
3.2 Rear panel
9.- Non-balanced mixer output
10.- AC IN
11.- Antenna A
12.-Antenna B
3.3 Transmitter

- Gain Control Adjust the gain of the volume.
- Microphone connector Connect the headset microphone or lapel.
- Power switch/ MUTE Turns on or off the microphone. Switch in the middle: Mute mode.
- Battery compartment Allows you to place a 9V battery.
3.4 Microphone
1.- Grill
Protects the microphone cartridge and helps reduce "breathy" and wind noise pick-up.
2.- Power switch
Used to turn the microphone power ON and OFF. The mic power is ON when the switch is in the ON position and the power is OFF when the switch is in the OFF position.
3.- Battery compartment
Allows you to place AA batteries.

4. BATTERY INSTALLATION

-
On the microphone, remove the cover by turning it counter clockwise until it snaps.
-
Insert two new AA batteries. Make sure the batteries are inserted with the correct polarity.
-
Replace the battery compartment cover by turning in clockwise until firm.
-
At the transmitter, remove the battery compartment.
- Place one 9V battery being careful with the polarity.
- Replace the cover.

5. CONNECTIONS

- Connect a microphone to transmitter input (tie or head microphone)
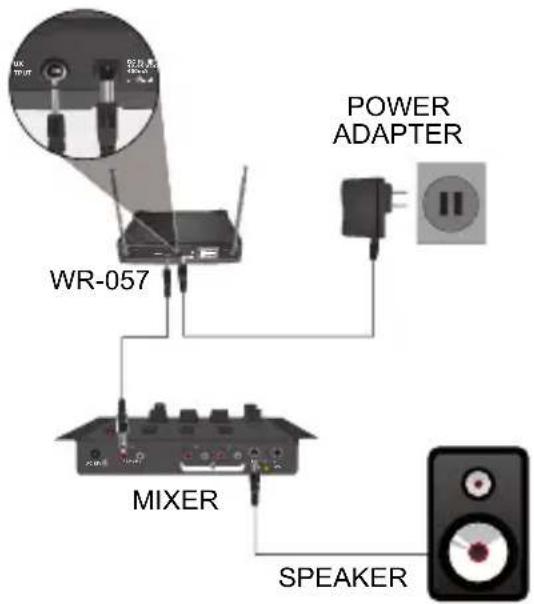
- Connect the AC power adapter to the receiver's DC IN connector, then plug the adapter into a compatible AC electrical outlet.
- Connect the receiver to a sound system, mixer or amplifier's microphone input(s) with 1/4 " output jacks. When using a mixer, connect each mic line into a separate channel. This gives you complete control when mixing the vocals.
6. MICROPHONE BASICS
The mic is ideal to close voice situations and may be used in the hand or in a stand. Remember that the microphone use technique is according to the user's likes and needs, and doesn't exists a "correct" way to use it.
Proximity Effect
When the sound source is less than 1/4 " from the microphone, the microphone boosts bass Frequencies (by 6 to 10 dB at 100 Hz), creating a warmer and richer bass sound than when farther away.
Feedback
Feedback occurs when the amplified sound from any loudspeaker reenters the sound system through any open microphone and is repeatedly amplified. Most commonly, feedback is caused by the following conditions:
placing loudspeakers too close to microphones, having too many open active microphones, boosting tone controls indiscriminately (mainly treble) and performing in areas with high ratios of room surfaces that have hard and reflective surfaces such as glass, marble and wood.
What to do if feedback occurs before the sound system is loud enough?
- Request that the talker speak louder into the microphone.
- Reduce the distance from the talker to the microphone.
- Reduce the number of open microphones.
- Move the loudspeaker farther away from the microphone.
- Move the loudspeaker closer to the listener.

6.1 Operations
1.- Press the power button on the receiver's front panel. The power LED on the receiver will be on.
2.- Adjust the receiver's volume controls to approximately 50%.
3.- Switch the microphone's or/and transmitter's power button to the ON position.
4.- Extend the receiver's antennas, and place them in a position where they can receive the signal from the microphones.


5.- Talk or sing into the microphones. During normal operation, the RF signal LED's will light on when a microphone is being use, if there are peaks the AF LED will light on.
7. SPECIFICATIONS
Microphone
Input (hand microphone) 3V --- (2xAA) — Input (tie and headset microphone): 9V --- (square battery) Frequency Range: 180MHz - 270MHz Stability: 50PPM (-10° \~ 50°C) Transmission power: 10dBm Maximum input level: 0dBV Operating Temperature: -10 \~ 50°C Dimensions: 265x56x56mm
Receiver
Power: 12V --- 15V --- 250mA Frequency Range: 180MHz \~ 270MHz Sensitivity: -92dBm for 30dB Frequency response: 70Hz \~ 16KHz +/- 3dB Dynamic Range: >90dB
Ac / dc converter
Input: 100 \~ 240V\~ 60Hz 8W Output: 12V --- 250mA

Product design and specifications are subject to change, without notice.
Product: VHF wireless hand, lapel and headset microphone system Part number: WR-057
Brand: Steren
WARRANTY
This Steren product is warranted under normal usage against defects in workmanship and materials to the original purchaser for one year from the date of purchase.
CONDITIONS
1.- This warranty card with all the required information, invoice, product box or package, and product, must be presented when warranty service is required.
2.-If the product stills on the warranty time, the company will repair it free of charge.
3.- The repairing time will not exceed 30 natural days, from the day the claim was received.
4.- Steren sell parts, components, consumables and accessories to customer, as well as warranty service, at any of the addresses mentioned later.
THIS WARRANTY IS VOID IN THE NEXT CASES:
If the product has been damaged by an accident, acts of God, mishandling, leaky batteries, failure to follow enclosed instructions, improper repair by unauthorized personnel, improper safe keeping, among others.
a) The consumer can also claim the warranty service in the purchase establishment. b) If you lose the warranty card, we can reissue it, if you show the invoice or purchase ticket.
RETAILER INFORMATION
Name of the retailer ____
Address
Product
Brand
Part number ____
Serial number
Date of delivery ____
In case your product fails or have questions, please contact your nearest dealer. If you are in Mexico, please give a call to our Call Center. Call Center

01 800 500 9000
www.steren.com

STEREN
Help us to improve this instruction manual, call us to:

01800 500 9000
Customer Service Center
- CONTROLES
- 3.1 PANEL FRONTAL
- CONEXIONES
- 6.1 OPERACIÓN
- VHF WIRELESS HAND, LAPEL AND HEADSET MICROPHONE SYSTEM
- THANK YOU
- CONTENTS
- IMPORTANT
- SAFETY INSTRUCTIONS
- RISK OF SHOCK
- WARNING
- LISTENING FOR A LIFETIME
- TO ESTABLISH A SAFE LEVEL
- FEATURES
- CONTENT
- CONTROLS
- 3.1 FRONT PANEL
- 3.2 REAR PANEL
- 3.3 TRANSMITTER
- 3.4 MICROPHONE
- 1.- GRILL
- 2.- POWER SWITCH
- 3.- BATTERY COMPARTMENT
- BATTERY INSTALLATION
- CONNECTIONS
- MICROPHONE BASICS
- PROXIMITY EFFECT
- FEEDBACK
- 6.1 OPERATIONS
- SPECIFICATIONS
- MICROPHONE
- RECEIVER
- AC / DC CONVERTER
- PRODUCT: VHF WIRELESS HAND, LAPEL AND HEADSET MICROPHONE SYSTEM PART NUMBER: WR-057
- BRAND: STEREN
- WARRANTY
- CONDITIONS
- THIS WARRANTY IS VOID IN THE NEXT CASES
- RETAILER INFORMATION
- STEREN
Brand : Steren
Model : WR-057
Category : Microphone