
CG 560J2 - Dishwasher CONSTRUCTA - Free user manual and instructions
Find the device manual for free CG 560J2 CONSTRUCTA in PDF.


| Product Type | Dishwasher |
| Brand | Constructa |
| Model | CG 560J2 |
| Capacity | 12 standard place settings |
| Programmes | Intensive 65°C/70°C, Normal 65°C, Eco 50°C, Quick 35°C, Pre-rinse |
| Programme Durations | 99 min (Intensive), 96 min (Normal), 90 min (Eco), 30 min (Quick), 13 min (Pre-rinse) |
| Energy Consumption | 2.0 kWh (Intensive), 1.75 kWh (Normal), 1.44 kWh (Eco), 0.80 kWh (Quick), 0.10 kWh (Pre-rinse) |
| Water Consumption | 26 L (Intensive), 26 L (Normal), 18 L (Eco), 15 L (Quick), 5 L (Pre-rinse) |
| Water Softener | Adjustable, requires dishwasher salt |
| Salt Container Capacity | Approx. 1.5 kg |
| Rinse-Aid Dispenser | Adjustable amount (factory setting 4), with refill indicator |
| Detergent Dispenser | Capacity up to 40 ml (15 ml bottom line, 25 ml middle line) |
| Spray Arms | Upper and lower rotary spray arms |
| Filter System | Filter cylinder, flat fine filter; microfilter on some models |
| Basket Features | Foldable spikes, adjustable top basket height, cutlery baskets, optional knife rack and shelf |
| Child Lock | Available on applicable models |
| Water Pressure | 0.5 to 10 bar |
| Flow Rate Required | Minimum 10 L/min |
| Maximum Hot Water Temperature | 60°C |
| Electrical Connection | 230/240 V AC, earthed socket |
| Installation Type | Built-under or built-in (continuous work surface required) |
| Dimensions | Standard undercounter dimensions (exact not specified) |
| Weight | Not specified |
Frequently Asked Questions - CG 560J2 CONSTRUCTA
User questions about CG 560J2 CONSTRUCTA
0 question about this device. Answer the ones you know or ask your own.
Ask a new question about this device
Download the instructions for your Dishwasher in PDF format for free! Find your manual CG 560J2 - CONSTRUCTA and take your electronic device back in hand. On this page are published all the documents necessary for the use of your device. CG 560J2 by CONSTRUCTA.
USER MANUAL CG 560J2 CONSTRUCTA
natural_image
Cross-sectional diagram of a kitchen appliance showing internal compartments and housing (no text or labels)DE Gebrauchsanweisung
GB Instruction for Use
FR Mode d'emploi
NL Gebruiksaanwijzing
Sicherheitshinweise
Bei der Anlieferung
natural_image
Mechanical process showing a funnel pouring granular material into a conical container, with a gear mechanism visible nearby (no text or symbols)natural_image
Hand inserting a component into a device (no text or symbols visible)natural_image
Line drawing of a laboratory setup with a hand pouring liquid into a gas stove and a control panel (no text or symbols)
Hinweis
natural_image
Simple line drawing of a device with labeled components and directional arrows (no text or symbols)natural_image
Black-and-white illustration of a shopping cart filled with various items (no visible text or symbols)Töpfe
natural_image
Illustration of a kitchen sink with plates, utensils, and a plate (no text or symbols)Besteck
natural_image
Line drawing of a hand using a tool to adjust or install a mechanical component inside a storage unit (no text or symbols)natural_image
Illustration of a kitchen interior with a plate, drawer, and food items (no text or symbols)Messeretagere (\*)
natural_image
Technical line drawing of a mechanical assembly with tool holders and structural framework (no text or symbols)Die Etagere \*
natural_image
Abstract line drawing of a grid-like structure with an arrow pointing to a dark triangular feature (no text or symbols)natural_image
Technical diagram showing two views of a mechanical assembly with pulleys and rotating components (no text or labels)natural_image
Illustration of a hand turning a valve into a mechanical component with a curved arrow indicating rotation (no text or symbols)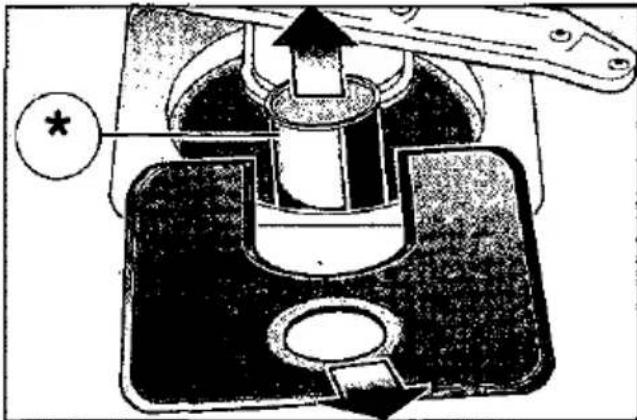
natural_image
Cross-sectional diagram of a mechanical device with internal components and directional arrows (no text or symbols)natural_image
Hand turning a valve on a mechanical component (no text or symbols visible)Wartung und Pflege
Sprüharme
natural_image
Mechanical assembly diagram showing a propeller being lifted by a valve, with no visible text or symbolsSprüharme
Abwasserpumpe
Fehlersuche
natural_image
Diagram showing two mechanical components with upward arrows indicating motion or assembly (no text or symbols present)
Achtung
natural_image
Illustration of a tray with various food items including sliced vegetables, mushrooms, and bread (no text or symbols)Bild A
natural_image
Illustration of a mechanical device with multiple rotating components and central hub (no text or symbols)Bild B
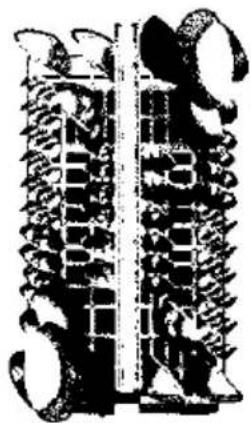
Bild C
Hinweise
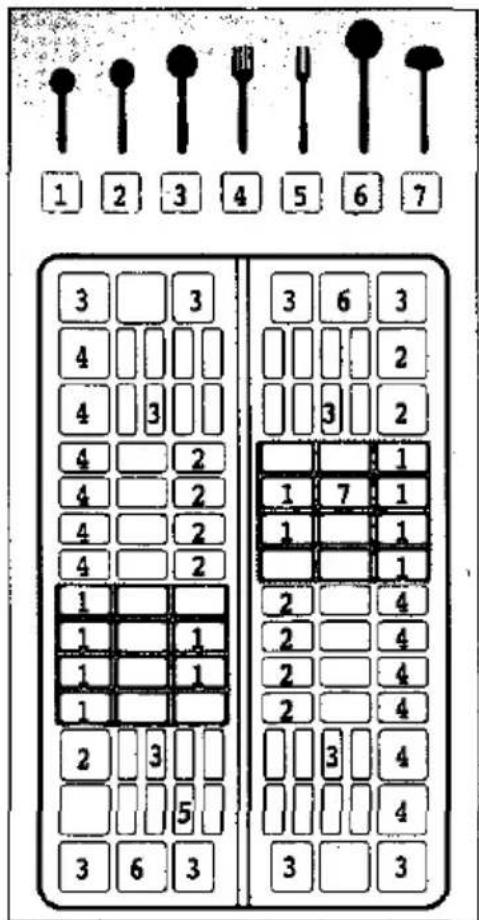
Bild D
Allgemeines
minimal 10 Liter/Minute
Wassertemperatur:
- Check packaging and dishwasher immediately for signs of transport damage. If the appliance is damaged, do not put it into use but contact your supplier without delay.
- Please dispose of packaging materials properly.
During installation
- Site the dishwasher and connect it up in accordance with the installation instructions.
- The dishwasher must not be connected to the electricity supply while installation is being carried out.
- Ensure that the domestic wiring is properly earthed.
- The mains electricity supply must conform to the details shown on the dishwasher nameplate.
- Do not connect the dishwasher to the electricity supply via an extension cable.
- Not on all models: The plastic housing on the water input contains an electrically operated valve. The connecting wires are inside the inlet hose. Do not cut through this hose and do not immerse the plastic housing in water.
- Built-under and built-in appliances should always be installed under a continuous work surface which is attached to the adjacent cupboards, in order to ensure that the appliance is entirely stable.
- After the appliance has been installed, the mains plug should still be easily accessible.
During normal use
- Use the dishwasher solely in a domestic environment and for its designated purpose: washing household tableware and other utensils.
- Do not place any heavy objects or stand on the door when it is open. The appliance could tip forward.
- The water inside the dishwasher is not suitable for drinking.
- Do not use solvents of any kind inside your dishwasher. They could cause an explosion.
- Open the door very carefully if the dishwasher is operating. There is a risk of water squirting out.
If your family includes children
- Do not permit small children to play with or operate the dishwasher.
- Keep children away from detergents and rinse-aids.
- Keep small children away from the open door of the dishwasher. There could still be some detergent left inside.
Safety information
Child lock \*
* on applicable models
Please refer to the drawings enclosed in the envelope
40 Engaging the child lock (Door handle 2)
41 Opening the door with the child lock engaged
42 Disengaging the child lock
If a fault occurs
- Repairs or other work on the dishwasher should only be carried out by a qualified specialist.
- The dishwasher must be disconnected from the electricity supply before any repairs or other work are started. Pull the mains plug out of the wall socket or switch off at the fuse box. Grasp the plug to remove it from the socket; do not tug on the cable. Turn the water off at the tap.
When disposing of old appliances
- Appliances that have reached the end of their service life should be rendered inoperable in order to exclude the possibility of subsequent accidents. Pull the mains plug out of the wall socket, cut through the connecting cable and disable the door lock.
- Take the appliance to a designated waste disposal centre.
Getting to know your dishwasher
Illustrations of the control panel and the interior of the dishwasher are shown on the rear fold-out cover of this manual. Fold this page out before you read the manual.
Control panel
1 Main switch
2 Door handle
3 End programme button.
4 Programme buttons
5 LOW SALT indicator
6. LOW RINSE-AID indicator
Appliance interior
20 Upper spray arm
21 Upper basket with 2-tiered cup rack
22 Lower spray arm
23 Filters
24 Lower basket with 2-tiered cup rack
25 Container for salt
26 Cutlery baskets
27 Detergent dispenser
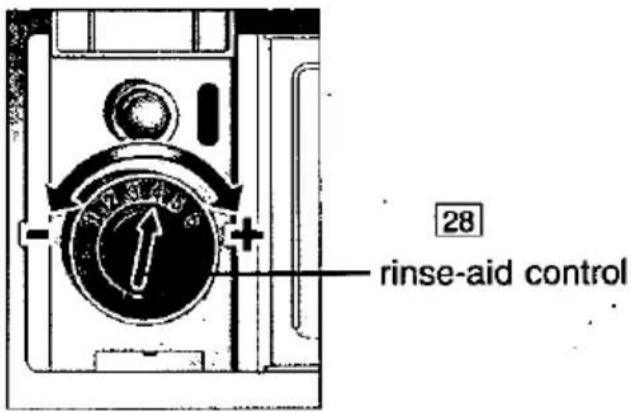
28 Container for rinsé-aid, with refill indicator.
29 Nameplate
30 Upper cutlery baskets (*)
* on applicable models
You will need to purchase the following before using the dishwasher for the first time:
- special salt for use in dishwashers
- detergent
- rinse-aid
Water softener
In order to rinse dishes and glasses satisfactorily, the dishwasher requires soft water, i.e. containing little or no lime, otherwise water stains will be left behind on crockery and glasses, etc.
If the tap water exceeds a certain level of hardness, it must be softened, i.e. decalcified, so that it can be used in the dishwasher.
This is achieved by adding a special salt to the water softener inside the dishwasher.
The water softener, that is the required amount of salt, is set up according to how hard the tap water is.
Water hardness table
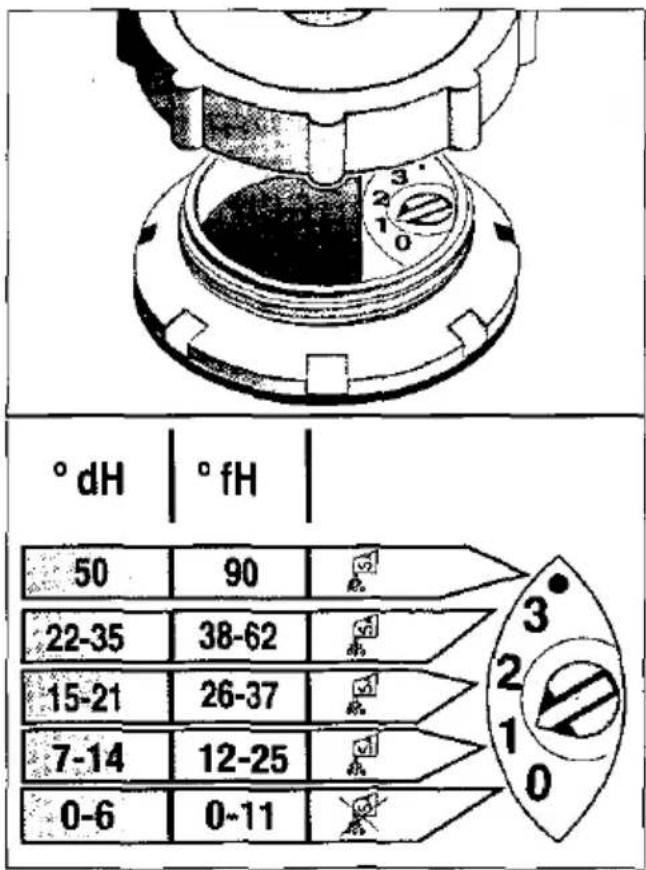
Setting up the water softener
- Determine the level of hardness of your tap water. Your local water company or service agent can help you with this.
- Identify setting from the following water hardness table.
Filling the special salt container
How the salt works
While washing is taking place, salt is automatically rinsed out of the salt container into the water softener where it dissolves the lime in the water.
The dissolved lime is pumped out of the dishwasher. The water softening system is then ready for the next load.
This process of regeneration can only function when the salt is dissolved in water.
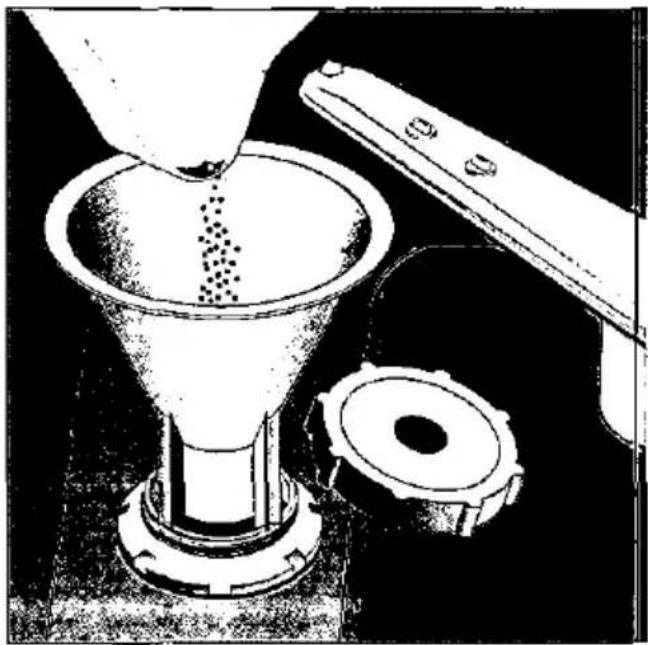
Unscrew the lid on the salt container 25
Before you use the dishwasher for the first time, pour approx. 1 litre of water into the salt container.
Place the funnel supplied with the dishwasher in the filler hole.
Tip in enough salt to fill the container to the top (maximum of 1.5 kg). As you tip in salt, some of the water is displaced and drains away. When you have done this, clean off any remnants of salt from the area round the neck of the container. Screw the lid back onto the container, ensuring that it is not cross-threaded.
natural_image
Illustration of a funnel pouring granular material into a conical container with a side view showing a mechanical component (no text or symbols)The LOW SALT indicator 5 on the front panel will light up initially but will extinguish again after a short period when the salt solution has become sufficiently concentrated.

Warning!
Do not pour detergent into the container for special salt. This would destroy the water softener.
LOW SALT indicator
Add more salt as soon as the LOW SALT indicator 5 on the front panel lights up.
Filling the rinse-aid container
The purpose of a rinse-aid is to prevent the formation of water marks on tableware and utensils, and to ensure that glasses are clean and sparkling. The rinse-aid is consumed during the washing process.
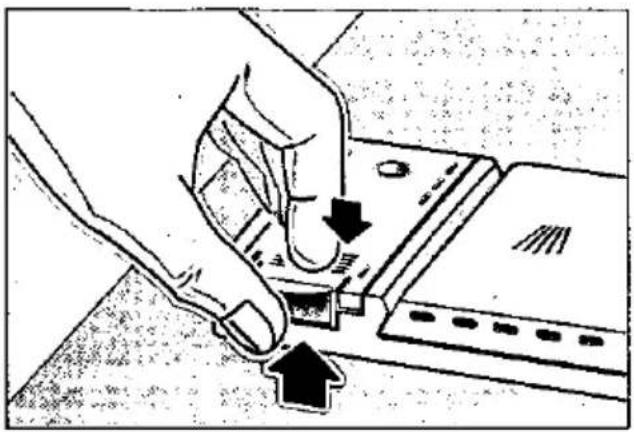
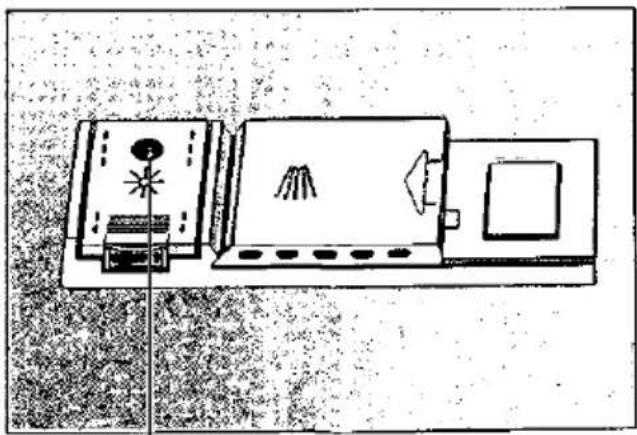
- Fold back the lid on the rinse-aid container 28. To open the lid, press the mark ↓ on the rinse-aid lid and simultaneously lift the lid off the lug ↑
natural_image
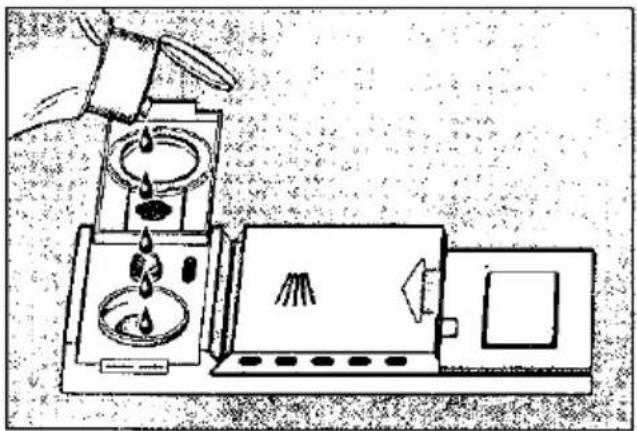
Illustration of a hand using a tool to press or install a component, with arrows indicating motion (no text or symbols present)- Pour the rinse-aid into the filler hole until the level indicator turns dark.
- Close the lid, ensuring that you hear it snap closed.
natural_image
Line drawing of a laboratory setup with a gas stove, dropping funnel, and open chamber (no text or symbols)
Important
Use only rinse-aids intended for use in domestic dishwashers.
Adjusting the amount of rinse-aid
The amount of rinse-aid added to the water can be varied by adjusting the stepless control. The rinse-aid control has been set to "4" in the factory. Do not alter the setting of the rinse-aid control unless streaks (turn knob towards "-") or water marks (turn knob towards "+") are left on the dishes.
Low rinse-aid indicator
As long as the rinse-aid refill indicator on the panel 6 or dispenser has not illuminated, there is sufficient rinse-aid in the dishwasher.
natural_image
Diagram of a device with labeled components and directional arrows, no readable text or symbols presentLOW RINSE-AID indicator
Not suitable for the dishwasher
What you should not put into the dishwasher:
Cutlery and tableware manufactured in whole or part from wood. They become faded and unsightly in appearance. Furthermore, the adhesives that are used are not suitable for the temperatures that occur inside the dishwasher. Delicate decorative glassware and vases, special antique or irreplaceable china. The decorative patterns on such items will not be dishwasher-proof.
Plastic objects that are not resistant to hot water, copper and pewter utensils are also not suitable. Decorative patterns printed or painted onto the surface of crockery, glasses, etc., aluminium and silver items tend to become discoloured or faded if washed in the dishwasher. Some types of glass can become opaque in appearance after they have been washed many times in a dishwasher. Highly absorbent materials, such as sponges and towels, should never be placed in the dishwater.
Our recommendation:
In future, only purchase table or kitchenware that has been confirmed as being dishwasher-proof.

Important
Dishes or cutlery that have been soiled by tobacco ash, wax, lubricating grease or paint, should not be put in the dishwasher.
Damage to glassware and other dishes
Possible causes:
-type of glass or manufacturing process
- chemical composition of detergent
– water temperature and duration of dishwasher programme.
Suggested remedy:
- Use glassware or porcelain dishes that have been marked fdishwasher-proofí by the manufacturer..
- Use a mild detergent that is described as kind to dishesi. If necessary, seek further information from detergent manufacturers.
- Select a programme with as low a temperature and as short a duration as possible.
- To prevent damage, take glass and cutlery out of the dishwasher as soon as possible after the programme has ended.
Arranging crockery, glasses, etc. in the dishwasher
Scrape off any large amounts of left-over food. It is not necessary to rinse the dishes under running water.
Place objects in the dishwasher in such a way that items such as cups, glasses, pots/pans, etc. are stood upside down, curved items, or those with recesses, should be at a slant so that water can run off, they are stacked securely and cannot tip over, they do not prevent the spray arms from rotating while washing takes place.
Cups and glasses 21
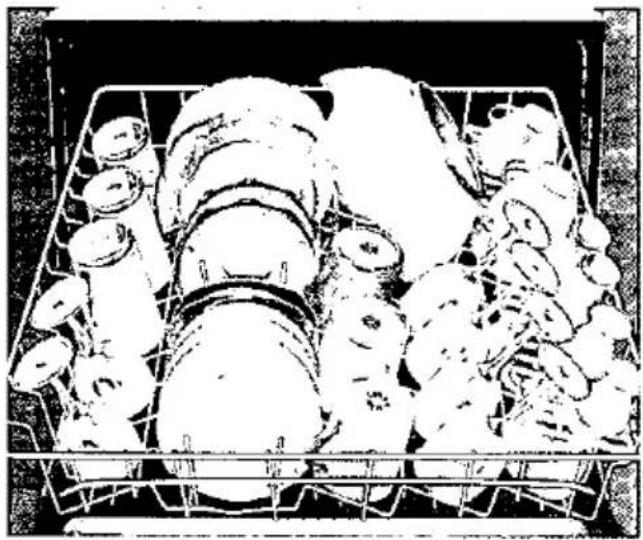
Cups and smaller glasses should preferably be arranged at the back or the front of the racks.
natural_image
Black-and-white illustration of a shopping cart filled with various items (no visible text or symbols)Pots and pans
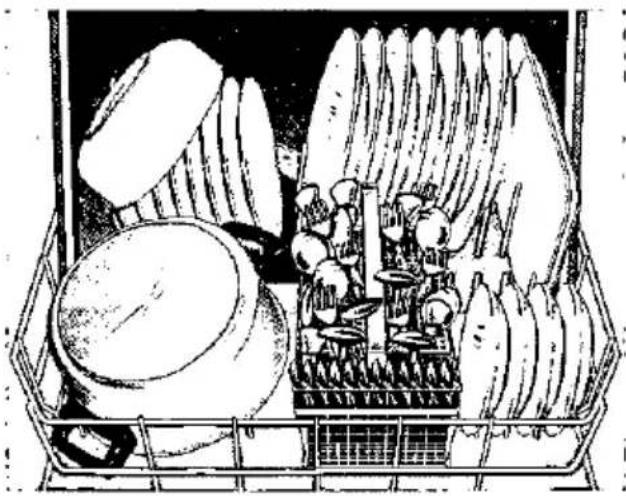
Pots and pans can be placed at the front of the rack 24.
natural_image
Illustration of a basket filled with various fruits and vegetables, no text or symbols presentCutlery
Cutlery should always be inserted in random order with the handles pointing downwards (take care with knife blades!). This enables the jet of water to reach the individual items more easily.
To prevent the risk of injury, place long and pointed implements and knives on the shelf (some models) or knife shelf (available as an accessory).
Arranging crockery; glasses, etc. in the dishwasher
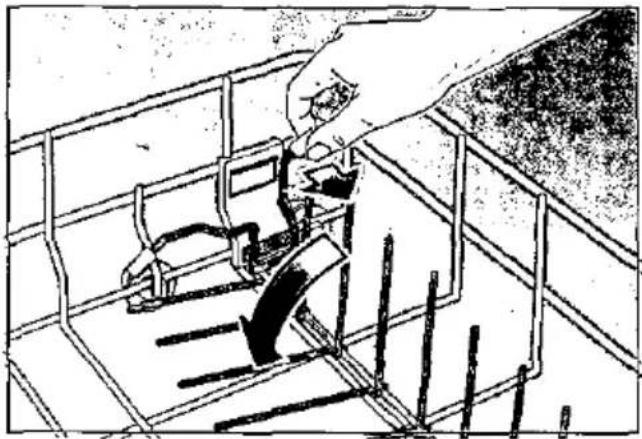
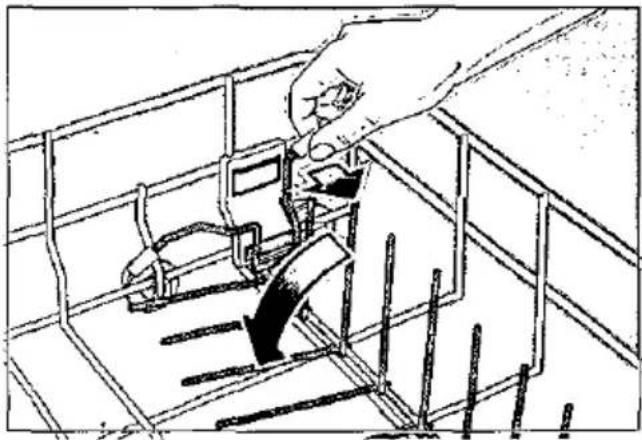
Folding spikes \*
* on applicable models.
• To improve stacking of pots and pans, the spikes can be folded down.
natural_image
Line drawing of a hand using a tool to interact with a mechanical device inside a metal enclosure (no text or symbols)Spray head for baking sheets \*
* on applicable models
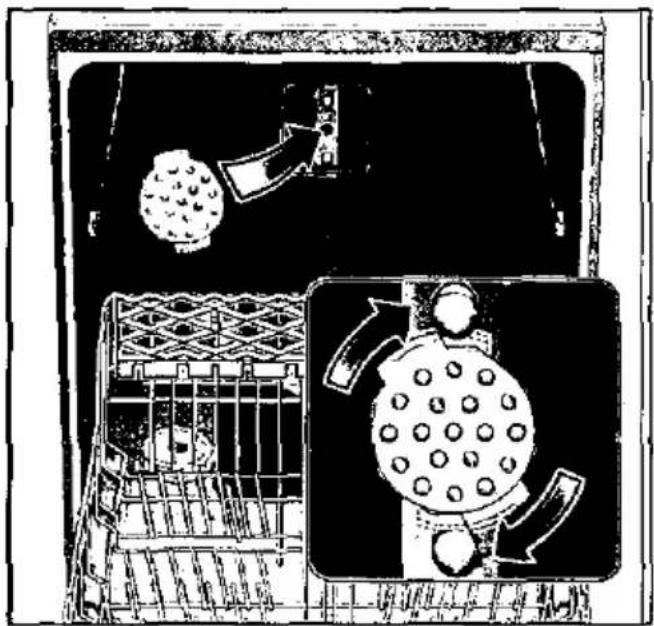
Please refer to the drawings enclosed in the envelope
Large baking sheets or grids can be cleaned with the aid of the special spray head. Remove the top basket and attach the spray head as shown in the drawing. Arrange the baking sheets as illustrated, so that the jet of water can reach all parts of them (max. 4 baking sheets and 2 grids).
natural_image
Illustration of a supermarket interior with a cart, a hand holding a bag, and a large container with circular patterns (no text or symbols)Knife rack \*
* on applicable models

natural_image
Illustration of a construction or steel structure with tools and materials, no visible text or symbolsShelf \*
* not on all models
Lean tall glasses and those with long stems against the shelf - not against other items to be washed.

natural_image
Diagram of a grid-patterned structure with an arrow pointing to a specific area (no text or symbols present)Long items, serving cutlery, salad servers or knives should be placed on the shelf so that they do not obstruct the rotation of the spray arms. The shelf can be folded back when not required for use.
Arranging crockery
Adjusting position of basket \*
* not on all models
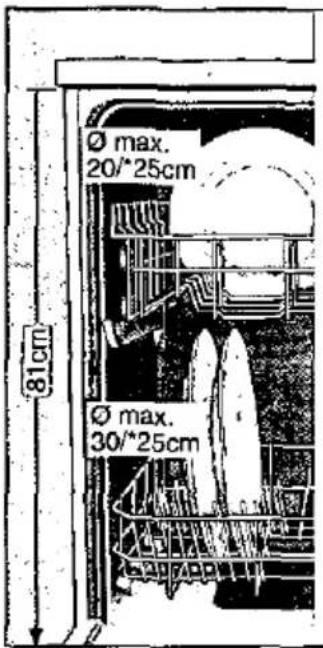
The top basket can be inserted on either its upper or lower rollers, according to requirement. This enables more height to be gained for bigger dishes in either the top or bottom basket.
The height of the cutlery-basket handle can also be adjusted.

natural_image
Technical diagram showing two mechanical assembly steps with pulleys and rotating components (no text or labels)Detergents
Information about detergents
You can use any brand of liquid or powder detergent, as well as tablets, that have been specifically designed for use in domestic dishwashers. (Do not use normal washing-up liquid!)
Nowadays there are three types of dishwasher detergent available:
- those containing phosphates and chlorine,
- those containing phosphates but no chlorine,
- those containing neither phosphates nor chlorine.
When a phosphate-free detergent is used in conjunction with hard water, there is a greater possibility that white marks will be left behind on crockery and glasses, etc. These can be avoided by pouring an increased amount of detergent into the dispenser.
Chlorine-free detergents have a reduced bleaching effect. This can mean that tea stains are not completely removed or plastic items become discoloured.
This can be resolved by:
- selecting a higher temperature programme, or
- increasing the amount of detergent, or
- using a detergent that contains chlorine.
Check the label on the detergent packaging to determine whether a particular product is suitable for use with silverware.
If you have any further questions, we recommend that you contact the customer advice departments of the various detergent manufacturers.
Detergent
Detergent compartment with measuring marks
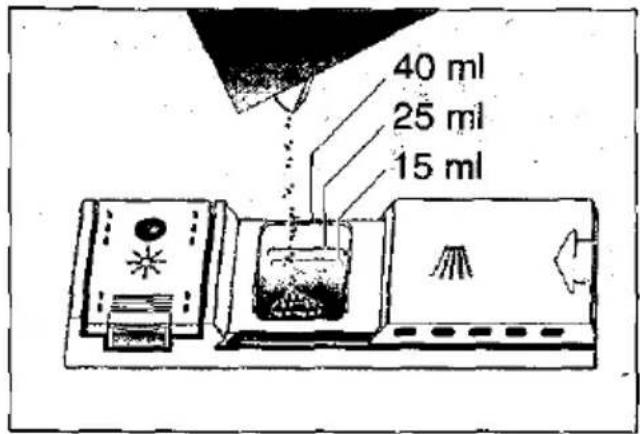
The side of the detergent compartment is marked with lines to help you determine how much powder to add.
The capacity of the detergent container is 15 ml up to the bottom line and 25 ml up to the middle line. When the compartment is full it contains 40 ml.

Important
If the lid on the detergent compartment is closed, press the release lever to open the flap.
Adding detergent
- Tip detergent powder into the 27
Please observe the manufacturer's instructions printed on the detergent packaging when determining the correct dosage.
When you select the INTENSIVE programme, tip an extra 10-15 ml of detergent onto the inside surface of the door.

Reduce costs!
If you are using the upper rack only, or if your dishes are only moderately dirty, it will normally suffice to employ a reduced amount of detergent than otherwise recommended.
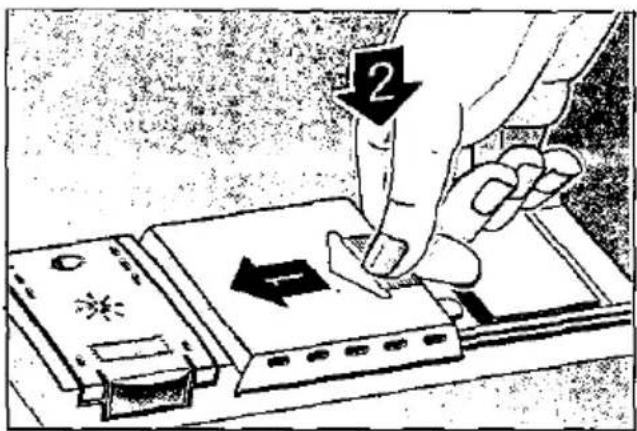
- Close the lid on the detergent compartment. Press down the lid (1) until it clicks shut (2).
- If you are using detergent in tablet form, read the manufacturer's recommendations on the packaging in order to determine where the tablets should be placed inside the dishwasher (e.g. in cutlery basket, detergent compartment, etc.).
Make sure that the lid on the detergent compartment is closed, even if you are using tablets.
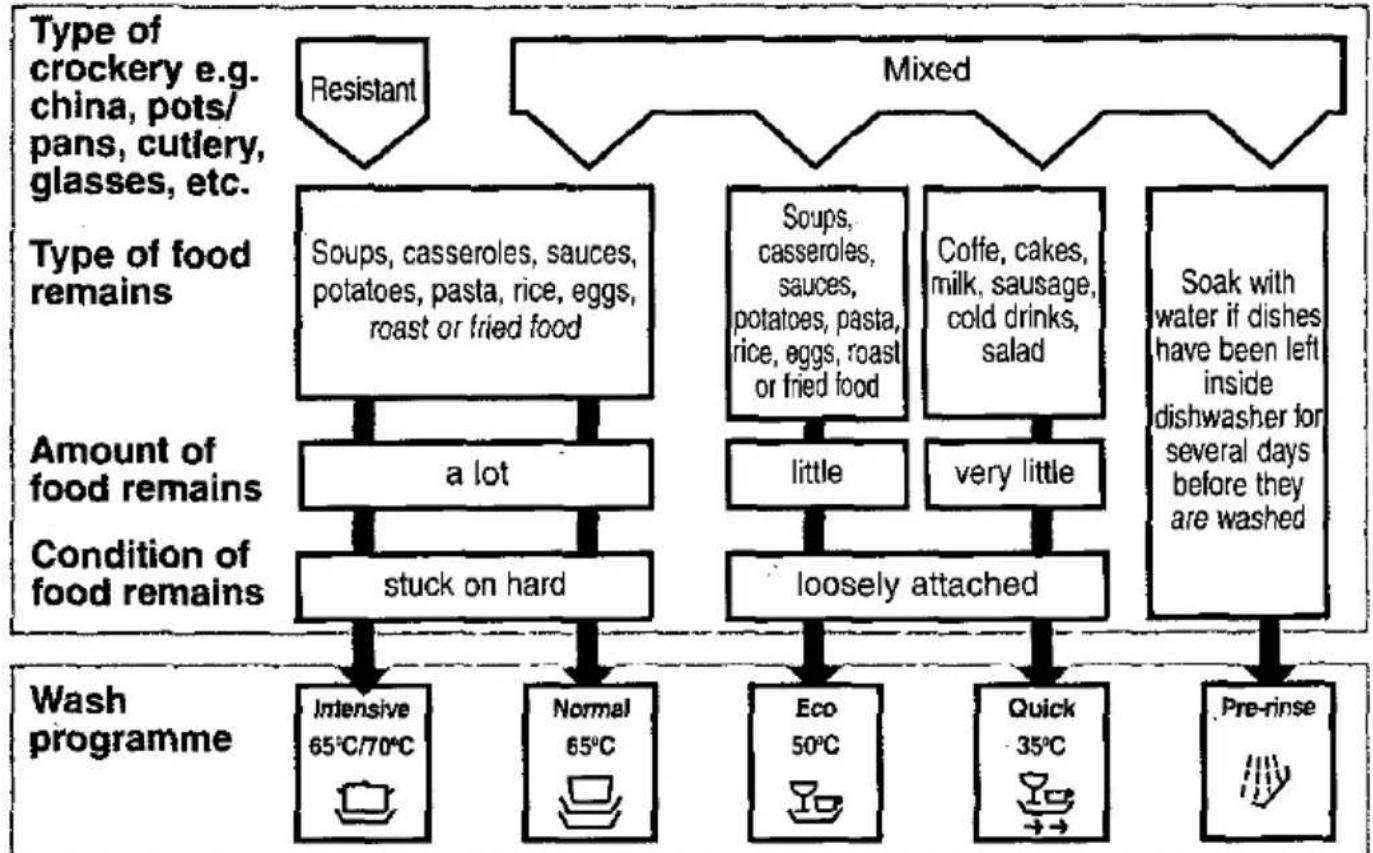
Programme overview
This overview lists the max. possible number of programmes. The programmes supplied with your appliance are indicated on the fascia.
flowchart
graph TD
    A["Type of crockery e.g. china, pots/ pans, cutlery, glasses, etc."] --> B["Resistant"]
    C["Type of food remains"] --> D["Soups, casseroles, sauces, potatoes, pasta, rice, eggs, roast or fried food"]
    D --> E["a lot"]
    E --> F["stuck on hard"]
    G["Amount of food remains"] --> H["Soups, casseroles, sauces, potatoes, pasta, rice, eggs, roast or fried food"]
    H --> I["little"]
    I --> J["loosely attached"]
    K["Condition of food remains"] --> L["soaks, cakes, milk, sausage, cold drinks, salad"]
    L --> M["very little"]
    M --> N["Soak with water if dishes have been left inside dishwasher for several days before they are washed"]
    O["Wash programme"] --> P["Intensive 65°C/70°C"]
    O --> Q["Normal 65°C"]
    O --> R["Eco 50°C"]
    O --> S["Quick 35°C"]
    O --> T["Pre-rinse"]

flowchart
graph TD
    A["Programme sequence"] --> B["Pre-rinse 50°C"]
    B --> C["Wash 70°C"]
    C --> D["Main rinse"]
    D --> E["Main rinse"]
    E --> F["End rinse 70°C"]
    F --> G["Drying"]

    H["Pre-rinse"] --> I["Wash 65°C"]
    I --> J["Main rinse"]
    J --> K["Main rinse"]
    K --> L["End rinse 65°C"]
    L --> M["Drying"]

    N["Wash 50°C"] --> O["Main rinse"]
    O --> P["End rinse 65°C"]
    P --> Q["Drying"]

    R["Wash 35°C"] --> S["Main rinse"]
    S --> T["End rinse 55°C"]

    U["Pre-rinse"] --> V["End rinse"]
| Programme details | Laboratory measured value in accordance with European Standard EN 50242 | ||||
| Duration in minutes | 99 | 96 | 90 | 30 | 13 |
| Electricity consumption in kWh | 2,0 | 1,75 | 1,44 | 0,80 | 0,10 |
| Water consumption in litres | 26 | 26 | 18 | 15 | 5 |
Washing dishes
Programme selection
The most appropriate programme can be identified by comparing the type of crockery, cutlery, etc., as well as the amount and condition of food remains, with the details contained in the programme overview.
The corresponding programme sequence, duration and consumption details are shown in the bottom half of the overview.
For example:
Use the "Normal" programme for dishes and utensils which have plenty of food remains stuck on hard.

Reduce costs!
If only small number of dishes have been loaded into the dishwasher, selecting a programme that operates at the next lowest temperature will usually suffice.
Programme data
The stated programme data are based on standard operating conditions. The values can vary considerably according to:
- different amounts of dishes
- temperature of mains water supply
- pressure of mains water supply
- ambient temperature
- fluctuations in mains voltage
- machine-related factors (e.g. temperature, water volume, ...).
Energy and water consumption is reduced by up to 1/4 when dishes are washed in the upper basket only.
Water consumption values are based on a water hardness setting of 4.
Switching the dishwasher ON
- Set main switch 1 to ON. Indicators light up according to the last programme that was selected. This same programme will run again if no other programme button is pressed.
- The programme starts automatically.
End of programme
The programme has ended when a light 3 turn on.
Switching the dishwasher OFF
Several minutes after the programme has ended:
- Set the main switch 1 to OFF.
- Turn the water tap off. (Does not apply when Aqua-Stop unit has been fitted)
- Remove dishes, etc. when they have cooled down.
Interrupting the programme
- Set main switch 1 to OFF.
- Indicator lights extinguish. The programme is retained in the dishwasher memory.
- If the hot water was switched ON or the appliance has already heated up and then the appliance door opened, leave the door ajar for several minutes and then close. Otherwise, the appliance door may fly open due to expansion.
- In order to continue with the stored programme, set the main switch to ON again.
GB
Washing dishes
Cancel programme (Reset)
- Only when the master switch is ON. Press the "reset" or "new selection" buttons simultaneously, and hold them pressed for approx. 3 seconds.
- The programme continues for approx. 1 min.
- When it has ended, set the main switch to OFF.
- Close the detergent compartment.
To restart the dishwasher, set main switch 1 to ON again and select desired programme.
Changing the programme
You can change the selected programme on the first 2 minutes after switching on the dishwasher.
If you wish to change a selected programme when it's running, first finish stages initialized before you can change it.
Care and maintenance
Regular inspection and maintenance of your appliance helps to prevent problems from occurring. This saves time and aggravation. You should therefore carefully inspect the inside of your dishwasher from time to time.
Overall condition of appliance
- Check that no grease or scale has accumulated on the inside of the dishwasher.
- If you discover any deposits: Clean the interior of the dishwasher thoroughly with a detergent solution.
Special dishwasher salt
Check the LOW SALT indicator 5. Top up with salt, if required.
Rinse-aid
Check the LOW RINSE-AID indicator 6 on the front panel or the level indicator on the rinse-aid container 27. Top up with rinse-aid, if required.
Care and maintenance
Filters
The filters 23 prevent larger remnants of food or other objects from getting inside the pump. This residue can occasionally clog up the filters.
The filter system consists of a filter cylinder, a flat fine filter and, depending on the model, a microfilter (*).
Inspect the filters for obstructions every time the dishwasher has been used.
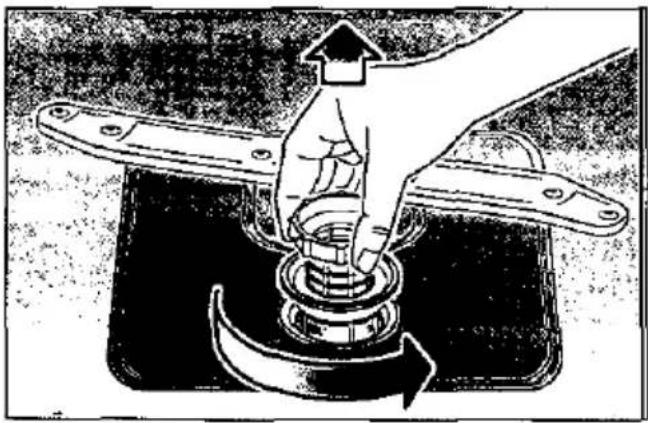
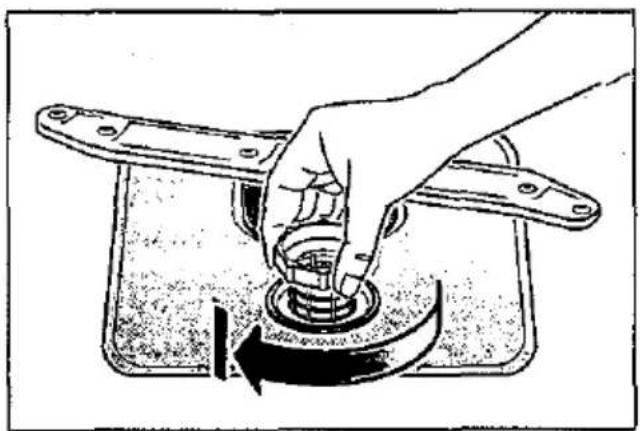
By unscrewing the filter cylinder, you can remove the filter system. Remove any food remnants and clean the filters under running water.
natural_image
Illustration of a hand pressing down on a mechanical component with a curved arrow indicating rotation (no text or symbols)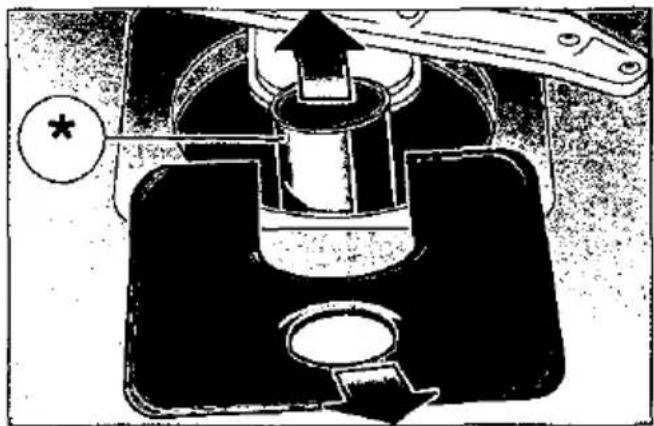
natural_image
Cross-sectional diagram of a mechanical piston assembly with an arrow indicating motion (no text or labels)Reassembly: Insert the filter system and screw down with the filter cylinder.
natural_image
Hand turning a mechanical component into a circular housing (no text or symbols visible)Care and maintenance
Spray arms
Lime and remnants of food in the washing water can block the nozzles in the spray arms 20 and 22 and the arm mountings.
- Inspect the nozzles in the spray arms for blocked holes due to remnants of food.
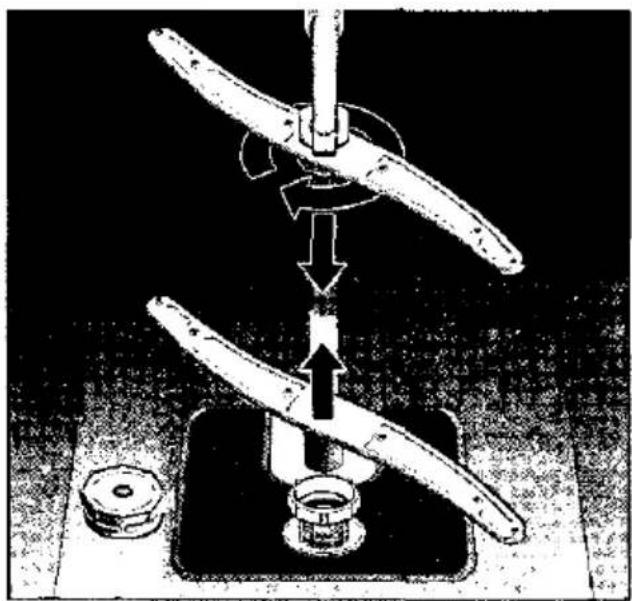
- If necessary, pull the lower arm 22 upwards and lift it off.
- Unscrew the upper spray arm 20.
- Clean both spray arms under running water.
- Refit the spray arms. Ensure that the lower arm has locked into place and the upper one is screwed tight.
Pump
Larger remnants of food that have not been trapped by the filters and have been left in the water can cause a blockage in the pump. The water is no longer pumped out of the dishwasher and it can be seen covering the filter.
Proceed as follows:
- Ladle out as much water as possible.
- Remove the filters 23.
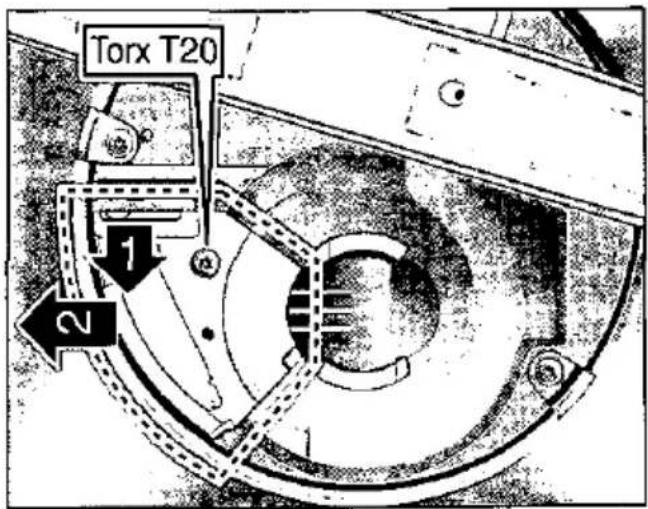
- Undo the screw in the cover (Torx T 20) and remove the cover.
- Inspect the inside and remove any obstructions that you find.
- Re-insert the cover and screw down.
- Re-insert the filters and screw down.
natural_image
Diagram of a mechanical device with three blades and a base, showing a process with an arrow indicating direction (no text or symbols present)Spray arms
Fault finding
• Water remains inside appliance after programme has ended
- Blockage or kink in drainage hose.
- Pump is jammed.
- Filters are blocked.
- The programme is still running. Wait for the programme to end (numerical display will indicate 0).
- Perform "Reset" function.
... during washing
• Unusual amount of foam is created
- Normal washing up liquid has been poured into the rinse-aid container.
• Appliance stops suddenly while washing is taking place
- Cut in electricity supply to appliance.
– Water supply has been interrupted.
- Knocking sound can be heard while washing is taking place
- A spray arm is knocking against the dishes inside the appliance.
- Rattling sound can be heard while washing is taking place
- Crockery has not been stacked properly inside the appliance.
- Knocking sound coming from inlet valves
- This is caused by the way the water pipes have been laid and it has no effect upon the way the appliance functions. There is no remedy for this.
... with the dishes, cutlery, etc.
- Remnants of food are stuck to the dishes, cutlery, etc.
- Dishwasher was not loaded properly. Jets of water could not reach all parts of the dishes, etc.
- Too many items in the rack.
- Items in the rack were touching each other.
- Not enough detergent was added to dispenser.
- Selected wash programme was not intensive enough.
- Rotation of spray arm was obstructed by dish, etc.
- Nozzles in spray arm are blocked by remnants of food.
- Filters are blocked.
- Filters have been incorrectly fitted.
- Waste-water pump is jammed.
- Plastic items are discoloured
- Not enough detergent was added to dispenser.
- Detergent has insufficient bleaching properties. Use a detergent containing a chemical bleaching agent.
Fault finding
- White stains are left on crockery, glasses have a milky appearance
- Not enough detergent was added to input compartment.
- Amount of rinse-aid was set too low.
- Although water is quite hard, no salt has been put in appliance.
- Water softener was set too low.
- Lid on salt container is not screwed tight.
- If you used a phosphate-free detergent, try a detergent containing phosphates and compare results.
• Dishes, cutlery, etc. have not been dried
- Selected programme did not include drying function.
- Amount of rinse-aid was set too low.
- Items were removed from dishwasher too soon.
• Glasses have a dull appearance
- Amount of rinse-aid was set too low.
• Tea stains or traces of lipstick have not been completely removed
- Detergent does not have a sufficient bleaching effect.
- Washing temperature was set too low.
• Traces of rust on cutlery
- Cutlery is not sufficiently rustproof.
- Salt content in washing water is too high.
- Lid on salt container is not screwed tight.
- Too much salt was spilt while filling container.
• Glasses become clouded and discoloured; coating cannot be wiped off
- Unsuitable detergent was used.
- Glasses are not dishwasher-proof.
- Smears left behind on glasses and cutlery; glasses have acquired a metallic appearance
- Amount of rinse-aid set too high.
Customer Service
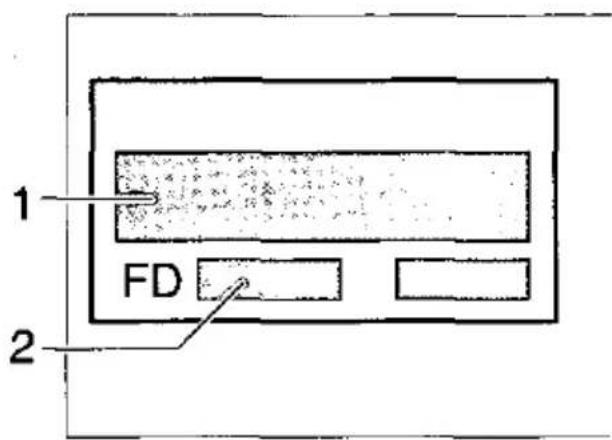
Please call your local service agent, if you are not able to resolve any problem yourself. The name of your nearest service agent is shown in the Customer Service address list. When you call, please provide details of the model number (1) and the production (FD) number (2) which are shown on the nameplate on the appliance door.
Other information
Notes on waste disposal
Old appliances still have some residual value. An environment-friendly method of disposal will ensure that valuable raw materials can be recovered and used again.
When an appliance has reached the end of its working life, unplug it from the mains. Cut through the mains cable and dispose of it together with the plug.
Destroy the door locking mechanism. This will ensure that children at play cannot become locked inside and are not exposed to the risk of suffocation.
Your new appliance was protected by suitable packaging while it was on its way to you. All materials used for this purpose are environment-friendly and can be recycled. Please make a contribution to protecting the environment by disposing of the packaging appropriately.
Do not allow children to play with any parts of the packaging. There is a risk of suffocation by the cardboard boxes and the plastic wrapping.
Up-to-date information concerning options for disposal can be obtained from your retailer or local municipal administration.
Other Information
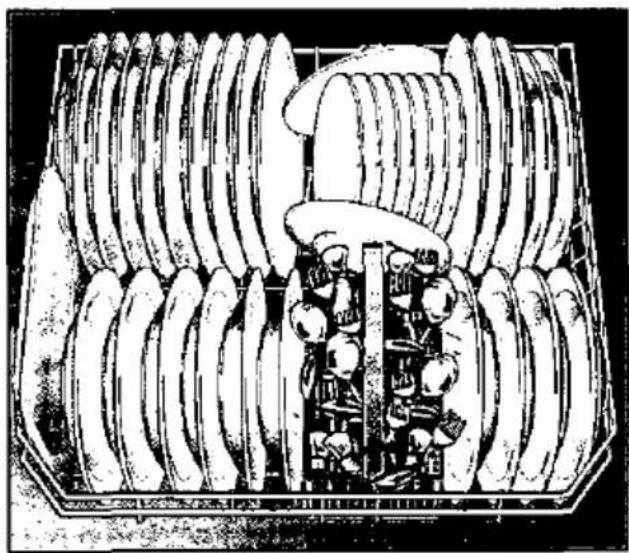
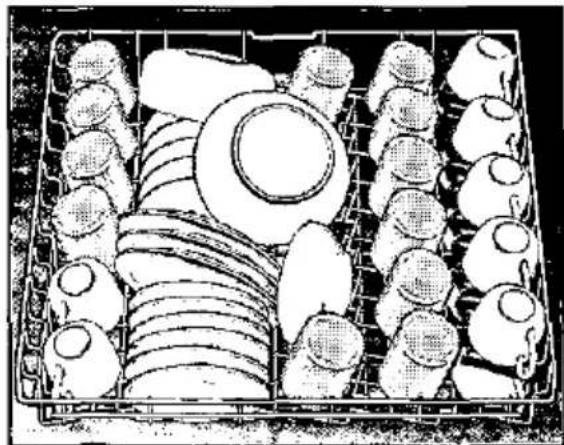
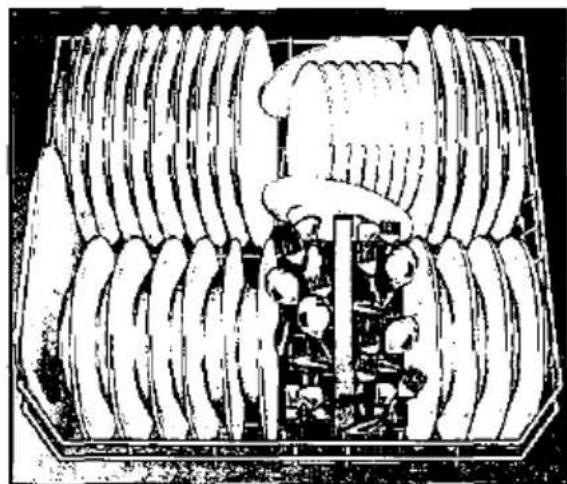
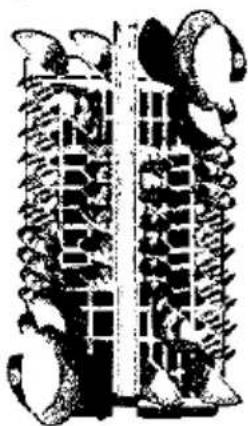
Information on comparability tests implemented in compliance with EN 50242
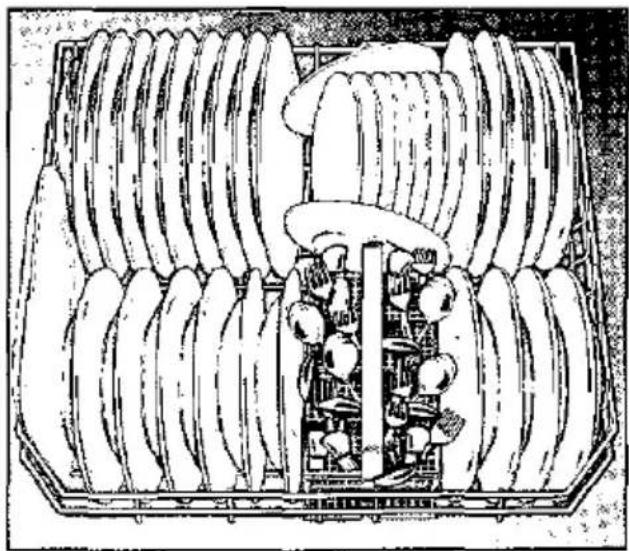
Appliance loaded in accordance with standard specifications.
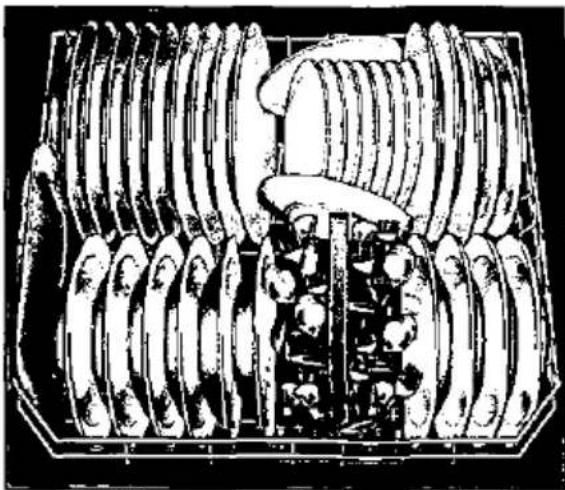
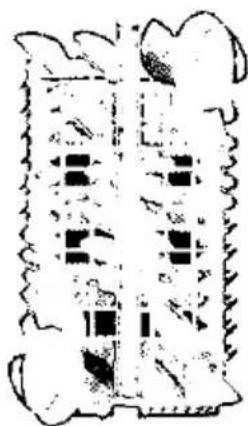
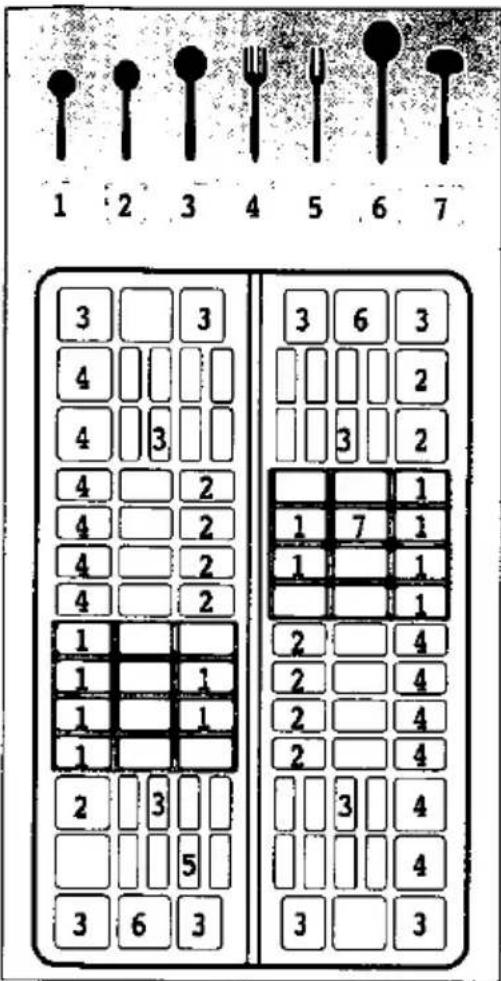
Example of loaded dishwasher: see Figs. A-D
Capacity: 12 place settings
Comparability programme: Eco.
Rinse-aid setting: 4
Height-adjustable top-basket must be inserted in the uppermost position.
If the comparability tests do not comply fully EN 50242, e.g. degree of soiling, type of dishes and cutlery, etc., contact the appliance manufacturer before starting the test.
natural_image
Black-and-white illustration of a tray with various food items including sliced vegetables, mushrooms, and bread (no text or symbols)Fig. A
natural_image
Illustration of a mechanical device with multiple coiled components and internal components (no text or symbols)Fig. B
natural_image
Illustration of two vertical cylindrical objects with textured surfaces and decorative elements (no text or symbols)Fig. C

Fig. D
General information
Measures must be taken to ensure that built-under and built-in units that are subsequently re-sited as free-standing appliances cannot topple over. This can be achieved by bolting the dishwasher to the wall or fitting it under a continuous work surface which is screwed to the adjacent cupboards.
Installation
In order to function correctly the dishwasher must be properly installed. Specifications for the water intake and waste-water drainage, as well as electrical connections, must fulfil the criteria that are set out in the following paragraphs and the installation instructions.
When installing the dishwasher, carry out tasks in the following order:
- check contents of delivery upon receipt,
- site dishwasher,
- connect drainage hose,
- connect inlet hose to water supply,
- connect dishwasher to electricity supply.
Checking contents of delivery
All functions of your dishwasher have been thoroughly tested in the factory. A small number of water marks have been left on the dishwasher as a result. They disappear as soon as the appliance is used for the first time.
Siting the dishwasher
Dimensions associated with siting the dishwasher are contained in the installation instructions. Ensure that the appliance is completely level by adjusting the feet. Make sure that it is standing on a firm surface.
Drainage connection
See the installation instructions for details of procedure to be followed.
If necessary, fit a siphon trap (U-bend) with a connecting piece for the drainage hose. Connect the drainage hose to the trap using the enclosed parts.
Fresh-water connection
Connect the inlet hose to a water tap using the enclosed parts and in accordance with the installation instructions.
Water pressure:
Minimum 0,5 bar - maximum 10 bar.
If the water pressure is higher, install a pressure reducing valve.
Flow rate:
Minimum of 10 litres per minute.
Water temperature:
We recommend that you use cold water.
If you do use hot water, the temperature should not exceed 60°C.
Installation
Electrical connection
This appliance should only be connected to a 230/240 V AC source via a properly installed earthed socket. See nameplate for size of required fuse.
The socket must be installed close to the dishwasher.
If you need to extend the mains connecting lead, do not cut off the plug. Replace the whole cable, which can be disconnected at the junction box on the rear of the appliance.
If the domestic wiring includes a residual- current-operated (FI) circuit-breaker, make sure that it bears the mark, as only this type conforms to the latest regulations
Disconnecting the dishwasher
Here too, it is important that tasks are carried out in the correct sequence: always unplug the appliance from the mains electricity first of all.
Pull plug out of wall socket.
Turn off water supply.
Disconnect drain and water input hoses.
Remove screws in underside of work surface. Detach base board, if fitted.
Pull out appliance and carefully withdraw hoses at same time.
Transporting the dishwasher
Drain water from the dishwasher. Secure all loose parts. The appliance should only be transported in an upright position.
If the appliance is not kept upright during transport, any water left inside may seep into the control module and cause subsequent errors with programme functions.
Protection from freezing temperatures
If the appliance is installed in a location where there is a risk of freezing temperatures (e.g. in a holiday home), all water must be completely drained out of the interior (see "Transporting the dishwasher").
Turn OFF the tap, disconnect the supply hose and allow to drain.
natural_image
Illustration of a funnel pouring granular material into a conical container with a gear mechanism nearby (no text or symbols)natural_image
Hand pressing a button on a mechanical component with arrows indicating motion (no text or symbols)natural_image
Line drawing of a laboratory setup with a dropping funnel, beaker, and control panel (no text or symbols)
Remarque
natural_image
Line drawing of a device with labeled components and no visible text or symbolsnatural_image
Black-and-white illustration of a shopping cart filled with various items (no visible text or symbols)Casseroles
natural_image
Illustration of a kitchen sink with plates, utensils, and food items (no text or symbols)Couverts
natural_image
Line drawing of a person climbing a metal platform with ropes and railings (no text or symbols)natural_image
Illustration of a shopping cart with a basket and a large fruit, alongside a person holding a large hat (no text or symbols)natural_image
Illustration of a construction site with scaffolding, steel beams, and workers (no text or symbols)L'étagère (\*)
natural_image
Diagram of a grid-patterned structure with an arrow pointing to a specific area (no text or symbols present)natural_image
Technical diagram showing two mechanical assembly steps with pulleys and rotating components (no text or labels)Détergent
natural_image
Illustration of a hand pressing down on a mechanical component with a curved arrow indicating rotation (no text or symbols)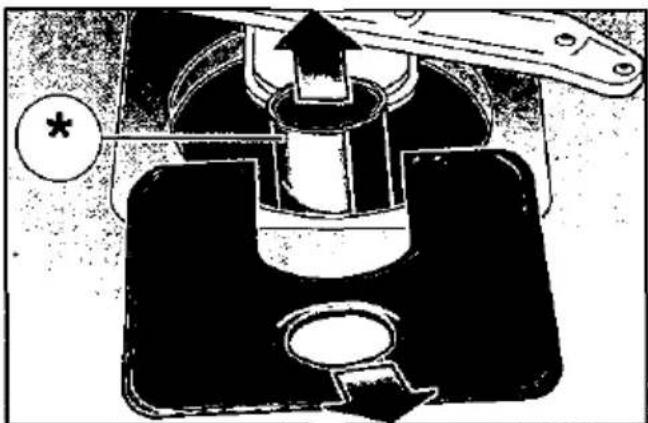
natural_image
Cross-sectional diagram of a mechanical device with an arrow indicating upward motion, no visible text or symbolsnatural_image
Hand turning a button into a mechanical component with a rotating arrow (no text or symbols visible)natural_image
Diagram of a mechanical device with three blades and a base, showing a downward force application (no text or symbols)Bras pivotants
Pompe de vidange
Détction des pannes
natural_image
Diagram showing two mechanical components with upward arrows indicating motion or force (no text or symbols)
Attention
Contenance 12 couverts standard.
natural_image
Illustration of a food tray with various items arranged in rows (no text or symbols visible)Fig. A
natural_image
Illustration of a historical or decorative architectural structure with spiral columns and central arch (no text or symbols)Fig. B
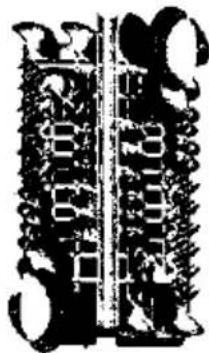
Fig. C
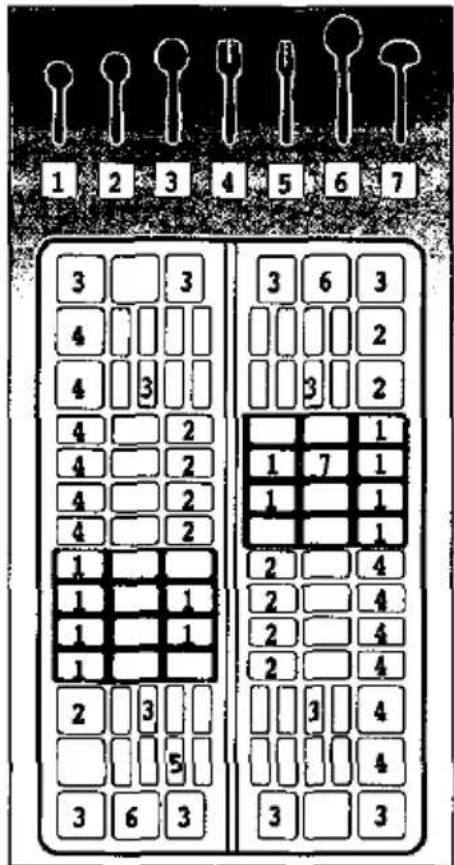
Fig. D
Généralités
natural_image
Illustration of a funnel pouring granular material into a mechanical component (no text or symbols visible)Zout bijvullen
natural_image
Hand pressing down on a device component with arrows indicating force or movement (no text or symbols)natural_image
Illustration of a laboratory setup with a dropping funnel, gas stove, and control panel (no text or symbols)
Attentie
natural_image
Line drawing of a device with labeled components and directional arrows (no readable text or symbols)natural_image
Black-and-white illustration of a supermarket shopping basket filled with instant noodles (no text or symbols visible)NL
natural_image
Illustration of a kitchen sink with plates and utensils (no text or symbols)Bestek
To improve stacking of pots and pans, the spikes can be folded down.
natural_image
Line drawing of a hand using a tool to adjust or install a component inside a metal frame (no text or symbols)natural_image
Illustration of a food delivery box with a cart and a conveyor belt, showing food items and a speedometer (no text or symbols)natural_image
Illustration of a construction or metal framework with tools and structural elements, no visible text or symbolsDe etagère (\*)
natural_image
Diagram of a grid-like structure with an arrow pointing to a specific area, no text or symbols present.natural_image
Diagram of a mechanical assembly with pulleys and a directional arrow (no text or symbols)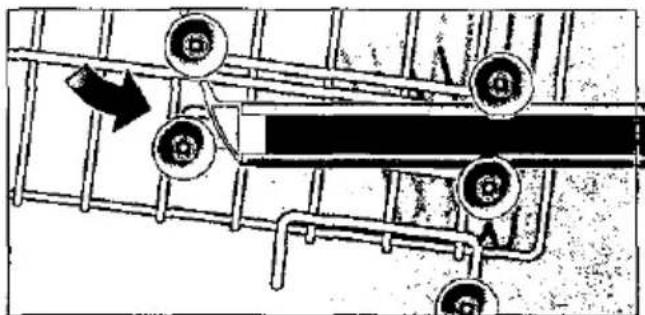
natural_image
Pure mechanical diagram showing pulleys and a horizontal bar without any text or symbolsAfwasmiddelen
Attentie
natural_image
Mechanical assembly diagram showing a rotating shaft, flange, and housing components with directional arrows indicating motion (no text or labels)natural_image
Mechanical assembly diagram showing a propeller being lifted by a valve, with no visible text or symbolsSproeiarmen
NL
Opsporing van storingen
natural_image
Diagram showing two mechanical components with upward arrows indicating motion or assembly (no text or symbols present)
Attentie
- De servieskorf was te vol.
natural_image
Top-down line drawing of a multi-tiered plastic tray with various items arranged in rows (no text or symbols)afb. A
natural_image
Illustration of a traditional Chinese mechanical device with coiled components and internal components (no text or symbols)afb. B
natural_image
Illustration of two buildings with windows and a cloud-like structure (no text or symbols)afb. B
Attentie
afb. D
Algemeen
- Sicherheitshinweise
- Bei der Anlieferung
- Hinweis
- Töpfe
- Besteck
- Messeretagere (\*)
- Die Etagere \*
- Wartung und Pflege
- Sprüharme
- Abwasserpumpe
- Fehlersuche
- Achtung
- Hinweise
- Allgemeines
- Wassertemperatur:
- During installation
- During normal use
- If your family includes children
- Safety information
- Child lock \*
- If a fault occurs
- When disposing of old appliances
- Getting to know your dishwasher
- Control panel
- Appliance interior
- You will need to purchase the following before using the dishwasher for the first time:
- Water softener
- Setting up the water softener
- Filling the special salt container
- How the salt works
- Warning!
- LOW SALT indicator
- Filling the rinse-aid container
- Important
- Adjusting the amount of rinse-aid
- Low rinse-aid indicator
- Not suitable for the dishwasher
- What you should not put into the dishwasher:
- Our recommendation:
- Damage to glassware and other dishes
- Possible causes:
- Suggested remedy:
- Arranging crockery, glasses, etc. in the dishwasher
- Cups and glasses 21
- Pots and pans
- Cutlery
- Arranging crockery; glasses, etc. in the dishwasher
- Folding spikes \*
- Spray head for baking sheets \*
- Knife rack \*
- Shelf \*
- Arranging crockery
- Adjusting position of basket \*
- Detergents
- Information about detergents
- Detergent
- Detergent compartment with measuring marks
- Adding detergent
- Reduce costs!
- Programme overview
- Washing dishes
- Programme selection
- Programme data
- Switching the dishwasher ON
- End of programme
- Switching the dishwasher OFF
- Interrupting the programme
- GB
- Cancel programme (Reset)
- Changing the programme
- Care and maintenance
- Overall condition of appliance
- Special dishwasher salt
- Rinse-aid
- Filters
- Spray arms
- Pump
- Fault finding
- ... during washing
- Customer Service
- Other information
- Notes on waste disposal
- Information on comparability tests implemented in compliance with EN 50242
- General information
- Installation
- Checking contents of delivery
- Siting the dishwasher
- Drainage connection
- Fresh-water connection
- Water pressure:
- Flow rate:
- Water temperature:
- Electrical connection
- Disconnecting the dishwasher
- Transporting the dishwasher
- Protection from freezing temperatures
- Remarque
- Casseroles
- Couverts
- L'étagère (\*)
- Détergent
- Pompe de vidange
- Détction des pannes
- Attention
- Généralités
- Zout bijvullen
- Attentie
- NL
- Bestek
- De etagère (\*)
- Afwasmiddelen
- Opsporing van storingen
- Algemeen
Brand : CONSTRUCTA
Model : CG 560J2
Category : Dishwasher