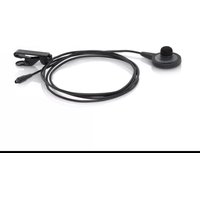
PinMic - Microphone RODE - Free user manual and instructions
Find the device manual for free PinMic RODE in PDF.


| Product Type | Lavalier (Lapel) Microphone |
| Brand | Røde |
| Model | PinMic |
| Directional Pattern | Omnidirectional |
| Frequency Response | 20 Hz – 20 kHz |
| Sensitivity | -33.5 dB re 1 V/Pa (at 1 kHz) |
| Maximum SPL | 115 dB SPL |
| Signal-to-Noise Ratio | 72 dB |
| Connector | 3.5 mm TRS (unbalanced) with locking nut |
| Power Supply | Plug-in power (2.5V – 5V) |
| Weight | Approx. 8 g |
| Dimensions (Capsule diameter × Cable length) | 3.5 mm × 1.2 m |
| Cable Color | Black or White (depending on variant) |
| Included Accessories | Mounting clip, windshield, locking nut, cable management clips, pouch |
| Operating Temperature Range | -10°C to 60°C |
| Storage Temperature Range | -20°C to 70°C |
| Cleaning | Wipe with a soft, dry cloth. Do not use solvents. |
| Safety Warnings | Keep away from moisture and extreme heat. Do not disassemble. |
| Spare Parts Availability | Cable, clips, and windshields available separately |
| Repairability | Designed for professional servicing; cable replacement possible by qualified technician |
Frequently Asked Questions - PinMic RODE
User questions about PinMic RODE
0 question about this device. Answer the ones you know or ask your own.
Ask a new question about this device
Download the instructions for your Microphone in PDF format for free! Find your manual PinMic - RODE and take your electronic device back in hand. On this page are published all the documents necessary for the use of your device. PinMic by RODE.
USER MANUAL PinMic RODE
natural_image
Black medical or diagnostic device with a coiled cable and connector, isolated on white background (no text or symbols visible)R∅DE®
MICROPHONES

www.rodemic.com
natural_image
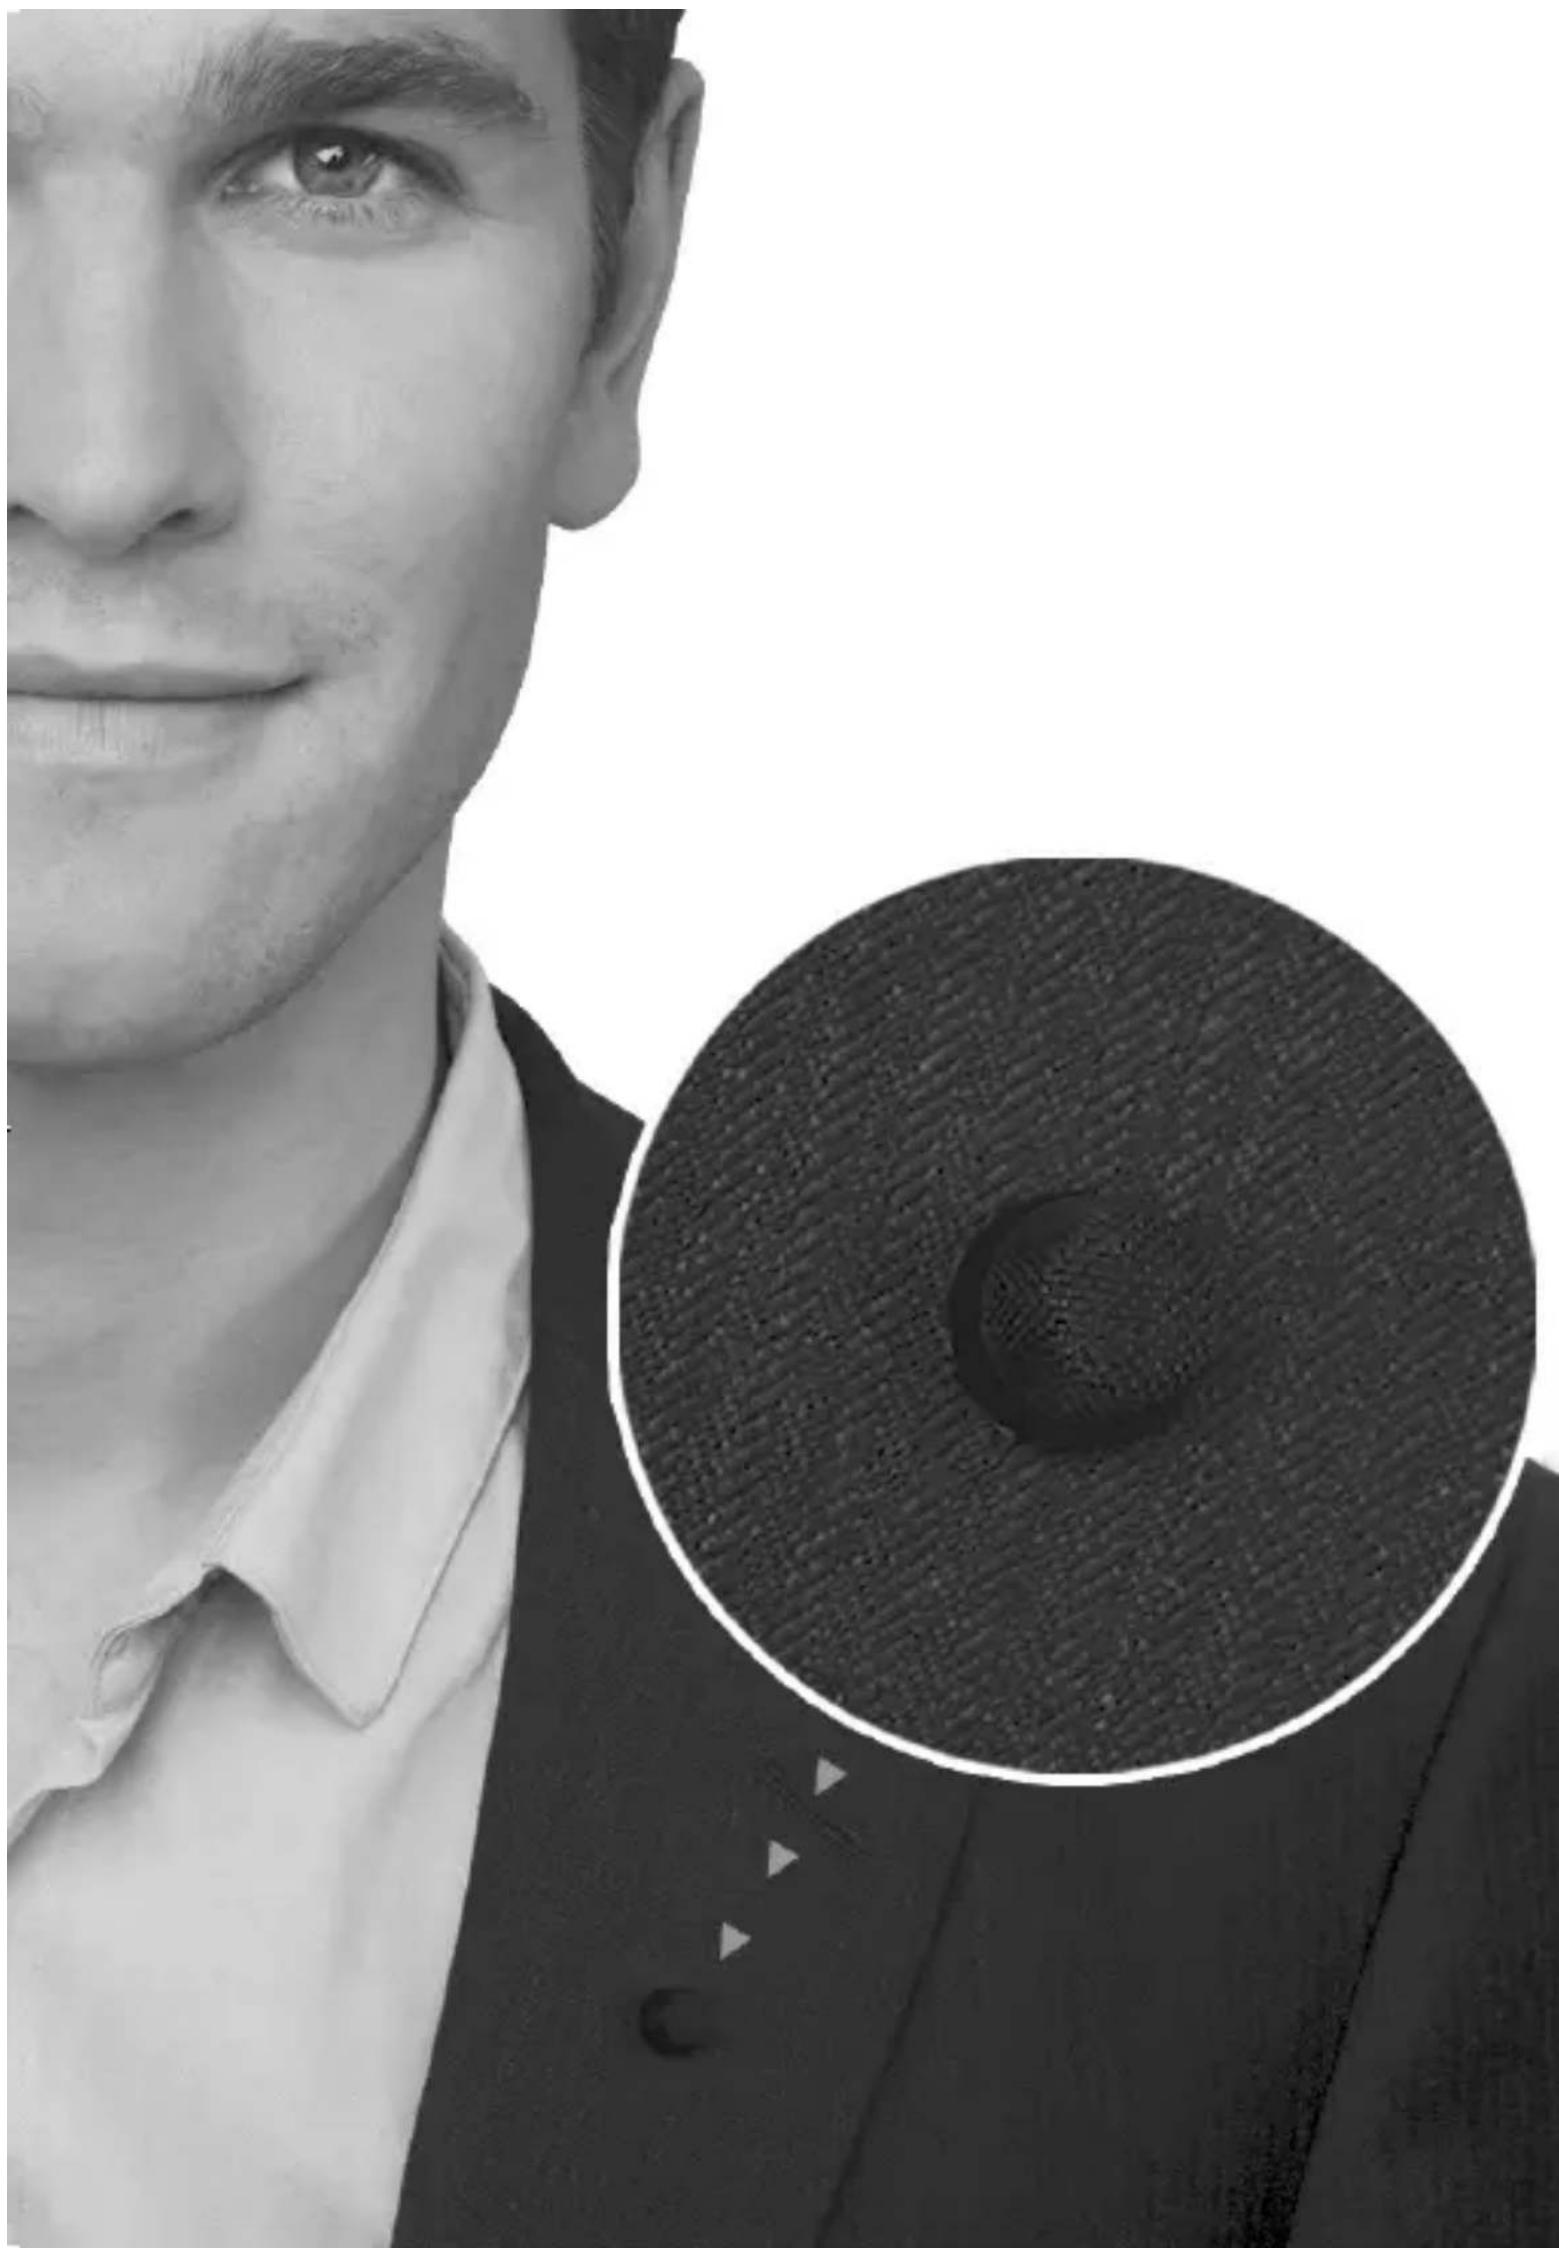
Black-and-white portrait of a man in formal attire with a circular inset showing a textured circular object (no text or symbols)Thank you for investing in the RODE™.
Whether you're presenting for television or live on-stage, in a 20,000 seat auditorium or in a house of worship, RODE has your needs covered with the intuitive and subtle PinMic™.
Featuring innovative, industry-leading design, the RODE PinMic™ is the first of its kind. The pin-on placement of the microphone provides an ultra discreet appearance, while also simplifying cable management.
The included mini-furry for high wind protection ensures quality recordings in adverse environments, while the anti-trauma water resistant case provides rugged and secure protection for the microphone, cable and accessories.
Knowing that versatility is paramount in any product, we at R∅DE have developed the MiCon™ connector system which provides seamless integration between the PinMic™ and a wide range of wireless systems.
Please take the time to visit www.rodemic.com and register your microphone for warranty.

Peter Freedman
R∅DE Microphones
Sydney, Australia
INTUITIVE AND SUBTLE
- Ultra discreet appearance
• Lightweight and easy to position - Pins through clothing up to approximately 1.5mm (0.006") thick (standard model) or approximately 1.5 \~ 3.5mm (0.006 \~ 0.14") thick (heavy duty model)
- Removable mesh head
HIGH QUALITY PERFORMANCE
- Low noise miniature microphone capsule
- Low handling noise
UNIVERSAL COMPATIBILITY
- R∅DE MiCon™ connector system provides seamless integration with a wide range of wireless systems while maintaining discreet and unobtrusive appearance

natural_image
Black medical or diagnostic device with a coiled cable and connector, isolated on white background (no text or symbols visible)PINMIC™ & ACCESSORIES
- R∅DE PinMic™
- Supplementary mesh head (silver) suitable for spray paint customisation to fully match clothing
- Anti-trauma water resistant storage case
- Mini-furry for high wind protection
- Shielded Kevlar® reinforced cable with moulded backplate
- Lapel-style cable management clip
- Adjustment tools
- Sanitary cleansing wipes
Compact, interchangeable MiCon™ adaptors available to suit industry standard wireless systems*

*MiCon™ adaptors sold separately - see rodemic.com/pinmic for a full list of compatibility
Acoustic Principle: Permanently polarised condenser
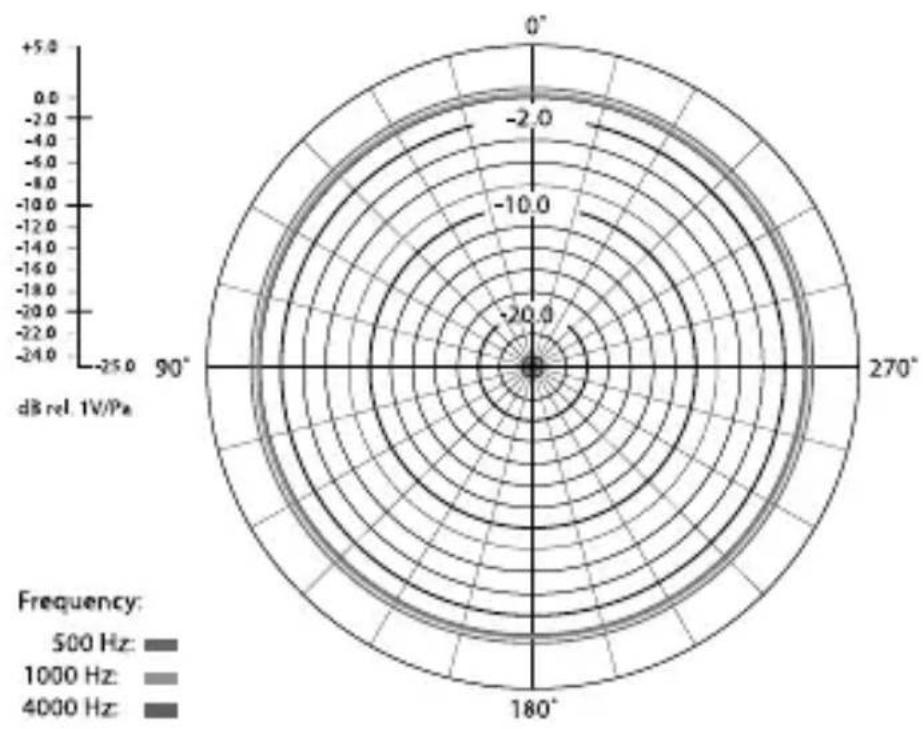
Directional Pattern: Omni-directional (see graph)
Frequency Range: 60 Hz \~ 18 kHz (see graph)
Output Impedence: 3k Ω Typical
Signal To Noise Ratio: 69 dBA
Equivalent Noise: 25 dBA SPL (per IEC651)
Clipping SPL: 110 dB
Maximum Output: 189 mV*
Sensitivity: -33.5 dB re 1 V/Pa (21 mV @ 94 dB SPL) ± 3 dB @ 1 kHz
Dynamic Range: 85 dB Typical*
Power Requirements: Min 2 V \~ Max 5 V through R∅DE wireless adaptors P48 through R∅DE XLR adaptor
Output Connection: R∅DE MiCon™ connector
FREQUENCY RANGE

line
| Frequency | dB rel 1V/Pa | | --------- | ------------ | | 20Hz | -10 | | 100 | 0 | | 1000 | 0 | | 10000 | 8 | | 20000 | -5 |POLAR RESPONSE
radar
| Angle | Frequency | |-------|---------| | 0° | 500 Hz | | 90° | 1000 Hz | | 180° | 4000 Hz | | 270° | 500 Hz |* Calculated from maximum SPL peak before clipping.
All measurements are calculated when powered at 5 V or P48 (R∅DE XLR adaptor)
PINMIC™ ASSEMBLY

PINMIC™ CAPSULE

MIC PLACEMENT
For the best performance, the PinMic™ should be positioned as close as possible to the sound source, without being subject to clothing rustle, gusts of air or dust.

natural_image
Black-and-white close-up of a person's face and neck, smiling with a circular badge on the chest (no text or symbols visible)Position the microphone close to the sound source
At times it may be best to test different placements to provide the optimal combination of sound quality and discretion.
FITTING YOUR PINMIC™
To fit your PinMic™ and connect to your wireless system, first pin the backplate of the microphone to your clothing, close to the sound source.
You may do this by weaving the backplate and cable up from underneath the user's clothing, or placing it just behind the lapel on a jacket. Ensure the backplate is hidden underneath the fabric, then press through until the pins are exposed on the other side.
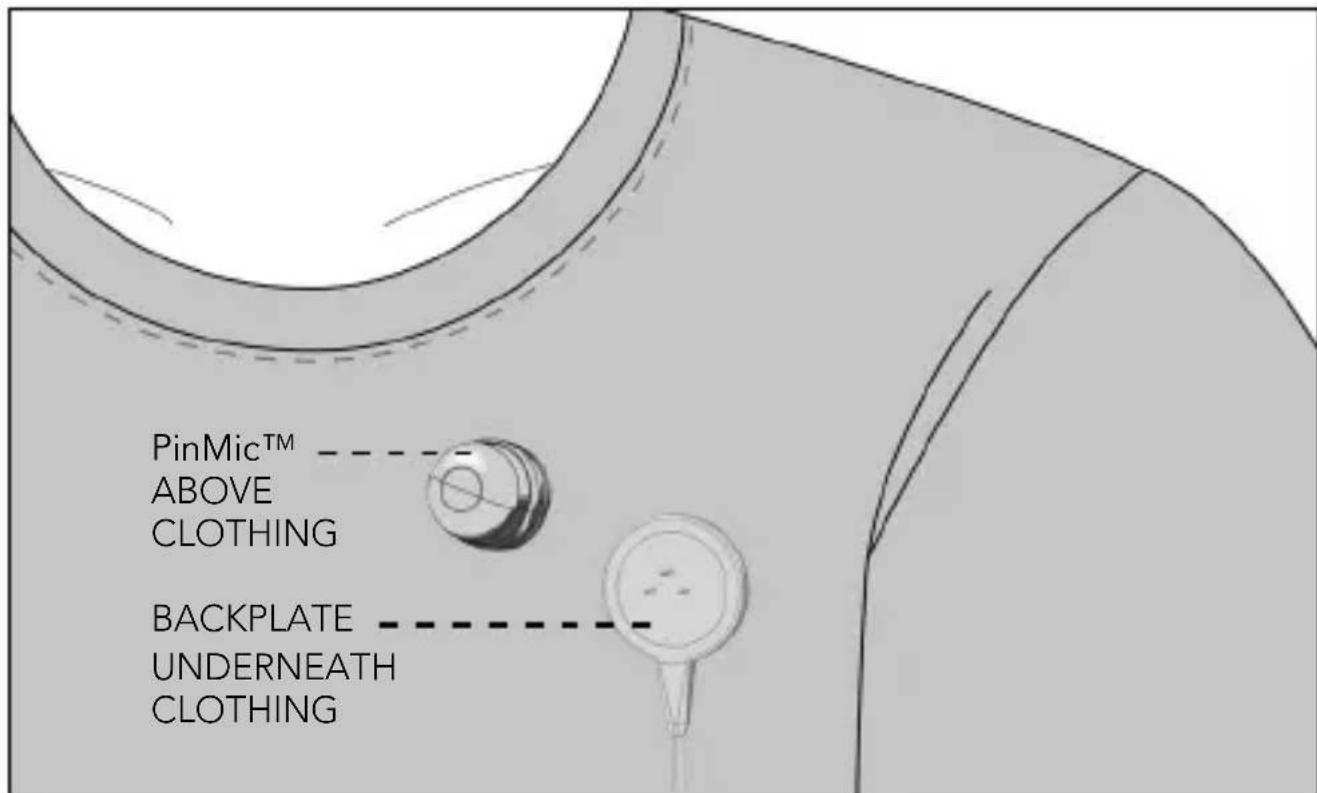
Bring the backplate up underneath the user's clothing, then press the pins through to the other side of the fabric
(The standard PinMic™'s backplate pins are able to comfortably pin through clothing up to approximately 1.5mm thick (0.006 \~ 0.14"). The heavy duty model is recommended for fabric from around 1.5mm up to 3.5mm (0.006 \~ 0.14") thick.)
FITTING YOUR PINMIC™
Once the pins are exposed, simply match the receptacles on the PinMic™ to the pins on the backplate and press on.
After the 'click', the PinMic™ will be securely fastened.
There is no need to push the microphone down further.
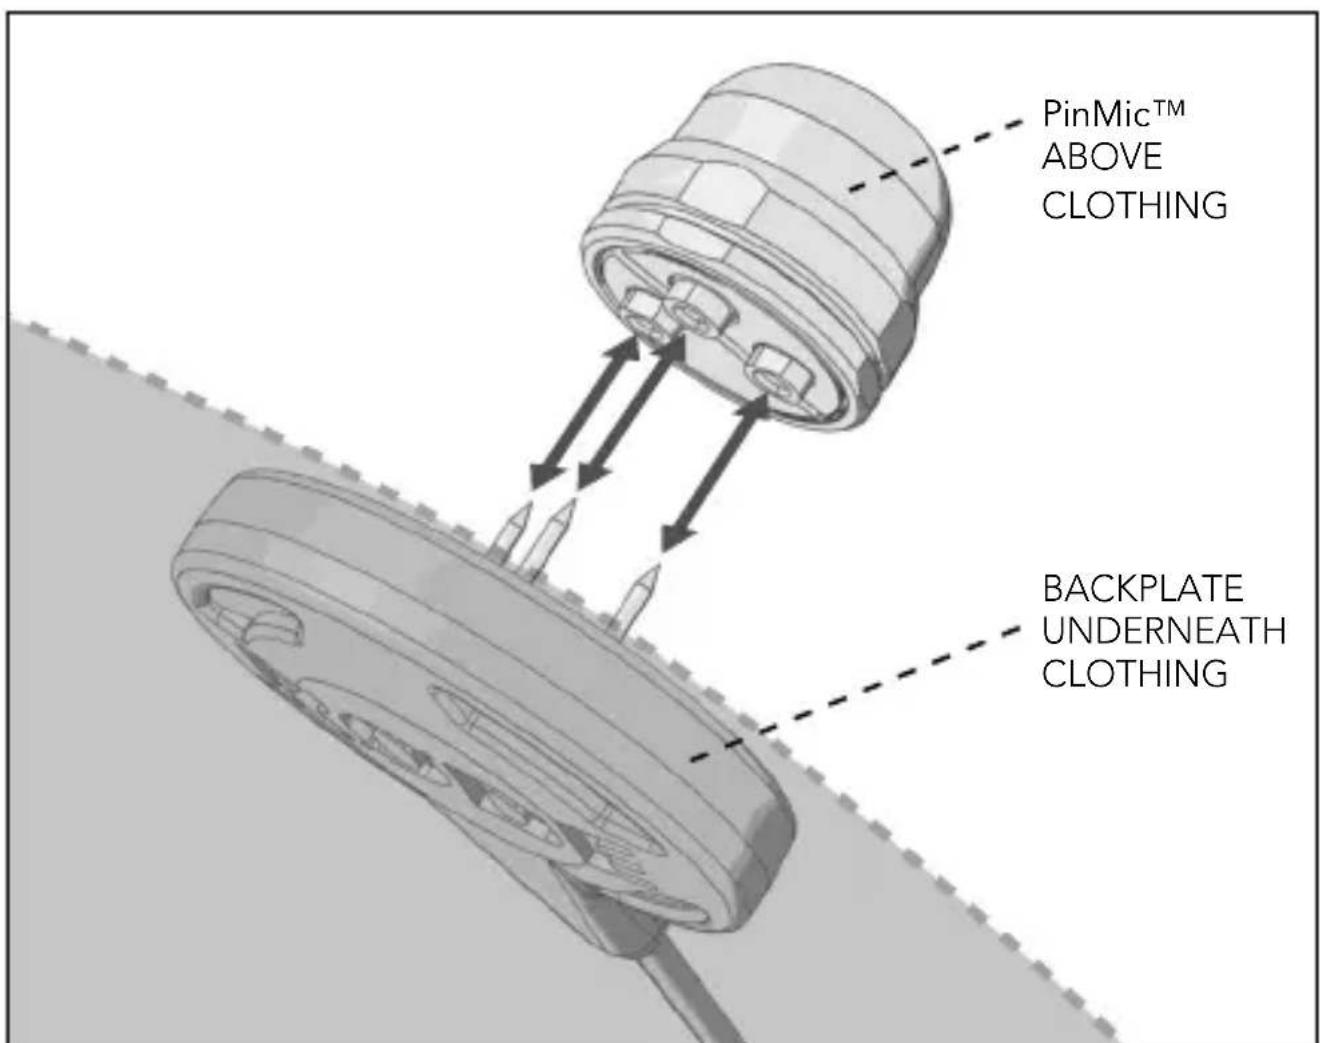
Match the backplate pins to the PinMic™ receptacles
FITTING YOUR PINMIC™
To prevent tangling, you may utilise the provided cable management clip. Clip the cable into the groove on the lapel clip, then loop through as many times as necessary and attach to clothing.

Clip the cable into the groove on your lapel clip
To connect your PinMic ^TM to your wireless system, securely fasten the corresponding adaptor to the end of your MiCon ^TM cable.

R∅DE MiCon™ cable and adaptor
The PinMic™'s connections have been designed using the R∅DE MiCon™ connector system, which provides seamless integration with a wide range of wireless systems, while maintaining the mic's discreet appearance.
(MiCon™ adaptors sold separately – see rodemic.com/pinmic for a full list of compatibility.)
Plug the adaptor into your wireless system and you're ready to go.
SUPPLEMENTARY MESH HEAD
For instances in which the PinMic™ user is wearing a light-coloured garment, R∅DE have provided a supplementary silver mesh head. This will maintain the PinMic™'s subtle appearance on the clothing.
To switch from your pre-fitted black mesh head to the silver, first disassemble your PinMic™ with your R∅DE adjustment tool. (This is best done over a desk or work surface to ensure no parts are misplaced). Pull apart the two sections of the adjustment tool to reveal the driver and socket sections.
Place your PinMic™ in the socket hole, mesh down, so that the bottom of the microphone is visible. Match the flat edges of the mesh head to the flat edges of the socket hole to insert correctly. Then use the groove across the bottom of the mic to unscrew the mic capsule from the mesh head.

Place microphone in the adjustment tool socket, mesh down

Use the groove across the bottom of the mic to unscrew
Once the microphone capsule is loose, remove it from the mesh. Remove the black mesh head from the socket, using the groove on the mesh ring as grip. Next, insert the silver mesh head into the socket. Place the microphone capsule into the silver mesh and tighten on securely with the driver.
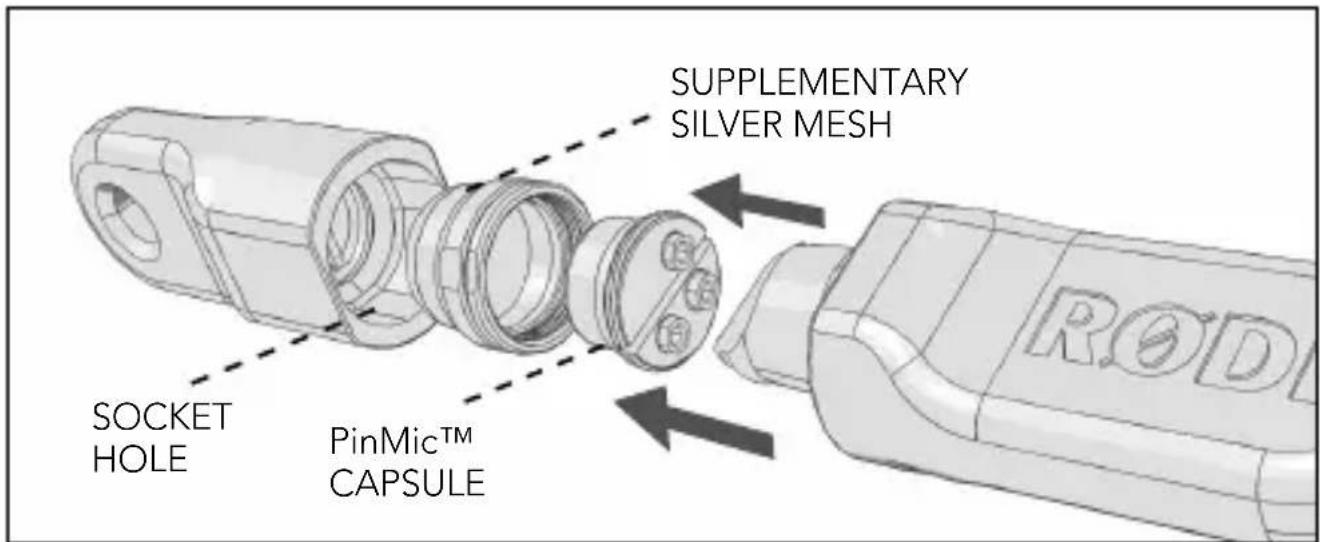
Place the silver mesh in the socket, then the mic capsule, then tighten
Note: Please do not attempt to screw the mesh head onto the PinMic™ by tightening while the microphone is attached to the backplate. This may cause damage to the backplate pins. Always remove your microphone from clothing and backplate before changing mesh heads.
CUSTOMISING THE SILVER MESH HEAD
The supplementary silver mesh head can be custom painted to match the colour of the user's clothing, providing an even higher level of microphone camouflage.
To colour your mesh, first use a pair of tweezers to remove the inner foam (pop filter) from just under the mesh head. (This foam reduces wind noise and moisture reaching the microphone capsule, and must not be exposed to paint.)
Once the foam is removed, use a spray paint in the colour of your choice to paint the mesh. Spray from a distance, applying a thin, even coat over the surface.
Allow the mesh to dry completely before its next usage. Once dry, return the inner foam to its place inside the mesh. Follow the instructions on pages 14-15 to switch the mesh heads on the PinMic™.
Always keep your unused mesh head in the provided storage case for complete protection.
Note: When colouring, please be cautious not to block any of the holes in the mesh head. This may reduce the acoustic transparency of the PinMic™, resulting in compromised audio quality.
To check that the mesh head is clear, hold it up against a light and ensure the light filters through the holes.
MINI-FURRY
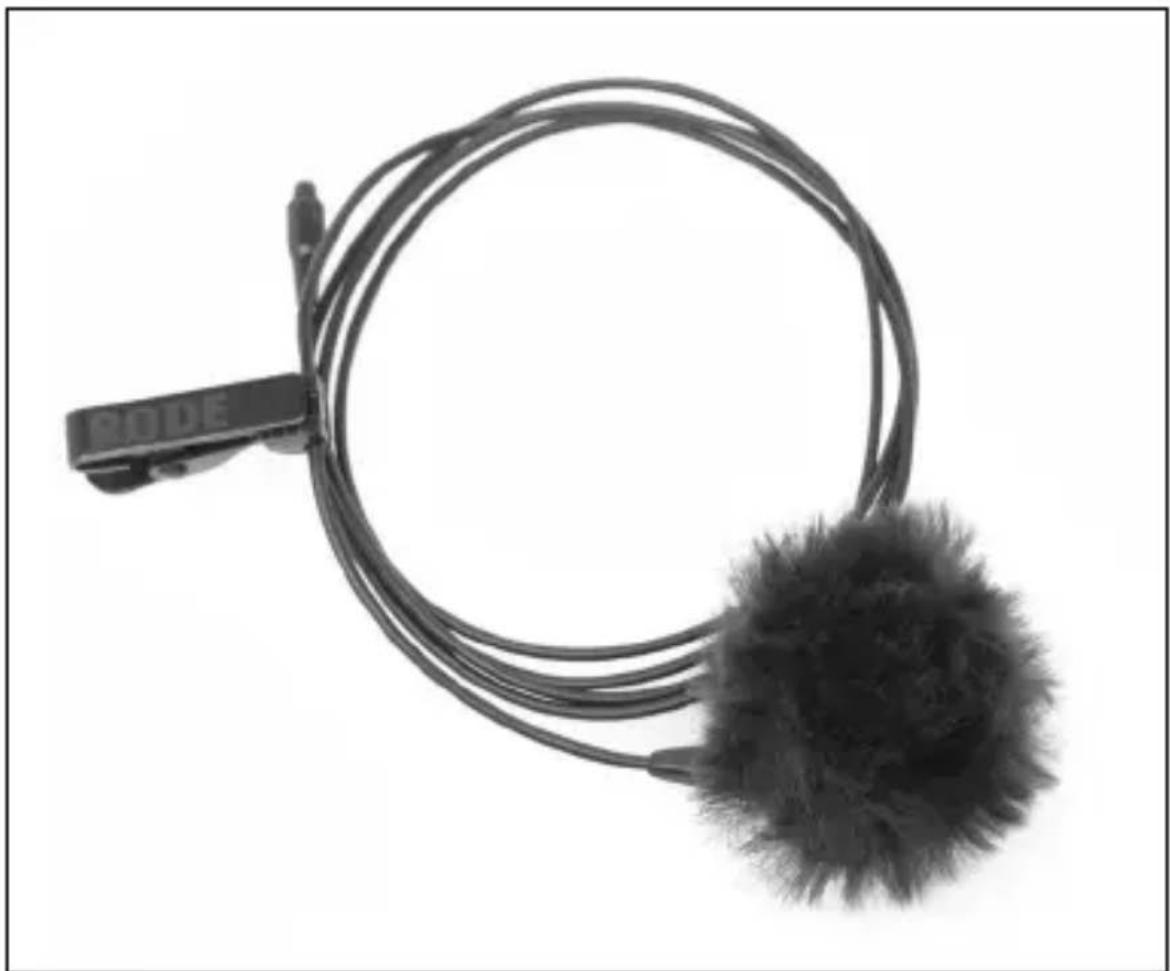
For increased wind protection, a mini-furry windshield is provided with the PinMic™. The windshield is ideal for situations such as outdoor performances, where wind noise may distort the audio quality of the mic.
To fit, simply press on the mini-furry straight over the PinMic™ until it is secured by the groove on the mesh head.
natural_image
Close-up of a black cord with a textured spherical object attached, labeled 'CODE' on the left (no other text or symbols visible)PinMic ^TM with mini-furry
When not in use, always keep your PinMic ^™ in the storage case provided. Close and snap the storage case for complete protection.
Inside the case, you will find a sachet of moisture absorbent crystals. Please retain these crystals and store with the PinMic ^TM to keep the microphone in ideal condition.
Eventually this pack of crystals will need to be dried. This is indicated by the crystals turning pink in colour. They can easily be re-used by placing them in an oven at 100-150 degrees Celsius for approximately ten minutes. The crystals will operate effectively again once they have turned blue.
In some cases, such as when there are multiple users of the PinMic™, you may wish to sanitise the backplate and cable.
To do this, use the provided Sanitary Cleansing Wipes to wipe down the PinMic™ surface. You may wish to detach the microphone from the backplate and cable for easier access.
Please be mindful when cleaning the PinMic™ not to let any dust or moisture into the microphone capsule.
If you experience any problem, or have questions regarding your microphone, first contact the dealer who sold it to you. We have an extensive dealer network to assist you.
If you have diffi culty getting the advice or assistance you require from the dealer, do not hesitate to contact us directly via the details below.

MICROPHONES

INTERNATIONAL
107 Carnarvon Street
Silverwater NSW 2128 Australia
Ph: +61 2 9648 5855
Fax: +61 2 9648 2455
USA
P.O. Box 4189
Santa Barbara, CA 93140-4189
Ph: 805 566 7777
Fax: 805 566 0071
TECHNICAL SUPPORT
For information and technical support please visit www.rodemic.com/support

natural_image
Solid black and gray gradient background with no text, symbols, or identifiable objects
Brand : RODE
Model : PinMic
Category : Microphone