
STROBE 37LED - Light Karma - Free user manual and instructions
Find the device manual for free STROBE 37LED Karma in PDF.


| Product Type | LED Strobe Light |
| Brand | Karma |
| Model | STROBE 37LED |
| Number of LEDs | 37 |
| LED Color | White (6000K) |
| Power Supply | AC 100-240V, 50/60Hz |
| Power Consumption | 30W |
| Dimensions (W x D x H) | 260 x 215 x 110 mm |
| Weight | 1.2 kg |
| Strobe Rate | 1-20 flashes per second |
| Control Modes | Sound-activated, Manual (via potentiometer), Master/Slave |
| DMX Support | Not available |
| Beam Angle | 120 degrees |
| Mounting | Floor stand or hanging bracket (not included) |
| Safety Certifications | CE, RoHS |
| Protection Rating | IP20 (indoor use only) |
| Cleaning Instructions | Wipe with a soft dry cloth. Do not use solvents. |
| Operating Temperature | 0°C to 40°C |
| Expected LED Lifespan | 50,000 hours |
| Included Accessories | Power cord, user manual |
Frequently Asked Questions - STROBE 37LED Karma
User questions about STROBE 37LED Karma
0 question about this device. Answer the ones you know or ask your own.
Ask a new question about this device
Download the instructions for your Light in PDF format for free! Find your manual STROBE 37LED - Karma and take your electronic device back in hand. On this page are published all the documents necessary for the use of your device. STROBE 37LED by Karma.
USER MANUAL STROBE 37LED Karma
• OUTRAS LINGUAS •
• OTROS IDOMAS •
natural_image
Black rectangular electronic device with a grid-patterned panel, no visible text or symbolsILLUMINATORE PAR light

natural_image
Pure electrical circuit lines without any symbolsCAVO ALIMENT. Power cable

natural_image
Icon of an open book with a gear symbol, no text or symbols presentMANUALE Manual

When you open the package check that product is in good condition and that all the parts are present. Immediately notify the seller if any part is damaged or missing.
IT
The manufacturer, in order to improve its products, reserves the right to modify their characteristics whether technical or aesthetic, at any time and without notice.
PANNELLO FRONTALEPANNELLO FRONTALE / FRONT PANEL

natural_image
Line drawing of a rectangular electronic device with a grid-patterned panel and a labeled connection point (no text or symbols on the device itself)PANNELLO POSTERIORE / REAR PANEL

GRAZIE PER IL VOSTRO ACQUISTO
| XLR Pin Configuration |
| Pin 1 = Ground |
| Pin 2 = Negative |
| Pin 3 = Postive |
TABELLA 2
MODALITA' 8 CANALI (A001)
The product you have purchased is the result of careful planning by specialized engineers. High quality materials were used for its construction, to ensure its functioning over time.
The product is manufactured in compliance with the strict regulations imposed by the European Union, a guarantee of reliability and safety.
Please read this manual carefully before starting using the device in order to take advantage of its full potential.
Hoping that you will be satisfied of your purchase, we thank you again for your trust in our brand and we invite you to visit our website www.karmaitaliana.it where you will find the whole range of our products, along with useful information and updates.
CAUTIONS AND WARNINGS
- Read and follow strictly the instructions contained in this manual.
- Keep this manual for future reference and include it if you give the product to another user.
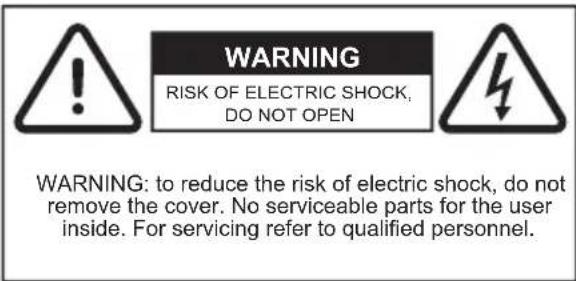
- This device works with dangerous 110 - 230V mains power. Do not open, do not disassemble and don't try to operate inside it. In case of wrong use an electric shock may occur.
- The installation of the product must be carried out exclusively by specialized technicians. In case of wrong installation or connections, the manufacturer doesn't take any responsibility for damages to people or objects.
- Make sure that your power outlet voltage matches with the voltage indicated on the product. A wrong voltage would seriously damage the fixture.
- To avoid the risk of dangerous electric shocks, before turning on the product always check that it is connected to a circuit with suitable earth ground.
- Before making any connection with other devices, check that all the fixtures are disconnected from the power source.
- If you need to suspend the product use only the original bracket. Make sure that the structure where it is mounted can support its weight and fasten it firmly, using also a safety cable.
- The product is not suitable for outdoor use. To avoid the risk of shortcircuits don't expose it to high temperatures (above 40^ ), rain or humidity.
- Do not allow flammable liquid, water or metal objects to enter the product.
- Don't touch the product with wet hands.
- Do not place any recipients filled with liquids, such as vases, on top of or directly next to the appliance.
- Install the product in a stable and ventilated position, far from heat sources and don't obstruct the air vents.
- Use the fixture and its controls with due accuracy, avoiding falls, vibrations or impacts.
- If the product doesn't turn on, check the fuse and if necessary replace it with one of the same type and rating, after disconnecting the fixture from power.
- In the event of a serious operating problem, stop using the product immediately. Never try to repair it by yourself, but contact the authorized technical service center. Repairs carried out by unskilled persons could lead to serious damages both to the fixture and to people.
- Avoid direct eye exposure to the light source.
- Do not turn the product on and off at short intervals, it may reduce the life of the device.
- Disconnect the unit from power when it is not used.
- Never disconnect the product from the power source by pulling on the cord. Do not cut, kink, otherwise damage nor modify the power supply cord and periodically check that it is in good condition.
- Wait for the product to cool before cleaning or maintenance.
- To clean the product, use only a dry or slightly damp cloth, avoiding solvents or detergents of any kind.
- If the product is used in the presence of children they must be supervised.
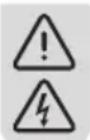
This symbol alerts you of the presence of important operating and maintenance instructions, in the manual or in the documentation accompanying the product
This symbol alerts you to the presence of uninsulated dangerous voltage within the product's enclosure that might be of sufficient magnitude to constitute a risk of electric shock. Do not open the product's case.
The CE mark indicates that this product complies with the applicable European directives and their related standards. Compliance documentation in complete form is available at the company Karma Italiana Srl
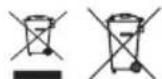
Directive 2012/19/UE regarding electric and electronic equipment waste (WEEE).
The symbol of the crossed-out dustbin indicates that the product at the end of its life must be collected separately from other waste. The user must, therefore, confer the fixture complete with all the essential components to an authorized disposal center for collection of electronic and electrical waste, or return it to the dealer when buying new equipment of equivalent type, at a rate of one to one, or one to zero if external dimension is less than 25cm. Appropriate separate collection to send the decommissioned equipment to recycling, treatment and environmentally compatible disposal helps to prevent negative impact on the environment and human health and promotes recycling of the materials making up the product. In Italy illegal dumping of the product by the user entails the application of administrative sanctions pursuant to Legislative Decree n. 49 (14/03/2014).
The product's remote control contains a battery, which according to the European Directive 2013/56/EU, cannot be disposed of with normal household waste. Please inquire about the local regulations regarding the separate collection of batteries: a correct disposal allows to avoid negative consequences for the environment and health.
WARRANTY CONDITIONS
The product is covered by warranty according to current national and European regulations.
For detailed warranty conditions and RMA requests please refer to our website: www.karmaitaliana.it.
- The warranty covers manufacturing defects and faults occurred in the first 2 years from the date of purchase. In case of purchase with invoice, the warranty is limited to 1 year.
- Damages caused by negligence or wrong use of the device are not covered by warranty.
- The warranty is no longer effective if the item is modified or disassembled by not authorized people.
- This warranty doesn't necessarily envisage the product's replacement.
- External components, batteries, knobs, switches and any removable or subject to wear and tear parts are excluded from warranty.
- Shipment for the return of faulty items is at expense and risk of the owner.
- For all intents and porpuses the warranty is effective only upon exhibition of the invoice or of the purchase receipt.
- If you send the product for repair, it must be shipped with complete original packaging: we therefore recommend to save it.
We also suggest to register your product on our website www.karmaitaliana.it, after signing in to access the private area. In this way you will have the possibility to keep track of the warranty validity and to receive updates on our items.
PRODUCT DESCRIPTION
1) LED PANEL
2) MOUNT BRACKET
It can be used to place the light effect on any surface or mount it on stands. Loosen the knobs (3), adjust the brackets correctly, the tighten the knobs again.
3) KNOBS
Tighten them to fix the bracker in the desired position.
4) POWER IN
Connect to this socket the power cable.
The plug on the other side is to be connected to an ordinary 110 or 220V electrical power outlet, according to your country's voltage.
5) FUSE HOLDER
If the light doesn't turn on, disconnect the power cable from the socket (4), then extract the fuse from the fuse holder and check it. If necessary replace it with one of the same amperage.
6) AIR VENT
Avoid opening this opening, necessary for internal ventilation of the fixture.
7) DMX IN SOCKET
You can connect here the 3 pin DMX cable coming from a DMX controller or another fixture connected to a DMX system
8) DMX OUT SOCKET
Thanks to this socket you can connect another fixture to the DMX system.
9) DISPLAY
It shows the main functions and allows, by means of the below keys, to set the fixture.
10) CONTROL KEYS
They are used to control all the functions of the fixture. Thanks to the MODE button you can select the setting to be changed: press repeatedly to skip from on function to another. Thanks to the UP and DOWN keys it is possible to select the available options, while by means of the ENTER button the selected value can be confirmed. For more details on the menu functions refer to chart one on the following page.
CHART 1 (FUNCTIONS FROM DISPLAY)
| SERIAL N. | CONTENT VALUE RANGE FUNCTION AND DESCRIPTION | |
| 1 | A001 001 - 512 | DMX512 address code setting -8 channel mode |
| 2 | d001 001 - 512 | DMX512 address code setting -8 channel mode |
| 3 | r255 000 - 255 Red dimming, from dark to bright. | |
| 4 | G255 000 - 255 Green dimming, from dark to bright. | |
| 5 | b255 000 - 255 Blue dimming, from dark to bright. | |
| 6 | FH99 00 - 99 | Stroboscopic, from slow to fast,value 0 turns off stroboscopic. |
| 7 | WL01 01 - 7 Manual color selection mode. | |
| 8 | E01 01 - 74 Effects 1-73,74 are the whole process effects. | |
| 9 | Co00 00 - 07 | OO refers to the color of non control effect,while 01-07 refers to the color of control effect |
| 10 | SP99 01 - 99 Effect speed, from slow to fast. | |
| 11 | SU01 01 - 02 Mode: 1 for stroboscopic jump, 2 for jump | |
INTRODUCTION TO DMX CONNECTIONS
In a DMX 512 connection there are 512 available channels. Each DMX fixture uses one or more channels to manage its functions. The user must assign a starting address to each DMX fixture connected to the system. This address will indicate the first channel used by the controller. You have to plan the starting address choice in order to avoid the channels' overlapping. Otherwise the fixture wouldn't work correctly.
Example: If you need to connect 3 DMX fixtures, each with 10 channels, the first unit is to be set on address 1, the second unit on address 11 and the third one on address 21. Anyway you can set the same starting address on more devices if you wish them to operate in synchrony. DMX devices are conceived to receive data through a serial Daisy Chain connection. With this kind of connection the data output of a fixture is connected to the data input of the following one. The connection order of the devices is not important and it doesn't affect on how the controller interacts with each of them. We suggest to put them in the easiest and most direct sequence for cable connection. The signal cable length should not be more than 100 m to avoid interferences with other signals or electric devices. To set the address you want to assign to the fixture (from 001 to 512), press the MENU key until the display shows the symbol "d" or "A". Then, by means of the UP and DOWN keys, set the address and confirm with ENTER.
To operate correctly with DMX systems it is necessary to know the number of channels available on each connected fixture and the function of these channels.
This fixture features 2 DMX modes, with 8 channels each.
The charts 2 and 3 show the functions related to each channel in DMX mode.
Before using the fixture it would be advisable to take a specific course on DMX systems for full understanding of its potential and functions.
DMX CONNECTORS
When purchasing DMX cables or creating DMX cables it is necessary to know exactly how the 3pin XLR type connectors should be connected. Refer to the drawings on the right.


| XLR Pin Configuration |
| Pin 1 = Ground |
| Pin 2 = Negative |
| Pin 3 = Postive |
CHART 2
8-CHANNEL MODE (A001 STATUS)
CHANNEL FUNCTION DESCRIPTION
| ch1 General dimming General dimming, from dark to bright | |
| ch2 R Dimming Red dimming, from dark to bright | |
| ch3 G Dimming Green dimming, from dark to bright | |
| ch4 B Dimming Blue dimming, from dark to bright | |
| ch5 Total stroboscopic Global strobe, from slow to fast | |
| ch6 Effect Color Control | 0-10: None; 11-44:R; 45-79:G; 80-114; B; 115-149: RG; 150-184: RB; 185-219:GB; 220-255:RGB; |
| ch7 Function selection | 0-10: Dimming mode; 11-223: effect 1-71 (The numerical interval of 3 is 1 effect); 224-239: all effects; 240-244: gradual change; 245-250 pulse change; 251-255: voice control (CH8 selects voice control 1 and 2) |
| ch8 Function speed | Function speed, from slow to fast (select voice controlled strobe and jump during voice control) |
CHART 3
8-CHANNEL MODE (D001 STATUS)
CHANNEL FUCTION DESCRIPTION
| ch1 General dimming | General dimming, from dark to bright | |
| ch2 | Total stroboscopic | Global strobe, from slow to fast |
| ch3 | Effect Color Control | 0-10: None; 11-44:R ; 45-79:G ; 80-114:B; 115-149: RG; 150-184:RB; 185-219:GB; 220-255:RGB; |
| ch4 | Function selection | 0-10: Dimming mode; 11-223: effect 1-71 (The numerical interval of 3 is 1 effect); 224-239: all effects; 240-244: gradual change; 245-250 pulse change; 251-255: voice control (CH5 selects voice control 1 and 2) |
| ch5 | Function speed | Function speed, from slow to fast (select voice controlled strobe and jump during voice control) |
| ch6 | R Dimming | Red dimming, from dark to bright |
| ch7 | G Dimming | Green dimming, from dark to bright |
| ch8 | B Dimming | Blue dimming, from dark to bright |
Master-slave operation
In d001 or A001 mode the slave signal is automatically received, without necessity of further settings.
REMOTE CONTROL
The product is endowed with remote control to operate from a distance.
Below are the keys' functions descriptions

TECHNICAL SPECIFICATIONS
| Type of light Wash / Strobo | |
| Leds 288 led (RGB 3 in uno) - 0,2W SMD 5050 | |
| Total pwer 58W | |
| Effects Strobe / dimmer / fade | |
| Beam angle 180° | |
| DMX channels 2 DMX modes with 8 channels each | |
| Operating mode Auto / manual / Music / DMX | |
| Connectors 3 pin XLR | |
| Bracket Yes | |
| Color Black | |
| Display Yes | |
| Power supply 110/230V ~ ; 50-60Hz | |
| Absorption | 60 W |
| Material | Plastic |
| Dimensions | 270 x 170 x 70 mm |
| Weight | 0,65 Kg |
KARMA
Prodotto da/ produced by:
KARMA ITALIANA SRL
Via Gozzano 38 bis
21052, Busto Arsizio (VA) - Italy

Ver. 23.1
Made in China
- IT
- PANNELLO FRONTALEPANNELLO FRONTALE / FRONT PANEL
- PANNELLO POSTERIORE / REAR PANEL
- GRAZIE PER IL VOSTRO ACQUISTO
- TABELLA 2
- MODALITA' 8 CANALI (A001)
- CAUTIONS AND WARNINGS
- WARRANTY CONDITIONS
- PRODUCT DESCRIPTION
- 1) LED PANEL
- 2) MOUNT BRACKET
- 3) KNOBS
- 4) POWER IN
- 5) FUSE HOLDER
- 6) AIR VENT
- 7) DMX IN SOCKET
- 8) DMX OUT SOCKET
- 9) DISPLAY
- 10) CONTROL KEYS
- INTRODUCTION TO DMX CONNECTIONS
- DMX CONNECTORS
- CHART 2
- 8-CHANNEL MODE (A001 STATUS)
- CHART 3
- 8-CHANNEL MODE (D001 STATUS)
- Master-slave operation
- REMOTE CONTROL
- KARMA ITALIANA SRL
Brand : Karma
Model : STROBE 37LED
Category : Light