
Casiatab Lyratab 10 - Tablet Phoenix Technologies - Free user manual and instructions
Find the device manual for free Casiatab Lyratab 10 Phoenix Technologies in PDF.


| Product Type | Tablet |
| Brand | Phoenix Technologies |
| Model | Casiatab Lyratab 10 |
| Display Size | 10.1 inches |
| Display Resolution | 1280 x 800 pixels |
| Processor | Quad-core 1.5 GHz |
| RAM | 2 GB |
| Storage | 32 GB (expandable via microSD) |
| Operating System | Android 10 |
| Battery Capacity | 6000 mAh |
| Dimensions (W x D x H) | 240 x 170 x 8 mm |
| Weight | 450 g |
| Cameras | Rear 5 MP, Front 2 MP |
| Connectivity | Wi-Fi 802.11 b/g/n, Bluetooth 4.2 |
| Ports | Micro-USB, 3.5 mm headphone jack |
| Power Supply | 5V/2A charger (included) |
| Main Functions | Web browsing, video playback, e-reading, gaming, productivity apps |
| Care and Cleaning | Wipe with a soft dry cloth; avoid liquids and abrasive cleaners |
| Safety | Use only approved charger; avoid extreme temperatures; keep away from water |
| Spare Parts and Repairability | Battery and screen replacement available through authorized service centers |
| General Information | Warranty: 1 year; supports multi-touch and gesture navigation |
Frequently Asked Questions - Casiatab Lyratab 10 Phoenix Technologies
User questions about Casiatab Lyratab 10 Phoenix Technologies
0 question about this device. Answer the ones you know or ask your own.
Ask a new question about this device
Download the instructions for your Tablet in PDF format for free! Find your manual Casiatab Lyratab 10 - Phoenix Technologies and take your electronic device back in hand. On this page are published all the documents necessary for the use of your device. Casiatab Lyratab 10 by Phoenix Technologies.
USER MANUAL Casiatab Lyratab 10 Phoenix Technologies
MANUAL DE USUARIO
life technology
www.phoenixtechnologies.es

Auto-rotación


RoHS

CE
FC
www.phoenixtechnologies.es

Phoenix
Lyra TAB10
TAB LET QUAD CORE | 10,1" 16 9 HD | BT | HDMI

USER'S MANUAL
life® technology
www.phoenixtechnologies.es
Read me first
- Please read this manual before operating your tablet, and keep it for future reference.
- The descriptions in this manual are based on the default settings.
- Images and screenshots used in this manual may differ from the actual product.
• Available features and additional services may vary by device, software or service provider. - Our company is not liable for performance issues caused by third-party applications.
ÍNDICE:
Assembling....32
Unpack....32
Charge the battery....32
Install the memory card....32
Getting started....33
Turn your device on and off....33
Switch to flight mode....33
Device layout....33
Home screen....34
Add items to the home screen....34
Task bar....35
Notification panel....35
Auto Rotation....35
Lock & unlock the screen......35
Text input....36
Customize your device....36
Manage applications....36
Security....36
Reset tablet....37
Web....38
Email....38
Gmail....39
Browser....40
Play Store....40
Entertainment....41
4K Player....41
Gallery....41
Play music....43
Camera....45
Tools....46
Calendar....46
Alarm....46
File Manager....47
Sound Recorder....47
Calculator....47
Connectivity....48
USB Connection....48
Wi-Fi....48
Bluetooth....49
VPN....50
Wireless display....50
Safety Precautions....51
Care & Maintenance....52
Features....53
Warranty....54
Assembling
Unpack
Check your product box for the following items.
Phoenix Tablet LYRATAB10.
- Stereo headphones with control.
• High-Speed USB 2.0 cable to connect with PC. - Micro USB adapter-Standard female USB.
• Power adapter AC/DC (Europlug) 9V/2A 100-240VAC 50-60Hz. - User manual.
You can purchase additional accessories from your local retailer.
Charge the battery
Before using the device for the first time, you must charge the battery.
- You can charge the device with a travel adapter or by connecting the device to a PC with a USB cable.
- Battery full icon is shown when finished if your device is off.
Warning: Use only original batteries and chargers. Unapproved chargers or cables can cause batteries to explode or damage your device.
Install the memory card
To store additional multimedia files, you need to insert a memory card.
- Insert a memory card with the gold contacts facing downwards.
- Push the memory card into the slot until it clicks.
Notice: Our company uses approved industry standards for memory cards, but some brands may not be fully compatible with your device..
Getting started
Turn your device on and off
To turn on your device, press and hold the power key.
To turn off your device, press and hold the power key, and then tap Power Off - OK.
Switch to flight mode
To use only your device's non-network services, switch to flight mode. Please follow the instructions below to turn on flight mode:
Tap Settings - WIRELESS & NETWORKS - More - Airplane mode from application list to create a checkmark.
Device layout

| Power on/off | Press and hold for 2 seconds to turn on or off |
| Lock | Press to lock the device |
| Reset | Press and hold for 6 seconds to reset the tablet |
Home screen
The home screen has multiple panels. Scroll left or right to the panels on the home screen, you can view indicator icons, widgets, shortcuts to applications, and other items.

| 1 | Indicator icons |
| 2 | Open the search bar |
| 3 | $croll left or right to the other panels |
| 4 | Access the application list and widget screen |
| 5 | Task bar |
Add items to the home screen
Tap the icon at the upper right to access the application list shown below from home screen.


Scroll left or right to view more items.
To add items to the home screen, tap and hold an item, then drag the item to a new location.
To remove items from the home screen, tap and hold an item, then drag the item to the Remove area at the top of the home screen.
Task bar
The task bar is shown at the bottom of the screen. It displays commonly used option buttons, battery level indicator, current time and other indicator icons.
![graph TD A["1"] --> B["2"] B --> C["3"] C --> D["4"] D --> E["5"] style A fill:#f9f,stroke:#333 style B fill:#f9f,stroke:#333 style C fill:#f9f,stroke:#333 style D fill:#f9f,stroke:#333 style E fill:#f9f,stroke:#333 note right of A: 1 Adj. note right of B: View note right of C: Return](/content/2026/05/1078457/images/7f2312c6128dc2d8d9d1e7f2b5873e42eb1c16fe9538cc4176a2af8b7a66c38a.jpg)
| 1 | Adjust the device volume to lower. |
| 2 | View the applications you have accessed recently. |
| 3 | Return to home screen. |
| 4 | Return to previous screen. |
| 5 | Adjust the device volume to higher. |
Notification panel
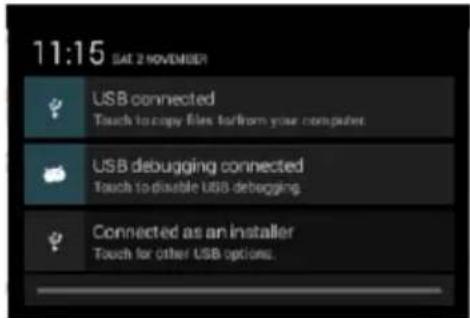
To show a pull-down list of the recent notifications, drag the left area of the notification bar downward.
Auto Rotation
If you rotate the device while it's being used, the interface will automatically rotate as well. To prevent the interface from rotating, open the notifications panel and select Auto-rotate screen, then scroll it to Off.
Lock & unlock the screen
To unlock the screen, tap and hold the lock icon, then drag it to the unlock area where the unlock icon is. To lock the screen manually, press Power key.
Text input
You can enter text by selecting characters on the virtual keyboard.
Tap the text input field to display the virtual keyboard. To hide the keyboard, tap at the task bar.
To change the text input method, tap the task bar.
From a text field, you can use the copy and paste feature for fast inputting.
Customize your device
To customize your device according to your preferences, tap Settings from application list or notification panel.
Manage applications
To manage the applications installed on your device, tap Settings - Apps.
- To uninstall an application, select DOWNLOADED, then select an item and tap Uninstall, tap OK to confirm.
- To stop or change the settings of an application, select RUNNING or ALL, then select an item and tap the option you need.
Security
You can protect your device and data by setting a screen lock or encrypting your tablet.
- Set a screen lock.
Select Settings – Display - Sleep from application list, you can set the time before the screen times out and goes into lock mode. (You have not entered any characters or made other selections).
Reset tablet
You can reset system and desktop settings to their original values by the following steps:
- Select Settings - Backup & reset from application list.
- Tap Factory data reset.
- If you want to erase all data on your tablet, such as music, pictures and any other data, tap Erase SD card checkbox to create a checkmark.
- Tap Reset tablet.
The device resets to the factory default settings automatically.
Warning! Factory data reset will erase all data from your device and SD card, including your google account, system and application data and settings and any other downloaded applications.
Web
To receive and send mail, you must have a remote mailbox service. This service may be offered by a service provider. Your device is compliant with applicable internet standards for POP3/IMAP/Exchange.
Before you can send or receive mail on your device, you need to set up an email account and define the email settings correctly. You can define more than 1 mailbox.
- Set up your email
- Tap Email from application list.
- You can use mailbox guide to set up your mailbox, tap Next until it's done.
- If you need to add another email account, tap the option button at the upper right - Settings - ADD ACCOUNT, then set up the email account with the mailbox guide.
When you are finished setting up the email account, the email messages will be downloaded to your device. If you have created more than two accounts, you can switch between email accounts. Select an account name at the top left of the screen and select the one you want to retrieve messages from.
- Open the application list and select Email.
- Tap the option button at the upper right, then select Settings and the email account you want to delete.
- Tap Remove account.
- Tap OK to confirm..
- Create and send email
- Open Email application.
- Tap Email icon.
- In To field, enter the recipient's email addresses manually and separate them with a comma. Add more reci-
pients by tapping Cc/Bcc.
- To insert attachments, tap the option button at the upper right and select Attach file.
- Enter the subject and the text.
- Tap SEND to send the email.
Gmail
You can retrieve new email messages from the Google Mail webmail service to your inbox. Before you can send or receive mail on your device, you need to set up a Gmail account.
- Create a Gmail account
If you don't have a Google Account, tap New, then follow the on-screen instructions to create a new one.
If you want to add an existing account, tap Existing, enter your email address and password, and then select Next, when you are finished setting up the email account, the email messages are downloaded to your device.
- View email messages
- When you open the email account, the amount of unread email messages is displayed at the title bar and the unread email messages are displayed in bold.
- To view an email message, tap it.
- To mark an important email message, tap the star icon below the date. To cancel the mark, tap the star icon again.
- Create and send an email
- Tap Email icon.
- In To field, enter the recipient's email addresses manually and separate them with a comma. Add more recipients by tapping Cc/Bcc.
- To insert attachments, tap the option button at the upper right and select Attach file.
- Enter the subject and the text.
- Tap SEND to send the email.
Browser
Tap Browser from application list to access to the web.
- Browser webpages
- Select Browser to launch a specified homepage.
- To access a specific webpage, select the URL input field, enter the web address of the webpage, and select Go.
- To zoom in, place two fingers on the screen and spread them apart. To zoom out, move your fingers closer together. You can also double-tap the screen.
Play Store
Play Store allows you to easily download an abundance of applications directly to your device. Before using the Play Store, you must have a Google Account.
- From the application list, tap Play Store.
- Sign in to your Google Account.
- Search for and download applications as desired.
- Follow the on-screen instructions.
Note:
- All applications offered by Play Store are developed by third party. To get the information about the developers, you can read the descriptions of each application.
- Our company is not liable for performance issues caused by third-party applications.
Entertainment
4K Player
Select 4K Player from application list.
You can view or play 4k video files with this application, which supports animation preview and presentation display.
- Supported file formats
It supports 4K standard video format.
Note: Some files may not play properly depending on how they are encoded.
- Play a video
-
Tap any video you would like to play.
-
Control playback with the virtual keys. To switch to floating window mode, move your fingers closer together or tap the button at the upper right. To switch to full-screen mode, place two fingers on the screen and spread them apart or tap the button at the upper left of the window.
Tap the lock icon at the upper left to lock the screen, tap it again to unlock.
- To watch a video saved on your device on TV, connect your device and TV with HDMI cable.
If you'd like to let your tablet and TV display the same screen synchronously, tap Disable presentation Display checkbox to create a checkmark.
- To disable animate preview, tap Disable animate preview checkbox to create a checkmark.
Gallery
To view or organize images, video clips, edit, send your files to other devices and set pictures as wallpapers, select Gallery from application list.
Note: It takes a few more minutes to enter this application if you store more files.
- Supported file formats.
| Type | Format |
| Image | JPEG, GIF, BMP, PNG |
| Video | AVI, RM, RMVB, MOV, FLV, 3GP, MP4 |
Note: Some files may not play properly depending on how they are encoded.
- View a picture
- Select a folder.
- Select a photo to view. To view more pictures, scroll left or right.
- To zoom in, place two fingers on the screen and spread them apart. To zoom out, move fingers closer together. You can also double-tap the screen.
- To start a slideshow, tap the option button and then select Slideshow.
- To view the details of a file, tap the option button, then select Details.
- To share a picture with others via Email, Gmail or Bluetooth, tap at the title bar.
- To set a photo as wallpaper, tap the option button at the upper right - select Set picture as - Wallpaper - drag the slides of the crop box to create the crop area, then tap Crop.
- To set a picture as a caller ID, tap the option button at the upper right - select Set picture as - Contact photo - Contacts - Create a new contact or select an existing contact - drag the slides of the crop box to create the crop area, then tap Crop.
- Edit a picture
-
To crop the image, tap the option button at the upper right, then select Crop.
-
To move the crop box, tap and hold the crop box and drag it to the desired location.
- To add or subtract from the selection border of the crop box, drag the crop box to the desired size.

Phoenix
- When you are finished, tap Save.
- To edit pictures and apply various effects, tap the option button at the upper right, then select Edit.

- To edit pictures and apply various effects, tap the option button at the upper right, then select Edit
• To apply a photo frame effect, tap - To crop, straighten, rotate or flip the image, tap
- To adjust contrast, tap
- Play a vídeo.
- Select a folder.
- Select a video to play.
- Control playback with the virtual keys.
- To watch a video saved on your device on TV, connect your device and TV with HDMI cable.
Play music
On the application list screen, tap Play music to access.
Note: Some files may not play properly depending on how they are encoded.
Start by transferring files to your device or memory card.
- Add music files to your device
Start by transferring files to your device or memory card..
- Play music
- Select a music file.
- Control playback with the virtual keys
The current list of songs are randomly shuffled for playback.
Replays the current list when the list ends.
Repeats the current playing song.
- Create a playlist.
- Tap the MENU button next to the music file.
- Select Add to playlist.
- Select New.
- Enter a name.
- Tap Save.
- Delete a playlist.
- Tap the music button on the upper left and then select Playlists.
- Tap the MENU button next to the playlist you want to delete.
- Select Delete.
- More features
Tap the MENU button on the upper right – Settings - Google account and then follow the on-screen instructions to add an account. With the account, you can enjoy more features of Play Music, such as synchronizing music and so on.
Camera
With the camera function, you can take pictures and record videos..
- ake a picture
- Open the application list and select Camera.
- Before taking a picture, you need to make some adjustments.
Tap to switch between the front and rear camera lenses.

Place two fingers on the screen and spread them apart or move fingers closer together to zoom in or zoom out.
- Set continuous snap mode.
- Change to panorama mode to take a landscape photo.
- Apply a filter effect.
- Change camera settings.
Tools
Calendar
With the Calendar feature, you can consult the calendar by day, week, or month, create events, and set an alarm to act as a reminder, if necessary.
To access the calendar, tap Calendar from application list.
- To create an event, tap

- Fill in the fields, and set category, date, time & an alarm.
• After you finish, select DONE. - You can view calendar in different views, Day, Week, Month and All.
- To delete an entry, tap the event to open it, and then select OK.
Alarm
From application list, tap Clock, and then select

- Tap to add alarm.
- Tap the numeric pad to set alarm time, when you are finished, tap OK.
- Tap get alarm details, when you are finished, tap

- Tap the time to change alarm time.
- To activate a preset alarm, set the alarm to ON.
-
To cancel an alarm, set the alarm to OFF.
-
When the alarm sounds, to stop the alarm, drag the alarm icon to

To repeat the alarm after a specified length of time, drag the alarm icon to


Phoenix
- To delete an alarm, tap

File Manager
Many features of the device, such as images, videos, documents, received attachments and downloaded files or applications, use memory to store data.
With File manager, you can store and browse files and folders in your device, or edit, move, copy files; you can send files to compatible devices as well.
Note:
- Some files formats are not supported depending on the software of the device.
- Some files may not play properly depending on how they are encoded.
Sound Recorder
With Recorder, you can record a voice memo. From application list, tap Recorder.
- To record a voice memo, tap
- To pause the recording, tap
- To listen to a voice recording that you just recorded, tap


Calculator
With this feature, you can use the device as a calculator. The calculator provides the basic arithmetic functions. Tap the virtual numeric and calculation keys to perform a calculation.
Connectivity
USB Connection
You can connect your device to a PC and use it as a removable disk, which allows you access the file directory
- With a USB cable, connect your device to a PC.
- Open the notification panel, select USB connected.
- Tap Turn on USB storage.
- Open the folder to view files.
-
Copy files from the PC to the memory card
-
If you want to transfer files from or to a memory card, insert a memory card into the device.
Wi-Fi
With Wi-Fi, you can connect to the internet or other network devices anywhere an access point or wireless hotspot is available.
- Activate the Wi-Fi feature
- From application list, tap Settings.
- In the field of WIRELESS & NETWORKS, turn on the Wi-Fi feature.
- Find and connect to Wi-Fi
- Once the Wi-Fi feature is activated, the device automatically search for available Wi-Fi connection.
- Select a network.
- Enter a password for the network (if necessary).
- Select Connect.
Bluetooth
You can connect to other compatible devices with wireless Bluetooth technology. Both devices only need to be within 33 feet of away each other.
With Bluetooth technology you can do the followings: handle calls with wireless
Bluetooth headset, listen to music a wireless stereo headset, send or receive data.
- Activate Bluetooth
- From application list, tap Settings.
- In the field of WIRELESS & NETWORKS, turn on the Bluetooth feature.
- Find and pair with other Bluetooth-enabled devices
- Select Settings - WIRELESS & NETWORKS - Bluetooth - Search for devices.
- Select a device.
- Enter a PIN and select OK. When the owner of the other device enters the same PIN or accepts the connection, pairing is complete. If the pairing is successful, the device will automatically search for available services.
Note: Some devices, especially headsets may have a fixed Bluetooth PIN, such as 0000. If the other device has a PIN, you must enter it.
- Send data via Bluetooth
- Select a file, such as a contact or a media file.
- Select an option of sending data via Bluetooth.
- Search for and pair with a Bluetooth-enabled device.
- Receive data via Bluetooth
- Select Settings - WIRELESS & NETWORKS - Bluetooth, tap BlueZ to set your device is visible to other Bluetooth devices.
- When prompted, enter the PIN for the Bluetooth wireless feature and select OK.
- Tap at the task bar and then select Accept to confirm and receive data from the device.
VPN
You can create virtual private networks and connect to your private network securely through a public network, such as the internet.
Note: You need to set a lock screen PIN or password before you can use VPN.
- Set up VPN connections
- Open the application list and select Settings - More - VPN.
- Select Add VPN profile and customize the connection information.
(Available options may vary depending on the VPN type.) - Tap Save when you are finished.
- Connect to a private network.
- Select Settings - More - VPN.
- Select a private network to connect.
- Enter the user name and password and select Connect.
Wireless display
On the application screen, tap Settings - Display - Wireless display.
Use this feature to connect your tablet to a large screen with a miracast dongle and then share your contents.
Note:
-Some files may be buffered during playback depending on the network.
-To save energy, deactivate this feature when not in use.
-To play videos or game on a TV, select an appropriate TV mode to get the best experience.
Follow the procedures below to activate this feature.
- Connect your tablet to a large screen with a miracast dongle.
-
Select an appropriate TV mode.
-
Activate the Wi-Fi feature
- On the application screen, tap Settings – Display - Wireless display, activate wireless display feature, then start searching by tapping SEARCH FOR DISPLAYS.
- Select a device showed on the screen, then tap Connect.
- When finished, open or play a file and then control the display with the keys on your device.
Safety Precautions
Read these simple guidelines before using your device. Not following them may be dangerous or illegal.
- Aircraft
Switch off in aircraft and follow any restrictions. Wireless devices can cause interference in aircraft.
- Vehicles
Never use your device while driving. Place it in a safe place.
Position your device within easy reach. Be able to access your device without removing your eyes from the road.
- Electronic devices
In some circumstances your device may cause interference with other devices.
- Potentially explosive environments
Switch off your device when in any area with a potentially explosive atmosphere, and obey all signs and instructions.
Sparks in such areas could cause an explosion or fire resulting in bodily injury or even death.
- Pacemakers and other medical devices
Pacemaker manufacturers recommend that a minimum separation of 8 inches be maintained between a wireless device and a pacemaker to avoid potential interference with the pacemaker.
Operation of any radio transmitting equipment, including wireless phones may interfere with the functionality of inadequately protected medical devices. Consult a physician or the manufacturer of the medical device to determine if they are adequately shielded from external RF energy or if you have any questions.
Switch off your device in health care facilities when any regulations posted in these areas instruct you to do so.
- Operating environment
When connecting to other device, read its user guide for detailed safety instructions. Do not connect incompatible products.
Do not place your device in the air bag deployment area.
Use the device only in its normal operating positions as explained in the product documentation.
Always switch off your device when its use is prohibited or when it may cause interference and danger.
- Areas with posted regulations
Switch off your device when any regulations posted in these areas instruct you to do so.
Care & Maintenance
- Use only manufacturer-approved accessories. Use general accessories may shorten the life of your device or cause device to malfunction.
- Keep your device dry. Humidity and all types of liquids may damage device parts or electronic circuits.
- Do not use or store the device in dusty, dirty areas.
- Do not store the device in hot or cold areas.
- Do not store your device near magnetic fields.
- Do not store your device with such metal objects as coins, keys and necklaces.
- Do not drop your device or cause any impacts to your device.
Features
CPU Quad-Core MTK 8127 1.3GHz Cortex A7.
RAM 1GB DDR3.
Storage 8GB (2.75 GB app, 2.78 GB for data. The remaining memory is used by the device itself to functions of your operating system).
And micro SD card slot (up to 64GB).
Display LCD capacitive digital TFT of 10.1" (25.6cm), 5-point touch-screen.
Connection Wi-Fi 802.11 b/g/n, Bluetooth, GPS and Radio FM.
Video Output Micro USB, HDMI FULL HD video (1080p).
Audio Output 3.5 mm headphones.
Features Front camera 0.3Mp/Back 2Mp. High-quality stereo speakers and microphone.
PC Interface USB 2.0 Hi-speed.
Platform Android 4.4.2.
Power built-in 4,300 mAh rechargeable Lithium Battery.
SIZE AND WEIGHT
- Size:
Length: 259mm, width: 149 mm and height: 9.6 mm..
- Weight: 480 g.
Declaration of conformity
We here by declare that the electrical product above is in compliance with the essential requirements of the Low Voltage Directive (2006/95/EC) and Electromagnetic Compatibility Directive (2004/108/EC) issued by European Parliament and the Council of March 9th.
It also complies with the EU RoHS Directive (2011/65/EU) on the restriction of the use of certain hazardous substances in electrical and electronic equipment.
Empresa: INFORMÁTICA MEGASUR S.L.
Thank you for purchasing one Phoenix product.
We hope our products will service you with an excellent service for a long time.
As manufacturers, at Phoenix Technologies we are liable to guarantee the first-rate quality of your Product, and so we expect you will not need to ask for technical assistance during the life of your Product. Notwithstanding, should you need technical assistance, you can refer to your vendor or contact our Customer Service by dialing +34 902 114 290 or sending an e-mail to sat@phoenixtechnologies.es.
CONDITIONS
The present warranty covers your Phoenix Technologies' product for a limited period of two years upon the date of purchase, which must be proven by a proof with fiscal value such as the original receipt of the purchase or ticket.
The warranty of your Product is subject to the General Law for the Defense of Consumers and Users (Ley General para la Defensa de Consumidores y Usuarios – LCU) by Royal Decree 1/2007.
Phoenix Technologies provides a Limited warranty of six (6) months for all batteries and of 12 months for all transformers and accessories, since they are considered perishable products. The warranty period shall commence upon purchase of the Product by the end user.
For more information on our warranty terms, please visit our website
www.phoenixtechnologies.es
XPhoenix
Warranty Card
In order to proceed with your guarantee terms, please fill in the following card.
Product's serial number:
Date of purchase: ____
Name: ____
Address:
Telephone number: ____
Vendor:
Address: ____
Distributor:
Distributor's stamp:




RoHS

CE
FC
www.phoenixtechnologies.es
- AUTO-ROTACIÓN
- READ ME FIRST
- ÍNDICE
- ASSEMBLING
- UNPACK
- CHARGE THE BATTERY
- INSTALL THE MEMORY CARD
- GETTING STARTED
- TURN YOUR DEVICE ON AND OFF
- SWITCH TO FLIGHT MODE
- DEVICE LAYOUT
- HOME SCREEN
- ADD ITEMS TO THE HOME SCREEN
- TASK BAR
- NOTIFICATION PANEL
- AUTO ROTATION
- LOCK & UNLOCK THE SCREEN
- TEXT INPUT
- CUSTOMIZE YOUR DEVICE
- MANAGE APPLICATIONS
- SECURITY
- SET A SCREEN LOCK
- RESET TABLET
- WEB
- SET UP YOUR EMAIL
- CREATE AND SEND EMAIL
- GMAIL
- CREATE A GMAIL ACCOUNT
- VIEW EMAIL MESSAGES
- CREATE AND SEND AN EMAIL
- BROWSER
- BROWSER WEBPAGES
- PLAY STORE
- NOTE
- ENTERTAINMENT
- 4K PLAYER
- SUPPORTED FILE FORMATS
- PLAY A VIDEO
- GALLERY
- VIEW A PICTURE
- EDIT A PICTURE
- PLAY A VÍDEO
- PLAY MUSIC
- ADD MUSIC FILES TO YOUR DEVICE
- CREATE A PLAYLIST
- DELETE A PLAYLIST
- MORE FEATURES
- CAMERA
- AKE A PICTURE
- TOOLS
- CALENDAR
- ALARM
- FILE MANAGER
- SOUND RECORDER
- CALCULATOR
- CONNECTIVITY
- USB CONNECTION
- WI-FI
- ACTIVATE THE WI-FI FEATURE
- FIND AND CONNECT TO WI-FI
- BLUETOOTH
- ACTIVATE BLUETOOTH
- FIND AND PAIR WITH OTHER BLUETOOTH-ENABLED DEVICES
- SEND DATA VIA BLUETOOTH
- RECEIVE DATA VIA BLUETOOTH
- VPN
- SET UP VPN CONNECTIONS
- CONNECT TO A PRIVATE NETWORK
- WIRELESS DISPLAY
- SAFETY PRECAUTIONS
- AIRCRAFT
- VEHICLES
- ELECTRONIC DEVICES
- POTENTIALLY EXPLOSIVE ENVIRONMENTS
- PACEMAKERS AND OTHER MEDICAL DEVICES
- OPERATING ENVIRONMENT
- AREAS WITH POSTED REGULATIONS
- CARE & MAINTENANCE
- FEATURES
- SIZE AND WEIGHT
- DECLARATION OF CONFORMITY
- CONDITIONS
- XPHOENIX
- WARRANTY CARD
Brand : Phoenix Technologies
Model : Casiatab Lyratab 10
Category : Tablet