
CS1000S - Loudspeaker Audac - Free user manual and instructions
Find the device manual for free CS1000S Audac in PDF.


| Product Type | Passive Bookshelf Speaker |
| Brand | Audac |
| Model | CS1000S |
| Dimensions (W x H x D) | 200 x 150 x 120 mm |
| Weight | 2.0 kg |
| Power Handling (RMS) | 50 W |
| Impedance | 8 Ω |
| Frequency Response | 60 Hz - 20 kHz |
| Sensitivity | 88 dB |
| Driver Configuration | 1 x 5" Woofer, 1 x 1" Tweeter |
| Crossover Frequency | 2.5 kHz |
| Enclosure Type | Bass Reflex (Rear Ported) |
| Recommended Amplifier Power | 20 - 100 W |
| Connection Type | Binding Posts (Banana Plugs) |
| Color | Black |
| Maintenance & Cleaning | Wipe with a soft dry cloth; do not use solvents or abrasive cleaners. Avoid exposure to moisture. |
| Safety Precautions | Do not place near heat sources; ensure adequate ventilation; do not submerge in water; use only with compatible amplifiers. |
| Spare Parts & Repairability | Contact Audac support for replacement drivers or crossovers; the speaker is designed for professional repair. |
| General Information | High-quality bookshelf speaker suitable for home audio or professional monitoring. |
Frequently Asked Questions - CS1000S Audac
User questions about CS1000S Audac
0 question about this device. Answer the ones you know or ask your own.
Ask a new question about this device
Download the instructions for your Loudspeaker in PDF format for free! Find your manual CS1000S - Audac and take your electronic device back in hand. On this page are published all the documents necessary for the use of your device. CS1000S by Audac.
USER MANUAL CS1000S Audac
The CS1000S is a 10" in-wall/ceiling subwoofer speaker with a super slim design. The built-in depth of merely 95 mm makes the CS1000S fit into almost every wall or ceiling, and it can be painted in any desired colour to blend in with the environment the speaker is used in.
It offers a superb reproduction of the low frequencies and is ideal to be used in combination with other ceiling or in-wall loudspeakers like the WS and CS series. It is made of strong ABS and equipped with the necessary installation accessories and connection clamps for easy mounting. The cone of the speaker is treated to be completely moisture proof, so it can also be used in damp rooms or outside applications.
The CS1000S features a 10" low frequency range woofer with an output power of 100 Watt RMS and a maximum power of 200 Watt. The speakers impedance is 8 Ohm and it can produce a sound pressure level up to 108 dB and has a stunning frequency response ranging from 28 Hz to 300 Hz, which is really low sound ensuring a brilliant reproduction of the low frequencies.
Instructions
Mounting and connecting
Preparing the location
The mounting location where the speaker will be mounted to should have a thickness between 9.5 mm and 31 mm. Behind the mounting surface, a clearance of 70 mm should be provided to make sure the rear side of the speaker isn't blocked. By means of the included cutout template, the cutout hole with dimensions 270 mm x 270 mm can be marked. After this is done, the mounting hole for the loudspeaker can be cut.
Painting the speaker
If you want to paint the loudspeaker to blend in with the environment the loudspeaker is used in, first the front grill needs to be removed. This can be easily done by sticking a thin object through the grill holes and pulling it. After this is done, the dust—cloth behind the front should be removed, to make sure the grill holes are still open after painting it. The painting of the speakers edge can be done by means of a roller, while for painting the speakers grill, spray painting is recommended to make sure the grill holes are still open after painting. After the painting is done and the speaker is dry, the dust cloth can be placed again after the speakers grill.
Connecting the speaker
- Route the cabling from the amplifier to the speakers desired location.
- Separate the speaker wire, strip the cable ends and twist them.
- Connect the speaker wires to the connection terminal. Connect the positive (+) amplifier output to the red terminal and connect the common (−) amplifier output to the black terminal. To connect these wires you have to press the tab, insert the wires to the hole and release the tab. Do this twice for both of the wires.
Mounting the speaker
- Insert the 4 long bolts through the holes in the frame. Tighten each bolt with a few turns into the corresponding hole provided in the metal mounting frame.
- Place the metal mounting frame through the cutout hole provided in the wall. This can be done by first inserting the top side of the metal mounting frame through the provided hole (The metal mounting frame at the back side of the wall, while the plastic loudspeaker surround stays at the front side of the wall). Afterwards, lift up the whole loudspeaker a few centimeters, so the bottom side of the metal mounting frame can fit through the provided cutout hole.
- Once this is done, the metal subframe is on the rear side of the wall while the plastic loudspeaker surround is on the front side of the wall. Push the loudspeaker to the wall making it rest on the white edge on the backside of the frame.
- Tighten the 4 bolts evenly and make the final adjustments so the frame isn't tilted before fully tightening them.
- After the speaker is secured to the wall, the grill can be placed again to the loudspeaker. First insert the delivered ‘gum’ into the ridge in the plastic surround wherein the grill should be placed. This prevents the grill to come loose because of the vibrations of the loudspeaker.
Additional information
Technical specifications
RMS Power 100 Watt
Max Power 200 Watt
Impedance 8 Ohm
Sensitivity (1W / 1m) 88 dB
Max SPL 108 dB
Crossover Frequency 250 Hz
Frequency Response ( ± 3 dB) 50 Hz – 250 Hz
Frequency Response ( -10 dB ) 28 Hz – 300 Hz
Build-in depth 95 mm
Cut-out dimensions 270 x 270 mm
Dimensions (W x H x D) 304 x 304 x 104 mm
Weight 3,6 Kg


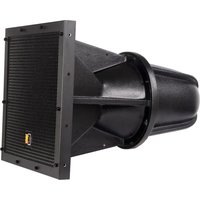
Brand : Audac
Model : CS1000S
Category : Loudspeaker