
VL-GW001A - Intercom PANASONIC - Free user manual and instructions
Find the device manual for free VL-GW001A PANASONIC in PDF.


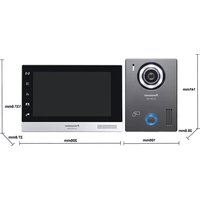
| Product Type | Video Intercom System |
| Brand | Panasonic |
| Model | VL-GW001A |
| Dimensions (Monitor) | Approx. 180 x 140 x 25 mm |
| Dimensions (Door Station) | Approx. 130 x 90 x 35 mm |
| Weight (Monitor) | Approx. 350 g |
| Weight (Door Station) | Approx. 200 g |
| Power Supply | AC 100-240 V, 50/60 Hz (adapter) |
| Display | 4.3-inch color LCD |
| Camera | Color CMOS, wide-angle lens |
| Audio | Full-duplex hands-free |
| Night Vision | Infrared LED for low-light |
| Door Release | Electric strike support |
| Intercom Functions | Call, talk, monitor, unlock |
| Memory | Stores up to 20 call logs |
| Mounting | Wall-mounted (monitor + door station) |
| Weatherproof Rating | IP44 (door station) |
| Cable Length | Up to 50 m (included) |
| Care Instructions | Wipe with soft dry cloth; no solvents |
| Safety | Use only supplied adapter; keep dry |
| Spare Parts | Contact Panasonic service center |
| Warranty | 2 years (varies by region) |
Frequently Asked Questions - VL-GW001A PANASONIC
User questions about VL-GW001A PANASONIC
0 question about this device. Answer the ones you know or ask your own.
Ask a new question about this device
Download the instructions for your Intercom in PDF format for free! Find your manual VL-GW001A - PANASONIC and take your electronic device back in hand. On this page are published all the documents necessary for the use of your device. VL-GW001A by PANASONIC.
USER MANUAL VL-GW001A PANASONIC
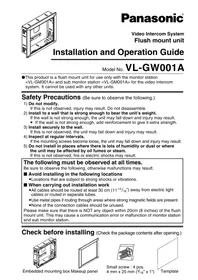
This product is a flush mount unit for use only with the monitor station and sub monitor station for the video intercom system. It cannot be used with any other units.
Safety Precautions (Be sure to observe the following.)
1) Do not modify.
If this is not observed, injury may result. Do not disassemble.
2) Install to a wall that is strong enough to bear the unit's weight.
If the wall is not strong enough, the unit may fall down and injury may result.
- If the wall is not strong enough, add reinforcement to give it extra strength.
3) Install securely to the wall.
If this is not observed, the unit may fall down and injury may result.
4) Inspect at regular intervals.
If the mounting screws become loose, the unit may fall down and injury may result.
5) Do not install in places where there is lots of humidity or dust or where the unit may be affected by oil fumes or steam.
If this is not observed, fire or electric shocks may result.
The following must be observed at all times.
Be sure to observe the following, otherwise malfunctions may result.
■ Avoid installing in the following locations
- Locations that are subject to strong shocks or vibrations.
■ When carrying out installation work
- All cables should be routed at least 30 cm (11 13/16 inches) away from electric light cables or routed in separate tubes.
- Use metal pipes if routing through areas where strong magnetic fields are present.
- None of the connection cables should be unused.
Please make sure that there is NOT any object within 20 cm (8 inches) of the flush mount unit. This may cause a communication error or malfunction of monitor station and sub monitor station.
Check before installing (Check the package contents after opening.)

Embedded mounting box Makeup panel


Small screw : 4 pcs.
4 mm x 25 mm (3/16" x 1")

Template
Installation
1
Make a hole in the wall.
Install so that the monitor screen will be at an appropriate level for the eyes of the person using it.

2
Place the embedded mounting box into the wall.
- Check that the embedded mounting box is installed the right way up.
(Check the UP mark.)
●Place the fixing plates inside the embedded mounting box (in four locations).

Embedded mounting box


3
Tighten the four embedded mounting box screws to secure the box to the wall.
- Check that the fixing plates move outside the embedded mounting box to securely clamp the box against the wall.
![Fixing plate [Cross-sectional view]](/content/2026/05/1074748/images/50ae1bc9ba0b0d94c91af0a746d66ad1b25bd308a8bf395f7990084c50a74aab.jpg)


4
Remove the front case and terminal cover from the bottom case of the monitor station and sub monitor station.
(Refer to the installation guide provided with the video intercom system.)

5
Install the bottom case to the embedded mounting box with the four small screws (4 mm x 25 mm, 3/16" x 1").
- If connecting a video cable, connect the video cable before installing the bottom case.

6
Connect the cables and then attach the front case and terminal cover.
(Refer to the installation guide provided with the video intercom system.)

7
Securely insert the tabs of the makeup panel into the slots in the embedded mounting box.
- Check that the makeup panel is installed the right way up. (Check the UP mark.) ●The number of makeup panel tabs is 10. If the tabs are not inserted securely, there will be a gap between the makeup panel and the wall.
Embedded mounting box
Reverse surface of makeup panel

Removing the Makeup panel
- Insert a flat-tipped screwdriver or similar into the slot at the bottom of the makeup panel to remove the makeup panel.
- Be careful not to break the makeup panel tabs when removing the makeup panel.

Makeup panel
Notes on installation
●Install to a wall with a thickness of approximately 5 - 20 mm (3/16" - 13/16") and a total space of approximately 45 mm (13/16") or more including the wall thickness and the depth of the cavity.

Approximately 5-20 mm (3/16" - 13/16") Approximately 45 mm (1 13/16") or more
●This unit is only for installing to a wall with a cavity, and so it cannot be used in concrete walls or earthen walls. ●This model is designed for embedded installation only, so do not install it directly to a ceiling or wall.
Specifications
Model No.: VL-GW001A
Weight : 600 g (1.32 lbs.)
Outer dimensions

For your future reference
Date of purchase
Serial number (found on the rear of the unit)
Dealer's name and address
Dealer's telephone number
Attach your sales receipt here.
Panasonic Consumer Electronics Company, Division of Panasonic Corporation of North America
One Panasonic Way, Secaucus, New Jersey 07094, U.S.A.
Panasonic Puerto Rico, Inc.
San Gabriel Industrial Park, Ave. 65 de Infantería, Km. 9.5, Carolina, Puerto Rico 00985, U.S.A.
Printed in CHINA
LHQT0199
S0305-0
Brand : PANASONIC
Model : VL-GW001A
Category : Intercom