
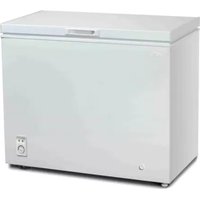
DCFM050XC1WDB - Freezer DANBY - Free user manual and instructions
Find the device manual for free DCFM050XC1WDB DANBY in PDF.


| Product Type | Chest Freezer |
| Model | DCFM050XC1WDB |
| Brand | Danby |
| Capacity | 5.0 cu. ft. (approx.) |
| Dimensions (W x D x H) | 28.5 x 20 x 33.5 inches (approx.) |
| Weight | 65 lbs (approx.) |
| Power Supply | 115V, 60Hz, exclusive 3-prong grounded outlet |
| Temperature Range | -12°C to -30°C (10.4°F to -22°F) |
| Temperature Control | Rotary dial, settings 1 (warmest) to 5 (coldest) |
| Indicator Lights | Red (power), Green (compressor running) |
| Defrost Method | Manual with external drain cap |
| Interior Features | Removable basket, interior defrost drain |
| Leveling Legs | Two adjustable legs on left side |
| Installation Clearances | Rear: 4 inches, sides: 8 inches, top: 12 inches |
| Refrigerant | R-600a (approx., standard for small freezers) |
| Safety Features | Child-resistant design, grounding plug, no sharp objects for defrost |
| Cleaning | Mild detergent and warm water; no abrasive cleaners |
| Warranty | 1 year parts and labor (Mexico) |
| Repairability | Contact Danby consumer care for authorized service |
Frequently Asked Questions - DCFM050XC1WDB DANBY
User questions about DCFM050XC1WDB DANBY
0 question about this device. Answer the ones you know or ask your own.
Ask a new question about this device
Download the instructions for your Freezer in PDF format for free! Find your manual DCFM050XC1WDB - DANBY and take your electronic device back in hand. On this page are published all the documents necessary for the use of your device. DCFM050XC1WDB by DANBY.
USER MANUAL DCFM050XC1WDB DANBY
Owner's Use and Care Guide....9 - 16
- Safety Instructions
- Installation
- Operation
- Care and Maintenance
- Troubleshooting
- Warranty
Modelo · Model
DCFM036XC1WDB
DCFM050XC1WDB
DCFM070XC1WDB
DCFM090XC1WDB
Read and follow all safety rules and operating instructions before first use of this product.

OPERATION
DEFROST
An empty appliance is a very dangerous attraction to children. Remove either the gasket or door from unused appliances, or take some other action that will guarantee it harmless.
DANGER: Risk of child entrapment. Before you throw away your old appliance:
• Take off door or lid. - Leave the shelves in place so that children may not easily climb in.
DON'T WAIT! DO IT NOW!
GROUNDING INSTRUCTIONS
This appliance must be grounded. In the event of an electrical short circuit, grounding reduces the risk of electrical shock by providing an escape wire for the electrical current.
This appliance is equipped with a cord that has a grounding wire with a grounding plug. The plug must be plugged into an outlet that is properly installed and grounded. If the outlet is a standard 2-prong wall outlet, it is your personal responsibility and obligation to have it replaced with a properly grounded 3-prong wall outlet.
Due to possible variations in line voltage (caused by overloading of circuits), it is advisable to install a separate fuse circuit from the meter panel. This will help to eliminate current fluctuation which might cause motor trouble. The serial rating plate indicates the voltage and frequency the appliance is designed for.
WARNING - Improper use of the grounding plug can result in a risk of electric shock. Consult a qualified electrician or service agent if the grounding instructions are not completely understood, or if doubt exists as to whether the appliance is properly grounded.
DO NOT USE AN EXTENSION CORD
Use an exclusive 115V wall outlet. Do not connect your appliance to extension cords or together with another appliance in the same wall outlet. Do not splice the cord. Do not under any circumstances cut or remove the third ground prong from the power cord. Do not use ungrounded (two prong) adapter plugs with this appliance.

WARNING! EXPLOSION HAZARD!
Risk of fire or explosion due to puncturing of refrigerant tubing. Do not use sharp objects to aid in defrost. Please handle with care. Keep flammable materials and vapors such as gasoline away from the freezer. Use non-flammable cleaner.
Disposal of this appliance should be in accordance with federal and local regulations.
SAFETY REQUIREMENTS
Ensure that component parts are replaced with like components and that servicing is done by factory authorized service personnel, to minimize the risk of possible ignition due to incorrect parts or improper service.
This appliance is not intended for use by persons (including children) whose physical, sensory, or mental capabilities may be different or reduced, or who lack experience or knowledge, unless such persons receive supervision or training to operate the appliance by a person responsible for their safety.
Children should be supervised to ensure that they do not play with the appliance.
Do not use extension cords or ungrounded (two-prong) adapters.
If the power supply cord is damaged, it must be replaced by the manufacturer, its service agent, or a similarly qualified person in order to avoid a hazard.
WARNING: Keep ventilation openings, in the appliance enclosure or in the built-in structure, clear of obstruction.
WARNING: Do not use mechanical devices or other means to accelerate the defrosting process, other than those recommended by the manufacturer.
WARNING: Do not damage the refrigerant circuit.
WARNING: Do not use electrical appliances inside the food storage compartments of the appliance, unless they are of the type recommended by the manufacturer.
This appliance is not designed for stacking with any other appliance. Do not attempt to sit or stand on top of this appliance as it is not designed for such use and this could cause injury or damage to the appliance.
This appliance is not designed for outside installation, including installation anywhere that is not temperature controlled (garages, porches, carports, etc.).
TRANSPORTATION INSTRUCTIONS
This appliance should be transported only in an upright position. The packing as supplied must be intact during transportation. If during the course of transportation the appliance must be transported on its side, it must be laid on its left side (when facing the appliance). Once the appliance has reached its destination, it must be allowed to stand upright and undisturbed for 6 hours before plugging in to allow the coolant to settle.
Failure to comply with these instructions could result in damage or malfunction of the appliance. The manufacturer will not be held responsible if these instructions are not followed.
The appliance must be protected from rain and moisture while in transportation.
LOCATION
Remove exterior and interior packaging, wipe the outside thoroughly with a soft dry cloth and the inside with a wet, lukewarm cloth. Avoid placing the appliance in a narrow recess or near any heat source, direct sunlight, or moisture. Let air circulate freely around the appliance. Keep the rear of the appliance 10.6 cm (4 inches) away from the wall, ensure there is 20.3 cm (8 inches) of clearance between each side and the surrounding walls and ensure there is 30.5 cm (12 inches) of clearance between the top of the appliance and any cabinets or ceilings. This will allow proper air circulation.

- Locate the appliance in a location where extension cords are not necessary.
- Select a location with consistent year round temperatures. It is not recommended to operate the appliance when surrounding air temperature is below 0°C (32°F). In order to keep operating cost down, do not place the appliance near a stove, furnace, heat register or in direct sunlight. Avoid placing the appliance in a damp or moist area, such as basements.
- Due to lid and hinge arrangement, it is impossible to install the appliance directly against a wall. The spacing on the back is essential for maintaining proper air circulation.
Note: Images in this manual are for explanatory purposes only. The actual shape of your unit may be slightly different. Operation and functions remain the same.
FEATURES
- Basket
- Control panel
- Defrost drain
- Levelling leg
CAUTION
The hinge of the chest freezer is under tension. Exercise extreme caution when attempting to remove, replace or adjust the hinge.


Operating Instructions
STARTING THE APPLIANCE
The appliance is ready to operate as received, when connected to the power supply. After connecting to the power supply, the "red light" will illuminate, indicating that the appliance has power. When the "green light" illuminates, that indicates that the compressor is running. Hearing a noise while the compressor is running is normal. The refrigerant in the system may create a noise even when the compressor is not running, which is also normal.
Once the appliance is cycling regularly, it is ready to store foods. The proper food storage temperature is -18°C ( 0°F ). Running the appliance below -18°C ( 0°F ) will cause the appliance to run longer and use more energy and it will not help the food freeze more quickly.
When adding fresh, unfrozen food packages, store them against the walls. In view of the value of the contents of the appliance, it is advisable to inspect contents and check operation regularly.
Note: The lid of the appliance may be difficult to open just after it has been closed. This is normal and is due to a pressure difference inside the appliance. The pressure will equalize and the lid will open normally after a few minutes.
TEMPERATURE CONTROL
The temperature is controlled by adjusting the thermostat control knob located on the front of the cabinet. To achieve the maximum cooling temperature quickly:
- Turn the temperature control knob clockwise to the number 5 on the control dial. 1 is the warmest setting, 5 is the coldest setting.
- The temperature range of the appliance is roughly -12°C (10.4°F) to -30°C (-22°F).
- Allow the appliance to run at this setting for approximately 3 - 4 hours.
- When maximum cooling is achieved, turn the control knob to your desired temperature setting.
- To turn the appliance off, turn the control knob to the "OFF" position.
Indicator Lights
- Red LED: indicates that the appliance is connected to a power supply
- Green LED: indicates that the compressor is working

LEVELING INSTRUCTIONS
There are two leveling legs on the left hand side of the freezer. To level the appliance, complete the following:
- Move the appliance to its final location.
- Turn the leveling legs clockwise until the top of the foot is touching the bottom of the chassis.
- Slowly turn the leveling legs counter-clockwise until the appliance is level.

DEFROSTING
This appliance should be defrosted approximately twice a year or when a 7 mm (1/4 inch) layer of frost has formed. Prior to defrosting the appliance, ensure all food has been removed and properly stored to ensure it will stay frozen.
Turn the appliance control knob to the "OFF" position and unplug the power cord. Remove the freezer basket and leave the lid open. Follow the instructions below:
- The exterior defrost drain cap is located on the front of the cabinet. The interior defrost drain is located on the inside floor of the cabinet. Remove the interior rubber cover from the defrost drain. Defrosted water will flow into the hole and exit through the exterior defrost drain cap. Keep the rubber cover in a safe place during the defrost process so that it does not get lost.
- Gently pull out the exterior drain cap approximately 20 - 25 mm until the water hole is visible.
- Twist the exterior drain cap so that the arrow points downward.
- Place a shallow pan under the drain cap to catch defrosted water. Check the appliance regularly during the defrosting process to ensure that the pan is not overflowing.
- Once defrosting is complete, ensure there is no remaining water inside the appliance and that there is no more water dripping from the drain cap before removing the shallow pan.
- Twist the drain cap until the arrow is pointing upwards and then push inward until it is flush with the cabinet.
- Replace the rubber cover in the interior defrost drain.

Note: Never use hairdryers, electrical heaters or other electrical appliances during defrosting. Do not use pointed or sharp objects such as knives to remove frost as this can damage the refrigerant lines.
CLEANING
- Remove all contents and unplug the appliance.
- Using a mild detergent and warm water solution, use a clean damp cloth or sponge to wipe the inside of the appliance.
- Do not use abrasive or harsh cleaners. Hand wash, rinse and dry all surfaces thoroughly. Do not use cleaning waxes, detergents, bleach etc. on the appliance. Never use paper towel, window spray, scouring cleansers or flammable cleaners as they can scratch and damage the appliance. Clean with a damp cloth and dry with a soft clean dry cloth.
VACATION TIME
For short vacation periods, leave the control knob at its normal setting. During longer absences:
- Remove all food.
- Disconnect power cord from electrical outlet.
- Clean the appliance thoroughly.
- Leave the lid open to avoid possible formations of condensation, mold or odors.
ELECTRICAL AND MECHANICAL FAILURE
In the event of mechanical or electrical failure of the appliance, contact consumer care for information on a local service agent immediately. Have the model number and serial number ready, these are shown on the serial plate located on the exterior of the rear cabinet wall.
POWER FAILURE
Most power failures are corrected within an hour or two and will not affect the appliance temperatures. Minimize the number of door openings while the power is off. During power failures of longer duration, take steps to protect the food.
IF YOU MOVE
Remove or securely fasten down all loose items inside the appliance. To avoid damaging the leveling legs, turn them all the way into the base.
| PROBLEM POSSIBLE CAUSE SOLUTION | ||
| Does not work • No power to appliance• Power cord is unplugged• Wrong voltage is being used | • Check connection of power cord to power source• Plug in appliance• Use proper voltage | |
| Appliance runs continuously | • Temperature set too low (cold)• Door is not closed• Hot food was inserted• Door opened too long or too often• Close proximity to heat source or direct sunlight• Quick Freeze function is set | • Set temperature control to warmer setting• Close door securely• Be sure food is at room temperature before inserting• Minimize door openings / duration• Do not place appliance close to heat sources or direct sunlight• This is normal |
| Internal temperature not cold enough | • No power to appliance• Power cord is unplugged• Temperature set too high (warm)• Lid is not closed• Hot food was inserted• Lid opened too long or too often• Air flow obstruction• Wrong voltage is being used.• Close proximity to heat source or direct sunlight | • Check connection of power cord to power source• Plug in appliance• Check setting and adjust as needed• Close lid securely• Be sure that food is at room temperature• Minimize lid openings / duration• Allow room for air to circulate around appliance• Use proper voltage• Do not place appliance close to heat sources or direct sunlight |
| Noises coming from the appliance (popping, cracking, gurgling) | • Internal parts are expanding and contracting• Refrigerant is circulating in the system | • This is normal• This is normal |
Guarantee Policy
INGRAM MICRO MEXICO, S.A. Of C.V. at Joselillo No. 3, 5th floor Col. El Parque, Naucalpan de Juárez Municipality, State of Mexico, CP 53398. Tel. 01 800 953 0750 Guarantee the product described below for the term of 1 year (one year) counted from the moment of purchase against any malfunction or defect in their materials, parts or components. The labor and transportation costs of the product that are within its service network are included.
The company agrees to exchange the defective product for a similar one with previous diagnosis made by our service center. The response time will not be more than 30 (thirty) calendar days from the date of receipt of the product.
To make the guarantee effective, you must present the properly sealed policy or the corresponding invoice or receipt and the product and its accessories included to the establishment where you purchased it; Or at the following address: Joselillo No. 3, 5th floor Col. El Parque, Naucalpan de Juárez Municipality, State of Mexico, C. P. 53398. Parts, components and accessories may be obtained at the same location.
This warranty will override any other warranty offered by the manufacturer or distributor.
- Repair or replacement of the product and workmanship, including transportation costs of the product, will be free of charge to you within the warranty period.
- You may purchase parts, components, consumables and accessories at the facility where you purchased your product or at the addresses listed above.
Exceptions:
a) When the product had been used in abnormal conditions. b) When the product has not been operated in accordance with the owner's manual. c) When the product has been altered or repaired by persons not authorized by INGRAM MICRO MEXICO, S.A. From C.V.
| Brand: | |
| Model: | |
| Dealer name: | |
| Dealer address: | |
| Dealer telephone number: | Stamp and date |
NOTES:
MODEL
DCFM036XC1WDB
DCFM050XC1WDB
DCFM070XC1WDB
DCFM090XC1WDB


- OWNER'S USE AND CARE GUIDE
- OPERATION
- DEFROST
- GROUNDING INSTRUCTIONS
- DO NOT USE AN EXTENSION CORD
- WARNING! EXPLOSION HAZARD
- SAFETY REQUIREMENTS
- TRANSPORTATION INSTRUCTIONS
- LOCATION
- FEATURES
- CAUTION
- OPERATING INSTRUCTIONS
- STARTING THE APPLIANCE
- TEMPERATURE CONTROL
- INDICATOR LIGHTS
- LEVELING INSTRUCTIONS
- DEFROSTING
- CLEANING
- VACATION TIME
- ELECTRICAL AND MECHANICAL FAILURE
- POWER FAILURE
- IF YOU MOVE
- GUARANTEE POLICY
- EXCEPTIONS
Brand : DANBY
Model : DCFM050XC1WDB
Category : Freezer