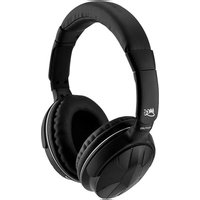
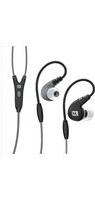
Venture AF52 - Headphones MEE audio - Free user manual and instructions
Find the device manual for free Venture AF52 MEE audio in PDF.


| Type | Wireless Bluetooth Headphones |
| Model | Venture AF52 |
| Brand | MEE audio |
| Connectivity | Bluetooth 5.0 |
| Wireless Range | Up to 10 meters (33 ft) |
| Battery Life | Up to 20 hours continuous playback |
| Charging Time | Approximately 2 hours |
| Driver Size | 40 mm |
| Frequency Response | 20 Hz - 20 kHz |
| Impedance | 32 ohms |
| Microphone | Built-in omnidirectional microphone |
| Controls | On-ear buttons for volume, playback, and calls |
| Weight | Approximately 200 g |
| Dimensions (folded) | 180 x 160 x 70 mm |
| Design | Foldable and adjustable headband with soft ear cushions |
| Cleaning | Wipe with a soft, dry cloth. Do not use liquids or solvents. |
| Storage | Store in a cool, dry place away from direct sunlight. |
| Safety | Do not use at high volume for extended periods to prevent hearing damage. |
Frequently Asked Questions - Venture AF52 MEE audio
User questions about Venture AF52 MEE audio
0 question about this device. Answer the ones you know or ask your own.
Ask a new question about this device
Download the instructions for your Headphones in PDF format for free! Find your manual Venture AF52 - MEE audio and take your electronic device back in hand. On this page are published all the documents necessary for the use of your device. Venture AF52 by MEE audio.
USER MANUAL Venture AF52 MEE audio
STEREO BLUETOOTH WIRELESS HEADPHONES WITH BUILT-IN MICROPHONE
part of the series AIR-FID
user manual
www.meelec.com
VENTURE
Thank you for your purchase of the
MEElectronics Air-Fi Venture AF52
Stereo Bluetooth Wireless Headphones
with Microphone

Please read this manual in its entirety.
If you have any issues after reading the manual
please contact
MEElectronics customer service at
customerservice@meelec.com
or (626) 965-1008 x31
TABLE OF CONTENTS
Package Contents 1
Bluetooth Information 2
Warning
FCC Warning 3
Safety and Care 4
Product Overview 5
Charging 6
Turning On and Off 7
Pairing with Bluetooth Devices iPhone ^® , iPad ^® , and iPod touch ^® 8
Android™ Phones and Tablets 9
Windows 7 Computers and Laptops 10
Other Phones, Tablets, and Devices 12
Connecting to Paired Devices 13
Controlling Volume 14
Controlling Phone Calls 15
Controlling Media Playback 17
Using as a Wired Headphone 18
Status, Button Functions, Light Patterns, 19 and Sounds
Specifications 21
Troubleshooting 22
Package Contents

natural_image
Line drawing of a pair of electronic devices with no visible text or symbolsVENTURE
Stereo
Bluetooth
Wireless
Headphones

natural_image
Two USB connectors with black leads, no visible text or symbolsMini-USB
Charging
Cable
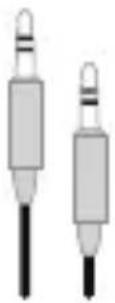
Audio
Cable

natural_image
Silhouette of a black fabric bag with a strap, no visible text or symbolsStorage
Pouch

User
Manual
Note: An online version of this manual is available on meelec.com

brings musical enjoyment to everyone
Bluetooth Information

Bluetooth is a short-distance
two-way wireless communication technology capable of transmitting data, commands, and audio
between devices. The Venture can connect with many devices such as mobile phones, tablets, PDAs, computers, media players, and more through a process called pairing. Before you can use your Venture with your device they will need to be paired.
Warning

Turn down the volume prior to using the headphones; adjust the volume to the desired level once they are connected. Do not use headphones at high volumes for extended periods of time as doing so will result in permanent hearing damage. It is advised you keep volume levels moderate to low at all times for your safety, even when loud background noise is present.
Please visit www.osha.gov for more info.
Do not use while driving a car, cycling, operating machinery, or performing other activities that require hearing surrounding sounds or are against local laws.
FCC Warning

Changes or modifications to this unit not expressly approved by the party responsible for compliance could void the user's authority to operate the equipment.
NOTE: This equipment has been tested and found to comply with the limits for a Class B digital device, pursuant to Part 15 of the FCC Rules. These limits are designed to provide reasonable protection against harmful interference in a residential installation. This equipment generates, uses and can radiate radio frequency energy and, if not installed and used in accordance with the instructions, may cause harmful interference to radio communications.
However, there is no guarantee that interference will not occur in a particular installation. If this equipment does cause harmful interference to radio or television reception, which can be determined by turning the equipment off and on, the user is encouraged to try to correct the interference by one or more of the following measures:
- Reorient or relocate the receiving antenna.
- Increase the separation between the equipment and receiver.
- Connect the equipment into an outlet on a circuit different from that to which the receiver is connected.
- Consult the dealer or an experienced radio/TV technician for help.
This device complies with Part 15 of the FCC Rules. Operation is subject to the following two conditions:
(1) this device may not cause harmful interference, and
(2) this device must accept any interference received, including interference that may cause undesired operation.
Safety and Care
a) When not in use, power the device off and store it in the included protective bag.
b) Clean with a soft, debris-free cloth. If necessary dampen the cloth with a diluted soap water solution. Never use chemical cleaners on the headphone. Leather conditioner and cleaner can be used on the ear pads.
c) This headphone was not designed for use while driving.
d) Do not use your wireless headset around flammable gases as fire or explosion may occur.
e) Keep the device and packaging out of the reach of children.
f) There are no user replaceable/reparable parts in the headset. Disassembling it will void your warranty.
g) If the device comes in contact with liquids, quickly wipe away. If submersed in water, do not turn the device on until completely dried.
Note: liquid submersion voids the warranty.
h) Avoid storage in extreme temperatures (45°C/113°F and above, including direct sunlight or -10°C/14°F below) as the service life of the battery will be decreased.
Product Overview
VENTURE
AF52 Stereo Bluetooth
Wireless Headphones

CA D EB F

HG I J
Left Ear Cup
A microphone
B LED indicator
C power on/off button ⏻
D volume down v-
E volume up V+
F 3.5mm audio jack
Right Ear Cup
G mini-USB port for charging
H next track
I play/pause button ▶/11
J previous track
Charging
*** You must completely charge the headset before the first use ***
a) Connect a mini USB charging cable to a powered USB source such as a wall charger, powered on computer, USB hub connected to a powered on computer, or car USB port.
b) While not required, it is recommended to turn the Venture off before charging. See note below.
c) Connect the charging cable to the mini USB jack on the right ear cup.
d) The bright red LED indicator should light solid and stay on while charging. Charge time is typically between 3-6 hours for the first charge and 2-3 hours for subsequent charges depending on the charging power.
e) When the battery is fully charged the bright red LED indicator will turn off.
Note: Bluetooth can be active when the unit is charging; however, depending on the power output of the charger, charging may be very slow. The Venture will work in wired mode via the audio jack while charging even with the headphones powered off.
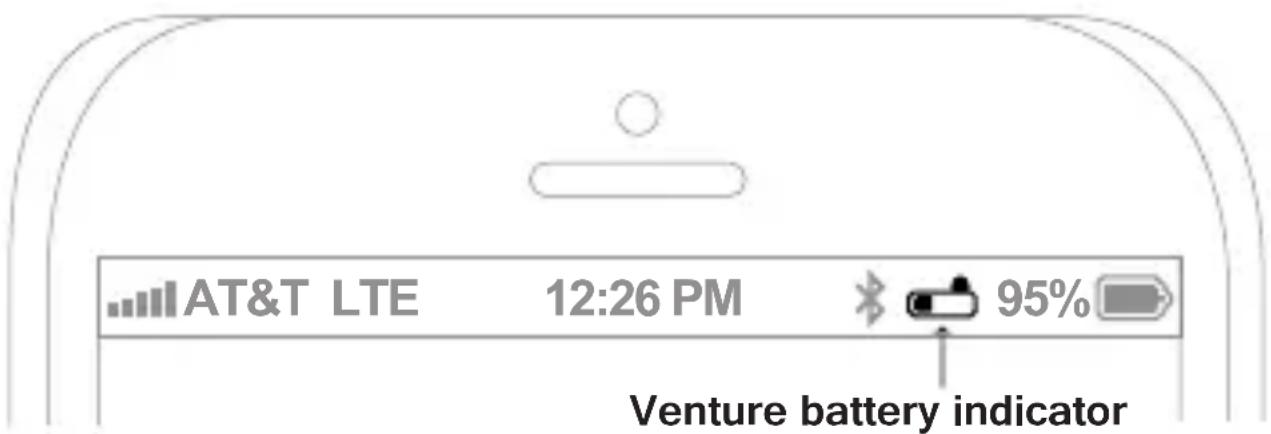
iDevices such as the iPhone, iPad, and iPod Touch will display a battery indicator when the Venture is connected.
Turning On and Off
a) To turn on, press and hold the Power ⏻ button for approximately 3 seconds. The Venture will say “power on” and the blue indicator light will flash once every 5 seconds to show the power is on. The LED indicator will continue to display a single blue flash every 5 seconds while the unit is on and not connected to a device.
b) To turn off, press and hold the Power ⏻ button for approximately 4 seconds. After 1 second you will hear a long tone and after 4 seconds the Venture will say “power off” and the red LED will flash 4 times to indicate the unit is powering down.
Releasing the power button before the Venture powers off will redial the last active phone number on a connected phone.
Pairing with Bluetooth Devices
*** It is only necessary to pair your Venture once with each device ***
iPhone, iPad, and iPod Touch
a) On your iPhone/iPad/iPod Touch, go to Settings
b) Select Bluetooth (on older devices or old versions of iOS, you may need to select General first)
c) Make sure the Venture is off and within 1 meter of your device
d) On your iPhone/iPad/iPod Touch make sure Bluetooth is turned on
e) Initiate pairing mode by holding the power button for 7 seconds, until you hear "pairing."
(Note: Pairing mode will be active for 2 minutes 30 seconds. If no devices are paired within that time, the Venture will return to standby mode.)
f) Wait until you see a "AF52" in the Devices section of the screen; it should show "Not Paired" as the status
g) Tap on "AF52" on the screen of your iDevice to pair and connect your iPhone/iPad/iPod Touch to Venture
h) The Venture will say “pairing completed” once pairing is complete. “AF52” should show “connected” on your device; the blue LED on the Venture will flash twice every 5 seconds to indicate it is connected in standby mode
If pairing fails, please repeat steps c) through h) above
Pairing (Continued)
Android Phones and Tablets
a) On your Android phone or tablet, navigate to the Settings menu
b) Select Wireless & Networks
c) Make sure the Venture is off and within 1 meter of your device
d) Make sure Bluetooth is enabled
e) Initiate pairing mode by holding the power button for 7 seconds, until you hear "pairing."
(Note: Pairing mode will be active for 2 minutes 30 seconds. If no devices are paired within that time, the Venture will return to standby mode.)
f) Select Bluetooth Settings
g) "AF52" should appear under devices; If it is not automatically found, select Scan for devices. Once it has been found, select "AF52" in the list of Bluetooth devices to pair and connect
h) The Venture will say “pairing completed” once pairing is complete. “AF52” should show “connected” on your device; the blue LED on the Venture will flash twice every 5 seconds to indicate it is connected in standby mode
If pairing fails, please repeat steps c) through h) above
Pairing (Continued)
Windows 7 Computers and Laptops
Note: The Windows 7 operating system does not have built-in Bluetooth drivers; drivers are provided by the Bluetooth transmitter manufacturer. Actual pairing and connecting process can vary depending on the Bluetooth device drivers and computer configuration.
a) Press on the Bluetooth icon in the notification area of your taskbar and select Add a Device
b) The Add a device popup window will appear with "Select a device to add to this computer"
c) Make sure the Venture is off and within 1 meter of your device
d) Initiate pairing mode by holding the power button for 7 seconds, until you hear "pairing." (Note: Pairing mode will be active for 2 minutes 30 seconds. If no devices are paired within that time, the Venture will return to standby mode.)
e) Wait until you see either "AF52" or "Bluetooth headset" in the Searching for devices area
f) Select "AF52" or "Bluetooth headset" and press the Next button; the Add a device popup will display "Connecting with this device"
g) When the computer is finished pairing with the Venture headset, the Add a device popup will display “This device has been successfully added to your computer”
h) On some computers, it can take a few minutes for the device driver software to install completely, and a “Your device is ready to use” notification will appear in the notification area; other computers will not show this notification
If pairing is successful, continue to the next page. If pairing fails, please repeat steps a) through h) above.
Pairing (Continued)
Windows 7 Computers and Laptops (Continued)
Now the Venture must be configured for audio and microphone use (enable Bluetooth audio)
i) Right press on the speaker in your notification area, or go to Start → Control Panel → Hardware and Sound → Manage Audio Devices
j) A popup window with "Sound" at the top should appear with Playback tab selected; "Bluetooth Hands-free Audio" and "Bluetooth Audio Render" should both appear in the list of audio devices
k) Select "Bluetooth Hands-free Audio" for headset use and "Bluetooth Audio Render" for stereo audio streaming
I) Press the Set Default button
m) Press the Apply button
n) In the Sound popup, select the Recording tab
o) Select "Bluetooth Audio Input Device" from the list of recording devices
p) Press the Set Default button
q) Press the OK button
Note: It may be necessary to repeat the above steps every time the Venture is connected.
Pairing (Continued)
Other Phones, Tablets, and Devices
a) Please refer to your device manual for instructions on how to pair Bluetooth devices
b) On your device, turn Bluetooth on and go to the appropriate pairing window
c) Make sure the Venture is off and within 1 meter of your device
d) Make sure Bluetooth is enabled on your device and you are in the Bluetooth screen
e) Initiate pairing mode by holding the power button for 7 seconds, until you hear “pairing.”
(Note: Pairing mode will be active for 2 minutes 30 seconds. If no devices are paired within that time, the Venture will return to standby mode.)
f) Wait until you see "AF52" in the list of Bluetooth devices
g) Tap or press on "AF52" to pair and connect your device to the Venture; if your device asks for a pin, enter "0000"
h) The Venture will say “pairing completed” once pairing is complete. “AF52” may show “connected” on your device; the blue LED on the Metro will flash twice every 5 seconds to indicate it is connected in standby mode
If pairing fails after several tries, please refer to the Bluetooth device's user manual for further information.
For additional information on Bluetooth and pairing videos, please visit meelec.com/bluetooth.
Connecting to Paired Devices
*** The Venture must have been paired with your device before it will connect. Pairing only needs to be done before the first use. ***
When the Venture is turned on and not in pairing mode, it should connect to the last connected device automatically. If the last connected device is not within range or does not have Bluetooth on, the Venture will connect to other paired devices in the order of last connection.
If the Venture does not connect and remains in standby mode, a short press of the Play/Pause ▶/11 button will connect to the last connected device with Bluetooth on and within range.
Notes
- On some Bluetooth devices, such as some Nokia and Blackberry cell phones, the settings must allow for automatic connection. Please refer to your devices manual for further information.
- On some PCs and Mac® you will need to manually enable Bluetooth audio every time you connect
Controlling Volume
When Media is Playing:
Volume adjustments will change the volume on the Venture, not the connected device; the connected device volume can be controlled on the device. If the volume is not loud enough or too loud, adjust the volume on your device. When connected to some computers the volume will be controlled only on the Venture.
Single press or press and hold Volume up button v+ to increase the volume
Single press or press and hold Volume down button v- to decrease the volume
When a phone call is active:
Volume adjustments will change the volume on the connected device
Single press Volume up button v+ to increase the volume Single press Volume down button v- to decrease the volume
When the volume reaches the minimum or maximum level there will be two short tones.
Note:
The volume buttons will not work when the Venture is connected, but in standby mode
Controlling Phone Calls
| Status | Function | Operation |
| Incoming call | Answer a call | Single press the Power ⏻ button |
| Reject a call | Press and hold the Power ⏻ button until you hear a long tone or single press the Power ⏻ button rapidly twice | |
| Device connected | Voice dial / Siri ^2 | Single press the Power ⏻ button |
| Redial the last number ^2 | Press and hold Power ⏻ button until you hear a long tone | |
| Call in progress | Increase volume ^1 | Single press the Volume Up v+ button |
| Decrease volume ^1 | Single press the Volume Down v- button | |
| Mute/Hold | Press and hold Power ⏻ button until you hear a long tone | |
| Cancel mute/hold | Press and hold Power ⏻ button until you hear a long tone | |
| End a call | Single press the Power ⏻ button |
1 Volume will be adjusted on the phone, not the Venture. Pressing and holding the volume buttons will not adjust the volume. When maximum or minimum volume is reached, you will hear a double tone from the Venture.
^2 Not all devices support this functionality. For more information, refer to the user manual for your device.
Notes:
If you answer a call from your phone instead of the headset, most phones will activate the phone handset, not the Venture. If you answer or make a call while listening to media, the music will pause until you end the call.
Controlling Phone Calls (Cont.)
| Status | Function | Operation |
| Call in progress, phone handset active | Switch from phone handset to Venture | Single press the Power ⏻ button |
| Call in progress, second incoming call | Answer new call and end current call | Single press the Power ⏻ button |
| Answer new call and place the current call on hold | Press and hold the Power ⏻ button until you hear a long tone | |
| Two active calls, one active, one on hold | Switch to call on hold | Press and hold the Power ⏻ button until you hear a long tone |
| End current call and switch to call on hold | Single press the Power ⏻ button |
Notes:
If you answer a call from your phone instead of the headset, most phones will activate the phone handset, not the Venture. If you answer or make a call while listening to media, the music will pause until you end the call.
Controlling Media Playback
Go to the music player on the connected device.
| Status | Function | Operation |
| No media playing1 | Play media | Press the Play/Pause ▶/□ button |
| Adjust volume | The Venture volume cannot be adjusted when media is not playing | |
| Media playing | Pause media playback | Press the Play/Pause ▶/□ button |
| Increase volume3 | Single press or press and hold the Volume Up √+ button | |
| Decrease volume3 | Single press or press and hold the Volume Down √- button | |
| Either media playing or stopped2 | Skip to next track | Press the Next ▶ button |
| Fast forward the track | Press and hold the Next ▶ button | |
| Restart the track/previous track | Press the Previous ▶ button | |
| Rewind the track | Press and hold the Previous ▶ button |
1 You may need to focus on the media player application for initial playback to start and some media players may need focus for functionality.
^2 Not all media players support this functionality.
3 There will be a beep if you continue to press the button after reaching the maximum or minimum volume level. Volume is also controlled by your device.
Notes:
If you answer or make a call while listening to media, the music will pause until you end the call.
Using as Wired Headphone
The Venture comes with a 3.5mm audio jack on the back of the left ear cup and an audio cable for wired use. This is convenient for use where Bluetooth isn't allowed such as on an airplane, when the battery is depleted, if you want to listen to media from a different device that isn't paired, or just to save battery power.
Connect one side of the audio cable to the Venture and the other side to the audio device.
Using wired audio and Bluetooth simultaneously: The Venture can be used to listen to wired audio while still connected to another device such as a phone.
When listening to wired audio and a phone call, media, or other audio transmits from the connected Bluetooth device, the wired audio will partially mute. Approximately 20 seconds after the Bluetooth transmission ends, the wired audio will resume.
Status, Button Functions, Light Patterns, and Sounds
Charging
| Status | LED Indicator |
| Charging | Red LED on |
| Charging complete | Red LED off |
Status Indicators and Button Functions
| Status | Button Functions | LED Indicator | Sounds |
| Turn on | Press and hold Power button ⏻ for 3 seconds | Blue LED will flash for 2 seconds | Venture will say “power on” |
| Turn off | Press and hold Power button ⏻ for 4 seconds | Red LED flash four times | Venture will say “power off” |
| Turn on pairing mode | When off, press and hold Power button ⏻ for 5 seconds | Red and blue LEDs will flash in an alternating manner while in pairing mode | Venture will say “pairing” |
| Paired with device | N/A | N/A | Venture will say “pairing completed” |
| On but not connect device | N/A | Single blue LED flash every 5 seconds | N/A |
| Connected with a device and in standby | Venture should automatically connect; if not single press the Play/Pause button ▶/□ | Double blue LED flash every 5 seconds | Long tone with increasing pitch at time of connection |
| Connected with a device; in use | N/A | Single blue LED flash every 5 seconds | N/A |
| Increase volume | Single press or press and hold Volume up button √+ | Single blue LED flash | Two short tones when the maximum volume is reached and the button is pressed |
| Decrease volume | Single press or press and hold Volume down button √- | Single blue LED flash | Two short tones when the minimum volume is reached and the button is pressed |
Status, Button Functions, Light Patterns, and Sounds (Cont.)
Status Indicators and Button Functions (Cont.)
| Status | Button Functions | LED Indicator | Sounds |
| Activate voice command/dialing - single press | Single press the Power button | N/A | Short tone |
| Play or pause media | Single press the ▶/|| Play/Pause button | N/A | N/A |
| Skip to next track | Press Next button | N/A | N/A |
| Fast forward a track | Press and hold the Next button | N/A | N/A |
| Restart track or skip to previous track | Press Previous button | N/A | N/A |
| Rewind a track | Press and hold the Previous button | ||
| Answer incoming call | Single press the Power button | Triple blue LED flash every 5 seconds | Long tone with increasing pitch |
| Reject incoming call | Press and hold the Power button ↓ for less than 4 seconds | N/A | Long tone |
| Call in progress | N/A | Triple blue LED flash every 5 seconds | N/A |
| End call | Single press the Power button | N/A | Short tone |
| Redial last phone number | Press and hold the Power button ↓ for less than 4 seconds | Triple blue LED flash every 5 seconds | Long tone when redial is initiated |
| Low battery | N/A | Two red LED flashes every 20 seconds | 4 short tones every 20 seconds |
Specifications
| Microphone Specifications | |
| Microphone Unit | 6.5mm |
| Directivity | omnidirectional |
| S.P.L | -58±2dB |
| Impedance | ≤2.2KΩ |
| Frequency Response | 10Hz-20,000Hz |
| Operating Voltage | 4.5V |
| Speaker Specifications | |
| Speaker diameter | 40mm |
| Impedance | 64Ω |
| Sensitivity | 103±3dB at 1KHZ |
| Rated power | 20mW |
| Maximum power | 50mW |
| Frequency response | 18Hz-20,000Hz |
| Power Specifications | |
| Battery type | Built-in 400mAh Lithium-polymer rechargeable battery |
| Charging connector type | Mini-USB |
| Run time | Up to 16 hours of talking or music playback time |
| Standby time | Up to 200 hours |
| Charging time | 2 – 3 hours |
| Operating Conditions | |
| Operating temperature | -10 °C to 45 °C |
| Storage temperature | -25 °C to 60 °C |
Troubleshooting
| Issue | Resolution |
| Crackling noise, static, interference | Make sure you are within range of your Bluetooth-enabled device |
| Bluetooth devices are susceptible to interference from other Bluetooth devices, microwave ovens, power stations and transmission lines, Direct Satellite Service (DSS), and wireless devices operating on the 2.4 GHz band. Eliminate as many potential sources of interference as possible while using your Bluetooth headphones. | |
| No sound or low volume | Adjust the volume on your headset and device as both control the sound |
| Not charging | If using a wall charger, make sure it is plugged in to a powered outlet. When charging from a computer, make sure the computer is on and the USB port is powered. If you are using a car USB port, make sure the car is on. The charging LED is not visible from all angles; make sure you look at the LED area from different angles. |
| Won't pair | Make sure the Venture is in pairing mode as indicated by red and blue LEDs flashing in an alternating manner. Make sure Bluetooth on your device is turned on and your device is within range. |
| Won't connect | Make sure your Venture is powered on, Bluetooth is enabled on your device, and it is within range. Make sure your device is not connected to any other Bluetooth headsets. Make sure the Venture is not connected to another device. If connecting still fails, power off your Venture and turn it back on. If problems persist, delete the device “AF52” and pair the Venture again. |
| Won't control calls/media players | The Venture headset is compatible with many Bluetooth versions, however not all versions of Bluetooth support these functions, and functionality is dependent upon the operating system of the device. Some functions, such as “Rejecting a call”, “Redialing” or “Voice dialing” are only available if supported by your mobile device. Please check the device manual for further information. |
Warranty
The Air-Fi Venture AF52 is covered by a 1 year manufacturer warranty against manufacturing defects. Cleaning the Venture when necessary will extend the life of your headphone.
For issues with your product, contact customerservice@meelec.com.
Contact warranty@meelec.com for warranty claims from:
Within the US or Canada from an authorized reseller
(see www.meelec.com/wheretobuy)
From www.meelec.com
From the MEElectronics store at Amazon.co.uk
For international retailers or distributors and unauthorized resellers (see authorized resellers at www.meelec.com/wheretobuy) contact your retailer for warranty service.
Please read this manual in its entirety.
If you have any issues after reading the manual
please contact
MEElectronics customer service at
customerservice@meelec.com
or (626) 965-1008 x31
NOTES
MEElectronics and its logo are registered trademarks of S2E, Inc.
All rights reserved.
iPod ^® , iPhone ^® , iPad ^® , and Mac ^® are registered trademarks of Apple Inc.
Android ^TM is a trademark of Google Inc.
Windows is a registered trademark of Microsoft Corporation in the United States and other countries.
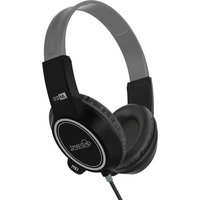

- STEREO BLUETOOTH WIRELESS HEADPHONES WITH BUILT-IN MICROPHONE
- VENTURE
- TABLE OF CONTENTS
- Package Contents
- Bluetooth Information
- Warning
- FCC Warning
- Safety and Care
- Product Overview
- Left Ear Cup
- Right Ear Cup
- Charging
- Turning On and Off
- Pairing with Bluetooth Devices
- iPhone, iPad, and iPod Touch
- Pairing (Continued)
- Android Phones and Tablets
- Windows 7 Computers and Laptops
- Windows 7 Computers and Laptops (Continued)
- Other Phones, Tablets, and Devices
- Connecting to Paired Devices
- Notes
- Controlling Volume
- When Media is Playing:
- When a phone call is active:
- Note:
- Controlling Phone Calls
- Notes:
- Controlling Phone Calls (Cont.)
- Controlling Media Playback
- Using as Wired Headphone
- Status, Button Functions, Light Patterns, and Sounds
- Status, Button Functions, Light Patterns, and Sounds (Cont.)
- Warranty
Brand : MEE audio
Model : Venture AF52
Category : Headphones