MM201 - CD Player Manta - Free user manual and instructions
Find the device manual for free MM201 Manta in PDF.


| Product Type | CD Player |
| Brand | Manta |
| Model | MM201 |
| Dimensions (W x H x D) | 430 x 80 x 250 mm |
| Weight | 2.5 kg |
| Power Supply | AC 230V, 50 Hz |
| Power Consumption | 15 W |
| Playback Formats | CD, CD-R, CD-RW |
| Playback Modes | Normal, Repeat, Random, Program |
| Remote Control | Included |
| Display | LED |
| Outputs | Analog Audio (RCA), Headphone (3.5 mm) |
| Inputs | None |
| Cleaning | Use a soft, dry cloth. Avoid liquids. |
| Safety | Do not open the device. Keep away from moisture. |
| Spare Parts | Contact Manta customer service. |
| Repairability | Refer to authorized service centers. |
Frequently Asked Questions - MM201 Manta
Also, make sure the player is in CD mode.
User questions about MM201 Manta
0 question about this device. Answer the ones you know or ask your own.
Ask a new question about this device
Download the instructions for your CD Player in PDF format for free! Find your manual MM201 - Manta and take your electronic device back in hand. On this page are published all the documents necessary for the use of your device. MM201 by Manta.
USER MANUAL MM201 Manta
natural_image
Silver MANTA portable radio with digital display and sound waves (no visible text or symbols)MM201
To ensure proper use of this product please read this User's Manual carefully and keep for future reference.
MM201 - CD & RADIO PLAYER
Instrukcja obsługi
Uwaga!
natural_image
Hand using a power tool to interact with a circular device, surrounded by directional arrows (no text or symbols)natural_image
Diagram of a car's steering wheel with motion arrows indicating rotational motion (no text or symbols)natural_image
Diagram of a mechanical device with rotating arrows indicating rotational motion (no text or symbols)Odtwarzacz CD
Warning! To reduce the risk of fire or electric shock, do not expose this appliance to dripping or spashing.
Important! Since the CD circuitry may cause interference to other radio tunes nearby, switch this unit off when not in use or move it away from the affected radio tuner.
The lighting flash and arrowhead within the triangle is a warning sign alerting you of "dangerous voltage" inside the product.

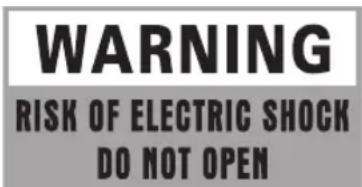
Warning! To reduce the risk of electric shock, do not remove cover (of back). No user serviceable parts inside. Refer servicing to qualified service personnel.
The exclamation point within the triangle is a warning sing alerting you of important instructions accompanying the product.

Danger! This product contains a low power laser device.
Laser Safety
This unit employs an optical laser beam system in the CD mechanism, designed with built-in safeguards. Do not attempt to disassemble, refer to qualified service personnel. Exposure to this invisible laser light beam may be harmful to the human eyes.
This is A Class-1 Laser product. Use of controls, or adjustments, or hazardous laser light beam exposure.
Precautions
Please read the following carefully to get the best and safest performance from this player.
Power Supply
Make sure to use the correct power outlet as rated on the back of the unit. (AC 230V\~).
Power Cord
Do not put any heavy objects on top of the power cord to avoid fires or electrical shocks caused by cord damage.
Unplug the power cord if the unit will not be used for a long time.
Usage and Storage
Do not remove the top cover to avoid possible electric shock from touching the inside of this unit.
Do not place any heavy objects on top of this unit.
Condensation
Condensation may result from moving the unit from a cold place to a hot place. Please turn the power on for 1 to 2 hours before using this unit if condensation occurs.
Unit Cleaning
Clean the front panel and the body of the unit with a dry soft cloth. Other areas can be cleaned using a soft cloth moistened with a mild detergent. Do not clean with evaporative solutions to avoid possible damage to the unit.
Disc Care
Disc Usage
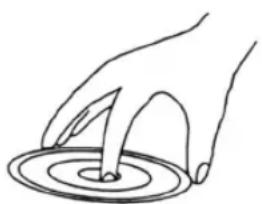
- Please hold all discs by their edges or the center opening as shown below. Do not touch the shiny surface of the discs.
natural_image
Line drawing of a hand holding a circular object with concentric rings (no text or symbols)MM201 - CD & RADIO PLAYER
- Do not stick labels or tape on the discs, and do not scratch or damage the discs.

● The disc spins at a high speed during playback. Do not use damaged, cracked, or warped discs because they could damage the unit.


Disc Cleaning
● Fingerprints or dirt on disc surfaces can weaken the light reflected from the disc and directly influence the signal quality. The poorer the signal quality, the poorer the playback performance. Keep the disc clean by wiping it straight out from the center with a dry soft cloth.

natural_image
Hand using a power tool to interact with a circular device, surrounded by directional arrows (no text or symbols)- If the disc is very dirty, wipe with a moist soft cloth, then follow with a dry soft cloth.
- Do not use record cleaning sprays, benzene, thinner, anti-static electricity liquids, or any other solvent. These may damage the disc surface.
Disc Storage
- Please keep the discs in their original cases to avoid bending the discs. Do not keep discs in locations with high temperature, high humidity, or direct sunshine. These conditions may also cause damage to the discs.
● Carefully read all instructions on the disc label.
Power Supply
AC power operation
Connect one end of the mains lead to (AC-In) socket and the other end to an AC outlet.
Battery power operation
- Open the battery compartment lid by pushing down on the tabs.
- Install 6 x "C" size batteries (not supplied). Refer to the polarity diagram in the battery compartment of the unit. Match the (+) and (−) marks on the diagram to the (+) and (−) marks on the batteries.
Caution!
When installing batteries
To prevent battery electrolyte leakage, which may result in injury and damage to the unit or other objects, observe the following precautions:
● All batteries must be installed with the proper polarity (see diagram in the compartment of the unit).
- Do not mix new with old or used batteries.
● Only use batteries of the same type and brand.
- Remove the batteries when they are not to be used for a long period time.
MM201 - CD & RADIO PLAYER
Description
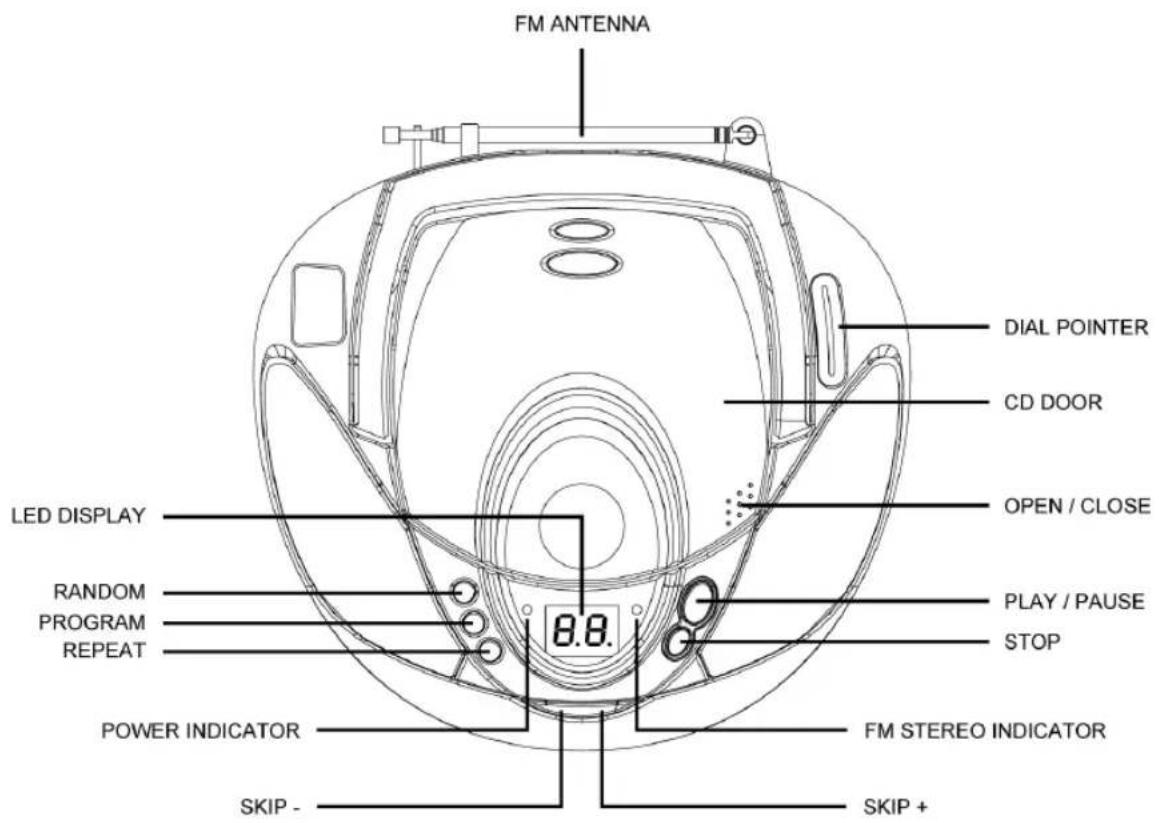

MM201 - CD & RADIO PLAYER
Radio operation
Listening to Radio
● Set the FUNCTION (slider to RADIO.
- Select the wave band by using the BAND selector.
● Turn to the desired radio station by using the Tuning knob.
- Adjust the Volume.
Turn On/Off Radio
Connecting the power, slide the FUNCTION slider to RADIO position, to turn on the radio. When turn off the radio, slide the FUNCTION slider to OFF position.
Selecting the Band
Turn radio on, slide the BAND SELECTOR and adjust TURNING controller to receive a desired AM/FM station.
Using the Antenna
FM Antenna
Receiving FM Broadcast
Extend the antenna (18) for better reception.

natural_image
Line drawing of a mechanical device with a rotating lever and curved arrows indicating motion (no text or symbols)AM Antenna
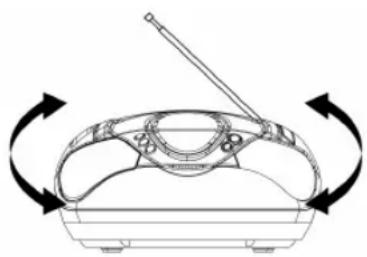
Rotate the unit horizontally for optimum reception, as a ferrite bar antenna is built into the unit.
natural_image
Diagram of a mechanical device with rotating arrows indicating motion (no text or symbols)Compact Disc Operation
● Set the FUNCTION slider to CD.
- Lift to open the CD door, place a disc in the center with the label side up and then close the CD door gently.
● The total number of tracks will be showed in the display.
Play/Pause Mode
- If PLAY/PAUSE button is pressed during Stop mode, the first track will be playing and the PLAY/PAUSE LED will be on.
- If PLAY/PAUSE button is pressed during Play mode, the PAY/PAUSE LED will flash.
Stop Mode
The Stop button is pressed during Play or Pause mode, the CD will stop.
Selecting a desired track.
Selecting a desired track in Stop mode.
- Press SKIP PREVIOUS or NEXT until the desired track appears on the LED display.
- Press PLAY/PAUSE button to start play. The selected track number appears on the LED display.
Searching for a particular passage during play.
Press and hold SKIP PREVIOUS and NEXT until the desired passage is located. During the search the sound is played faster than normal at a reduced volume. Play returns to normal when Skip PREVIOUS and NEXT is released.
Programmed Disc Play
- Set the FUNCTION switch to CD.
- Press the PROGRAM button.
- Press the SKIP PREVIOUS or NEXT button to select the track number.
- Press the PROGRAM button when the desired track number is displayed.
- Repeat step 3 and 4 to program more tracks.
- Press the PLAY/PAUSE button to start programmed play. Disc play will start at the beginning of first programmed track.
To Check the Program
Press the PROGRAM button programmed order.
MM201 - CD & RADIO PLAYER
To Erase the Program
Press the PROGRAM button and the STOP button at the same during stop mode. Opening the disc compartment also erase the contents of program memory.
Repeat Mode
Press the REPEAT button before or during play. A single track or all the tracks can be repeated. Each press switches the repeat mode.
● First press REPEAT button repeat one track
● Second press REPEAT button repeat all tracks
● Third press REPEAT button turn off repeat mode.
Specifications
Power Supply: 230V\~50 Hz
Power Output: 2x1.2W
Frequency range:
AM 530 - 1600kHz
FM 88 - 108MHz

INFORMACJA O PRAWIDŁOWYM POSTĘPOWANIU W PRZYPADKU UTYLIZACJI URZĄDZEŃ ELEKTRONICZNYCH I ELEKTRYCZNYCH
- MM201 - CD & RADIO PLAYER
- Instrukcja obsługi
- Uwaga!
- Odtwarzacz CD
- Laser Safety
- Precautions
- Power Supply
- Power Cord
- Usage and Storage
- Condensation
- Unit Cleaning
- Disc Care
- Disc Usage
- Disc Cleaning
- Disc Storage
- AC power operation
- Battery power operation
- Caution!
- Description
- Radio operation
- Listening to Radio
- Turn On/Off Radio
- Selecting the Band
- Using the Antenna
- FM Antenna
- AM Antenna
- Compact Disc Operation
- Play/Pause Mode
- Stop Mode
- Selecting a desired track.
- Selecting a desired track in Stop mode.
- Searching for a particular passage during play.
- Programmed Disc Play
- To Check the Program
- To Erase the Program
- Repeat Mode
- Specifications
- INFORMACJA O PRAWIDŁOWYM POSTĘPOWANIU W PRZYPADKU UTYLIZACJI URZĄDZEŃ ELEKTRONICZNYCH I ELEKTRYCZNYCH
Brand : Manta
Model : MM201
Category : CD Player