
Premium 00095283 - Digital photo frame HAMA - Free user manual and instructions
Find the device manual for free Premium 00095283 HAMA in PDF.


| Product Type | Digital Photo Frame |
| Model | Premium 00095283 |
| Brand | Hama |
| Screen Size | 18.5 inches (47.0 cm) TFT |
| Resolution | 1366 x 768 (RGB) |
| Brightness | 180 cd/m² |
| Contrast Ratio | 500:1 |
| Dimensions (with base) | 478 x 128 x 325 mm |
| Weight | Approx. 2900 g |
| Power Supply Input | AC 100-240 V / 50/60 Hz / 0.4 A max |
| Power Supply Output | 12V DC / 1.5A |
| Power Consumption | < 12 W |
| Internal Storage | 4 GB |
| Supported File Formats | JPEG, JPG (up to 105 megapixels), MP3, MPEG 4 (.avi/.divx/.xvid), MJPEG (Full HD 1080p) |
| Storage Media Support | SD/SDHC/MMC/MS, USB Type A |
| Connections | USB 2.0 (Host & Device), Audio Out 3.5mm, Mini USB |
| Remote Control Battery | CR2025 button cell (3V) |
| Wall Mount Compatible | VESA 100 x 100 |
| Intended Use | Indoor display of photos, videos, and music |
| Cleaning Instructions | Use a dry, soft cloth; avoid solvents; microfibre cloth recommended |
| Safety Features | Auto standby (off, 4, 8, 12 h), auto power on/off, alarm clock |
| Included Accessories | Power supply adapter, remote control, USB cable, stand screw |
| Warranty | Repairs by specialists only; use original spare parts |
Frequently Asked Questions - Premium 00095283 HAMA
User questions about Premium 00095283 HAMA
0 question about this device. Answer the ones you know or ask your own.
Ask a new question about this device
Download the instructions for your Digital photo frame in PDF format for free! Find your manual Premium 00095283 - HAMA and take your electronic device back in hand. On this page are published all the documents necessary for the use of your device. Premium 00095283 by HAMA.
USER MANUAL Premium 00095283 HAMA
Operating Instructions
GB
Mode d'emploi
F
Digitaler Bilderrahmen 18.5 Digital Photo Frame
00095283
Aufbau und Funktion
D
D
Aufbau und Funktion
Fernbedienung
ACHTUNG
D
Systemeinstellungen
D

D
D
Funktionen
Photo
HINWEIS
D
D
Musik
D
Kalender
D Zusatzfunktionen
D
Fehlerbehebung
D
Lagerung
GB Operating Instructions
Contents
GB
Introduction .....29
Preface 29
Copyright 29
Warnings 30
Intended use 31
Limitation of liability .....31
Basic safety instructions .32
Design and functionality .33
Digital picture frame .....33
Remote control....34
Extent of delivery and delivery inspection .....35
Installation and connections 35
Operation 36
Using the menu .....36
System settings .....37
Functions .....40
Photos 40
Music 42
Calendar....44
Folder / File .....45
Additional functions .....46
Use as a card reader .....46
Cleaning and care .....47
Safety instructions .....47
Cleaning....47
Troubleshooting....48
Safety instructions .....48
Causes of errors and error rectification ....48
Storage 50
Disposal 50
Device disposal .....50
Battery disposal .....50
Appendix....51
Technical specifications ....51
Menu structure for the DPF .52
Support information.....53
Introduction
Preface
GB
Dear customer,
By purchasing this Hama digital picture frame, you have chosen a quality product which conforms to state-of-the-art development standards in technology and functionality.
Read the following information carefully in order to familiarise yourself with the device and its full range of functions.
We hope you enjoy this device for many years to come.
Copyright
This documentation is protected by copyright.
It may not be reprinted or reproduced (including illustrations) in whole or in part without prior written consent from the manufacturer. This also applies after changes to the documentation.

Warnings
The following warnings are used in these operating instructions:
GB
! DANGER
A warning of this type indicates the immediate threat of a dangerous situation.
Death or serious injuries can result if this situation is not avoided.
▶ Follow the information in this warning to prevent death or serious personal injury.
WARNING
A warning of this type indicates the possibility of a dangerous situation.
Injuries and/or material damage can result if this situation is not avoided.
▶ Follow the information in this warning to prevent personal injury or material damage.
CAUTION
A warning of this type indicates the possibility of material damage.
Material damage can result if this situation is not avoided.
▶ Observe the information in this warning to prevent material damage.
NOTE
▶ A note indicates additional useful information for handling the device.
Intended use
This device is only intended for indoor use to display photos, videos and music files.
Other uses or uses that go beyond this use are considered unintended.

WARNING
Danger caused by unintended use
Danger may result from unintended or other use of the device.
▶ Only use the device as intended.
▶ Adhere to the procedures described in these operating instructions.
All claims made as a result of damage caused by unintended use are excluded.
The operator alone bears the risk resulting from unintended use.
Limitation of liability
All technical information, data and instructions contained in these operating instructions were current at the time of printing and written to the best of our knowledge based on previous experiences and findings.
Therefore, no claims can be derived from the specifications, illustrations and descriptions contained in these instructions.
The manufacturer accepts no liability for damages caused by failure to observe these instructions, improper use or repairs, unauthorised device modifications or the use of non-approved spare parts.
CAUTION
▶ Pixel defects can occur due to the manufacturing process. These manifest themselves as white or black pixels that permanently light up during playback. Within the context of production tolerances, a maximum of 0.01% of these pixel defects measured against the total size of the screen are permitted as a tolerance and are not considered a product defect.
Basic safety instructions
GB
■ Visually inspect the device before using it to make sure that there is no external damage. Do not operate the device if it is damaged.
- Keep the device away from moisture and do not allow liquids or objects to enter the device. Disconnect the power supply adapter immediately if the device comes into contact with liquids.
■ Place the device on a flat, level surface.
■ Do not place any objects on top of the device.
■ Do not place the device in a hot, wet or very humid environment.
■ The device requires adequate air circulation in order to function properly. During operation, do not place the device on soft surfaces, carpets or other materials that might block air circulation, and do not make any modifications to the device.
- Keep the cable away from hot surfaces and sharp edges.
■ Make sure not to bend the cable or pull it too tightly.
■ The electrical socket must be easily accessible so that the power supply adapter can be easily unplugged in case of emergency.
■ If you are not going to use the device for an extended period of time, switch off the device, disconnect it from the power supply and store it in a clean, dry place that is away from direct sunlight.
■ Only use the included power supply adapter; otherwise the device may be damaged.
■ Do not operate the device if the power supply adapter, connection cable or plug is damaged.
■ Do not open the housing of the device or the power supply adapter under any circumstances. There is a risk of electric shock if live connections are touched or if the electronic or mechanical layout of the device is altered.
■ Disconnect the power supply adapter from the power supply before cleaning the device, during thunderstorms or in the event of a malfunction.
■ Any repairs to the device should be left to specialists. Improper repair work invalidates any warranty claims.
■ Faulty components may be replaced with original spare parts only.
■ Packaging materials may not be used as toys. There is a risk of suffocation.
Design and functionality
Digital picture frame
GB

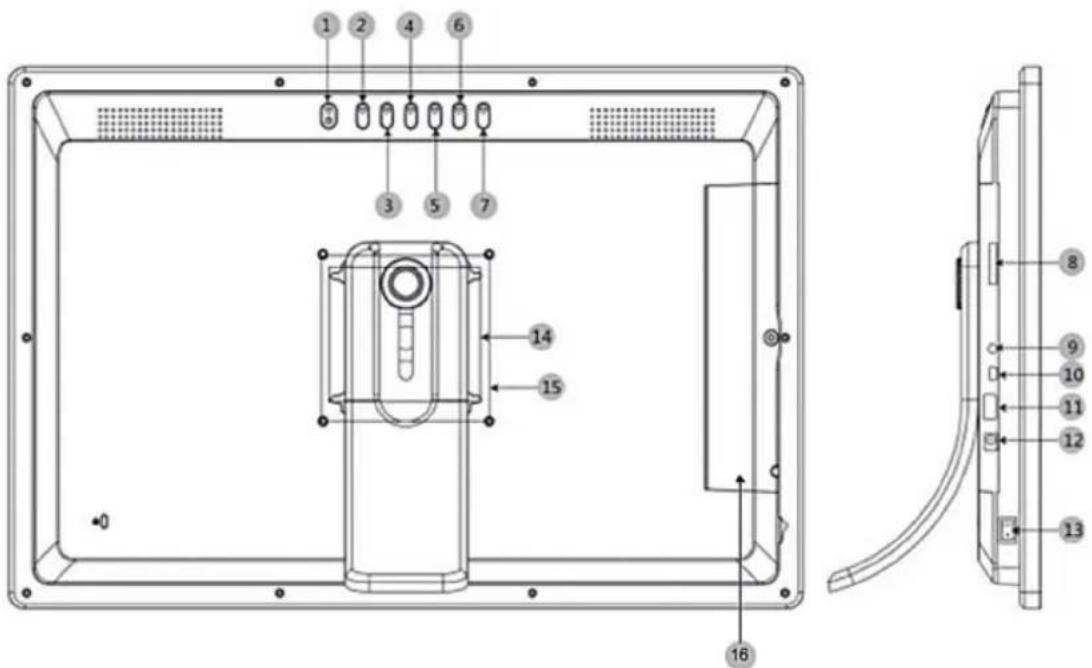
| 1 | ON/OFF button |
| 2 | OK/ENTER/Play button |
| 3 | Up navigation button |
| 4 | Down navigation button |
| 5 | Left navigation button |
| 6 | Right navigation button |
| 7 | EXIT/Back button |
| 8 | SD/SDHC/MMC/MS card slot |
| 9 | Audio out (3.5 mm jack) |
| 10 | Mini USB |
| 11 | USB type A |
| 12 | Socket for power supply adapter |
| 13 | ON/OFF main switch |
| 14 | Preparation for wall mounting |
| 15 | VESA standard 100 x 100 mounting option |
| 16 | Cover to protect the connector panel. You can secure the cover against unauthorised access using the included screw. |
Design and functionality
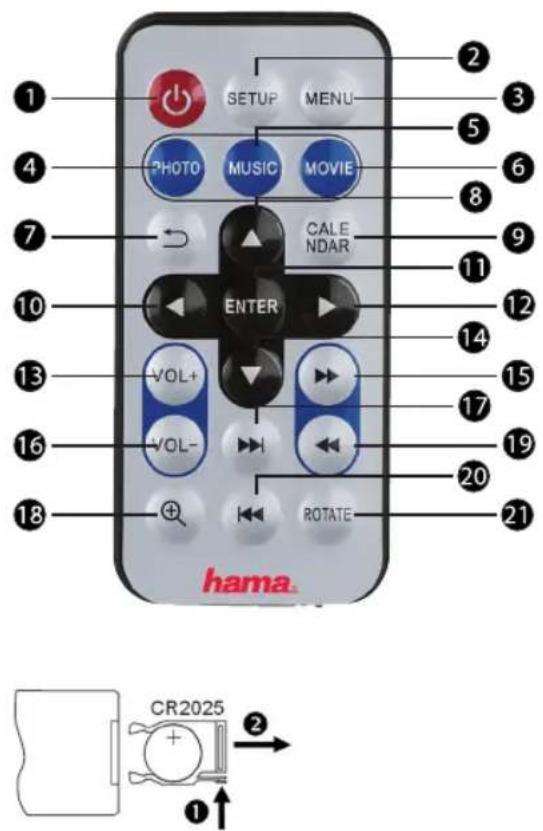
Remote control
GB

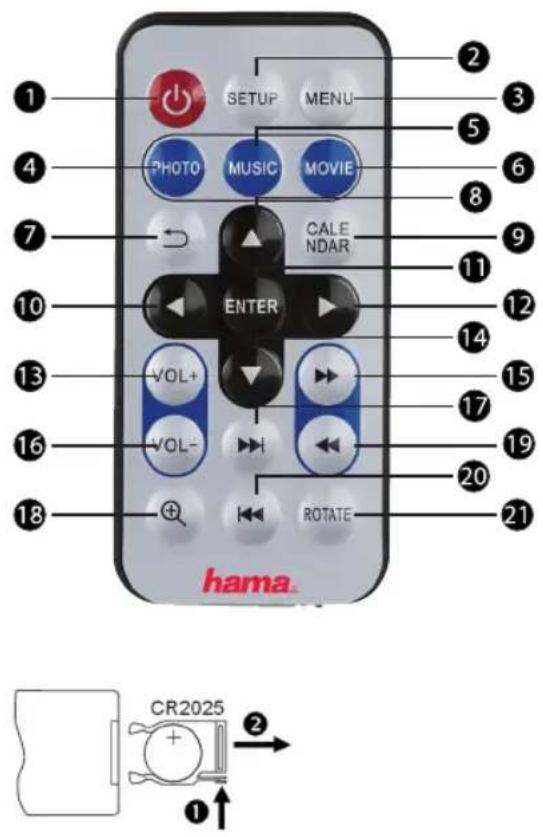
| 1 | Power |
| 2 | Setup/settings |
| 3 | Main/function menu |
| 4 | Photo mode |
| 5 | Music mode |
| 6 | Video mode |
| 7 | EXIT/return to the previous menu/selection |
| 8 | Left navigation button |
| 9 | Calendar mode |
| 10 | Navigation button |
| 11 | OK/ENTER confirm button; play/pause button in play-back mode |
| 12 | Right navigation button |
| 13 | Increase volume; Vol. + |
| 14 | Navigation button down |
| 15 | Fast forward |
| 16 | Decrease volume; Vol. - |
| 17 | Next photo/track/video |
| 18 | Image zoom function +/- |
| 19 | Rewind |
| 20 | Last photo/track/video |
| 21 | Rotate image |
Remote control
Inserting the battery
To insert/replace the battery, proceed as follows:
◆ Remove the battery compartment from the remote control by pressing in the locking mechanism while simultaneously pulling out the battery compartment.
◆ Remove the used battery and insert a new battery of type CR2025 (button cell) in the battery compartment. Be sure to install the battery according to the correct polarity.
◆ Slide the battery compartment back into the remote control.
Extent of delivery and delivery inspection
The device includes the following components as standard:
• Digital picture frame
• Power supply adapter
- Operating instructions
- Remote control
- USB adapter cable
NOTE
▶ Check the delivery for completeness and visible damage. Inform your supplier/dealer in the event of incomplete or damaged deliveries.
Installation and connections
For continuous playback, the device can be placed on a flat surface. To do so, screw the included screw into the housing with the base until it is hand-tight.

CAUTION
The device can be damaged if it tips over or falls down.
▶ Make sure that the device cannot tip over.

Operation
GB Using the menu
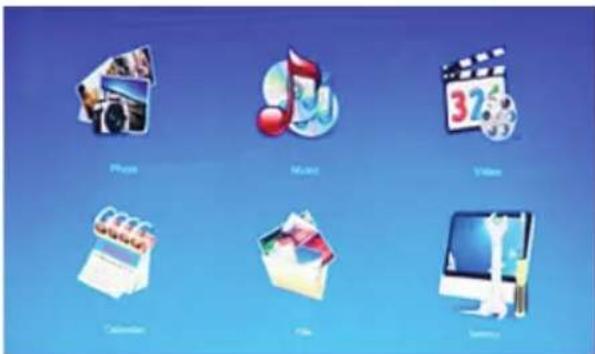
The device is equipped with a user-friendly menu. The menu appears on the screen.
◆ Switch the device on or off by pressing the ON/OFF main switch first. Afterwards, you can also switch the device on or off using the ON/OFF button on the back of the device or the ON/OFF power button on the remote control.
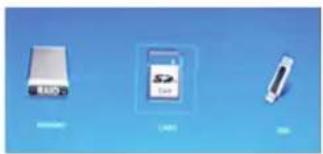
◆ The following types of storage media can be read:
- Internal storage
• SD/SDHC, MMC, MS memory card - USB storage media
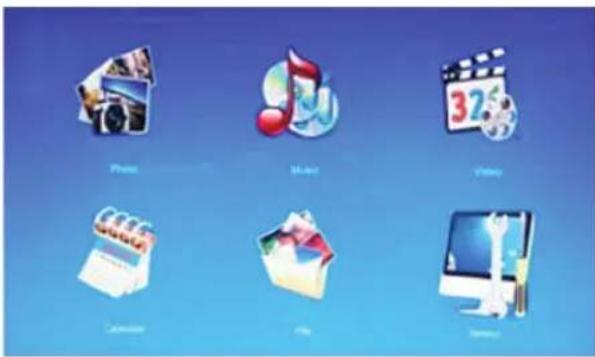
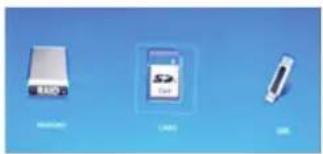
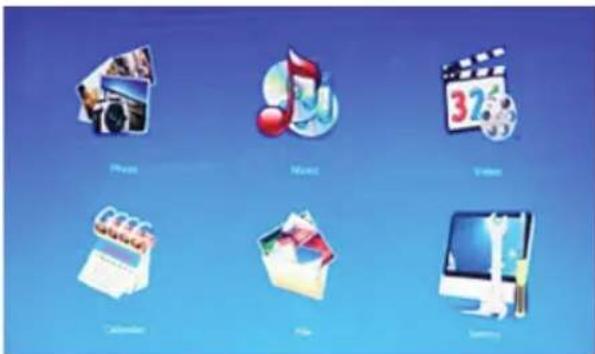
You open the main menu using the [MENU] button. In the menu, use the [◀][▶] buttons to move around, and select the desired function.
When you confirm your selection by pressing [OK/ENTER], a corresponding submenu appears. In this menu, use the [▲] or [▼] buttons to move around, and select the desired line. The selected line is highlighted in colour.
Confirm your selection using the [OK/ENTER] button. Usually, an additional menu will then appear, in which you move around using the [◀][▶][▲][▼] buttons and select the desired setting.
Use the [EXIT] button to exit the current menu level.
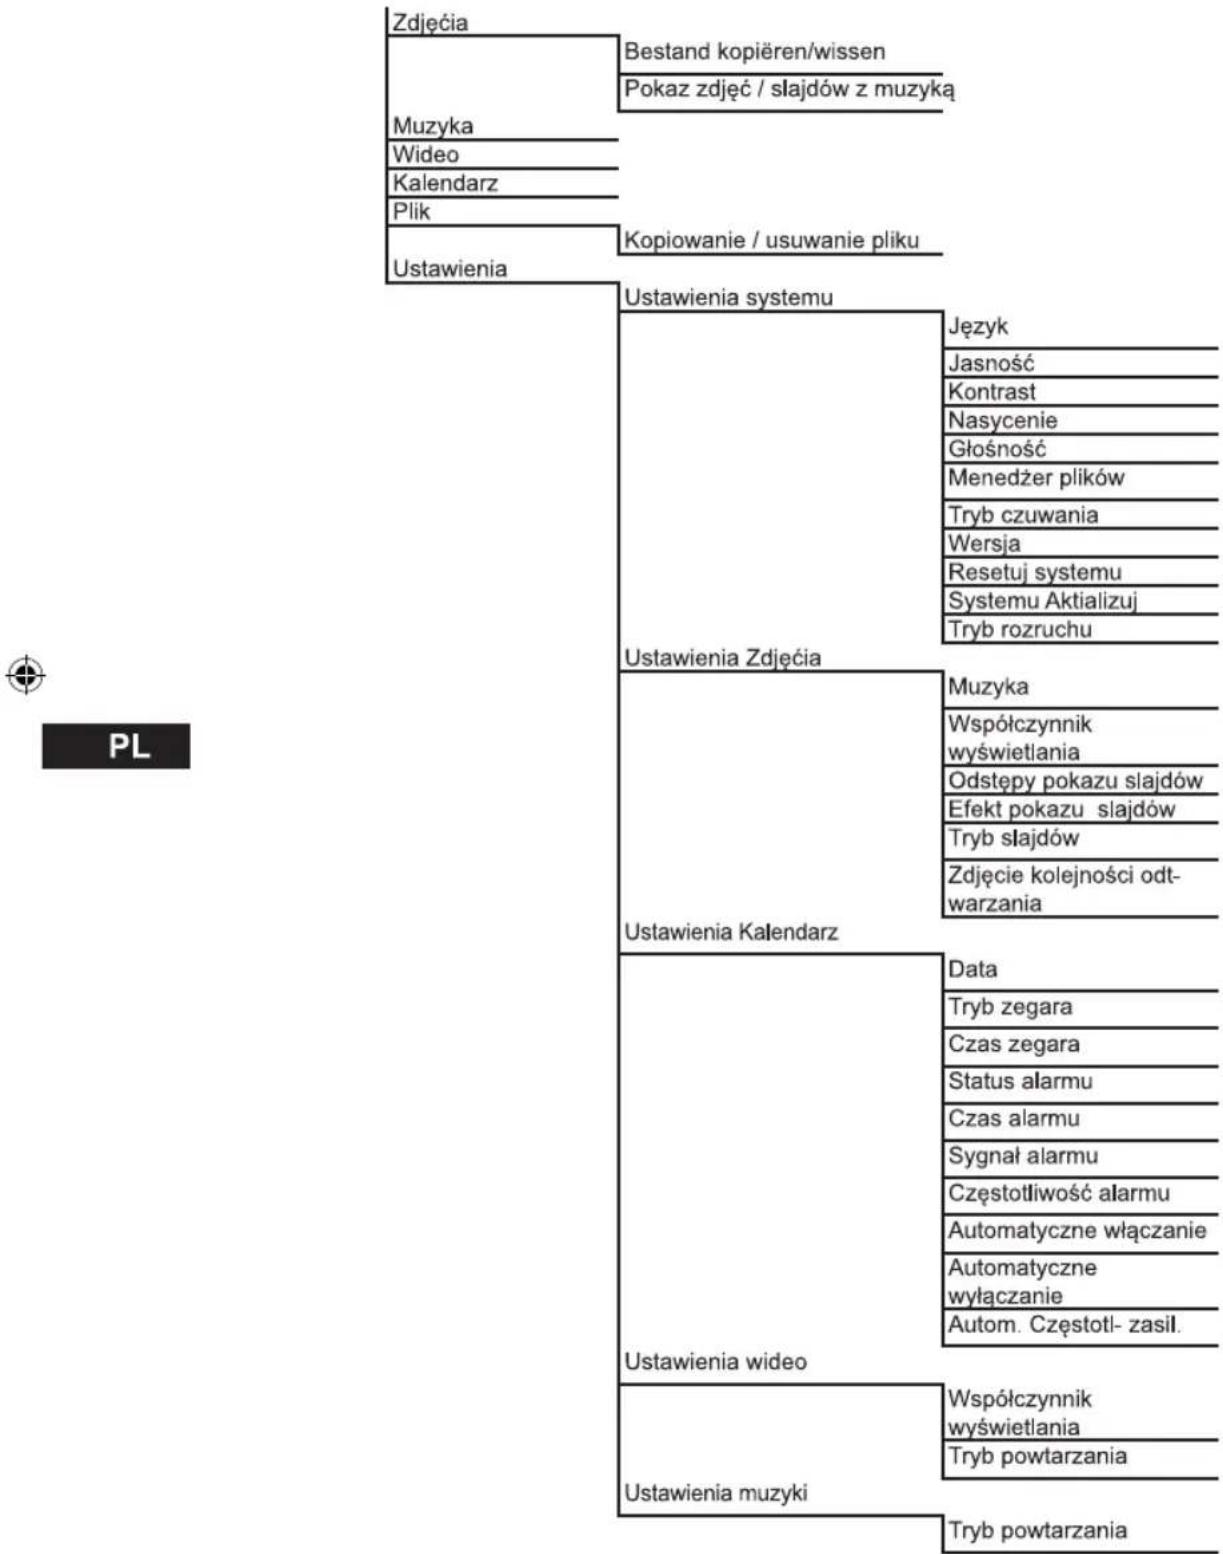
For orientation purposes, the menu structure is also included in the Appendix.
You can control the device using the buttons on the rear or with the included remote control.

System settings
To enter the setup menu, press the [SETUP] button on your remote control or use the [◀][▶] buttons on the rear of the device or the remote control to access the "Settings" menu item

GB
The following menu items are available:


GB
| System Setup | Language | Select the menu/operating language |
| Brightness | Set the brightness, contrast, colour saturation and shading of the device | |
| Contrast | ||
| Saturation | ||
| Volume | ||
| File Manager | If the file manager is activated, the device displays all of the files that are saved on the storage medium. Note that the device cannot read certain file formats. | |
| Standby Mode | Function menu for activating the automatic standby function. Select OFF, 4, 8, or 12 hours. The device will switch to standby mode automatically after the selected time period has elapsed. | |
| Version | Function menu for displaying the current firmware version | |
| Reset Setting | Function menu for resetting to factory settings | |
| System Upgrade | Function menu for updating the firmware | |
| Start Up Mode | Select a start up mode: main menu, photo, video, music, calendar |

| Photo Setup | Background Music | Function menu for switching the music on/off during the slideshow |
| Display Ratio | Adjust image to the screen | |
| Slideshow Speed | Select the time interval at which the pictures change (5 sec/15 sec/30 sec/1 min/5 min/15 min) | |
| Slideshow Effect | Function menu for setting the picture transitions | |
| Slide Mode | Select between two display modes | |
| Photo Play Sequence | Function menu for setting the playback loop | |
| Time Setup | Date | Function menu for setting the date |
| Set Time format | Function menu for setting the time | |
| Clock | ||
| Alarm Status | Function menu for setting the alarm time | |
| Alarm Time | ||
| Alarm Tone | ||
| Alarm Frequency | ||
| Auto Power On | Set the time at which the device is to switch on or off. | |
| Auto Power Off | ||
| Auto-Power Frequency | WARNING: Auto switch-on/switch-off function must first be activated! | |
| Video Setup | Display Ratio | Select between two display modes |
| Repeat Mode | Function menu for setting the playback loop | |
| Music Setup | Repeat Mode | Function menu for setting the playback loop |
GB

Functions
GB Photos
The device starts a photo slide show automatically when a storage medium is inserted. If no storage medium has been inserted, the device uses the photos stored on the internal memory.
You can navigate in the photo menu as follows:
- Use the [◀][▶][▲][▼] buttons on the device or remote control to select the symbol and then press [ENTER/OK].
- In the default setting, the device displays the slide show upon start-up.
- Press the [EXIT] button on the remote control or the back of the device to enter "Image Preview Mode". Use the [◀][▶][▲][▼] button to select a photo and then press [ENTER/OK] to view it on the device.

NOTE
▶ You can make additional changes to the settings in the photo settings menu.

GB
Press the OK button on your remote control or the back of the device during the slideshow or in thumbnail/preview mode to view the following function menu:


Rotate image
Zoom in/out on the image
Back
Forward
Start slideshow with current image
Delete the currently displayed image
Copy function
Displays information about the current image
Return to thumbnail/preview mode
HINWEIS
▶ Use the [EXIT] button to exit the current menu level.
Music
GB
Use the [◀][▶][▲][▼] buttons on the device or remote control to select the symbol and then press [ENTER/OK].
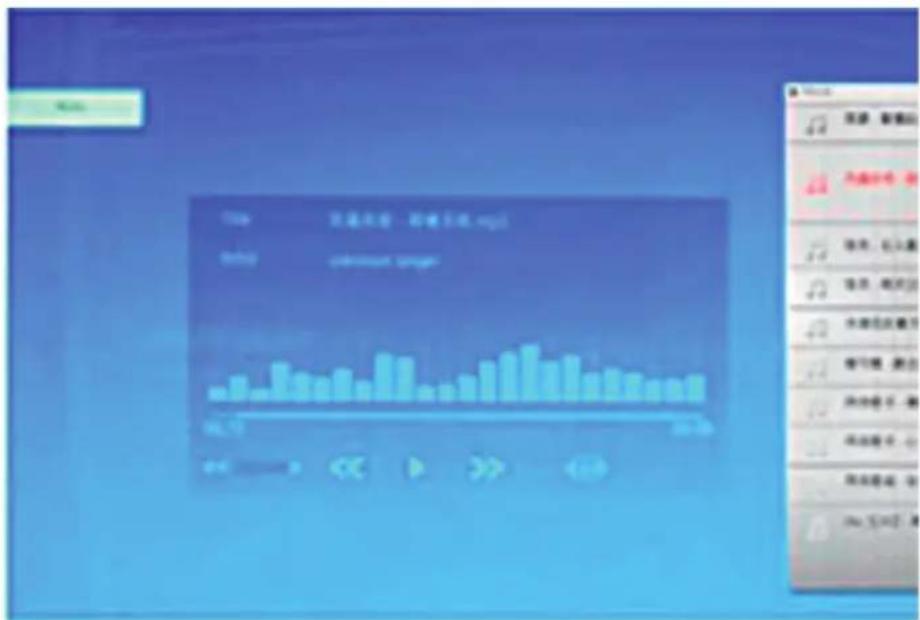
You can perform the following functions during playback:
You can press the [◀][▶] buttons on your remote control to navigate between the individual functions in the playbar, including the following playback settings: ↓1 play one track, ↓1 repeat all, ↓a repeat one track, ↑x shuffle.
◆ You can switch to the previous track or the next track using the [◀◀][▶▶] buttons.
◆ You can play/pause the playback by pressing [ENTER/OK] or [▶].
◆ You can set the volume level using the [VOL +/-] buttons.
NOTE
▶ You can make additional changes to the settings in the music settings menu.
Videos
Use the [◀][▶][▲][▼] buttons on the device or remote control to select the symbol and then press [ENTER/OK].
GB
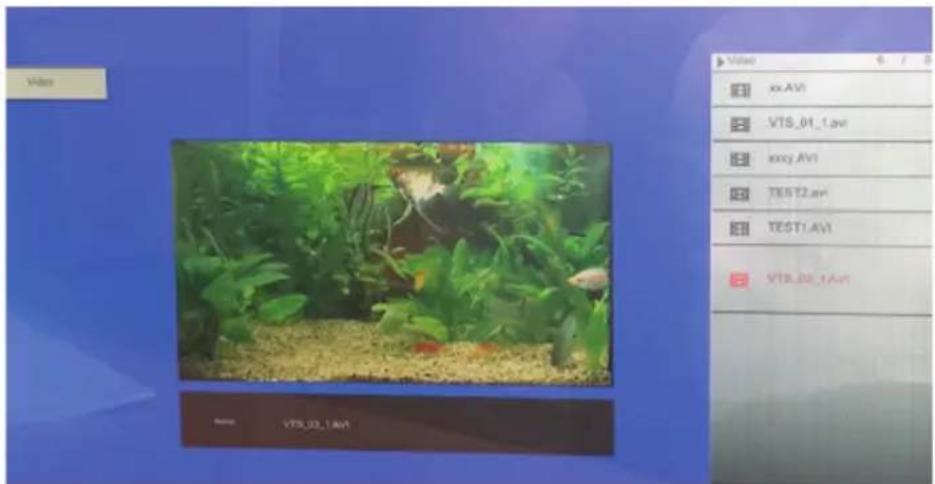
You can perform the following functions during playback:
◆ You can fast forward or rewind the current video using the [◀][▶] buttons on your remote control.
◆ You can switch to the previous video or the next video using the [◀◀][▶▶] or [▲][▼] buttons.
◆ You can play/pause the playback by pressing [ENTER/OK] or [▶II].
◆ You can set the volume level using the [VOL +/-] buttons.
NOTE
▶ You can make addition changes to the settings in the video settings menu.

GB
Calendar
Use the [◀][▶][▲][▼] buttons on the device or remote control to select the symbol and then press [ENTER/OK].

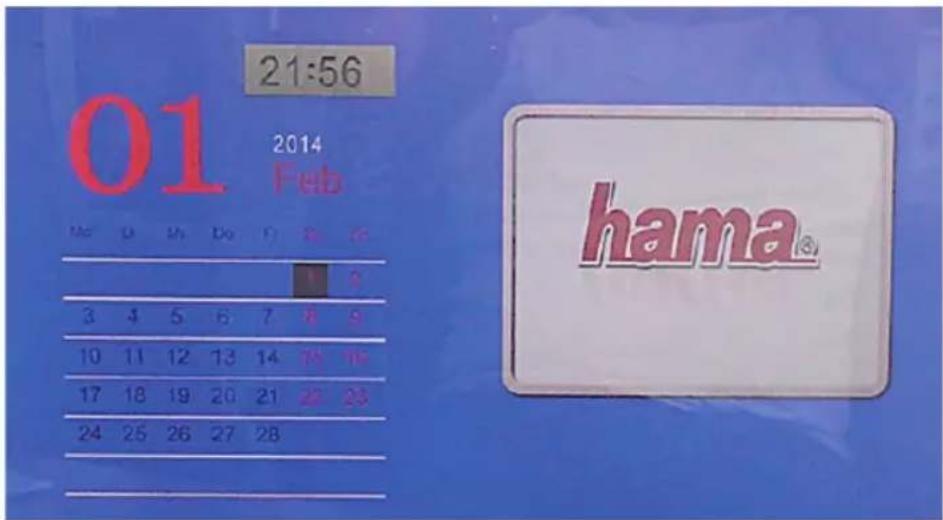
You can perform the following functions:
◆ You can change the month using the [◀][▶] buttons.
◆ You can change the year using the [▲][▼] buttons.
NOTE
The alarm icon is displayed when the alarm function is activated
▶ You can make additional changes to the settings in the calendar settings menu.
Folder / File
Use the [◀][▶][▲][▼] buttons on the device or remote control to select the symbol and then press [ENTER/OK].
GB
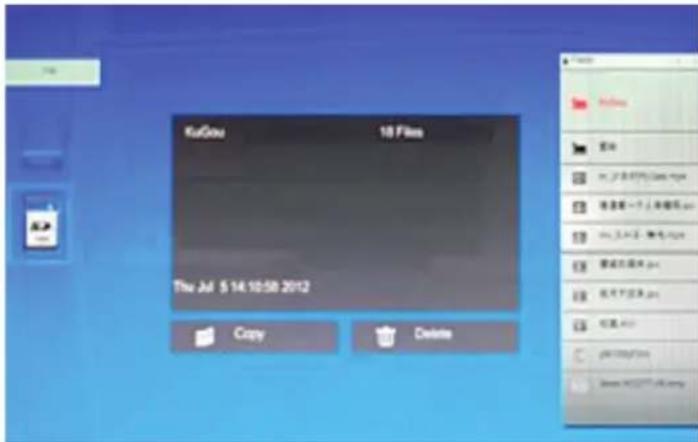
Use the [▲][▼] buttons to select a file and then press the [◀] button on the remote control or ⑤ on your device. A new menu window appears. Now you can copy or delete the selected file.
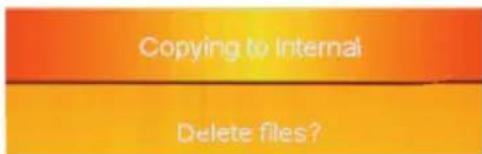
Press [ENTER/OK] to transfer the selected file from the storage medium to the internal memory or to delete the file.
Press the [EXIT] button to return to the folder level.
NOTE
▶ By selecting the internal memory, you can delete selected files from the internal memory.
▶ Please note that the amount of data you can copy is limited to the amount of free storage space available on the internal storage.
The more data you wish to store, the longer it will take to copy this data. Please wait until the system is completely finished copying the data.

Additional functions
GB Use as a card reader
This device has a card reader function. You can connect your device to your computer via USB to access files on the inserted storage medium or the internal memory or exchange/copy/delete data via the USB interface. Proceed as follows to connect the device to your computer using USB type A:


◆ Switch off the device.
◆ Connect the device with your computer using the included USB cable.
◆ Switch your device back on. The device now switches automatically to "PC mode"; this appears on the display of the device as well.
◆ If the USB connection to your computer is functioning properly, the device is recognised automatically and two drive letters are assigned.
◆ To exit "PC mode", switch off the device and remove the USB connection cable.
NOTE
▶ System requirements: Windows XP, VISTA, Win7, Win8, MAC OS
Cleaning and care
This chapter contains important information for the cleaning and care of the device.
GB
Safety instructions
CAUTION
Moisture can damage the device.
▶ To prevent irreparable damage, make sure that no moisture gets into the device when you clean it.
Cleaning
The display on your device is located behind protective glass.
■ Only clean the display with a dry, soft cloth.
■ Do not apply pressure to the screen surface when you clean the device.
■ To keep from damaging the surface, do not use solvents or alcohol-based cleaners to clean the device.
NOTE
▶ For gentle cleaning and care of the display, we recommend that you use a microfibre cleaning cloth.
■ Clean the rest of the device with a dry cloth. You can lightly dampen the cloth if the device is very dirty.

Troubleshooting
GB
This chapter contains important information for localising and rectifying errors. Observe the information to avoid dangers and material damage.
Safety instructions

WARNING
Observe the following safety instructions to avoid safety risks and material damage:
▶ Repairs to electrical devices may only be carried out by specialists who have been trained by the manufacturer. Improper repairs can result in significant danger to the operator and damage to the device.
Causes of errors and error rectification
The following table can be used to localise and rectify minor errors with the device:
| Error | Possible cause | Solution | |
| General information | Device is switched off | Switch on the device. | |
| Display is blank | Power supply adapter not connected correctly | Ensure that the power supply adapter is plugged in and connected to the device. | |
| No mains power | Check your fuse box. | ||
| Device is faulty | Inform our customer service department. |

| Error | Possible cause | Solution | |
| General information | Device turns off | By static electricity, such as occur during normal daily use (car-pet, wool sweater), it may happen that the device will go into Standby Mode. | In case that the device shouldn't react on any commands or show a black screen, reset the device by pressing the POWER button on the remote control or on the backpanel of the device. |
| No image ap-pears | No storage medium is inserted | Insert a storage medium. | |
| The storage medium does not contain data | Check your sto-rage medium. | ||
| No Sound | The device is set to “Mute” | Increase the volu-me of the device | |
| DPF | Video/music does not play | No storage medium is inserted | Insert a storage medium. |
| The storage medium does not contain any files | Check your sto-rage medium | ||
| Music does not play | Incorrect format | Convert the music file to mp3 format | |
| Videos do not play, or playback is not smooth | Incorrect format | Convert the video to a different for-mat |
NOTE
▶ Contact our customer service department if the problem remains after taking the steps detailed above.

Storage
GB
If you are not going to use the device for an extended period of time, switch off the device, disconnect it from power, and store it in a clean, dry place that is away from direct sunlight.
Disposal
Device disposal
Do not dispose of the device with household waste. This product is subject to the European 2002/96/EC Waste Electrical and Electronic Equipment (WEEE) directive.
Dispose of the device at an approved waste disposal company or at your local waste disposal facility. Observe all applicable regulations. In case of doubt, contact your waste disposal facility.
Battery disposal
Batteries must not be disposed of with household waste. Consumers are obliged by law to return batteries to the public collection points set up for this purpose. This legal obligation ensures that batteries are disposed of in an environmentally-friendly fashion. Only return discharged batteries.
Appendix
Technical specifications
| Allgemein | |
| Power supply input | AC 100-240 V / 50/60 Hz / 0.4 A max |
| Power supply output | 12V DC / 1.5A |
| Power consumption | < 12 W |
| Dimensions (L x W x H) | 478 x 38 x 325 mm (without the base)478 x 128 x 325 mm (with the base) |
| Weight | approx. 2900 g |
| Recommended ambient temperature for device | 0°C to 40°C (32°F to 104°F) |
| Relative humidity | 10% to 80% (non-condensing) |
| Screen | |
| Display | 47.0 cm (18.5") 16:9 TFT |
| Resolution | 1366 x 768 (RGB) |
| Brightness | 180 cd/m2 |
| Contrast | 500 : 1 |
| Remote control | |
| Button cell battery (CR 2025) | 3 V |
| Compatible storage media | |
| SD/SDHC/MMC/MS | |
| External connections | |
| USB 2.0 (Host & Device), Audio Out 3.5mm | |
| Supported file formats | |
| JPEG, JPG (up to 105 megapixels)MP3MPEG 4 (.avi/.divx/.xvid) (Full HD 1080p video-compatible)MJPEG (Full HD 1080p video-compatible) | |
| Internal storage | |
| 4 GB | |
GB
GB
Menu structure for the DPF
| Photo | |
| Photo slideshow | |
| Photo slideshow with music | |
| Music | |
| Video | |
| Calendar | |
| File | |
| Copy/delete file | |
| Setting | |
| System Setup | |
| Language | |
| Brightness | |
| Contrast | |
| Saturation | |
| Volume | |
| File Manager | |
| Standby Mode | |
| Version | |
| Reset Setting | |
| System Update | |
| Start Up Mode | |
| Photo Setup | |
| Background Music | |
| Display Ratio | |
| Slideshow Speed | |
| Slideshow Effect | |
| Slide Mode | |
| Photo Play Sequence | |
| Time Setup | |
| Date | |
| Set Time format | |
| Clock | |
| Alarm Status | |
| Alarm Time | |
| Alarm Tone | |
| Alarm Frequency | |
| Auto Power On | |
| Auto Power Off | |
| Auto-Power Frequency | |
| Video Setup | |
| Display Ratio | |
| Repeat Mode | |
| Music Setup | |
| Repeat Mode | |
Support information
Contact your dealer or Hama Product Consulting if you have a faulty product:
GB
Support hotline – Hama Product Consulting (German/English):
Phone: +49 (0) 9091/502-115
Fax: +49 (0) 9091 / 502 - 272
Email: mailto:produktberatung@hama.de
For more product information see www.hama.com.
Note:
All technical specifications and descriptions can change at any time without prior notice.


CE
53
⑤ Mode d'emploi
Sommaire
Introduction 55
Préface.... 55
Droits d'auteur 55
ATTENTION


F
Fonctions
Photo
F
REMARQUE
Musique
Calendrier

F
Elimination des pannes
Entreposage
E
ATENCIÓN


E
Funciones
Foto
NOTA
Música
Vídeo
Calendario
E
E


Solución de fallos
Almacenamiento
ATTENZIONE

1
Funzioni
Foto
NOTA
I
Musica
I Calendario
I Ricerca guasti
Immagazzinaggio
Avisos
P

ATENÇÃO
P

P
Funções
Fotografias
NOTA
Música
Calendário
Com os botões
Funções adicionais

| USB 2.0 (Host & Device), Audio Out 3.5mm |
Waarschuwingen
Opbouw en functie
Digitale fotolijst
NL
ATTENTIE
NL


Systeeminstellingen
NL

NL

Functions
Foto
AANWIJZING
Muziek
Kalender
NL
Extra functies


Bewaren
Montáž a funkce
CZ

Montáž a funkce
Dálkové ovládání
POZOR
Obsluha a provoz
Vedení menu
Nastavení systému
CZ

Funkce
Foto
UPOZORNĚNÍ
Hudba
CZ
Kalendář
CZ
Přídavné funkce

Odstranění závad
Uschování
Struktura menu DPF

Výstražné upozornenia
SK
POZOR
Tlačidlom [MENU] vyvoláte hlavné menu. V menu sa pohybujte pomocou tlačidiel [◀][▶] a zvol'te požadovanú funkciu.
Ked' svoj výber potvrdíte tlačidlom [OK/ENTER], zobrazí sa príslušné vedl'ajšie menu. Tu sa pohybujte pomocou tlačidla [▲] alebo [▼] a zvol'te požadovaný riadok. Zvolený riadok je farebne zvýraznený.
SK

Funkcie
Fotografie
UPOZORNENIE
Hudba
Video
SK
Kalendár
Doplnkové funkcie
SK
Uschovanie
Štruktúra menu DFR
![graph TD A["Fotografie"] --> B["Foto prezentácia"] A --> C["Foto prezentácia s hudbou"] D["Hudba"] --> E["Video"] D --> F["Kalendár"] D --> G["Súbor"] D --> H["Nastavenia"] H --> I["Súbor kopírovat'/vymazať"] I --> J["Systémové nastavenia"] J --> K["Jazyk"] J --> L["Jas"] J --> M["Kontrast"] J --> N…](/content/2026/05/1071681/images/32231833f0a07262dfb9b6a6d59a6fc6e4bdb395516f1dd5ca2d4f6aaedd002a.jpg)
Budowa i działanie
PL
Budowa i działanie
PL
UWAGA
Obsługa
Struktura menu

PL
PL

Funkcje
Zdjęcia
WSKAZÓWKA
Muzyka
Kalendarz
PL
Funkcje dodatkowe
PL
Usuwanie usterek
Przechowywanie
Struktura menu DPF
H
H
FIGYELEM
Rendszerbeállítások
H

Funkciók
Fotó
MEGJEGYZÉS
Zene
Naptár
Kiegészítő funkciók

H
Hibaelhárítás
DPF menüszerkezet


hama®
Hama GmbH & Co KG
D-86652 Monheim
www.hama.com
00095283/04.14
CE

© 2009 by Hama GmbH & Co KG
We reserve the right to make technical changes, we are not liable for any errors or printing errors.

- DIGITALER BILDERRAHMEN 18.5 DIGITAL PHOTO FRAME
- AUFBAU UND FUNKTION
- D
- FERNBEDIENUNG
- ACHTUNG
- SYSTEMEINSTELLUNGEN
- FUNKTIONEN
- PHOTO
- HINWEIS
- MUSIK
- KALENDER
- D ZUSATZFUNKTIONEN
- FEHLERBEHEBUNG
- LAGERUNG
- GB OPERATING INSTRUCTIONS
- CONTENTS
- GB
- INTRODUCTION
- PREFACE
- COPYRIGHT
- WARNINGS
- DANGER
- WARNING
- CAUTION
- NOTE
- INTENDED USE
- DANGER CAUSED BY UNINTENDED USE
- LIMITATION OF LIABILITY
- BASIC SAFETY INSTRUCTIONS
- DESIGN AND FUNCTIONALITY
- DIGITAL PICTURE FRAME
- REMOTE CONTROL
- INSERTING THE BATTERY
- EXTENT OF DELIVERY AND DELIVERY INSPECTION
- INSTALLATION AND CONNECTIONS
- OPERATION
- GB USING THE MENU
- SYSTEM SETTINGS
- FUNCTIONS
- GB PHOTOS
- MUSIC
- VIDEOS
- CALENDAR
- FOLDER / FILE
- ADDITIONAL FUNCTIONS
- GB USE AS A CARD READER
- CLEANING AND CARE
- SAFETY INSTRUCTIONS
- CLEANING
- TROUBLESHOOTING
- CAUSES OF ERRORS AND ERROR RECTIFICATION
- STORAGE
- DISPOSAL
- DEVICE DISPOSAL
- BATTERY DISPOSAL
- APPENDIX
- SUPPORT INFORMATION
- ⑤ MODE D'EMPLOI
- SOMMAIRE
- ATTENTION
- FONCTIONS
- F
- REMARQUE
- MUSIQUE
- CALENDRIER
- ELIMINATION DES PANNES
- ENTREPOSAGE
- ATENCIÓN
- E
- FUNCIONES
- FOTO
- NOTA
- MÚSICA
- VÍDEO
- CALENDARIO
- SOLUCIÓN DE FALLOS
- ALMACENAMIENTO
- ATTENZIONE
- FUNZIONI
- MUSICA
- I CALENDARIO
- I RICERCA GUASTI
- IMMAGAZZINAGGIO
- AVISOS
- ATENÇÃO
- FUNÇÕES
- FOTOGRAFIAS
- CALENDÁRIO
- FUNÇÕES ADICIONAIS
- WAARSCHUWINGEN
- OPBOUW EN FUNCTIE
- DIGITALE FOTOLIJST
- ATTENTIE
- NL
- SYSTEEMINSTELLINGEN
- AANWIJZING
- MUZIEK
- EXTRA FUNCTIES
- BEWAREN
- MONTÁŽ A FUNKCE
- DÁLKOVÉ OVLÁDÁNÍ
- POZOR
- OBSLUHA A PROVOZ
- VEDENÍ MENU
- NASTAVENÍ SYSTÉMU
- FUNKCE
- UPOZORNĚNÍ
- HUDBA
- KALENDÁŘ
- PŘÍDAVNÉ FUNKCE
- ODSTRANĚNÍ ZÁVAD
- USCHOVÁNÍ
- VÝSTRAŽNÉ UPOZORNENIA
- FUNKCIE
- FOTOGRAFIE
- UPOZORNENIE
- VIDEO
- SK
- KALENDÁR
- DOPLNKOVÉ FUNKCIE
- USCHOVANIE
- BUDOWA I DZIAŁANIE
- PL
- UWAGA
- OBSŁUGA
- STRUKTURA MENU
- FUNKCJE
- ZDJĘCIA
- WSKAZÓWKA
- MUZYKA
- KALENDARZ
- FUNKCJE DODATKOWE
- USUWANIE USTEREK
- PRZECHOWYWANIE
- FIGYELEM
- RENDSZERBEÁLLÍTÁSOK
- FUNKCIÓK
- FOTÓ
- MEGJEGYZÉS
- ZENE
- NAPTÁR
- KIEGÉSZÍTŐ FUNKCIÓK
- H
- HIBAELHÁRÍTÁS
- HAMA®
Brand : HAMA
Model : Premium 00095283
Category : Digital photo frame