
KX-FLM600 - Fax PANASONIC - Free user manual and instructions
Find the device manual for free KX-FLM600 PANASONIC in PDF.


| Product Type | Plain Paper Fax Machine with Integrated Answering System |
| Brand | Panasonic |
| Model | KX-FLM600 |
| Dimensions (W x D x H) | Approximately 355 x 342 x 254 mm |
| Weight | Approximately 5.8 kg |
| Power Supply | 120 V AC, 60 Hz |
| Power Consumption (Standby/Active) | Approximately 4.8 W / 28 W |
| Fax Transmission Speed | Up to 14.4 kbps (G3) |
| Fax Resolution | Standard/ Fine/ Super Fine |
| Copy Function | Yes, single and multi-copy |
| Telephone Features | Speakerphone, Caller ID, 100 station memory |
| Answering Machine | Digital TAM up to 12 minutes recording |
| Paper Capacity | Up to 50 sheets (A4) |
| Recording Paper Type | Plain paper (thermal transfer) |
| Display | 2-line backlit LCD |
| Interface | RJ11 telephone line, external phone jack |
| Maintenance | Clean the paper roller and document feeder with a soft, lint-free cloth; replace ink ribbon when faded |
| Safety | Do not expose to water or excessive heat; unplug before cleaning |
| Spare Parts & Repairability | Replacement ink ribbons and telephone cords available; modular design for easy access |
| General Information | Compatible with standard PSTN lines; designed for home office use |
Frequently Asked Questions - KX-FLM600 PANASONIC
User questions about KX-FLM600 PANASONIC
0 question about this device. Answer the ones you know or ask your own.
Ask a new question about this device
Download the instructions for your Fax in PDF format for free! Find your manual KX-FLM600 - PANASONIC and take your electronic device back in hand. On this page are published all the documents necessary for the use of your device. KX-FLM600 by PANASONIC.
USER MANUAL KX-FLM600 PANASONIC
To get started, please read the Quick Start section (p. 6–13).
OPERATING INSTRUCTIONS
natural_image
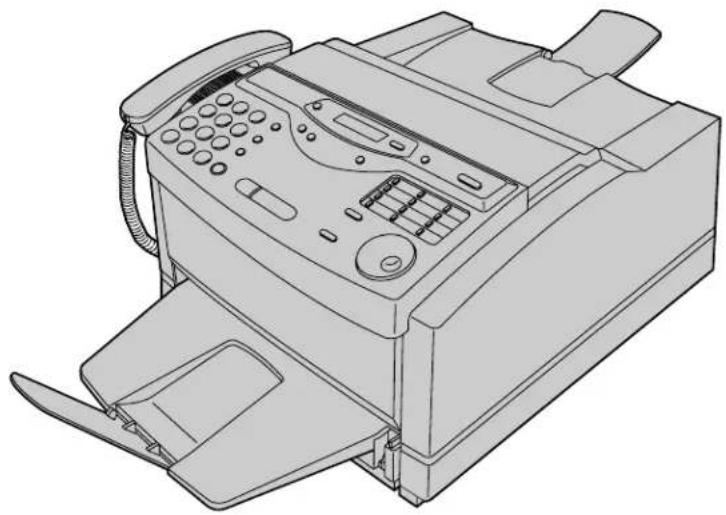
Line drawing of a printer with ports and control panel (no text or symbols)Please read these Operating Instructions before using the unit and save for future reference.
OR SEND A FAX TO 1-215-741-6376.
Comienzo rápido
(p. 132)
Thank you for purchasing a Panasonic facsimile.
Welcome to the world of Panasonic facsimiles.
This product combines facsimile, telephone, copier, scanner, PC Fax and printer features to provide you with more efficient office or home use. By utilizing these convenient features, you can maximize the effectiveness of this unit.
Things you should keep record of
Attach your sales receipt here
For future reference
Date of purchase Serial number
(found on the rear of the unit)
Dealer's name and address
Dealer's telephone number
Caution:
- The Telephone Protection Act of 1991 requires the following information to be clearly stated either at the top or bottom margin of the first message page when transmitting messages via telephone facsimile;
—Date and time of transmission,
—Identification of the business, entity or person(s) sending the facsimile, and
—Telephone number of the business, entity or person(s).
To program this information into your unit, complete all the instructions on pages 29 to 32.
- If you have not applied to the faxS service, you will not be able to use the IQ-FAX function (p. 46–48).
- When connecting the fax machine to your computer, use the included parallel cable for reliable data communications and compliance with FCC rules.
Trademarks
IBM is a registered trademark of International Business Machines Corporation.
Microsoft and Windows are registered trademarks of Microsoft Corporation in the United States and/or other countries.
faxSAV is a registered trademark of FaxSav Incorporated.
All other trademarks identified herein are the property of their respective owners.
Copyright:
This manual is copyrighted by Kyushu Matsushita Electric Co., Ltd. (KME) and its licensee. Under the copyright laws, this manual may not be reproduced in any form, in whole or part, without the prior written consent of KME and its licensee.
© Kyushu Matsushita Electric Co., Ltd. 1999
Important safety instructions
When using this unit, basic safety precautions should always be followed to reduce the risk of fire, electric shock, or personal injury.
- Read and understand all instructions.
- Follow all warnings and instructions marked on this unit.
- Unplug this unit from AC outlets before cleaning. Do not use liquid or aerosol cleaners. Use a damp cloth for cleaning.
- Do not use this unit near water, for example near a bath tub, wash bowl, kitchen sink, or the like.
- Place the unit securely on a stable surface. Serious damage and/or injury may result if the unit falls.
- Do not cover slots and openings on the unit. They are provided for ventilation and protection against overheating. Never place the unit near radiators, or in a place where proper ventilation is not provided.
- Use only the power source marked on the unit. If you are not sure of the type of power supplied to your home, consult your dealer or local power company.
- For safety purposes this unit is equipped with a three prong grounded plug. If you do not have this type of outlet, please have one installed. Do not use any type of adaptor plug to defeat this safety feature.
-
Do not place objects on the power cord. Install the unit where no one can step or trip on the cord.
-
Do not overload wall outlets and extension cords. This can result in the risk of fire or electric shock.
- Never push any objects through slots in this unit. This may result in the risk of fire or electric shock. Never spill any liquid on the unit.
- To reduce the risk of electric shock, do not disassemble this unit. Take the unit to an authorized servicenter when service is required. Opening or removing covers may expose you to dangerous voltages or other risks. Incorrect reassembly can cause electric shock when the unit is subsequently used.
- Unplug this unit from the wall outlet and refer servicing to an authorized servicenter when the following conditions occur:
A. When the power supply cord or plug is damaged or frayed.
B. If liquid has been spilled into the unit.
C. If the unit has been exposed to rain or water.
D. If the unit does not work normally by following the operating instructions. Adjust only controls covered by the operating instructions. Improper adjustment may require extensive work by an authorized servicenter.
E. If the unit has been dropped or physically damaged.
F. If the unit exhibits a distinct change in performance. - During thunderstorms, avoid using telephones except cordless types. There may be a remote risk of an electric shock from lightning.
- Do not use this unit to report a gas leak, when in the vicinity of the leak.
SAVE THESE INSTRUCTIONS
INSTALLATION:
- Never install telephone wiring during a lightning storm.
- Never install telephone jacks in wet locations unless the jack is specifically designed for wet locations.
- Never touch uninsulated telephone wires or terminals unless the telephone line has been disconnected at the network interface.
- Use caution when installing or modifying telephone lines.
WARNING:
- To prevent the risk of fire or electrical shock, do not expose this product to rain or any type of moisture.
CAUTION:
- This printer utilizes a laser. Use of controls or adjustments or performance of procedures other than those specified here in may result in hazardous radiation exposure.
OTHER INFORMATION:
- Keep the unit away from electrical noise generating devices, such as fluorescent lamps and motors.
●The unit should be kept free from dust, high temperature and vibration.
●The unit should not be exposed to direct sunlight. - Do not place heavy objects on top of this unit.
- Do not touch the plug with wet hands.
WASTE DISPOSAL METHOD:
- Waste material may be dumped or incinerated under conditions which meet all federal, state and local environmental regulations.

Included accessories
Power cord......1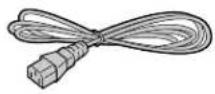 Part No. PFJA1030Z Part Part No. PFJA1030Z Part | Telephone line cord ......1 No. PQJA10075Z Part No. No. PQJA10075Z Part No. | Handset ......1 PFJXE0105Z Part No. PFJA PFJXE0105Z Part No. PFJA | Handset cord ......1 1029Z Part No. PFZXFLM600M 1029Z Part No. PFZXFLM600M | Paper tray ......1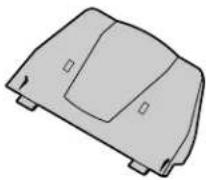 |
Toner cartridge ....1 | Drum unit ......1 | Printer cable......1(Parallel cable) Part No. PFJA1031Z Part Part No. PFJA1031Z Part | Panasonic PC software for KX-FLM600 (CD-ROM) ......1 No. PFJK20100101* No. PFJK20100101* |
*You will receive the latest software, therefore the part number may be different to the above. However the software is still compatible with your product.
- If any items are missing or damaged, check with the place of purchase.
●The part numbers listed above are subject to change without notice. - Save the original carton and packing materials for future shipping and transporting of the unit.
- If your PC is not equipped with a CD-ROM drive, you can purchase floppy disks [3.5" high-density (1.44 MB)]. Please fill out all portions of the Accessory Order Form included in the packing, and send by fax to 1-800-237-9080, or call 1-800-332-5368.
Accessory order information
For best results, use genuine Panasonic toner cartridge/drum unit Model No. KX-FA75. To order, call toll-free 1-800-332-5368 or see the fax order instructions below.
Fax order: Please send a fax to 1-800-237-9080. Include: your name, shipping address, telephone number, credit card type, number, expiration date and your signature, order part number and quantity, delivery method – overnight, 2nd day, or ground.
| Model No. | Description Specifications | |
| KX-FA75 1 | Toner cartridge toner cartridge and and drum unit | drum unit |
To order accessories, call toll-free 1-800-332-5368.
Installation
Before installation (p. 21)
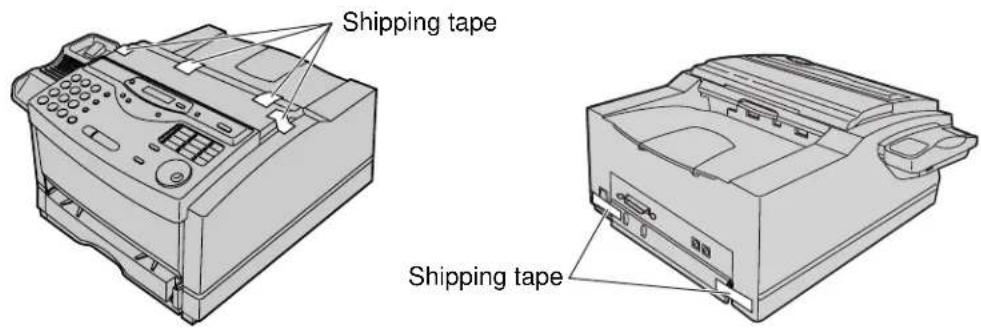
Remove the shipping tape.


flowchart
graph TD
    A["1 Toner cartridge (p. 21–23)"] --> B["A. Pull the top cover handle forward and open the top cover.<br>B. Remove the protection cap attached to the cartridge.<br>Protection cap"]
    B --> C["Do not touch the roller.<br>C. Rock the cartridge from side to side several times carefully.<br>D. Install the cartridge by holding the two tabs."]
    C --> D["Top cover handle"]
    A --> E["Tabs"]
    E --> F["Roller"]
    F --> G["2"]
Drum unit (p. 21–23)
A. Remove the protection cap and protection sheet attached to the drum unit.
- Do not touch or scratch the green drum surface.
- Do not expose the drum unit to light for more than 5 minutes.
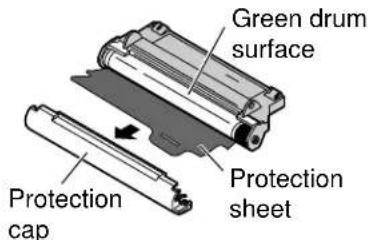
B. Install the drum unit on the toner cartridge by holding the two tabs.
C. Close the top cover.
3 Recording paper (p. 24, 25)

4 Paper tray and paper stacker (p. 26)

For assistance, call 1-800-435-7329.
Connections
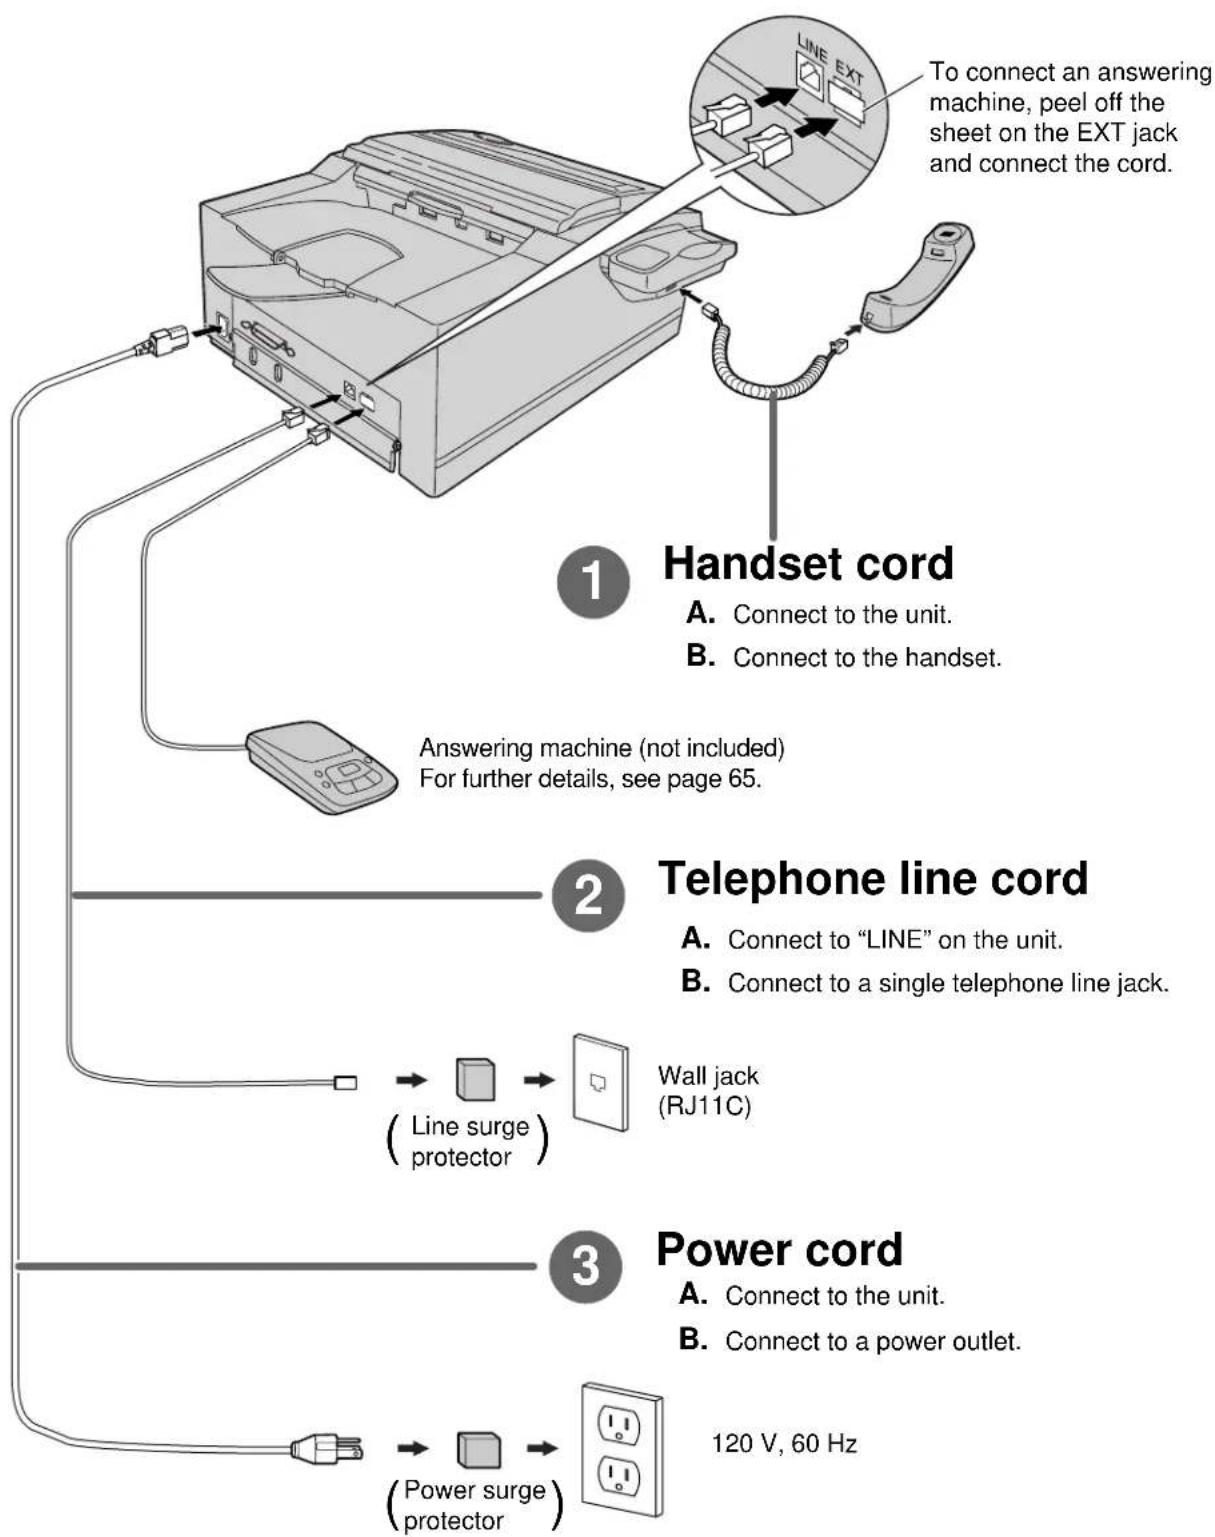
flowchart
graph TD
    A["Handset cord"] --> B["Answering machine (not included)"]
    B --> C["Line surge protector"]
    C --> D["Wall jack (RJ11C)"]
    D --> E["Power cord"]
    E --> F["Power surge protector"]
    F --> G["120 V, 60 Hz"]
    style A fill:#f9f,stroke:#333
    style B fill:#ccf,stroke:#333
    style C fill:#cfc,stroke:#333
    style D fill:#fcc,stroke:#333
    style E fill:#cff,stroke:#333
    style F fill:#ffc,stroke:#333
    note1["To connect an answering machine, peel off the sheet on the EXT jack and connect the cord."]
    note2["A. Connect to the unit. B. Connect to the handset."]
    note3["Telephone line cord"]
    note4["A. Connect to "LINE" on the unit. B. Connect to a single telephone line jack."]
- For further details, see page 27.
Voice calls - making/answering
Voice calls - making

- For further details, see page 34.
- If you are having trouble, see page 108.
Voice calls - answering

- For further details, see page 34.
- If you are having trouble, see page 108.
Faxes - sending/receiving
Faxes - sending
1 Open the document feeder tray.

natural_image
Illustration of a hand inserting a button into a printer (no text or symbols visible)2 Adjust the width of the document guides to
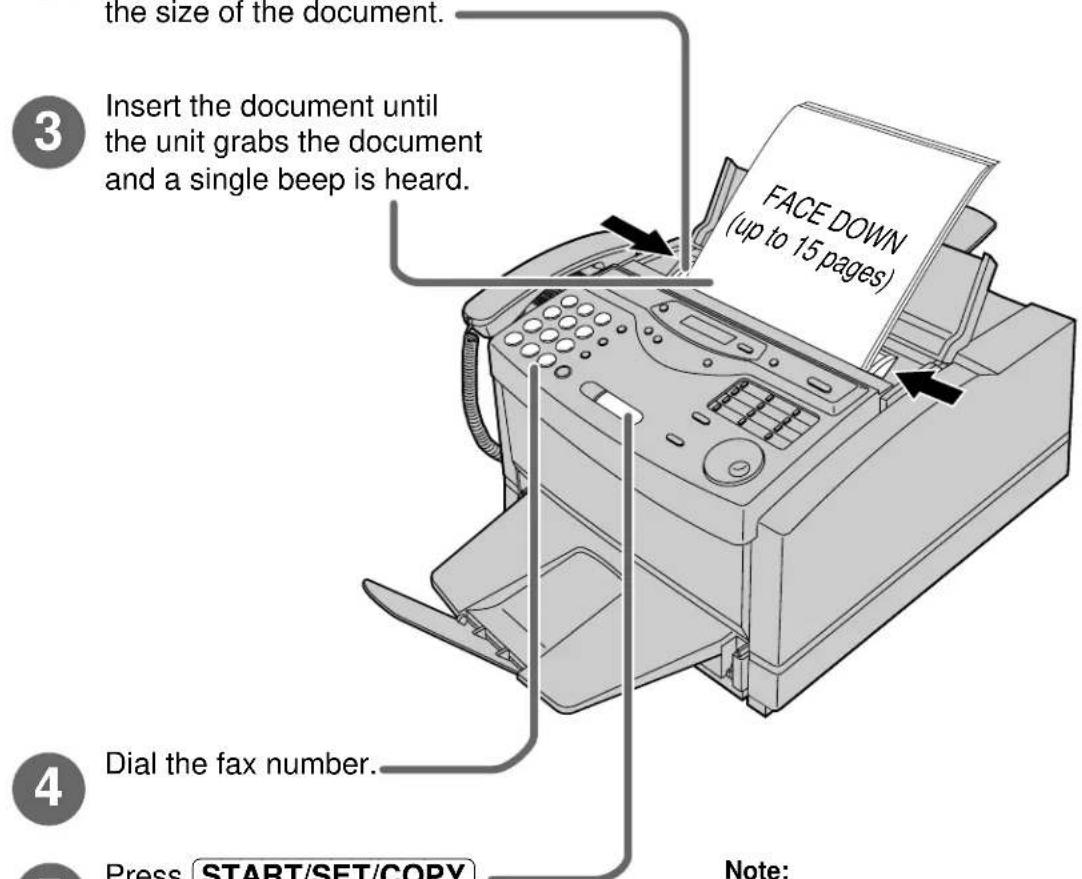
5 Press START/SET/COPY.
- For further details, see page 43.
- If you are having trouble, see page 108.
Note:
- While scanning, do not move the pages which have already ejected. A paper jam may occur. Allow the scanning process to finish before viewing documents.
Faxes - receiving
1 When the unit rings, lift the handset.

natural_image
Line drawing of a printer with paper feed and control panel (no text or symbols)2 When: — document reception is required, — a fax calling tone (slow beep) is heard, or — no sound is heard, press START/SET/COPY.
3 Replace the handset.
- For further details, see page 62.
- You can select the way to receive calls according to your needs (p. 60, 61).
- If you are having trouble, see page 109.
Copying
1 Open the document feeder tray.
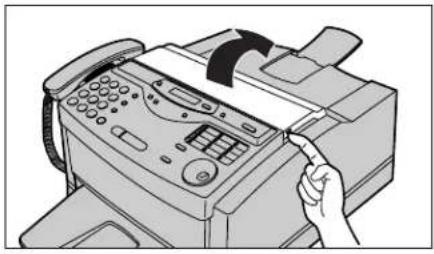
natural_image
Illustration of a hand inserting a card into a printer (no text or symbols visible)2 Adjust the width of the document guides to the size of the document.
3 Insert the document until the unit grabs the document and a single beep is heard.
• Make sure the handset is on the cradle.
4 Press (START/SET/COPY).
5 Enter the number of copies.
6 Press START/SET/COPY.
- For further details, see page 80.
- If you are having trouble, see page 109.
Note:
- While scanning, do not move the pages which have already ejected. A paper jam may occur. Allow the scanning process to finish before viewing documents.
PC information

Connect to a computer (p. 82).
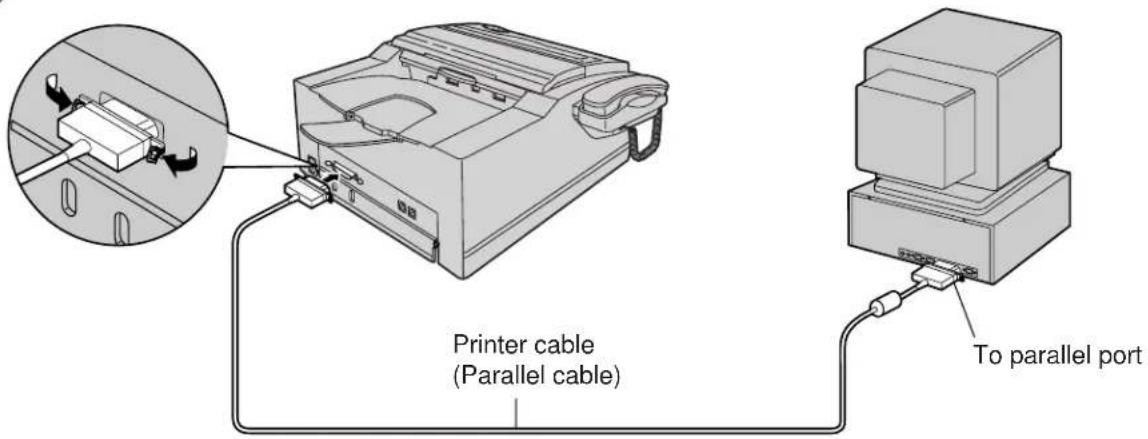
Caution:
When connecting the fax machine to your computer, use the included printer cable for reliable data communications and compliance with FCC rules.

Install the PANA LINK software (p. 83).
- Start Windows ® 95* or Windows 98** and close all applications.
- Insert the included CD into your CD-ROM drive.
●The language dialog box will appear.
Select the desired language that you use with this software. Then click OK.
If the language dialog box does not appear:
The installation will automatically start.
If the language dialog box does not appear and the installation does not start automatically:
Click Start, choose Run... . Type "d:\setup" (where d: is the drive letter of your CD-ROM drive). Click OK.
(If you are not sure what the drive letter is for your CD-ROM drive, please use Windows Explorer and look for the CD-ROM drive.)
- The installation will start automatically.
- Follow the instructions on the screen until all files have been installed.
- Be sure to read a README file for more information.

Activate the PANA LINK software (p. 84).
- Click Start.
- Point to Programs, point to PANA LINK and click PANA LINK.
The PANA LINK main panel will appear.
*Microsoft Windows 95 operating system (hereafter Windows 95)
**Microsoft Windows 98 operating system (hereafter Windows 98)
For assistance, call 1-800-435-7329.
Table of Contents
| Initial Preparation | Help Button | Help function | 17 | |
| Finding the Controls | Location | 18 | ||
| Overview | 20 | |||
| Setup Before installation | 21 | |||
| Toner cartridge and drum unit | 21 | |||
| Recording paper | 24 | |||
| Paper tray | 26 | |||
| Paper stacker | 26 | |||
| Connections | 27 | |||
| Recording paper size | 28 | |||
| Date and time, your logo and facsimile telephone number | 29 | |||
| Volumes Adjusting volumes | 33 | |||
| Telephone | Making and Answering Calls | Voice calls - making | 34 | |
| Voice calls - answering | 34 | |||
| TONE, FLASH and PAUSE buttons | 35 | |||
| Dialing mode (touch tone or pulse) | 36 | |||
| One-Touch Storing names and telephone numbers | ||||
| Dial in the One-Touch Dial | 37 | |||
| Making a voice call using the One-Touch Dial | 38 | |||
| JOG DIAL | Storing names and telephone numbers in the JOG DIAL directory | 39 | ||
| Making a voice call using the JOG DIAL directory | 41 | |||
| Voice Contact | Talking to the caller after fax transmission or reception | 42 | ||
| Fax/Copy | Sending Faxes | Sending a fax manually | 43 | |
| Sending a fax using the One-Touch Dial | 44 | |||
| Sending a fax using the JOG DIAL directory | 45 | |||
| IQ-FAX | 46 | |||
| Documents you can send | 49 | |||
| Sending report for confirmation | 50 | |||
| Automatic journal report | 51 | |||
| Delayed transmission (sending a fax at a specified time) | 52 | |||
| From memory | 53 | |||
| Multiple stations | 54 | |||
| Overseas mode | 57 | |||
| Half-tone setting | 58 | |||
| Error correction mode setting | 58 | |||
| Connecting tone | 59 | |||
| Receiving Faxes | Setting the unit to receive calls | 60 | ||
| TEL mode (answering all calls manually) | 62 | |||
| FAX ONLY mode (all calls are received as faxes) | 63 | |||
| Using the unit with an answering machine | 65 | |||
| Distinctive Ring service (ring pattern detection feature) | 68 | |||
| TEL/FAX mode (receiving voice calls with rings and fax calls without rings when you are near the unit) | 70 | |||
| Extension telephone | 74 | |||
| Fax activation code | 74 | |||
| (continued) | ||||
| Fax/Copy | Receiving Faxes (continued) Silent detection (receiving faxes from older model fax machines) | Other size documents....75 | ||
| 76 | ||||
| Memory reception alert....77 | ||||
| Friendly reception....77 | ||||
| Pager call - when your unit receives a fax....78 | ||||
| Toner save....79 | ||||
| Copying | Making a copy....80 | |||
| PC Software | Setup (PC) Connecting to a computer....82 | |||
| Printer | Printing documents created on the PC....88 | |||
| PC Fax | Sending documents created on the PC....93 | |||
| PC Receiving | Receiving faxes on your PC....96 | |||
| Phone Call | Making a phone call....98 | |||
| Address Book | Computerized directory for fax and phone numbers....99 | |||
| Scanning | Using your fax machine as a scanner....100 | |||
| Copier | PC based copying....101 | |||
| More Information | The Communication Log....102 | |||
| Viewer....103 | ||||
| PC link (turning PC related functions on/off)...104 | ||||
| Help | Error Messages | Reports....105 | ||
| Display....106 | ||||
| Operations When a function does not work, check here before requesting help....108If a power failure occurs....113 | ||||
| Jams Clearing paper jams....114Sending document jams....116 | ||||
| Cleaning | Cleaning....116 | |||
| Replacement Replacing the toner cartridge and drum unit....117 | ||||
| Repacking | Transporting the unit....120 | |||
| General Information | Print Reports | Printing the feature settings, telephone numbers, journal and broadcast list....123 | ||
| Display Contrast | Changing the display contrast....124 | |||
| Reset | Resetting the advanced features....124 | |||
| FCC Information | List of FCC requirements and information....125 | |||
| (continued) | ||||
| General Information | Limited Limited Warranty . . . . . . . . . . . . . . . . . . . . . . . . . . . . . . . . . . . . . . . . . . . . . . . . . . . . . . . . . . . . . . . . . . . . . . . . . . . . . . . . . . . . . . . . . . . . . . . . . . . . Notes for product service and shipping the product . . . . . 128 | |||
| Energy Star | Energy Star . . . . . . . . . . . . . . . . . . . . . . . . . . . . . . . . . . . . . . . . . . . . . . . . . . . . . . . . . . . . . . . . . . . . . . . . . . . . . . . . . . . . . . . . . . . . . . . . . . . | |||
| Specifications Technical data about this product . . . . . . . . . . . . . . . . . . . . . . . . . . . . . . . . . . . . . . . . . . . . . . . . . . . . . . . . . . . . . . . . . . . . . . . . . . . . . . . . . . . . . . . . . . . . . . . . . . . | ||||
| Comienzo rápido en español | Comienzo rápido en español | Instalación . . . . . . . . . . . . . . . . . . . . . . . . . . . . . . . . . . . . . . . . . . . . . . . . . . . . . . . . . . . . . . . . . . . . . . . . . . . . . . . . . . . . . . . . . . . . . . . . . . . Memorización de nombres y números de teléfono para la marcación de un toque . . . . . . . . . . . . . . . . . . . . . . . . . . . . . . . . . . . . . . . . . . . . . . . . . . . . . . . . . . . . . . . . . . . . . . . . . . . . . . . . . . . . . . . . . . . . . . . . . . . Memorización de nombres y números de teléfono en el directorio JOG DIAL . . . . . . . . . . . . . . . . . . . . . . . . . . . . . . . . . . . . . . . . . . . . . . . . . . Para hacer/contestar una llamada de voz . . . . . . . . . . . . . . . . . . . . . . . . Envío de un fax . . . . . . . . . . . . . Reciviendo un fax . . . . . . . . . . . . . . . . . . . . . . . . . . . . . . . . . . . . . . . . . . . . . . . . . . . . Utilización del software (PANA LINK) de computadora . . . . . . . . . . . . . . . . . . . . . . . . . . . . . . . . . . . . . . Index Index 151Features Summary of user programmable features. 153Summary | ||
Help function
You can print a quick reference for assistance as follows.
1 Press HELP.
Display: PRESS [▼▲] & [SET]
2 Press ▼ until the desired item is displayed. The following items are available.
-
How to program your unit
-
HOW TO SET UP
-
How to store names in the JOG DIAL directory and how to dial them
2.JOG/AUTO DIAL
- Help with problems sending faxes
3.FAX SENDING
- Help with problems receiving faxes
4.FAX RECEIVING
-
How to use the copier function
-
COPIER
-
Frequently asked questions and answers
6.Q and A
-
Explanation of error messages shown on the display
-
ERRORS
-
List of available reports
-
REPORTS
3 Press START/SET/COPY.
PRINTING

Finding the Controls
Location


Finding the Controls
Overview
Front view
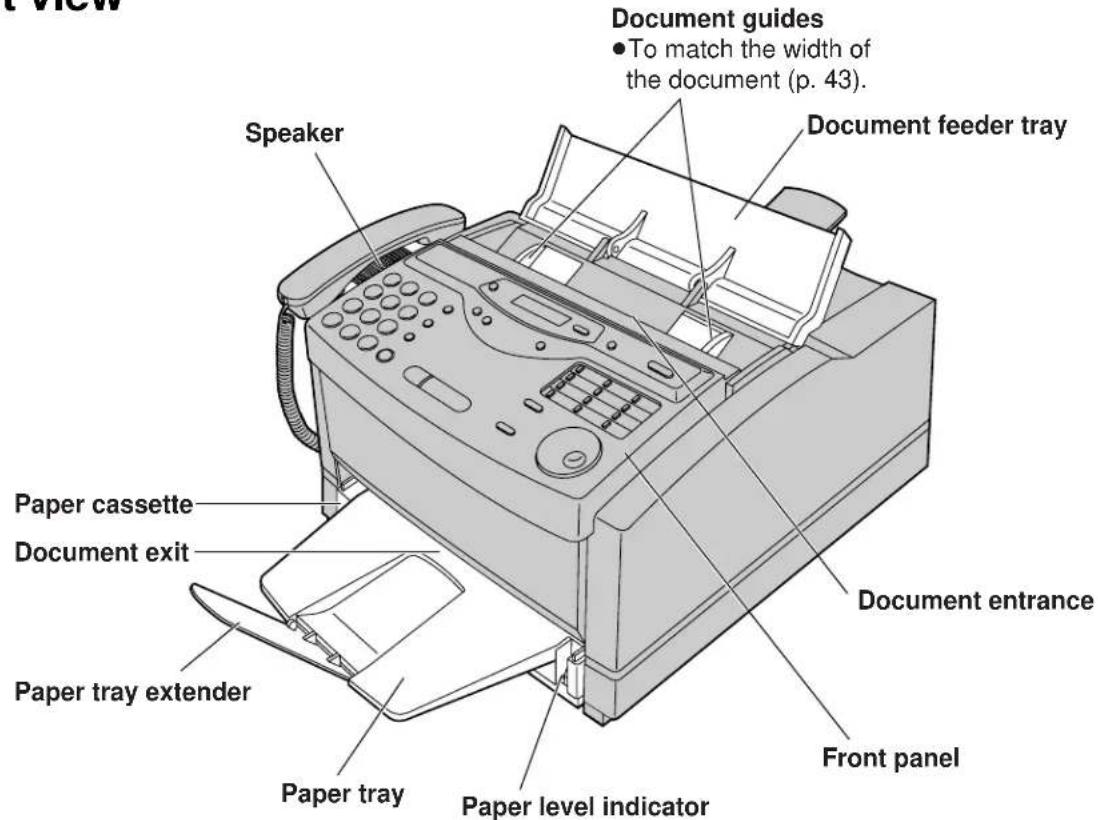
Rear view
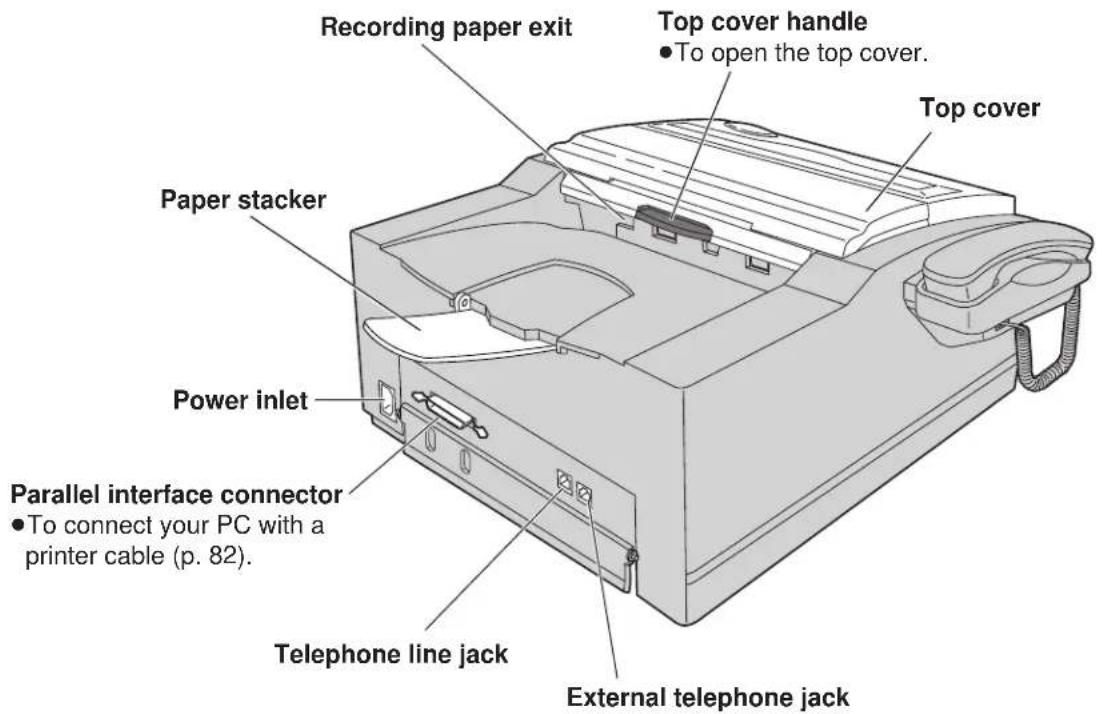
Before installation
Remove the shipping tape.
Toner cartridge and drum unit
Caution:
- If ingestion of toner occurs, drink several glasses of water to dilute stomach contents, and seek immediate medical treatment. If toner comes into contact with eyes, flush thoroughly with water, and seek medical treatment. If toner comes into contact with skin, wash thoroughly with soap and water.
- Do not put up the toner cartridge.
- Do not open the protection bag until you have read the following instructions and are ready to install the drum unit. The drum unit contains a photosensitive drum. Exposing it to light may damage the drum.
Once you have opened the protection bag:
—Do not expose the drum unit to light for more than 5 minutes.
—Do not touch or scratch the green drum surface.
—Do not place the drum unit near dust or dirt.
—Do not place the drum unit in a high humidity area.
—Do not expose the drum unit to direct sunlight.
Important:
- Keep the protection materials in case the fax machine must be repacked and transported.
1 Pull the top cover handle forward and open the top cover.
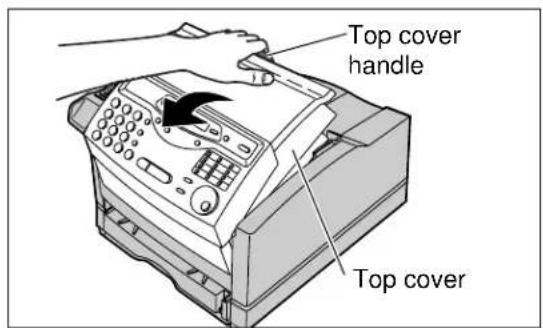
(continued)
Setup
2 Open the protection bag by cutting the end of the bag and remove the toner cartridge.
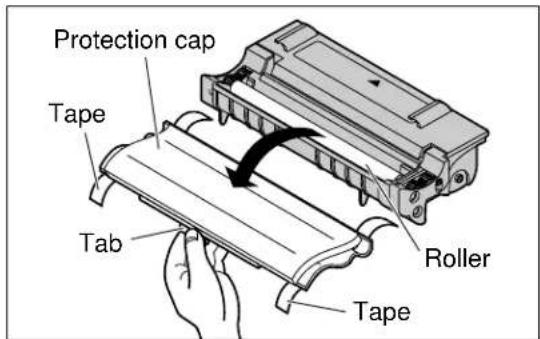
3 Remove the tape and remove the protection cap by holding the tab.
Caution:
- Do not touch the roller.
- Do not put up the toner cartridge.
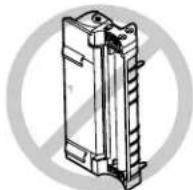
4 Rock the toner cartridge from side to side several times carefully.
5 Install the toner cartridge by holding the two tabs and matching the triangles.
6 Open the protection bag by cutting the end of the bag, and remove the drum unit.


natural_image
Illustration of hands holding a rectangular device with two opposing arrows indicating motion (no text or symbols)

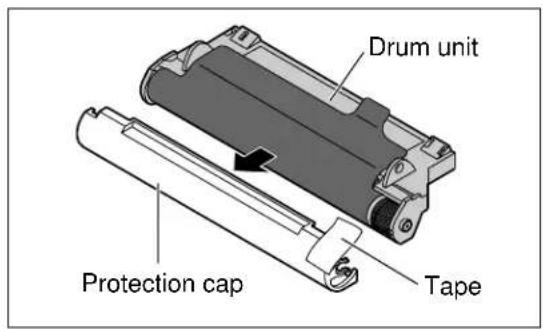
7 Remove the tape and protection cap.
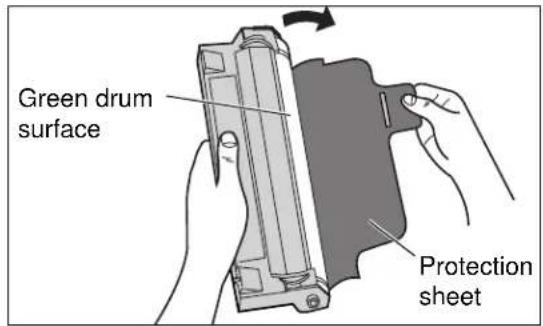
8 Remove the protection sheet.
Caution:
- Do not touch or scratch the green drum surface as this may damage the drum unit.
- Do not expose the drum unit to light for more than 5 minutes as this may damage the drum unit.
9 Install the drum unit on the toner cartridge by holding the two tabs and matching the triangles.

10 Close the top cover securely by pushing down on the dotted area at both ends.

Setup
Recording paper
You can load letter or legal size paper in the paper cassette. The paper cassette can hold up to 250 sheets of 75g / m2 (20 lb.) paper. You can use 60g / m2 to 90g / m2 (16 lb. to 24 lb.) paper.
Loading paper in the paper cassette
1 Lift the paper cassette up slightly and pull it out of the unit.

2 Fan the stack of paper to prevent a paper jam and place the paper into the paper cassette.
- Put the side to be printed face up.
- The height of the stack of paper should not exceed the upper limit on the paper cassette, or the paper may jam or multi-feed.
- When using legal size paper, see next page.
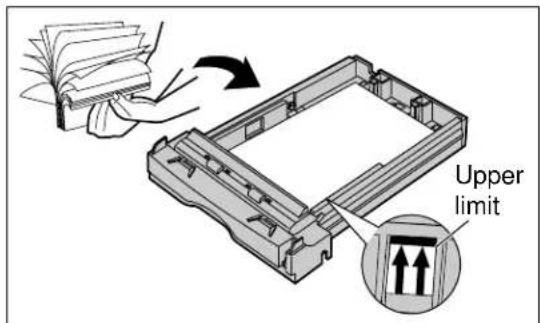
3 Insert the paper cassette into the unit until it clicks into place.

natural_image
Illustration of a printer being placed into a plastic tray, showing the printer's handle and control panel (no text or symbols present)Note:
- Do not use different types or thicknesses of paper in the paper cassette at the same time. This may cause a paper jam.
- Avoid double-sided printing.
- Do not use paper printed from this unit for double-sided printing with other copiers or printers, or a paper jam may occur.
Using legal size paper
Press and hold the button on the paper cassette to release the tray (A), and slide the tray so that "LGL" on the tray aligns with "◀" on the cassette and lock into place (B).

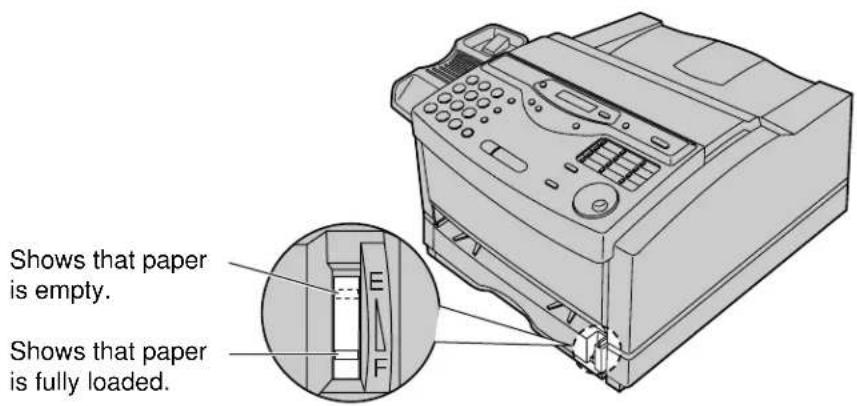
Checking the amount of remaining recording paper
You can see the amount of remaining paper without removing the paper cassette.
Types of paper to avoid
- Extremely smooth or shiny paper or paper that is highly textured
- Coated papers
- Letterhead imprinted with low temperature or thermography. These materials may transfer onto the fusing roller and cause damage. Any pre-printed paper should use inks compatible with 200 °C (392 °F) for 0.1 second.
- Damaged or wrinkled paper, or paper with irregularities such as tabs, staples, etc.
●Multipart forms or carbonless paper
●Paper with a cotton and/or fiber content over 25 % - Ink jet paper (It may transfer onto the fuser roller and cause damage.)
Setup
Paper tray
1 Insert the two tabs of the paper tray into the slots on the paper cassette.

2 Open the paper tray extender by pressing "▽" marked area.

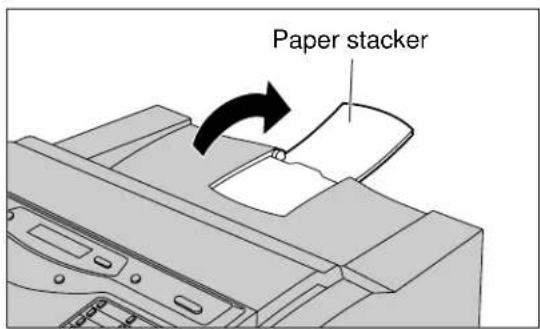
Paper stacker
1 Press "▽" marked area on the paper stacker.

2 Open the paper stacker.
Connections
1 Connect the handset cord.
2 Connect the telephone line cord.
2 Connect the power cord.
●The unit will automatically start to detect the dialing mode of your telephone line (see below).
- When the power is turned on for the first time, the unit will eject the protection sheet and print some basic information.

Note:
- For additional equipment protection, we recommend the use of a surge protector. The following types are available; TELESPIKE BLOK MODEL TSB (TRIPPE MFG. CO.), SPIKE BLOK MODEL SK6-0 (TRIPPE MFG. CO.), SUPER MAX (PANAMAX) or MP1 (ITW LINX).
The warranty does not cover damage due to power line surges or lightning. - When you operate this product, the power outlet should be near the product and easily accessible.
- If you want to connect a personal computer to the unit, see page 82.
- If you want to connect an answering machine to the unit, see page 65.
Automatic dialing mode setting
When the telephone line cord and the power cord are connected, the unit will automatically start to detect the dialing mode of your telephone line.
Display: CHECKING LINE
Wait until one of the following messages is displayed.

- If the power cord is disconnected or a power failure occurs, the unit will detect the dialing mode again when power is restored.
- If you connect the power cord before connecting the telephone line cord, the following messages will be shown alternately.

Connect the telephone line cord.
Setup
Recording paper size
Set the size of recording paper you load in the paper cassette.
This setting is used when the unit determines the reduction rate for incoming faxes.
The following choices are available.
LETTER: 216 mm×279 mm (8 12 "×11")
A4: 210 mm×297 mm (May not be available in the United States.)
LEGAL: 216 mm×356 mm (8 12 "×14")
1 Press MENU.
Display: 1.SYSTEM SET UP
2 Press #, then 16.
PAPER SIZE
Press START/SET/COPY.
=LETTER ▼▲
4 Press ▼ to select the size of paper you load.
5 Press START/SET/COPY.
SETUP ITEM [ ]
6 Press MENU.

Date and time, your logo and facsimile telephone number \_\_\_\_
You should program the date and time, your logo and facsimile telephone number. This information will be printed on each page transmitted from your unit, fulfilling the requirements of the Telephone Protection Act of 1991.
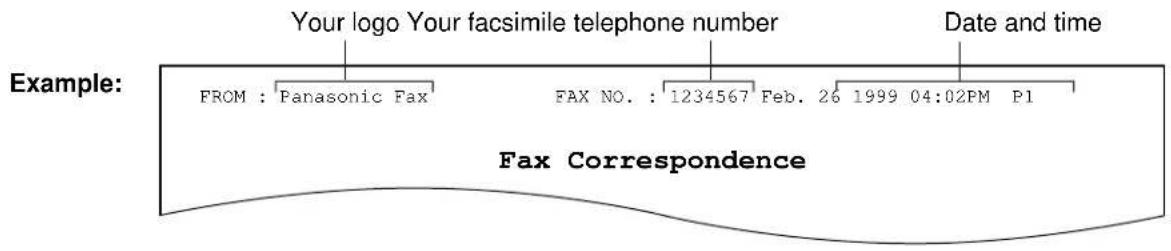
Setting the date and time
1 Press MENU.
Display: 1.SYSTEM SET UP
2 Press #, then 01.
SET DATE & TIME
3 Press START/SET/COPY.
M:01/D:01/Y:99
Cursor
4 Enter the correct month/day/year by selecting each 2 digits using the dial keypad.
6 Enter the correct hour/minute by selecting each 2 digits using the dial keypad.
Press ✕ to select "AM" or "PM".
Example: 3:15PM
- Press 0315.
TIME: 03:15AM
- Press ✝ until "PM" is displayed.
TIME: 03:15PM
7 Press START/SET/COPY.
SETUP ITEM [ ]
8 Press MENU.

Note:
- To enter the year 2000 in step 4, press 00 for the correct year.
- You can enter the number by rotating JOG DIAL in steps 4 and 6. In this case, press ▶ to move the cursor.
- The accuracy of the clock is approximately ±60 seconds a month.
To correct a mistake
- Press ◀ or ▶ to move the cursor to the incorrect number, then make the correction.
- If you press STOP while programming, the display will return to the previous one.
Setup
Setting your logo
The logo can be your company, division or name.
1 Press MENU.
Display: 1.SYSTEM SET UP
2 Press #, then 02.
YOUR LOGO
Press START/SET/COPY.
LOGO=
4 Enter your logo, up to 30 characters, by using the dial keypad. See next page for details.
Example: Bill
- Press ② twice.
LOGO=B
Cursor
- Press ④ six times.
LOGO=Bi
- Press ⑤ six times.
LOGO=Bil
- Press ▶ to move the cursor to the next space and press 5 six times.
LOGO=Bill
5 Press START/SET/COPY.
SETUP ITEM [ ]
6 Press MENU.

Note:
- You can enter your logo by rotating JOG DIAL (see next page).
To correct a mistake
- Press ◀ or ▶ to move the cursor to the incorrect character, then make the correction.
To delete a character
- Move the cursor to the character you want to delete and press STOP.
To insert a character
- Press ◀ or ▶ to move the cursor to the right of where you want to insert the character.
- Press INSERT (One-Touch Dial key 2) to insert a space and enter the character.
To select characters with the dial keypad
Pressing the dial keys will select a character as shown below.
| Keys | Characters |
 | 1 [ ] { } + - / = , . _ ` : ; ? | |
 | A B C a b c 2 |
 | D E F d e f 3 |
 | G H I g h i 4 |
 | J K L j k l 5 |
 | M N O m n o 6 |
 | P Q R S p q r s 7 |
 | T U V t u v 8 |
 | W X Y Z w x y z 9 |
 | 0 ( ) < > ! " # $ % & ¥ * @ ^ ' → |
 | HYPHEN key (To insert a hyphen.) |
 | INSERT key (To insert one character or one space.) |
 | Delete key (To delete a character.) |
 | ◀ key (To move the cursor to the left.) |
 | ▶ key (To move the cursor to the right.)To enter another character using the same number key, move the cursor to the next space. |
To select characters using the JOG DIAL
Instead of pressing the dial keys, you can select characters using the JOG DIAL.
- Rotate JOG DIAL until the desired character is displayed.
- Press ▶ to move the cursor to the next space. • The character displayed in step 1 is inserted.
- Return to step 1 to enter the next character.
Display order of characters

flowchart
graph TD
    A["Capital alphabet"] --> B["Number"]
    B --> C["Symbol"]
    C --> D["Lower case alphabet"]
    D --> A


Setup
Setting your facsimile telephone number
1 Press MENU.
Display: 1.SYSTEM SET UP
2 Press #, then 03.
YOUR FAX NO.
3 Press START/SET/COPY.
NO.=
4 Enter your facsimile telephone number up to 20 digits using the dial keypad.
Example: NO.=1234567
5 Press START/SET/COPY.
SETUP ITEM [ ]
6 Press MENU.
Note:
- You can enter your facsimile telephone number by rotating JOG DIAL. If using JOG DIAL, press ▶ to move the cursor.
- The * button replaces the digit with a "+" and the # button replaces it with a space.
Example (using the dial keypad): +234 5678
Press *234#5678.
- To enter a hyphen in a telephone number, press HYPHEN (One-Touch Dial key 1).

To correct a mistake
- Press ◀ or ▶ to move the cursor to the incorrect number, then make the correction.
To delete a number
- Move the cursor to the number you want to delete and press STOP.
Adjusting volumes
Ringer volume
4 levels (high/middle/low/off) are available.
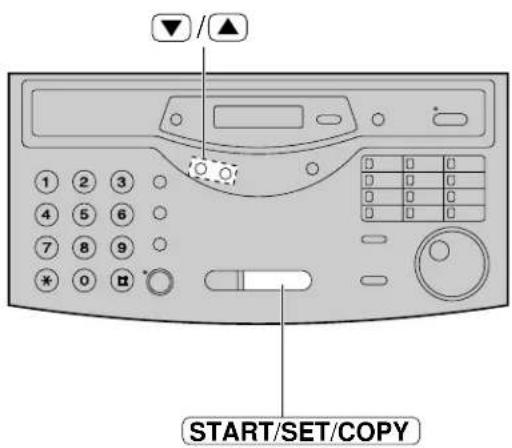
While the unit is idle, press ▼.
■ To turn the ringer off:
- Press repeatedly until the following message is displayed.
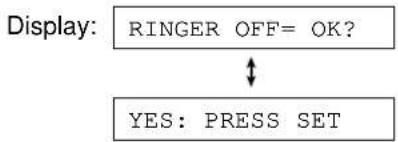
flowchart
graph TD
    A["Display: RINGER OFF= OK?"] --> B{↓}
    B --> C["YES: PRESS SET"]
2. Press START/SET/COPY.
- To turn the ringer back on, press ▲
■ While the ringer volume is set to off:
The display will show the following message.
RINGER OFF
When a call is received, the unit will not ring and will display the following.
INCOMING CALL
Handset receiver volume
5 levels (high to low) are available.
While using the handset, press ▼.
Monitor volume
8 levels (high to low) are available.
While using the monitor, press ▼.
Making and Answering Calls
Voice calls - making
1 Press MONITOR or lift the handset.
Display: TEL=
2 Dial the telephone number.
Example: TEL=2345678
- If you misdial, hang up and dial again.
3 When the other party answers, talk into the handset.
4 When finished talking, replace the handset.

Voice calls - answering
1 When the unit rings, lift the handset.
2 When finished talking, replace the handset.
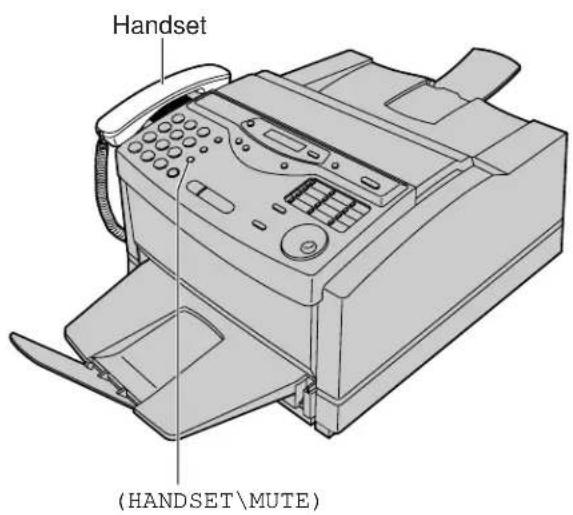
To redial the last number
-
Press MONITOR or lift the handset.
-
Press REDIAL/PAUSE.
-
When the other party answers, talk into the handset.
To mute your voice to the other party
- Press HANDSET MUTE during a telephone conversation using the handset.
Display:
- The other party cannot hear you, but you can hear them.
- To resume the conversation, press HANDSET MUTE again.
TONE, FLASH and PAUSE buttons
TONE button
The TONE (*) button is used for rotary pulse dial services and allows you to temporarily change from the pulse to tone mode during a dialing operation. When you hang up, the unit will automatically return to the pulse mode.
FLASH button
The FLASH button functions as the hookswitch on a regular telephone. If you misdial a telephone number, press the FLASH button firmly.
The FLASH button also allows you to use special features of a host exchange (if connected) or local telephone company services such as call waiting. For further details, contact your host exchange supplier or local telephone company.
Entering pauses
When the REDIAL/PAUSE button is pressed during dialing, a pause will be inserted. Pressing REDIAL/PAUSE once creates a 5 second pause.
Example 1:
If your unit is connected to a host exchange, insert a pause to get an outside line.

flowchart
graph LR
    A["9 PAUSE"] --> B["Telephone number"]
    C["Line access code"] --> A
Example 2:
If a transmission error occurs during an overseas transmission, add two pauses at the end of the telephone number.

flowchart
graph LR
    A["International access code"] --> B["Country code"]
    B --> C["Telephone number"]
    C --> D["PAUSE"]
    C --> E["PAUSE"]

Note:
- TONE, FLASH and PAUSE can be stored into a telephone number in the One-Touch Dial and the JOG DIAL directory.
Making and Answering Calls
Dialing mode —— (touch tone or pulse)
If this feature is set to "AUTO", the unit will automatically set the dialing mode when it is turned on. If you cannot dial, change the dialing mode setting to "TONE" or "PULSE" by following the instructions below.
1 Press MENU.
Display: 1.SYSTEM SET UP
2 Press #, then 13.
DIALING MODE
Press START/SET/COPY.
MODE=AUTO ▼▲
4 Press ▼ to select the desired setting.
5 Press START/SET/COPY.
SETUP ITEM [ ]
6 Press MENU.

Storing names and telephone numbers in the One-Touch Dial
The unit's memory allows you to use the One-Touch Dial for rapid access to your most frequently dialed numbers. 22 stations are available.
- One-Touch Dial keys 1 to 4 can be used as One-Touch Dial keys (DIAL MODE) or as broadcast keys (BROADCAST). These functions cannot be used at the same time. For the broadcast function, see pages 54 to 56.
1 Press DIRECTORY PROGRAM.
Display: PRESS STATION
(HYPHEN)
One-Touch
Dial keys
OR USE JOG-DIAL
For stations 1–4
Press one of the One-Touch Dial keys.
Select the following by pressing .
DIAL MODE ▼▲
Press START/SET/COPY to go to the next prompt.
For stations 5–11
Press one of the One-Touch Dial keys.
For stations 12–22
Press LOWER, then press one of the One-Touch Dial keys.
3 Enter the station name, up to 10 characters, following the instructions on page 31.
Example: NAME=John
4 Press START/SET/COPY.
Example:
5 Enter the telephone number up to 30 digits.
- If you want to enter a hyphen, press HYPHEN (One-Touch Dial key 1).
Example:
6 Press START/SET/COPY.
REGISTERED
PRESS STATION
OR USE JOG-DIAL
- To program other stations, repeat steps 2 to 6.
7 Press DIRECTORY PROGRAM to exit the program.
(SECRET)
START/SET/COPY
(LOWER)
(DIRECTORY\PROGRAM)
Helpful hint:
- You can confirm the stored items on the display (p. 41), or on the telephone number list (p. 123).
Note:
- A hyphen entered in a telephone number is counted as two digits.
To keep a telephone number secret
Press SECRET (One-Touch Dial key 3) after entering the telephone number in step 5.
- A secret number cannot be viewed if this is set.
- The telephone number will not appear on the telephone number list.
- Pressing SECRET does not count as a digit.
To edit a stored station name and number
Enter the desired name in step 3.
Enter the desired number in step 5.
To erase a stored station name and number, see page 40.
One-Touch Dial
Making a voice call using the One-Touch Dial
Before using this feature, program the desired names and telephone numbers into the One-Touch Dial (p. 37).
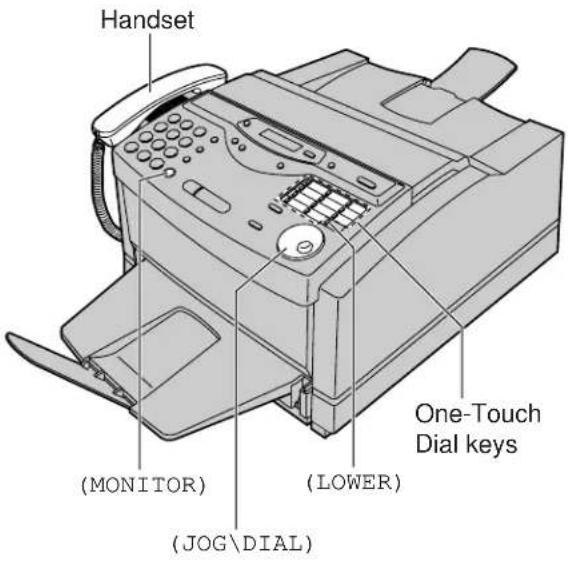
1 Press MONITOR or lift the handset.
Display: TEL=
- Confirm that there are no documents in the document feeder tray.
2 For stations 1–11 Press the desired One-Touch Dial key.
For stations 12–22
Press LOWER, then press the desired One-Touch Dial key.
Example: TEL=
3 When the other party answers, talk into the handset.
4 When finished talking, replace the handset.
Helpful hints:
- You can confirm the stored items on the display (p. 41), or on the telephone number list (p. 123).
- You can use the JOG DIAL directory to select the station name instead of using the One-Touch Dial keys. Rotate JOG DIAL until the desired name is displayed, then press MONITOR or lift the handset.
Storing names and telephone numbers in the JOG DIAL directory
For rapid access to frequently dialed numbers, the unit also provides a JOG DIAL directory (100 stations) in addition to the One-Touch Dial. For your convenience, the following 2 stations have been pre-programmed in the JOG DIAL directory.
HELP-FAX (1-800-435-7329): If you cannot correct a problem after trying the help function (p. 17), call using this station (p. 41).
IQ-FAX-CS (IQ-FAX Customer Service Center) (1-888-332-9728): If you have a problem with IQ-FAX, call using this station (p. 41).
If you do not need the above stations, you can edit or erase them (p. 40).
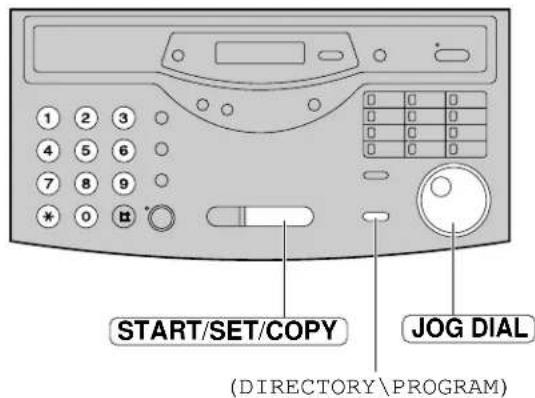
1 Press DIRECTORY PROGRAM.

flowchart
graph TD
    A["PRESS STATION"] --> B["OR USE JOG-DIAL"]
2 Rotate JOG DIAL until the following is displayed.

3 Enter the name, up to 10 characters, following the instructions on page 31.
Example: NAME=Alice
4 Press START/SET/COPY.
NO.=
5 Enter the telephone number, up to 30 digits.
- To enter a hyphen in a telephone number, press HYPHEN (One-Touch Dial key 1).
Example: NO.=5552233
6 Press START/SET/COPY.
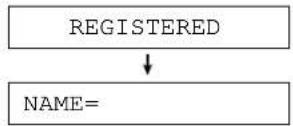
- To program other items, repeat steps 3 to 6.
7 Press DIRECTORY PROGRAM to exit the program.

Note:
- You can confirm the stored items on the display (p. 41), or on the telephone number list (p. 123).
- You can store items during a telephone conversation.
- When the following message is displayed in step 6, you can only store 5 more items.
Display: SPACE= 5 DIRS.
- If the unit shows "JOG-DIAL FULL" in step 1, there is no space to store new stations. Edit or erase unnecessary stations (p. 40).
●A hyphen entered in a telephone number is counted as two digits.
To correct a mistake
- Press ◀ or ▶ to move the cursor to the incorrect character, then make the correction.
To delete a character or number
- Move the cursor to the character or number you want to delete and press STOP.
To keep a telephone number secret
Press SECRET (One-Touch Dial key 3) after entering the telephone number in step 5.
●A secret number cannot be viewed if this is set.
●The telephone number will not appear on the telephone number list.
- Pressing SECRET does not count as a digit.
Editing a stored name and number
1 Rotate JOG DIAL until the desired name is displayed.
Example: Mary
2 Press DIRECTORY PROGRAM.
EDIT=* DELETE=#
3 Press ✱ to select "EDIT".
NAME=Mary
- If you do not need to edit the name, skip to step 5.
4 Edit the name by following the instructions on page 31.
5 Press START/SET/COPY.
Example: NO.=0123456
- If you do not need to edit the telephone number, skip to step 7.
6 Edit the telephone number. For further details, see page 39.
7 Press START/SET/COPY.
REGISTERED
Erasing a stored name and number
You can erase a name and number stored in the One-Touch Dial and JOG DIAL directory.
1 Rotate JOG DIAL until the desired name is displayed.
Example: Smith
2 Press DIRECTORY PROGRAM.
EDIT=* DELETE=#
3 Press # to select "DELETE".
DELETE OK?

YES: PRESS SET
- If you do not want to erase the item, press STOP.
4 Press START/SET/COPY.
DELETED
●The stored name and number are deleted.

Making a voice call using the JOG DIAL directory
Before using this feature, program the desired names and telephone numbers into the directory (p. 39).
1 Rotate JOG DIAL until the desired name is displayed.
Example: Lisa
2 Press MONITOR or lift the handset.
●The unit will start dialing automatically.
DIALING
3 When the other party answers, talk into the handset.
TEL=
4 When finished talking, replace the handset.
Helpful hint:
- You can confirm the stored items on the display (see below) or on the telephone number list (p. 123).
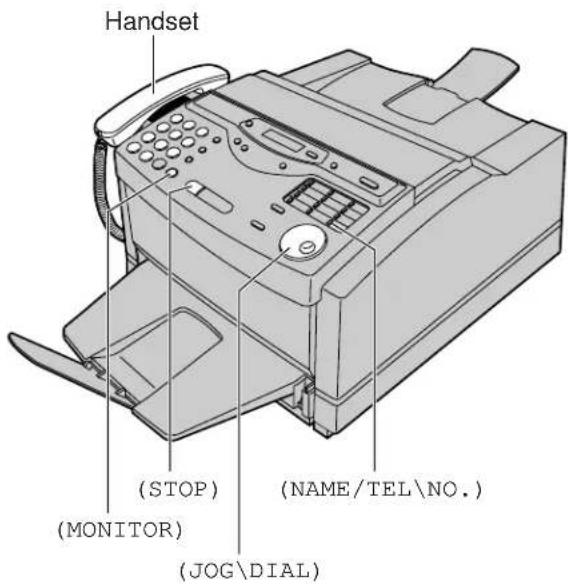
Note:
- If the desired name has not been stored, press STOP and dial the number manually.
To confirm the stored items on the display
- Rotate JOG DIAL until the desired name is displayed.
Example: Kim
- Press NAME/TEL NO.
4567890
- To stop the operation, press STOP.
- Press MONITOR or lift the handset, and the unit will automatically dial the number.
To search for a name by initial
Example: If you want to search for the name "Lisa"
- Rotate JOG DIAL until any name is displayed.
Example: Alan
- Press 5 repeatedly until any name with the initial "L" is displayed (see the character table on page 31).
Larry
- Rotate JOG DIAL to the right until "Lisa" is displayed.
Lisa
- To stop the operation, press STOP.
- Press MONITOR or lift the handset.
●The unit will automatically dial the number.
Note:
- When you want to search for symbols (not letters or numbers), press (*) in step 2.
Voice Contact
Talking to the caller after fax transmission or reception
You can have a conversation with the same call after a fax message is completed. This will save the added expense and time of making another call.
This feature only works when the other party's fax machine is equipped with a voice contact feature.
Initiating voice contact
1 Press MONITOR while transmitting or receiving documents.
Display: VOICE STANDBY
- Your unit will call the other party with a distinctive ring.
- When the other party answers, your unit will emit a distinctive ring.
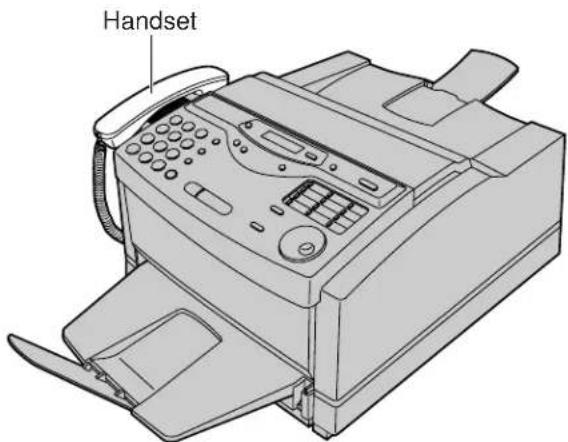
2 Lift the handset to start talking.
Note:
- If you initiate voice contact during transmission, the unit will call you with a distinctive ring after all the documents have been transmitted.
- If you initiate voice contact during reception, the unit will call you with a distinctive ring after the current page of the document is received.

Receiving a request for voice contact
1 If the other party initiates voice contact, your unit will sound a distinctive ring and the following will be displayed.
Display: PLEASE PICK UP
2 Lift the handset within 10 seconds of the distinctive ring to start talking.
Sending a fax manually
1 Open the document feeder tray.
2 Adjust the width of the document guides to the size of the document.
3 Insert the document (up to 15 pages) FACE DOWN until the unit grabs the document and a single beep is heard.
Display: STANDARD
4 If necessary, press RESOLUTION repeatedly to select the desired setting (see below).
5 Press MONITOR or lift the handset. (This step is optional. See note.)
TEL=
6 Dial the fax number.
Example: TEL=5678901
7 When a fax tone is heard: Press [START/SET/COPY], and replace the handset if using it. OR
When the other party answers your call: Lift the handset if using the monitor and ask them to press their start button. When a fax tone is heard, press your START/SET/COPY and replace the handset.
CONNECTING.....

Note:
- While scanning, do not move the pages which have already ejected. A paper jam may occur. Allow the scanning process to finish before viewing documents.
- If you cannot send a fax, confirm the problem by printing a journal report (p. 123) and see page 105 to solve the problem.
- Performing step 5 allows you to identify any possible problems in sending a fax. For the parties with whom you have experienced no problems, you can skip step 5. Dial the fax number and press START/SET/COPY.
- If the other party's fax number is written on the document, you can enter the number by referring to the document before inserting it.
To feed more than 15 pages at a time
Insert the first 15 pages of the document. Add the extra pages (up to 15) before the last page is fed into the unit.
To redial the last number
Press REDIAL/PAUSE.
- If the line is busy, the unit will automatically redial the number up to 2 times.
- During redial, the following will be displayed.
Display: WAITING REDIAL
To stop transmission
Press STOP.
To eject the document, press STOP again.
To select the resolution
Select the desired resolution according to the type of document.
STANDARD: For printed or typewritten originals with normal-sized characters.
FINE: For originals with small printing.
SUPER FINE: For originals with minute printing.
HALF TONE: For originals containing photographs, shaded drawings, etc.
- Using the fine, super fine or half tone setting will increase the transmission time.
- If the resolution setting is changed during feeding, it will be effective from the next sheet.
- The super fine resolution only works with other compatible fax machines.
Sending a fax using the One-Touch Dial
Before using this feature, program the desired names and telephone numbers into the One-Touch Dial (p. 37).
1 Open the document feeder tray.
2 Adjust the width of the document guides to the size of the document.
3 Insert the document (up to 15 pages) FACE DOWN until the unit grabs the document and a single beep is heard.
Display: STANDARD
4 If necessary, press RESOLUTION repeatedly to select the desired setting (p. 43).
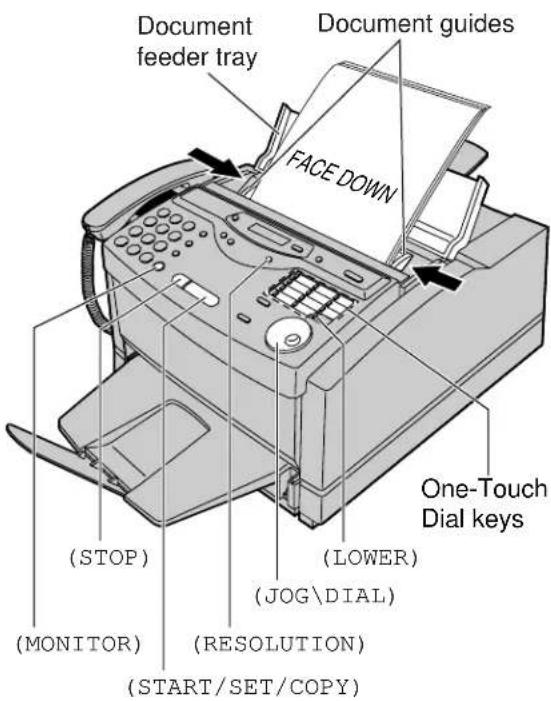
5 For stations 1–11
Press the desired One-Touch Dial key.
For stations 12–22
Press LOWER, then press the desired One-Touch Dial key.
flowchart
graph TD
    A["FAX=<John>"] --> B["CONNECTING..."]
●The unit will start transmission.
Helpful hints:
- You can confirm the stored items on the display (p. 41), or on the telephone number list (p. 123).
- You can use the JOG DIAL directory to select the station name instead of using the One-Touch Dial keys. Rotate JOG DIAL until the desired name is displayed, then press START/SET/COPY.
- The connecting tone will be heard during dialing to tell you the status of the other party's machine (p. 59).
Note:
- While scanning, do not move the pages which have already ejected. A paper jam may occur. Allow the scanning process to finish before viewing documents.
Fax auto redial
If the line is busy or there is no answer, the unit will automatically redial the number up to 2 times.
- This feature is also available for; —sending faxes using the JOG DIAL directory (p. 45), and —delayed transmission (p. 52).
- During redial, the following will be displayed.
Display: WAITING REDIAL
- To cancel redialing, press STOP.
If your unit cannot send a fax
Verify that the number dialed is answered by the other party's machine.
- Press MONITOR.
- For stations 1–11
Press the desired One-Touch Dial key.
For stations 12–22
Press LOWER then press the desired
One-Touch Dial key.
Sending a fax using the JOG DIAL directory \_\_\_\_
Before using this feature, program the desired names and telephone numbers into the directory (p. 39).
1 Open the document feeder tray.
2 Adjust the width of the document guides to the size of the document.
3 Insert the document (up to 15 pages) FACE DOWN until the unit grabs the document and a single beep is heard.
Display: STANDARD
4 If necessary, press RESOLUTION repeatedly to select the desired setting (p. 43).
5 Rotate JOG DIAL until the desired name is displayed.
Example: Alice
- To confirm the number, press NAME/TEL NO.
6 Press START/SET/COPY.
●The unit will start transmission.
Helpful hints:
- You can confirm the stored items on the display (p. 41) or on the telephone number list (p. 123).
- The connecting tone will be heard during dialing to tell you the status of the other party's machine (p. 59).
Note:
●While scanning, do not move the pages which have already ejected. A paper jam may occur. Allow the scanning process to finish before viewing documents.
- If the desired name has not been stored, press STOP and dial the number manually.
- For further details about using the JOG DIAL, see page 41.

If your unit cannot send a fax
Verify that the number dialed is answered by the other party's machine.
- Rotate JOG DIAL until the desired name is displayed.
- Press MONITOR.
IQ-FAX
This feature can only be used by those who apply to the FaxSav service.
IQ-FAX is intelligent faxing which allows you to send faxes via the Internet using the IQ-FAX button. Behind the IQ-FAX button is the FaxSav Global Fax Network which manages the delivery of your fax to any fax machine in the world. It routes your fax via the best and most time-efficient route and will automatically resend your fax for you, if the receiving fax machine is unavailable.
This “fax-only” network has the added advantage of cost efficiency due to the Internet being integrated into the network. Every fax is secure since the FaxSav network utilizes the highest encryption legally allowed, ensuring that your document stays secure. You get the benefits of carefree faxing with savings associated with the use of the Internet. It is simple, quick, and secure.
For more information, contact FaxSav at 1-888-332-9728. This number is pre-programmed in the JOG DIAL directory (p. 39).
How your fax is sent to the other party's fax machine

flowchart
graph LR
    A["Your unit will send a fax to the fax server."] --> B["Fax server"]
    B --> C["The other party's fax machine will receive the fax from the fax server."]
    B --> D["The fax server will receive the fax from your unit, then send it to the other party's fax machine."]
If any transmission errors occur between your unit and the fax server, your unit will automatically redial the fax server up to 2 times.
If any transmission errors occur between the fax server and the other party's fax machine, the fax server will automatically redial the other party's fax machine up to 4 times. If your fax is still not transmitted after 4 attempts, the fax server will fax a Non-Delivery Notice to you. In this case, there is no charge. Set your unit to receive a fax.
How to apply for the FaxSav Internet service for your unit
1 Fill out the attached application form and fax it to 1-800-909-6649.
- The FaxSav company will send you a welcome fax after they have activated your account.
- There is no application or monthly fee. You pay only for the faxes you send.
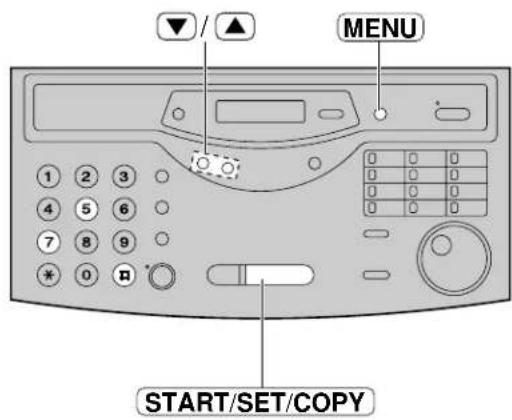
2 To activate the IQ-FAX function from your fax machine, set feature setting #75 to "ON" (see next page).
Turning on the IQ-FAX function
Before programming, confirm that your application has been processed by FaxSav.
![1 Press MENU. Display: 1.SYSTEM SET UP 2 Press #, then 7 5. IQ-FAX 3 Press START/SET/COPY. MODE=OFF ▼▲ 4 Press ▼ or ▲ to select "ON". MODE=ON ▼▲ • If this feature is not required, select "OFF". 5 Press START/SET/COPY. SETUP ITEM [ ] 6 Press MENU.](/content/2026/05/1071125/images/17af73d2d86d7e8ffbb1bb92b4aea015bdb69734ee7a544b1d9421a92939f9b7.jpg)
Sending Faxes
Sending a fax using the Internet
1 Open the document feeder tray.
2 Adjust the width of the document guides to the size of the document.
3 Insert the document (up to 15 pages) FACE DOWN until the unit grabs the document and a single beep is heard.
Display: STANDARD
4 If necessary, press RESOLUTION repeatedly to select the desired setting (p. 43).
5 Press IQ-FAX.
6 Enter the fax number using the dial keypad, the One-Touch Dial or JOG DIAL.
- When you use JOG DIAL, press START/SET/COPY after displaying the desired item.
- You can use the BROADCAST keys (p. 54–56).
Example: FAX=223344
7 Press START/SET/COPY.
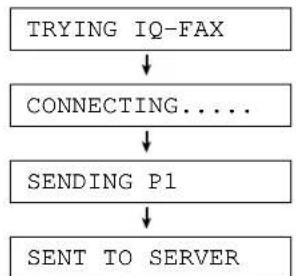
flowchart
graph TD
    A["TRYING IQ-FAX"] --> B["CONNECTING...."]
    B --> C["SENDING P1"]
    C --> D["SENT TO SERVER"]
- If the number you dialed is out of the FaxSav network service area, the unit will show the following messages and send the fax directly over the telephone line.

- If "OUT OF NETWORK" is displayed when sending a fax long-distance or internationally using IQ-FAX, contact FaxSav at 1-888-332-9728.

Note:
- While scanning, do not move the pages which have already ejected. A paper jam may occur. Allow the scanning process to finish before viewing documents.
- If you send a fax using a PC, this feature cannot be used with the IQ-FAX button.
If you cannot send a fax
Contact FaxSav at 1-888-332-9728.
The FaxSav customer service center may send you a program update. While receiving this update, you will not be able to operate the unit and the following message will be displayed for about 3 minutes.
Display: LOADING IQ-DATA
During this time, you will not be able to operate extension telephones.
If a loading error occurs, the unit will display the following message.
LOADING ERROR
In this case, contact FaxSav at 1-888-332-9728.
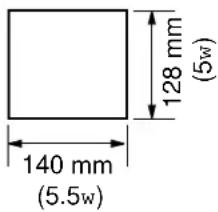
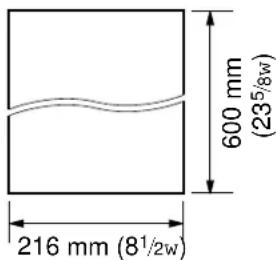
Documents you can send
Minimum size
Maximum size
Effective scanning area

Document weight
Single sheet: 45 g/m² to 90 g/m² (12 lb. to 24 lb.)
Multiple sheets: 60 g/m² to 75 g/m² (16 lb. to 20 lb.)
Note:
- Remove clips, staples or other similar fastening objects.
- Check that ink, paste or correction fluid has dried.
- Do not send the following types of document. Use copies for fax transmission.
—Chemically treated paper such as carbon or carbonless duplicating paper
—Electrostatically-charged paper
—Heavily curled, creased or torn paper
—Paper with a coated surface
—Paper with a faint image
—Paper with printing on the opposite side that can be seen through the front (e.g. newspaper)
Sending Faxes
Sending report for confirmation
The sending report will provide you with a printed record of the fax transmission result.
One of the following choices is available.
ERROR: The sending report will print out only when fax transmission fails (pre-selected setting).
ON: The sending report will always print out, indicating whether fax transmission is successful or not.
OFF: The sending report will not print.
1 Press MENU.
Display: 1. SYSTEM SET UP
2 Press #, then 04.
SENDING REPORT
2 Press START/SET/COPY.
MODE=ERROR ▼▲
4 Press ▼ to select the desired setting.
5 Press START/SET/COPY.
SETUP ITEM [ ]
6 Press MENU.

Sample of a sending report
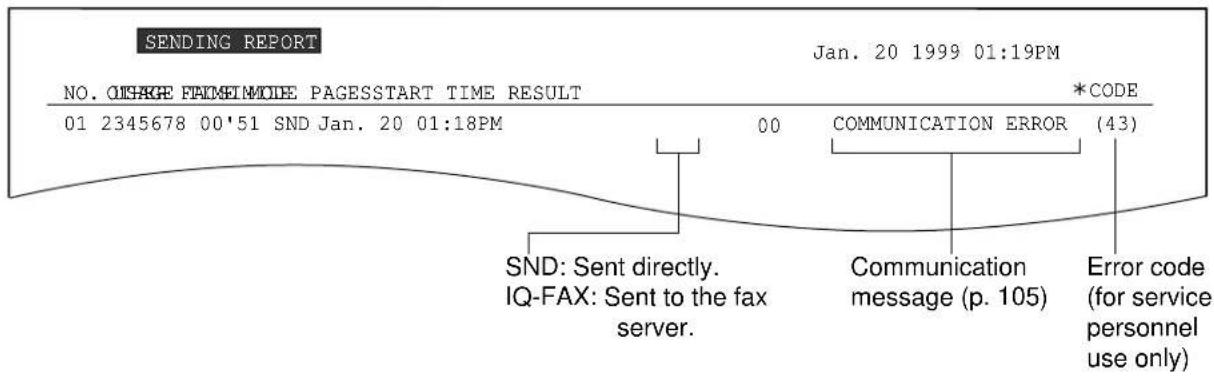
Note:
- If your fax is not transmitted to the other party's fax machine when using the FaxSav network, the FaxSav network will send a Non-Delivery Notice to your unit.
Automatic journal report
This feature prints a journal report automatically after every 35 new fax communications.
After printing, only the oldest communication result will be erased when a new communication occurs. If this feature is deactivated, the unit will store the records of the fax communications, but will not print the journal report automatically.
1 Press MENU.
Display: 1.SYSTEM SET UP
2 Press #, then 22.
AUTO JOURNAL
Press START/SET/COPY.
MODE=ON

4 Press ▼ to select the desired setting.
- If this feature is not required, select "OFF".
5 Press START/SET/COPY.
SETUP ITEM [ ]
6 Press MENU.

Sample of a journal report
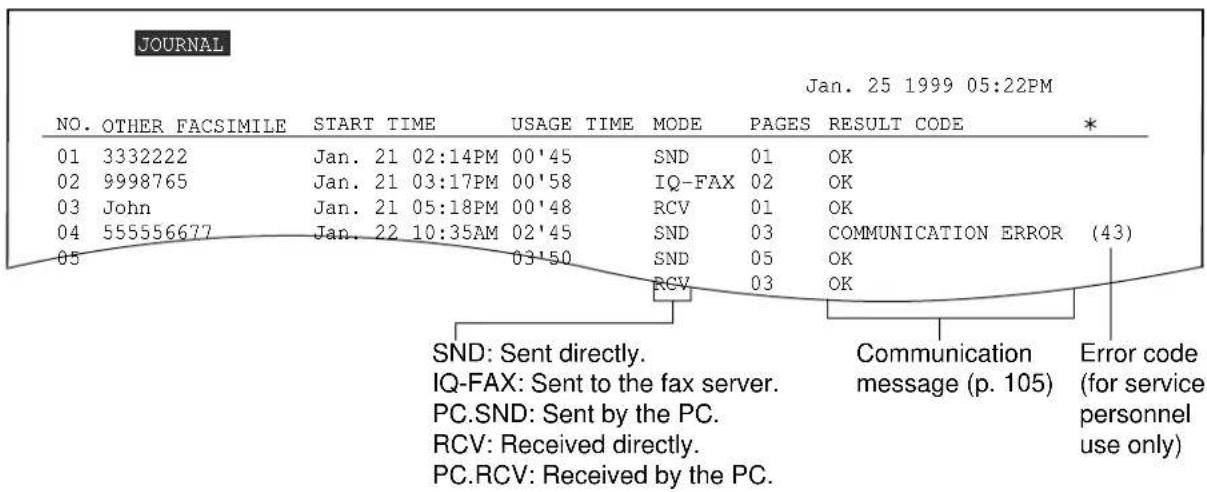
Note:
- You can also print a journal report manually (p. 123).
- If your fax is not transmitted to the other party's fax machine when using the FaxSav network, the FaxSav network will send a Non-Delivery Notice to your unit.
Delayed transmission (sending a fax at a specified time)
Using a built-in clock, this unit can send documents automatically at a specified time. This allows you to take advantage of low-cost calling hours offered by your telephone company. The delayed transmission can be reserved to take place up to 24 hours in advance.
1 Insert the document FACE DOWN until the unit grabs the document and a single beep is heard.
Display: STANDARD
2 Press MENU.
1. SYSTEM SET UP
3 Press #, then 25.
DELAYED SEND
4 Press START/SET/COPY.
MODE=OFF ▼▲
5 Press ▼ or ▲ to select "ON".
MODE=ON ▼ ▲
6 Press START/SET/COPY.
FAX=
7 Enter the fax number using the dial keypad, One-Touch Dial or JOG DIAL.
Press START/SET/COPY.
TIME=12:00AM
9 Enter the transmission start time. Press ☑ to select "AM" or "PM".
Example (using the dial keypad): 11:30PM Press 1130, then press * until "PM" is displayed.
TIME=11:30PM
10 Press START/SET/COPY.
SETUP ITEM [ ]
11 Press MENU.
SEND AT 11:30PM
- At the programmed time, the unit will automatically start transmission.

Note:
- While scanning, do not move the pages which have already ejected. A paper jam may occur. Allow the scanning process to finish before viewing documents.
- You can receive, transmit and copy documents while delayed transmission is set.
To cancel the delayed transmission setting
- Press STOP while the unit is idle.

flowchart
graph TD
    A["SEND CANCELED?"] --> B{?}
    B -->|Yes| C["YES: PRESS SET"]
- Press START/SET/COPY.
From memory
The unit is able to scan and store documents into memory, and then transmit the stored document. The memory capacity is approx. 120 pages based on the CCITT No. 1 Test Chart in standard resolution. For the CCITT No. 1 Test Chart, see page 129.
Transmitting documents from memory
1 Insert the document FACE DOWN.
2 Enter the fax number using the dial keypad.
3 Press QUICK SCAN.
- The document will be fed into the unit and scanned into memory.
- The amount of memory used will be shown as a percentage on the display.

flowchart
graph TD
    A["Display: SAVING DATA"] --> B["PAGES=01 05"]
    B --> C["Amount of memory used (%)"]
●After storing all pages, the unit will transmit the document.

Note:
- While scanning, do not move the pages which have already ejected. A paper jam may occur. Allow the scanning process to finish before viewing documents.
- The stored document will be automatically erased after transmission.
- To cancel the memory transmission, press STOP while or after scanning the document.
- If you select the fine, super fine or half tone resolution, the number of document that can be sent will decrease.
- If the stored pages exceed the memory capacity, the transmission will be canceled.
Multiple stations
This feature is useful for sending the same document to selected parties whose telephone numbers are stored in the One-Touch Dial or JOG DIAL directory. You must program the desired parties into one of the BROADCAST keys (One-Touch Dial key 1, 2, 3 or 4).
Important:
- Before programming, make sure that the desired telephone numbers have been stored in the One-Touch Dial or JOG DIAL directory.
- Each BROADCAST key can be used as a One-Touch Dial key or as a broadcast key. These functions cannot be used at the same time.
Programming telephone numbers into the BROADCAST keys
1 Press DIRECTORY PROGRAM.

flowchart
graph TD
    A["PRESS STATION"] --> B["OR USE JOG-DIAL"]
2 Press one of the BROADCAST keys.

3 Press ▼ or ▲ to select "BROADCAST".

4 Press START/SET/COPY.

5 Enter the stations.
a: Using the One-Touch Dial:
For stations 1–4, press the preset One-Touch Dial key which is not used as the BROADCAST key.
For stations 5–11, press the preset One-Touch Dial key.
For stations 12–22, press LOWER, then press the preset One-Touch Dial key.
Example: DIR=Luke [001]
b: Using the JOG DIAL directory:
Rotate JOG DIAL until the desired name is displayed.

Press START/SET/COPY.

- To enter other stations, repeat this step (up to 20 stations).
6 Press START/SET/COPY after entering all of the desired stations.
flowchart
graph TD
    A["REGISTERED"] --> B["PRESS STATION"]
    B --> C["OR USE JOG-DIAL"]
- To program another BROADCAST key, repeat steps 2 to 6.
7 Press DIRECTORY PROGRAM to exit the program.
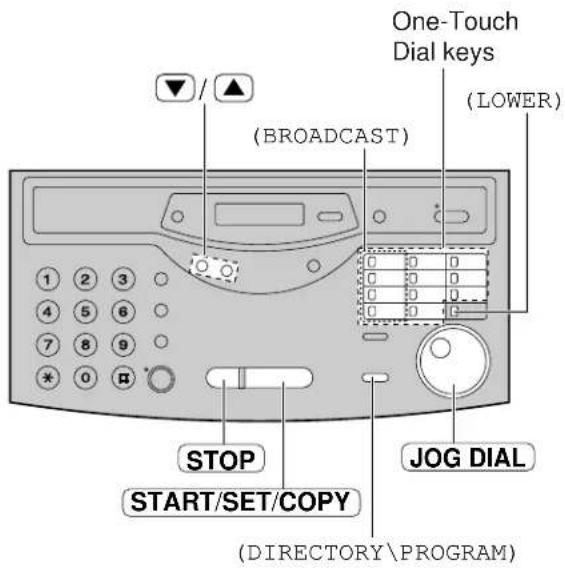
Note:
- If you make a mistake while programming, press STOP, and make the correction.
- Confirm the stored numbers by printing a broadcast list (p. 123).
Adding a new name and number
1 Rotate JOG DIAL until the BROADCAST key you want to edit is displayed.
Example:
Press DIRECTORY PROGRAM.
ADD=* DELETE=#
2 Press * to select "ADD".
Example: Alex
4 Rotate JOG DIAL until the desired name is displayed.
Example: Jack
5 Press START/SET/COPY.

flowchart
graph TD
    A["REGISTERED"] --> B["Example: Mike"]
- To add other stations, repeat steps 4 and 5 (up to 20 stations).
6 Press DIRECTORY PROGRAM to exit the program.

Erasing a stored name and number
1 Rotate JOG DIAL until the BROADCAST key you want to edit is displayed.
Example:
2 Press DIRECTORY PROGRAM.
ADD=* DELETE=#
Press # to select "DELETE".
●The first name will be shown.
Example: Alex
4 Rotate JOG DIAL until the desired name is displayed.
Example: Dick
- If you do not want to erase the item, press STOP.
5 Press START/SET/COPY.

flowchart
graph TD
    A["DELETE OK?"] --> B{↓}
    B --> C["YES: PRESS SET"]
6 Press START/SET/COPY.

flowchart
graph TD
    A["DELETED"] --> B["Example: Alex"]
- To delete other stations, repeat steps 4 to 6.
7 Press DIRECTORY PROGRAM to exit the program.
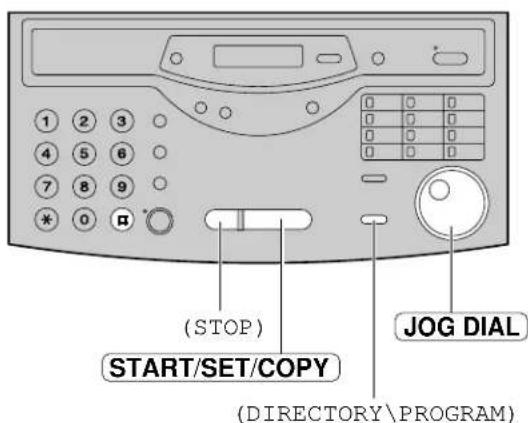
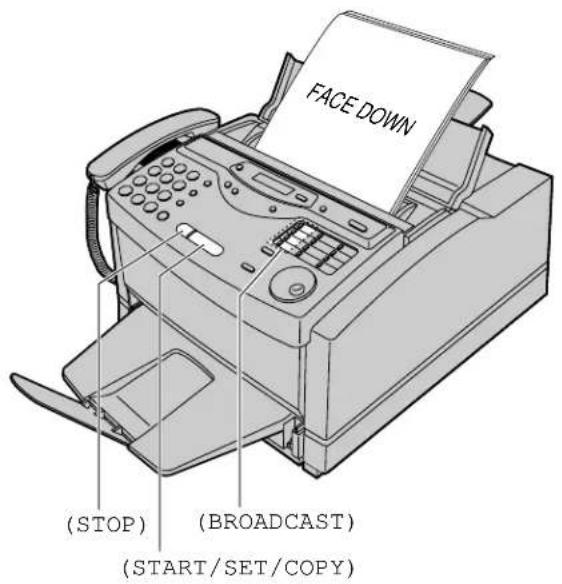
Using BROADCAST keys
The document will be scanned and stored into memory when using a BROADCAST key. After transmission, the stored document will be erased automatically.
The memory capacity is approx. 120 pages based on the CCITT No. 1 Test Chart in standard resolution.
For the CCITT No. 1 test chart, see page 129.
1 Insert the document FACE DOWN.
Press the preset BROADCAST key.
- The document will be fed into the unit and scanned into memory. The unit will then transmit the data to each station, calling each number sequentially.
Note:
- While scanning, do not move the pages which have already ejected. A paper jam may occur. Allow the scanning process to finish before viewing documents.
- If you select the fine, super fine or half tone resolution, the number of pages that the unit can transmit will decrease.
- If one of the stations is busy or does not answer, the station will be skipped. All skipped stations will be redialed up to 2 times after all other stations have been called.
To cancel the broadcast setting
- Press STOP while the unit displays "BROADCASTING".

flowchart
graph TD
    A["SEND CANCELED?"] --> B{?}
    B -->|Yes| C["YES: PRESS SET"]
    B -->|No| D["Process"]
- Press START/SET/COPY.
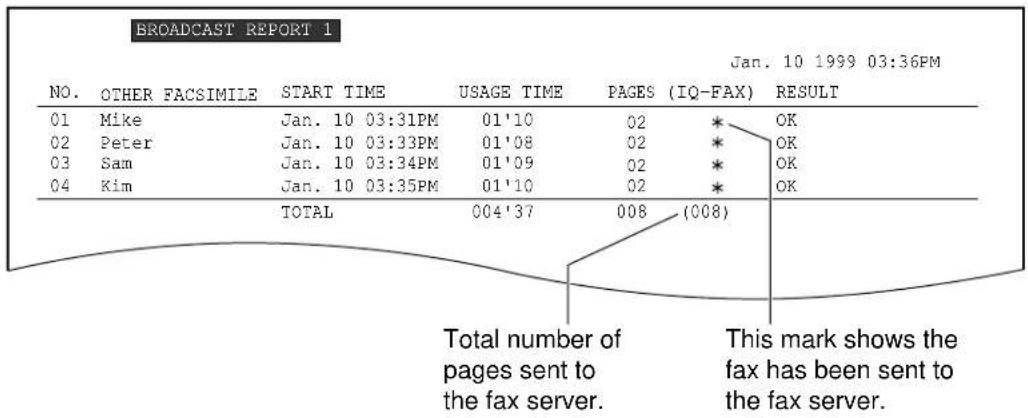
Broadcast report
After all of the transmissions have been completed, the unit will automatically print the following report.
Sample of a broadcast report:
Overseas mode
You may experience difficulty when transmitting documents overseas. This feature makes sending documents easier as the transmission speed is slowed down. Before starting transmission, follow the steps below.
1 Press MENU.
Display: 1.SYSTEM SET UP
2 Press #, then 23.
OVERSEAS MODE
3 Press START/SET/COPY.
MODE=OFF ▼ ▲
4 Press ▼ or ▲ to
select "ON".
MODE=ON ▼ ▲
- If this feature is not required, select "OFF".
5 Press START/SET/COPY.
SETUP ITEM [ ]
6 Press MENU.
Note:
● After transmission, this feature will turn off automatically.
- This feature is not available for transmission using the BROADCAST keys.
- A slower transmission speed will lengthen the call duration. Therefore the calling charges may be higher.

Sending Faxes
Half-tone setting
You can change the setting of the half-tone resolution according to the image to be scanned. You can choose from the following.
PHOTO: Use this setting when the image to be scanned mainly contains photographs.
AUTO: Use this setting when the image to be scanned contains both photographs and words (pre-selected setting).
1 Press MENU.
Display: 1.SYSTEM SET UP
2 Press #, then 38.
HALFTONE MODE
2 Press START/SET/COPY.
MODE=AUTO ▼▲
4 Press ▼ to select the desired setting.
5 Press START/SET/COPY.
SETUP ITEM [ ]
6 Press MENU.

Error correction mode setting
ECM means Error Correction Mode.
You can send documents even if there is static interference on the telephone line, provided both the transmitting and receiving stations are ECM compatible.
ON: The unit functions with ECM communication.
OFF: The unit does not function with ECM communication (pre-selected setting).
1 Press MENU.
Display: 1.SYSTEM SET UP
Press #, then 68.
ECM SELECTION
2 Press START/SET/COPY.
MODE=OFF ▼ ▲
4 Press ▼ to select the desired setting.
5 Press START/SET/COPY.
SETUP ITEM [ ]
6 Press MENU.

Connecting tone
This feature allows you to hear connecting tones, such as a fax tone, ring back tone or busy tone for several seconds when you send a fax using the One-Touch Dial or JOG DIAL directory. This will tell you the status of the other party's machine.
If you hear a:
—Fax tone: The other party's machine is ready for reception.
—Ring back tone: If this tone continues, the other party's machine may not be a facsimile or may have run out of paper. Check with the other party.
—Busy tone: The other party's machine is busy. Let the unit continue redialing or press STOP and try again later.
This feature is set to "ON" as a pre-selected setting. If this feature is not required, you can turn it off.
1 Press MENU.
Display: 1.SYSTEM SET UP
2 Press #, then 76.
CONNECTING TONE
2 Press START/SET/COPY.
MODE=ON ▼ ▲
4 Press ▼ to select the desired setting.
- If this feature is not required, select "OFF".
5 Press START/SET/COPY.
SETUP ITEM [ ]
6 Press MENU.
Note:
●The connecting tone volume cannot be adjusted.

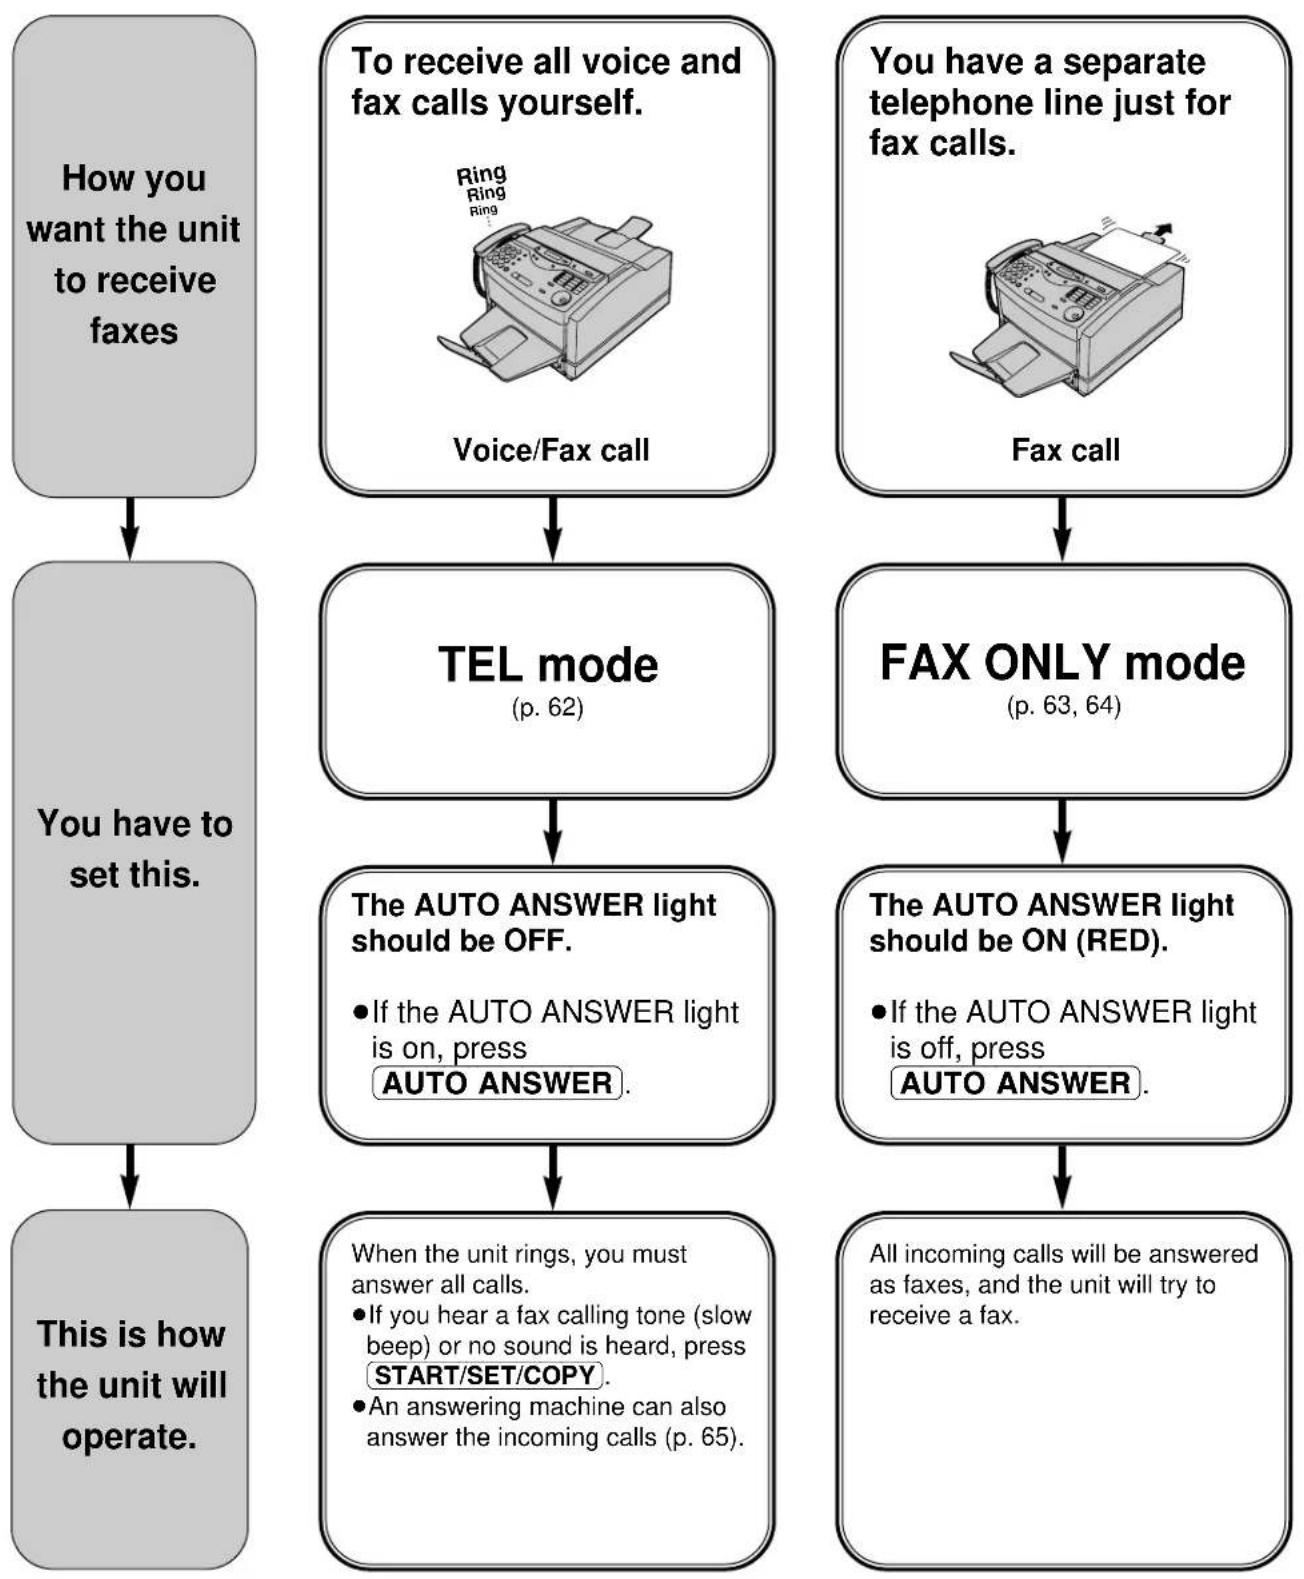
Setting the unit to receive calls
Option A Option B
flowchart
graph TD
    A["How you want the unit to receive faxes"] --> B["You have to set this."]
    B --> C["This is how the unit will operate."]

    A --> D["To receive all voice and fax calls yourself."]
    D --> E["Voice/Fax call"]
    E --> F["TEL mode (p. 62)"]
    F --> G["The AUTO ANSWER light should be OFF."]
    G --> H["When the unit rings, you must answer all calls."]
    H --> I["• If you hear a fax calling tone (slow beep) or no sound is heard, press START/SET/COPY."]
    H --> J["• An answering machine can also answer the incoming calls (p. 65)."]

    D --> K["You have a separate telephone line just for fax calls."]
    K --> L["Fax call"]
    L --> M["FAX ONLY mode (p. 63, 64)"]
    M --> N["The AUTO ANSWER light should be ON (RED)."]
    N --> O["• If the AUTO ANSWER light is off, press AUTO ANSWER."]
    M --> P["All incoming calls will be answered as faxes, and the unit will try to receive a fax."]
Option C Option D
You have Distinctive Ring service from your telephone company (this allows you to have up to 3 telephone numbers on the same line).
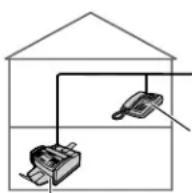
2-number example
To the same line
Telephone No.
(555-1111)
Facsimile No. (555-1333) Facsimile
You want to use the fax machine with an answering machine.
Voice/Fax call
To activate the Distinctive Ring mode, select the same ring pattern assigned to the facsimile number in feature #31 (p. 68, 69).
A: Standard ring (one long ring)
B: Double ring (two short rings)
C: Triple ring (short-long-short rings)
D: Other triple ring (short-short-long rings)
- Connect an answering machine to the EXT jack.
- Set the number of rings on the answering machine to less than 4.
- Record a greeting message on the answering machine.
- Turn on the answering machine.
- Program the remote activation ID into your fax machine.
For further details, see pages 65 to 67.
Use with TEL mode or FAX ONLY mode.
If you use with FAX ONLY mode, set the FAX ONLY mode ring count to "5 EXT.TAM" (p. 64).
The unit will automatically answer calls received at your facsimile number. If a call is received at the other telephone number, the unit will operate based on the set receive mode.
When receiving voice calls:
The answering machine will record voice messages.
When receiving fax calls:
The fax machine will receive documents.
Other options
Voice mail If you have a voice mail service from your telephone company, you also need to subscribe to a Distinctive Ring service (p. 68, 69).
With PC
If you have a computer attached to the same telephone line, see page 66.
TEL/FAX mode
If you are near the unit and want to use it to receive your voice calls yourself and fax calls automatically, see pages 70 to 73.
Remote activation
If you answer a telephone in another room and hear the fax tone, you can activate the unit remotely by pressing × 9 (p. 74).
TEL mode (answering all calls manually)
If the AUTO ANSWER light is on, turn it off by pressing AUTO ANSWER.
Display: TEL MODE
1 When the unit rings, lift the handset to answer the call.
2 When: — document reception is required, — a fax calling tone (slow beep) is heard, or — no sound is heard, press START/SET/COPY.
CONNECTING.....
3 Replace the handset. • The unit will start reception.
Note:
- If you do not answer the call within 15 rings, the unit will temporarily switch to the fax and the caller can send documents.
- Manual feeding is not available for receiving documents.

To stop receiving
Press STOP.
Friendly reception feature
When you answer a call and hear a fax calling tone (slow beep), the unit will automatically start receiving.
- If this feature is not required, set to "OFF" (p. 77).
Memory reception
When a printing problem is detected, the unit will temporarily store the received document into memory.
While document is in memory, the unit will:
— display an error message and the following message alternately.
Display: FAX IN MEMORY
— alert you with a slow beep (memory reception alert).
- Follow the instructions on pages 106 and 107 to solve the problem and print the stored document.
- For memory capacity, see page 129.
FAX ONLY mode (all calls are received as faxes)
Activating the FAX ONLY mode
Press AUTO ANSWER if the AUTO ANSWER light is off.
●The display will show the following.
Display: FAX ONLY MODE
- The unit will automatically answer all calls and only receive fax documents.
- The number of rings before a call is answered can be changed (p. 64).
Note:
- This mode should not be used with a telephone line which is used for both voice and fax calls. When the unit answers the call, fax communication is attempted even if someone is trying to call you.

If you have a telephone line just for receiving faxes, we recommend the following setup.

flowchart
graph TD
    A["House"] --> B["Phone"]
    A --> C["Phone"]
    D["Phone"] --> E["Line 1 – Voice calls"]
    F["Printer"] --> G["Line 2 – Fax calls"]
Only a fax machine is connected.
Example: One telephone line is used for voice calls and a separate telephone line for faxes. If someone sends a fax to Line 2, the fax machine will ring.
Receiving Faxes
Setting the ring count in the FAX ONLY mode
This setting determines the number of rings before the unit answers a call in the FAX ONLY mode. You can choose from 1 to 5 rings. If you use the unit with an answering machine (p. 65–67), select "5 EXT.TAM".
Helpful hints:
- To answer a call before the unit does, increase the number of rings.
- If you have difficulty receiving faxes, the other parties may have tried to send faxes before confirming if your unit answered or not. Decrease the number of rings.
1 Press MENU.
Display: 1. SYSTEM SET UP
2 Press #, then 06.
FAX RING COUNT
3 Press START/SET/COPY.
RING=1 ▼ ▲
4 Press ▼ to select the desired number, or enter the number using the dial keypad.
5 Press START/SET/COPY.
SETUP ITEM [ ]
6 Press MENU.

Using the unit with an answering machine
Setting up the fax machine with an answering machine
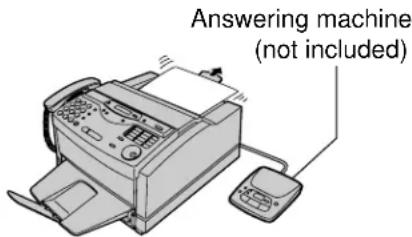
1 Connect the answering machine to the EXT jack on the back of the fax machine.

2 If you plan to use the FAX ONLY mode on the fax machine, set the number of rings on the answering machine to less than 4.
●This will allow the answering machine to answer the call first.
Record a greeting message on the answering machine.
Example: "This is (your name, business and/or telephone number). We are unable to answer the phone right now. To send a fax, start transmission. To leave a message, please speak after the beep. Thank you."
4 Turn on the answering machine.
5 Set the receive mode of the fax machine to the TEL mode (p. 62) or FAX ONLY mode (p. 63).
- If you set it to FAX ONLY mode, set the ring count in the FAX ONLY mode (feature setting #06) to "5 EXT.TAM" (p. 64). The number of rings on the answering machine should be less than the FAX ONLY mode ring count so that the answering machine will answer a call first. Using the FAX ONLY mode will allow you to receive faxes if the answering machine is full.
6 Check the remote access code of your answering machine and program the same code into the remote operation ID of the fax machine (feature setting #12). See page 67.
Note:
- Do not pause for more than 4 seconds during the greeting message. If a 4-second pause is stored in the greeting message, all incoming calls will be routed to the unit from the answering machine even while the greeting message is playing.
- We recommend you make the greeting message around 10 seconds long. If the greeting message is too long, some incoming fax calls may not be answered by the fax machine.
- Each time the unit receives a document, a silent pause or fax tone may be recorded on the answering machine.
Receiving Faxes
How the fax machine and answering machine work
Receiving voice calls
The answering machine will record voice messages automatically.
Receiving fax calls
The fax machine will receive documents automatically.
Receiving a voice message and fax document in one call
The answering machine will record the voice message first. The fax machine will then be activated by the caller's request and receive the document. For further details, see page 67.
To use the unit with an answering machine and computer, we recommend the following setup.
Always connect the fax machine directly to the wall jack.

Note:
- Set the TEL mode on the fax machine.
●The device which has the shortest ring count will answer a call first. Confirm the ring count for each device. - If you use your computer as an answering machine, connect the telephone line cord from the EXT jack on the back of the fax machine to the computer.
Remote operation of your answering machine (remote activation ID)
Some answering machines will allow you to retrieve voice messages from a remote location. To deactivate the fax machine while you are checking your messages, set the remote activation ID code for the answering machine.
Important:
● This ID must be different from the fax activation code (p. 74).
1 Press MENU.
Display: 1.SYSTEM SET UP
2 Press #, then 12.
REMOTE TAM ACT.
3 Press START/SET/COPY.
4 Press ▼ or ▲ to
MODE=OFF ▼▲
select "ON".
MODE=ON ▼ ▲
5 Press START/SET/COPY.
ID=11
●The display will show the pre-selected ID.
6 Enter your ID number.
- This ID can be from 1 to 5 digits in length using 0–9, * and #.
7 Press START/SET/COPY.
SETUP ITEM [ ]
8 Press MENU.

Receiving a voice message and fax document in one call
The caller can leave a voice message and send a fax document during the same call. Inform the caller of the following procedures beforehand.
- The caller calls your fax machine.
●The answering machine will answer the call.
-
The caller can leave their message after the greeting message.
-
The caller presses Ⓞ9 (pre-selected fax activation code).
●The fax machine will activate the fax function.
- The caller presses their start button to send a document.
Note:
●The fax activation code can be changed (p. 74).
- If the wrong fax activation code is entered, the caller must wait at least 5 seconds to reenter the correct code.
Distinctive Ring service
(ring pattern detection feature)
This feature can only be used when you subscribe to a Distinctive Ring service from your telephone company. For more information on the availability of this service, contact your telephone company.
This feature will work regardless of the AUTO ANSWER or receive mode settings.
What is a Distinctive Ring service?
A Distinctive Ring service will give you up to 3 telephone numbers on a single telephone line, each having a different ring pattern.
Ring patterns:
| Standard ring (one long ring) |  |
| Double ring (two short rings) |  |
| Triple ring (short-long-short rings) |  |
| Other triple ring (short-short-long rings) |  |
If you subscribe to a Distinctive Ring service, you can assign telephone numbers for personal numbers, business numbers, fax numbers, and so on.
When a call is received, you will know which number is being called by the ring pattern.
Example:
| Your telephone number | Ring pattern | Use |
| 012 1234 | Standard ring | Personal |
| 012 5678 | Double ring | Business |
| 012 9876 | Triple ring | Facsimile |
Using one of the telephone numbers as a facsimile number
Program the ring pattern assigned to the facsimile number (see next page).
When the unit detects a call matching the selected Distinctive Ring pattern, it will activate the fax function.
Setting the Distinctive Ring pattern assigned for faxes
Select the ring pattern of the facsimile number that is assigned by your telephone company.
1 Press MENU.
Display: 1.SYSTEM SET UP
2 Press #, then 31.
RING DETECTION
3 Press START/SET/COPY.
MODE=OFF ▼ ▲
4 Press ▼ to select the ring pattern to be assigned to the facsimile number.
A: Standard ring (one long ring)
B: Double ring (two short rings)
C: Triple ring (short-long-short rings)
D: Other triple ring (short-short-long rings)
OFF: Turns off the feature (pre-selected setting).
5 Press START/SET/COPY.
- When the setting is changed from OFF to either A, B, C or D, the unit will print an information list.

6 Press MENU.
Note:
- The unit will automatically answer a Distinctive Ring call after the first ring regardless of the AUTO ANSWER, receive mode or ring count setting.
- If you have only 1 Distinctive Ring number, the most likely setting will be "B".

TEL/FAX mode
(receiving voice calls with rings and fax calls without rings when you are near the unit)
Use this mode when you are always near the unit, are not using an answering machine and want the fax machine to detect faxes without ringing. When a call is received, the unit will work as follows. If you have an extension telephone connected, see next page.

flowchart
graph TD
    A["A call is received."] --> B["Voice call"]
    B --> C["The unit will not ring.* TEL/FAX delayed ring count"]
    C --> D["Fax calling tone**"]
    D --> E["The unit will automatically receive documents without ringing."]
    E --> F["Answer the call."]
    F --> G["Silent fax recognition ring count"]
    G --> H["Ring Ring Ring"]
    H --> I["The unit will automatically activate the fax function for fax machines that do not send a fax calling tone."]
* A telephone fee will be charged to the caller from this point.
** A fax calling tone is automatically generated by the sending fax machine. Some fax machines do not have this capability.
*** While ringing, the unit will emit a different ring back tone to the calling party.
Note:
●The unit will display the following when a call is received.
Display:
INCOMING CALL
- Some fax messages that are transmitted manually may not send a fax calling tone. These calls must be received manually.
●The ringer should be on (p. 33).
Ring pattern when an extension telephone is connected
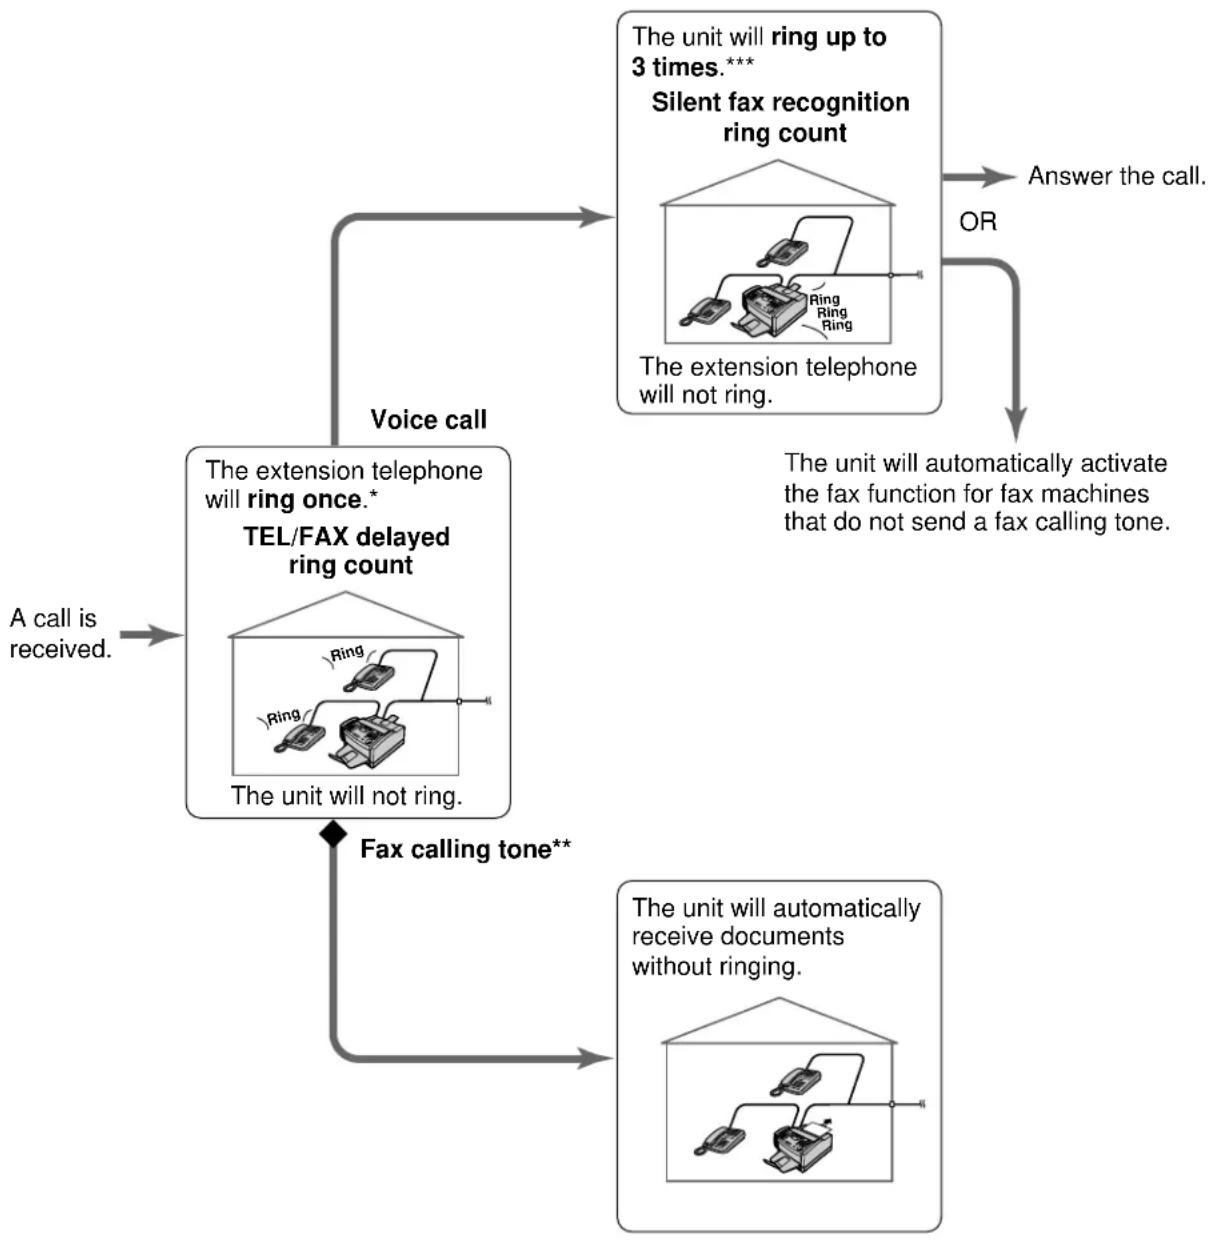
flowchart
graph TD
    A["Voice call"] --> B["The extension telephone will ring once.* TEL/FAX delayed ring count"]
    B --> C["A call is received."]
    C --> D["The unit will not ring."]
    D --> E["Fax calling tone**"]
    E --> F["The unit will automatically receive documents without ringing."]
    F --> G["Answer the call."]
    G --> H["Silent fax recognition ring count"]
    H --> I["The extension telephone will not ring."]
    I --> J["OR"]
    J --> K["The unit will automatically activate the fax function for fax machines that do not send a fax calling tone."]
TEL/FAX delayed ring count:
Up to 4 ring signals will be generated before the unit answers, depending on feature setting #78 on page 73. In the TEL/FAX mode, the unit will not generate an audible ring during this time.
Silent fax recognition ring count:
The unit generates audible rings to indicate that it is receiving a voice call. 3 to 6 rings will be generated, depending on feature setting #30 on page 73. This signal will not ring at an extension telephone.
Receiving Faxes
Changing the AUTO ANSWER setting to the TEL/FAX mode
1 Press MENU.
Display: 1.SYSTEM SET UP
2 Press #, then 77.
AUTO ANSWER
3 Press START/SET/COPY.
MODE=FAX ONLY ▼ ▲
4 Press ▼ or ▲ to
select "TEL/FAX".
MODE=TEL/FAX ▼▲
5 Press START/SET/COPY.
PRINTING
●The unit will print an information list.
SETUP ITEM [ ]
6 Press MENU.
7 If the AUTO ANSWER light is off, turn it on by pressing AUTO ANSWER.
TEL/FAX MODE
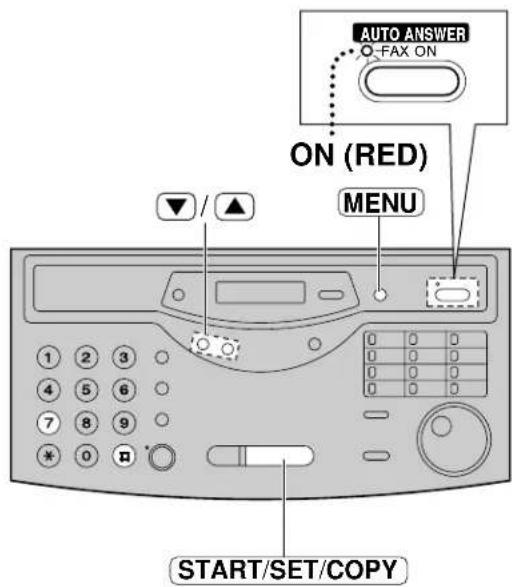
Note:
- To return to the FAX ONLY mode, select "FAX ONLY" in step 4.
We recommend the following setup.

natural_image
Line drawing of a person sitting at a desk under a roof, with a printer and paper nearby (no text or symbols)Only a fax machine is connected and you are always near the fax machine.

Do not connect an answering machine when using the TEL/FAX mode.
TEL/FAX delayed ring count
This setting determines the number of times the extension telephone rings in the TEL/FAX mode. You can choose from 1 to 4 rings.
This setting does not need to be changed if an extension telephone is not connected.
![1 Press MENU. Display: 1.SYSTEM SET UP 2 Press #, then 7 8. TEL/FAX RING 3 Press START/SET/COPY. RING=1 ▼▲ 4 Press ⬇ to select the desired number, or enter the number using the dial keypad. 5 Press START/SET/COPY. SETUP ITEM [ ] 6 Press MENU.](/content/2026/05/1071125/images/a99a4bddb38935d24ac9a85f16b8621d6db90fa842de3bc4f06458901b5972d9.jpg)
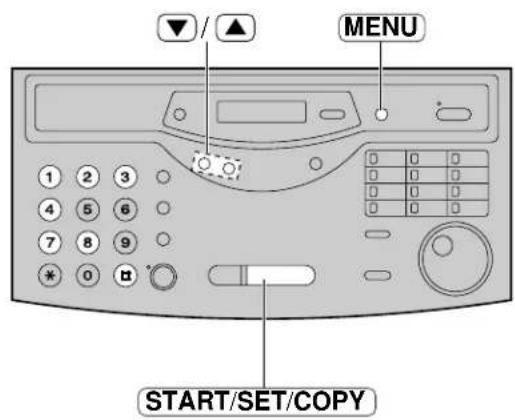
Note:
- If the number of rings is increased, you may not be able to receive documents from some older model fax machines which do not send a fax calling tone.
Silent fax recognition ring count
When the unit detects a voice call in the TEL/FAX mode, it will ring up to 3 times. The number of rings can be changed up to 6. If a voice call is not answered within the selected number of rings (3 to 6 rings), the unit will automatically start to receive a fax.
![1 Press MENU. Display: 1.SYSTEM SET UP 2 Press #, then 3 0. SILENT FAX RING 3 Press START/SET/COPY. RING=3 ▼▲ 4 Press ⬇ to select the desired number, or enter the number using the dial keypad. 5 Press START/SET/COPY. SETUP ITEM [ ] 6 Press MENU.](/content/2026/05/1071125/images/c4b51e1715fbabf97f1fe54f074557c4e02a272197de1eb91674982e2280f20d.jpg)

Note:
- If the number of rings is increased, you may not be able to receive documents from some older model fax machines which do not send a fax calling tone.
Receiving Faxes
Extension telephone
If you connect an extension telephone to your unit or on the same line, you can receive fax documents using the extension telephone.
You do not have to press START/SET/COPY on the unit.
Important:
- Use a touch tone telephone as the extension telephone and enter the fax activation code firmly.
1 When the extension telephone rings, lift the handset.
2 When: —document reception is required, —a fax calling tone (slow beep) is heard, or —no sound is heard, press ⓧ9 (pre-selected fax activation code) firmly.
3 Hang up the handset. • The unit will start reception.

Note:
- You can change the fax activation code (see below).
Fax activation code
The fax activation code is required in the following cases:
—when receiving faxes using an extension telephone (see above).
—when receiving a voice message and fax document in the same call (p. 67).
Important:
●This code should be different from the remote activation ID (p. 67).
1 Press MENU. Display: 1.SYSTEM SET UP
2 Press #, then 41.
3 Press START/SET/COPY.
4 Press ▼ or ▲ to select "ON". • If this feature is not required, select "OFF".
5 Press START/SET/COPY. CODE=*9
●The display will show the pre-selected code.
6 Enter the new code. - This code can be from 2 to 4 digits in length using 0–9 and *.
7 Press START/SET/COPY. SETUP ITEM [ ]
8 Press MENU.

Note:
- If you subscribe to any special telephone company services which require a code, all or part of the fax activation code must be different from the service access code.
- The fax activation code should not be set to "0000".
Other size documents
When the size of the document sent by the other party is larger than the recording paper, the unit can reduce each page of the document to fit on one page.
The reduction rate is determined by a combination of the size of the recording paper and the received document.
You can choose the desired reduction rate from the following.
A4 → LTR: The unit can reduce an A4-size document to fit on letter size recording paper.
LEGAL → LTR: The unit can reduce a legal size document to fit on letter size recording paper (pre-selected setting).
OFF: The unit does not reduce any incoming faxes. Oversized documents will be divided when printed out.
To change the setting, proceed as follows.
1 Press MENU.
Display: 1.SYSTEM SET UP
2 Press #, then 37.
AUTO REDUCTION
3 Press START/SET/COPY.
=LEGAL→LTR ▼▲
4 Press ▼ to select the desired setting.
5 Press START/SET/COPY.
SETUP ITEM [ ]
6 Press MENU.

Note:
- Documents usually have a heading on the top of each page which contains the sender's name/telephone number. This increases the length of each page. Therefore using the reduction mode is recommended.
- If the appropriate reduction rate is not programmed, the document will be divided.
Silent detection
(receiving faxes from older model fax machines)
This feature allows the unit to activate the fax function automatically if a silent pause longer than 4 seconds is detected when using an answering machine.
Helpful hints:
- If you wish to receive documents from fax machines that do not send a fax calling tone, activate this feature.
- If you use an answering machine to give greeting messages and record incoming messages on a single cassette tape, deactivate this feature.
1 Press MENU.
Display: 1. SYSTEM SET UP
2 Press #, then 40.
SILENT DETECT.
3 Press START/SET/COPY.
MODE=ON ▼ ▲
4 Press ▼ to select the desired setting.
- If this feature is not required, select "OFF".
5 Press START/SET/COPY.
SETUP ITEM [ ]
6 Press MENU.

Memory reception alert
When a received document is stored into memory due to a problem, the unit will alert you with beep tones. If you hear slow beeps, clear the printing problem or supply paper to print the stored document. The beep tones will stop.
1 Press MENU.
Display: 1.SYSTEM SET UP
2 Press #, then 4 4.
RECEIVE ALERT
3 Press START/SET/COPY.
MODE=ON ▼ ▲
4 Press ▼ to select the desired setting.
- If this feature is not required, select "OFF".
5 Press START/SET/COPY.
SETUP ITEM [ ]
6 Press MENU.

Friendly reception
The friendly reception feature allows you to receive fax documents automatically without pressing START/SET/COPY (p. 62).
When this feature is deactivated, you have to press START/SET/COPY to receive fax documents each time you answer a fax call.
1 Press MENU.
Display: 1.SYSTEM SET UP
Press #, then 46.
FRIENDLY RCV
3 Press START/SET/COPY.
MODE=ON ▼ ▲
4 Press ▼ to select the desired setting.
- If this feature is not required, select "OFF".
5 Press START/SET/COPY.
SETUP ITEM [ ]
6 Press MENU.

Pager call - when your unit receives a fax
This feature allows your unit to call your pager when your unit receives a fax document.
1 Press MENU.
Display: 1. SYSTEM SET UP
2 Press #, then 70.
FAX PAGER CALL
3 Press START/SET/COPY.
4 Press ▼ or ▲ to
MODE=OFF ▼ ▲
select "ON".
MODE=ON ▼ ▲
- If this feature is not required, select "OFF".
5 Press START/SET/COPY.
NO.=
6 Enter your pager number.
- You can enter a total of 46 digits and/or pauses.
Example:
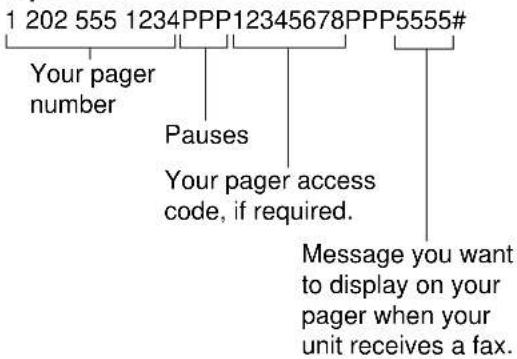
flowchart
graph TD
    A["1 202 555 1234PPP12345678PPP5555#"] --> B["Your pager number"]
    B --> C["Pauses"]
    C --> D["Your pager access code, if required."]
    D --> E["Message you want to display on your pager when your unit receives a fax."]
7 Press START/SET/COPY.
●The unit will dial the stored pager number.
PAGER TEST
8 Confirm if the message is displayed on your pager.
9 Press MONITOR.
10 If the AUTO ANSWER light is off, turn it on by pressing AUTO ANSWER.
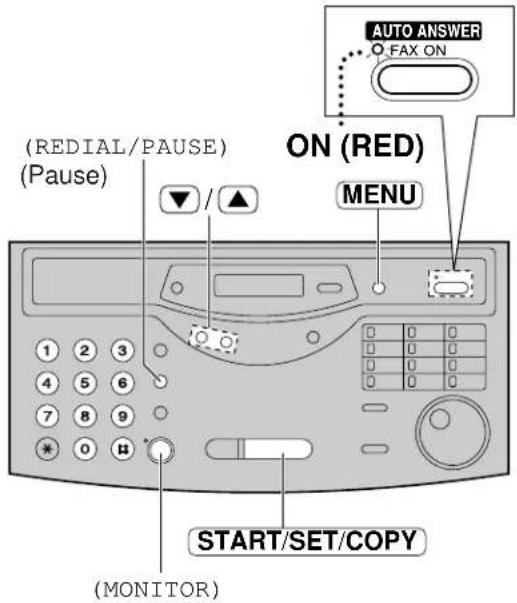
How your unit and pager work

flowchart
graph LR
    A["Printer"] --> B["Pager company"]
    B --> C["Final Output: 5555"]
When your unit receives a fax document, it will call your pager company.
Your pager company will call your pager.
A few minutes later, your pager will display the same message you entered in step 6 above. (For example: 5555)
Toner save
With the toner save feature on, toner consumption can be decreased, resulting in a longer effective cartridge life.
This feature is available when printing received fax documents, help lists and other reports/lists or copying documents.
![1 Press MENU. Display: 1.SYSTEM SET UP 2 Press #, then 7 9. TONER SAVE 3 Press START/SET/COPY. MODE=OFF ▼▲ 4 Press ▼ or ▲ to select "ON". MODE=ON ▼▲ 5 Press START/SET/COPY. SETUP ITEM [ ] 6 Press MENU.](/content/2026/05/1071125/images/d0ac2adff31be3fbf1288b75c1d621a48d94c47b9ab518e20999b5f854fac64e.jpg)
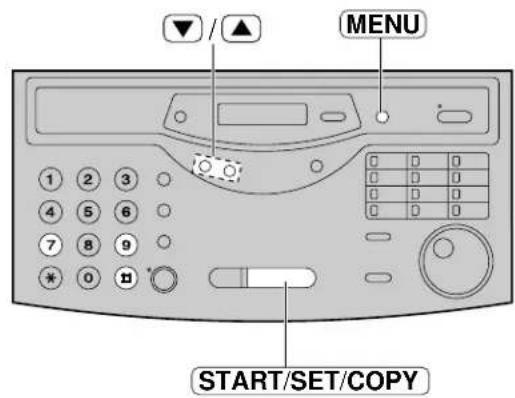
Note:
- Using the toner save feature may reduce print quality.
- When printing from the PC, this setting does not work. To save toner, use the PANA LINK printer driver setting.
Copying
Making a copy
The unit can make single or multiple copies (up to 99). Any transmittable document (p. 49) can be copied.
1 Open the document feeder tray.
2 Adjust the width of the document guides to the size of the document.
3 Insert the document (up to 15 pages) FACE DOWN until the unit grabs the document and a single beep is heard.
Display: STANDARD
- Make sure the handset is on the cradle.
4 If necessary, press RESOLUTION repeatedly to select the desired setting (p. 43).
5 Press START/SET/COPY.
NUMBER=1 [100%]
6 Enter the number of copies (up to 99).
7 If necessary, choose an enlargement/reduction rate by rotating JOG DIAL. See next page.
8 If you want to print collated copies, press COLLATE until the following is displayed (see next page).
COLLATE=ON
9 Press START/SET/COPY.
OR
Press QUICK SCAN if you want to remove the copy document for other uses.
●The unit will feed the documents and scan them into memory, then start printing.

Note:
- While scanning, do not move the pages which have already ejected. A paper jam may occur. Allow the scanning process to finish before viewing documents.
- If a resolution is not selected, FINE resolution will automatically be selected.
- Once copying has started, the resolution cannot be changed.
- You can make or receive a voice call while making copies.
- After copying, the enlargement/reduction rate setting will return to "100%".
- Manual feeding is not available when making a copy.
To stop copying
Press STOP.
Printing collated copies
The unit will print uncollated copies. You can also print collated copies. See the example below.
Example: Making two copies of a 4 page original document
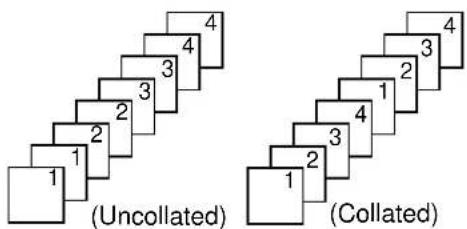
- If you turn the collating feature on, the unit will store the document into memory and print it. If memory becomes full while storing, the unit will only print out the stored pages.
●After copying, the collating feature will turn off automatically.
Choosing an enlargement/reduction rate
The unit can make enlarged or reduced copies of a document.
■ To enlarge a document:
Select the desired enlargement rate by rotating JOG DIAL to the right. The unit will only enlarge the center part of the document and print it on two pages.
The unit can enlarge copies by 5 % to as much as 200 % of the original.
Sample of an enlarged copy:
- 200 % example
Original document
Area to be enlarged
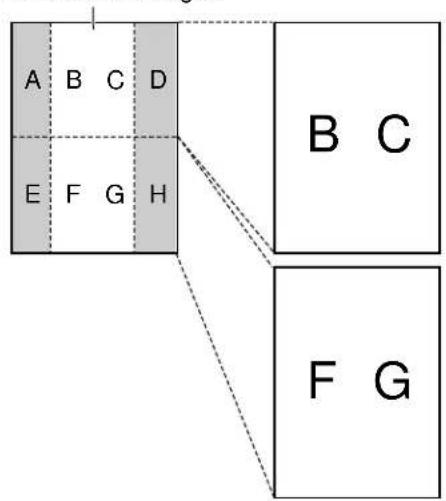
- 150 % example
Original document
Area to be enlarged

■ To reduce a document:
Select the desired reduction rate by rotating JOG DIAL to the left.
The unit can reduce copies by 5 % to as little as 50 % of the original.
Note:
- If the appropriate reduction rate is not programmed, the document may be divided and the top of the second sheet will be deleted.
Setup (PC)
Connecting to a computer
To run the Panasonic Multi-Function software (PANA LINK), you need the following software and hardware.
CPU: An IBM compatible personal computer with a 486 or higher processor (Pentium is recommended.)
Basic Software: Microsoft Windows 95 or Windows 98 (Windows 3.1/3.11*—printer driver only)
Memory Minimum: 16 MB (32 MB or more is recommended)
Hard disk: More than 40 MB available space
Other: Parallel port
Panasonic Multi-Function fax machine
*Microsoft Windows operating system Version 3.1/3.11 (hereafter Windows 3.1/3.11)
Connect your personal computer to the fax machine as follows:

Caution:
- When connecting the fax machine to your computer, use the included printer cable for reliable data communications and compliance with FCC rules.
- Do not connect the printer cable to the serial port on the computer. This may cause damage to your fax machine and computer.
Installing the PANA LINK software
1 Start Windows 95 or Windows 98 and close all applications.
2 Insert the included CD into your CD-ROM drive.
- The language dialog box will appear. Select the desired language that you use with this software. Then click OK.

- If the language dialog box does not appear: The installation will automatically start.
- If the language dialog box does not appear and the installation does not start automatically:
Click Start, choose Run... . Type "d:\setup" (where d: is the drive letter of your CD-ROM drive). Click OK.
(If you are not sure what the drive letter is for your CD-ROM drive, please use Windows Explorer and look for the CD-ROM drive.)

3 The installation will automatically start.
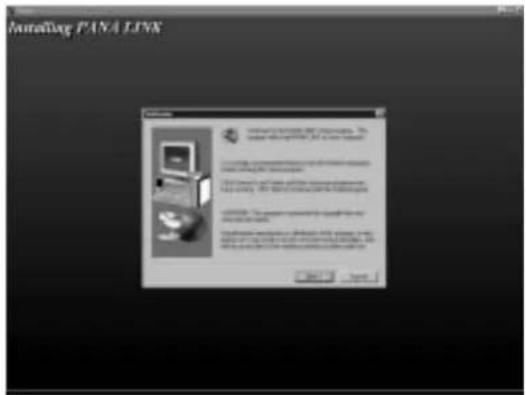
4 Follow the instructions on the screen until all files have been installed.
5 Be sure to read a README file for more information.
●The README file contains the following information:
- Install/uninstall PANA LINK for Windows 95/98.
- Install/uninstall KX-FLM600/650 for Windows 3.1.
- Print and Scan from Windows 3.1.
- How to feed recording paper manually.
- How to use Help.
- Acrobat Reader
- ECP Problems
Note:
- For detailed instructions on PANA LINK software, use the Help function.
- The screens shown in these instructions are from Windows 95.
Windows 3.1 or 3.11 users:
- If you are using Windows 3.1 or 3.11, follow these steps to install the software.
- From the Program Manager, click File, choose Run...
- Type "d:\setup" (where d: is the drive letter of your CD-ROM drive).
- Click OK.
- The printer driver only is available. Please read a README file (README.WRI) in the CD-ROM for more information.
- The display illustrations may differ slightly from the display of the actual product.
●The display details are subject to change without notice for improvement.
Activating the PANA LINK software
1 Click Start.
2 Point to Programs, point to PANA LINK and click PANA LINK.
●The PANA LINK main panel will appear.


Setup (PC)
Setting up PANA LINK
The items which can be set are the Line, Transmission, Reception, System, User Information and Cover Page.
1 Open the PANA LINK main panel.

2 Click Setup in the main panel.
●The Setup dialog box will be displayed.
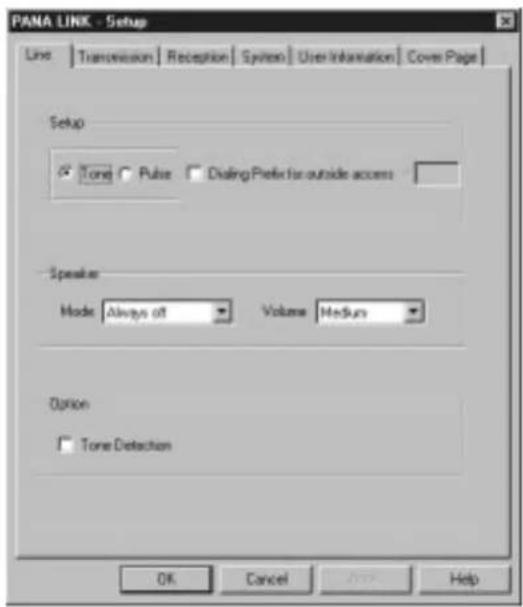
2 Change the set value in the Setup dialog box.
- To change the value without closing the window, press [Apply].
4 Click OK.
Note:
- For further details, use the Help function.
Setting user information
The information set here is used on your cover page and the header that prints on the top of each page you send from the PC.
1 Open the PANA LINK main panel.
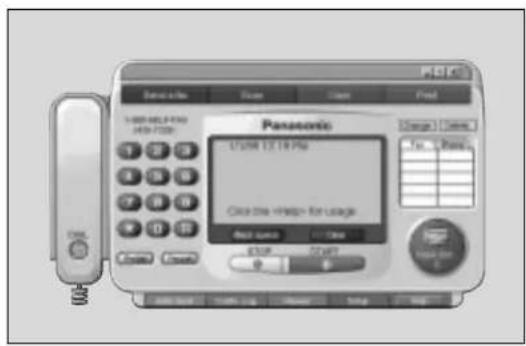
2 Click Setup in the main panel.
●The Setup dialog box will be displayed.

3 Click User Information.
- The User Information dialog box will be displayed.
![PANA LINK - Setup Line | Transmission | Reception | System | User Information | Cover Page | FAX HEADER Your Logo: Your Fax No: This information will be posted on each page transmitted from your unit. fulfilling the requirements of the Telephone Protection Act at 1991. Name: Tel. number: Fax. number: Company: Department: Street Address: City: State: Zip code: Country: United States of America [T] OK Cancel Help](/content/2026/05/1071125/images/6a16753a26b3b984fada39cac95a677f7cf613611ea316fbaee36dd6db5a6c09.jpg)
4 Enter your information for each item.
5 Click OK.
Printer
Printing documents created on the PC
You can print documents created from a Windows application.
Select Panasonic Fax Machine "Panasonic KX-FLM600/650" as the active printer.
Printing from Windows applications
For example, to print from Microsoft Word, proceed as follows.
1 Open the document you want to print.
2 Select Print from the File menu.
•The Print dialog box will appea

3 Select "Panasonic KX-FLM600/650" as the active printer.
- If you want to change the printer setting, click [Properties]. The printer setup dialog box will appear.
You can change the following;
Resolution, Orientation, Paper Source,
Copies and Paper Size.
4 Set the Page range and enter the number of copies.
5 Click OK in the Print dialog box.
• The unit will start printing.
Note:
- For details about the printer driver, use the Help function.
Printing a selected file
You can print a specific file created with an application.
1 Open the PANA LINK main panel.
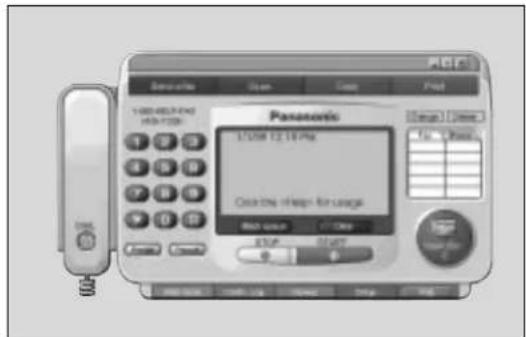
2 Click Print in the main panel.
●The Open dialog box will appear.

3 Select the file you want to print.
4 Click [Open] in the Open dialog box.
- The unit will start printing. - If an application which creates the file starts, follow the instructions for the application to print the file.
Printer
Printing using the paper tray (manual feeding) =
Using the printing manual feed, you can print on media other than letter or legal size plain paper.
Media you can print on
■ Media size
| Media Size | Dimension | |
| Paper | Letter | 216 mm×279 mm ( 81/2 ′′×11′′) |
| Legal | 216 mm×356 mm ( 81/2 ′′×14′′) | |
| A4 | 210 mm×297 mm | |
| Executive | 184 mm×267 mm ( 71/4 ′′× 101/2 ′′) | |
| Transparency | Letter | 216 mm×279 mm ( 81/2 ′′×11′′) |
| A4 | 210 mm×297 mm | |
| Envelope | COM10 | 105 mm×241 mm ( 41/8 ′′× 91/2 ′′) |
| DL | 220 mm×110 mm |
■ Paper weight
60 g/m² to 105 g/m²
(16 lb. to 28 lb.)
Loading a sheet manually
Important:
- You cannot load two or more sheets at one time.
1 Close the paper tray extender.
2 Press START/SET/COPY and confirm the following message.
Display: READY TO PRINT

3 Place a sheet on the paper tray with printing side face down and align the edge of the sheet to the guide marks.
- The sheet should not exceed the tabs on both ends of the paper tray.
4 Slide the sheet into the unit until it is stops. • A few seconds later, the unit will feed the sheet.
5 To print, change the Paper Source setting in the printer setup dialog box to Manual Sheet Feed (p. 88).

Note:
- Manual feeding is not available for receiving or copying documents.
- Do not load a sheet while the unit displays the following message.
Display:
PLEASE WAIT
- If you load another paper on the paper tray when the fax machine is feeding the paper, a paper jam may occur. When you print two or more sheets, place a next sheet one by one after confirming the message indicating to insert a sheet on your PC.
- If printing is not performed for 20 minutes after loading a sheet on the paper tray, the sheet will automatically be ejected.
- Please read a README file (README.WRI) in the CD-ROM for more information.
Transparencies and labels
You may also print on labels and transparencies that are made for the printer. Panasonic has tested and found that the following work satisfactorily.
Transparencies 3M CG3300, 3M CG5000
Labels Avery 5160, Avery 5161, Avery 5162
Avery 5163, Avery 5164, Avery 5165,
Avery 5167, Avery 5168
Xerox LWH100, Xerox LWH110, Xerox LWH120
Xerox LWH130, Xerox LWH140
Note:
- With any label, the labels must completely cover the backing material (see below).
- Re-using transparencies that have been fed through the printer once (for example, after jams or if the transparency is ejected without being printed) can reduce the life of the consumables and paper path components.
- Some types of paper, especially transparencies are made to print on a specific side. If the print quality is poor, try printing on the other side.
YES NO
Labels cover the entire backing material.

natural_image
Three vertical columns of empty rectangular boxes, no text or symbols present
natural_image
Blank grid layout with uniform squares, no text or symbols present
natural_image
Simple diagram with three vertical rectangular panels, no text or symbols present
natural_image
Grid of empty rectangular boxes arranged in 4 rows and 5 columns (no text or symbols)The backing material is exposed.
Envelope specifications
We recommend that you purchase only high quality envelopes with diagonal seams, as shown in the diagram below:

natural_image
Simple line drawing of a closed envelope (no text or symbols)High quality envelopes have the following characteristics:
●A thin, sharply creased leading edge
● Paper weight of 75 g/m² (20 lb.)
- Flat, free of curls, wrinkles, nicks, etc.
●No cotton and/or fiber material included
Note:
- Wrinkles may occur in some cases, even if high quality envelopes are used.
We recommend that you do not use envelopes with any of the following characteristics (using these may result in paper jams):
- Irregularly shaped envelopes
- Envelopes with curls, wrinkles, nicks, twists, dog-ears or other damage
● Envelopes with side seam construction
● Highly textured envelopes, or with extremely shiny surfaces
● Envelopes that seal by removing a peel-off strip
● Envelopes with more than one flap to be sealed
●Self-adhesive envelopes
●Envelopes that are baggy or not sharply creased - Embossed envelopes
● Envelopes that have previously been printed on

Side seam construction

Peel-off strip Multiple flaps


Twist Curl Bent-edge




Wave Dog-ears Self adhesive
Do not attempt to print on any of the following types of envelopes (these may cause damage to your printer):
● Envelopes with clasps, snaps or tie strings (see Fig. 1)
●Envelopes with transparent windows (see Fig. 2)
- Envelopes that will melt, discolor, scorch, offset or release hazardous emissions when exposed to 200 °C (392 °F) for 0.1 second
- Envelopes that use encapsulated types of adhesive that do not require moistening but rely on pressure to seal them

Fig. 1

Fig. 2
Always test a sample of the envelopes you are thinking of buying. Confirm that the envelope performs acceptably.
For best printing results
- Avoid printing in high humidity i.e., above 70 %.
High humidity may cause the envelope to curl and pick up excess toner.
High humidity may also cause the envelope to seal. - Avoid printing below 10ircC (50 °F) with less than 30% relative humidity.
Low temperature with low humidity may cause light printing. - Print only one envelope at a time.
Envelope storage is very important. Store them away from moisture and humidity, where they can lay flat and their edges will not be bent or damaged. The humidity should not exceed 70 % RH.
Sending documents created on the PC
Sending a document created by an application as a fax message
You can access the fax function from a Windows application by using the Print command in the File menu. Select PANA LINK FAX as the active printer.
For example, to send a document created from Microsoft Word, proceed as follows.
1 Open the document you want to send.
Select Print from the File menu.
●The Print dialog box will appear.
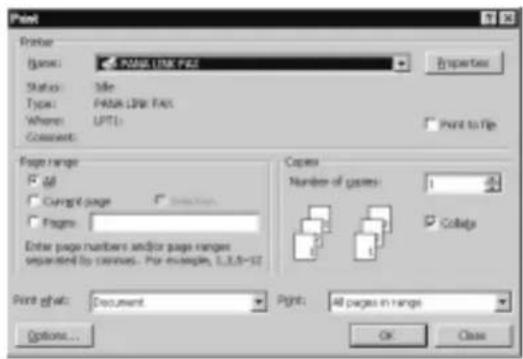
3 Select PANA LINK FAX as the active printer.
Click OK in the Print dialog box.
- If the PANA LINK application has not started yet, it will start now, and then one item is added to it as the transmission document.

5 Set the fax number you want to send the document to.
- To set the telephone number, you can use the keypad, one-touch dialing or the address book.
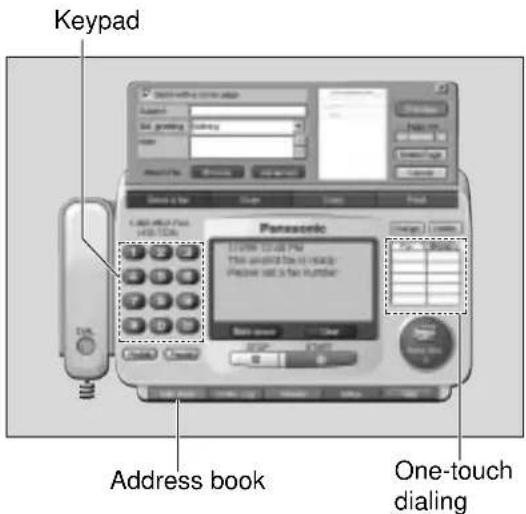
6 Click START in the main panel. •The document will be sent
Note:
- If the line is busy or there is no answer, the PANA LINK Fax will automatically redial the number up to 5 times.
- To cancel transmission after dialing, click STOP in the main panel.
- If you send a fax using a PC, the FaxSav service cannot be used (p. 46).
- When you click START to send the selected file, any document set on the fax machine will also be sent at the same time.
Sending a file from the PANA LINK window
1 Open the PANA LINK main panel.

2 Click Send a fax in the main panel. • The Send fax panel will be displayed
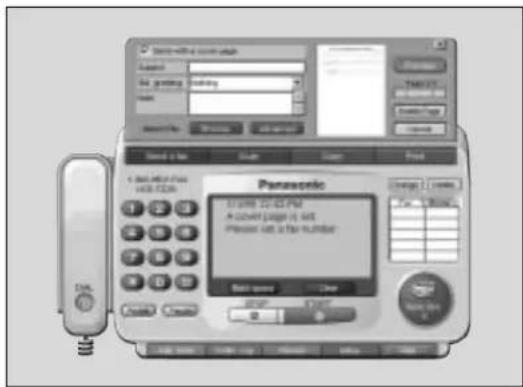
3 Click Browse in the Send fax panel. • The Open file dialog box will be displayed.

4 Select a file you want to send, and then click [Open].
- An image of the file will be displayed in the preview window.

5 Set the fax number which you are going to send the file to.
- To set the telephone number, you can use the keypad, one-touch dialing or the address book.
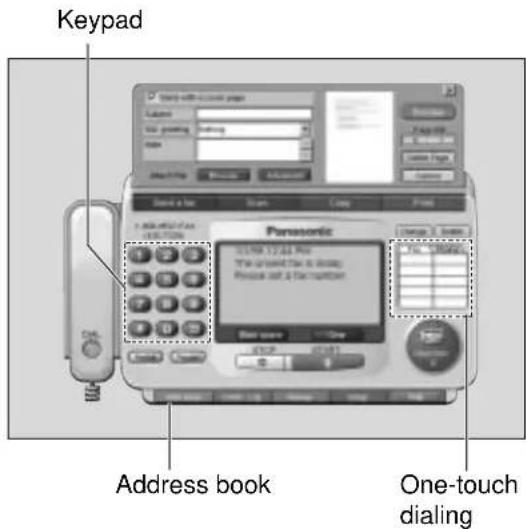
6 Click START in the main panel.
- The document will be sent. - If an application which creates the file starts, follow the instructions for the application to send the file.
Note:
- If the line is busy or there is no answer, the PANA LINK Fax will automatically redial the number up to 5 times.
- To cancel transmission after dialing, click STOP in the main panel.
- If you send a fax using a PC, the FaxSav service cannot be used (p. 46).
- When you click START to send the selected file, any document set on the fax machine will also be sent at the same time.
Sending a document from the fax machine using the PC
1 Place the document on the fax machine.

2 Open the PANA LINK main panel.
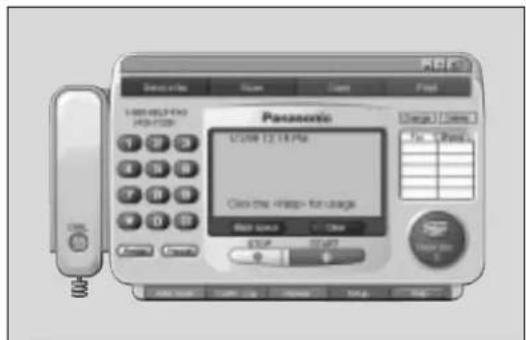
3 Set the fax number you want to send the document to in the main panel.
- To set the telephone number, you can use the keypad, one-touch dialing or the address book.
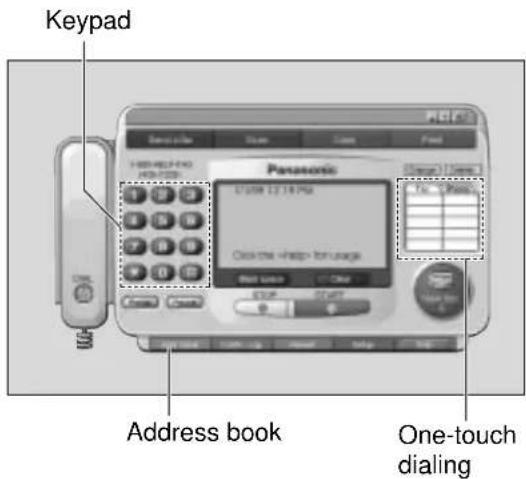
4 Click START.
●A dialog box to set the image quality, type and brightness will be displayed.

5 Set the image quality, type and brightness, and then click Scan.
Note:
- If you send a fax using a PC, the FaxSav service cannot be used (p. 46).
- To cancel transmission after dialing, press STOP on the fax machine.
PC Receiving
Receiving faxes on your PC
You can receive a fax on the computer.
The received facsimile document is saved as an image file (TIFF-G4 format), and which you can view, print or send again.
To receive manually
You can receive manually during a telephone conversation.
1 Open the PANA LINK main panel.
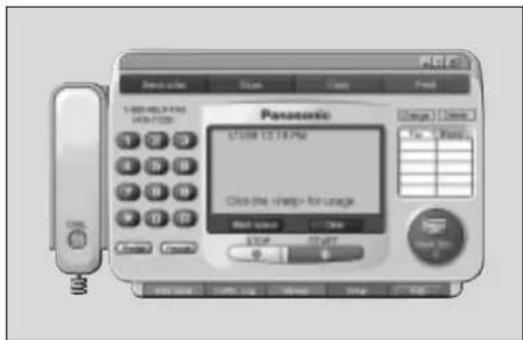
2 Click START in the main panel.
To receive automatically
You can receive faxes to your PC automatically.
1 Set the fax machine to the AUTO ANSWER mode by pressing AUTO ANSWER.

2 Open or minimize the PANA LINK main panel.
To receive directly to the fax machine
If you do not want to be disturbed by incoming faxes when using the PC, but want to receive faxes directly to your facsimile machine, follow these steps.
- Click [Setup] in the main panel.
●The Setup dialog box will appear. - Click the Reception tab in the dialog box.
- Click "Receive directly to facsimile unit".
- Click OK.
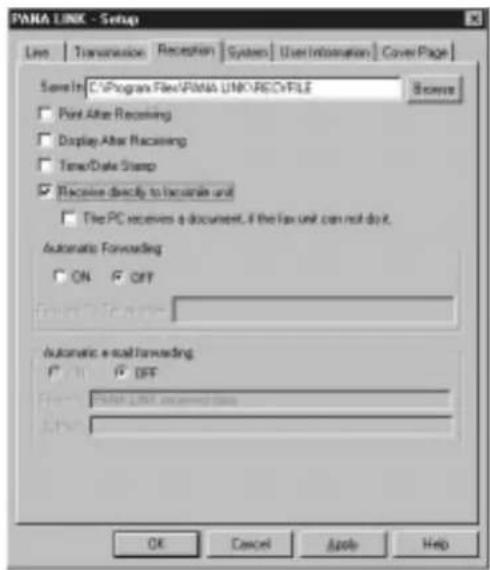
Confirming the result of reception
1 Open the PANA LINK main panel.
2 Click on the reception icon (New doc.) in the main panel, or click on [Comtn.\Log] and switch to the received log.

3 Click on the items in the received log which have not been viewed yet (icon).

4 Click on File in the menu bar, then click on View, or click View in the toolbar.
●The Viewer window will appear, and the received fax will be displayed.
![PANA LIST Video De 10th Postman Text Bars Use Custom Web THE VOLUME CHANGE ORDER [ ] [ ] [ ] [ ] [ ] [ ] [ ] [ ] [ ] [ ] [ ] [ ] [ ] [ ] [ ] [ ] [ ] [ ] [ ] [ ] [ ] [ ] [ ] [ ] [ ] [ ] [ ] [ ] [ ] [ ] [ ] [ ] [ ] [ ] [ ] [ ] [ ] [ ] [ ] [ ] [ ] [ ] [ ] [ ] [ ] [ ] [ ] [ ] [ ] [ ] [ ] (4) [1] 2017-03-25 [1] 2017-03-26 [1] 2017-03-27 [1] 2017-03-28 [1] 2017-03-29 [1] 2017-04-01 [1] 2017-04-02 [1] 2017-04-03 [1] 2017-04-04 [1] 2017-04-05 [1] 2017-04-06 [1] 2017-04-07 [1] 2017-04-08 [1] 2017-04-09 [1] 2017-04-10 [1] 2017-04-11 [1] 2017-04-12 [1] 2017-04-13 [1] 2017-04-14 [1] 2017-04-15 [1] 2017-04-16 [1] 2017-04-17 [1] 2017-04-18 [1] 2017-04-19 [1] 2017-04-20 [1] 2017-04-21 [1] 2017-04-22 [1] 2017-04-23 [1] 2017-04-24 [1] 2017-04-25 [1] 2017-04-26 [1] 2017-04-27 [1] 2017-04-28 [1] 2017-04-29 [1] 2017-04-30 [1] 2017-04-31 [1] 2017-04-32 [1] 2017-04-33 [1] 2017-04-34 [1] 2017-04-35 [1] 2017-04-36 [1] 2017-04-37 [1] 2017-04-38 [1] 2017-04-39 [1] 2017-04-40 [1] 2017-04-41 [1] 2017-04-42 [1] 2017-04-43 [1] 2017-04-44 [1] 2017-04-45 [1] 2017-04-46 [1] 2017-04-47 [1] 2017-04-48 [1] 2017-04-49 [1] 2017-04-50 [1] 2017-04-51 [1] 2017-04-52 [1] 2017-04-53 [1] 2017-04-54 [1] 2017-04-55 [1] 2017-04-56 [1] 2017-04-57 [1] 2017-04-58 [1] 2017-04-59 [1] 2017-04-60 [1] 2017-04-61 [1] 2017-04-62 [1] 2017-04-63 [1] 2017-04-64 [1] 2017-04-65 [1] 2017-04-66 [1] 2017-04-67 [1] 2017-04-68 [1] 2017-04-69 [1] 2017-04-70 [1] 2017-04-71 [1] 2017-04-72 [1] 2017-04-73 [1] 2017-04-74 [1] 2017-04-75 [1] 2017-04-76 [1] 2017-04-77 [1] 2017-04-78 [1] 2017-04-79 [1] 2017-04-80 [1] 2017-04-81 [1] 2017-04-82 [1] 2017-04-83 [1] 2017-04-84 [1] 2017-04-85 [1] 2017-04-86 [1] 2017-04-87 [1] 2017-04-88 [1] 2017-04-89 [1] 2017-04-90 [1] 2017-04-91 [1] 2017-04-92 [1] 2017-04-93 [1] 2017-04-94 [1] 2017-04-95 [1] 2017-04-96 [1] 2017-04-97 [1] 2017-04-98 [1] 2017-04 -](/content/2026/05/1071125/images/af8d1045a7c3c0a00ec63752152ab0c20d137d55ee5128feecbe509399b35a1b.jpg)
Phone Call
Making a phone call
You can place a phone call using PANA LINK.
Use the handset on the fax machine to talk.
1 Open the PANA LINK main panel.

2 Enter the telephone number in the main panel.
- You can select the telephone numbers using the following methods: Keypad, one-touch dial, address book or redial.
The main panel indicator will display "Start calling by pressing the

3 Click Dial.
- The main panel indicator will display "Lift the fax machine's handset to talk."
4 Lift the fax machine's handset.
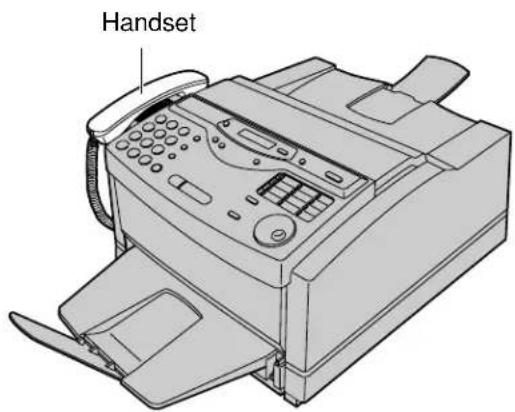
Computerized directory for fax and phone numbers
The Address Book is your personal information database for fax and phone numbers.
1
Open the PANA LINK main panel.
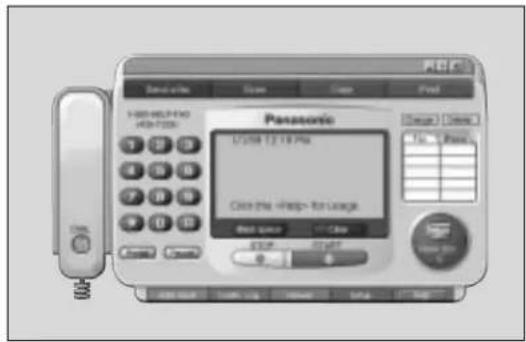
2
Click Add. Book in the main panel.
●The Address Book window will appear.

3
Select New entry from Edit menu or click [New\entry] in the toolbar.
- A dialog box to register personal information will appear.

4
Enter personal information in each space.
- The name is essential.
5
Click OK.
- The registered information will be shown in the list.

Broadcast
When sending the same document to more than one location, you can use the "Group" function in the Address Book. You may select as many locations as you want from the Address Book.
Using your fax machine as a scanner
Create an image file (TIF format) by scanning the document which is set in the fax machine.
1 Set the document which you are going to scan, in the fax machine.

2 Open the PANA LINK main panel.

2 Click Scan in the main panel.
●The Scan dialog box will appear.

4 If necessary, change the setting of Image Quality, Image Type and Brightness.
5 Click Scan.
- The Viewer window will appear after scanning, and the scanned image will be displayed in it.

6 To save the scanned image, select Save from the File menu.
Note:
●While scanning, do not move the pages which have already ejected. A paper jam may occur. Allow the scanning process to finish before viewing documents.
- To cancel scanning while the document is being scanned, press STOP on the fax machine.
PC based copying
1 Set the document which you are going to copy in the fax machine.

2 Open the PANA LINK main panel.

3 Click [Copy] in the main panel.
●The Copier dialog box will appear.
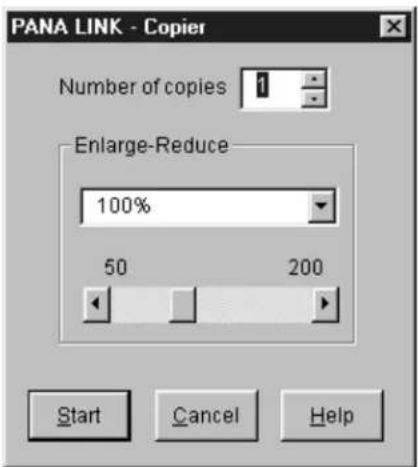
4 Enter the number of copies required in Number of copies.
5 If necessary, change the setting of Enlarge-Reduce.
6 Click Start.
●The Scan dialog box will appear.

7 If necessary, change the setting of Image Quality, Image Type and Brightness.
8 Click Scan.
- The fax machine will start scanning the documents, then will print the copies.
Note:
- While scanning, do not move the pages which have already ejected. A paper jam may occur. Allow the scanning process to finish before viewing documents.
- To cancel copying while the document is being scanned, press STOP on the fax machine.
More Information
The Communication Log
It is possible to view a list of faxes sent or received from the PC, and to view their contents.
It is also possible to forward or resend these faxes.
1 Open the PANA LINK main panel.

2 Click [Comtn.\Log] in the main panel.
●The Communication Log window will appear.

3 Select the Communication Log Folder.
- The content of the selected Communication Log Folder will be displayed in the Communication Log List.

Note:
- As the transmitted image files will remain in the hard disk, please check regularly that there is enough free space.
Viewer
- It is possible to display the images sent, received, or scanned with PANA LINK.
- It is possible to move, copy and delete a file or page.
- From the Viewer, it is also possible to send an image as a fax.
1 Open the PANA LINK main panel.

2 Click Viewer in the main panel. • The Viewer window will appear.

3 Click on File then Open in the menu bar, or click the Open icon in the tool bar in the main panel.
●The Open window will appear.

4 Select the file you want to view.
Note:
- Text on the image cannot be edited.
- Use OCR to convert text on the image to text data that can be edited with word-processor software.
PC link
(turning PC related functions on/off)
The PC LINK feature by default is "ON".
If the AUTO ANSWER mode is turned on, all faxes will be received at your PC automatically.
If you do not want to be disturbed by incoming faxes when using the PC, but want to receive faxes directly to your fax machine, do one of the following.
—Turn off the PC LINK on the fax machine.
—Select "Receive directly to facsimile unit" on the PC (p. 97).
To turn off the PC LINK on the fax machine
- When this feature is off, operations from your PC, such as fax transmission/reception, scanning, printing or copying are not available.
1 Press MENU.
Display: 1. SYSTEM SET UP
2 Press #, then 1 4.
PC LINK
3 Press START/SET/COPY.
MODE=ON

4 Press ▼ or ▲ to
select
"OFF".
MODE=OFF

- To turn on the PC LINK on the fax machine, select "ON".
5 Press START/SET/COPY.
SETUP ITEM [ ]
6 Press MENU.
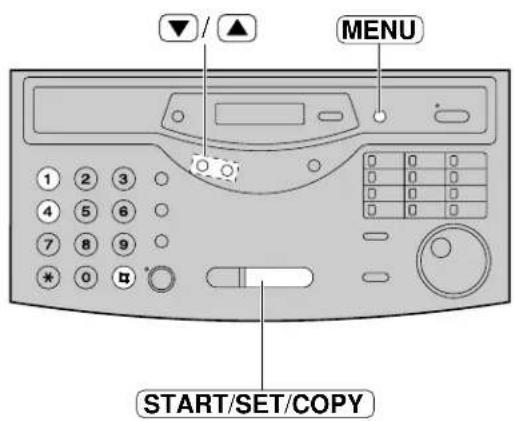
Reports
If your unit cannot send a fax, check the following.
—The number you dialed is correct.
—The other party's machine is a facsimile.
If the problem remains, correct it by following the communication message printed on the sending and journal reports (p. 50, 51).
| Communication message | Error code | Cause & Remedy |
| COMMUNICATION ERROR | 41–72 FF | ●A transmission or reception error occurred. Try again or check with the other party. |
| DOCUMENT JAMMED | — | ●The document is jammed. Remove the jammed document (p. 116).●A sheet of paper was inserted from the paper tray while scanning the document. Remove the paper from the paper tray. |
| ERROR-NOT YOUR UNIT | 54, 59 70 | ●A transmission or reception error occurred because of a problem with the other party's fax machine. Check with the other party. |
| MEMORY FULL | — | ●The document was not received due to memory being full. |
| NO DOCUMENT | — | ●The document was not fed into the unit properly. Reinsert the document and try again. |
| OTHER FAX NOT RESPOND | — | ●The other party's fax machine was busy or ran out of recording paper. Try again.●The document was not fed properly. Reinsert the document and try again.●The other party's fax machine rings too many times. To send a fax manually, dial the number, confirm the fax tone, and press [START/SET/COPY].●The other party's machine is not a facsimile. Check with the other party.●The number you dialed is not in service. |
| PC FAIL OR BUSY | — | ●The PC cannot control the fax functions. The printer cable is not connected correctly, or the software is not running on the PC (p. 82–85). |
| PRESSED THE STOP KEY | — | ●[STOP]was pressed and fax communication was canceled. |
| TOP COVER WAS OPENED | — | ●The top cover was opened. Close it and try again. |
| FRONT PANEL WAS OPENED | — | ●The front panel was opened. Close it and try again. |
| OK | — | ●Fax communication was successful. |
Display
If the unit detects a problem, one or more of the following messages will appear on the display.
| Cause & RemedyDisplay message | |
| CALL SERVICE | There is something wrong with the unit. Contact our service personnel. |
| CHANGE DRUM | The drum unit is being worn out. Replace the drum unit and toner cartridge with new ones as soon as possible (p. 117-119). |
| CHECK DOCUMENT | The document is not fed into the unit properly. Reinsert the document. |
| CHECK DRUM | The drum unit is not inserted properly. Reinsert it correctly (p. 21-23).The installed drum is worn out. Replace the drum unit with a new one. |
| CHECK MEMORY | Memory (telephone numbers, parameters, etc.) has been erased. Re-program. |
| CHECK TONER | The toner cartridge is not installed properly. Reinsert it correctly (p. 21-23). |
| DRUM LIFE OVER | The drum unit has reached the end of its life expectancy. Replace the drum unit and toner cartridge with new ones (p. 117-119). |
| FAILED PICK UP | The unit cannot pick up the recording paper loaded in the paper cassette.Remove the paper cassette and clear the jammed paper (p. 115). |
| FAX IN MEMORY | The unit has a document in memory. See the other message instructions to print out the document. |
| FAX MEMORY FULL | Memory is full of received documents due to a lack of recording paper or a recording paper jam etc. Install paper or clear the jammed paper.When performing memory transmission, the document being stored exceeds the memory capacity of the unit. Transmit the entire documents using manual or automatic transmission. |
| JOG-DIAL FULL | There is no space to store new stations in the JOG DIAL directory. Edit or erase unnecessary stations (p. 40). |
| LOADING ERROR | A loading error occurred while receiving IQ-data from FaxSav. Contact FaxSav at 1-888-332-9728. |
| MEMORY FULL | When making a copy, the document being stored exceeds the memory capacity of the unit. Press [STOP] to clear the message. Divide the documents and try again. |
| MODEM ERROR | There is something wrong with the modem circuit. Contact our service personnel. |
| NO FAX REPLY | The other party's fax machine is busy or has run out of recording paper. Try again. |
| OUT OF PAPER | The recording paper is not installed or the unit has run out of paper. Install paper (p. 24, 25). |
| PANEL OPEN | The front panel is open. Close it. |
| PAPER JAMMED | A recording paper jam occurred. Clear the jammed paper (p. 114, 115). |
| PC FAIL OR BUSY | The fax function cannot be operated by the PC. The printer cable is not connected correctly, or the software is not running on the PC (p. 82–85). |
| PLEASE WAIT | The top cover was closed. Wait a while.START/SET/COPYwas pressed during the power save mode. Wait a while. |
| REDIAL TIME OUT | The other party's fax machine is busy or has run out of recording paper. Try again. |
| REMOVE DOCUMENT | The document is jammed. Remove the jammed document (p. 116).Attempted to transmit a document longer than 600 mm ( 235/8 ). Press the STOP button to remove the document. Divide the document into two or more sheets and try again. |
| REMOVE PAPER | Paper was placed on the paper tray for manual feeding without first pressing START/SET/COPY. Remove the paper. When the “PLEASE WAIT” message disappears, place the paper on the paper tray.The paper cassette is not inserted correctly. Insert it correctly. |
| TONER EMPTY | The toner is empty. Replace the toner cartridge and drum unit with new ones (p. 117–119). |
| TONER LOW | The remaining toner is low. Replace the toner cartridge and drum unit with new ones as soon as possible (p. 117–119). |
| TOP COVER OPEN | The top cover is open. Close it. |
| TRANSMIT ERROR | Transmission error occurred. Try again. |
| UNIT OVERHEATED | The unit is too hot. Let the unit cool down. |
| USE 1 FEED ONLY | When making transmission or copying, another sheet was placed on the paper tray. Remove it from the paper tray and try again. |
| WRONG PAPER | The unit printed on paper which is shorter than letter size paper. To prevent the drum unit becoming dirty, use letter or legal size paper and set the correct recording paper size in feature setting #16 (p. 28). |
Operations
When a function does not work, check here before requesting help
Problems with fax machine
General
| Cause & RemedyProblem | |
| I cannot make and receive calls. | ●The power cord or telephone line cord is not connected. Check the connections (p. 27). |
| I cannot make calls. | ●The dialing mode setting is wrong. Change to “TONE” or “PULSE” (p. 36). |
| The unit does not work. | ●Disconnect the unit from the telephone line and connect the line to a known working telephone. If the working telephone operates properly, contact our service personnel to have the unit repaired. If the working telephone does not operate properly, contact your telephone company. |
| The unit does not ring. | ●The ringer volume is set to off. Adjust it to a suitable level (p. 33). |
| The other party complains they only hear a fax tone and cannot talk. | ●The FAX ONLY mode is set. Tell them the number is only used for faxes or change to another mode (p. 60, 61). |
| The REDIAL/PAUSE button does not function properly. | ●If this button is pressed during dialing, a pause will be inserted. If pressed immediately after a dial tone is obtained, the last number dialed will be redialed. |
| The receive mode does not function as explained on page 60. | ●A Distinctive Ring pattern is set (p. 68, 69).●The TEL/FAX mode is set (p. 70–73). |
| During programming, I cannot enter the code or ID number. | ●All or part of the numbers are the same. Change the number (p. 67, 74). |
Fax - sending
| Cause & RemedyProblem | |
| I cannot send documents. | ●The telephone line cord is connected to the EXT jack on the unit. Connect to the LINE jack (p. 27).●The other party's fax machine is busy or has run out of paper. Try again.●The other party's machine is not a facsimile. Check with the other party.●The other party's fax machine rings too many times. Send the fax manually - dial the number, confirm the fax tone, then press START/SET/COPY. |
| The other party complains that letters on their received documents are distorted. | ●If your line has special telephone services such as call waiting, the service may have been activated during fax transmission. Connect the unit to a line that does not have these services.●The extension telephone on the same line is off the hook. Hang up the extension telephone and try again. |
| The other party complains that white lines or black lines appear on their received documents. | ●The white roller is dirty. Clean it (p. 116). |
| I cannot make an international fax call. | ●Use the overseas transmission mode (p. 57).●Add two pauses at the end of the telephone number (p. 35) or dial manually. |
Fax - receiving
| Cause & RemedyProblem | |
| I cannot receive documents. | ●The telephone line cord is connected to the EXT jack on the unit. Connect to the LINE jack (p. 27). |
| I cannot receive documents automatically. | ●The receive mode is set to the TEL mode. Set to the FAX ONLY or TEL/FAX mode.●The time taken to answer a call is too long. Decrease the number of rings (p. 64, 73). |
| The display shows “CONNECTING......” but faxes are not received. | ●The incoming call is not a fax. Change the receive mode to the TEL mode. |
| The recording image is faint. | ●The sender transmitted a faint document. Ask them to transmit a clearer copy of the document. |
Receive mode
| Cause & RemedyProblem | |
| I cannot select the desired receive mode. | ●If you want to set the FAX ONLY or TEL/FAX mode:—Select the desired mode using feature #77 (p. 72), and—Press AUTO ANSWER to turn on the AUTO ANSWER light.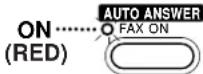 ●If you want to set the TEL mode:—Press AUTO ANSWER to turn off the AUTO ANSWER light.OFF ......FAX ON ●If you want to set the TEL mode:—Press AUTO ANSWER to turn off the AUTO ANSWER light.OFF ......FAX ON |
Copying
| Cause & RemedyProblem | |
| The unit does not make a copy. | ●You cannot make a copy during programming. Make the copy after programming or stop the programming. |
| White lines or black lines appear on the copied document. | ●The white roller is dirty. Clean it (p. 116). |
Operations
Print quality
| Cause & RemedyProblem | |
| The printing quality is poor. | Some paper has instructions recommending which side to print on.Try turning the paper over. |
The printing is faint.Original Copy  | You may have used paper with a cotton and/or fiber content that is over 25 %, such as letterhead or resume paper.The remaining toner is low. Replace the toner cartridge (p. 117–119). |
| A dirty pattern or a black line appears on the printouts. | There are scratches on the drum unit. Replace the drum unit (p. 117–119). |
Using an answering machine
| Cause & RemedyProblem | |
| I cannot receive documents automatically. | ●Your greeting message on the answering machine is too long.Shorten the message (up to 10 seconds).●The answering machine rings too many times. Set to 1 or 2 rings.●The silent detection feature is deactivated. Activate this feature (p. 76). |
| I cannot receive voice messages. | ●Check if the answering machine is turned on and connected to the unit properly (p. 65).●Set the number of rings on the answering machine to 1 or 2. |
| I cannot retrieve recorded voice messages on the answering machine from a remote location. | ●The remote access code on your answering machine is the same as your fax activation code. Set a different number for each code.●You did not program your remote access code in your fax machine correctly. Program the same code that is programmed on the answering machine (p. 67). |
| The greeting message on the answering machine is interrupted halfway and the caller cannot leave a voice message. | ●The greeting message has a silent pause longer than 4 seconds. Re-record the greeting message. |
| I pressed the remote access code to access the answering machine remotely, but the line was disconnected. | ●The code may include “#” which is used for certain features provided by telephone companies. Change the code on the answering machine to another number which does not include “#” (p. 67). |
| Callers complain that their voice message is interrupted halfway and they cannot leave a message. | ●Advise the caller not to pause for over 4 seconds while recording their voice message. |
| Callers complain that they cannot send a document. | ●Your answering machine ran out of recording tape. Rewind the tape to record messages.●You set the answering machine to only give a greeting message. |
| When I answer a call with the extension telephone, the unit switches to the fax mode and I cannot talk with the other party. | ●You paused for over 4 seconds during the conversation. To resume the conversation, press the STOP button on the unit. |
Problems with PC software
General
Problem Cause & Remedy
I do not know how to move the PANA LINK Main Panel, because there is no title bar.
I do not know whether the PANA LINK Main Panel is active or not.
A Quick tip does not appear when I hold the mouse pointer over a button in the PANA LINK Main Panel, although I have set to display this.
The telephone number set in the Main Panel Display disappears, and the display shows "For storing a phone or fax number." explanation of the button and so on.
The PANA LINK Main Panel disappears.
The PANA LINK Main Panel disappears just after initializing.
I want to delete all of the telephone numbers set in the Main Panel Display.
I cannot recognize the last part of the entry in the address list of the Address Book or Communication log, because that part ended with...
A cover page is sent whenever I send a fax, though I do not want to send it.
I attempted to select a telephone number from the Address Book to the PANA LINK Main Panel, but I selected a fax number by mistake.
I cannot use the Dial button, even though I specified a telephone number.
When I exit PANA LINK, the Viewer does not close.
- Point at an area with no buttons or parts and drag it where you want to move.
- The brightness of the Main Panel Display shows you whether the PANA LINK Main Panel is active or not.
- If the PANA LINK Main Panel is non-active, the quick tip does not appear. Confirm again after making the PANA LINK Main Panel be active by clicking anywhere on it.
- The quick tip is displayed. Move the mouse cursor out of the PANA LINK Main Panel. If you do not need quick tips, open the setup dialog and select OFF of the Quick Tip in the System tab.
- Look in the task tray (in the task bar). If you do not find the PANA LINK icon, it is closed. If you find the icon, the PANA LINK Main Panel is just minimized or iconified. Double-click the icon in the task tray or open the menu by right-clicking the fax icon then select Restore.
- The PANA LINK Main Panel is set to minimize when PANA LINK starts. Double-click the icon in the task tray or open the menu by right-clicking the fax icon, then select Restore. If you do not want this to happen each time you start PANA LINK, press the Setup button in the PANA LINK Main Panel, and check off the Start minimized check box in the Program startup settings in the System tab.
- Press the Stop button.
- Put a cursor on the line between the buttons, the cursor changes shape and you can expand the area by dragging, or double-clicking.
- The setting of the cover page is ON by default. To deactivate the setting, open the Setup dialog by pressing the Setup button, and click the Default cover page at every transmission check box in the Cover page tab.
- You can change your selection in the PANA LINK Main Panel. Double click the number you set in the Main Panel Display, the fax number switches into the telephone number. You can also right-click the entry to select a specific number.
- If there is transmission data or a document is set in the fax, you can only use the fax transmission function. If you want to make a phone call, please delete the transmission data.
- The viewer can be operated separately, so when the PANA LINK is closed, it remains open.
(continued)
Operations
General (cont.)
| Problem Cause & Remedy | |
| The PANA LINK does not work properly. | ●Click the button to exit PANA LINK, and restart.If PANA LINK does not closed, please force it to close by pressing Ctrl+Alt+Delete keys. |
Transmission
| Problem Cause & Remedy | |
| I see a “Sending a fax failed.” message. | ●Possible causes are as follows.—Telephone circuit is not good.—You received a call-waiting signal.—The other party stopped reception.—The other party ran out of the recording paper.Transmit again after confirming with the other party. |
| I see a “No response” message. | ●The other party did not answer the call or the line was busy.Transmit again after waiting a while.●The the dialing mode setting (tone or pulse) is not correct.Open the Setup dialog box and confirm the dialing mode setup check box in the Line tab. |
| I cannot make an international transmission. | ●Set the fax machine to the overseas transmission mode (p. 57). |
Reception
| Problem Cause & Remedy | |
| The fax machine receives a fax, but I want to receive it with the PC. | ●You probably checked the [Receive directly to Facsimile Unit] check box to activate in the Reception tab in the Setup dialog box. If so, click this check box to deactivate.●The setting of the PC LINK on the fax machine is off. Turn it on (p. 104).●The PANA LINK application does not operate. Start the PANA LINK application. |
| The PC receives a fax, but I want to receive it with the fax machine. | ●Open the Setup dialog box, then check the [Receive directly to Facsimile Unit] check box to activate in the Reception tab. |
| I want to print out the received fax with another printer. | ●Print after selecting the desired printer from the Print dialog box. |
| The “Receiving a fax failed.” message is displayed. | ●Possible causes are as follows.—The line condition was not good.—The reception was interfered with the call waiting signal. Check with the other party and try again. |
Scan and copy
| Problem Cause & Remedy | |
| I cannot scan. | ●The facsimile unit is probably busy. Try again after the other operation is completed.●There might not be enough free space on the hard disk. Try again after deleting unnecessary files or closing unused applications.●There might not be enough RAM. Try again after closing some applications.●Restart the PC, then try again. |
| The document is not pulled into the document feeder. | ●Confirm that a maximum of 15 pages are set correctly. |
| A document is jammed. | ●If you select Fine (200 x 200 dpi) in the image quality list, make sure the document is less than 655 mm ( 257/8 ). If you select Line Art (400 x 400 dpi), make sure the document is less than 470 mm ( 181/2 ). Remove the jammed document and try it again. |
| The recording paper is jammed. | ●Remove the jammed recording paper, reinsert it, then try again. |
| Even after clicking the Cancel button, scanning continues. | ●Please wait. Sometimes, it takes a while for the cancel request to be accepted. |
| I cannot scan documents using other applications. | ●Due to compatibility issues, an error may occur when you scan documents using certain applications. Scan from PANA LINK. |
Error message
| Problem Cause & Remedy | |
| “Initialization failed.” is displayed. | ●Reconfirm the connection of the PC and the fax machine.●The setting of the PC LINK on the fax machine is off. Turn it on (p. 104). |
If a power failure occurs
●The unit will not function.
●Transmission and reception will be interrupted.
- If fax documents are stored in memory, they will be lost. When power is restored, a power down report will be printed out stating which contents in memory have been erased.
- If delayed transmission is programmed, and the start time passes during a power failure, transmission will be attempted soon after power is restored.
- If an extension telephone/answering machine is connected to the unit, you can use it during a power failure.
Power down report
The power down report will be automatically printed out after power is restored.
The report will not be printed out if there are no documents stored in memory.
Sample of a power down report
POWER DOWN REPORT
FOR ADDITIONAL INFORMATION, PLEASE SEE THE JOURNAL REPORT.
NO. OTHER FACSIMILE
01
MODE
RCV
PAGES
01
FUNCTION
MEMORY RECEIVE
Clearing paper jams
If the unit does not eject any recording paper while printing, the recording paper has jammed. When the unit detects a paper jam, the following messages will be displayed.

flowchart
graph TD
    A["PAPER JAMMED"] <--> B["OPEN TOP COVER"]
Open the top cover by pulling the top cover handle forward and check where the paper has jammed.
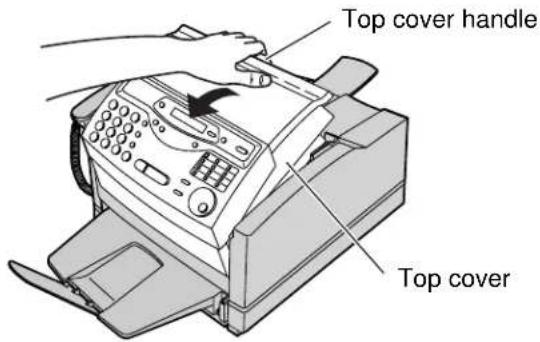

If paper has jammed on the drum unit
1 Remove the jammed paper carefully.
Caution:
- Do not touch or scratch the green drum surface as this may damage the drum unit.
2 Close the top cover securely by pushing down on the dotted area at both ends.

If paper has jammed in the fuser unit
1 Pull the jammed paper out carefully.
Caution:
- Do not touch or scratch the green drum surface as this may damage the drum unit.
2 Close the top cover securely by pushing down on the dotted area at both ends.

Note:
- If the jammed paper cannot be found, it may have stopped under the drum unit. Follow the instructions on next page to clear the jammed paper.
If "FAILED PICK UP" is displayed
1 Close the paper tray extender and remove the paper tray by (A) slightly lifting and (B) pulling it out of the unit.
2 Lift the paper cassette up slightly and pull it out of the unit.
3 Remove the jammed recording paper.
4 Insert the paper cassette into the unit until it clicks into place.
5 Replace the paper tray and open the paper tray extender.


natural_image
Diagram showing a printer's internal structure being placed into a plastic case, with no visible text or symbols.Jams / Cleaning
Sending document jams
If the unit does not release the document during feeding, remove the jammed document.
1 Open the front panel.
2 Remove the jammed document carefully.
3 Close the front panel securely by pushing down on both ends.
Note:
- Do not pull out the jammed paper forcibly before opening the front panel.

natural_image
Illustration of a hand using a printer to press a sheet of paper with a prohibition symbol (no text or symbols present)
Cleaning
If white or black bands appear on a copied or transmitted document, clean the white roller.
1 Disconnect the printer cable, the power cord and the telephone line cord.
2 Open the document feeder tray and the front panel.
3 Clean the white roller with a cloth moistened with isopropyl rubbing alcohol by rotating the roller and let it dry thoroughly.
4 Close the front panel securely by pushing down on both ends.
5 Connect the printer cable, the power cord and the telephone line cord.
Caution:
- Do not use paper products, such as paper towels or tissues, to clean the white roller.

Replacing the toner cartridge and drum unit
When the display shows the following message, replace the toner cartridge and drum unit with new ones.
Display: OR
TONER LOWTONER EMPTY
Depending on usage, the following message may be displayed.
The image contains no text or characters. It is a blank rectangular box with no visible content, figures, or markings.
OR CHANGE DRUMDRUM LIFE OVER
The following is available for replacement. To order, see page 5.
KX-FA75: Toner cartridge and drum unit
Caution:
- If ingestion of toner occurs, drink several glasses of water to dilute stomach contents, and seek immediate medical treatment. If toner comes into contact with eyes, flush thoroughly with water, and seek medical treatment. If toner comes into contact with skin, wash thoroughly with soap and water.
- Do not put up the toner cartridge.
- The drum unit contains a photosensitive drum. Exposing it to light may damage the drum.
—Do not expose the drum unit to light for more than 5 minutes.
—Do not touch or scratch the green drum surface.
—Do not place the drum unit near dust or dirt.
—Do not place the drum unit in a high humidity area.
—Do not expose the drum unit to direct sunlight.
Important:
- To prevent loss of fax memory, when replacing the toner cartridge and drum unit, do not unplug the fax machine.
- Keep the protection materials in case the unit must be repacked and transported (p. 120–122).
1 Pull the top cover handle forward and open the top cover.

Caution:
The fuser unit gets
hot. Do not touch it.

natural_image
Technical line drawing of a mechanical device with internal components (no text or symbols)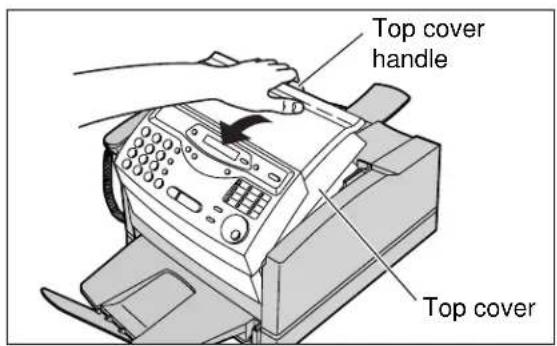
2 Remove the used drum unit by holding the two tabs.
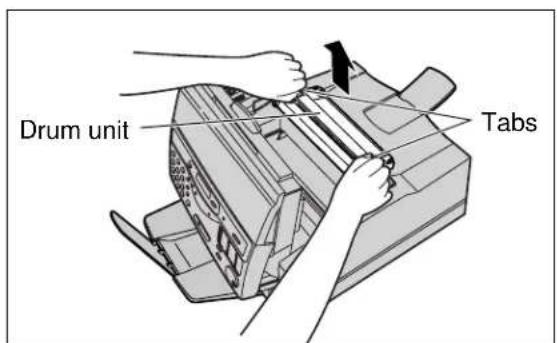
(continued)
For assistance, call 1-800-435-7329.
Replacement
3 Remove the used toner cartridge by holding the two tabs.
Caution:
- To avoid getting your hands dirty, do not touch the roller.
4 Open the protection bag by cutting the end of the bag and remove the new toner cartridge.
5 Remove the tape and remove the protection cap by holding the tab.
Caution:
- Do not put up the toner cartridge.
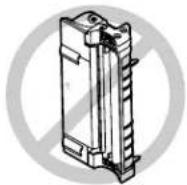
6 Rock the toner cartridge from side to side several times carefully.
7 Install the new toner cartridge by holding the two tabs and matching the triangles.

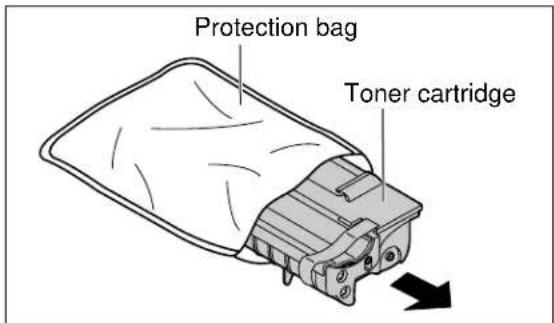


natural_image
Illustration of two hands holding a rectangular device with arrows indicating motion or force direction (no text or symbols)
Replacement
8 Open the protection bag by cutting the end of the bag and remove the drum unit.

9 Remove the protection cap.
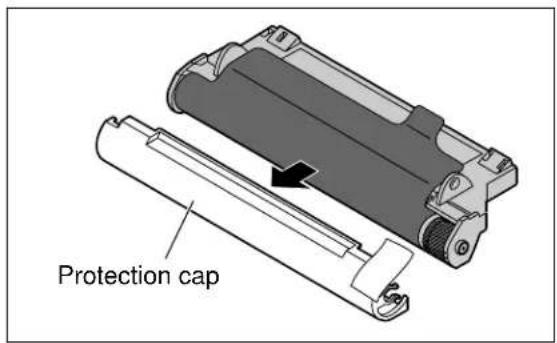
10 Remove the protection sheet.
Caution:
- Do not touch or scratch the green drum surface as this may damage the drum unit.
- Do not expose the drum unit to light for more than 5 minutes as this may damage the drum unit.
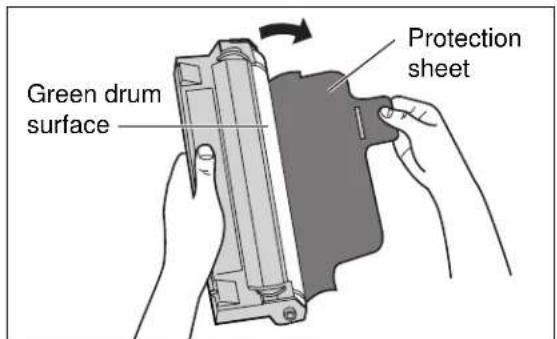
11 Install the new drum unit on the toner cartridge by holding the two tabs and matching the triangles.

12 Close the top cover securely by pushing down on the dotted area at both ends.
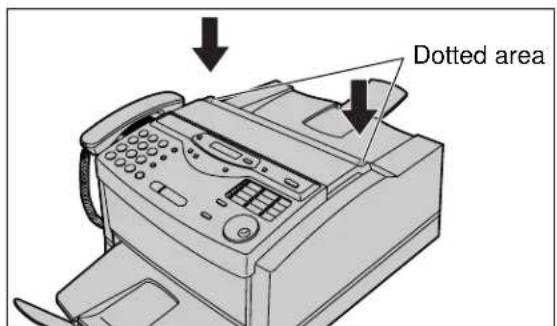
Repacking
Transporting the unit
This unit is not portable, so please take care when transporting it.
—Use the original carton and all of the original packing materials.
—Improper repacking of the unit may result in a service charge to repair the unit or in a cleaning charge to remove spilled toner.
—Because the unit uses dry toner, extreme care must be taken when handling. The unit should be handled in the upright (vertical) position until the unit is repacked completely.
If you plan to move the unit from one location to another, or if you want to store it, follow the steps below.
1 Disconnect the power cord, printer cable, telephone line cord, handset and handset cord.

2 Close the paper stacker and the paper tray extender. Remove the paper tray by (A) slightly lifting and (B) pulling it out of the unit.
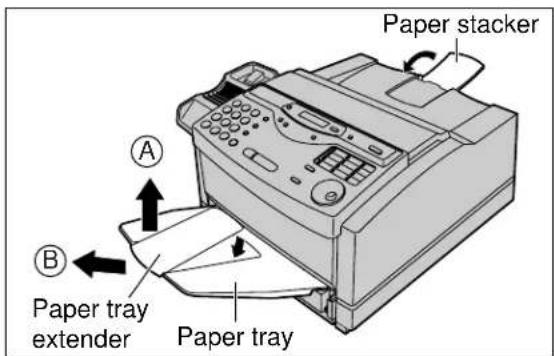
3 Spread a dropcloth or newspaper under the unit to keep the work area clean.
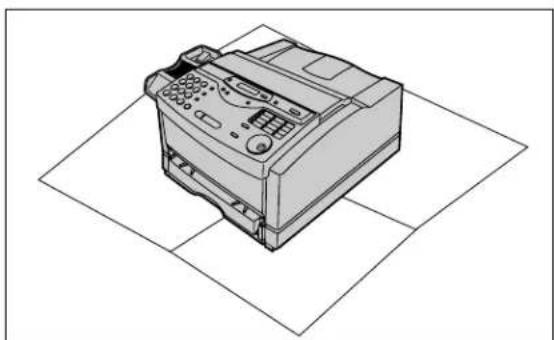
natural_image
Line drawing of a printer with control panel and paper grid background (no text or symbols)4 Pull the top cover handle forward and open the top cover.

5 Remove the drum unit by holding the two tabs.
Caution:
- Do not touch or scratch the green drum surface as this may damage the drum unit.

6 Attach the protection sheet and cover the green drum surface completely.
Caution:
- Do not expose the drum unit to light for more than 5 minutes as this may damage the drum unit. - Prevent the green drum surface from being sticked with the tape.

7 Attach the protection cap to the drum unit using the tape.
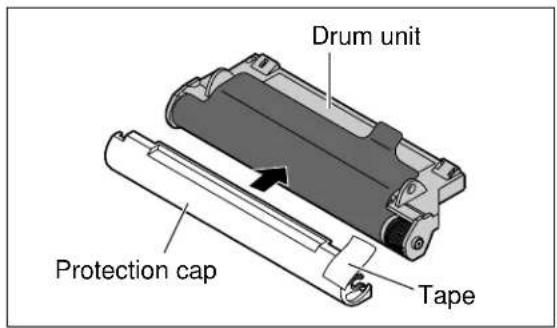
8 Pack the drum unit into the protection bag.

(continued)
Repacking
9
Remove the toner cartridge by holding the two tabs.
Caution:
- Do not put up the toner cartridge.

10
Attach the protection cap using the tape tightly.
Caution:
- To avoid getting your hands dirty, do not touch the roller.
11
Pack the toner cartridge into the protection bag.
12
Close the top cover securely by pushing down on the dotted area at both ends.
13
Repack the unit in its original packing materials.


Printing the feature settings, telephone numbers, journal and broadcast list
You can print out the following report and lists.
Feature list: provides you with the current settings of the basic and advanced programming features (p. 153–155).
Telephone number list: provides you with names and telephone numbers which are stored in the One-Touch Dial and JOG DIAL directory. The telephone number codes are as shown below.
P: A pause has been entered.
F: A flash has been entered.
[ ]: A secret telephone number has been entered. (The telephone number is not printed.)
Journal report: keeps records of fax transmissions and receptions. This report will be printed automatically after every 35 fax communications (p. 51).
Broadcast list: provides you with names and telephone numbers which are stored in the BROADCAST keys (p. 54–56).
1 Press MENU two times.
Display: 2.PRINT REPORT
For the feature list, press #, then 1.
SETUP LIST
For the telephone number list, press #, then 3.
TEL NO. LIST
For the journal report, press #, then 4.
JOURNAL REPORT
For the broadcast list, press #, then 6.
BROADCAST LIST
Press START/SET/COPY to start printing.
PRINTING
- To stop printing, press STOP.
●After printing, the following will be displayed.
PRINT ITEM [ ]
4 Press MENU.
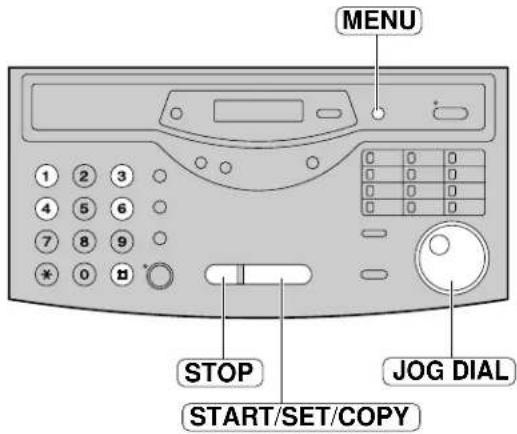
Note:
- In step 2, you can select the desired item by rotating JOG DIAL.
Changing the display contrast
Use this feature to adjust the display contrast.
NORMAL: (Pre-selected setting)
DARKER: Used when the display contrast is too light.
1 Press MENU.
Display: 1.SYSTEM SET UP
Press #, then 39.
LCD CONTRAST
2 Press START/SET/COPY.
MODE=NORMAL ▼ ▲
4 Press ▼ to select the desired setting.
5 Press START/SET/COPY.
SETUP ITEM [ ]
6 Press MENU.

Resetting the advanced features
Use this feature to return the advanced features (p. 154, 155) to their pre-selected settings.
1 Press MENU.
Display: 1.SYSTEM SET UP
Press #, then 80.
SET DEFAULT
Press START/SET/COPY.
RESET=NO ▼ ▲
Press ▼ or ▲ to
select "YES".
RESET=YES ▼▲
5 Press START/SET/COPY.
RESET OK?
- If this feature is not required, press STOP.
6 Press START/SET/COPY again for confirmation.
RESET COMPLETED
SETUP ITEM [ ]
7 Press MENU.

List of FCC requirements and information
If required by the telephone company, inform them of the following.
●FCC Registration No.:
(found on the rear of the unit)
●Ringer Equivalence No.:
(found on the rear of the unit)
●The particular telephone line to which the equipment is connected.
This unit must not be connected to a coin operated line. If you are on a party line, check with your local telephone company.
Ringer Equivalence Number (REN):
This REN is useful in determining the quantity of devices you may connect to your telephone line and still have all of those devices ring when your telephone number is called. In most but not all areas, the sum of the REN's of all devices connected to one line should not exceed five (5.0). To be certain of the number of devices you may connect to your line, as determined by the REN, you should contact your local telephone company to determine the maximum REN for your calling area.
In the event that terminal equipment causes harm to the telephone network, the telephone company should notify the customer, if possible, that service may be stopped. However, where prior notice is impractical, the company may temporarily cease service providing that they:
a) Promptly notify the customer.
b) Give the customer an opportunity to correct the problem with their equipment.
c) Inform the customer of the right to bring a complaint to the Federal Communication Commission pursuant to procedures set out in FCC Rules and Regulations Subpart E of Part 68.
The Telephone Company may make changes in its communications facilities, equipment operations, or procedures where such action is reasonably required in the operation of its business and is not inconsistent with the rules and regulations in FCC Part 68. If such changes can be reasonably expected to render any customer terminal equipment incompatible with telephone company communications facilities, or require modification or
alteration of such terminal equipment, or otherwise materially affect its use or performance, the customer shall be given adequate notice in writing, to allow the customer an opportunity to maintain uninterrupted service.
CAUTION:
Any changes or modifications not expressly approved by the party responsible for compliance could void the user's authority to operate this device.
When programming emergency numbers and/or making test calls to emergency numbers:
-
Remain on the line and briefly explain to the dispatcher the reason for the call before hanging up.
-
Perform such activities in the off-peak hours; such as early morning or late evenings.
This telephone provides magnetic coupling to hearing aids.
NOTE:
This equipment has been tested and found to comply with the limits for a Class B digital device, pursuant to Part 15 of the FCC Rules. These limits are designed to provide reasonable protection against harmful interference in a residential installation. This equipment generates, uses, and can radiate radio frequency energy and, if not installed and used in accordance with the instructions, may cause harmful interference to radio communications. However, there is no guarantee that interference will not occur in a particular installation. If this equipment does cause harmful interference to radio or television reception, which can be determined by turning the equipment off and on, the user is encouraged to try to correct the interference by one or more of the following measures:
—Reorient or relocate the receiving antenna.
—Increase the separation between the equipment and receiver.
—Connect the equipment into an outlet on a circuit different from that to which the receiver is connected.
—Consult the dealer or an experienced radio/TV technician for help.
Panasonic Consumer Electronics Company, Division of Matsushita Electric Corporation of America
One Panasonic Way, Secaucus, New Jersey 07094
Panasonic Sales Company Division of Matsushita Electric of Puerto Rico, Inc.
Ave. 65 de Infantería, Km. 9.5, San Gabriel Industrial Park, Carolina, Puerto Rico 00985
PANASONIC Facsimile Products Limited Warranty
Have any questions? CALL 1-800-HELPFAX on:
How to operate the unit,
How to get repair service,
How to get supplies.
Panasonic Consumer Electronics Company or Panasonic Sales Company (collectively referred to as "the warrantor"), will repair this product with new or refurbished parts, free of charge, in the USA or Puerto Rico for one (1) year from the date of original purchase in the event of a defect in materials or workmanship.
This Limited Warranty Excludes both Labor and Parts for: batteries, antennas, and cosmetic parts (cabinet).
Carry-in or mail-in service in the USA or Puerto Rico can be obtained during the warranty period by contacting a Panasonic Services Company (PASC) Factory Servicenter listed in the Servicenter Directory. Or call, toll free, 1-800-HELP FAX (1-800-435-7329) to locate a PASC Factory Servicenter. Carry-in or mail-in service in Puerto Rico can be obtained during the warranty period by calling the Panasonic Sales Company telephone number listed in the Servicenter Directory.
This warranty is extended only to the original purchaser. A purchase receipt or other proof of date of original purchase will be required before warranty service is rendered.
This warranty only covers failures due to defects in material or workmanship which occur during normal use and (when applicable) does not cover the film cartridge, the toner cartridge and drum unit or the print and ink cartridge. The inability of this product to interface with any specific computer is not a manufacturing defect and is outside of the scope of this Limited Warranty. In no event shall the warrantor be liable by reason of such incompatibility. The warranty does not cover damages which occur in shipment, or failures which are caused by products not supplied by the warrantor such as non Panasonic ink cartridges, or failures which result from accident, misuse, abuse, neglect, mishandling, faulty installation, misapplication, set-up adjustments, improper operation or maintenance, alteration, modification, power line surge, improper voltage supply, lightning damage, signal reception problems, rental use of the product, or service by anyone other than a PASC Factory Servicenter or a PASC authorized Servicenter, or damage that is attributable to acts of God.
LIMITS AND EXCLUSIONS
There are no express warranties except as listed above. THE WARRANTOR SHALL NOT BE LIABLE FOR INCIDENTAL OR CONSEQUENTIAL DAMAGES RESULTING FROM THE USE OF THIS PRODUCT, OR ARISING OUT OF ANY BREACH OF THIS WARRANTY. ALL EXPRESS AND IMPLIED WARRANTIES, INCLUDING THE WARRANTIES OF MERCHANTABILITY, ARE LIMITED TO THE APPLICABLE WARRANTY PERIOD SET FORTH ABOVE.
Some states do not allow the exclusion or limitation of incidental or consequential damages, or limitations on how long an implied warranty lasts, so the above exclusions or limitations may not apply to you.
This warranty gives you specific legal rights and you may also have other rights which vary from state to state. If a problem with this product develops during or after the warranty period, you may contact your dealer or Servicenter. If the problem is not handled to your satisfaction, then write to the Customer Satisfaction Center at the company address indicated above.
Servicenter Directory
For Product Information, Operating Assistance, Literature Requests, Dealer Locations, and all Customer Service inquiries please contact: 1-800-HELP-FAX (435-7329), Monday-Friday 9am - 8pm EST.
Web Site: http://www.Panasonic.com You can purchase parts, accessories or locate your nearest servicenter by visiting our Web Site.
Factory Servicenters Locations
| CALIFORNIA6550 Katella AvenueCypress, CA 90630800 Dubuque AvenueS. San Francisco,CA 9408020201 Sherman WaySuite 102Canoga Park, CA 913063878 Ruffin RoadSuite ASan Diego, CA 92123COLORADO1640 South Abilene StreetSuite DAurora, CO 80012FLORIDA3700 North 29thAvenueSuite 102Hollywood, FL 33020 | GEORGIA8655 Roswell RoadSuite 100Atlanta, GA 30350ILLINOIS9060 Golf RoadNiles, IL 607141703 North Randall RoadElgin, IL 60123(Pick-up / Drop-off only)MARYLAND62 Mountain RoadGlen Burnie, MD 21061MASSACHUSETTS60 Glacier DriveSuite GWestwood, MA 02090 | MICHIGAN37048 Van Dyke AvenueSterling Heights, MI 48312MINNESOTA7850-12 th Avenue SouthAirport Business CenterBloomington, MN 55425OHIO2236 Waycross RoadCivic Center PlazaForest Park, OH 45240PENNSYLVANIA2221 Cabot Blvd. West Suite BLanghorne, PA 19047Chartiers ValleyShopping Center1025 Washington PikeBridgeville, PA 15017 | TENNESSEE3800 Ezell RoadSuite 806Nashville, TN 37211TEXAS7482 Harwin DriveHouston, TX 7703613615 Welch RoadSuite #101Farmers Branch, TX75244WASHINGTON20425-84 th Avenue SouthKent, WA 98032 |
| HAWAII99-859 Iwaiwa StreetAiea, Hawaii 96701Phone (808) 488-1996Fax (808) 486-4369 |
Service in Puerto Rico
Matsushita Electric of Puerto Rico, Inc. Panasonic Sales Company/ Factory Servicenter: Ave. 65 de Infantería, Km. 9.5, San Gabriel Industrial Park, Carolina, Puerto Rico 00985 Phone (787) 750-4300 Fax (787) 768-2910
Accessory Purchases:
1-800-332-5368 (Customer Orders Only) Panasonic Services Company 20421 84th Avenue South, Kent, WA 98032 (6 am to 5 pm Monday – Friday; 6 am to 10:30 am Saturday; PST) (Visa, MasterCard, Discover Card, American Express, Check)
As of Jul. '98
Limited Warranty / Energy Star
Notes for product service and shipping the product
For product service
●Servicenters are listed on page 127.
- Call toll free 1-800-HELP-FAX (435-7329) for the location of an authorized servicenter.
When you ship the product
- Carefully pack your unit, preferably in the original carton.
- Attach a letter, detailing the symptom or problem, to the outside of the carton.
- Send the unit to an authorized servicenter, prepaid and adequately insured.
- Do not send your unit to the Panasonic Consumer Electronics Company or to any executive or regional sales offices. These locations do not repair consumer products.
Energy Star
As an ENERGY STAR ® Partner, Panasonic has determined that this product meets the ENERGY STAR ® guidelines for energy efficiency.
ENERGY STAR is a U.S. registered mark.

If this product is not used for 5 minutes, it will change to power save mode.
Technical data about this product
Common specifications
Laser diode properties: Laser output: 5 mW max
Wave length: 760–800 nm
Emission duration: Continuous
Operating Environment: 10 °C – 32.5 °C (50 °F – 90.5 °F), 20 % – 80 % RH (Relative Humidity)
Dimensions (H×W×D): 422 mm×430 mm×212 mm ( 165/8'' × 1615/16'' × 811/32'' )
Mass (Weight): Approx. 12.2 kg (26.9 lb.)
Power Consumption: Standby: Approx. 40 W
Power save*: Approx. 10 W
Transmission: Approx. 12 W (Power save)
Approx. 42 W (Standby)
Print (Copy or Reception): Approx. 200 W
Maximum: Approx. 480 W
Power Supply: 120 V AC, 60 Hz
*If this product is not used for 5 minutes, it will change to power save mode.
Fax/Copy feature
Applicable Lines: Public Switched Telephone Network
Document Size: Max. 216 mm (8 12 ) in width
Max. 600 mm (23 5/8 ″) in length—STANDARD/FINE/HALF TONE mode
Max. 420 mm (16 17/32'' ) in length—SUPER FINE mode
Effective Scanning Width: 208 mm (8 316 )
Effective Printing Width: 208 mm (8 3/16'' )
Transmission Time*: Approx. 8 s/page (ECM-MMR)**
Scanning Density: Horizontal: 8 pels/mm (203 pels/inch)
Vertical: 3.85 lines/mm (98 lines/inch) —STANDARD mode
7.7 lines/mm (196 lines/inch) —FINE/HALF TONE mode
15.4 lines/mm (392 lines/inch) —SUPER FINE mode
Halftone Level: 64-level
Scanner Type: CIS (Contact Image Sensor)
Printer Type: Laser beam printer
Data Compression System: Modified Huffman (MH), Modified READ (MR),
Modified Modified READ (MMR)
Modem Speed: 14,400 / 12,000 / 9,600 / 7,200 / 4,800 / 2,400 bps; Automatic Fallback
Memory Capacity: Approx. 120 pages of memory transmission/reception/copy
(Based on the CCITT No. 1 Test Chart in standard resolution.)
*Transmission speed depends upon the contents of the pages, resolution, telephone line conditions and capability of the receiving unit.
**The 8 second speed is based upon the CCITT No. 1 Test Chart.
CCITT No. 1 Test Chart

Printer feature
Printer Type: Laser beam printer
Print Speed: 8 ppm
Printing Resolution: 600× 600 dpi
Compatible OS: Windows 3.1/3.11/95/98
Interface: 8-bit parallel (Included)
Paper specifications:
Media Size: Using the paper cassette
| Media Size | Dimension | |
| Paper | Letter | 216 mm×279 mm ( 81/2 ′′×11′′) |
| Legal | 216 mm×356 mm ( 81/2 ′′×14′′) |
Using the paper tray
| Media Size | Dimension | |
| Paper | Letter | 216 mm×279 mm ( 81/2 ′′×11′′) |
| Legal | 216 mm×356 mm ( 81/2 ′′×14′′) | |
| A4 | 210 mm×297 mm | |
| Executive | 184 mm×267 mm ( 71/4 ′′× 101/2 ′′) | |
| Transparency | Letter | 216 mm×279 mm ( 81/2 ′′×11′′) |
| A4 | 210 mm×297 mm | |
| Envelope | COM10 | 105 mm×241 mm ( 41/8 ′′× 91/2 ′′) |
| DL | 110 mm×220 mm |
Paper Weight: Using the paper cassette
60 g/m² to 90 g/m² (16 lb. to 24 lb.)
Using the paper tray
60 g/m² to 105 g/m² (16 lb. to 28 lb.)
Note:
- Fax receiving and copying are only available when using the paper cassette.
Scanner feature
Document Size: Max. 216 mm (8
1/2 ) in width
Max. 600 mm (23 5/8 ″) in length
Effective Scanning Width: 208 mm (8 316 )
Scanning Density: Standard 200×100 dpi
Fine 200×200 dpi
S-Fine 200×400 dpi
Halftone Level: 64-level
Scanner Type: CIS (Contact Image Sensor)
Compatible OS: Windows 95/98,
Windows 3.1/3.11 (Need application software which is compatible with TWAIN driver.)
Note:
- Any details given in these instructions are subject to change without notice.
●The pictures and illustrations in these instructions may vary slightly from the actual product.
Toner life
Toner life of the included toner cartridge or KX-FA75 toner cartridge depends on the amount of content in a received, copied or printed document. We refer to the content as "image area". Because image area varies in actual usage, so does toner life. The following is the approximate relationship between image area and toner life for the included toner cartridge or KX-FA75 toner cartridge.
■ Toner life for the included toner cartridge or KX-FA75 toner cartridge:
5% image area

10% image area 15% image area

Note:
- The image area changes with the depth, thickness and size of the characters in the document.
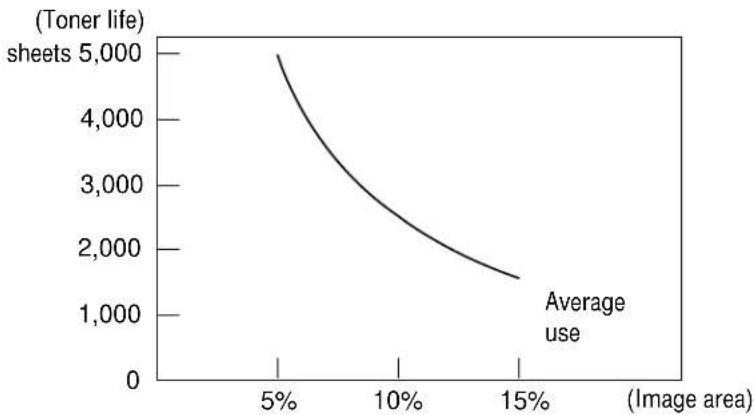
line
| Image area | Toner life | | ---------- | ---------- | | 5% | 5,000 | | 10% | 3,000 | | 15% | 1,500 |Note:
- Toner life will vary depending on actual usage.
Drum life
The included drum unit or KX-FA75 drum unit can print approx. 5,000 sheets of letter size paper regardless of the content of image area.
③ Seleccione "Panasonic KX-FLM600/650" como impresora activa.
② Haga clic en Print del panel principal.
3 Haga clic en Scan del panel principal.
Advanced features ..... 154, 155
(Resetting) 124
Answering machine 65–67
AUTO ANSWER button ..... 60, 62, 63, 72
AUTO ANSWER mode ..... 60, 62, 63, 72
Auto reduction 75
Automatic dialing mode setting ..... 27
B Basic features ..... 153
BROADCAST keys ..... 54, 56
Broadcast list 123
Broadcast report 56
C Character table 31
Cleaning 116
COLLATE button 80
Communication Log 84, 97, 102
Communication messages ..... 105
Connecting tone 59
Connections 8,27
Copier 101
Copy (Collated) 80, 81
(Enlargement/reduction) ..... 80, 81
(Multiple copies) 80
COPY button 12,80
D Date and time 29
Delayed transmission 52
Dialing mode 36
Directory feature 39, 41, 45
DIRECTORY PROGRAM button ..... 37, 39, 40, 54
Display (Contrast) 124
(Error messages) 106, 107
Distinctive Ring service ..... 68, 69
Document jam 116
Document size 49,129
Drum life 131
Drum unit (Installing) 6, 21–23
(Replacing) 117–119
E Enlarge/Reduce copy 80, 81
Envelope specifications ..... 92
Error correction mode setting ..... 58
Error messages 105–107
Extension telephone 71, 74
F Facsimile telephone number 32
Fax activation code 74
Fax auto redial 44
FAX ONLY mode 60, 63, 64
FAX ONLY ring count 64
Fax pager 78
Feature list 123
Feeder jam 116
FLASH button 35
Friendly reception 62,77
H Half-tone setting 58
Handset cord 8,27
HANDSET MUTE button 34
Handset receiver volume 33
HELP button 17
HYPHEN key 31, 32, 37
I INSERT key 30, 31
IQ-FAX 46-48
IQ-FAX button 48
J Jam 114–116
JOG DIAL (Making a voice call) .... 41 (Selecting characters) .... 31 (Sending faxes) .... 45 (Storing) .... 39, 40
Journal auto print 51
Journal report 51, 123
L Legal paper 25
List (Broadcast)....123 (Feature)....123 (Telephone number)....123
Location panel 18, 19
Logo 30,31
LOWER key 37, 38, 44
M Manual feeding 90
Media size 90,130
Memory reception alert....62,77
Memory transmission 53
MONITOR button 34, 38, 42
Monitor volume 33
N NAME/TEL NO. key 41
One-Touch Dial (Making a voice call)....38 (Sending faxes)....44 (Storing)....37
Other size documents 75
Overseas transmission mode ..... 57
Overview 20
Index
P Pager call 78
PANA LINK software
(Activating) 84
(Installing) 83
(Setup) 86
Paper jam 114, 115
Paper stacker 7,26
Paper tray 7,26,90
PAUSE button 35
PC link 104
Power down report 113
Power failure 113
Power supply/cord 8, 27, 129
Printing paper size 130
Printing reports 123
Problem solving
(Fax machine) 108-110
(PC software)....111-113
Programmable features ..... 153–155
Pulse 36
Q QUICK SCAN button .....53, 80
R Receiving
(Fax) 11,62
(Setting) 60, 61
Receiving reduction 75
Recording paper ..... 7, 24, 25, 130
Recording paper jam 114, 115
REDIAL button 34, 43
Remote activation ID 67
Report
(Broadcast) 56
(Feature setting) 123
(Journal) 51, 123
(Sending) 50
(Telephone numbers) 123
Reset 124
RESOLUTION button ..... 43–45, 48, 80
Ring count 64,73
Ring pattern detection ..... 68, 69
Ringer volume 33
S Scanner 100
SECRET key 37, 39
Sending
(From memory) 53
(From PC) 93–95
(IQ-FAX) 46-48
(JOG DIAL) 45
(Manually) 10,43
(Multiple stations) 54–56
(One-Touch Dial) 44
Sending document jam 116
Sending report 50
Set default 124
Silent detection 76
Silent fax recognition ring 73
Specifications
(Common) 129
(Fax/Copy) 129
(Printer) 130
(Scanner) 130
Storing
(JOG DIAL) 39, 40
(One-Touch Dial) 37
T TEL mode 60, 62
TEL/FAX delayed ring count 73
TEL/FAX mode 70-73
Telephone line cord 8,27
Telephone number list 123
TONE button 35
Toner cartridge
(Installing) 21–23
(Replacing) 117–119
Toner life 131
Toner save 79
Transmission
(IQ-FAX) 46-48
(JOG DIAL) 45
(Manually) 10,43
(One-Touch Dial) 44
Transmittable document ..... 49, 129
V Viewer 84,103
Voice call
(Answering) 9,34
(JOG DIAL) 41
(Making) 9,34
(One-Touch Dial) 38
(PC) 99
Voice contact 42
VOLUME button 33
Summary of user programmable features
Basic features
| Code | Feature & Display Available settings Meaning Page | |||
| #01 | Setting the date and timeSET DATE & TIME | (2 digits for each entry) | mm/dd/yy hh:mm | 29 |
| #02 | Setting your logoYOUR LOGO | (Up to 30 characters) | 30 | |
| #03 | Setting your facsimile telephone numberYOUR FAX NO. | (Up to 20 digits) | 32 | |
| #04 | Printing the sending reportSENDING REPORT | ERROR | If transmission fails | 50 |
| ON | Activate | |||
| OFF | Deactivate | |||
| #06 | Setting the ring count in the FAX ONLY modeFAX RING COUNT | 1, 2, 3, 4,5 EXT.TAM | 1 to 5 rings(5 rings if used with an answering machine) | 64 |
| #12 | Securing the remote operation for the answering machineREMOTE TAM ACT. | ON / ID=11 | Activate | 67 |
| OFF | Deactivate | |||
| #13 | Setting the dialing modeDIALING MODE | AUTO | Sets the dialing mode automatically. | 36 |
| TONE | Sets to TONE. | |||
| PULSE | Sets to PULSE. | |||
| #14 | Setting the PC linkPC LINK | ON | Activate | 104 |
| OFF | Deactivate | |||
| #16 | Setting the recording paper sizePAPER SIZE | LETTER | Letter size paper | 28 |
| A4 | A4 size paper | |||
| LEGAL | Legal size paper | |||
(The pre-selected value is in bold.)
Note:
- You can display the basic features in the order above by rotating JOG DIAL instead of entering the code number (#01, #02, etc.).
Advanced features
| Code | Feature & Display Available settings Meaning Page | |||
| #22 | Setting the journal report to print automaticallyAUTO JOURNAL | ON | Activate | 51 |
| OFF | Deactivate | |||
| #23 | Sending documents overseasOVERSEAS MODE | ON | Activate | 57 |
| OFF | Deactivate | |||
| #25 | Sending a fax at a specific timeDELAYED SEND | ON | Activate | 52 |
| OFF | Deactivate | |||
| #30 | Setting the silent fax recognition ring countSILENT FAX RING | 3, 4, 5, 6 | 3 to 6 rings | 73 |
| #31 | Setting the Distinctive Ring patternRING DETECTION | A, B, C, D | Patterns A-D | 69 |
| OFF | Deactivate | |||
| #37 | Receiving other sizes of documentsAUTO REDUCTION | A4→LTR | Reduces A4 size document to fit into letter size paper. | 75 |
| LEGAL→LTR | Reduces legal size document to fit into letter size paper. | |||
| OFF | Deactivate | |||
| #38 | Changing the half-tone settingHALFTONE MODE | PHOTO | For photographs | 58 |
| AUTO | For photographs and words | |||
| #39 | Changing the display contrastLCD CONTRAST | NORMAL | Normal contrast | 124 |
| DARKER | Darker contrast | |||
| #40 | Setting the silent detectionSILENT DETECT. | ON | Activate | 76 |
| OFF | Deactivate | |||
| #41 | Changing the fax activation codeFAX ACTIVATION | ON / CODE= *9* | Activate | 74 |
| OFF | Deactivate | |||
| #44 | Setting the memory reception alertRECEIVE ALERT | ON | Activate | 77 |
| OFF | Deactivate | |||
| #46 | Setting the friendly receptionFRIENDLY RCV | ON | Activate | 77 |
| OFF | Deactivate | |||
| #68 | Setting the error correction modeECM SELECTION | ON | Activate | 58 |
| OFF | Deactivate | |||
(The pre-selected value is in bold.)
| Code | Feature & Display Available settings Meaning Page | |||
| #70 | Signaling your pager when your unit receives a faxFAX PAGER CALL | ON | Activate | 78 |
| OFF | Deactivate | |||
| #75 | Setting the IQ-FAX functionIQ-FAX | ON | Activate | 47 |
| OFF | Deactivate | |||
| #76 | Setting the connecting toneCONNECTING TONE | ON | Activate | 59 |
| OFF | Deactivate | |||
| #77 | Changing the AUTO ANSWER settingAUTO ANSWER | FAX ONLY | Facsimile only mode | 72 |
| TEL/FAX | Telephone/Facsimile mode | |||
| #78 | Setting the TEL/FAX delayed ring countTEL/FAX RING | 1, 2, 3, 4 | 1 to 4 rings | 73 |
| #79 | Setting the toner saveTONER SAVE | ON | Activate | 79 |
| OFF | Deactivate | |||
| #80 | Resetting the advanced featuresSET DEFAULT | YES | Reset | 124 |
| NO | Will not reset | |||
(The pre-selected value is in bold.)
Panasonic FAX ADVANTAGE PROGRAM
Free peace of mind, direct from Panasonic
NO EXTRA COST

■ 1-year limited warranty 1 parts & labor
■ Toll-free help line
■ Free overnight replacement 2 and repair program
The Panasonic Fax Advantage Consumer Service Program.
Panasonic knows that if your fax machine is not up and running, neither is your business. That's why we created the Panasonic Fax Advantage Program. Included at no extra cost with the purchase of a Panasonic Fax Machine. the Fax Advantage Program can provide a free replacement unit overnight if your original unit is in need of repair. Here's how it works:
- If you have a problem with your fax while it is covered by the one-year limited warranty 1 , call our toll-free help-line at 1-800-HELPFAX.
- Talk to one of our technical experts to diagnose your problem over the phone.
- If repairs are necessary and you are entitled to service under the terms and conditions of the limited warranty 4 , we will send a refurbished replacement unit to you overnight or second business day delivery, depending on the time of your call.
A second option available under our one-year limited warranty is to mail-in or carry-in your fax to one of our Regional Service centers, where the unit will be repaired and returned to you.
Instructions
If you choose to receive a replacement unit under the Fax Advantage Program, Panasonic will provide a replacement unit which will be completely refurbished, quality-tested by Panasonic technicians and individually hand-inspected before it is shipped to you. You will keep the replacement unit and send the original unit to us in the replacement unit's box. UPS will pick up the unit at no charge to you, should it be determined that you are entitled to warranty service. A proof-of-purchase must be included with the returned product. Any unit that is replaced by Panasonic and not shipped with proper proof-of-purchase by you will be subject to a minimum \$100.00 charge. The original unit must be properly packaged in the same manner as the replacement unit, utilizing the packing materials provided. Damage due to improper
or inadequate packing will be charged to you as an out-of-warranty cost.
If our 1-800-HELPFAX technicians determine that your unit may be an "out-of-box failure" 4 , we will attempt to provide you with a factory-new replacement unit 5 . You must ship a copy of your receipt with your original unit to verify that you purchased the unit within 10 days prior to your 1-800-HELPFAX call.
Requirements
You must give our technicians a valid credit card number (Discover, VISA. Master Card, or American Express/Optima). Product that is not returned to Panasonic by 10 business days after shipment of the replacement product will be charged to your credit card account at Panasonic's Suggested Retail Price (see dealer for details). If your original unit is not eligible for warranty service, your card will be charged for the non-warranty repair of the unit at Panasonic's current rate for parts and labor and for any shipping charges associated with this program. If you do not wish to pay out-of-warranty repair costs, you will be responsible for returning the replacement unit to Panasonic and for paying all shipping charges associated with this program including the overnight delivery of the replacement product to you, shipment of the problem unit to Panasonic, shipment of the replacement unit back to Panasonic and the return of your original unit back to you. Credit status will be verified prior to sending the replacement product.
- See dealer for limited warranty details.
- Replacement unit is refurbished.
- Replacement program excludes Puerto Rico and is subject to termination at any time without advance notice.
- "Out-of-box failure" is an inoperable unit that was purchased no more than 10 days prior to your 1-800-HELPFAX call, and would otherwise qualify for warranty service under the terms and conditions of the limited warranty.
- Panasonic reserves the right to send a refurbished unit.
Panasonic Consumer Electronics Company, Division of Matsushita Electric Corporation of America
One Panasonic Way, Secaucus,
New Jersey 07094
Panasonic Sales Company, Division of Matsushita Electric of Puerto Rico, Inc. ("PSC")
San Gabriel Industrial Park, Carolina,
Puerto Rico 00985
- OPERATING INSTRUCTIONS
- Welcome to the world of Panasonic facsimiles.
- Things you should keep record of
- Attach your sales receipt here
- For future reference
- Caution:
- Trademarks
- Copyright:
- Important safety instructions
- SAVE THESE INSTRUCTIONS
- INSTALLATION:
- WARNING:
- OTHER INFORMATION:
- WASTE DISPOSAL METHOD:
- Included accessories
- Accessory order information
- Installation
- Before installation (p. 21)
- Drum unit (p. 21–23)
- Recording paper (p. 24, 25)
- Paper tray and paper stacker (p. 26)
- Connections
- Voice calls - making/answering
- Voice calls - making
- Voice calls - answering
- Faxes - sending/receiving
- Faxes - sending
- Note:
- Faxes - receiving
- Copying
- PC information
- Help function
- Finding the Controls
- Location
- Overview
- Before installation
- Toner cartridge and drum unit
- Important:
- Setup
- Recording paper
- Loading paper in the paper cassette
- Using legal size paper
- Checking the amount of remaining recording paper
- Types of paper to avoid
- Paper tray
- Paper stacker
- Automatic dialing mode setting
- Recording paper size
- Date and time, your logo and facsimile telephone number \_\_\_\_
- Setting the date and time
- To correct a mistake
- Setting your logo
- To delete a character
- To insert a character
- To select characters with the dial keypad
- To select characters using the JOG DIAL
- Setting your facsimile telephone number
- To delete a number
- Adjusting volumes
- Ringer volume
- ■ To turn the ringer off:
- Press START/SET/COPY.
- ■ While the ringer volume is set to off:
- Handset receiver volume
- Monitor volume
- Making and Answering Calls
- To redial the last number
- To mute your voice to the other party
- TONE, FLASH and PAUSE buttons
- TONE button
- FLASH button
- Entering pauses
- Example 1:
- Example 2:
- Dialing mode —— (touch tone or pulse)
- Storing names and telephone numbers in the One-Touch Dial
- Press DIRECTORY PROGRAM.
- For stations 1–4
- For stations 5–11
- For stations 12–22
- Enter the station name, up to 10 characters, following the instructions on page 31.
- Press START/SET/COPY.
- Enter the telephone number up to 30 digits.
- Press START/SET/COPY.
- Press DIRECTORY PROGRAM to exit the program.
- START/SET/COPY
- Helpful hint:
- To keep a telephone number secret
- To edit a stored station name and number
- One-Touch Dial
- Making a voice call using the One-Touch Dial
- Helpful hints:
- Storing names and telephone numbers in the JOG DIAL directory
- To delete a character or number
- Editing a stored name and number
- Erasing a stored name and number
- Making a voice call using the JOG DIAL directory
- To confirm the stored items on the display
- To search for a name by initial
- Voice Contact
- Talking to the caller after fax transmission or reception
- Initiating voice contact
- Receiving a request for voice contact
- Sending a fax manually
- To feed more than 15 pages at a time
- To stop transmission
- To select the resolution
- Sending a fax using the One-Touch Dial
- Fax auto redial
- If your unit cannot send a fax
- Sending a fax using the JOG DIAL directory \_\_\_\_
- IQ-FAX
- How your fax is sent to the other party's fax machine
- How to apply for the FaxSav Internet service for your unit
- Turning on the IQ-FAX function
- Sending Faxes
- Sending a fax using the Internet
- If you cannot send a fax
- Documents you can send
- Sending report for confirmation
- Automatic journal report
- Delayed transmission (sending a fax at a specified time)
- To cancel the delayed transmission setting
- From memory
- Transmitting documents from memory
- Multiple stations
- Programming telephone numbers into the BROADCAST keys
- Press one of the BROADCAST keys.
- Press ▼ or ▲ to select "BROADCAST".
- Enter the stations.
- a: Using the One-Touch Dial:
- b: Using the JOG DIAL directory:
- Press START/SET/COPY.
- Press START/SET/COPY after entering all of the desired stations.
- Adding a new name and number
- Using BROADCAST keys
- To cancel the broadcast setting
- Broadcast report
- Overseas mode
- Half-tone setting
- Error correction mode setting
- Connecting tone
- Setting the unit to receive calls
- Option C Option D
- Other options
- With PC
- TEL/FAX mode
- Remote activation
- TEL mode (answering all calls manually)
- To stop receiving
- Friendly reception feature
- Memory reception
- FAX ONLY mode (all calls are received as faxes)
- Activating the FAX ONLY mode
- Receiving Faxes
- Setting the ring count in the FAX ONLY mode
- Using the unit with an answering machine
- Setting up the fax machine with an answering machine
- How the fax machine and answering machine work
- Receiving voice calls
- Receiving fax calls
- Receiving a voice message and fax document in one call
- To use the unit with an answering machine and computer, we recommend the following setup.
- Remote operation of your answering machine (remote activation ID)
- Distinctive Ring service
- (ring pattern detection feature)
- What is a Distinctive Ring service?
- Using one of the telephone numbers as a facsimile number
- Setting the Distinctive Ring pattern assigned for faxes
- (receiving voice calls with rings and fax calls without rings when you are near the unit)
- TEL/FAX delayed ring count:
- Silent fax recognition ring count:
- Changing the AUTO ANSWER setting to the TEL/FAX mode
- We recommend the following setup.
- TEL/FAX delayed ring count
- Silent fax recognition ring count
- Extension telephone
- Fax activation code
- Other size documents
- Silent detection
- (receiving faxes from older model fax machines)
- Memory reception alert
- Friendly reception
- Pager call - when your unit receives a fax
- How your unit and pager work
- Toner save
- Making a copy
- To stop copying
- Printing collated copies
- Choosing an enlargement/reduction rate
- ■ To enlarge a document:
- ■ To reduce a document:
- Setup (PC)
- Connecting to a computer
- Connect your personal computer to the fax machine as follows:
- Installing the PANA LINK software
- Windows 3.1 or 3.11 users:
- Activating the PANA LINK software
- Click Start.
- Point to Programs, point to PANA LINK and click PANA LINK.
- Setting up PANA LINK
- Open the PANA LINK main panel.
- Click Setup in the main panel.
- Change the set value in the Setup dialog box.
- Click OK.
- Setting user information
- Click User Information.
- Enter your information for each item.
- Click OK.
- Printer
- Printing documents created on the PC
- Printing from Windows applications
- Printing a selected file
- Click Print in the main panel.
- Select the file you want to print.
- Click [Open] in the Open dialog box.
- Printing using the paper tray (manual feeding) =
- Media you can print on
- ■ Paper weight
- Loading a sheet manually
- Transparencies and labels
- Envelope specifications
- We recommend that you do not use envelopes with any of the following characteristics (using these may result in paper jams):
- Do not attempt to print on any of the following types of envelopes (these may cause damage to your printer):
- For best printing results
- Sending documents created on the PC
- Sending a document created by an application as a fax message
- Sending a file from the PANA LINK window
- Click Send a fax in the main panel. • The Send fax panel will be displayed
- Click Browse in the Send fax panel. • The Open file dialog box will be displayed.
- Select a file you want to send, and then click [Open].
- Set the fax number which you are going to send the file to.
- Click START in the main panel.
- Sending a document from the fax machine using the PC
- Place the document on the fax machine.
- Open the PANA LINK main panel.
- Set the fax number you want to send the document to in the main panel.
- Click START.
- Set the image quality, type and brightness, and then click Scan.
- PC Receiving
- Receiving faxes on your PC
- To receive manually
- To receive automatically
- To receive directly to the fax machine
- Confirming the result of reception
- Phone Call
- Making a phone call
- Enter the telephone number in the main panel.
- Click Dial.
- Lift the fax machine's handset.
- Computerized directory for fax and phone numbers
- 1
- 2
- 3
- 4
- 5
- Broadcast
- Using your fax machine as a scanner
- PC based copying
- More Information
- The Communication Log
- Click [Comtn.\Log] in the main panel.
- Select the Communication Log Folder.
- Viewer
- Click Viewer in the main panel. • The Viewer window will appear.
- Click on File then Open in the menu bar, or click the Open icon in the tool bar in the main panel.
- Select the file you want to view.
- PC link
- (turning PC related functions on/off)
- To turn off the PC LINK on the fax machine
- Reports
- Display
- Operations
- When a function does not work, check here before requesting help
- Problems with fax machine
- Problems with PC software
- General
- Problem Cause & Remedy
- If a power failure occurs
- Power down report
- Sample of a power down report
- Clearing paper jams
- If paper has jammed on the drum unit
- If paper has jammed in the fuser unit
- If "FAILED PICK UP" is displayed
- Jams / Cleaning
- Sending document jams
- Cleaning
- Replacing the toner cartridge and drum unit
- Replacement
- Repacking
- Transporting the unit
- 9
- 10
- 11
- 12
- 13
- Printing the feature settings, telephone numbers, journal and broadcast list
- Changing the display contrast
- Resetting the advanced features
- List of FCC requirements and information
- Ringer Equivalence Number (REN):
- PANASONIC Facsimile Products Limited Warranty
- LIMITS AND EXCLUSIONS
- Servicenter Directory
- Service in Puerto Rico
- Accessory Purchases:
- Limited Warranty / Energy Star
- Notes for product service and shipping the product
- For product service
- When you ship the product
- Energy Star
- Technical data about this product
- Common specifications
- Fax/Copy feature
- Printer feature
- Scanner feature
- Toner life
- ■ Toner life for the included toner cartridge or KX-FA75 toner cartridge:
- Drum life
- Index
- Summary of user programmable features
- Panasonic FAX ADVANTAGE PROGRAM
- Free peace of mind, direct from Panasonic
- NO EXTRA COST
- The Panasonic Fax Advantage Consumer Service Program.
- Instructions
- Requirements
Brand : PANASONIC
Model : KX-FLM600
Category : Fax