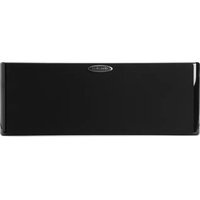
LSiM 704c - Loudspeaker POLK - Free user manual and instructions
Find the device manual for free LSiM 704c POLK in PDF.


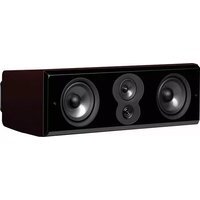
| Product Type | Center Channel Speaker |
| Brand | Polk |
| Model | LSiM 704c |
| Speaker Configuration | 2.5-way |
| Drivers | 1 x 1-inch Ring Radiator Tweeter, 2 x 5.25-inch Dynamic Balance Mid-Bass Drivers |
| Frequency Response | 55 Hz - 40 kHz |
| Sensitivity | 89 dB (2.83V @ 1m) |
| Impedance | 8 ohms (compatible with 4 ohms) |
| Recommended Amplifier Power | 20 - 200 watts per channel |
| Crossover Frequency | 2.5 kHz |
| Dimensions (W x H x D) | 19.0 x 7.75 x 10.5 inches (483 x 197 x 267 mm) |
| Weight | 21 lbs (9.5 kg) |
| Finish | Black Ash Vinyl, Cherry Vinyl, or Piano Black Gloss |
| Mounting | Designed for shelf or stand placement; optional wall-mount bracket available |
| Input Terminals | Gold-plated 5-way binding posts |
| Recommended Placement | Center channel above or below TV screen, angled towards listening position |
| Cleaning Instructions | Wipe with a soft, dry cloth. Avoid liquid cleaners or abrasive materials. |
| Safety Warnings | Do not expose to moisture; ensure stable placement to prevent tipping; use with appropriate speaker wire. |
| Warranty | 5 years limited (parts and labor) |
Frequently Asked Questions - LSiM 704c POLK
User questions about LSiM 704c POLK
0 question about this device. Answer the ones you know or ask your own.
Ask a new question about this device
Download the instructions for your Loudspeaker in PDF format for free! Find your manual LSiM 704c - POLK and take your electronic device back in hand. On this page are published all the documents necessary for the use of your device. LSiM 704c by POLK.
USER MANUAL LSiM 704c POLK
the speaker specialists®
ENGLISH

natural_image
Close-up of two black speaker speakers with concentric rings against a dark background (no text or symbols visible)Technical Assistance or Service
If anything is missing or damaged, or if your speaker fails to operate, notify Polk Audio Customer Service immediately at 800-377-7655. If, after following the hookup directions, you experience difficulty, please double-check all wire connections. Should you isolate the problem to the speaker, contact the authorized Polk Audio dealer where you made your purchase, or contact Polk Audio Customer Service 800-377-7655 (M-F, 9-5:30 EST, US & Canada only) or via email polkcs@polkaudio.com. Outside the US & Canada, call +1 410-358-3600.
WARNING: Listen Carefully
Polk Audio loudspeakers and subwoofers are capable of playing at extremely high volume levels, which could cause serious or permanent hearing damage. Polk Audio, Inc. accepts no liability for hearing loss, bodily injury or property damage resulting from the misuse of its products.
Keep these guidelines in mind and always use your own good judgment when controlling volume:
- You should limit prolonged exposure to volumes that exceed 85 decibels (dB). For more about safe volume levels, go to the Occupational Health and Safety Administration (OSHA) guidelines at http://www.osha.gov/.

Product Disposal
Certain international, national and/or local laws and/or regulations may apply regarding the disposal of this product. For further detailed information,
please contact the retailer where you purchased this product or the Polk Audio Importer/Distributor in your country. A listing of Polk Audio Importer/Distributors can be found on the Polk Audio website www.polkaudio.com or by contacting Polk Audio at 5601 Metro Drive, Baltimore, Maryland 21215, USA—Phone: +1 410-358-3600.

natural_image
Exterior view of a modern multi-tiered audio amplifier with black and red speakers (no text or symbols visible)Table of Contents
LSi Legacy 4
Performance Objectives of the LSiM Series 5
Take Inventory 6
Applications/Configurations 8
LSiM702F/x Surround Loudspeaker Placement
Hookups, Preparation & Options 10
Standard Hookup 11
Wire Recommendations 11
Rubber Feet & Adjustable Floor Spikes 12
Caring For Your LSiM Loudspeakers 13
Specifications 14
Warranty 16
9
Polk Audio History—A Passion For Sound
Polk Audio was founded in Baltimore in 1972 by Johns Hopkins University graduates Matthew Polk and George Klopfer. Today, Polk Audio is a leading international manufacturer of high quality home and automotive loudspeakers. Polk® products emphasize superior sound and build quality, and feature many patented and award-winning innovations. Polk Audio has built a reputation as "The Speaker Specialists®." Polk products are sold throughout the USA, Canada and in over 50 countries around the world. Polk Audio's mission has always been to build high quality, great sounding speakers at affordable prices. For the people of Polk Audio, building speakers is not just a job; it's a passion.

natural_image
Exterior view of a multi-tiered audio amplifier with multiple speakers and stacked blocks (no visible text or labels)SRT Series, circa 1995

natural_image
Two tall electronic speakers with speaker towers and sound blockers, shown from different angles (no text or symbols visible)LSi25, circa 2001
The LSi Legacy
First introduced in 2001, LSi represented Polk's expression of a true high-performance loudspeaker that was also reasonably priced. LSi was created for the serious listener, those who really enjoy music and who enjoy intently listening to their audio system. LSi delivered a flatter frequency response with lower distortion and revealed more detail than comparably priced speakers. The series was also touted in the press for its tonal accuracy. LSi imaged very well, thanks in part to the quality of the tweeter and the wide dispersion of the small midbass drivers. The series' performance has made LSi Polk's flagship product for almost a decade. But after a decade, it was time to revisit LSi. The result is not so much an evolution of the current series as it is a re-engineering of the qualities that have made LSi a great series.
Performance Objectives of the LSiM Series
The performance objectives for the new LSiM Series predate the original LSi design and are, in fact, design principles Polk Audio first set down during development of its original Monitor loudspeakers.
Sound that virtually transports the listener to the scene of the recorded performance.
These ideals have been guiding principles for Polk Audio's best high-performance loudspeakers:
- Pleasing tonality, even during extended listening at performance levels.
- Crisp, lifelike impulses, transients and coherent detail without any unnatural ringing or decay.
- Natural reproduction of complex low frequency instruments and special effects.
- Uniform sonic representation within the listening area and immersive spatial impression.
- Reproduce concert/theater levels while maintaining linearity and accuracy.
- Compatibility with a wide array of electronics both past, present and future.
- Work as promised for many years of enjoyment.

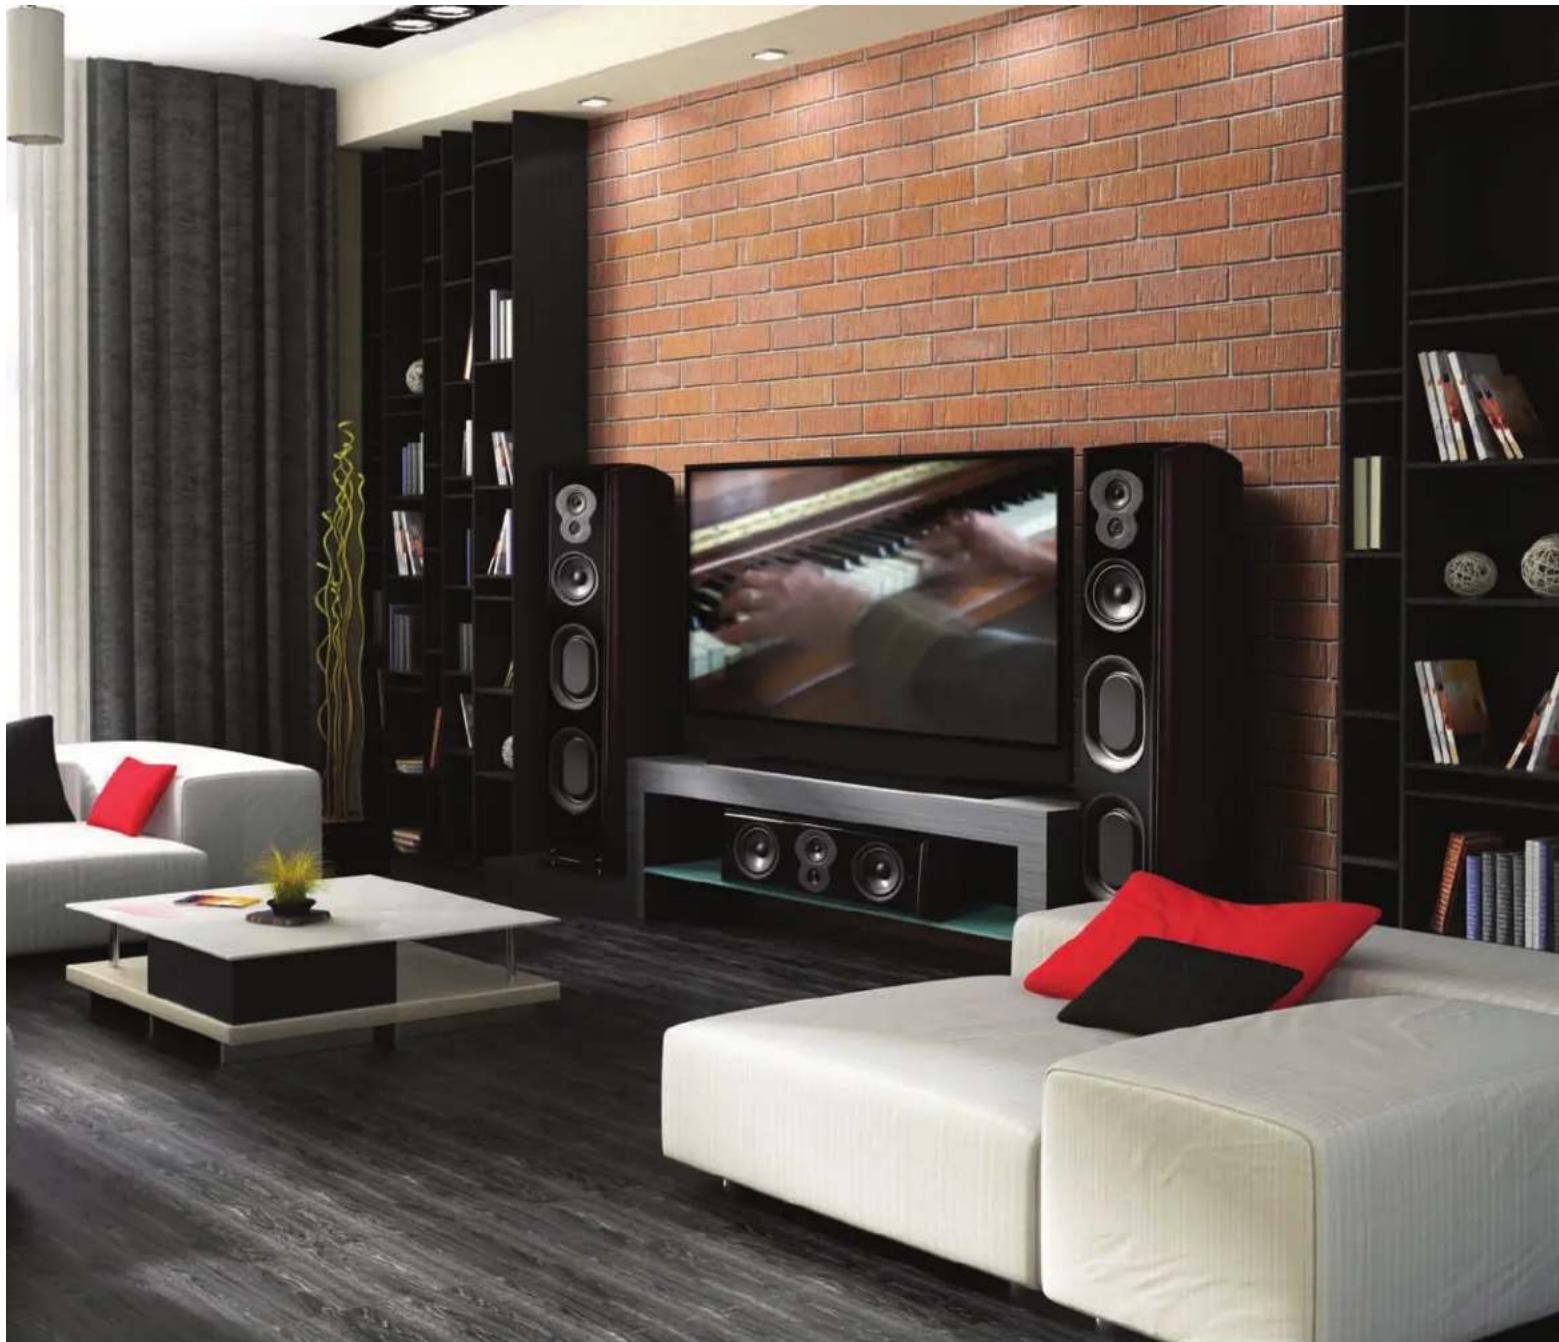
2011 LSiM Series
natural_image
Modern living room interior with white sofas, black speakers, and brick wall art (no visible text or symbols)
natural_image
Black rectangular box with a metallic knob (no text or symbols visible)
natural_image
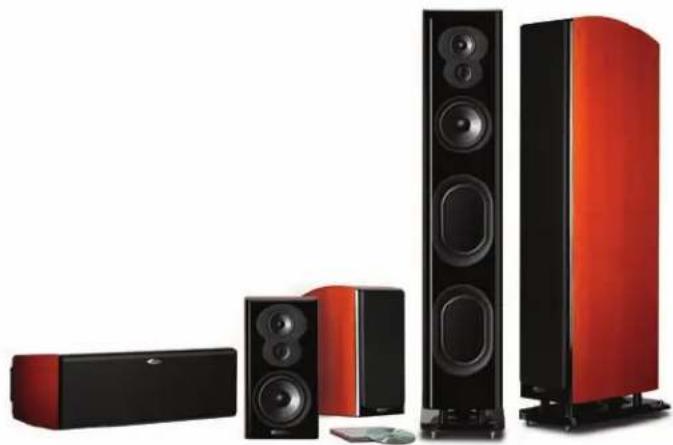
Red and black audio amplifier with three speakers and a CD, no visible text or symbolsLSiM706cLSiM704c

natural_image
Black cylindrical audio speaker with two speakers and a speaker tower (no visible text or symbols)LSiM702F/X®

natural_image
Black cylindrical electronic device with a small logo on the side (no visible text or symbols)Take Inventory
Inside each loudspeaker carton:
- Either one LSiM Floorstanding Speaker or one Bookshelf Speaker or two F/X Surround Speakers or one Center Channel Speaker.
- Zero Diffraction Magnetic Grille (one per speaker, packed separately except F/X Surround).
- Literature Packet (Quick Start Guide, Letter and Owner's Manual on CD).
- Floor Spike 5 mm Hex Key (floorstanding speakers only).
- Adhesive-Backed Rubber Pads (4 for Bookshelf Speakers or 4 for Center Channel Speaker or 8 for F/S Surround Speakers).
- Wall Mount Template (F/X surround speakers only).

natural_image
Product lineup of three LSIM models (LSiM703, LSiM705, LSiM707) showing different speaker models and colors on a stand (no text or symbols on the models themselves)
flowchart
graph TD
    A["Room 1"] --> B["Room 2"]
    B --> C["Room 3"]
    C --> D["Room 4"]
    D --> E["Room 5"]
    E --> F["Room 6"]
    style A fill:#f9f,stroke:#333
    style B fill:#f9f,stroke:#333
    style C fill:#f9f,stroke:#333
    style D fill:#f9f,stroke:#333
    style E fill:#f9f,stroke:#333
    style F fill:#f9f,stroke:#333
Stereo

5.1

7.1
Applications/Configurations
Floorstanding & Bookshelf Loudspeakers
To enjoy the most realistic stereo image and lifelike sound, place the speakers so that an equilateral triangle is created between the speakers and your favorite listening position. Angle the speakers toward the middle as necessary in order to support a more solid center image. And experiment with the distance between your speakers and both the back and side walls. You'll experience some bass boost with the speakers located close to walls.
The LSiM Series bookshelf loudspeakers were designed to provide excellent performance on a bookshelf or placed on a floor stand. For best results place LSiM bookshelf loudspeakers so the tweeter height is within 6" (15cm) of seated ear height. When using speaker stands, select sturdy stands 30" - 36" (76.2 - 91.4cm) high.
If you are using your LSiM Series bookshelf loudspeakers as rear channels in a home theater system, they should be placed on the rear or side walls, slightly above (and, on the side walls behind) the listening position. Angle them toward the listening area if possible.
Center Channel Loudspeaker
With today's modern flat panel TVs, the most popular placement, and our recommendation for your center channel speaker, is beneath your TV screen. You may also place your center channel above your TV should you choose. LSiM center channel loudspeakers are very heavy, and we do not recommend wall mounting them, unless placed on a sturdy shelf.
Note: If you have an older model television, you could experience a color shift or image distortion in your TV's screen. If that is the case, move the speaker away from your TV.
F/X Surround Loudspeakers
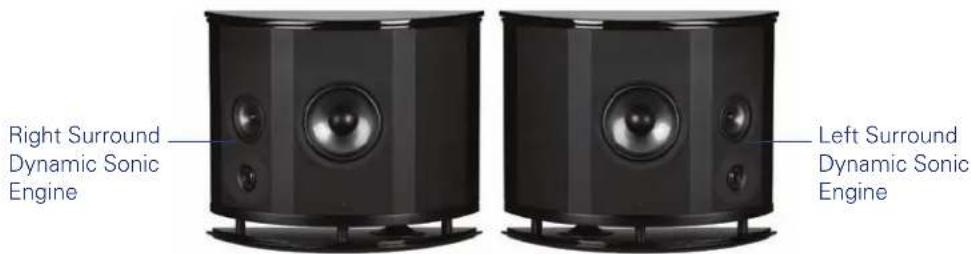
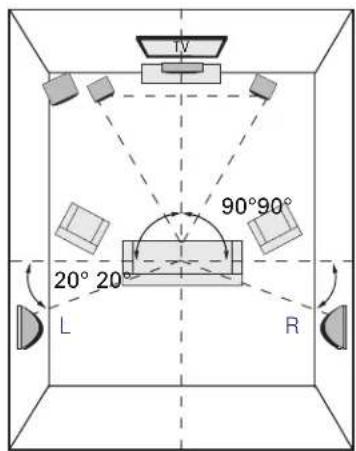
The LSiM Series surround loudspeakers must be wall-mounted, either on side walls or rear walls; they have built-in wall mounting keyhole slots. Mount the loudspeakers 6-8 feet off the floor. If you're setting up a 7.1 system, mount the Surround Back Left and Surround Back Right loudspeakers at the same height as the Surround Left and Surround Right loudspeakers.
Make sure the material on which you plan to mount the speakers (plaster, drywall, paneling, stone, etc.) can support the weight of the speakers (LSiM702F/x = approx 28.9 lbs/13.1 kg ea). Be aware of any electrical wiring or plumbing that may be behind your walls.
Note: The LSiM702F/x Surround Loudspeaker should be oriented so that its Dynamic Sonic Engine (3 1/4" mid-range and 1" Ring Radiator tweeter) points toward your listening area. Therefore, the F/X surround loudspeaker that would serve as the right surround on a sidewall will become the left surround on a rear wall.
LSiM702F/x Surround Loudspeaker Placement
Wall Distance Switch (located on baffle underneath the grille) If position limitations demand that your LSiM702F/x loudspeakers be mounted closer than 2' (60cm) from side walls or ceiling, the proximity of the surface can result in a response "bump" between 50 and 200Hz. This can cause the loudspeakers to sound "boomy." The "Wall Distance" switch flattens response and eliminates "boominess" without sacrificing deep bass response for more lifelike sound. Set the switch accordingly, <2' (60 cm) or >2' (60 cm).
Wall Mounting LSiM702F/x
Prior to installation, hold the speaker in the chosen location, 6 to 8 feet off the floor, to make sure it safely clears obstacles such as ceiling, adjacent walls, corners, beams, lighting fixtures and door/window frames.
Using the keyhole slots in the bracket template (included), mark the installation location of the two keyhole slots with a pencil. Orient the template so that the small ends of the keyhole slots are facing "up."
- If you are certain that there is a stud behind the wall surface, drive a screw (not included) capable of supporting the loudspeaker's weight through the wall and into the stud.
- If there is no stud behind the wall at the chosen location, install a wall anchor (not included) capable of supporting the loudspeaker's weight into the wall by following the wall-anchor-manufacturer's instructions.
- For masonry walls, use a masonry drill bit and #10 masonry anchor and screw (not included).
- Tighten screws into stud or wall anchors, leaving screw heads protruding 1/4" (6mm).
- Make all wire attachments now.
- Line up the keyhole slots on the back of the speakers so that the screw heads pass through the large center hole of the slots.
- Let the speaker slide straight down, allowing the screw head to slip behind the smaller end of the keyhole slot.
- Tug gently on the speaker to make certain that the screws and bracket are properly aligned and that the wall anchors are secure.
- If the bracket is not held snug against the wall by the screw heads, remove the speaker from the wall, drive the screws in a little further and then remount the speaker.
5.1

7.1

natural_image
Close-up of a red audio component with four connectors and labeled 'polkaudio' (no additional text or symbols visible)Input Plate
natural_image
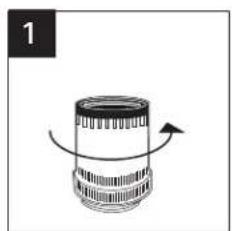
Simple line drawing of a cylindrical object with an arrow indicating rotation (no text or symbols)Loosen hex nut. Insert speaker wire through hole.
natural_image
Diagram of a mechanical component with threaded end and clamped shaft (no text or symbols)
natural_image
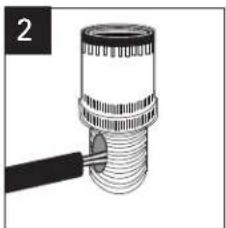
Diagram of a cylindrical object with arrows indicating rotation or movement, no text or symbols presentTighten hex nut. Do not insert insulated section of speaker wire.

natural_image
Mechanical assembly diagram showing a cylindrical component connected to a black rod (no text or symbols)Hookups, Preparation & Options
Wire Preparation
Follow the hookup directions included with your receiver/amplifier. Strip 1/2" (12.7mm) of insulation from each of the two conductors of the wire to expose the bare metal and twist each of the individual conductors into single unfrayed strands. Note that one of the terminals on the rear of each speaker is red (+) and the other is black (-). Make certain that you connect the wire from the positive (+) terminal of your amplifier or receiver to the red (+) terminal on your speaker and the wire from the negative (-) terminal of your amplifier or receiver to the black (-) terminal on your speaker. Most wire has some indicator (such as color-coding, ribbing or writing) on one of the two conductors to help you maintain consistency.
Binding Posts
To connect wire to the binding post, unscrew the binding post cap and insert the bare wire into the hole near the base of the binding post. Do not insert the insulated part of the wire into the hole as this will not give you a good connection. Tighten the binding post cap until it seats firmly with the wire, but do not over tighten.
Connectors
You have several options when choosing connectors for your speaker wires, and it's really a matter of personal preference. Three of the more commonly used are banana plugs, spade lugs and bare wire.
If you know where you want to locate your speakers and plan to set up your system and leave them there, then bare wire will work fine. Just make sure there are not stray strands of wire that could come into contact.
If you like to experiment with different speaker locations, spade lugs or banana plugs offer more convenient options when it comes to disconnecting and reconnecting wires.
Banana Plugs
LSiM binding posts have openings in the ends of their caps to accept individual banana plugs. The binding posts cannot accept dual banana plugs.
natural_image
Product series of a multi-tiered audio amplifier with red and black speakers (no text or labels visible)Standard Hookup
Bi-Wiring & Bi-Amping
If you decide to bi-wire or bi-amp, you must remove the jumpers between the terminal posts. Failure to do this could result in damage to your amplifier and loudspeakers. The binding post caps must be completely removed to remove the jumpers, which use ring terminals. There are color coded collars so you can identify which is (+) or (−) after you remove the caps.
Bi-Wiring (see Figure 1)
Bi-wiring can provide noticeable improvements in the overall transparency of your loudspeakers. Run separate speaker wires to the low and high frequency drivers from a single amplifier (the upper set of binding posts are for the high frequency drivers, the lower set of binding posts are for the low frequency drivers): after removing the jumpers, connect one set of speaker wires to the upper terminals on each speaker and one set of wires to the lower terminals. Connect the other ends of both wire sets to the same amplifier outputs.
Bi-Amping (see Figure 2)
Bi-amping allows you to use separate amplifiers for the high and low frequency sections of your loudspeaker for greater dynamic range and lower distortion. We recommend that your separate amplifiers have identical gain to preserve the speaker's voicing balance. After removing the jumpers, connect the speaker wires from the high frequency amplifier outputs to the upper set of terminal posts on each speaker. Follow the same procedure for connecting the low frequency amplifier outputs to the lower set of terminals. Remember to maintain correct wiring polarity (+ to +, - to -) in all connections.
Wire Recommendations
These recommendations are for all connections from the amplifier/receiver to each speaker:
| Runs | Gauge | |
| Lengths up to 25' | 16 or better | |
| Lengths greater than 25' but less than 50' | 14 | |
| Lengths greater than 50' but less than 75' | 12 | |
| Lengths greater than 75' | 12 | |

Figure 1: Bi-Wiring

flowchart
graph TD
    A["High Frequency Amplifier"] --> B["Upper Input"]
    A --> C["Lower Input"]
    B --> D["Low Frequency Amplifier"]
    C --> D
    D --> E["Upper Input"]
    D --> F["Lower Input"]
    E --> G["High Frequency Amplifier"]
    E --> H["Lower Frequency Amplifier"]
    G --> I["Upper Input"]
    G --> J["Lower Input"]
    H --> K["Upper Input"]
    H --> L["Lower Input"]
Figure 2: Bi-Amping

natural_image
Close-up of a metallic cylindrical mechanical component with a flanged base and textured top (no text or symbols visible)
natural_image
Close-up of a metallic conical tool with a pointed tip and flange (no text or symbols visible)
natural_image
Close-up of a metallic mechanical component with a conical tip and flange (no visible text or symbols)LSiM Floor SpikeLSiM Rubber Foot
Rubber Feet & Adjustable Floor Spikes
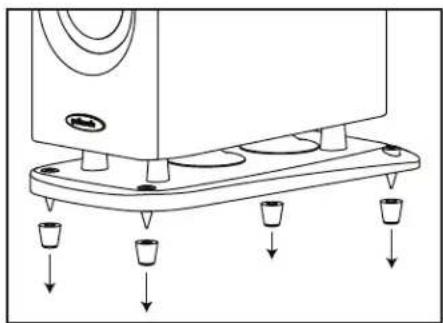
Rubber feet and adjustable floor spikes are included with your LSiM floorstanding loudspeakers to anchor and stabilize the speaker on any type of floor. However, you may wish to tilt the speaker backwards or forward a tiny bit in order to optimize your listening area. This is a subtle change you can experience that optimizes imaging in your setup.
To Adjust The Floor Spikes
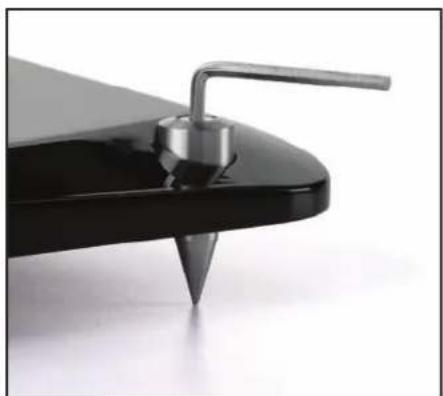
The floor spikes can be adjusted with the use of the supplied 5 mm hex (Allen) wrench. Most floorstanding speakers are adjustable only from below and require two hands. The LSiM floor spikes are adjustable from above.
Note: If the speaker is stable on the floor, no adjustment is necessary.
If the speaker is unstable, follow these steps:
- The speaker will be inclined to settle on three of the four spikes leaving one spike slightly off the floor.
- Determine which spike needs to be adjusted.
- Use the supplied hex wrench and turn it clockwise to lower the spike or counterclockwise to raise it.
- The threaded portion of the spike is coated with a locking compound, so the spike may offer some resistance when you turn it.
- As the spike contacts the floor, it will become more difficult to turn. At that point the speaker should be stabilized.
natural_image
Diagram of a mechanical device with multiple base mount and downward force arrows indicating force or movement (no text or symbols)Removing Rubber Feet
natural_image
Close-up of a black sculptor with a pointed base and handle, no visible text or symbolsAdjusting Floor Spike with Supplied Hex (Allen) Wrench

natural_image
Simple line drawing of a mechanical component with an arrow indicating rotation (no text or symbols)Clockwise to raise

natural_image
Simple line drawing of a mechanical lever with rotational arrow and upward arrow (no text or symbols)Counterclockwise to lower

natural_image
Line drawing of a hand cleaning a cloth against a black background (no text or symbols)
natural_image
Prohibition sign showing a hand holding a device against a black background (no text or symbols)Caring for Your LSiM Loudspeakers
Enclosure Finish
Your LSiM enclosures (except LSiM702F/x) are finished in real natural wood veneer. Clean these panels periodically with a soft cloth and furniture polish to remove dust and fingerprints. Never use harsh detergents and cleaning fluids.
Important Note: Do not use any petroleum based cleaners or solvents on the loudspeaker cabinets.
- Clean wood panels with furniture polish and a soft cloth.
- Do not use furniture polish on black gloss lacquer.
- Clean black lacquer veneer with a damp cloth.
Baffle Smudges
Dust baffles and F/X end caps with a dry or damp cloth. (A damp cloth is one that has been sprayed with a recommended cleaner, not one soaked with water.) We recommend you use a lint-free cloth; LSiM rubber trim rings have a slight texture to them and can collect fibers from a cloth that is not lint-free.
Dusting The Baffle
Use a can of compressed air for the grille and/or baffle to dust. Use a "computer keyboard" vacuum but only on the grille not the baffle.

natural_image
Red and black audio speaker with two large speakers, no visible text or symbols on the device body| Specifications | LSiM707 | LSiM705 | LSiM703 |
| Type | tower tower bookshelf | ||
| Tweeter | 1" (25mm) enhanced Ring Radiator | 1" (25mm) enhanced Ring Radiator | 1" (25mm) enhanced Ring Radiator |
| Midrange | 3 1/4" super cell aerated polypropylene | 3 1/4" super cell aerated polypropylene | 3 1/4" super cell aerated polypropylene |
| Midbass | 6 1/2" super cell aerated polypropylene | 5 1/4" super cell aerated polypropylene | 6 1/2" super cell aerated polypropylene |
| Woofers | 6" x 9" Cassini oval, super cell aerated polypropylene | 5" x 7" Cassini oval, super cell aerated polypropylene | n/a |
| Frequency Response (-3dB limits) | 38 Hz - 30 kHz 42 Hz - 30 kHz 50 Hz - 30 kHz | ||
| Overall Frequency Response | 20 Hz - 40 kHz 22 Hz - 40 kHz 36 Hz - 40 kHz | ||
| Steady State Recommended Amp Power | 20 W - 300 W 20 W - 250 W 20 W - 200 W | ||
| 2.83V Sensitivity | 88 dB 88 dB 88 dB | ||
| Impedance | compatible w/ 8 Ohm outputs compatible w/ 8 Ohm outputs compatible w/ 8 Ohm outputs | ||
| Orth Crossover | |
| Tweeter/Midrange Crossover Frequency | 3.0 kHz 2.8 kHz 2.8 kHz |
| Midrange/Midbass Crossover Frequency | 300 Hz 280 Hz 300 Hz |
| Midbass/Woofer Crossover Frequency | 100 Hz 100 Hz n/a |
| Tweeter High Pass Slope (acoustic) | 18 dB/oct 18 dB/oct 18 dB/oct |
| Midrange Low Pass Slope (acoustic) | 18 dB/oct 18 dB/oct 18 dB/oct |
| Midrange High Pass Slope (acoustic) | 12 dB/oct 12 dB/oct 12 dB/oct |
| Midbass Low Pass Slope (acoustic) | 12 dB/oct 12 dB/oct 6 dB/oct |
| Midbass High Pass Slope (acoustic) | 6 dB/oct 12 dB/oct n/a |
| Woofer Low Pass Slope (acoustic) | 6 dB/oct 12 dB/oct n/a |
| Midrange Enclosure Type | sealed sealed sealed | ||
| Midbass Enclosure Type | sealed sealed n/a | ||
| Woofer Enclosure Type | dual PowerPort® | dual PowerPort PowerPort | |
| Dimensions W x H x D(greatest overall depth, grille) | 9 1/2" x 50 13/16" x 18 7/16"24.1 cm x 129.1 cm x 46.8 cm | 8 5/16" x 47" x 14 3/8"21.1 cm x 119.4 cm x 36.5 cm | 8 13/16" x 16 3/4" x 14 9/16"22.4 cm x 42.5 cm x 37 cm |
| Base Dimensions | 10 1/2" x 20 5/16"26.7 cm x 51.6 cm | 9 1/4" x 16 1/4"23.5 cm x 41.3 cm | n/a |
| Product Weight (each) | 99.2 lbs (45 kg) | 78 lbs (35.4 kg) | 29.6 lbs (13.4 kg) |
| Shipping Weight | 114.7 lbs (52 kg) | 86.4 lbs (39.2 kg) | 32.5 lbs (14.75 kg) |
| Specifications | LSiM706c | LSiM704c | LSiM702F/x |
| Type | center channel center channel surround | ||
| Tweeter | 1" (25mm) enhanced Ring Radiator | 1" (25mm) enhanced Ring Radiator | 1" (25mm) enhanced Ring Radiator |
| Midrange | 3 1/4" super cell aerated polypropylene | 3 1/4" super cell aerated polypropylene | 3 1/4" super cell aerated polypropylene |
| Woofer | 6 1/2" super cell aerated polypropylene | 5 1/4" super cell aerated polypropylene | 6 1/2" super cell aerated polypropylene |
| Frequency Response (-3dB limits) | 50 Hz - 30 kHz 70 Hz - 30 kHz 55 Hz - 30 kHz | ||
| Overall Frequency Response | 30 Hz - 40 kHz 40 Hz - 40 kHz 40 Hz - 40 kHz | ||
| Steady State Recommended Amp Power | 20 W - 250 W 20 W - 200 W 20 W - 200 W | ||
| 2.83V Sensitivity | 88 dB 88 dB 88 dB | ||
| Impedance | compatible w/ 8 Ohm outputs compatible w/ 8 Ohm outputs compatible w/ 8 Ohm outputs | ||
| Orth Crossover | |||
| Tweeter/Midrange Crossover Frequency | 2.8 kHz 2.5 kHz 2.4 kHz | ||
| Midrange/Midbass Crossover Frequency | 280 Hz 280 Hz 240 Hz | ||
| Tweeter High Pass Slope (acoustic) | 18 dB/oct 18 dB/oct 18 dB/oct | ||
| Midrange Low Pass Slope (acoustic) | 18 dB/oct 18 dB/oct 18 dB/oct | ||
| Midrange High Pass Slope (acoustic) | 12 dB/oct 12 dB/oct 12 dB/oct | ||
| Midbass Low Pass Slope (acoustic) | 6 dB/oct 12 dB/oct 12 dB/oct | ||
| Midrange Enclosure Type | sealed sealed sealed | ||
| Woofer Enclosure Type | dual PowerPort | dual PowerPort | PowerPort |
| Dimensions W x H x D (greatest overall depth, grille) | 28 3/4" x 9" x 13 13/16" 73 cm x 22.9 cm x 35.1 cm | 21 3/16" x 7 3/4" x 9 3/8" 53.8 cm x 19.7 cm x 23.8 cm | 19 15/16" x 16 1/4" x 6 3/4" 50.6 cm x 41.3 cm x 17.1 cm |
| Product Weight (each) | 42.3 lbs (19.2 kg) | 27.8 lbs (12.6 kg) | 28.9 lbs (13.1 kg) |
| Shipping Weight | 46.3 lbs (21 kg) | 29.1 lbs (13.2 kg) | 62.1 lbs (28.18 kg) |
Specifications, dimensions and features subject to change without notice. For more information call us at 1-800-377-7655 (USA and Canada). Outside of North America call +1 (410) 358-3600.
Limited Warranty
Polk Audio, Inc. warrants to the original purchaser only that this Polk Audio Loudspeaker Product (the "Product") will be free from defects in materials and workmanship for a period of five (5) years from the date of original retail purchase from a Polk Audio Authorized Dealer. However, this Warranty will automatically terminate prior to the expiration of the five (5) years if the original retail purchaser sells or otherwise transfers the Product to any other party. The original retail purchaser shall hereinafter be referred to as "you." To allow Polk Audio to offer the best possible warranty service, please fill out the Product Registration Card(s) and send it to the Factory, at the address provided on the Product Cards(s) within ten (10) days of the date of purchase.
Defective Products must be shipped, together with proof of purchase, prepaid insured to the Polk Audio Authorized Dealer from whom you purchased the Product, or to the Factory at 1 Viper Way, Vista, California 92081. Products must be shipped in the original shipping container or its equivalent; in any case the risk of loss or damage in transit is to be borne by you. If upon examination at the Factory or Polk Audio Authorized Dealer it is determined that the unit was defective in materials or workmanship at any time during this Warranty period, Polk Audio or the Polk Audio Authorized Dealer will, at its option, repair or replace this Product at no additional charge, except as set forth below. All replaced parts and Products become the property of Polk Audio. Products replaced or repaired under this warranty will be returned to you, within a reasonable time, freight prepaid.
This warranty does not include service or parts to repair damage caused by accident, disaster, misuse, abuse, negligence, inadequate packing or shipping procedures, commercial use, voltage inputs in excess of the rated maximum of the unit, cosmetic appearance of cabinetry not directly attributable to defect in materials or workmanship, or service, repair, or modification of the Product which has not been authorized or approved by Polk Audio. This warranty shall terminate if the Serial number on the Product has been removed, tampered with or defaced. This warranty is in lieu of all other expressed Warranties. If this Product is defective in materials or workmanship as warranted above, your sole remedy shall be repair or replacement as provided above. In no event will Polk Audio, Inc. be liable to you for any incidental or consequential damages arising out of the use or inability to use the Product, even if Polk Audio, Inc. or a Polk Audio Authorized Dealer has been advised of the possibility of such damages, or for any claim by any other party. Some states do not allow the exclusion or limitation of consequential damages, so the above limitation and exclusion may not apply to you. All implied warranties on this Product are limited to the duration of this expressed Warranty. Some states do not allow limitation on how long an implied Warranty lasts, so the above limitations may not apply to you. This Warranty gives you specific legal rights, and you also may have other rights which vary from state to state.
This Warranty applies only to Products purchased in the United States of America, its possessions, and U.S. and NATO armed forces exchanges and audio clubs. The Warranty terms and conditions applicable to Products purchased in other countries are available from the Polk Audio Authorized Distributors in such countries.
polkaudio®
the speaker specialists®
POLK AUDIO, INC. • 5601 METRO DRIVE,
BALTIMORE, MD 21215 USA • 800.377.7655
FAX: 410.764.5266 • WWW.POLKAUDIO.COM
LSiM series manual
For recommended accessories (speaker stands,
brackets and exclusive Polk Audio logowear),
visit our webstore: http://shop.polkaudio.com/
HBP2356
- the speaker specialists®
- Technical Assistance or Service
- WARNING: Listen Carefully
- Product Disposal
- Polk Audio History—A Passion For Sound
- The LSi Legacy
- Performance Objectives of the LSiM Series
- Take Inventory
- Applications/Configurations
- Floorstanding & Bookshelf Loudspeakers
- Center Channel Loudspeaker
- F/X Surround Loudspeakers
- LSiM702F/x Surround Loudspeaker Placement
- Wall Mounting LSiM702F/x
- Hookups, Preparation & Options
- Wire Preparation
- Binding Posts
- Connectors
- Banana Plugs
- Standard Hookup
- Bi-Wiring & Bi-Amping
- Bi-Wiring (see Figure 1)
- Bi-Amping (see Figure 2)
- Wire Recommendations
- Rubber Feet & Adjustable Floor Spikes
- To Adjust The Floor Spikes
- Caring for Your LSiM Loudspeakers
- Enclosure Finish
- Baffle Smudges
- Dusting The Baffle
- Limited Warranty
Brand : POLK
Model : LSiM 704c
Category : Loudspeaker