MWI 14IX - Microwaves INDESIT - Free user manual and instructions
Find the device manual for free MWI 14IX INDESIT in PDF.

| Product Type | Built-in Microwave |
| Model | MWI 14IX |
| Brand | Indesit |
| Capacity | 14 Liters |
| Microwave Power | 700 W |
| Grill Power | 1000 W (if applicable) |
| Control Type | Electronic with Touch Controls |
| Display | LED Digital |
| Number of Power Levels | 5 |
| Defrost Function | Yes, by weight |
| Auto Cook Programs | Yes |
| Child Lock | Yes |
| Turntable Diameter | 245 mm |
| Interior Light | Yes |
| Dimensions (HxWxD) | 388 x 595 x 320 mm |
| Built-in Dimensions (HxWxD) | 380 x 560 x 300 mm |
| Net Weight | 15 kg |
| Power Supply | 230 V / 50 Hz |
| Energy Consumption | Typical 0.8 kWh |
| Cleaning | Wipe with damp cloth |
| Maintenance | Check seal and turntable regularly |
| Safety Features | Child lock, overheat protection |
| Spare Parts Availability | Yes, via Indesit authorized service |
| Repair Index (France) | 7.5 / 10 (estimated) |
Frequently Asked Questions - MWI 14IX INDESIT
User questions about MWI 14IX INDESIT
0 question about this device. Answer the ones you know or ask your own.
Ask a new question about this device
Download the instructions for your Microwaves in PDF format for free! Find your manual MWI 14IX - INDESIT and take your electronic device back in hand. On this page are published all the documents necessary for the use of your device. MWI 14IX by INDESIT.
USER MANUAL MWI 14IX INDESIT
Description of the oven page 20
Description of the control panel page 20
Building-in page 21
Important safety warnings page 22
Technical data page 23
Installation and electrical connection page 24
Ovenware to use page 24
How to get the best results from your oven page 25
Rules and general suggestions for using the oven page 26
Using the controls and setting the modes
Microwave-only function page 27
Using the microwave-only function for keep food hot page 27
Using the microwave-only function for defrosting page 27
Using the microwave-only function for re-heating page 28
Using the microwave-only function for cooking page 30
Combined microwave + grill function page 32
Grill only function page 34
Cleaning and maintenance
Cleaning
page 35
Maintenance
page 36

indesit
Description of the oven
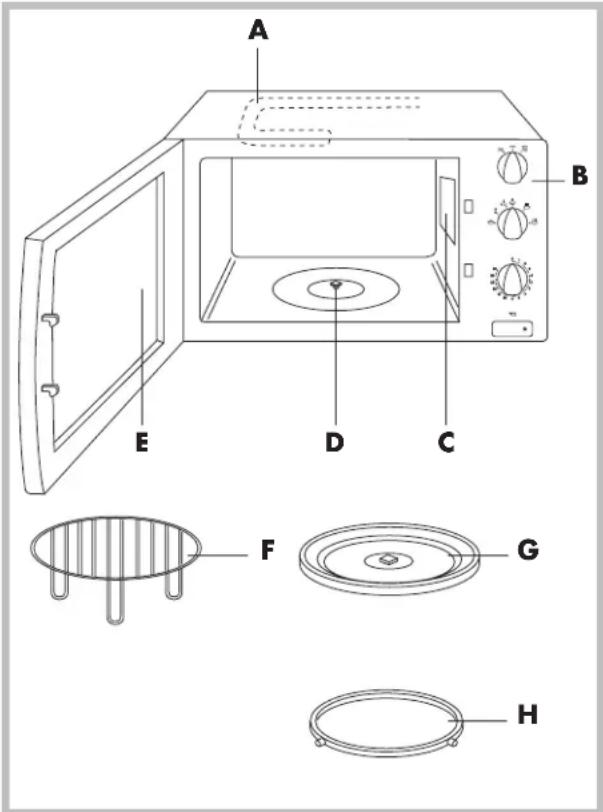
A Grill heating element
B Control panel
C Microwave outlet cover
D Turntable spindle
E Inside of door
F Wire rack
G Turntable
H Turntable support
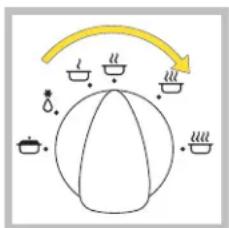
Description of the control panel
natural_image
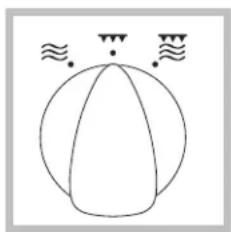
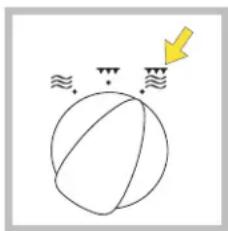
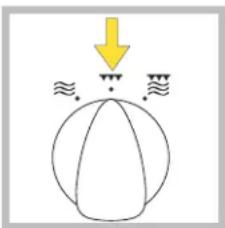
Simple line drawing of a sphere with two small triangular symbols above it, no text or labels present.Programme selector knob
Microwave only :
Set the knob at

Grill only:
Set the knob at

Combined microwave + grill:
Set the knob at ≈.
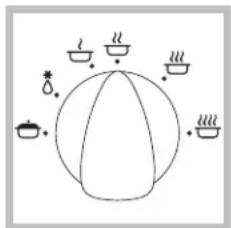
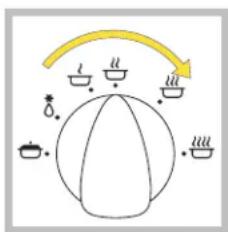
Microwave power knob
Microwave only :
Turn the knob to the power you wish.
The available power levels of the microwaves are the following:


- 135 W (defrosting)

radar
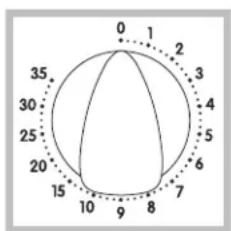
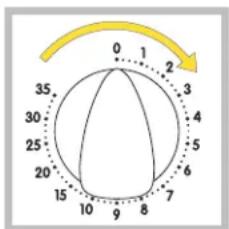
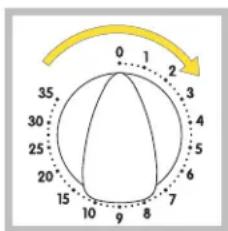
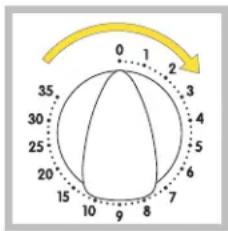
| Angle | Value | |---|---| | 0 | 0 | | 1 | 1 | | 2 | 2 | | 3 | 3 | | 4 | 4 | | 5 | 5 | | 6 | 6 | | 7 | 7 | | 8 | 8 | | 9 | 9 | | 10 | 10 | | 15 | 15 | | 20 | 20 | | 25 | 25 | | 30 | 30 | | 35 | 35 |Timer knob
This knob starts all the operations.
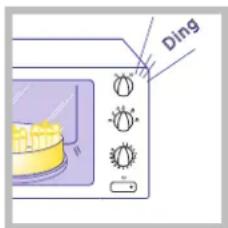
Microwave only, Combined microwave + grill, Grill only: Turn it in a clockwise direction from 1 to 35 min. When that time has expired, the oven will
turn off and you will hear a buzzing signal.
natural_image
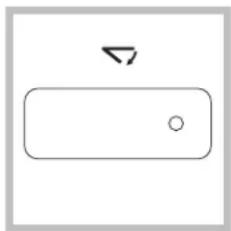
Simple geometric diagram with a rectangle and two circles, no text or symbols presentOpen door button
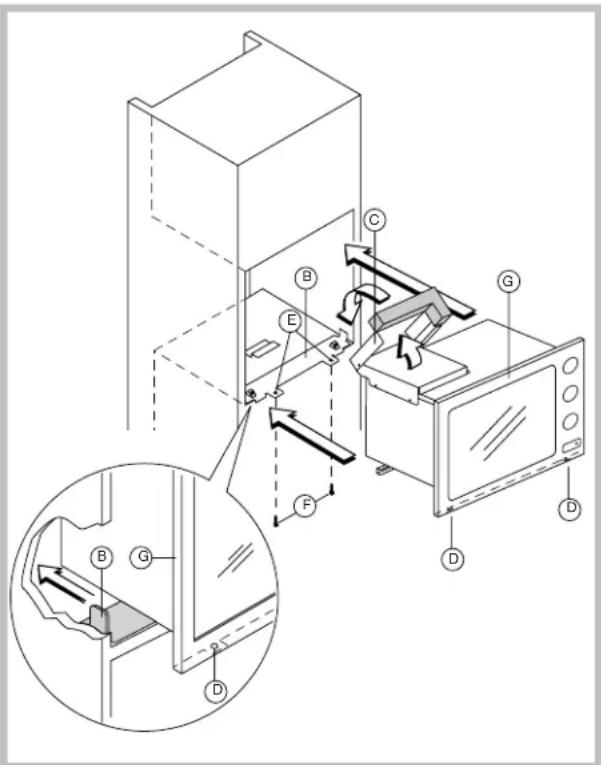
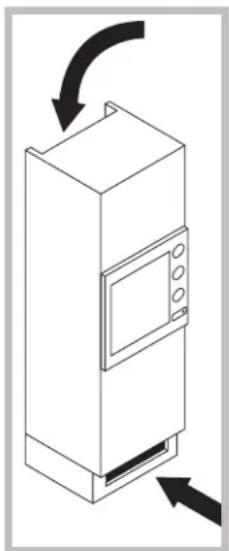
Building-in
Inside the oven there is a plastic bag with fixing material. Take this bag out of the oven. BEFORE USING THE OVEN, REMOVE THE PLASTIC PROTECTION ANGLES ON THE GLASS DOOR (IF EQUIPPED)
- Fasten metal strip (A) using the two 13 mm. screws (all of which can be found in the accessory bag).

The appliance needs sufficient ventilation. Make an opening in the plinth at least 280 cm2 large for this purpose.

-
Remove the 2 screws (x) from the fastening bar under the microwave oven.
-
Fit the fastening bar (B) at the correct position in the recess. Make sure that there is the same amount of free space at each side of the fastening bar. Fasten the fastening bar using the two 16 mm. screws (H) which can be found in the accessory bag.
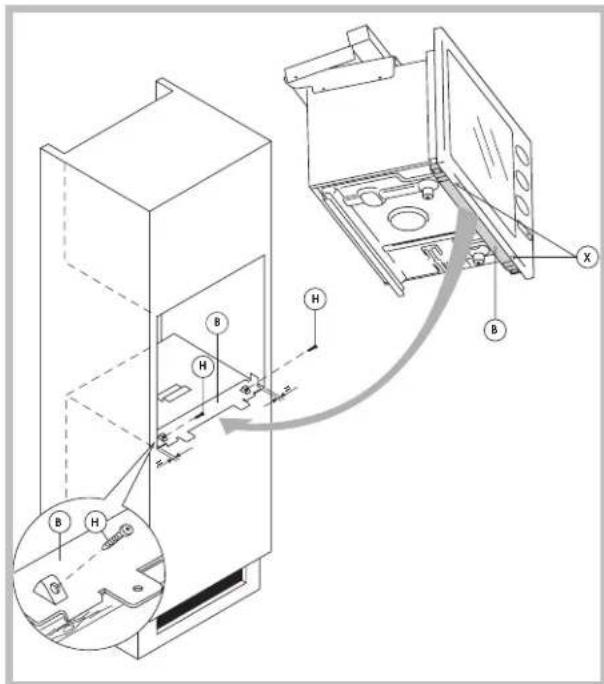
Fix the fastening bar such that the two lips stick out over the edge of the bottom of the recess and rest against it at the front.
- Open the lid of the smoke discharge (C) fully (if fitted)
- Slide the appliance into the recess. Keep sliding it until the front of the oven (G) is resting against the cupboard and the holes (D) under the oven are aligned with the holes (E) in the fastening bar (B).
- Fasten the appliance to the fastening bar (B) using the previously removed screws (X).
ELECTRICAL CONNECTION - IMPORTANT:
If the appliance is provided with supply cord AND plug, the appliance shall be positioned so that the plug is always accessible. If the appliance is provided with a supply cord WITHOUT the plug, the appliance must be connected to a fixed main wiring incorporating a disconnection switch with contact separation of at least 3 mm in all poles and provided with permanent connection to earth.
Important safety warnings
Read carefully these instructions and keep for future reference.
N.B. This oven has been designed to defrost, heat and cook food in the home. It must never be used for other purposes, modified or tampered with in any way.
1) WARNING: If the door or door seals are damaged, the oven must not be operated until it has been repaired by a competent person (trained by the manufacturer or by its Customer Service).
2) WARNING: It is hazardous for anyone other than a competent person to carry out any service or repair operation which involves the removal of a cover which gives protection against exposure to microwave energy.
3) WARNING: Liquids and other foods must not be heated in sealed containers since they are liable to explode. Eggs in their shell and whole hard-boiled eggs should not be heated in microwave ovens since they may explode even after microwave heating has ended.
4) WARNING: Accessible parts may become hot during use. Young children should be kept away. Do not allow the appliance to be used by persons (including children) with psychological, physical or sensory impairments, or with inadequate experience or knowledge, unless closely supervised and instructed by someone responsible for their safety who can ensure they are aware of the dangers associated with inappropriate use. Children must be supervised to ensure they do not play with the appliance.
5) WARNING: When the appliance is operated in the combination mode, children should only use the oven under adult supervision due to the temperatures generated.
6) Do not attempt to operate the oven with the door open by tampering with the safety devices.
7) Do not operate the oven if objects for any kind get stuck between the front panel of the oven and the door. Always keep the inside of the door (E) clean, using a damp cloth and non-abrasive detergents. Do not allow dirt or remains of food to accumulate between the front panel of the oven on the door.
8) Do not operate the oven if the supply cable or the plug is damaged, as this may result in electric shocks. If the supply cord is damaged, it must be replaced by the manufacturer or its service agent or a similarly qualified person in order to avoid a hazard.
9) If smoke is observed, switch off or unplug the appliance and KEEP THE DOOR CLOSED in order to stifle any flames.
10) Only use utensils that are suitable for use in microwave ovens. In order to avoid overheating and the consequent risk of fire, it is advisable to supervise the oven when cooking food in disposable containers made of plastic, cardboard or other inflammable materials, and when heating small quantities of food.
11) Never place the turntable in water after it has been heated for a long time. The high thermal shock resulting would break the turntable.
12) When cooking "Only MICROWAVE" and "COMBINED WITH MICROWAVE", you absolutely must not pre-heat the oven (without foodstuffs in it) and you must not operate it when it is empty, because you might cause sparking.
13) Before using this oven, check to be certain that the utensil and containers chosen are suitable for microwave oven use (see the section on "Glassware and Similar Items").
14) The temperature of the door or the outer surface may be high when the appliance is operating. Do not touch the heating elements inside the oven.
15) When heating liquids (water, coffee, milk, etc.) it is possible that the contents may suddenly start to boil and spill violently as a result of delayed boiling, causing scalding. To avoid this happening, you should place a heat-resistant plastic spoon or a glass rod in the container before starting to heat liquids. Anyway, care shall be taken when handling the container.
16) Do not heat spirit with a high alcohol content, nor large quantities of oil, as these could catch fire!
17) The contents of feeding bottles and baby food jars shall be stirred or shaken and the temperature shall be checked before consumption in order to avoid burns. It is also advisable to stir or shake the food in order to ensure that it has an even temperature. When using commercially available bottle sterilisers, before turning the oven on, ALWAYS make sure the container is filled with the quantity of water indicated by the manufacturer.
18) Failure to maintain the oven in a clean condition could lead to deterioration of the surface that could adversely affect the life of the appliance and possibly result in a hazardous situation.
19) Do not use harsh abrasive cleaners or sharp metal scrapers to clean the oven door glass since they can scratch the surface, which may result in shattering of the glass.
20) All microwaves are tested and approved in accordance with current electromagnetic safety and compatibility regulations and standards. As a precautionary measure, pacemaker manufacturers recommend wearers to keep a minimum distance of 20-30 cm between an operating microwave oven
and the pacemaker in order to avoid possible interference with the pacemaker. If you suspect that such an interference is occurring, turn the oven off immediately and contact the pacemaker manufacturer.
21) If the oven overheats (prolonged use, use empty, etc), the safety thermostat could turn the oven off. After cooling down, the oven will operate as normal.
22) The door or the outer surface may get hot when the appliance is operating.
N.B. When the oven is used for the first time it is possible that, for a period of approx. 10 minutes, it may produce a "new" smell and a small amount of smoke. This is only a result of protective substances applied to the heating element
Technical data
Outer measurements (see building-in) Inner measurements (LxDxH) 322x202x330
Oven's net volume 24 Lt
Approximate weight 20 Kg
Turntable diameter 27,5 cm
Oven light 25 w
Output power - microwave: 900 W (IEC705)
For additional data, consult the data plate placed on the front side of the appliance.
This appliance conforms to EC directive 2004/108/EC on Electromagnetic Compatibility and EC regulation no. 1935/2004 of 27/10/2004 on materials intended for contact with food.
The product is classified as Group 2, Class B ISM equipment. The definition of Group 2 which contains all ISM (Industrial, Scientific and Medical) equipment in which radio-frequency energy is intentionally generated and/or used in the form of electromagnetic radiation for the treatment of material, and spark erosion equipment.
For Class B equipment is equipment suitable for use in domestic establishments and in establishments directly connected to a low voltage power supply network which supplies buildings used for domestic purpose.
Installation and electrical connection
1) Remove all the accessories and wash them.
2) Clean the inside with a soft, damp cloth.
3) Check that there is no damage as a result of transportation, and in particular that the door opens
and closes properly.
4) Place the support (H) in the centre of the circular groove and fix the turntable (G) to it. The spindle (D) should be inserted in the corresponding groove in the centre of the turntable.
5) After the installation has been performed, the power supply cable and the power socket must be easy to access.
6) Only a qualified electrician may install or relocate a socket outlet.
7) Only connect the appliance to a power socket with a power capacity of at least 16A. Also make sure that the main switch installed in your home has a minimum power capacity of 16A in order to avoid it suddenly tripping while the oven is on.
8) Before use, check that the power supply voltage is the same as the one shown on the rating label and that the power outlet is properly earthed: the manufacturer disclaims any liability in the event of non-compliance with this safety regulation.
9) The majority of modern electronic appliances (TV, radio, stereo systems etc) are shielded from radio frequency (RF) signals. Certain electronic appliances may not, however, be shielded from radio frequency signals deriving from a microwave oven. You should therefore keep a distance of at least 1 - 2 metres between these appliances and the operating oven.
Ovenware to be used
You can make use of all types of containers made of glass (preferably Pyrex), ceramics, porcelain and glazed pottery as long as they do not have decorations or metal parts (gilded borders, handles, feet). Heat resistant plastic containers can also be used, but only for "Microwave Only" cooking. If you are still doubtful about using a particular container, you can perform a simple test. Place the empty container in the oven for 30 seconds at maximum power ("Microwave Only" function).
If the container is still cold or only slightly warm, it is suitable for microwave cooking.
If it is very hot or gives out sparks, it is not suitable.
For short heating periods, you may use paper napkins, cardboard trays and plastic "throwaway" plates as a base.
As far as shape and size are concerned, it is absolutely essential that containers be such as to allow the turntable to rotate.
In order to use large-size rectangular containers (which may not be able to rotate inside the cooking cavity), you can remove the spindle (D) from its housing to prevent the turntable (G) moving. Bear in mind that to be assured of good results when carrying this out you must stir the food and turn the container around several times during the cooking process.
Containers made of metal, wood, recycled kitchen paper, cane and plate glass are not suitable for use in microwave ovens. The metal grill rack supplied with your microwave have been fully tested for safe use.
You should remember, too, that since microwaves heat the food and not the glassware, earthenware or similar containers for that food, it is possible to cook such foods in the serving dish and thereby avoid the problem of having to clean pans later.
If the oven is used in its grill only functions, any type of oven container may be used (see chart).
| PyrexGlass | Ceramic glass | Earthenware | Aluminium foil | Plastic | Paper or cardboard | Metal containers | ||
| Microwave only | NOYESYES | |||||||
| Combined microwave + grill | NONONON | |||||||
| Grill only | YESNONOY |
How to get the best results from your oven
| What do I want to do? | What function should I choose? | Use instructions page | Amount & time chart page | |
| ·Keep food warm | ≈ | (90W) | 27 | |
| ·D e f r o s t | ≈ | (135W) | 27 | 28 |
| ·Soften chocolate & icing | 27 | |||
| ·Melt butter and soften cheese | ≈ | (315W) | 28 | 29 |
| ·Heat pastry goods | (450W) | 30 | 31 | |
| ·Cook stew, chicken breasts | ≈ | (650W) | 27 | |
| 30 | 31 | |||
| ·Cook fruit, vegetables, rice, soup, fish | ≈ | (900W) | 27 | |
| 30 | 31 | |||
| ·Heat up any type of already cooked or frozen food | 28 | 29 | ||
| ·Quickly make all kinds of roasts, poultry, skewered meats, potatoes | 32 | 33 | ||
| ·Au gratin dishes (e.g., lasagne, vegetables au gratin, macaroni) | ≈ | 32 | 33 | |
| ·G rill hamburgers, chops, frankfurters, sausages, toast, etc. in a “traditional” way | ≈ | with wire rack | 34 | 34 |
GB
Rules and general suggestions for using the oven
Microwaves consist of electromagnetic radiation found in nature under the form of light waves (e.g., sunlight). Inside the oven, these waves penetrate food from all directions and heat up the water, fatty and sugar molecules. Heat is produced very quickly only in the food itself, whereas the container being used warms up indirectly by means of heat given off by the heated food. This prevents food from sticking to its container, so you can use very little fatty substance or, in some cases, no fat at all during the cooking process. Therefore cooking in a microwave oven is considered to be healthy and good for one's diet. And in contrast to traditional methods, cooking in a microwave foodstuffs are less dehydrated, lose less of their nutritional value, and retain more of their original flavour.
Basic rules for correct cooking with a microwave oven
1) In order to set cooking times correctly, remember (in referring to the charts on the following pages) that when you increase the amount of foodstuffs the cooking temperature must likewise be proportionately increased and vice-versa. It is important to respect the “standing” times: standing time means that period during which the food must be left to “rest” after being cooked so as to allow an even greater spreading of the temperature within. The temperature of meat, for example, will rise about 5°-8° C. (approx. 9°-15° F.) during the standing time. Standing times may be observed either inside or outside the oven.
2) One of the main things you must do is stir the food several times while it is being cooked. This helps make the temperature distribution more uniform and thus shortens the cooking time.
3) It is also advisable to turn the foodstuff over during its cooking process: this applies especially for meat, whether it is in large pieces (roasts, whole chickens, etc.) or small (chicken breasts, etc.).
4) Foods having a skin, shell or peel (e.g., apples, potatoes, tomatoes, frankfurters, fish) must be pierced with a fork in several points so as to permit steam to escape and to prevent those items from exploding.
5) If you are preparing a large number of portions of the same food item (e.g., boiled potatoes), place those portions in a Pyrex dish in order to have them cook in a uniform manner:
6) The lower the temperature at which a foodstuff is placed in a microwave oven, the longer the cooking time required. Food having a room temperature will
cook more quickly than food having a refrigerator temperature.
7) Always do your cooking by placing the food container in the centre of the turntable.
8) It is perfectly normal for condensation to form inside the oven and near the air outlet. To reduce such condensation, cover the foodstuffs with clear-sheet, wax paper, a glass lid or simply an overturned plate. Then, too, foods having a water content (e.g., greens and vegetables) cook better when covered. The covering of food also helps keep the oven clean on the inside. Use clear-sheet made expressly for microwave ovens.
9) Do not cook eggs in their shells: the pressure which builds up on the inside would cause the egg to explode, even after cooking has finished. Do not heat up eggs which have already been cooked, unless they are scrambled.
10) Do not forget to open containers which are air-tight or sealed before heating or cooking food in the oven. The pressure on the inside of the container would rise, causing them to explode even after cooking has finished.
Using the controls and setting ⓘ indesit the modes
Microwave-only function
This function is suitable for:
- Keeping food hot page 27
• Defrosting page 27
- Heating page
- Cooking stew, white meats, fruit, vegetables, rice, soup and fish page 31
• T o brown the foods, to bake pastry and fruit page 33
Turning the oven on using only microwave function
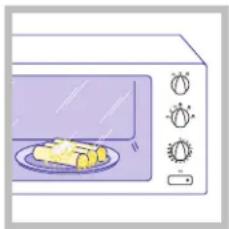
natural_image
Illustration of a microwave oven with a food item on a plate (no text or symbols)Place the food in a container suitable for microwave cooking and place it in the centre of the turntable
N.B: You do not have to pre-heat the oven.
natural_image
Simple line drawing of a sphere with a lightning bolt above it, no text or symbols presentCheck to make sure that the programme selector knob is in position ≈
flowchart
graph TD
    A["Central Sphere"] --> B["i"]
    A --> C["u"]
    A --> D["dd"]
    A --> E["w"]
    style A fill:#f9f,stroke:#333
    style B fill:#ccf,stroke:#333
    style C fill:#ccf,stroke:#333
    style D fill:#ccf,stroke:#333
    style E fill:#ccf,stroke:#333
Choose the power level you want by turning the power selector knob.
Set the cooking time desired by turning the timer knob in a clockwise direction.
Once the set cooking time has expired, a buzzer will sound to signal that your food is ready.
It is possible to interrupt the oven's operations at any time
simply by turning the timer knob to its "0" setting. You may also change the cooking time (while the cooking itself is in progress) by turning that same knob back or forth.
You can check on the situation while the cooking is in progress by opening the door and examining the food. That move will interrupt the oven's operations, but they will begin again once the door has been closed.
Using the microwave only function to keep food hot
This function enables you to keep food hot, whether that food be just cooked or re-heated, without having it get dry or stick to its container.
Selecting the power level and covering the food with a plate or plastic film, you will find that foods will remain warm up to serving time
You can leave foods in their cooking container if they are covered.
Using the microwave only function to defrosting
- Foods frozen in bags or plastic sheeting or in their packaging may be placed directly in the oven, as long as they have no metal parts (e.g., bands or closure rivets).
- Certain foods, such as greens, vegetables and fish, do not have to be completely defrosted before you begin cooking them.
- Stewed foods and meats as well as meat sauces defrost better and quicker if they are stirred from time to time, turned over or separated.
- While defrosting, meat and fish lose their liquid content. It is recommended, therefore, that you defrost such items in a tray or basin.
- It is advisable to separate each individual piece of meat from its bag before putting it in the freezer. This will help you save valuable time will preparing foods.
- B e careful about following the cooking times printed on frozen products, because those times are not always correct. It is best to use defrosting times slightly less than those indicated. The time needed for defrosting will vary in terms of the degree to which the food has been frozen.
Defrosting time
| Type | Quantity | Time to be set(minutes) | Notes | Standing time(minutes) |
| MEAT | ||||
| • Roasts (pork, beef, veal, etc.) | 1 kg | 19 - 21 | Turn over halfway through defrosting | 20 |
| • Steaks, cutlets, meat slices | 200 gr | 4 - 6 | 5 | |
| • Stew, goulash | 500 gr | 10 - 12 | 10 | |
| • Ground meat | 500 gr | 10 - 12 | 15 | |
| • Ground meat | 250 gr | 5 - 7 | See note (*) | 10 |
| • Hamburger | 200 gr | 5 - 7 | 10 | |
| • Sausages | 300 gr | 6 - 8 | 10 | |
| POULTRY | ||||
| • Duck, turkey | 1,5 kg | 25 - 27 | Turn the poultry over halfway through defrosting. | 20 |
| • W hole chickens | 1,5 kg | 25 - 27 | At the end of the rest period, wash under hot water to remove possible ice | 20 |
| • Cut-up chicken | 700 gr | 13 - 15 | 10 | |
| • C hicken breasts | 300 gr | 8 - 10 | 10 | |
| VEGETABLES | ||||
| Frozen vegetables do not need to be defrosted before cooking. | ||||
| FISH | ||||
| • F illeted fish | 300 gr | 7 - 9 | Turn the fish over halfway through defrosting | 7 |
| • Cut-up fish | 400 gr | 8 - 10 | 7 | |
| • Whole fish | 500 gr | 10 - 12 | 7 | |
| • P rawn, shrimps | 400 gr | 8 - 10 | 7 | |
| DAIRY PRODUCTS | ||||
| • Butter | 250 gr | 4 - 6 | Remove the silver foil or the metal parts. | 10 |
| • Cheese | 250 gr | 5 - 7 | Cheese should not be completely defrosted. | 15 |
| • Cream | 200 ml | 7 - 9 | The cream should be removed from its container and placed in a dish. | 5 |
| BREAD PRODUCTS | ||||
| • 2 average-size rolls | 150 gr | 1 - 2 | Put the bread directly onto the turntable. | 3 |
| • 4 average-size rolls | 300 gr | 2 - 4 | 3 | |
| • Sliced home-style bread | 250 gr | 2 - 4 | 3 | |
| • Whole-wheat bread | 250 gr | 2 - 4 | 3 | |
| FRUIT | ||||
| • S strawberries, prunes, cherries, currants, apricots | 500 gr | 8 - 10 | Stir 2-3 times | 10 |
| • Raspberries | 300 gr | 5 - 7 | Stir 2-3 times | 10 |
| • Blackberries | 250 gr | 3 - 5 | Stir 2-3 times | 6 |
(*) These indications are suitable for performing the minced meat defrosting test according to Regulation 60705, Par. 13.3 (see page 2). Turn over halfway through the set time. Place directly on the turntable.
Further information, including on other performance tests according to Regulation 60705, is given in the table on page 2.
Using the microwave only function to re-heating
Heating food in a microwave oven is much quicker and energy efficient than traditional methods.
- We recommend that you heat foodstuffs (especially if they are frozen) to a temperature of at least 70^
C. (it must be piping hot!). Leave to stand for a few minutes as you will not be able to eat that food immediately because it will be too hot.
This will ensure that any possible bacteria present in food will have been killed.
- T o heat pre-cooked or frozen foods, follow these rules:
- remove the food from its metal containers;
- cover it with plastic wrap (the clear-film type suitable for microwave ovens) or wax paper; in this way, all the food's natural flavour will be preserved and the oven will stay cleaner; you may also cover the food with an upside-down plate;
- if possible, stir or turn the food over frequently so as to speed up the heating process and keep the heat uniform at the same time;
- follow the cooking times listed with great caution; remember that under certain conditions the timings given must be lengthened
- Frozen foods must be defrosted before the heating process begins. The lower the food's initial temperature, the longer the time needed for heating.
- Foodstuffs and drinks may be heated briefly in paper or plastic containers. In any event, however, such containers may become misshapen if the heating time is too long.
Heating times
| Type Quantity | power level | Time to be set (minutes) | Notes | |
| SOFTENING FOOD | ||||
| • Chocolate/icing | 100 gr | [IMAGE] | 4 - 5 | Put on a plate. Mix the icing once. |
| • Butter | 50 -70 gr | 0'.10" - 0'.15" | To melt butter, add one minute. | |
| CHILLED FOOD (INITIAL TEMP. 5/8°C) UP TO 20/30°C | ||||
| • Y o g h u r t | 125 gr | “ | 0'.15" - 0'.20" | Remove metal foil |
| • Baby's bottle | 240 gr | “ | 0'.30" - 0'.35" | Heat the baby's bottle without the teat and mix it immediately after heating to make the temperature uniform. Check the temperature of the contents before use. With milk at room temperature the heating time is lower. To avoid risk of fire when using dried milk please stir evenly. Please use already sterilized milk. |
| CHILLED PRECOOKED FOOD (INITIAL TEMP. 5/8°C) UP TO APPROX. 70°C | ||||
| • Packet of lasagne or of pasta with filling | 400 gr | “ | 3 - 5 | Packets of any kind of commercially available pre-cooked food, to be heated to a temp. of 70°C. Remove the food from any rice metal packets and put it directly onto the plate from which it is to be eaten. For best results, always cover the food. |
| • Packet of meat with and/or vegetables | 400 gr | “ | 3 - 5 | |
| • Packet of fish and/or vegetables | 300 gr | “ | 2 - 4 | |
| • Plate of meat and/or vegetables | 400 gr | “ | 4 - 6 | Portions of any kind of already cooked food, to heat to a temp. of 70°C. The food is placed directly onto the plate from which it is to be eaten and is always covered either with a transparent film or with an upturned plate. |
| • P late of pasta, cannelloni or lasagne | 400 gr | “ | 4 - 6 | |
| • Plate of fish and/or rice | 300 gr | “ | 3 - 5 | |
| FROZEN FOOD TO REHEAT/COOK (INITIAL TEMP. -18°/-20°C) UP TO APPROX. 70°C | ||||
| • Packet of lasagne or of pasta with filling | 400 gr | “ | 5 - 7 | Packets of any kind of commercially available pre-cooked frozen food, to be heated to a temp. of 70°C directly in its packet. Remove the food from any metal containers and put it directly onto the plate from which it is to be eaten, increasing cooking time by a few minutes. |
| • Packet of meat with rice and/or vegetables | 400 gr | “ | 4 - 6 | |
| • Packet of fish and/or pre-cooked vegetables | 300 gr | “ | 2 - 4 | |
| • Packet of fish and/or raw vegetables | 300 gr | “ | 6 - 8 | Remove the raw food from the packets and place it in a container suitable for microwaves and cover. |
| • Portion of meat and/or vegetables | 400 gr | “ | 5 - 7 | Portions of any kind of already cooked frozen food, to be heated to a temperature of 70°C. Place the frozen food in the plate from which it is to be eaten and cover it with another upturned plate or pyrex dish. Check that it is hot in the centre; where possible, mix the food. |
| • Portion of pasta, cannelloni or lasagne | 400 gr | “ | 6 - 8 | |
| • Portion of fish and/or rice | 300 gr | “ | 3 - 5 | |
| CHILLED DRINKS (INITIAL TEMP. 5°/8°C) UP TO APPROX. 70°C | ||||
| • 1 cup of water | 180 cc | “ | 1'.30" - 2 | All the drinks should be mixed after being heated to make the temperature uniform. For the broth we recommend covering it with an upturned plate. |
| • 1 cup of milk | 150 cc | “ | 1'.15" - 1'.45" | |
| • 1 cup of coffee | 100 cc | “ | 1'.15" - 1'.45" | |
| • 1 plate of broth | 300 cc | “ | 3 - 4 | |
| DRINKS AT ROOM TEMPERATURE (INITIAL TEMP. 20°/30°C) UP TO APPROX. 70°C | ||||
| • 1 cup of water | 180 cc | “ | 1'.15" - 1'.45" | All the drinks should be mixed after being heated to make the temperature uniform. For the broth we recommend covering it with an upturned plate. |
| • 1 cup of milk | 150 cc | “ | 1 - 1'.30" | |
| • 1 cup of coffee | 100 cc | “ | 0'.45" - 1'.15" | |
| • 1 plate of broth | 300 cc | “ | 2 - 3 | |
Using the microwave only function for cooking
Soups and rice
Soups or broth usually require a smaller amount of liquid because the evaporation in microwave ovens is rather limited. Because it is a dehydrating agent, salt must be added only when the cooking is finished or during the standing time.
It is correct to say that the temperature required for cooking rice in a microwave oven (as is true also for pasta) is more or less the same as that needed to cook this foodstuff over a burner on a regular stove. The advantage of preparing a risotto dish in a microwave oven lies in the fact that you do not have to stir the rice constantly (two or three times is enough). The ingredients are placed in a container suitable for microwave ovens and covered with plastic wrap (for about 300 gr. of rice, you need 750 gr. of broth with the oven programmed at top power for about 12 to 15 minutes). In addition, the rice will not stick to the bottom of its container and, since it can be cooked in a tureen or some other such receptacle to be brought to the table, you will not have to transfer that rice to a serving plate.
Meats
When using the microwave-only function to cook meat, you should cover the meat with plastic wrap made for microwave oven use; in this way, the heat is distributed better and you will prevent the loss of juices that often leads to dried-up and stringy meat. This oven function is suitable for making stews, goulash, chicken breasts, etc. To prepare roasts and skewered meat dishes (among others), you must use the combined function.
Fish
In a microwave oven, fish can be prepared very quickly and with excellent results. You can season it with a little oil or butter (or not season it at all, if you so prefer). Cover the fish with clear-sheet. The skin is to be slit, of course, and filleted fish must be placed in a uniform fashion. We recommend that you not use this oven to cook fish which has been dipped in egg batter.
Green and vegetables
Greens and vegetables cooked in a microwave oven retain more of their colour and nutritional value than when cooked in traditional ovens. Before cooking greens and vegetables, wash and clean them. Larger-sized varieties of this category are to be cut up into uniform pieces. Per every 500 gr. of greens or vegetables add about 5 teaspoons of water (fibre-type vegetables need more
water).
Greens and vegetables must always be covered with plastic wrap.
Stir greens and vegetables at least once at the halfway point. Add a little salt only at the end.
Fruit and baked goods
Baked goods rise (at lower oven power) much more than then do with regular baking. Since no crust is formed, it is better to garnish the surface portions with cream or icing (e.g., chocolate); in addition, you must keep the item being baked fully covered, because such foodstuffs tend to dry out more quickly than those baked in a regular oven. Fruit is to be pierced if cooked with its peel on and is to be kept covered: it is essential that you adhere to the standing time (3 to 5 minutes).
Cooking times
| Type | Quantity | Power level | Time to be set(minutes) | Notes | Standing time(minutes) |
| Fish | |||||
| • Filleted | 300 gr |  | 5 - 7 | Cover with plastic wrap | 2 |
| • Slices | 300 gr | “ | 7 - 9 | Cover with plastic wrap | 2 |
| • Whole | 500 gr | “ | 8 - 10 | Cover with plastic wrap | 2 |
| • Whole | 250 gr | “ | 5 - 7 | Cover with plastic wrap | 2 |
| • Cut-up fish | 400 gr | “ | 7 - 9 | Cover with plastic wrap | 2 |
| • Crayfish | 500 gr | “ | 7 - 9 | Cover with plastic wrap | 2 |
| Greens and vegetables | |||||
| • Asparagus | 500 gr |  | 8 - 9 | Cut into 2-cm. pieces. | 4 |
| • Artichokes | 300 gr | “ | 10 - 11 | It would be better to use artichoke bottoms. | 4 |
| • Green beans | 500 gr | “ | 10 - 11 | Cut into pieces. | 4 |
| • Broccoli | 500 gr | “ | 6 - 7 | Separate into individual “florets”. | 4 |
| • Brussels sprouts | 500 gr | “ | 6 - 7 | Leave whole. | 4 |
| • White cabbage | 500 gr | “ | 6 - 7 | Leave whole. | 4 |
| • Red cabbage | 500 gr | “ | 6 - 7 | Leave whole. | 4 |
| • Carrots | 500 gr | “ | 8 - 9 | Cut into same-size pieces. | 4 |
| • Cauliflower | 500 gr | “ | 10 - 11 | Separate into stalks. | 4 |
| • Celery | 500 gr | “ | 6 - 7 | Separate into pieces . | 4 |
| • Eggplant | 500 gr | “ | 5 - 6 | Cut into cubes. | 4 |
| • Leek | 500 gr | “ | 5 - 6 | Leave whole. | 4 |
| • Mushrooms | 500 gr | “ | 5 - 6 | Leave whole. No water is needed. | 4 |
| • Onions | 250 gr | “ | 4 - 5 | Whole, but of the same size. No water is needed. | 4 |
| • Spinach | 300 gr | “ | 5 - 6 | Cover after having washed and drained the leaves. | 4 |
| • Peas | 500 gr | “ | 9 - 10 | 4 | |
| • Fennel | 500 gr | “ | 11 - 12 | Cut into quarters. | 4 |
| • Peppers | 500 gr | “ | 8 - 9 | Cut into pieces. | 4 |
| • Potatoes | 500 gr | “ | 7 - 8 | Cut into same-size pieces. | 4 |
| • Zucchini | 500 gr | “ | 6 - 7 | Leave whole. | 4 |
| Meats | |||||
| • Stew | 1,5 kg |  | 30 - 35 | Cook covered and stir 2 or 3 times. | 10 |
| • C hicken breasts | 500 gr | “ | 10 - 15 | Turn over at the halfway point | 3 |
| • Meat loaf | 900 gr | “ | 19 - 21 | (*) | 5 |
N.B: These cooking times are but approximate and are better determined by the weight as well as the starting temperature of the foodstuffs and — for greens and vegetables — by the foodstuffs' consistency and general make-up.
(*) These indications are suitable for performing the minced meat cooking test according to Regulation 60705, Para. 12.3.3. Cover the container with clear film for microwave use. Further information, including on other performance tests according to Regulation 60705, is given in the table on page 2.
Cooking times for baked goods and fruit
| Type/Quantity Power level | Time to be set(minutes) | Standing time(minutes) | Notes | |
| Nut cake (700 gr) |  | 15 - 17 | 5 | May be used in combination with any cream whatsoever. |
| Viennese torte (850 gr) | “ | 19 - 21 | 5 | To be filled with jam or jelly. |
| Pineapple cake (800 gr) | “ | 17 - 19 | 5 | The pineapple slices can be laid on the bottom of the pin plate or cut into pieces and mixed into the dough. |
| Apple cake (1000 gr) | “ | 19 - 21 | 5 | The apples are spread on top as a decorative effect. |
| Coffee cake (750 gr) | “ | 15 - 17 | 5 | Excellent when filled with cream. |
| Zabaione | “ | 2 - 4 | 3 | Mix with a whisk every 30 seconds |
| Cooked pears (300 gr) | “ | 4 - 6 | 3 | The pears are to be cut into quarters. |
| Cooked apples (300 gr) | “ | 5 - 7 | 3 | The apples are to be cut into pieces. |
| Egg custard (750 gr) |  | 15 - 17 | 5 | These indications are suitable for performing the cooking tests according to Regulation 60705, Para. 12.3.1. |
| Sponge cake (475 gr) |  | 5 - 7 | 5 | These indications are suitable for performing the cooking tests according to Regulation 60705, Para. 12.3.2. Further information, including on other performance tests according to Regulation 60705, is given in the table on page 2. |
Combined microwave + grill function
This function is suitable for:
- Quick preparation of roasts, poultry, skewered meat and potatoes. page 33
- Au gratin dishes (e.g., lasagne, vegetables au gratin, macaroni) page 33
Turning the oven on with the microwave + grill function
natural_image
Illustration of a microwave oven with a cake and control knobs (no text or symbols)Put the food in a receptacle made for microwave cooking and place it on the turntable.
natural_image
Simple line drawing of a sphere with wavy lines and a lightning bolt above it, no text or symbols present.Turn the programme selector knob in position to ≈
Choose the power level you want by turning the power selector knob.
Turn the timer knob to the temperature you want. The grill operating light will come on.
Once the set cooking time has expired, a buzzer will sound to signal that your food is ready.
- You can check on the situation while the cooking is in progress by opening the door and examining the food. That move will interrupt the oven's operations, but they will begin again once the door has been closed.
- It is possible to interrupt the oven's operations at any time simply by turning the timer knob to its "0" setting.
Using the combined microwave + grill function to cook
This setting is ideal for all those dishes which have to be “au gratin” or must be given a certain colour. You must keep the following in mind.
- Do not spunkle seasonings in general (use only 1/2 cup of water to keep meat tender).
- T urn roasts and large cuts of meat over when they are half-cooked.
- If the upper portion seems sufficiently browned before the set time has expired, turn the programme Timer knob to position "0". To check on
how the food is cooking, open the oven door. This will interrupt the microwave operations, but the grill will continue to operate. We recommend, therefore, that you use a pot holder. The door must always be closed again after you have checked the food being cooked.
- In cooking with the combined grill function, do not pre-heat the oven and do not operate the oven if there are no foodstuffs in it.
Cooking times
| Type Quantity | Power level | Time to be set(minutes) | Notes | Standing time(minutes) | |
| • Lasagne | 1100 gr |  | 8+8 onlymicrowave | Times listed are for uncooked pasta. If pasta is pre-cooked, use the combined function until the desired color is obtained. | 5 |
| • Gnocchi alla romana | 600 gr | “ | 12 | Avoid excessive melting. | 5 |
| • W ell-seasoned macaroni | 1500 gr | “ | 8 | The pasta should first be partly boiled. | 5 |
| • Cauliflower in bechamel sauce | 1000 gr | “ | 17 | Times listed are for raw cauliflower. If raw cauliflower is pre-boiled, use the combined function until the desired color is obtained. | 5 |
| • T omatoes au gratin | 800 gr | [5KGW] | 10 | The tomatoes should all be of the same size. | 5 |
| • Stuffed peppers | 1400 gr | — | 17 | Short wide peppers are best. | 5 |
| • Aubergine alla parmigiana | 1300 gr | “ | 10 | The aubergine may first be fried or grilled. | 5 |
| • Roast potatoes | 750 gr | [WOKT] | 30 | Stir 2 or 3 times. | 5 |
| • P otatoes au gratin | 1100 gr | 25 | (*) | 5 | |
| • Roasts (pork, beef) | 1000 gr | 55 | Turn at the halfway point. Turn after 35'-40'. | 10 | |
| • Meat loafThese instructions do not refer to test 12.3.3 of IEC regulation 60705 which is represented in the table on page 2 | 800 gr |  | 20 | Mix together 500 grams of ground beef, eggs, ham, bread crumbs, etc. | 10 |
| • W hole chicken | 1200 gr |  | 40 | (**) | 10 |
| • Skewered meat | 600 gr | — | 20 | Turn at the halfway point. | 10 |
| • Lamb | 1000 gr | “ | 40 | Turn at the halfway point. | 10 |
| • T urkey (pieces) | 1000 gr | “ | 45 | Turn at the halfway point. | 10 |
| • Duck | 1500 gr | “ | 50 | Turn at the halfway point | 10 |
(*) These indications are suitable for performing the cooking test according to Regulation 60705, Para. 12.3.4. Further information, including on other performance tests according to Regulation 60705, is given in the table on page 2.
(**) These indications are suitable for performing the cooking test according to Regulation 60705, Para. 12.3.6. Further information, including on other performance tests according to Regulation 60705, is given in the table on page 2.
Grill-only function
This function is suitable for:
- All types of traditional grilling (e.g., chops, hamburgers, frankfurters, toast, etc.)
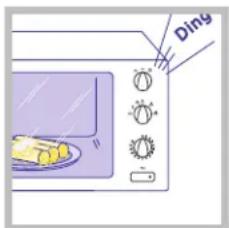
Turning the oven on with the grill-only function
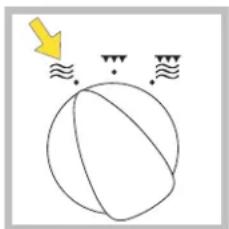
natural_image
Simple line drawing of a sphere with a downward arrow and wavy lines below, no text or symbols present.Pre-heat the grill as follows: Turn the thermostat knob to the setting.
Set the reheating time desired by turning the timer knob in a clockwise direction. The grill operating light will come on. The door must be kept closed.
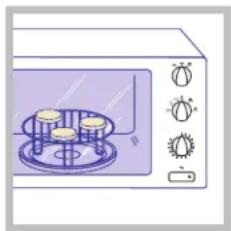
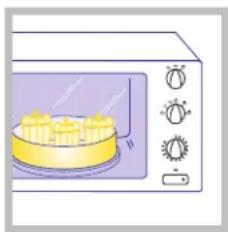
natural_image
Illustration of a microwave oven with three round appliances on a stand (no text or symbols)After about 5 to 8 minutes, put the food on the high wire rack and place everything on the turntable. While the grilling is in progress, the turntable will collect all the escaping fat. Set the cooking time desired by turning the timer knob in a clockwise direction.
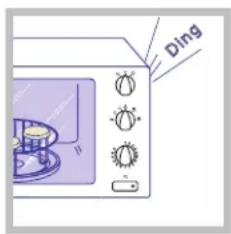
Once the set cooking time has expired, a buzzer will sound to signal that your food is ready.
Using the oven-grill-only function for grilling
By using this function, you can make all kinds of delicious grilled dishes.
Always pre-heat the grill for 5 to 8 minutes before starting the cooking process.
All dishes being prepared must be turned over at the halfway point, to archive even browning.
When you open the door to check the grilling process, the heating element continues to operate: always be careful to wear padded gloves made for oven use. You must always close the door again after checking the food.
Cooking times
| Type | Quantity | Time to be set (minutes) | Notes |
| V eal or pork chops | 3 | 16 - 18 | Turn over after 7-8 minutes. |
| Sausages | 3 | 10 - 12 | Must always be pierced. If particularly fatty, the sausages should be cut in half.Turn over after 4-5 minutes. |
| Hamburger | 3 | 10 - 12 | Turn over after 3-4 minutes. |
| Peppers | 1 | 9 - 11 | Cut in quarters. Turn over after 3-4 minutes |
| Aubergine (eggplant) | 4 slices | 9 - 11 | Slices one cm. thick. Turn over after 3-4 minutes. |
| Zucchini | 6 strips | 8 - 10 | Slices one cm. thick. Turn over after 2-3 minutes. |
| T oasted bread | 4 slices | 2,30 | Trim the crusts carefully. Turn over after 1,15 minutes. |
Cleaning
Always switch off at the power socket, disconnect the plug and wait for the appliance to cool down, before any cleaning and maintenance is carried out.
The internal cavity of your oven is covered with a special non-stick finish to which splashes and food particles do not stick, making cleaning particularly simple. Always keep the microwave outlet cover (C) clean and free from grease and splashes of fat.

natural_image
Illustration of a microwave oven with open door and yellow paper inside, showing internal components (no text or symbols)Do not use abrasive detergents, wire sponges and sharp metal tools when cleaning the external surface of the oven.
It is also advisable not to use alcohol, abrasive detergents or ammonia-based detergents to
clean the internal and external surfaces of the door. Do not steam clean the inside of the oven.

natural_image
Illustration of a smiling microwave with a cloth, no text or symbols presentAlways keep the inside of the door clean to ensure that it closes properly, so that dirt and food residues do not become trapped between the door and the front panel of the oven.
natural_image
Isometric line drawing of a microwave oven with airflow arrows indicating direction (no text or symbols)Check from time to time that the ventilation openings located on the back and underneath the cabinet which houses the appliance are free from any obstructions or dust. Contact your Service
Assistance Centre for any necessary controls of the ventilation openings found on the back of the appliance.
It is necessary to remove the turntable (G) and its corresponding support (H) periodically in order to clean them; the bottom of the oven should also be cleaned.
Wash the turntable and its support in soapy water using mild soap. They can also be washed in a dishwasher.
Do not immerse the turntable in cold water after prolonged heating; the sudden change in temperature would cause it to crack.
The turntable motor is sealed. When cleaning the bottom, you should nevertheless take care to avoid water penetrating under the turntable spindle (D).
Important information for correct disposal of the product in accordance with EC Directive 2002/96/EC.

At the end of its working life, the product must not be disposed of as urban waste. It must be taken to a special local authority differentiated waste collection centre or to a dealer providing this service.
Disposing of a household appliance separately avoids possible negative
consequences for the environment and health deriving from inappropriate disposal and enables the constituent materials to be recovered to obtain significant savings in energy and resources. As a reminder of the need to dispose of household appliances separately, the product is marked with a crossed-out wheeled dustbin.
Maintenance
Before calling Service for assistance, check through
the following list, there may be nothing wrong:
| PROBLEM | CAUSE/SOLUTION |
| The appliance does not work | · The door is not closed properly.· The plug is not correctly inserted.· No power at the socket (check the fuse box)· The time has not been set correctly. |
| Condensation on the work surface, inside the oven or around the door. | · W hen food is cooked which contains water it is quite normal for the steam which is generated inside the oven to escape and condense inside the oven, on the cooking surface or around the doorframe. |
| Sparks inside the oven | · Do not turn the oven on without food in Microwave and Combined cooking modes.· Do not use metal containers for the above cooking modes or bags or packets with metal parts. |
| The food does not heat or cook properly | · Select the correct cooking mode or reduce the cooking time.· T he food has not been completely defrosted before being cooked. |
| The food burns | · Select a lower power level or reduce the cooking time. |
| The food does not cook evenly | · Stir the food during cooking. Remember that food cooks better when cut in evenly-sized pieces.· The turntable does not rotate. |
NOTE: The oven may be used safely even if the light
bulb is not working. Contact an authorised Service
Centre for bulb replacement.
