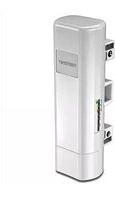
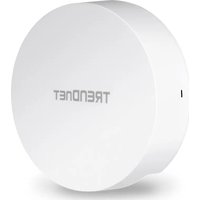
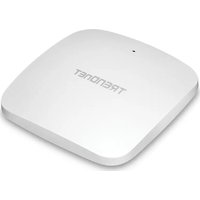
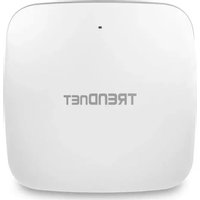
TEW-734APO - Access Point TRENDNET - Free user manual and instructions
Find the device manual for free TEW-734APO TRENDNET in PDF.


| Product Type | Wireless N Access Point |
| Model | TEW-734APO |
| Wireless Standards | IEEE 802.11b/g/n |
| Frequency Band | 2.4 GHz |
| Maximum Data Rate | 300 Mbps |
| Ports | 1 x 10/100 Fast Ethernet (PoE capable) |
| Power Supply | Power over Ethernet (802.3af) or 5V DC adapter |
| Dimensions (W x D x H) | 150 x 120 x 30 mm |
| Weight | 200 g |
| Antenna Type | Internal omnidirectional |
| Security | WEP, WPA/WPA2-PSK, WPA2-Enterprise |
| Operating Modes | Access Point, Repeater, WDS Bridge |
| Management | Web interface, SNMP v1/v2c |
| Mounting | Wall mount (bracket included) |
| Operating Temperature | 0°C to 40°C |
| Humidity | 10% to 90% non-condensing |
| Certifications | FCC, CE |
| Maintenance | Clean with a soft, dry cloth; avoid liquids |
| Spare Parts | Power adapter (optional), not user-serviceable |
Frequently Asked Questions - TEW-734APO TRENDNET
User questions about TEW-734APO TRENDNET
0 question about this device. Answer the ones you know or ask your own.
Ask a new question about this device
Download the instructions for your Access Point in PDF format for free! Find your manual TEW-734APO - TRENDNET and take your electronic device back in hand. On this page are published all the documents necessary for the use of your device. TEW-734APO by TRENDNET.
USER MANUAL TEW-734APO TRENDNET
natural_image
White Trenchnet device with visible internal components and mounting holes (no text or symbols on body)•13 dBi Outdoor PoE Access Point
TEW-734APO
• Quick Installation Guide (1)
1. Before You Start
Package Contents
- TEW-734APO
• CD-ROM (User's Guide) - Quick Installation Guide
- Mounting hardware
• Power adapter (24V DC, 1A) - PoE injector
- Grounding wire
Minimum Requirements
• Computer with an Ethernet port and Web Browser
• Network switch or router with an available network port
- 2 x network cables
Note: The TEW-734APO does not support IEEE 802.3af. You must use the included proprietary Power over Ethernet (PoE) injector.
2. Configuring a WDS connection
Note:
- The default IP address of the TEW-734APO is 192.168.10.100. To configure the unit, your network adapter must have an IP address within the 192.168.10.XX range.
(192.168.10.1 - 192.168.10.254)
Please refer to the Appendix in the User's Guide for more information. - All antivirus and firewall software must be disabled before configuring the TEW-734APO.
- The initial configuration should be done in a testing environment, with two TEW-734APO units approximately 15 ft. (5 meters) apart.
-
Configure and connect the devices before they are mounted.
-
Write the MAC address of the two TEW-734APOs. The MAC address can be found on the label on the back of the unit.

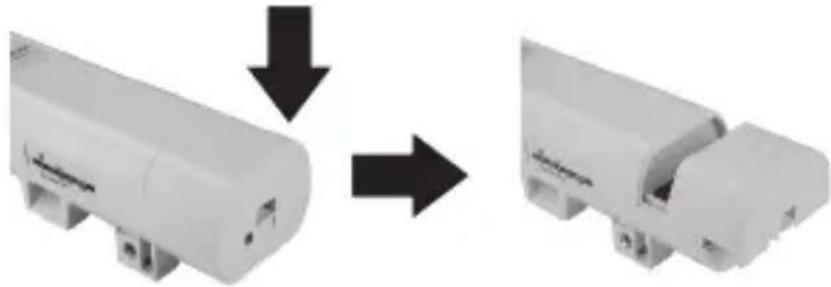
- Pinch the tab and slide the cover down.
natural_image
Two white plastic electronic devices with black arrows indicating transformation or assembly (no text or symbols visible)- Connect a network cable into the PoE port on the TEW-734APO.

- Connect the other end of the network cable to the Data & Power Out port on the included Power over Ethernet (PoE) Injector.
- Using the second network cable, connect one end to the Data In port of the PoE injector.
- Connect the other end of the second network cable to your computer's network port.
- Connect the power cord to the PoE Injector, and plug the adapter into an electrical outlet.
- Assign a static IP address to your computer's network adapter, using the subnet setting 192.168.10.XX (192.168.10.00 – 192.168.10.255). For this example we will assign our computer with 192.168.10.30.
Note: The default IP address of the TEW-734APO is 192.168.10.100. Do not set your computer's network adapter to this address.
- Set the subnet mask to 255.255.255.0.
-
Open your web browser, and enter the IP address 192.168.10.100 into the address bar to log into the TEW-734APO.
-
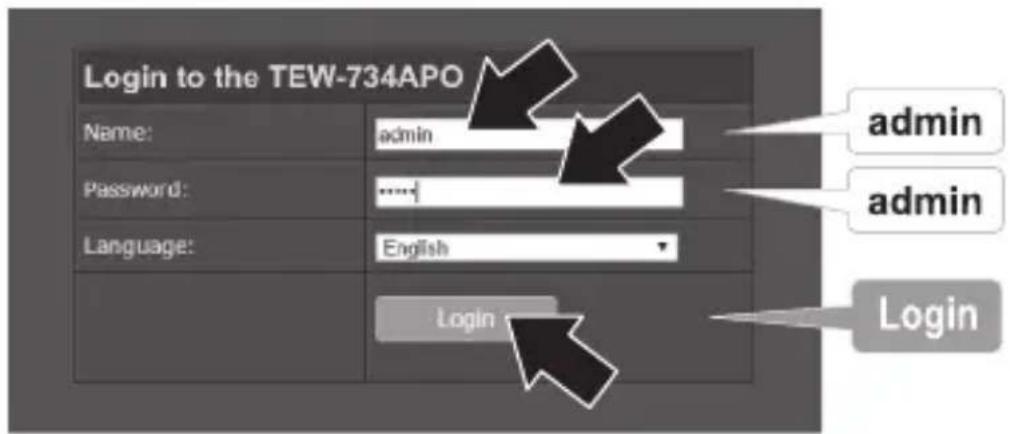
Enter the username and password, then click Login. Passwords are case-sensitive. The default username and password are:
User Name: admin
Password: admin
- Click Wireless and then click Basic Settings.

- Change the Operation Mode setting to Bridge.

- Click Apply to save your settings.

- Click OK.

- Click Wireless, then WDS Settings.
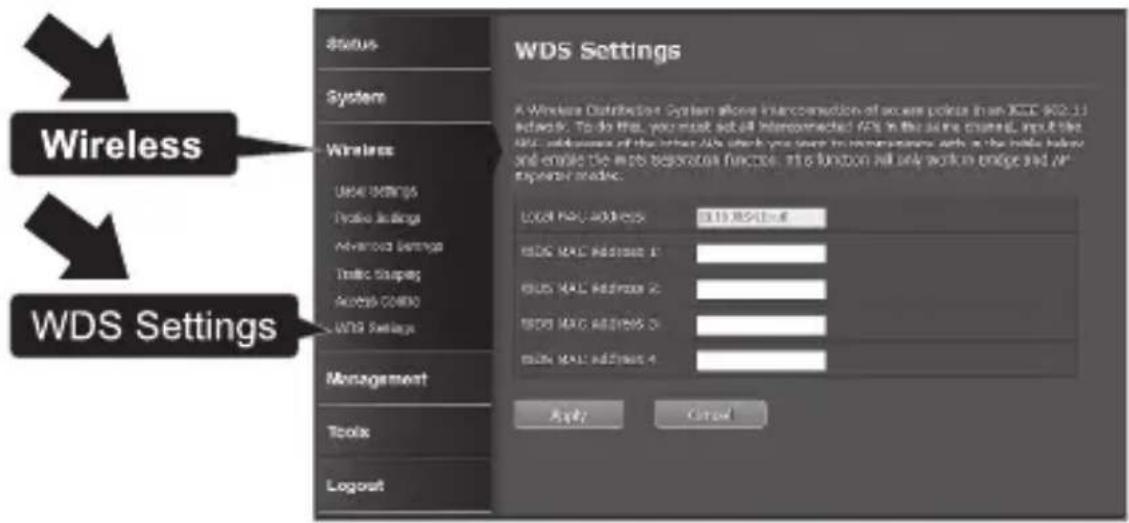
- In the field WDS MAC Address 1, enter the MAC address of the TEW-734APO or other devices that you are connecting to.

- Click Apply.

- Click OK.
- Click System, then Network Settings.

- Change the Network Mode setting to Bridge, and under IP Address Assignment select Static IP.

- Configure the TEW-734APO's IP address to a valid IP address, using the subnet defined by the router. Each TEW-734APO must have a unique IP address. Avoid using an IP address within the DHCP pool of your router. In this example, we will assume the following:
Router IP Address: 192.168.10.1
Subnet Mask: 255.255.255.0
DHCP Pool: 192.168.10.100\~192.168.10.199
The TEW-734APO will be set up with the following IP address assignment:
IP Address: 192.168.10.200
Subnet Mask: 255.255.255.0
Gateway IP Address: 192.168.10.1
DNS 1: 192.168.10.1
- Click Apply.

-
Click OK.
-
To configure the second TEW-734APO, return to step 2 and complete the configuration process again. When assigning the IP addresses to your TEW-734APOs, make sure each device has a different IP address.
Secure Your Wireless Network
- Click Wireless, then Profile Settings.
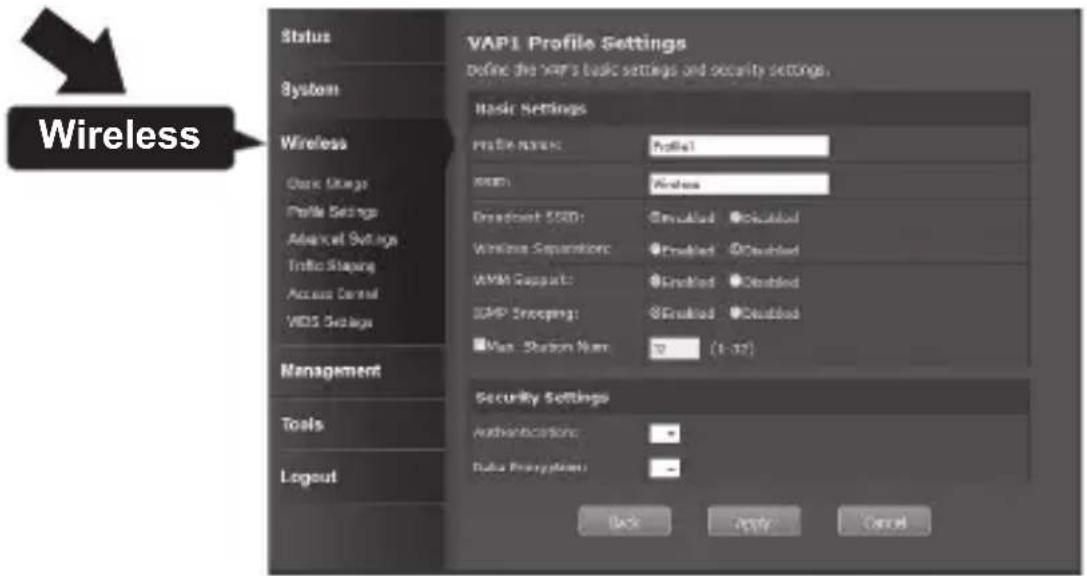
- Select the profile name of your network.
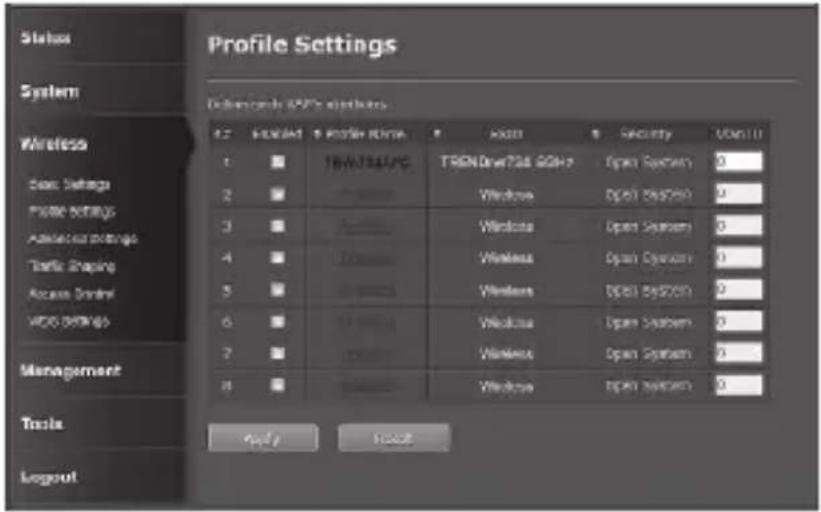
- In the Security Setting section, select the authentication type you want to use. We recommend WPA2-PSK. No matter which protocol you choose, both TEW-734APO devices must have the same encryption protocol to establish a connection.
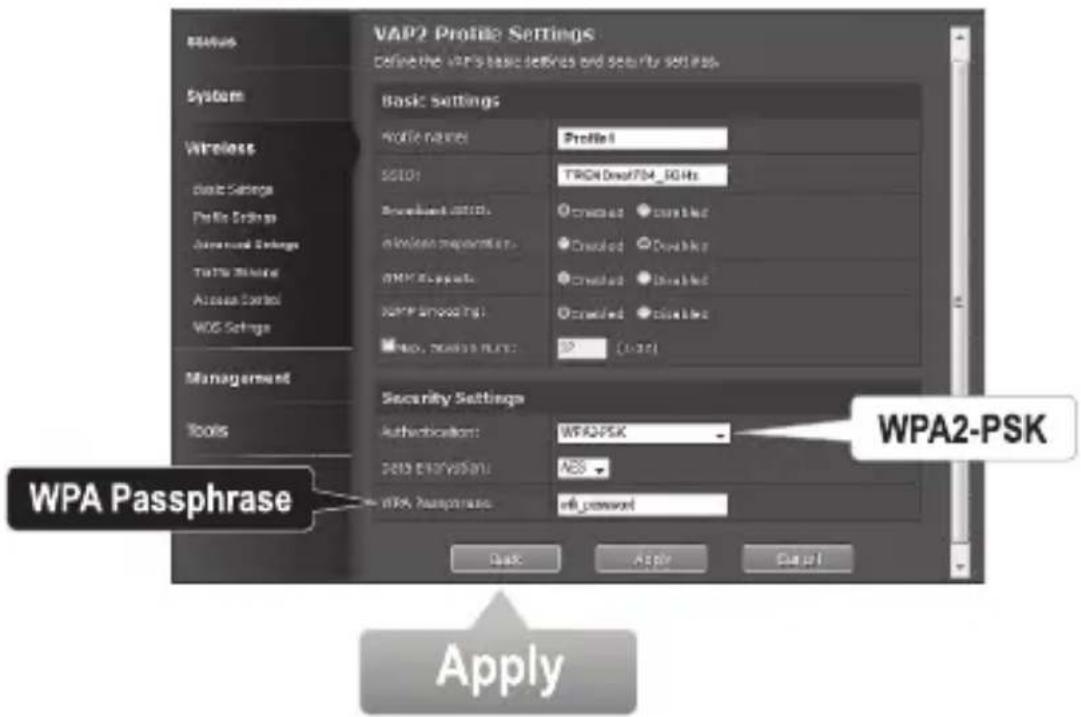
- Under the WPA Passphrase enter your WiFi password.
- Click Apply to save your settings.
Confirm Connectivity
- Leave the TEW-734APO (#2) connected to your computer.
- Connect the TEW-734APO (#1) to the LAN port of a router on your network.
- To verify connectivity, bring up your computer's command prompt, and ping the TEW-734APO (#1) using the IP address you assigned to the device.
- A successful ping reply indicates that both TEW-734APO units are configured properly and connected.
3. Hardware Installation
5 Ghz WiFi

flowchart
graph TD
    A["Server 1"] -->|Wireless Signal| B["Router"]
    B --> C["Modem"]
    C --> D["Internet"]
    D --> E["Router"]
    E --> F["Modem"]
    F --> G["Internet"]
    G --> H["Router"]
    H --> I["Modem"]
    I --> J["Internet"]
    J --> K["Router"]
    K --> L["Modem"]
    L --> M["Internet"]
    M --> N["Router"]
    N --> O["Modem"]
    O --> P["Internet"]
    P --> Q["Router"]
    Q --> R["Modem"]
    R --> S["Internet"]
    S --> T["Router"]
    T --> U["Modem"]
    U --> V["Internet"]
    V --> W["Router"]
    W --> X["Modem"]
    X --> Y["Internet"]
    Y --> Z["Router"]
Building 1 Building 2
Note: For this section, refer to the diagram above.
- Mount the TEW-734APO devices in the desired locations. For instruction on mounting the TEW-734APO to a pole, refer to the Pole Mounting the TEW-734APO section below.
- Connect each TEW-734APO to their respective networks.
- Confirm that the TEW-734APO units are positioned correctly, and facing each other.
- Verify that the status LED indicators on each unit are functional and illuminated. Power: Green
LAN: Green (blinking)
Signal Indicator: Green, Yellow, or Red.
Connect the Grounding Wire
- Pinch the tab and slide the cover down.
- Remove the screw and insert the grounding wire on the screw.
- Tighten the screw firmly in place and route the wire alongside the Ethernet cable.

natural_image
Close-up of a small electrical outlet with cable and connector, showing internal components and a magnified view (no text or symbols)- Position both wires inside the access hole at the edge of the case, and slide the cover back into place.
Pole Mounting the TEW-734APO
Note: The mounting clamp supports poles with a maximum diameter of 63mm (2.48 inches)
- Turn the screw on the pole mounting clamp counter-clockwise to open the clamp.

natural_image
Close-up of a metal clamp ring with a small rectangular component attached (no text or symbols visible)- Insert the clamp through the slots on the TEW-734APO.

natural_image
Exterior view of a white remote control device with ventilation slots and a cable strap (no visible text or symbols)- Wrap the clamp around the pole.

natural_image
Illustration of a cylindrical mechanical device with attached clamping bracket (no text or symbols)- Secure the TEW-734APO to the pole by turning the screw clockwise to tighten the clamp.

natural_image
Close-up of a metallic mechanical component with a downward arrow and circular feature (no text or symbols)Installation is now complete. For detailed information on configuring the TEW-734APO and advanced settings, please refer to the User's Guide on the CD-ROM that came with the device.
Manufacturer's Name and Address
TRENDnet, Inc.
20675 Manhattan Place
Torrance, CA 90501 USA

Product Information
Model Number: TEW-734APO
Product Name: 13 dBi Outdoor PoE Access Point
Trade Name: TRENDnet
TRENDnet hereby declare that the product is in compliance with the essential requirements and other relevant provisions under our sole responsibility.
Safety
EN 60950-1: 2006 + A11: 2009: +A1: 2010 + A12: 2011
EN 60950-22: 2005
EMC
EN 301 489-1 V1.9.2:09-2011
EN 301 489-17 V2.2.1:09-2012
EN 55022: 2010 + AC: 2011
EN 55024: 2010
Radio Spectrum & Health
EN 300 328 V1.8.1: 06-2012
EN 62311: 2008
Energy Efficiency
Regulation (EC) No. 1275/2008, No. 278/2009
This product is herewith confirmed to comply with the Directives.
Directives:
Low Voltage Directive 2006/95/EC
EMC Directive 2004/108/EC
R&TTE Directive 1999/5/EC
EMF Directive 1999/519/EC
Ecodesign Directive 2009/125/EC
RoHS Directive 2011/65/EU
REACH Regulation (EC) No. 1907/2006
Person responsible for this declaration.
Place of Issue: Torrance, California, USA
Date: June 8, 2015
Name: Sonny Su
Title: Director of Technology
Signature:

Manufacturer's Nom et Adre
TRENDnet, Inc.
20675 Manhattan Place
Torrance, CA 90501 USA

Détails du produit
Modèle: TEW-734APO
Directive Basse Tension 2006/95/CE
Directive CEM 2004/108/CE
Directive R&TTE 1999/5/CE
Directive EMF 1999/519/CE
Directive RoHS 2011/65/UE
REACH Réglement (CE) N° 1907/2006
Date: June 8, 2015 Lieu de délivrance: To
Nom: Sonny Su
Position: Director of Technology
Signature:
GPL/LGPL General Information
This TRENDnet product includes free software written by third party developers. These codes are subject to the GNU General Public License ("GPL") or GNU Lesser General Public License ("LGPL"). These codes are distributed WITHOUT WARRANTY and are subject to the copyrights of the developers. TRENDnet does not provide technical support for these codes. The details of the GNU GPL and LGPL are included in the product CD-ROM.
Please also go to (http://www.gnu.org/licenses/gpl.txt) or (http://www.gnu.org/licenses/lgpl.txt) for specific terms of each license.
The source codes are available for download from TRENDnet's web site (http://trendnet.com/downloads/list_gpl.asp) for at least three years from the product shipping date.
You could also request the source codes by contacting TRENDnet.
20675 Manhattan Place, Torrance, CA 90501, USA. Tel: +1-310-961-5500 Fax: +1-310-961-5511
TRENDnet warrants its products against defects in material and workmanship, under normal use and service, for the following length of time from the date of purchase. Warranty: 3 year limited warranty (When Applicable: 1 year warranty for power adapter, power supply, and cooling fan components.) Visit TRENDnet.com to review the full warranty policy, rights, and restrictions for this product.
Garantie Limitée
This device can be expected to comply with Part 15 of the FCC Rules provided it is assembled in exact accordance with the instructions provided with this kit. Operation is subject to the following conditions:
(1) This device may not cause harmful interference
(2) This device must accept any interference received including interference that may cause undesired operation.


Waste electrical an electronic products must not be disposed of with household waste. Please recycle where facilities exist. Check with your Local Authority or Retailer for recycling advice.
Applies to PoE Products Only: This product is to be connected only to PoE networks without routing to the outside plant.
Note
The Manufacturer is not responsible for any radio or TV interference caused by unauthorized modifications to this equipment. Such modifications could void the user's authority to operate the equipment.
Advertencia
If you have any questions regarding the product installation, please contact our Technical Support.
Toll free US/Canada: 1-866-845-3673
Regional phone numbers available at www.trendnet.com/support
Product Warranty Registration
Please take a moment to register your product online. Go to TRENDnet's website at: http://www.trendnet.com/register
TRENDnet
20675 Manhattan Place, Torrance, CA 90501. USA
Copyright © 2015. All Rights Reserved. TRENDnet.
- TEW-734APO
- Before You Start
- Package Contents
- Minimum Requirements
- Configuring a WDS connection
- Note:
- Secure Your Wireless Network
- Confirm Connectivity
- Hardware Installation
- Connect the Grounding Wire
- Pole Mounting the TEW-734APO
- Manufacturer's Name and Address
- Product Information
- Safety
- EMC
- Radio Spectrum & Health
- Energy Efficiency
- Directives:
- Manufacturer's Nom et Adre
- Détails du produit
- GPL/LGPL General Information
- Garantie Limitée
- Note
- Advertencia
- Product Warranty Registration
- TRENDnet
Brand : TRENDNET
Model : TEW-734APO
Category : Access Point