USER MANUAL PZ-22IR Provision-ISR
Item Qty. Z-22/27 IR PTZ 1 Wall Bracket 1 Hinge Pin 1 Rubber Seal 1 DC12V/5A power supply 4 Wall Screws 4 PM8*25 socket head screws 1 Allan Key 1 User Manual
Table of Contents:
1 General Instructions.... 3
1.1 Safety Instructions .... 3
2 Features .... 4
2.2 Product Features.... 4
3 Installation Site Preparations 6
3.1 Tool List....6
4.1 Display Boot-UP Info....8
APPENDIX I: DIP Switch Setting.... 33
APPENDIX II Shortcuts Key Chart 3838
APPENDIX III Trouble Shooting.... 400
1.1 Safety Instructions:
◆ Make sure to read the user manual before using the product.
1.2 Warnings:
Do not install this speed dome in hazardous places where combustible or explosive materials are stored or used.
2 Features:
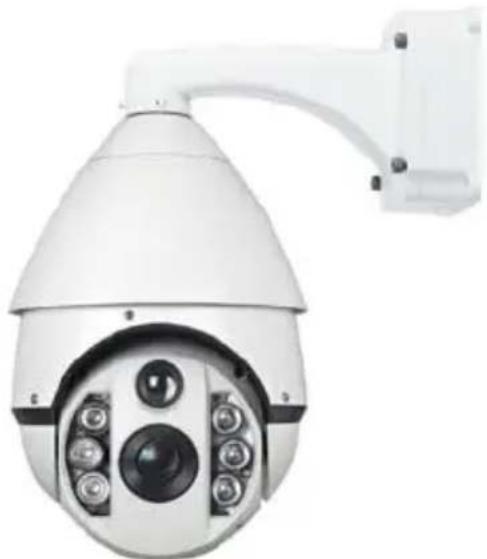
2.1 Product Picture:
natural_image
Close-up of a white security camera with multiple circular sensors mounted on a wall (no visible text or symbols)
2.2 Product Features
◆ Alarm I/O.
speed to reduce the dark angle and flashlight effect.
◆ The upper dome adopts 7" aluminum alloy structure for better magnetic shield and heat radiation.
2.3 Specifications:
Power Supply Input: AC100~240V 50/60HzOutput: DC12V±5%, 5A Max. Power Consumption IR off: 15WIR on: 31W Sync system Internal Sync Language English Pan Speed 0.08°~240°/S Tilt Speed 0.08°~240°/S Pan Range 0°~360°(Continuous) Tilt Range 0°~90° (180° auto flip) Preset 128 Preset Accuracy <±0.1° Tour 4, 27 presets/tour Pattern 4 Zone 1 Protocol RS485 Communication PELCO-D/P auto detected Baud Rate 2400bps、4800bps、9600bps、19200bps Address 1-255 (By DIP Switch or Software) RTC Set any functions at any time IR Light switch Superpower LED: Default: Zoom x1~5: open the near-distance IR lights; Zoom x6~9: open the near-distance and middle-distance IR lights; Zoom >x10: turn off the near-distance IR lights, open the middle-distance and far-distance IR lights. Work Temperature Indoor: 0°C~+50°C; Outdoor: -20°C~+50°C (with heater) Work Humidity <90%
3 Installation Site Preparations:
(1) Screws* (2) Monkey wrench
3.2 Installation Preparation:
(1) Check the space and toughness of the site and make sure that the environmental conditions meet the installation requirements for this product.
3.3 DIP Switch Setting:
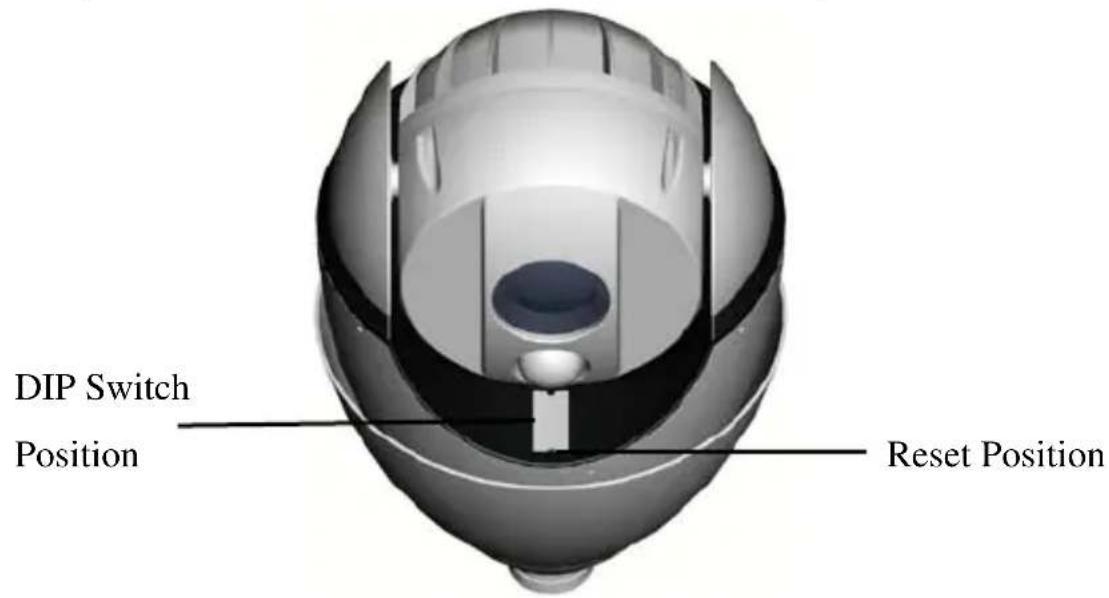
(1)Default Settings: Pelco P/D (auto-detected), baud rate: 2400, address: 1. Use Philips screwdriver to remove the DIP switch cover (see location below)
(2) Baud Rate Setup
Decoder Switch: 9\~10 (1=ON, 0=OFF)
Switch 9-10 setting Baud Rate Max transmission distance(M) 9 10 0 0 2400BPS 1800 1 0 4800BPS 1200 0 1 9600BPS 800 1 1 Auto detected 2400、4800、9600、19200BPS 600-1800
(3) When the DIP Switch 9th and 10th are ON, the PTZ can automatically detected the baud rate 2400, 4800, 9600, 19200
*Please note that the address setting can also be configured via the software using the camera OSD (Page 11).
4.1 Display Boot-UP Info.
Before installation please check the protocol, baud rate, address and RS485 data cable. Default protocol: PELCO-D, address: 1, baud rate: 2400.
PROTOCOL: PELCO P D
BAUD RATE: 2400BPS
CAMERA ID: 001
CAMERA S/N: 0000000001
MODEL: ----
VERSION: V1.02
FAN SPEED: 6000RPM
STARTING... ....
When starting, the PTZ will display the following information:
Level self-check: Success
Vertical self-check: Success
Camera type: ###
Success
Once done, the above information will disappear and the user will gain control over the camera.
While the camera is in standby condition, call preset 95 ("Call" + 95 + "Enter") in order to display the main menu. Use the Up/Down direction to select item or start the configuration. Use the Right key to confirm and left key for exit the current setting.
The Main menu as follows:
SYSTEM LENS CAMERA PAN/TILT AUTO RUNNING PRIVACY MASK ALARM LANGUAGE IR SET EXIT
→
SITE INFO DISPLAY SETUP BOOTUP SCREEN PASSWORD SET DEFAULT SYSTEM REBOOT RTC TIME SET RTC TIMER RUNNING BACK EXIT
System info includes following settings.
- : In this menu the user can setup the dome's name, View the Hardware address, change the camera software address and choose the leading command (Hardware or Software).
- < DISPLAY SETUP>: In this menu the user can choose which details will display on the camera Screen. The available options are: Site name, Preset title, Pattern name, Zoom, Orientation, Temperature, Zone name and RTC time.
- : User can view the boot information.
- : User can setup or change menu access password.
- : All settings will go back to factory default. Preset positions will be retained.
- : After change dome ID or adjust deviation between two preset positions, user this to remotely reboot the system.
- : Set the present date and time.
- : Schedule actions for specific date and time.
4.3.1 SITE INFO
NAME: GXAAF DOME: 001 DOME ID OPT: SOFT SOFTWARE ID: 001 HARDWARE ID: 000 BROADCAST ID: 255 BACK EXIT
- : The title name of the dome. Assigning a name to a dome helps the user to identify which dome is under control for multiple domes site. Max 16 digits Setting with number from 0\~9 and letter from A\~Z. Move the cursor to and then move the joystick right to enter dome ID setting,
\- : Setting the address method that controls the dome, user can choose from SOFT (Software) and HARD (Hardware).
[SOFT]: when choose this, the SOFTWARE ID is effective while the HARDWARE ID is ineffective.
[HARD]: when choose this, the HARDWARE ID is effective while the SOFTWARE ID is ineffective.
\- : shows the current software ID, user can modify and choose address in the range of 001\~254
\- : shows the current physical ID, it is decided by the DIP Switch only: user cannot modify via the OSD.
\- : shows the current ID, The ID functions the same as dome's , The dome works when receives any of those ID. The dome's broadcast ID is 255 and cannot be modified.
\- : return to upper menu.
\- : exit the menu
4.3.2 DISPLAY SET UP
< Main Menu>→→
SITE NAME: OFF PRESET TITLE: OFF PATTERN NAME: OFF ZOOM: OFF ORIENATATION: OFF TEMPRETURE: OFF ZONE NAME: OFF RTC TIME: OFF BACK EXIT
- : Choose to display site name or not.
- : Choose to display preset position or not.
● : Choose to display pattern name or not
- : Choose to display the current zoom or not.
- : Choose to display the current lens direction or not.
- : Choose to display the current temperature or not.
- : Choose to display the current zone name or not.
- : Choose to display the date and time or not.
4.3.3 DISPLAY BOOT-UP INFO
PROTOCOL: PELCO P D
BAUD RATE: 2400BPS
CAMERA ID: 001
CAMERA S/N: 0000000001
MODEL: \_\_\_\_
VERSION: V1.02
FAN SPEED: 6000RPM
CALL PRESET 1 TO BACK
→→
Enter into Boot-up info displays to check current setup, call preset 1 to return to upper menu
4.3.4 PASSWORD
→→
INPUT PASSWORD: \*\*\*\*\*\*
CONFIRM: \*\*\*\*
PSWD PROTECTION: OFF
BACK
EXIT
\- :
Re-input the new password and confirm. If the input is not the same as the first time input, the system will remain the old password.
\- :
Switch on / off the password protection. When it is user need to enter password in order to access OSD menu or save preset through keyboard.
- : return to upper menu.
- : exit the menu
4.3.5 SET DEFAULT
→→
Select to restore factory default setting.
Please note: there is no confirmation prompt! Once entering the camera will immediately restore itself.
4.3.6 SYSTEM REBOOT
→→
Select to reboot the dome.
4.3.7 RTC TIME SET
→→
DATE Y/M/D: 00 00 00
TIME H: M: S: 00 00 00
BACK
EXIT
Use left and right keys to move the cursor to desired item, use up and down keys to change the current cursor value.
4.3.8 RTC RIME RUNNING
→→
DATE Y/M/D: 00 00 00
TIME H: M: S: 00 00 00
ACTION: PRESET 001
BACK
EXIT
- : Setup time running time (24-hour)
- : Choose one function from , , , to run.
- : Back to the upper menu.
- : Exit the current menu.
4.4 LENS
→
ZOOM SPEED: HIGH
DIGITAL ZOOM: OFF
JOYSTICK AF/AI: BOTH
AF RESUME TIME: 005
AI RESUME TIME: 005
DAY/NIGHT: IR-CTR
CAMERA P/N: AUTO
BACK
EXIT
- : Set the zoom speed level to HIGH or LOW
- : Turn On/Off the Digital Zoom.
- : Set up Auto Focus (AF), Auto Iris (AI) or Both
: Joystick movement triggers both auto focus and auto iris :
Joystick movement triggers auto focus only
: Joystick movement triggers auto iris only.
: Joystick movement triggers none of the functions.
\- : This item sets the time to restore auto focus after focus is manually changed. The default setting is 005, options are:
[OFF] Never restore auto focus after switch to manual.
[001-255]The dome will start auto focus that number of seconds after user manually adjusts focus.
\- : This item sets the time to restore auto iris after iris is manually changed. The default setting is 005 seconds, options are:
[OFF]: Never restore auto iris after switch to manual.
[001-255]: The dome will start auto iris that number of seconds after user manually adjust iris.
\- : Set the dome color/ black & white mode. Color mode is suitable to work in daytime because it needs higher illumination. Light sensitivity of black & white mode is much higher. It is suitable to work at night without illumination but the video is black and white.
There are 4 options:
[AUTO]: The dome will automatically change modes according to the environment illumination.
[COLOR]: The dome is always in color mode.
[NIGHT]: The dome is always in Black and White mode.
[IR-CTL]: The dome is controlled by the IR lights sensor, when the IR lights opened, the mode auto change to Black and White.
- :
Show the current camera P/N (PAL/ NTSC), The PTZ can automatically detected some of the camera Signal mode. If not, please set manually.
4.5 CAMERA:
Important Note: Camera setting will vary between Z-22IR and Z-27IR.
For the Simple camera menu access >.
WHITE BALANCE: AUTO
BLC MODE
BACK
EXIT
-
White Balance is normally compensated for by the automatic white balance gain control. In some lighting conditions, user may want to manually adjust the red and blue settings for optimal viewing. There are 6 options:
[AUTO]: Auto White Balance (default setting).
[MANUAL]: Manually set the red and blue values, setup from 000 to 255.
[ATW]: Auto track White Balance.
[OPW]: Once touch White Balance
[OUTDOOR]: Suitable for outdoor use.
[INDOOR]: Suitable for indoor use.
•
If the backlight is bright, the objects in the center of the picture may appear
dark. The dome can auto adjust the brightness of the whole image according to the brightness of the center point. Thus backlight compensation can increase the brightness of the objects in the center of the picture.
Select, and choose the right key to access the sub-menu as below
BLC QTY: 000
WDR: OFF
BACK
EXIT
[BLC QTY]: Adjust the data of the BLC, choose from 000-255
[WDR]: ON and OFF the camera's WDR function (Not supported)
For advanced Menu, Call preset #69.
1) The controller joystick has effect.
2) Scrolling up and down is done by pressing IRIS+/IRIS-
3) Changing Values of the selected feature is done by pressing ZOOM+/ZOOM-
IMPORTANT!!! Changing any values except of in the menu will result in the camera malfunctioning
FOCUS AUTO
ID DISPLAY OFF
CAM ID 1
PROTOCOL VISCA
BAUD RATE 9600
485 CONTROL NORMAL
LED 1 8
LED 2 15
LANGUAGE ##
RESET
EXIT
DSP Settings:
SHUTTER AUTO
WB MODE AUTO
AGC 88
DNR ON
BACKLIGHT OFF
HLC LEVEL 48
MIRROR OFF
BRIGHTNESS 8
SHARPNESS 8
COLOR 8
EXIT
- : Choosing between Auto and Manual
- : White Balance is normally compensated for by the automatic white balance gain control. In some lighting conditions, user may want to manually adjust the red and blue settings for optimal viewing. There are 6 options:
● [AUTO]: Auto White Balance (default setting).
● [MANUAL]: Manually set the red and blue values, setup from 000 to 255.
● [ATW]: Auto track White Balance.
● [OPW]: Once touch White Balance
● [OUTDOOR]: Suitable for outdoor use.
● [INDOOR]: Suitable for indoor use.
- : changing the value of AGC
● : Turning digital noise reduction on/off
- : switching between OFF/BLC/HLC.
- : after choosing HLC in the backlight menu, you can change level of HLC effect.
● : Turning Mirror effect ON/OFF
● : Changing the brightness value.
- : Changing the sharpness value.
- : This mask setting it referring to the zoom module only and will not be effective in a PTZ.
- : Adjusting color levels
4.6 PAN/TILT
→
AUTO STOP TIME: OFF
SPEED AMPLIFY: OFF
PROPORTIONAL P/T: ON
SET NORTH
BACK
EXIT
● :
For some particular protocols, the dome will not stop moving even there is no operation on CCTV Tester. This menu sets the time after which the dome receives last control command.
[Off]: Disable this function
[001\~255]: The time (second) that dome will stop moving without receiving any commands.
• :
Some protocols' controlling speed is much lower, set to accelerate domes movement. Options are as below:
[Off]: Disable this function
[01x\~ 32x]: Speed amplify from 01\~32x
Notice: The above two functions is not available at present
● :
The dome moves at a certain speed (degree per second). While zoomed in, the default movement speed may become too fast. This function decreases the dome movement speed while zoomed in for easier control on the dome.
: , following menu will pop-up.
CALL PRESET 1 TO RETURN
CONFIRM. . . . . .
Adjust the lens to desired position and call preset 1 to confirm and return.
4.7 AUTO RUNNING
→
PRESET
TOUR
PATTERN
360° SCAN
ZONE
PARK TIME: 0S
PARK ACTION: OFF
BACK
EXIT
4.7.1 PRESET
→→
PRESET NUMBER: 001
TITLE: PRESET 001
SET CURRNET
REMOVE CURRENT
BACK
EXIT
In this function, the values of the pan/tilt positions will be stored in the desired memory slot so that you will be able to call it when in need. 128 presets can be saved. It could also setup by shortcuts of control system.
\-
Display current preset number, the value ranges from 001 to 064 (Except preset 33 and 34) and 101 to 164
Note: Presets 33/34 has other functions in PELCO protocols, so the user cannot save any information on it.
\-
To set current preset title.16-bit can be set by the number 0 to 9 and the letters A-Z of any combination.
\- <SET CURRENT>
Select this item to set the preset position and zoom. The following menu will pop-up when < Set Current> is selected.
CALL PRESET 1 TO BACK
CONFIRM ... ...
Move to the desired position and zoom to a suitable level, call preset 1 to save the current preset and return.
\- < REMOVE CURRENT>: Delete the preset with the number and title display above.
<h1 id="472-tour">4.7.2 TOUR</h1>
<Main Menu> → <AUTO RUNNING> → <TOUR>
TOUR NUMBER: 001
DWELL: 003
EDIT
RUN
BACK
EXIT
The dome camera will run repeatedly as the given sequence of presets at certain dwell time by one command. Max. 4 tours available (27preset/tour).
- <TOUR NUMBER>: Set current tour number from 001\~004.
- <DWELL>: Set the default dwell time from 000\~255 seconds for each preset. User can still set independent dwell time for each preset when editing the tour.
- <EDIT>: Edit presets and corresponding dwell time in a tour as follows.
PRESET-DWELL
000-003 000-003 000-003
000-003 000-003 000-003
000-004 000-003 000-003
000-003 000-003 000-003
000-003 000-003 000-003
000-003 000-003 000-003
000-003 000-003 000-003
000-003 000-003 000-003
000-003 000-003 000-003
SAVE AND BACK
CANCEL AND BACK
There are three group numbers, the left side is preset number, the right side is dwell time; tour from left to right, up to down in the order to run preset; when the preset number is set to <000>, the current preset is skipped;
- <SAVE AND BACK>: Save the tour and back.
- <CANCEL AND BACK>: Quit without saving and then exit to the upper menu.
<h1 id="473-pattern">4.7.3 PATTERN</h1>
<Main Menu> → <AUTO RUNNING> → <PATTERN>
PATTERN NUMBER: 001
RECORD
RUN
BACK
EXIT
There are max 4 patterns, and the dome camera can record all regular operation in 3 minutes at least. The command will drive the speed dome runs as given route repeatedly.
- <PATTERN NUMBER>: Set current pattern number from 001\~004.
- <RECORD>: Edit the current pattern's running route and record all operation in 3 minutes at least.
CALL PRESET 1 TO BACK
CONFIRM....
180S
000%
RECORD......
[180S]: Remaining record time.
[000%]: The recording space. The record time will decrease while the space increases. User can call preset 1 to back to the upper menu.
Notice: Any of the time and space is finished; even not call preset 1, the recording is end and exit and saved the recording
\- <RUN>: Run current pattern repeatedly until other command received.
<h1 id="474-360-scan">4.7.4 360° SCAN</h1>
<Main Menu> → <AUTO RUNNING> → <360° scan>
360° SCAN DWELL: 0S
PAN SPEED: HIGH
RUN
BACK
EXIT
<h1 id="360-scan-dwell"><360° SCAN DWELL>:</h1>
[OS]: 360 continuous scan
[5S]: 90 intermittent scan, then dwell on 5s, the dome will continuously run at the given route repeatedly until receiving new command.
[10S]: 90 intermittent scan, then dwell on 10s, the dome will continuously run at the given route repeatedly until receiving new command.
<h1 id="pan-speed"><PAN SPEED></h1>
High: 20/S
Middle: 15/S
Low: 6/S
Auto: Do as the camera's proportional P/T speed.
<h1 id="run"><RUN></h1>
The dome will continuously run at the given route repeatedly until receiving new command.
<h1 id="475-zone">4.7.5 ZONE</h1>
<Main Menu> → <AUTO RUNNING> → <ZONE>
TITLE: RGEIN
LEFT LIMIT
RIGHT LIMIT
PAN SPEED: HIGH
REMOVE CURRENT
RUN
BACK
EXIT
- <TITLE>: To set current zone Name, 16-bit can be set up by the number 0-9 and the letters A-Z of any combination
- <LEFT LIMIT>: Set the right edge of region <A>
CALL PRESET 1 TO BACK CONFIRM. . . . . .
Move the camera left limit position to confirm and return. The position of the left limit position will now be marked on the menu screen.
● <RIGHT LIMIT>: Set the right edge of region (B)
CALL PRESET 1 TO BACK
CONFIRM. . . . . .
Move the camera right limit position to confirm and return. The position of the right limit position will now be marked on the menu screen.
<PAN SPEED>
High: 20/S
Middle: 15/S
Low: 6/S
Auto: Do as the camera's proportional P/T speed.
- <REMOVE CURRENT>: Delete current zone
- <RUN>: Start current zone scan repeatedly before receiving new command.
<h1 id="note">Note:</h1>
PTZ default tour scan direction clockwise direction starting from the left limit. If the user finds out the route is wrong, he could call number 82 preset again, when the tour scan run to the critical point, PTZ will scan in the reverse direction.
<h1 id="476-park-time">4.7.6 <PARK TIME></h1>
The camera will run certain function automatically if the dome is not receiving any command for the specified time.
OS: PARK TIME OFF
60S: PARK TIME ON, 60S
120S: PARK TIME ON, 120S
<h1 id="477-running-type">4.7.7 <RUNNING TYPE></h1>
Choose the type of action that will take place on activation of Park: users can choose between: Preset, Tour or Pattern.
Note: Time running available only if <IDLE TIME> and <RUNNING TYPE> are both ON state.
<h1 id="48-privacy-mask">4.8 PRIVACY MASK</h1>
<Main Menu> → <PRIVACY MASK>
MASK NUMBER: 001
MASK SETUP
REMOVE MASK
REMOVE ALL MASK
BACK
EXIT
- <MASK NUMBER>: Set and edit the current mask zone number from 001-008
- <PRIVACY MASK SETUP>: Enter privacy mask setup to edit and confirm.
CALL PRESET 1 TO RETURN
CONFIRM.....
Call preset 1 to confirm your setup and then you will see below sub-menu:
CALL PRESET 1 TO RETURN
CONFIRM. . . . . .
SIZE

Using up, down, left and right key to adjust the size of the mask, then call preset 1 to confirm and return.
- <REMOVE CURRENT MASK>: Remove current mask, then the black lump will disappear.
- <REMOVE ALL MASK>: Remove all mask, then all the black lump will disappear.
<h1 id="49-alarm">4.9 ALARM</h1>
(Optional function, standard camera do not include alarm)
<Main Menu> → <ALARM>
ALARM IN 1: OFF
RELAY 1: OFF
ARM/DISARM: ARM
INTERVAL<S>: 004
BACK
EXIT
Using an external alarm sensor can activate the corresponding function to achieve the auto monitoring purpose. The dome camera supports one way alarm input (grounded connection available) and one way alarm output. Any auto run functions can be set and called.
Wiring: ALin+ alarm input positive, ALin-alarm input com polarity; ALoutA
means alarm out on A side, ALoutB means alarm out on B side.
Note: The alarm has highest priority. For example, if Cruise set to run at 12:00, and at the same time an alarm signal input, the dome camera would respond to the alarm first.
- <ALARM IN 1>: Set the alarm input and the dome's corresponding action. Following options are applicable:
- [Off] or choose one function of <Preset>, <Tour>, <Pattern>, and <Auto>: when alarm.
- <RELAY 1>:
◆ [OFF]: Turn off the alarm output, the alarm will not be activated.
◆ [ON]: Turn on the alarm output, the alarm will give an alarm signal when activated.
- <ARM/DISARM>:
◆ <ARM> The alarm system effective.
◆ <DISARM> The alarm system is not effective.
- <INTERVAL>: Set the alarm interval time from 004\~255 seconds.
<h1 id="410-language">4.10 LANGUAGE</h1>
<Main Menu> → <LANGUAGE>
LANGUAGE: English
BACK
EXIT
(Language>, move the cursor up and down to choose language, press the left direction key to confirm.
<h1 id="411-ir-set">4.11 IR SET</h1>
<Main Menu> → <IR SET>
IR MODE: AUTO
IR ZOOM SET 1:006
IR ZOOM SET 2:010
PRESENT LUX: 010
IR START SET: 006
IR CLOSE SET: 012
BACK
EXIT
\- <IR MODE>: AUTO/OPEN/CLOSE
<AUTO>: Default. When the detected signal value from the IR sensitive below the value of IR Start, the IR dome automatically open the IR lights.
<OPEN>: Open the IR lights forcibly (No influence from the detected signal value).
<CLOSE>: Close the IR lights forcibly (No influence from the detected signal value).
Notice: The function only effective in <LENS> → <DAY/NIGHT> → <IR CHANGE> mode.
- <IR ZOOM SET 1>: 006 (The second section IR Zoom value)\*
- <IR ZOOM SET 2>: 010 (The third section IR Zoom value)\*
- <PRESENT LUX>: Display the current illumination value (Unit: Lux) cannot be edited
- <IR START SET>: 006 (Default Open IR light illumination value), Range: 0-8 Unit: Lux
- <IR CLOSE SET>: 012 (Close IR light illumination value) Range: 12-20 Unit: Lux
<h1 id="appendix-i-dip-switch-setting">APPENDIX I: DIP SWITCH SETTING</h1>
DIP Switch consists of 8 numbers from 1-8, use 8421 binary cod, max 255 address. When the switch is in the “ON” position, the number from 1-8 corresponding to 1, 2, 4, 8, 32, 64, 128. For example, if you set 1, 3, 5, 7 switch to the “ON” position, the corresponding address will be 1+4+16+64=85 , please refer to the blow details.
Sheet 1 (1=ON, 0=OFF)
<table><tr><td rowspan="2">DIP switchAddress</td><td colspan="8">K1 ID Switch(number 1-number 8)</td><td rowspan="19" colspan="7">DIP switchAddress 6 7</td><td colspan="7">K1 ID Switch(number 1-number 8)</td><td></td><td></td><td></td><td></td><td></td></tr><tr><td>1</td><td>2</td><td>3</td><td>4</td><td>5</td><td>6</td><td>7</td><td>8</td><td colspan="7">8</td><td></td><td></td><td></td><td></td><td></td></tr><tr><td>1</td><td>1</td><td>0</td><td>0</td><td>0</td><td>0</td><td>0</td><td>0</td><td>0</td><td colspan="4">2</td><td>0</td><td>1</td><td>0</td><td>0</td><td>0</td><td>0</td><td>0</td><td>0</td></tr><tr><td>3</td><td>1</td><td>1</td><td>0</td><td>0</td><td>0</td><td>0</td><td>0</td><td>0</td><td colspan="4">4</td><td>0</td><td>0</td><td>1</td><td>0</td><td>0</td><td>0</td><td>0</td><td>0</td></tr><tr><td>5</td><td>1</td><td>0</td><td>1</td><td>0</td><td>0</td><td>0</td><td>0</td><td>0</td><td colspan="4">6</td><td>0</td><td>1</td><td>1</td><td>0</td><td>0</td><td>0</td><td>0</td><td>0</td></tr><tr><td>7</td><td>1</td><td>1</td><td>1</td><td>0</td><td>0</td><td>0</td><td>0</td><td>0</td><td colspan="4">8</td><td>0</td><td>0</td><td>0</td><td>1</td><td>0</td><td>0</td><td>0</td><td>0</td></tr><tr><td>9</td><td>1</td><td>0</td><td>0</td><td>1</td><td>0</td><td>0</td><td>0</td><td>0</td><td colspan="4">10</td><td>0</td><td>1</td><td>0</td><td>1</td><td>0</td><td>0</td><td>0</td><td>0</td></tr><tr><td>11</td><td>1</td><td>1</td><td>0</td><td>1</td><td>0</td><td>0</td><td>0</td><td>0</td><td colspan="4">12</td><td>0</td><td>0</td><td>1</td><td>1</td><td>0</td><td>0</td><td>0</td><td>0</td></tr><tr><td>13</td><td>1</td><td>0</td><td>1</td><td>1</td><td>0</td><td>0</td><td>0</td><td>0</td><td colspan="4">14</td><td>0</td><td>1</td><td>1</td><td>1</td><td>0</td><td>0</td><td>0</td><td>0</td></tr><tr><td>15</td><td>1</td><td>1</td><td>1</td><td>1</td><td>0</td><td>0</td><td>0</td><td>0</td><td colspan="4">16</td><td>0</td><td>0</td><td>0</td><td>0</td><td>1</td><td>0</td><td>0</td><td>0</td></tr><tr><td>17</td><td>1</td><td>0</td><td>0</td><td>0</td><td>1</td><td>0</td><td>0</td><td>0</td><td colspan="4">18</td><td>0</td><td>1</td><td>0</td><td>0</td><td>1</td><td>0</td><td>0</td><td>0</td></tr><tr><td>19</td><td>1</td><td>1</td><td>0</td><td>0</td><td>1</td><td>0</td><td>0</td><td>0</td><td colspan="4">20</td><td>0</td><td>0</td><td>1</td><td>0</td><td>1</td><td>0</td><td>0</td><td>0</td></tr><tr><td>21</td><td>1</td><td>0</td><td>1</td><td>0</td><td>1</td><td>0</td><td>0</td><td>0</td><td colspan="4">22</td><td>0</td><td>1</td><td>1</td><td>0</td><td>1</td><td>0</td><td>0</td><td>0</td></tr><tr><td>23</td><td>1</td><td>1</td><td>1</td><td>0</td><td>1</td><td>0</td><td>0</td><td>0</td><td colspan="4">24</td><td>0</td><td>0</td><td>0</td><td>1</td><td>1</td><td>0</td><td>0</td><td>0</td></tr><tr><td>25</td><td>1</td><td>0</td><td>0</td><td>1</td><td>1</td><td>0</td><td>0</td><td>0</td><td colspan="4">26</td><td>0</td><td>1</td><td>0</td><td>1</td><td>1</td><td>0</td><td>0</td><td>0</td></tr><tr><td>27</td><td>1</td><td>1</td><td>0</td><td>1</td><td>1</td><td>0</td><td>0</td><td>0</td><td colspan="4">28</td><td>0</td><td>0</td><td>1</td><td>1</td><td>1</td><td>0</td><td>0</td><td>0</td></tr><tr><td>29</td><td>1</td><td>0</td><td>1</td><td>1</td><td>1</td><td>0</td><td>0</td><td>0</td><td colspan="4">30</td><td>0</td><td>1</td><td>1</td><td>1</td><td>1</td><td>0</td><td>0</td><td>0</td></tr><tr><td>31</td><td>1</td><td>1</td><td>1</td><td>1</td><td>1</td><td>0</td><td>0</td><td>0</td><td colspan="4">32</td><td>0</td><td>0</td><td>0</td><td>0</td><td>0</td><td>1</td><td>0</td><td>0</td></tr><tr><td>33</td><td>1</td><td>0</td><td>0</td><td>0</td><td>0</td><td>1</td><td>0</td><td>0</td><td colspan="4">34</td><td>0</td><td>1</td><td>0</td><td>0</td><td>0</td><td>1</td><td>0</td><td>0</td></tr></table>
<table><tr><td>35</td><td>1 1 0 0 0 1 0 0</td><td rowspan="27"></td><td>36</td><td>0 0 1 0 0 1 0 0</td></tr><tr><td>37</td><td>1 0 1 0 0 1 0 0</td><td>38</td><td>0 1 1 0 0 1 0 0</td></tr><tr><td>39</td><td>1 1 1 0 0 1 0 0</td><td>40</td><td>0 0 0 1 0 1 0 0</td></tr><tr><td>41</td><td>1 0 0 1 0 1 0 0</td><td>42</td><td>0 1 0 1 0 1 0 0</td></tr><tr><td>43</td><td>1 1 0 1 0 1 0 0</td><td>44</td><td>0 0 1 1 0 1 0 0</td></tr><tr><td>45</td><td>1 0 1 1 0 1 0 0</td><td>46</td><td>0 1 1 1 0 1 0 0</td></tr><tr><td>47</td><td>1 1 1 1 0 1 0 0</td><td>48</td><td>0 0 0 0 1 1 0 0</td></tr><tr><td>49</td><td>1 0 0 0 1 1 0 0</td><td>50</td><td>0 1 0 0 1 1 0 0</td></tr><tr><td>51</td><td>1 1 0 0 1 1 0 0</td><td>52</td><td>0 0 1 0 1 1 0 0</td></tr><tr><td>53</td><td>1 0 1 0 1 1 0 0</td><td>54</td><td>0 1 1 0 1 1 0 0</td></tr><tr><td>55</td><td>1 1 1 0 1 1 0 0</td><td>56</td><td>0 0 0 1 1 1 0 0</td></tr><tr><td>57</td><td>1 0 0 1 1 1 0 0</td><td>58</td><td>0 1 0 1 1 1 0 0</td></tr><tr><td>59</td><td>1 1 0 1 1 1 0 0</td><td>60</td><td>0 0 1 1 1 1 0 0</td></tr><tr><td>61</td><td>1 0 1 1 1 1 0 0</td><td>62</td><td>0 1 1 1 1 1 0 0</td></tr><tr><td>63</td><td>1 1 1 1 1 1 0 0</td><td>64</td><td>0 0 0 0 0 0 1 0</td></tr><tr><td>65</td><td>1 0 0 0 0 0 1 0</td><td>66</td><td>0 1 0 0 0 0 1 0</td></tr><tr><td>67</td><td>1 1 0 0 0 0 1 0</td><td>68</td><td>0 0 1 0 0 0 1 0</td></tr><tr><td>69</td><td>1 0 1 0 0 0 1 0</td><td>70</td><td>0 1 1 0 0 0 1 0</td></tr><tr><td>71</td><td>1 1 1 0 0 0 1 0</td><td>72</td><td>0 0 0 1 0 0 1 0</td></tr><tr><td>73</td><td>1 0 0 1 0 0 1 0</td><td>74</td><td>0 1 0 1 0 0 1 0</td></tr><tr><td>75</td><td>1 1 0 1 0 0 1 0</td><td>76</td><td>0 0 1 1 0 0 1 0</td></tr><tr><td>77</td><td>1 0 1 1 0 0 1 0</td><td>78</td><td>0 1 1 1 0 0 1 0</td></tr><tr><td>79</td><td>1 1 1 1 0 0 1 0</td><td>95</td><td>1 1 1 1 1 0 1 0</td></tr><tr><td>81</td><td>1 0 0 0 1 0 1 0</td><td>82</td><td>0 1 0 0 1 0 1 0</td></tr><tr><td>83</td><td>1 1 0 0 1 0 1 0</td><td>84</td><td>0 0 1 0 1 0 1 0</td></tr><tr><td>85</td><td>1 0 1 0 1 0 1 0</td><td>86</td><td>0 1 1 0 1 0 1 0</td></tr><tr><td>87</td><td>1 1 1 0 1 0 1 0</td><td>88</td><td>0 0 0 1 1 0 1 0</td></tr><tr><td>89</td><td>1 0 0 1 1 0 1 0</td><td rowspan="27"></td><td>90</td><td>0 1 0 1 1 0 1 0</td></tr><tr><td>91</td><td>0 0 1 1 1 0 1 0</td><td>92</td><td>0 0 1 1 1 0 1 0</td></tr><tr><td>93</td><td>1 0 1 1 1 0 1 0</td><td>94</td><td>0 1 1 1 1 0 1 0</td></tr><tr><td>95</td><td>1 1 1 1 1 0 1 0</td><td>96</td><td>0 0 0 0 0 1 1 0</td></tr><tr><td>97</td><td>1 0 0 0 0 1 1 0</td><td>98</td><td>0 1 0 0 0 1 1 0</td></tr><tr><td>99</td><td>1 1 0 0 0 1 1 0</td><td>100</td><td>0 0 1 0 0 1 1 0</td></tr><tr><td>101</td><td>1 0 1 0 0 1 1 0</td><td>102</td><td>0 1 1 0 0 1 1 0</td></tr><tr><td>103</td><td>1 1 1 0 0 1 1 0</td><td>104</td><td>0 0 0 1 0 1 1 0</td></tr><tr><td>105</td><td>1 0 0 1 0 1 1 0</td><td>106</td><td>0 1 0 1 0 1 1 0</td></tr><tr><td>107</td><td>1 1 0 1 0 1 1 0</td><td>108</td><td>0 0 1 1 0 1 1 0</td></tr><tr><td>109</td><td>1 0 1 1 0 1 1 0</td><td>110</td><td>0 1 1 1 0 1 1 0</td></tr><tr><td>111</td><td>1 1 1 1 0 1 1 0</td><td>112</td><td>0 0 0 0 1 1 1 0</td></tr><tr><td>113</td><td>1 0 0 0 1 1 1 0</td><td>114</td><td>0 1 0 0 1 1 1 0</td></tr><tr><td>115</td><td>1 1 0 0 1 1 1 0</td><td>116</td><td>0 0 1 0 1 1 1 0</td></tr><tr><td>117</td><td>1 0 1 0 1 1 1 0</td><td>118</td><td>0 1 1 0 1 1 1 0</td></tr><tr><td>119</td><td>1 1 1 0 1 1 1 0</td><td>120</td><td>0 0 0 1 1 1 1 0</td></tr><tr><td>121</td><td>1 0 0 1 1 1 1 0</td><td>122</td><td>0 1 0 1 1 1 1 0</td></tr><tr><td>123</td><td>1 1 0 1 1 1 1 0</td><td>124</td><td>0 0 1 1 1 1 1 0</td></tr><tr><td>125</td><td>1 0 1 1 1 1 1 0</td><td>126</td><td>0 1 1 1 1 1 1 0</td></tr><tr><td>127</td><td>1 1 1 1 1 1 1 0</td><td>128</td><td>0 0 0 0 0 0 0 1</td></tr><tr><td>129</td><td>1 0 0 0 0 0 0 1</td><td>130</td><td>0 1 0 0 0 0 0 1</td></tr><tr><td>131</td><td>1 1 0 0 0 0 0 1</td><td>132</td><td>0 0 1 0 0 0 0 1</td></tr><tr><td>133</td><td>1 0 1 0 0 0 0 1</td><td>134</td><td>0 1 1 0 0 0 0 1</td></tr><tr><td>135</td><td>1 1 1 0 0 0 0 1</td><td>136</td><td>0 0 0 1 0 0 0 1</td></tr><tr><td>137</td><td>1 0 0 1 0 0 0 1</td><td>138</td><td>0 1 0 1 0 0 0 1</td></tr><tr><td>139</td><td>1 1 0 1 0 0 0 1</td><td>140</td><td>0 0 1 1 0 0 0 1</td></tr><tr><td>141</td><td>1 0 1 1 0 0 0 1</td><td>142</td><td>0 1 1 1 0 0 0 1</td></tr><tr><td>143</td><td>1 1 1 1 0 0 0 1</td><td rowspan="27"></td><td>144</td><td>0 0 0 0 1 0 0 1</td></tr><tr><td>145</td><td>1 0 0 0 1 0 0 1</td><td>146</td><td>0 1 0 0 1 0 0 1</td></tr><tr><td>147</td><td>1 1 0 0 1 0 0 1</td><td>148</td><td>0 0 1 0 1 0 0 1</td></tr><tr><td>149</td><td>1 0 1 0 1 0 0 1</td><td>150</td><td>0 1 1 0 1 0 0 1</td></tr><tr><td>151</td><td>1 1 1 0 1 0 0 1</td><td>152</td><td>0 0 0 1 1 0 0 1</td></tr><tr><td>153</td><td>1 0 0 1 1 0 0 1</td><td>154</td><td>0 1 0 1 1 0 0 1</td></tr><tr><td>155</td><td>1 1 0 1 1 0 0 1</td><td>156</td><td>0 0 1 1 1 0 0 1</td></tr><tr><td>157</td><td>1 0 1 1 1 0 0 1</td><td>158</td><td>0 1 1 1 1 0 0 1</td></tr><tr><td>159</td><td>1 1 1 1 1 0 0 1</td><td>160</td><td>0 0 0 0 0 1 0 1</td></tr><tr><td>161</td><td>1 0 0 0 0 1 0 1</td><td>162</td><td>0 1 0 0 0 1 0 1</td></tr><tr><td>163</td><td>1 1 0 0 0 1 0 1</td><td>164</td><td>0 0 1 0 0 1 0 1</td></tr><tr><td>165</td><td>1 0 1 0 0 1 0 1</td><td>166</td><td>0 1 1 0 0 1 0 1</td></tr><tr><td>167</td><td>1 1 1 0 0 1 0 1</td><td>168</td><td>0 0 0 1 0 1 0 1</td></tr><tr><td>169</td><td>1 0 0 1 0 1 0 1</td><td>170</td><td>0 1 0 1 0 1 0 1</td></tr><tr><td>171</td><td>1 1 0 1 0 1 0 1</td><td>172</td><td>0 0 1 1 0 1 0 1</td></tr><tr><td>173</td><td>1 0 1 1 0 1 0 1</td><td>174</td><td>0 1 1 1 0 1 0 1</td></tr><tr><td>175</td><td>1 1 1 1 0 1 0 1</td><td>176</td><td>0 0 0 0 1 1 0 1</td></tr><tr><td>177</td><td>1 0 0 0 1 1 0 1</td><td>178</td><td>0 1 0 0 1 1 0 1</td></tr><tr><td>179</td><td>1 1 0 0 1 1 0 1</td><td>180</td><td>0 0 1 0 1 1 0 1</td></tr><tr><td>181</td><td>1 0 1 0 1 1 0 1</td><td>182</td><td>0 1 1 0 1 1 0 1</td></tr><tr><td>183</td><td>1 1 1 0 1 1 0 1</td><td>184</td><td>0 0 0 1 1 1 0 1</td></tr><tr><td>185</td><td>1 0 0 1 1 1 0 1</td><td>186</td><td>0 1 0 1 1 1 0 1</td></tr><tr><td>187</td><td>1 1 0 1 1 1 0 1</td><td>188</td><td>0 0 1 1 1 1 0 1</td></tr><tr><td>189</td><td>1 0 1 1 1 1 0 1</td><td>190</td><td>0 1 1 1 1 1 0 1</td></tr><tr><td>191</td><td>1 1 1 1 1 1 0 1</td><td>192</td><td>0 0 0 0 0 0 1 1</td></tr><tr><td>193</td><td>1 0 0 0 0 0 1 1</td><td>194</td><td>0 1 0 0 0 0 1 1</td></tr><tr><td>195</td><td>1 1 0 0 0 0 1 1</td><td>196</td><td>0 0 1 0 0 0 1 1</td></tr><tr><td>197</td><td>1 0 1 0 0 0 1 1</td><td rowspan="22"></td><td>198</td><td>0 1 1 0 0 0 1 1</td></tr><tr><td>199</td><td>1 1 1 0 0 0 1 1</td><td>200</td><td>0 0 0 1 0 0 1 1</td></tr><tr><td>201</td><td>1 0 0 1 0 0 1 1</td><td>202</td><td>0 1 0 1 0 0 1 1</td></tr><tr><td>203</td><td>1 1 0 1 0 0 1 1</td><td>204</td><td>0 0 1 1 0 0 1 1</td></tr><tr><td>205</td><td>1 0 1 1 0 0 1 1</td><td>206</td><td>0 1 1 1 0 0 1 1</td></tr><tr><td>207</td><td>1 1 1 1 0 0 1 1</td><td>208</td><td>0 0 0 0 1 0 1 1</td></tr><tr><td>209</td><td>1 0 0 0 1 0 1 1</td><td>210</td><td>0 1 0 0 1 0 1 1</td></tr><tr><td>211</td><td>1 1 0 0 1 0 1 1</td><td>212</td><td>0 0 1 0 1 0 1 1</td></tr><tr><td>213</td><td>1 0 1 0 1 0 1 1</td><td>214</td><td>0 1 1 0 1 0 1 1</td></tr><tr><td>215</td><td>1 1 1 0 1 0 1 1</td><td>216</td><td>0 0 0 1 1 0 1 1</td></tr><tr><td>217</td><td>1 0 0 1 1 0 1 1</td><td>218</td><td>0 1 0 1 1 0 1 1</td></tr><tr><td>219</td><td>1 1 0 1 1 0 1 1</td><td>220</td><td>0 0 1 1 1 0 1 1</td></tr><tr><td>221</td><td>1 0 1 1 1 0 1 1</td><td>222</td><td>0 1 1 1 1 0 1 1</td></tr><tr><td>223</td><td>1 1 1 1 1 0 1 1</td><td>224</td><td>0 0 0 0 0 1 1 1</td></tr><tr><td>225</td><td>1 0 0 0 0 1 1 1</td><td>226</td><td>0 1 0 0 0 1 1 1</td></tr><tr><td>227</td><td>1 1 0 0 0 1 1 1</td><td>228</td><td>0 0 1 0 0 1 1 1</td></tr><tr><td>229</td><td>1 0 1 0 0 1 1 1</td><td>230</td><td>0 1 1 0 0 1 1 1</td></tr><tr><td>231</td><td>1 1 1 0 0 1 1 1</td><td>232</td><td>0 0 0 1 0 1 1 1</td></tr><tr><td>233</td><td>1 0 0 1 0 1 1 1</td><td>234</td><td>0 1 0 1 0 1 1 1</td></tr><tr><td>235</td><td>1 1 0 1 0 1 1 1</td><td>236</td><td>0 0 1 1 0 1 1 1</td></tr><tr><td>237</td><td>1 0 1 1 0 1 1 1</td><td>238</td><td>0 1 1 1 0 1 1 1</td></tr><tr><td>239</td><td></td><td>240</td><td>0 0 0 0 1 1 1 1</td></tr></table>
<table><tr><td>Shortcut Key</td><td>Function (Set Preset)</td></tr><tr><td colspan="2">Set #71 preset Proportional P/T OFF</td></tr><tr><td>Set #73 preset</td><td>OS Park time ON</td></tr><tr><td colspan="2">Set #74 preset 60S Park time ON</td></tr><tr><td colspan="2">Set #75 preset 120S Park time ON</td></tr><tr><td colspan="2">Set #76 preset Dome restart</td></tr><tr><td colspan="2">Set #77 preset Restore Factory Setting</td></tr><tr><td>Set #78 preset</td><td>360° scan and tour scan speed is automatic</td></tr><tr><td>Set #79 preset</td><td>360° scan and tour scan speed is high, 20°/sec</td></tr><tr><td>Set #80 preset</td><td>360° scan and tour scan speed is middle, 15°/sec</td></tr><tr><td>Set #81 preset</td><td>360° scan and tour scan speed is low, 6°/sec</td></tr><tr><td colspan="2">Set #82 preset Delete left/right limit</td></tr><tr><td colspan="2">Set #84 preset Record Pattern scan 1</td></tr><tr><td colspan="2">Set #85 preset Record Pattern scan 2</td></tr><tr><td colspan="2">Set #86 preset Record Pattern scan 3</td></tr><tr><td colspan="2">Set #87 preset Record Pattern scan 4</td></tr><tr><td colspan="2">Set #88 preset Set cruise 1</td></tr><tr><td colspan="2">Set #89 preset Set cruise 2</td></tr><tr><td colspan="2">Set #90 preset Set cruise 3</td></tr><tr><td colspan="2">Set #91 preset Set cruise 4</td></tr><tr><td>Set #94 preset</td><td>Set color-to-black function</td></tr><tr><td colspan="2">Set #95 preset Open main menu</td></tr><tr><td>Set #97 preset</td><td>Set 360°scan, the preset-dwell: OS</td></tr><tr><td>Set #98 preset</td><td>Set 360°scan, the preset-dwell: 5S</td></tr><tr><td>Set #99 preset</td><td>Set 360°scan, the preset-dwell: 10S</td></tr><tr><td colspan="2">Shortcut Key Function (Call Preset)</td></tr><tr><td>Call #71 preset</td><td>Proportional P/T ON</td></tr><tr><td>Call #82 preset</td><td>Start Cruise scan and switch the cruise scan direction</td></tr><tr><td colspan="2">Call #83 preset Delete all Presets</td></tr><tr><td colspan="2">Call #84 preset Start Pattern 1</td></tr><tr><td colspan="2">Call #85 preset Start Pattern 2</td></tr><tr><td colspan="2">Call #86 preset Start Pattern 3</td></tr><tr><td colspan="2">Call #87 preset Start Pattern 4</td></tr><tr><td>Call #88 preset</td><td>Call cruise 1 (default number 1~16 preset)</td></tr><tr><td>Call #89 preset</td><td>Call cruise 2 (default number 17~32 preset)</td></tr><tr><td>Call #90 preset</td><td>Call cruise 3 (default number 35~48 preset)</td></tr><tr><td>Call #91 preset</td><td>Call cruise 4 (default number 49~64 preset)</td></tr><tr><td colspan="2">Call #92 preset Set left limit Position</td></tr><tr><td colspan="2">Call #93 preset Set right limit Position</td></tr><tr><td colspan="2">Call #94 preset Camera IR-CUT switch</td></tr><tr><td colspan="2">Call #95 preset Open main menu</td></tr><tr><td colspan="2">Call #97 preset Call all valid presets cruise</td></tr><tr><td colspan="2">Call #98 preset Call 360°scan</td></tr><tr><td colspan="2">Call #99 preset Preset Error Correction</td></tr></table>
<table><tr><td colspan="2">Troubles Reason Solution</td><td></td></tr><tr><td>No action when power on</td><td>1. The power supply is not connected correctly.2. The fuse is broken.</td><td>1. Correct the connection.2. Check the power supply LED power indicator.3. Replace the fuse.</td></tr><tr><td>Self-testing and image are normal but the dome is out of control</td><td>1. The dome DIP switch setting is incorrect.2. RS485 cable is disconnected or reversed.3. Control device is not properly configured.</td><td>1. Confirm DIP settings on camera power up screen.2. Reset the DIP Switch according to the DIP switch chart.3. Check the wiring.4. Check the control device settings</td></tr><tr><td>Some function is out of control</td><td>1. RS485 communication signal is not balance.2. Control protocol is not compatible.</td><td>1. Connect 120Ω resistor to the RS485 line.2. Change protocol type.</td></tr><tr><td colspan="2">Unclear image 1. Focus is in manual state.2. Digital Zoom is on and in full ratio (If applicable)3. Dome cover is dirty.</td><td>1. Reset the focus mode to Auto.2. Cancel/reduce digital zoom.3. Clean the dome cover.</td></tr><tr><td>No night vision</td><td>1. Camera is in Color mode.2. backlight on the top or back of the dome camera</td><td>1. Reset the day/night function to Auto.2. Remove the direct light source.</td></tr></table>

Now you can see!
Ultra-Z IR PTZ gives you even more of everything: It is faster, More accurate, Easier for installation and its video Performance is better than ever even in complete darkness!