7R100 - Router 7inova - Free user manual and instructions
Find the device manual for free 7R100 7inova in PDF.


| Product Type | Wireless Router |
| Brand | 7inova |
| Model | 7R100 |
| Wireless Standard | Wi-Fi 5 (802.11ac) |
| Frequency Bands | 2.4 GHz and 5 GHz |
| Maximum Speed | 1200 Mbps (dual-band) |
| Ports | 4 x Gigabit LAN, 1 x Gigabit WAN |
| Antennas | 4 external fixed antennas |
| Dimensions (LxWxH) | 200 x 130 x 30 mm |
| Weight | 300 g |
| Power Supply | 12V DC, 1A |
| Security | WPA/WPA2, WPS, Firewall |
| Parental Controls | Yes |
| Guest Network | Yes |
| VPN Support | Yes (PPTP, L2TP, OpenVPN) |
| Installation | Web interface or mobile app |
Frequently Asked Questions - 7R100 7inova
User questions about 7R100 7inova
0 question about this device. Answer the ones you know or ask your own.
Ask a new question about this device
Download the instructions for your Router in PDF format for free! Find your manual 7R100 - 7inova and take your electronic device back in hand. On this page are published all the documents necessary for the use of your device. 7R100 by 7inova.
USER MANUAL 7R100 7inova
Quick Installation Guide
Model: 7R100
Battery Powered Wifi 3G Router 150M

Before you start to use this device, please check if there's anything missing in the package, and contact your dealer of purchase to claim for missing items:
Package Contents:
1x 7R100 Battery powered WiFi 3G Router
1x USB Charging Cable
1x Quick Installation Guide
5 IN 1:
Power bank,3G Hotspot, Mini AP, cloud storage, multimedia share.
Product pictures are only for reference and please consult the objectives.
7nows 7R100 battery powered with 3G router moves your 3G Internet. When Plug 3G modem into 7R100's USB port, it will create 3G hotspot, and broadcast a wireless signal at up to 150Mbps access the internet to multusers or devices simultaneously. When work as a will router, it can works in 3G, AP, Router, Repeater mode, providing an excellent solution for users various network need.
Overview
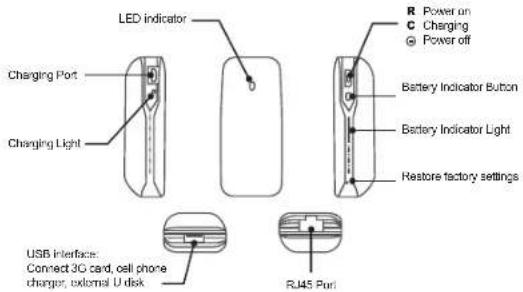
Charging Instruction (mobile power)
- Powering off for charging: Push the switch to gear C, then select the correct tip for your device and connect the charger lead of the digital product to the USB port. Then it will charge the intelligent mobile phone of iPhone, iPad and other smart phones.
- Powering on for charging: Push the switch to gear R, then select the correct tip for your device and connect the charger load of the digital product to the USB port. Then it will charge the intelligent mobile phone of iPhone and other smartphone. The charge current is 500mA.
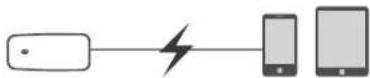
- Charging the Power Bank: Connect the Micro USB lip to the Input port of the Power Bank, then plug the USB connector into an empty USB port on your Laptop/PC, or other USB power equipment.
Check power method
- Method to see the battery electric quantity: no matter what condition TR100 is in. press the display button of electric quantity (beside the switch) and then observe the electric quantity according to the indication status of the electric quantity lights (if four lights are on, it shows that the battery is fully charged).
- Method to see the battery with a full charge: charging is done under the condition of powering off. if the blue light is one, it indicates charging and if the blue light is off, it shows that the battery is fully charged.
Instruction to the connection of the wireless network
1 Computer Configuration
(Before configuring, first ensure your PC has installed wireless LAN card)
-
Click*Start→Control Panel→Network and Internet→Network and Sharing Center→Change adapter settings→Wi-Fi(right click)→Properties*
-
Double click Internet Protocol Version 4(TCP/IPv4)*
-
Select "Obtain an IP address automatically" and "Obtain DSN server address automatically". Click "OK". Back to the last interface and click "OK"
2 Connect To Wireless Network
(Note: You have to get device connected wirelessly firstly then can login Web browser)
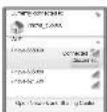
After Wireless LAN card installed successfully, click icon on the lower right corner of desktop.
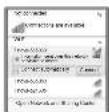
2 Select the SSID of your target network from the displayed list and click "Connect" and input password "12345678" (Default).
When shows: "Connected", means your computer has connected to wireless network successfully.
3 WiFi Setting
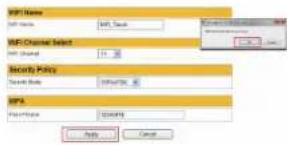
1 Through WIFI, connect the Internet device wirelessly to 7R100, input 192.168.169.1 into the address bar of the device's browser and enter the management interface.


2 Modify the WIFI Name and Password and Channel in the interface of wireless setting.
The setting of all network model
The setting of 3G wireless Modem
- Push the switch to gear R. The default network mode is intelligent. Insert the wireless network card into the USB port. The device will connect to the Internet through automatic dial without any setting.
- When the status indicator for 7R100 is "Blue light is on continuously" it means the direct dial is successful. Through WIFI, connect the Internet device wirelessly to 7R100 and the Internet can be visited.
Network setting for Smart ADSL
- Dial Smartly: Push the switch to gear R. Under the intelligent mode, connect the LAN port of modern to network port of 7R100 through the network cable. Input any web address, 7R100 will push dial web smartly. Input user name and password, and then 7R100 will do the dial process.
- Dial manually: Through WIFI, connect the Internet device wirelessly to 7R100, input 192.168.169.1 into the address bar of the device's browser then enter the management interface. Click "ADSL", Input the ADSL account and password, then click "Apply", then the network will restart, just connect it again. "Blue light is on continuously" then the internet can be visited.
• Turn off the Smart ADSL
| PPP&E Mode | ||
| User Items | 007-31-FIT/00647 | |
| Request | —— | |
| Trade Requests | —— | |
[Unreadable]
Network setting for the hotel
- Push the switch to gear R. Under the Intelligent mode, connect the network cable of the hotel or LAN port of upper-level router to network port of 7R100.
- Through WIFI, connect the Internet device wirelessly to 7R100. When the status indicator for 7R100 is "Blue light is on continuously" it means the network connection is successful and the Internet can be visited.
Network setting for static IP and DHCP
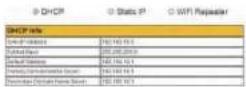
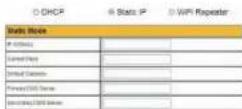
- Push the switch to gear R. Connect LAN port of upper-level router to the WAN port of 7R100.
- Through WIFI, connect the internet device wirelessly to 7R100, input 192.168.169.1 into the address bar of the browser then enter the selling interface of 7R100, click "Conn to Router", choose the mode of wireless router and input relevant parameter, then click "Apply". After restart, just connect it again, then the internet can be visited.
[Unreadable]
[Unreadable]
Network setting for WiFi Repeater
- WiFi Repeater can enlarge upper router signal.
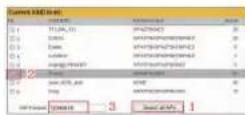
read to use WPI reset tool box 4
1. Add: 5
Multi-Media Sharing and Cloud Storage
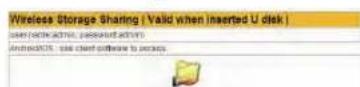
Multi-Media function support Samba protocol. Can realize single or more multimedia file sharing.
IOS Platform:
You can user GoodPlayer, Aoeplayer, and Kuluo etc support Smaba.
A Open "Goodplayer", click 📄, then in "SMB/CIFS Client" option to add the server address 192.168.169.1, User name admin, password admin, then save and enter.
After enter the server, you will see the all documents, select the appropriate file to browser, edit, playback, upload, and download
Android Platform:
You can user GoodPlayer,Aceplayer.and Kuluo etc support Smsba.
A Download and install "ES File Browser"
Open*ES File Browser", click*Share", choose "Menu" → "New" server, location 192.168.169.1, username admin, password admin, confirm and save
Enter the server, select the appropriate file photo browsing, document editing, audio and video playback.
In the "Local" long press the corresponding file "Copy to", "Move to" upload the local files to the server. After enter the server, long press the corresponding file "Copy to", "Move to" operation can download the server file to local
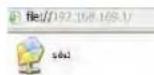
PC:
Enter web page, then click enter to server.
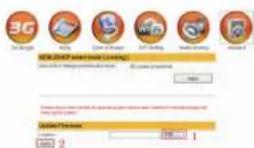
Update Firmware
All configuration information will be lost after you restore factory defaults. Factory default will not change the SSID that user set.
Insert an object with sharp ends into the small hole as the Overview shows "R", press it for more than five seconds, stop pressing when the red light is one for an emergency and wall for the restart of the device. If the red light flashes per one second, the restoration of factory defaults is successful. All the settings will be restored to the factory defaults. Wireless connection shall be done again.
Restore factory defaults
All configuration information will be lost after you restore factory defaults. Factory default will not change the SSID that user set.
Insert an object with sharp ends into the small hole as the Overview shows "R", press it for more than five seconds, stop pressing when the red light is one for an emergency and wait for the restart of the device. If the red light finishes per one second, the restoration of factory defaults is successful. All the sellings will be restored to the factory defaults. Wireless connection shall be done again.
- Quick Installation Guide
- Charging Instruction (mobile power)
- Check power method
- Instruction to the connection of the wireless network
- Computer Configuration
- Connect To Wireless Network
- WiFi Setting
- The setting of all network model
- The setting of 3G wireless Modem
- Network setting for Smart ADSL
- Network setting for the hotel
- Network setting for static IP and DHCP
- Network setting for WiFi Repeater
- Multi-Media Sharing and Cloud Storage
- IOS Platform:
- Android Platform:
- PC:
- Update Firmware
- Restore factory defaults
Brand : 7inova
Model : 7R100
Category : Router