7R200 - Router 7inova - Free user manual and instructions
Find the device manual for free 7R200 7inova in PDF.


| Product Type | Wireless Router |
| Brand | 7inova |
| Model | 7R200 |
| Dimensions (W x D x H) | 200 x 150 x 30 mm |
| Weight | 300 g |
| Power Supply | DC 12V, 1A |
| Wi-Fi Standards | IEEE 802.11b/g/n |
| Frequency Bands | 2.4 GHz |
| Maximum Wireless Speed | 300 Mbps |
| WAN Port | 1 x 10/100 Mbps |
| LAN Ports | 4 x 10/100 Mbps |
| Antennas | 2 x External, Fixed |
| Encryption Security | WPA2-PSK, WPA3-PSK |
| Firewall | SPI Firewall |
| VPN Support | PPTP, L2TP, IPSec |
| DHCP Server | Built-in |
| LED Indicators | Power, WAN, LAN, Wi-Fi |
| Operating Temperature | 0°C to 40°C |
| Storage Humidity | 10% to 90% RH (non-condensing) |
| Maintenance | Clean with a dry cloth; avoid liquids |
| Safety | Do not expose to water or extreme temperatures |
| Spare Parts & Repairability | Contact 7inova support for spare parts; not user-serviceable |
| General Information | Designed for home or small office use |
Frequently Asked Questions - 7R200 7inova
User questions about 7R200 7inova
0 question about this device. Answer the ones you know or ask your own.
Ask a new question about this device
Download the instructions for your Router in PDF format for free! Find your manual 7R200 - 7inova and take your electronic device back in hand. On this page are published all the documents necessary for the use of your device. 7R200 by 7inova.
USER MANUAL 7R200 7inova
Quick Installation Guide
Model: 7R200
3G Wireless Travel Reader 150M

Before you start to use this device, please check if there's anything missing in the package, and contact your dealer of purchase to claim for missing items:
Package Contents:
1x 7R200 3G Wireless Travel Reader
1x 1m Ethernet cable with RJ45 connector
1x Quick Installation Guide
3 Application Modes Introduction
(3G Mode is Default mode. For wireless encryption or change to Wireless Router / AP / WISP + Bridge Mode, please login and setup on web browser with followed steps)
3G Mode
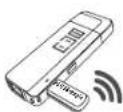
Plug 3G modem into the router's USB port, configure accordingly, computer / WI-FI phone / Tablet can connect the router wired / wireless and share 3G internet. Under 3G Mode, the Ethernet port is used as LAN port.
2 Wire Mode
Under Router Mode, the Ethernet port is used as WAN port. Connect 7R200 with ADSL Modem port using RJ45 cable. Computer/WI-FI phone/Tablet can connect the router wirelessly and share internet.
3 Wireless Client Mode
Under WISP+Bridge Mode, the router can connect Wireless hotspot or wireless router, make wired device wireless ready, and bridge wireless signal extend wireless signal range. Create a new SSID. The Ethernet port is used as LAN port. To avoid same IP address as front-end router, users need to set different IP address.
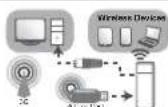
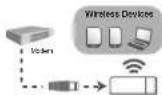
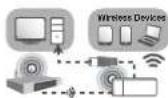
LED indicators' Status Description:
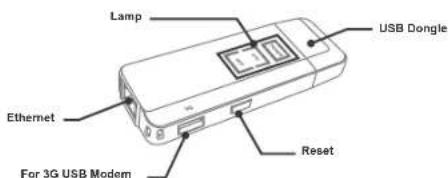
Reset: If need to reset the router, press and hold WPS/RESET button for 8-10 seconds, all indicators will be on, release until all other LED are off except Power LED.
Cautions:
-
Disconnect the device in thunderstorms in case of lightning damage.
-
Keep far from heat source and ensure ventilation.
-
Keep waterproof in the storage, transportation and operating environment.
| Indicator Name | Status Description | ||
| Power Status Indicator | Red On Get Powered | ||
| Ethernet Status Indicator | Green On Ethernet | Connected | |
| Green fast blink Data Transmission via Ethernet | |||
| Wireless Status Indicator | Green slow blink | Wireless Function Launched | |
| Green fast blink | Data Transmission via wireless | ||
Device Connection
1) To use 3G Mode, plug 3G modem into USB port of 7R200.
2) To use Wire Mode, plug one side of RJ45 cable into 7R200's Ethernet port, plug the other side into Modem's LAN port.
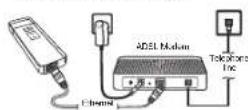
3) To use Wireless Client Mode, connect 7R200 and device (Such as desktop computers) via RJ15 cable as following show.
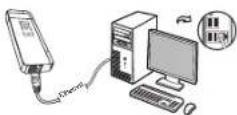
Windows 7
Please click on the steps to set up Windows 7 system
1 Computer Configuration
(Before configuring, first ensure your PC has installed wireless LAN card)
- Click "Start→Control Panel→Network and Internet→Network and Sharing Center→Change adapter settings" >W=Fl(right click) >Properties"
- Double click*Internet Protocol Version 4|TCP/IPv4
- Select "Obtain an IP address automatically" and "Obtain DSN server address automatically". Click "OK". Back to the last interface and click "OK"
2 Connect To Wireless Network
(Note. You have to get device connected wirelessly firstly then can log in Web browser)
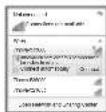
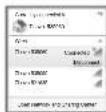
1 After Wireless LAN card installed successfully, click icon on the lower right corner of desktop.
2 Select the SSID of your target network from the displayed list and click"Connect"
3 When shows: "Connected", means your computer has connected to wireless network successfully.
3 Router Configurations
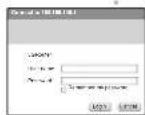
1 Open a web browser, type 192.168.100.1, and press Enter, type the password (default is admin). Click login'.
2 According to the choice of mode for wireless parameters Settings.
3G Mode
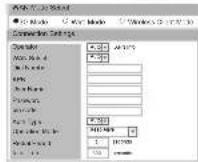
It's the Intra default relawking mode. Insert a 3G wireless modem (reboot) into the USB port of the device, if the blue LED is always on, it means a successful 3G network connection. Then other devices connected with this WiFi can share the 3G network connection.
Note: If the blue light slits slowly, it implies the plugged 3G modem is not supported, therefore of the device may need to be updated. The devices support about '50 different 3G adapters; contact your supplier?Your mode is not supported.
Wire Mode
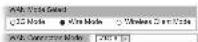
- PPPoE PPPC mode, that a ADSL dis-up networking mode: Input the ADSL standard and password ISP provides, check OK - STATIC Static IP networking mode: it is appropriate when front-end router or ISP device uses assigned IP address. - DHCP Dynamic IP access distribution mode: specific IP accesses are allocated automatically and demarcily between devices.
Wireless Client Mode
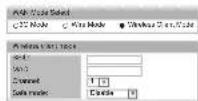
Select "Wireless client mode" in the above figure. And then click "star, scanning", and it should display nearby APs. Select preferred AP (by SSID), type its security mode and password if needed. Click "Apply".
File sharing
Download and install FTP client applications from respective app stores to phones or tablets. Thus it could make use of file sharing function. Popular FTP client software includes: AndFTP, eftin FTP, ES File Browser, etc.
When sharing files through FTP client software in phones or tablets, simple settings are necessary for the first time. In the FTP client software, server settings are: 192.165.100.1. Account and password are both: "admin". Enter into media/sda directory to enjoy sharing the files from USB flash disk or mobile HDD.
Multimedia sharing
Built-in with multimedia server. the product supports DLNA sharing technology, identify automatically and play media files like videos, music, pictures stored in the wirelessly connected USB flash disk or mobile HDD. Supported file formats include:
- Support tens of video formats such as MKV, avl, mp4, mov, 3gp, mpeg, m4v; - Support audio formats like LPCM, AAC, AC-3, ATRAC 3plus, MP3, WMAS; - Support picture formats like JPEG, PNG, GIF, TIFF.
Terminals with player supporting DLNA installed can share multimedia playing through the device. For instance: smart devices could stream the media files stored in USB flash disk connected to the product to TV screen with HDMI port with the help of floatink stick in the market.
3 Search out the device(by its identifier) as multimedia server in the client player and make it without any settings. Please refer to detailed instructions on specific software operation.
4 Popular APP software on the following platform: • Apple platform (iPhone - iPad - iTouch) : Download the players supporting DLNA from App Store such as: AirPlayer, GoodPlayer, AirMusic, FlexPlayer, yplayer. • Android platform iPhones and tablets based on android system: Download the players supporting DLNA from App Store. For example, SoftMedia,VPlayer, Tencent video,kascend music,PowerDVD.
4 Reconnect to Router
Select the wireless network name configured in step 2 click "Connect" button
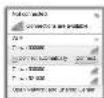
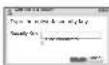
2 If you encrypted wireless network in step 2, the following message will be displayed on web browser. fill in password, click "OK"
Appendix: Troubleshooting
What can I do if I forgot my password?
1) Restore the 7R200's configuration to its factory default settings. (With 7R200 powered on, press and hold the Reset button for about 10 seconds before releasing it). 2) To log in the Web Management page, use the default user name and password: admin admin. To connect to the Wireless Network, use the default password on the label. 3) Try to configure 7R200 once again by following the instructions in the previous steps of the QIC.
- Quick Installation Guide
- Application Modes Introduction
- 3G Mode
- Wire Mode
- Wireless Client Mode
- Cautions:
- Device Connection
- Windows 7
- Computer Configuration
- Connect To Wireless Network
- Router Configurations
- Wire Mode
- Wireless Client Mode
- File sharing
- Multimedia sharing
- Reconnect to Router
- Appendix: Troubleshooting
- What can I do if I forgot my password?
Brand : 7inova
Model : 7R200
Category : Router