42399 Mini - Milk frother Gastroback - Free user manual and instructions
Find the device manual for free 42399 Mini Gastroback in PDF.

User questions about 42399 Mini Gastroback
0 question about this device. Answer the ones you know or ask your own.
Ask a new question about this device
Download the instructions for your Milk frother in PDF format for free! Find your manual 42399 Mini - Gastroback and take your electronic device back in hand. On this page are published all the documents necessary for the use of your device. 42399 Mini by Gastroback.
USER MANUAL 42399 Mini Gastroback
Operating Instructions
Automatic Milk Frother - Mini
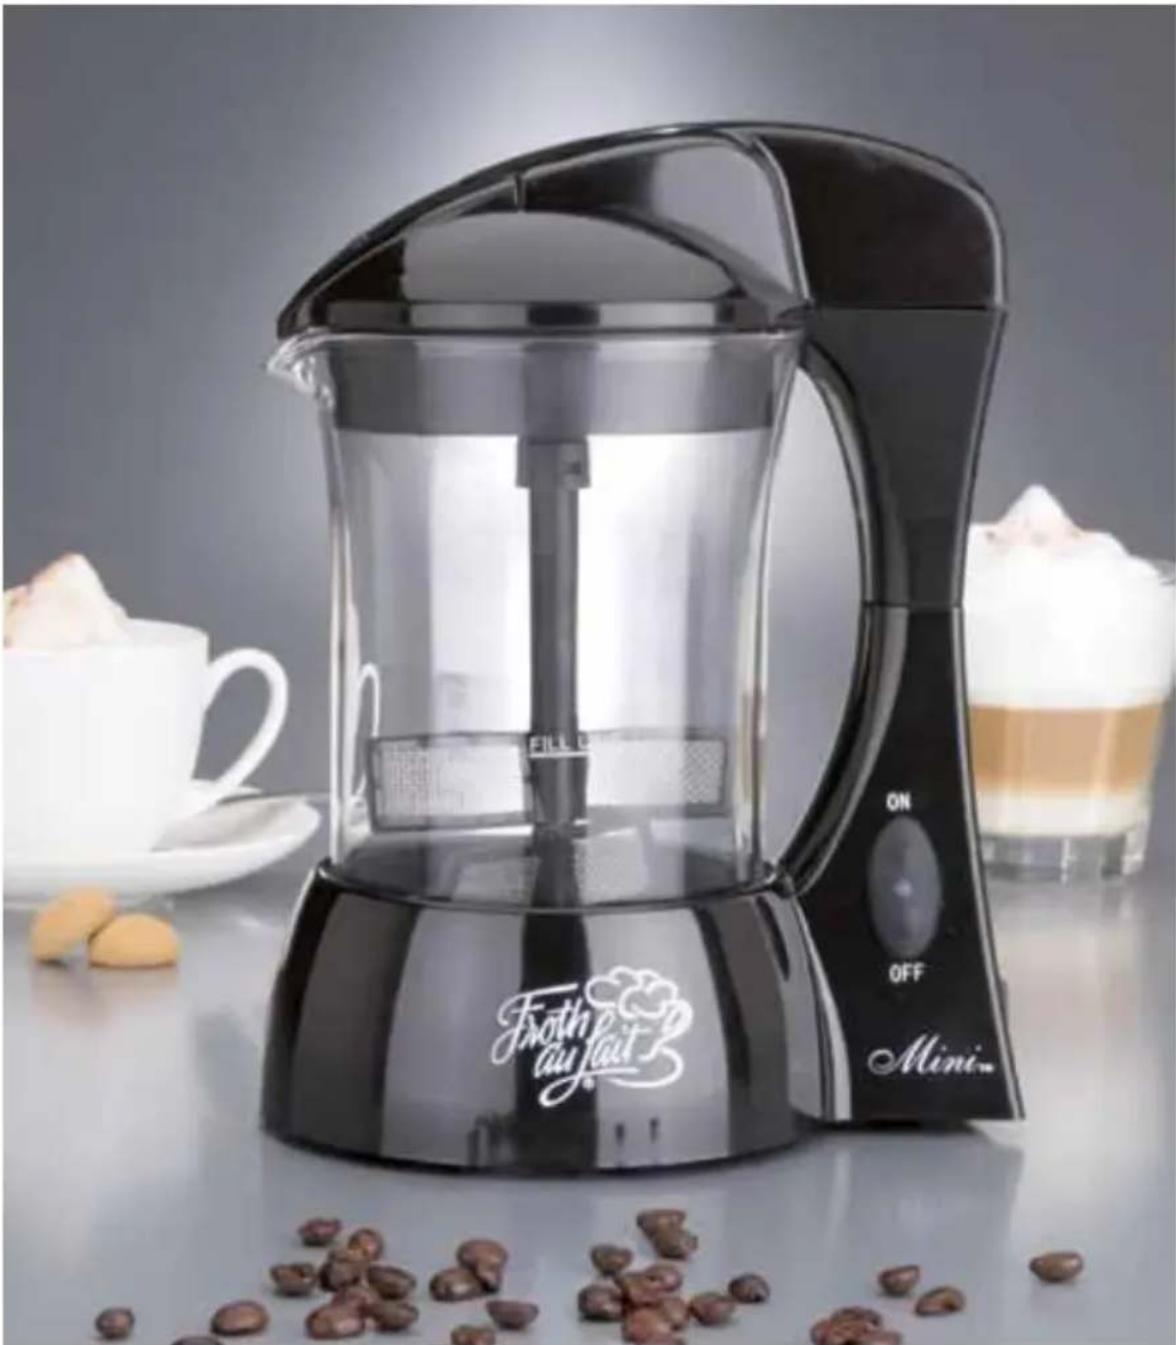
natural_image
Black and white photo of a Free Player with coffee cups and coffee beans in the background (no visible text or symbols on main objects)Read all provided instructions before first use!
Model and attachments are subject to change!
For domestic use only!

Carefully read all provided instructions before you start running the appliance and pay attention to the warnings mentioned in these instructions.
Table of Contents
Knowing the Milk Frother 19
Important safeguards 20
Important safeguards for electrical appliances 21
Hot surfaces – risk of burns 21
Technical specifications 22
Before first use 22
Operation 23
Care and cleaning 24
Recipes 25
Troubleshooting guide 29
Storage 30
Notes for disposal 30
Warranty 30
Information and service 30
Dear Customer!
Congratulations! Your new milk frother produces delicious milk froth within only a few minutes. It is very quiet and easy to clean. Prepare your own flavoured milk froth. With the help of the flavour hatch you can add, according to your personal taste, fruit syrup, flavour syrup or flavoured powders. You will find some recipes in this manual. Feel free to experiment.
These instructions for use will inform you about the various functions and features of the Automatic Milk Frother - Mini. That makes it easy to take pleasure in your new milk frother.
We hope that you will enjoy your new Automatic Milk Frother.
Your Gastroback GmbH
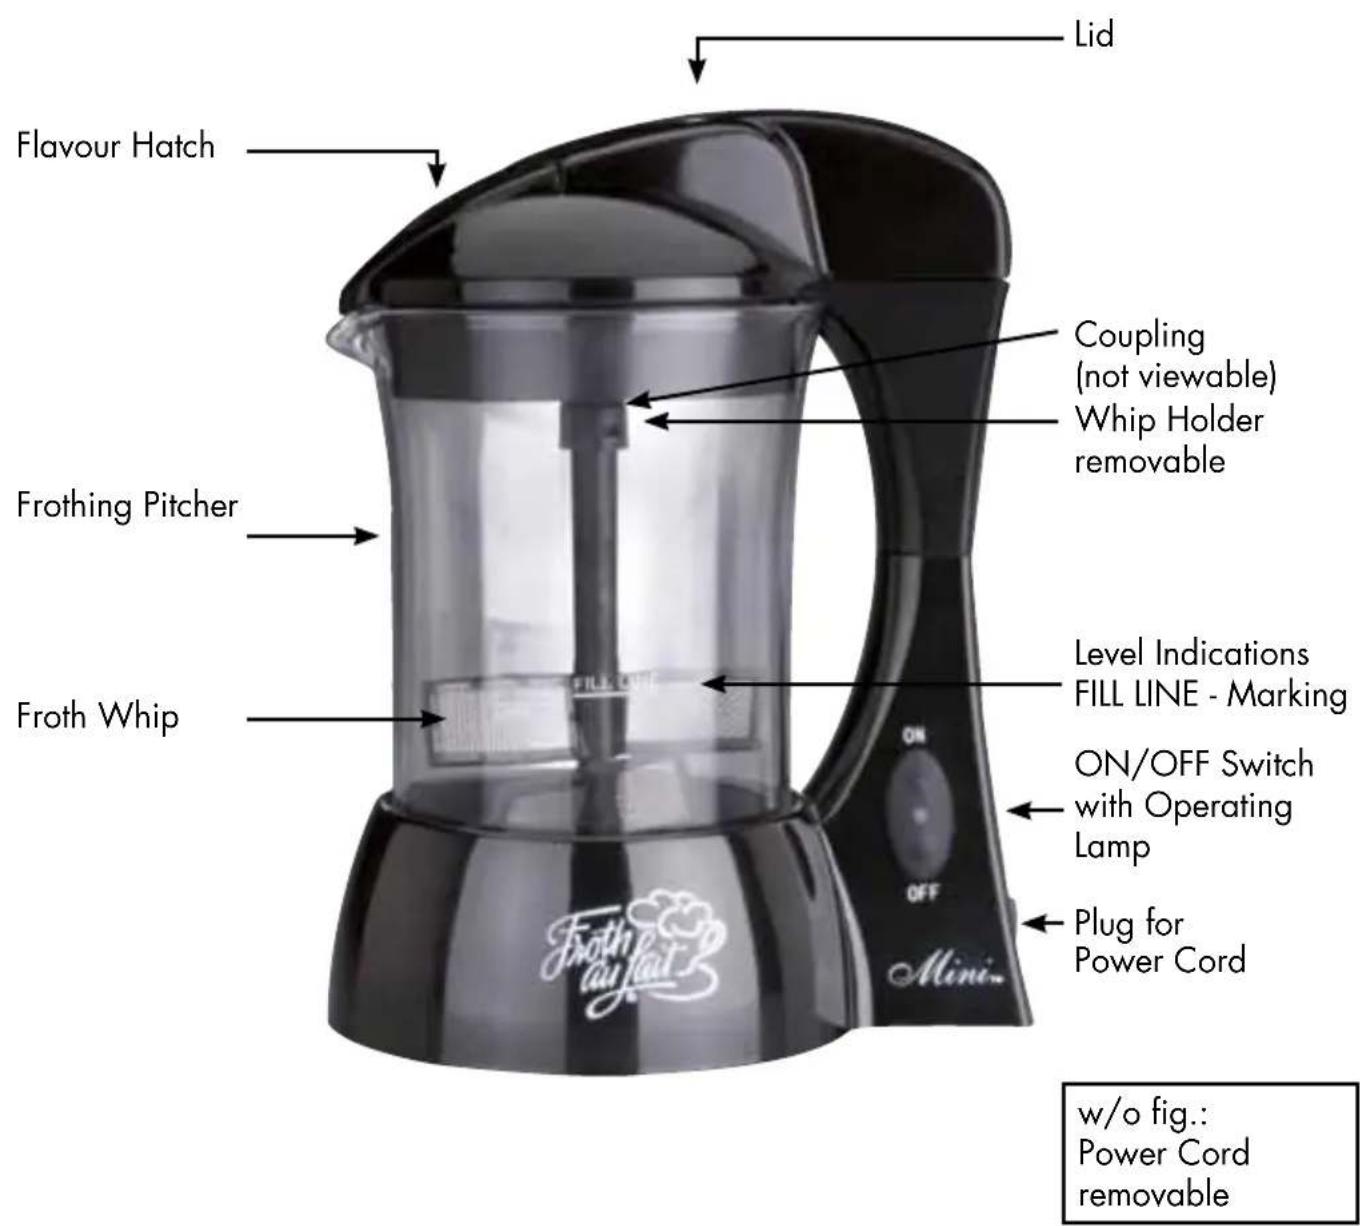
Knowing the Milk Frother
Important safeguards
Carefully read all instructions before operating this appliance and save for further reference. Do not attempt to use this appliance for any other than the intended use, described in these instructions. Any other use, especially misuse, can cause severe injuries or damage by electric shock, heat or fire. Never leave the appliance unattended when in use.
Any operation, repair and technical maintenance of the appliance or any part of it, other than described in these instructions, may only be performed at an authorised service centre. Please contact your vendor.
- Check the entire appliance regularly for proper operation – especially the power cord. The pins of the power cord must be clean, smooth, and without discolouration. Do not operate the appliance, when the appliance or any part of it is likely to be damaged, to avoid risk of fire, electric shock or any other damage or injuries to persons. The appliance is likely to be damaged if the appliance was subject to inadmissible strain (i.e. overheating, electric shock, moisture) or if there are any cracks, excessively frayed parts, or distortions. In this case, immediately unplug the appliance and return the entire appliance (including all parts and accessories) to an authorised service centre for examination and repair. Any maintenance, repair and operation other than described in these instructions must be performed at an authorised service centre to avoid risk of electric shock, fire or injuries to persons. Never try to repair or open the appliance yourself.
- Close supervision is necessary when the appliance is used near young children. Do not let young children play with any parts of the appliance. The appliance is not intended for use by children or infirm persons without supervision. For storage always keep the entire appliance dry and clean and where young children cannot reach it. Do not place any hard and/or heavy objects on the appliance or any part of it or inside the pitcher.
- Do not place the appliance or any part of it on or near hot surfaces (heater, gas burner, grill or oven). The pitcher is heated electrically.
- Ensure the appliance is completely and correctly assembled before turning the appliance on. If the pitcher is overfilled, hot milk or other ingredients may spill and cause damage to the electronic components.
• This appliance is not intended for use outdoors or in moving vehicles. - While operating, NEVER remove the lid. Scalding may occur if the lid is removed during the heating/frothing cycles. Never place hand or any unapproved objects in frothing pitcher.
- The milk frother must be used and rested on a stable surface.
- This appliance is intended to be used in household and similar applications such as:
– staff kitchen areas in shops, offices and other working environments;
- farm houses;
– by clients in hotels, motels and other residential type environments;
- bed and breakfast type environments
Important safeguards for electrical appliances
Basic safety precautions should always be followed when using electrical appliances. To reduce the risk of fire, electric shock, and/or injury, it is important that you read all instructions before to use.
- Ensure that the voltage rating of your mains power supply corresponds to the voltage requirements of the appliance (220/230 V, 50 Hz, AC, rated for 16 A). Always connect the appliance directly to a separately protected mains power supply wall socket with protective conductor (earth/ground). Do not use any extension cord.
The installation of a residual current safety switch with a maximum rated residual operating current of 30 mA in the supplying electrical circuit is recommended. If in doubt, contact your electrician for further information.
- Always unplug the appliance when not in use and before moving or cleaning the appliance. Do not leave the appliance unattended while connected to the power supply.
- Keep the cord away from hot surfaces, including the stove. When the power cord warms up during operation or is likely to be damaged, it must be replaced by an authorised service centre. Do not attempt to repair the power cord!
- Do not immerse the pitcher or power cord in water or any other liquid.
- If the supply cord is damaged, it must be replaced by the manufacturer, its service agent or similarly qualified persons in order to avoid a hazard.
Hot surfaces - risk of burns
The milk frother is used for frothing and heating milk. During operation the inside of the pitcher and the lid heat up.
- Dry spilled liquids immediately. When moving the filled pitcher, close supervision is necessary to keep the pitcher in an upright position to avoid spilling, and thus avoid injuries and damage. Use the handle to lift the pitcher.
- The interior of the pitcher and Lid heat up during operation. Always keep your hands, face and arm as well as any clothing and other heat-sensitive objects out of the pitcher during operation or shortly after to avoid injury - risk of getting burned. Wait for the appliance to cool down. Do not place any objects or clothes on or in the appliance during operation to avoid overheating. Before filling the pitcher ensure no foreign objects are inside the pitcher.
• Always place the appliance on a stable, level, dry, heat-resistant and easy accessible surface (i. e. glass, ceramic, stone). - Ensure the appliance is properly assembled, the attachment is locked in position and the correct amount of milk is filled into the pitcher before turning the appliance on. Do not overfill the pitcher.
• Always keep the lid except flavour hatch closed during operation. The rotation of the attachment during operation can cause spilling when the lid is removed. Do not hold your face, hands, other parts of your body, or heat-sensitive objects over the lid or spout, and always beware of hot steam, when opening the lid after operation to avoid scalding. - Never place any heat-sensitive objects on the appliance when in use to prevent damage from heat, condense water and splatter.
- Unplug from outlet when not in use and before cleaning. Allow the appliance to cool before assembling or disassembling parts, and before cleaning the appliance.
-
Never operate the appliance without milk, water, or other appropriate ingredients in the pitcher. Failure to do so can result in damage to the appliance. If a problem appears, return appliance to an authorised service centre or factory for repair. Do not attempt to repair. Appliance contains no user serviceable parts.
-
Do not use appliance for anything other then intended use.
- Ensure the froth whip and the whip holder are correctly assembled.
- Beware of hot steam when removing the lid.
- WARNING: When making froth or hot beverages, the heated liquid is hotter than the froth. When serving, especially to children, wait briefly for heated liquid to cool down and sip cautiously.
- ATTENTION: Your milk frother's pitcher is made of high quality PYREX Glass. The pitcher should not come in contact with a cold liquid (including tap water) or surface for about three minutes following the completion of the frothing process. Despite its strength, the Pyrex frothing pitcher can break due to a sudden temperature change to your pitcher. After the three minute period, add a little warm or hot water to the pitcher, and then the frothing pitcher can be cleaned as specified in the >Care and cleaning< instructions. Remember, however, to rinse with cold water prior to initiating a new frothing cycle.
Technical specifications
| Model: Art.-No. 42399 | Automatic Milk Frother - Mini |
| Power supply: 230 V AC, 50 Hz | |
| Power consumption: 500 W | |
| Length of power cord: ca. 1.4 m | |
| Weight: ca. 1 kg | |
| Dimensions: (width x height) ca. 16.5 cm x 22 cm | |
| Certification: |    |
Before first use
Carefully unpack the appliance and remove any promotional material attached to the pitcher, but do not remove the warning or model labels on the appliance.
ATTENTION: The milk frother is used for heating and frothing milk. Never fill other foods inside the pitcher.
Before cooking, insert the plug into the outlet on the body, and the power supply plug into the socket outlet
WARNING: Always connect the appliance directly to a separately protected mains power supply wall socket with protective conductor (earth/ground) connected properly. Do not use any extension cord.
Always attach the power plug to the appliance first, then plug the cord into the wall outlet. To disconnect, turn unit's control switch to OFF, then remove the power plug from the wall outlet.
Before first use and after each use, it is important that you clean your milk frother (see: >Care and cleaning<).
ATTENTION: The appliance is not dishwasher safe.
Note: Before first use there might be a slight smell. That is normal and absolutely harmless. The smell will dissapear when you use the appliance several times.
ATTENTION: Do not put foreign objects in the pitcher.
Operation
- Place the appliance onto a counter or a table. Insert the modular power cord into the unit's power receptacle and plug the other end into a power outlet.
- While holding the lid upside down, insert the froth whip and the whip holder onto gear shaft located in the center of the lid. Grasp shaft of the whip and firmly snap into place. If the whip has been removed from the whip holder, insert the whip into the whip holder after aligning its tabs and press down. Turn the whip clockwise to lock. Be sure that the whip holder is snapped and locked into place by pressing it firmly against the lid.
Note: The volume and texture of froth varies depending on the fat content of the milk. Whole milk produces good froth but at reduced volume. Fat free milk produces the greatest volume of froth.
- For the optimal milk froth pour refrigerated milk (250 ml) up to the pitcher's FILL LINE. Frothing a volume of milk which is below or above the FILL LINE will not produce optimal froth quality or temperature. You can use fat free milk, low fat, reduced-fat milk or whole milk.
For thinner froth with less volume and more milk (e.g. for a latte), you may use up to an additional 125 ml of milk above the FILL LINE. For less volume and hotter milk and froth, you may use less milk. However, in this case you should use the manual OFF switch to stop the unit prior to its automatic shutoff. This will ensure that the milk and froth do not get too hot.
- Place the lid upright on the frothing pitcher so that the narrow end of the flavour hatch is positioned just above the pitcher spout. Press and release the ON switch. This starts the frothing cycle and turns ON the operating lamp.
Never remove the lid while the appliance is operating.
- Once the heating and frothing cycle is complete (about three minutes), the milk frother shuts off automatically and turns off. Allow about 30 – 60 seconds for the hot milk to settle. 250 ml milk result in appr. 550 – 600 ml milk froth.
Note: The heating and frothing cycle can be stopped anytime by pressing the OFF switch. This action also turns off the operating lamp. Pressing the ON switch will turn on the frothing cycle and light the operating lamp.
- To prepare flavoured froth, hot chocolate, frothy drinks, dessert toppings, or desserts, you may add syrups, powders, sugar, sugar substitutes, or liqueurs to the milk. For details see >Recipes<.

After approximately 1½ minutes of frothing, or when the frothing pitcher begins to feel warm, press down on the flavour hatch so that it opens fully and the pouring channel is exposed. Pour desired amount of flavouring into the pitcher. Push back the end of the flavour hatch forward and down to close.
Note: As a safety feature, the milk frother cannot be restarted immediately after reaching its shut off temperature. Wait approximately three minutes for the appliance to cool off and then pour cold water into the pitcher.
If you prepare more froth than you require and the remaining froth in the pitcher has lost some of its richness, or the froth temperature has declined, you may refresh the froth to its original richness and temperature by simply pressing the ON switch.
- Allow about 30 – 60 seconds for the hot milk to settle. Then, unplug the power cord, and using the spout, carefully pour the desired amount of hot milk for Cappuccinos, Lattes or other specialty drinks.
Remember that liquid milk heats to a higher temperature than froth. When serving to children, wait until the hot milk cools down slightly or stop unit early by pressing the OFF switch.
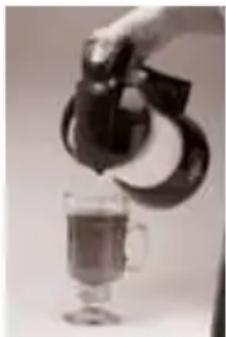
natural_image
Hand pouring liquid from a black kettle into a glass of dark liquid (no text or symbols visible)
natural_image
Close-up of a hand pouring white powder into a glass mug (no visible text or symbols)- Remove the lid from the frothing pitcher, place the lid upside down on the counter to minimize any milk spillage, and then spoon out the rich froth.
Note: After use, clean your appliance following the >Care and cleaning< instructions.
Between consecutive cycles, the unit must be rinsed with cold water. Wait for approximately three minutes and then pour water into the pitcher. To help cool the pitcher, allow cold water to remain in the pitcher for a few minutes.
After 4 consecutive cycles, the appliance must be shut off for approximately 10 minutes.
Caution: Only liquids or powdered mixes can be used. Solid food items must not be used while the appliance is operating as they may cause damage to the froth whip.
Care and cleaning
Before first use and after each use, it is important that you clean your milk frother following the guidelines below. You should wait for approximately three minutes and then rinse the pitcher in cold water between consecutive cycles.
- ALWAYS UNPLUG POWER CORD FROM UNIT PRIOR TO CLEANING AND NEVER IMMERSE IN WATER.
- To allow the froth whip to be thoroughly cleaned, remove the lid from the frothing Pitcher and hold the lid with the whip facing upward. Remove the whip and tha whip holder by firmly grasping the whip holder and pulling outward and away from the lid. You may also remove the whip from the whip holder by securely grasping the whip holder with your thumb and forefinger and turning the whip counterclockwise one quarter turn. Carefully pull the whip out of the whip holder. Never remove the froth whip by pulling on the frothing blades.
- After each use the frothing pitcher, froth whip, and lid should be carefully washed with warm, soapy water using a soft cleaning brush or a sponge. All milk residue must be removed from the pitcher bottom. Rinse and dry with a soft towel.
- If washing needs to be delayed, pour a small amount of warm water into the frothing pitcher to soak. The water helps to prevent building up and drying of milk and flavourings on the glass surface. Leave water until ready to clean (following directions above).
- The milk frother should never be immersed in water, placed in an automatic dishwasher, or left in the sink.
- For thorough cleaning, it is recommended that the milk frother is occasionally operated with water to the FILL LINE and with a small amount of dishwashing detergent (optional). Rinse thoroughly. Run a second rinse cycle with water only.
Recipes
NOTE: You can use whole milk to make these recipes; the mixtures will be creamy textured but not as thick and frothy.
Classic Milk Froth (2 - 4 servings)
• fat free milk, low fat, or reduced-fat milk
Put the froth whip into the pitcher. Pour refrigerated milk into the pitcher up to the FILL LINE. Press the ON switch and let the appliance run until it shuts off automatically. Allow 30 – 60 seconds for the hot milk to settle then hold the lid down and pour desired amount of hot milk for cappuccinos, lattes or other specialty drinks. Remove the lid, and spoon out the exceptionally rich, thick froth.
Note: For thinner froth with less volume and more milk (e.g. for a latte), you may use up to an additional 125 ml of milk above FILL LINE.
Flavoured Milk Froth (2 - 4 servings)
• fat free milk, low fat, or reduced-fat milk
- 2 – 4 tablespoons flavoured coffee syrups and/or flavoured beverage powders*
• sugar or sugar substitutes
Put the froth whip into the pitcher. Pour refrigerated milk into the pitcher to the FILL LINE, and press the ON switch. Continue heating milk until froth has formed and the pitcher feels warm, about 1½ – 2 minutes into the frothing cycle. While the appliance is running, press down on the front of the flavour hatch. Pour desired amount (to taste) of flavoured syrup, powder* or sweetener through the hatch opening and then close the hatch. After cycle automatically ends allow 30 seconds or more for the milk to settle then pour desired amount of milk for cappuccinos, lattes or other specialty drinks. Remove the lid, and spoon out the thick froth onto your favorite beverages or desserts.
* Beverage powders include malted milk, Ovomaltine, cappuccino, chocolate, mocha or cocoa drink mixes for hot liquids. To add powders, you may want to press the stop button, remove the lid, add desired powder. Then replace the lid and restart the unit to continue heating.
Milk Froth Floaters (2 - 4 servings)
• fat free milk, low fat, or reduced-fat milk
- 2 – 4 tablespoons flavoured coffee syrups (vanilla, hazelnut, caramel or raspberry) or a liqueur*
Follow the steps to make »Flavoured Milk Froth«. Spoon flavoured froth into 4 cups about half filled with hot coffee, hot espresso, or hot chocolate, or smaller cups with 2 to 3 tablespoons of liqueur.* Pour remaining hot milk (to taste) into beverage.
*Compatible liqueur choices to flavour floater mixture and to also float the mixture on are Amaretto, Frangelico, Kahlua, Tia Maria, Bailey's Irish Cream, Benedictine, and crème de cacao.
Espresso Latte (1 or 2 servings)
If you like sweetened coffee add Irish cream or other suitable flavoured syrup, sugar or sugar substitute.
• fat free milk, low fat, or reduced-fat milk
• 12 cup hot espresso or strong hot coffee
• 2 tablespoons Irish cream syrup (optional)
- fat free milk, low fat, or reduced-fat milk
- 12 cup hot espresso or strong hot coffee
- 2 tablespoons Irish cream syrup (optional)
Follow the steps to make »Flavoured Milk Froth«. While unit is still running, pour espresso or strong coffee and syrup through the flavour hatch opening. When the ingredients are mixed, press the OFF switch, and pour mixture into 1 or 2 mugs.
Note: For thinner froth with less volume and more milk (e.g. for a latte), you may use up to an additional 12 cup of milk above FILL LINE.
Instant Frothy Coffee or Cappuccino (1 or 2 servings)
• fat free milk, low fat, or reduced-fat milk
• 4 tablespoons of instant cappuccino powder, or other flavoured instant coffee powders
Follow the steps to make »Flavoured Milk Froth«. When the pitcher feels warm, press the OFF switch, remove the lid, and add desired powder. Then replace the lid and press the ON switch to continue heating. When the appliance shuts off automatically, pour mixture into 1 or 2 mugs.
Velvety Hot Chocolate (1 or 2 servings)
• fat free milk, low fat, or reduced-fat milk
- 1 – 2 single serving envelopes of hot cocoa mix or 3 to 4 tablespoons Hershey's chocolate syrup
Follow the steps to make »Flavoured Milk Froth«. When the pitcher feels warm, press the OFF switch, remove the lid, and add desired powder. Then replace the lid and press the ON switch to continue heating. When the appliance shuts off automatically, pour mixture into 1 or 2 mugs.
Note: The heated milk is hotter than the froth. When serving, especially to children, wait briefly for heated milk to cool down. You may also stop the heating cycle early, before the automatic shutoff, by pressing the OFF switch.
Tip: For a different consistency and a less frothy drink, you may use up to an additional 125 ml of milk above FILL LINE.
Classic or Flavoured Guilt Free Whipped Topping (3 - 4 servings)
- fat free milk
• 2 – 4 tablespoons vanilla syrup or other flavoured coffee syrups*
• 1 or 2 packets sugar substitute such as Sweet'N Low or Equal
Follow the steps to make »Flavoured Milk Froth«. Add sugar substitute and vanilla syrup to taste for »Classic Guilt Free Whipped Topping« or choose another syrup for »Flavoured Guilt Free Whipped Topping« to compliment.
You can serve the different »Guilt Free Whipped Toppings« in addition to: cakes (carrot, layer, or pound cake), cereals (granola, hot oatmeal, hot cream of wheat, or grapenuts), fruit (raspberries, strawberries, baked apples, applesauce, baked pears), gelatin desserts, ice cream, frozen yogurt, and pies (apple, berry, custard, pecan, and pumpkin).
* Compatible flavoured syrups include maple, chocolate, fruit, nut, coffee, and liqueur syrups.
Caramel Macchiato (2 - 4 servings)
• 1 – 2 tablespoons vanilla syrup
• 1 – 2 tablespoons caramel syrup
- Caramel sauce
Follow the steps to make »Flavoured Milk Froth«. Add flavoured froth and hot milk to a cup. Pour 1 or 2 shots of espresso or strong coffee through the foam. Garnish with caramel sauce.
Rainbow Froths (2 - 4 servings)
• fat free milk, low fat or reduced-fat milk
- Food coloring 2 – 4 tablespoons light colored flavoured coffee syrup (such as vanilla or hazelnut), sugar, or light color powder (such as plain malted milk or flan dessert powder)
Follow the steps to make »Flavoured Milk Froth«. Tint milk to desired hue with a few drops of food color and flavour to taste. Fun to color coordinate for the holidays and a wonderful way to brighten your beverages and desserts.
The Raj's Chai (1 serving)
If you like sweet tea, add sugar to taste; mixture will be frothy but not as thick.
• 2 teaspoons instant tea powder, plain or sweetened
- 1/8 teaspoon each ground cloves, ground nutmeg, ground cinnamon
• 4 or 5 hulled cardamom seeds or about/16 teaspoon ground cardamom
• fat free milk, low fat, or reduced-fat milk
In a small bowl, mix tea powder, cloves, nutmeg, cinnamon, and cardamom. Put the froth whip in the pitcher. Pour milk into the pitcher and press the ON switch. Heat milk in unit until frothing pitcher feels warm. Press the OFF switch, remove the lid, and add tea mixture. Replace the lid and push the ON switch. When ingredients are mixed or the appliance stops automatically, remove the lid, and pour mixture into 1 large mug.
Optional:
• 1 tablespoon finely chopped candied ginger or ginger marmalade,
• 1 Long cinnamon stick
Add candied ginger or ginger marmalade, cinnamon stick (or a spoon) and stir to mix.
This dessert also makes a delicious sauce, hot or cool, to serve on fresh raspberries, strawberries, and blackberries, sliced peaches or apricots, baked apples or pears, and steamed puddings.
• fat free milk, low fat, or reduced-fat milk
• 2 tablespoons flan dessert mix powder (Jello or Royal)
• 2 tablespoons dry sherry, Chambord, or vanilla or raspberry syrup
Put the froth whip into the pitcher. Pour the desired amount and type of refrigerated milk into the pitcher, and press the ON switch. Heat milk about 112 – 2 minutes or until the pitcher feels warm. Press the OFF switch, remove the lid, and add flan mix and sherry (or Chambord or syrup). Replace the lid and press the ON switch. When the ingredients are mixed or the appliance stops automatically, remove the lid and pour mixture into 4 wine glasses; enjoy with spoons or sip.
To make a cool dessert or sauce, pour zabaglione mixture into a bowl and refrigerate for about 10 minutes; whisk to blend and serve.
Sippin' Chocolate Mousse (2 - 4 servings)
• fat free milk, low fat, or reduced-fat milk
• 3 tablespoons flan dessert mix powder (Jello or Royal)
• ¼ cup Hershey's chocolate syrup
Follow the steps to make »Flavoured Milk Froth«.. Pour flan mix and syrup through the flavour hatch opening and close the hatch. When ingredients are mixed and the appliance shuts off automatically, remove the lid.
Optional:
• 12 cup mini or regular chocolate chips
Add chocolate chips. Shake the pitcher slightly to mix chips with froth, then pour mixture into 4 wine glasses. Eat with spoons or sip slowly.
Black Russian Royales (2 servings)
- fat free milk, low fat, or reduced-fat milk*
• 1 teaspoon instant espresso coffee powder or instant coffee powder
• 1 tablespoon Hershey chocolate syrup
• ¼ cup coffee liqueur such as Kahlua or Tia Maria
Follow the steps to make »Flavoured Milk Froth«. When ther pitcher feels warm, press the OFF switch, remove the lid, and add coffee powder, syrup, and liqueur. Replace the lid and press the ON switch. When ingredients are mixed and the appliance shuts off automatically, remove the lid, and pour into 2 mugs.
Troubleshooting guide
| Problem Possible Cause Solution | ||
| Froth whip is not rotating The froth whip is not properly seated in the whip holder.The lid is not properly placed.The power cord is not fully plugged into the base of the appliance or the wall outlet. | Make sure that the froth whip is placed in the whip holder and locked into place. Check that the whip holder is fully snapped onto the lid.Make sure that the lid is properly placed on the electrical connector of the appliance.Check all electrical connections. | |
| Froth overflows You are using too much milk. For optimal results, add milk to FILL LINE. | ||
| The appliance is not properly frothing | The froth whip and/or the whip holder is not snapped properly in the lid.You are not using proper amount of milk.Residue is building up on the bottom, inside of the pitcher, and/or the whip.You are using a brand or type of milk that doesn't froth.The pitcher has not cooled down. | See chapter >Operation< for further reference.For optimal results, add milk to FILL LINE.Remove all milk residue from the pitcher with a sponge or a sofr cleaning brush. Operate the appliance filled with water up to the FILL LINE.Use cold, fresh milk. Occasionally, a brand or type of milk may not froth as well.Wait for approximately three minutes after every frothing cycle and then rinse the pitcher in COLD water. Add COLD water into the empty pitcher and wait a few minutes until cool. |
| The appliance does not restart and the operating light stays on | The lid has been removed while the appliance was in operation. | Unplug the appliance from power outlet and reinsert the plug. Press the ON switch to restart. |
| The appliance does not operate or the operating light is not on | The appliance is not plugged in into the power outlet.The appliance is in safety cool down period.The ON switch is not properly engaged. | Make sure the appliance is plugged into a power outlet and the power receptacle into the appliance.Wait for approximately three minutes after every frothing cycle and then rinse the pitcher in COLD water. Add COLD water to empty Pitcher and wait a few minutes until cool.Press the ON switch firmly. |
| Milk residue on bottom, inside the pitcher, and/or the the whip | The pitcher was not cleaned properly after use. | Clean the pitcher with a sponge or a soft cleaning brush after each use.If cleaning is delayed, add warm water to soak. Add 1⁄2 to 1 cup water with a very small amount of dishwashing detergent and run a full cycle. RINSE. Repeat the cycle with cleare water. |
Storage
Store the entire appliance (including the power unit) on a clean and dry surface, where it may not tilt or fall and no other objects could fall on it and where it is safe from frost and inadmissible strain (mechanical or electric shock, heat) and where it is out of reach of young children. Do not place any hard or heavy objects on the appliance or any parts of it.
Always switch OFF the pitcher and unplug the power unit, when the appliance is not in use.
Notes for disposal
Dispose of the appliance must be effected in accordance with the corresponding local regulations and requirements for electrical appliances. Please contact your local disposal company. Do not dispose of electrical appliances as unsorted municipal waste, use separate collection facilities.
Contact your local government for information regarding the collection systems available. If electrical appliances are disposed of in landfills or dumps, hazardous substances can leak into the groundwater and get into the food chain, damaging your health and well-being. When replacing old appliances with new once, the retailer is legally obligated to take back your old appliance for disposal at least for free of charge.
Warranty
We guarantee that all our products are free of defects at the time of purchase. Any demonstrable manufacturing or material defects will be to the exclusion of any further claim and within warranty limits of the law free of charge repaired or substituted. There is no Warranty claim of the purchaser if the damage or defect of the appliance is caused by inappropriate treatment, over loading or installation mistakes. The Warranty claim expires if there is any technical interference of a third party without an written agreement.
The purchaser has to present the sales slip in assertion-of-claim and has to bear all charges of costs and risk of the transport.
Information and service
Please check www.gastroback.de for further information. For technical support, please contact Gastroback Customer Care Center by phone: +49 (0)4165/22 25-0 or e-mail: info@gastroback.de.
