
WV-QSR506 - Mounting bracket i-PRO - Free user manual and instructions
Find the device manual for free WV-QSR506 i-PRO in PDF.

| Product Type | Mounting Bracket |
| Brand | i-PRO |
| Model | WV-QSR506 |
| Dimensions (W x H x D) | 120 mm x 120 mm x 80 mm |
| Weight | 250 g |
| Material | Aluminum alloy |
| Color | White |
| Finish | Powder coated |
| Mount Type | Wall mount |
| Compatible Devices | i-PRO cameras with standard mounting interface |
| Load Capacity | 5 kg |
| Adjustment | 3-axis (pan, tilt, rotation) |
| Installation | Screw mounting with included hardware |
| Environment | Indoor/Outdoor (IP66 rated) |
| Operating Temperature | -30°C to 60°C |
| Humidity | 0-95% non condensing |
| Cable Management | Integrated cable routing |
| Application | Security camera mounting |
| Included Accessories | Mounting screws, wall plugs, Allen key |
| Certifications | CE, FCC, RoHS |
| Warranty | 2 years |
Frequently Asked Questions - WV-QSR506 i-PRO
User questions about WV-QSR506 i-PRO
0 question about this device. Answer the ones you know or ask your own.
Ask a new question about this device
Download the instructions for your Mounting bracket in PDF format for free! Find your manual WV-QSR506 - i-PRO and take your electronic device back in hand. On this page are published all the documents necessary for the use of your device. WV-QSR506 by i-PRO.
USER MANUAL WV-QSR506 i-PRO
Included Installation Instructions
Mount Bracket
Model No. WV-QSR506
natural_image
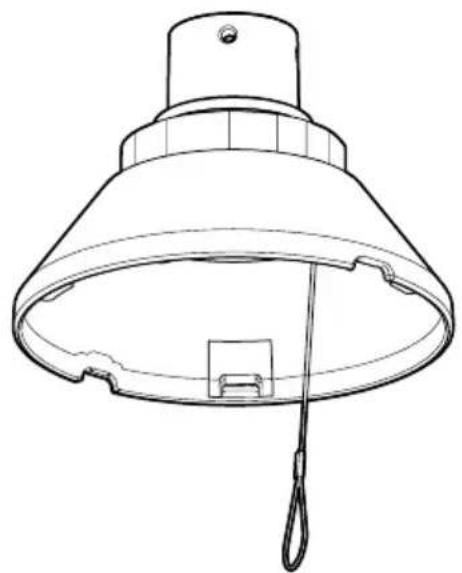
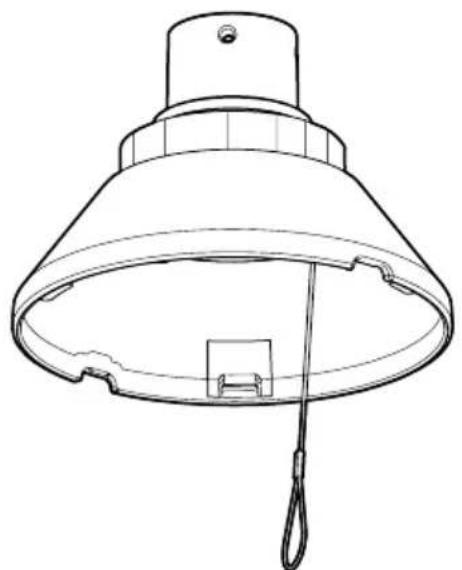
Line drawing of a ceiling lamp with a conical shade and hanging handle (no text or symbols)WV-QSR506-W
- Before attempting to connect or install this product, please read these instructions carefully and save this manual for future use.
- The external appearance and other parts shown in this manual may differ from the actual product within the scope that will not interfere with normal use due to improvement of the product.
i-PRO Co., Ltd. assumes no responsibility for injuries or property damage resulting from failures arising out of improper installation or operation inconsistent with this documentation or through use of parts other than this product, such as locally procured parts.
“

i-PRO Co., Ltd.
https://www.i-pro.com/
Caution:
- Before attempting to connect or operate this product, please read these instructions carefully.
Notice:
- This product is not suitable for use in locations where children are likely to be present.
- Do not install this product in locations where ordinary persons can easily reach.
- For information about screws and other parts required for installation, refer to the corresponding section of this document.
Precautions
■ Do not hang down from this product or use this product as a pedestal.
Failure to observe this may cause injury or accidents.
■ Do not use this bracket except with suitable cameras.
Failure to observe this may cause a drop resulting in injury or accidents.
■ Refer installation work to the dealer.
Installation work requires technique and experience.
Failure to observe this may cause fire, electric shock, injury, or damage to the product.
Be sure to consult the dealer.
■ Take measures of protection against this product falling.
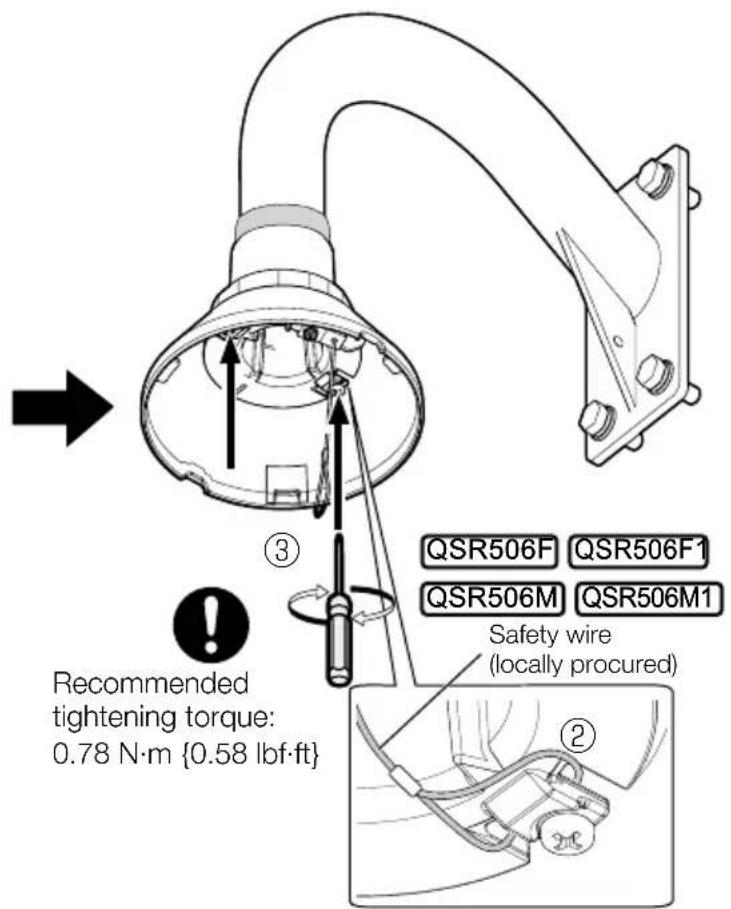
QSR506F QSR506M QSR506F1 QSR506M1
Failure to observe this may cause a drop resulting in injury or accidents.
Be sure to install the safety wire.
■ The screws and bolts must be tightened to the specified torque.
Failure to observe this may cause a drop resulting in injury or accidents.
■ Install the product accurately and securely on the bracket in accordance with the installation instructions.
Failure to observe this may cause injury or accidents.
■ Do not rub the edges of metal parts with your hand.
Failure to observe this may cause injury.
When using this product, also read the “Precautions” described in the operating instructions for the camera to be attached.
About notations
| Connection part specifications of this product | Mount bracket corresponding with this product | ||
| QSR506 | 4 holes WV-QCL501, |  | WV-QWL501 |
| QSR506S | WV-QCL501S-W,WV-QWL501S-W | ||
| QSR506F | Female parallel pipe thread (ISO)40A, Rp 1-1/2, 11crest depth 25.4 mm {1 inch} | 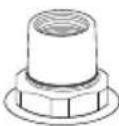 | Locally procured40A, R 1-1/2, 11crest length 25.4 mm {1 inch} or more (male taper pipe thread) |
| QSR506F1 | Female parallel pipe thread (ANSI)40A, NPSC 1-1/2, 11.5 crest depth 25.4 mm {1 inch} | 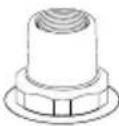 | Locally procured40A, NPT 1-1/2, 11.5 crest length 25.4 mm {1 inch} or more (male taper pipe thread) |
| QSR506M | Male taper pipe thread (ISO)40A, R 1-1/2, 11 crest length 25.4 mm {1 inch} | 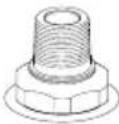 | Locally procured40A, Rp 1-1/2, 11 crest depth 25.4 mm {1 inch} or more (female parallel pipe thread) |
| QSR506M1 | Male taper pipe thread (ANSI)40A, NPT 1-1/2, 11.5 crest length 25.4 mm {1 inch} | 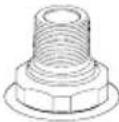 | Locally procured40A, NPSC 1-1/2, 11.5 crest depth 25.4 mm {1 inch} or more (female parallel pipe thread) |
Preface
This product is a mount bracket for a camera. Use this product when connecting a camera to a ceiling mount bracket, wall mount bracket or a locally procured bracket.

The latest information about the supported cameras
The model number is abbreviated in some descriptions in this manual.
Specifications
| Ambient operating temperature: | -50 °C to +60 °C {-58 °F to +140 °F} |
| Dimensions: ø161 mm (W) x | 115 mm (H){ø6-11/32 inches x 4-17/32 inches (H)} |
| Mass: Approx. 700 g {1.55 lbs} | |
| Finish: Aluminum die cast | Heavy salt damage prevention coating QSR506S, i-PRO white |
| Others: | Heavy salt damage prevention (ISO14993-compliant) QSR506S |
Precautions for installation
In order to prevent injury, this product must be securely mounted to a bracket according to Installation Guide.
■ Mounting method for this product
This product is designed to be used as a pendant mount camera. If it is mounted on a desktop or at a slant, the camera may not work correctly and its lifetime may be shortened.
■ Make sure to remove this product if it will no longer be used.
Standard Accessories
Screw (Spare screw for connect bracket: M4 x 8 mm {5/16 inches})......1 pc.
Other items that are needed (not included)
Common
- Screws to fix a locally procured bracket on the installation surface.
QSR506
- 5 mm {3/16 inches} (distance between two parallel sides of a hexagon) hex wrench
QSR506F QSR506M QSR506F1 QSR506M1
- Sealant for waterproof treatment
- Safety wire
- Fixing screw for safety wire

- Use a screw having a pull-out strength that is enough to hold the sum of weight of the camera, this bracket, locally procured bracket, wire and cables.
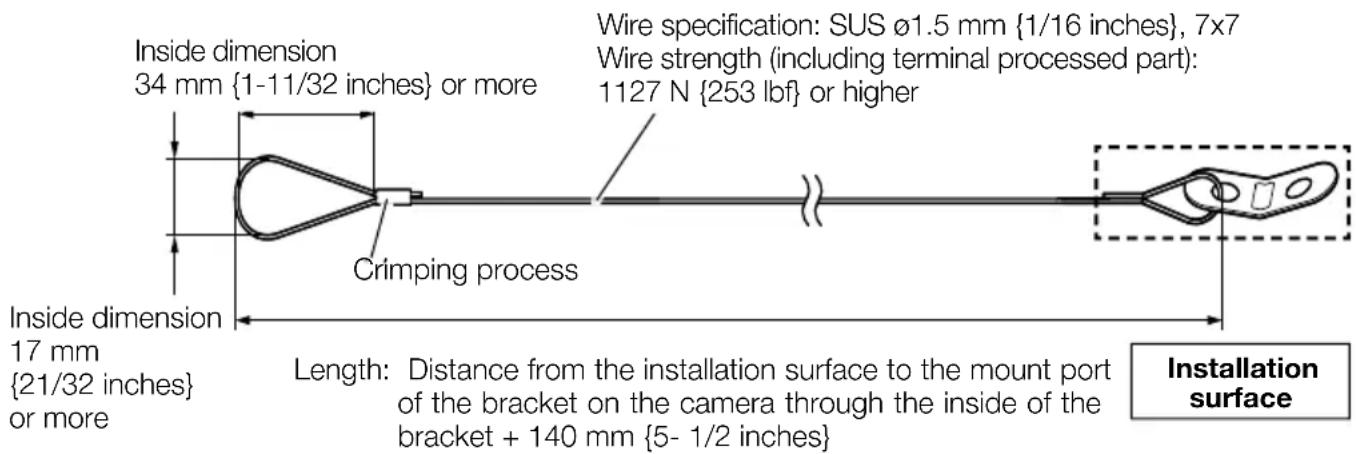

- Select a fixing method in accordance with the installation surface for a part where the safety wire is to be fixed.
- Use the dedicated tool when processing the wire.
• Maximum weight of locally procured bracket: 5 kg {11 lbs}
Installation

flowchart
graph LR
    A["QSR506"] --> B["Step 1"]
    B --> C["Step 2"]
    C --> D["Step 4"]
    D --> E[" "]
    F["QSR506F"] --> G["QSR506M"]
    G --> H["QSR506F1"]
    H --> I["QSR506M1"]
    I --> J["Step 3"]
Step 1
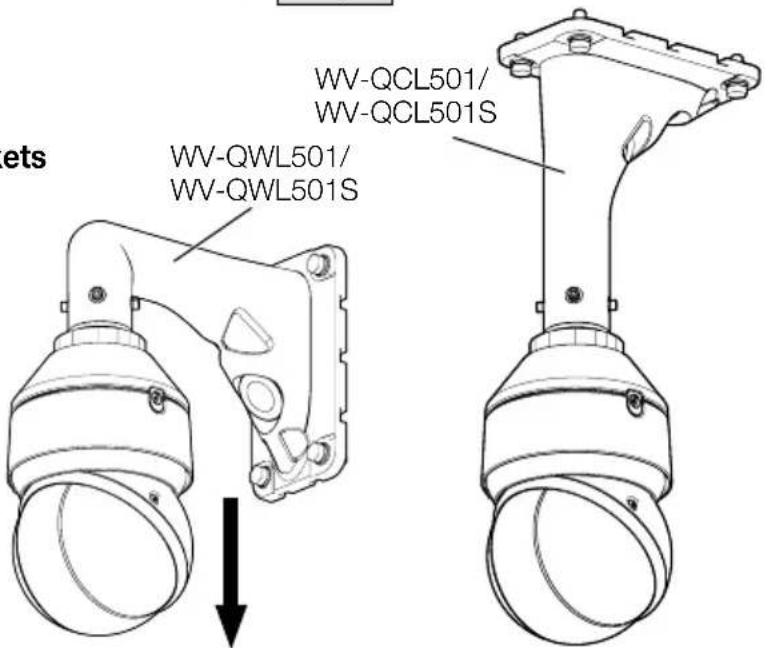
■ Check of combination of brackets
- Brackets with normal specification
QSR506 +WV-QCL501
(Ceiling mount bracket)
+ WV-QWL501
(Wall mount bracket)
- Brackets with heavy salt damage resistance specification
QSR506S+WV-QCL501S-W
(Ceiling mount bracket)
+ WV-QWL501S-W
(Wall mount bracket)
Example of explanation for installation

- Refer to the operating instructions of each bracket for how to fix the brackets to be used with to the installation surface.
Step 2
Hexagon screws (4 pcs.) (M6: WV-QWL501/ WV-QWL501S accessory) Recommended tightening torque: 2.45 N·m {1.81 lbf·ft}
WV-QWL501/
WV-QWL501S
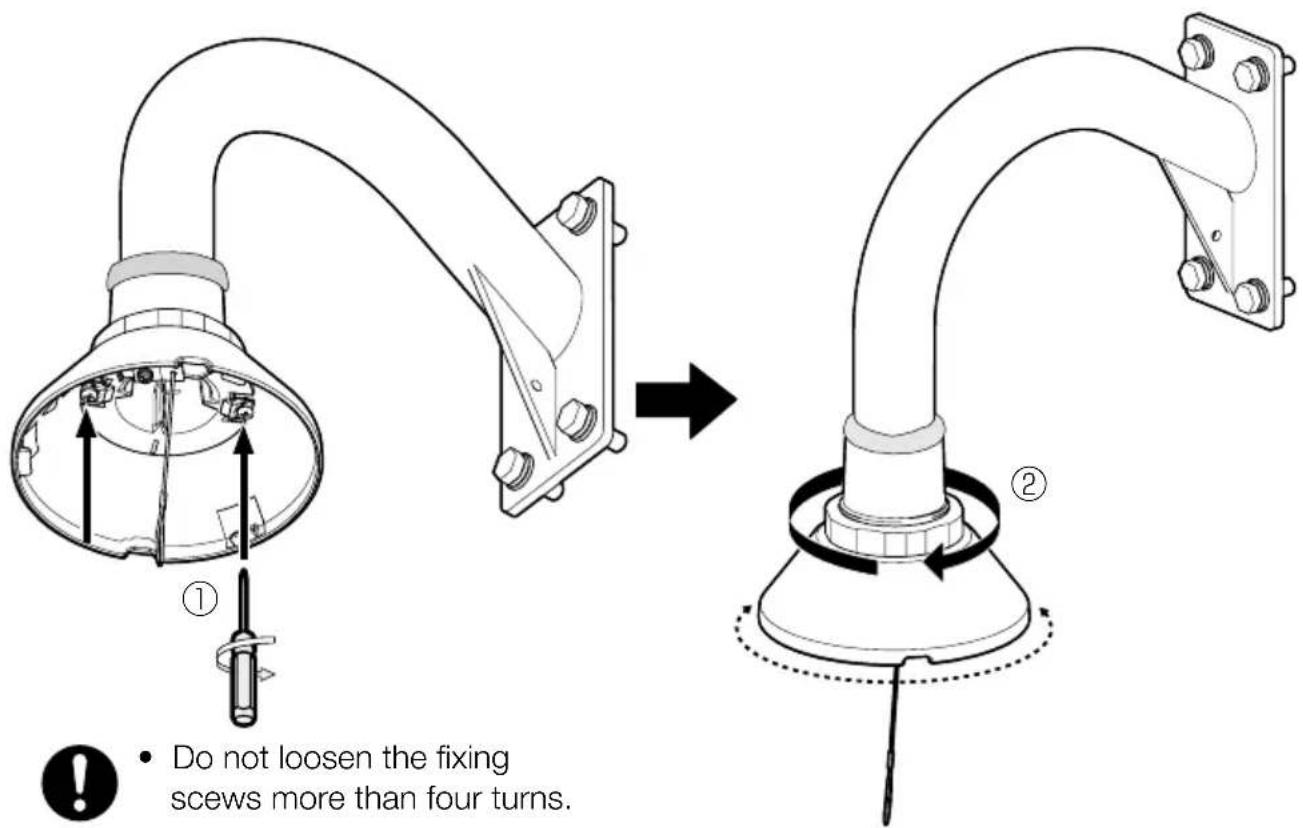
Step 3

- Securely fasten when fixing this product. (Due to the thread of the fastening section, this product's fixing position is not consistent.)

- Make sure to waterproof the connection this product and the mount bracket.
Step 4
Hereafter, illustrations are created using WV-QSR506F installation as an example. Also, cables and safety wire may be omitted.
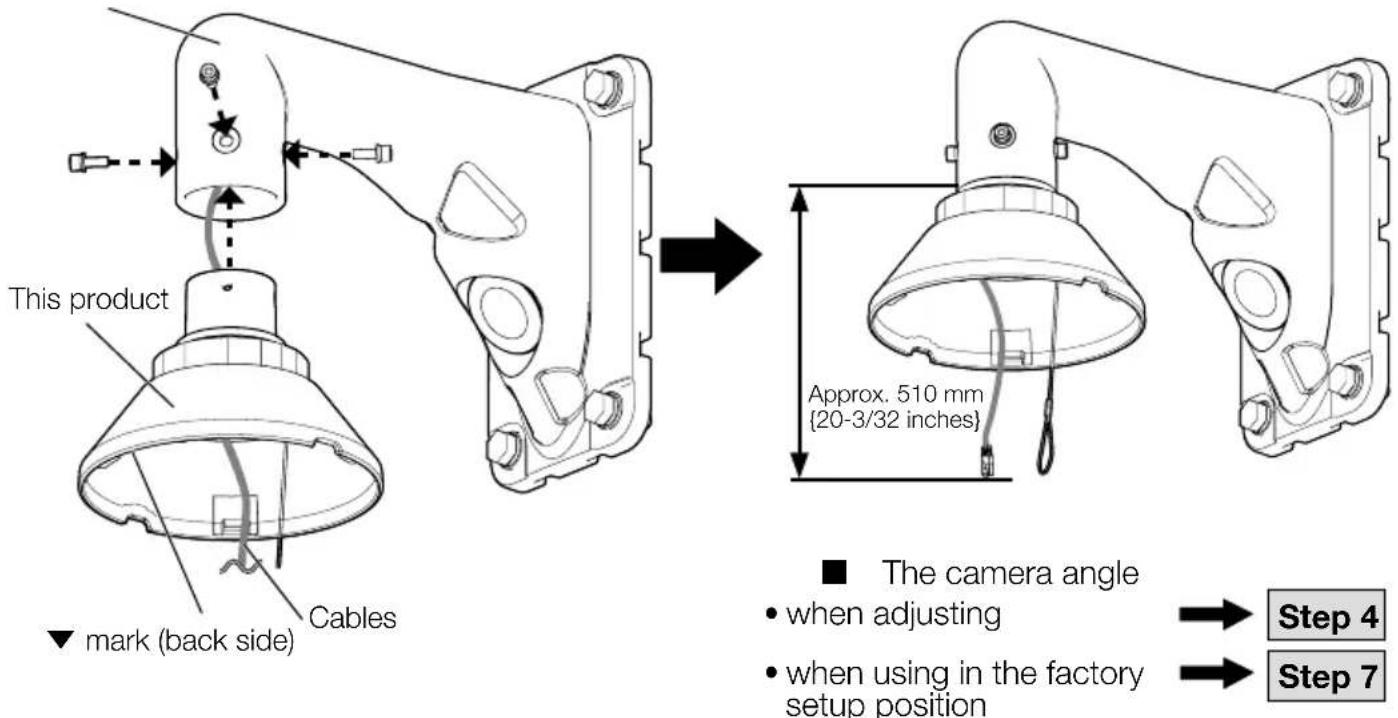
Step 5
Depending on the installation location, if it is difficult to adjust the angle of view with the camera front installation setting below, align the camera front (▼ mark direction) with the shooting direction.

Step 6


- Tighten the nut until the bracket is fixed.
Step7

Follow the installation procedure described in the installation guide of the camera for the subsequent procedures.

natural_image
Technical line drawing of a mechanical assembly with no visible text or symbols取扱説明書
設置ガイド
工事説明付き
吊り下げ金具
品番 WV-QSR506
natural_image
Line drawing of a ceiling lamp with a handle and internal structure (no text or symbols)WV-QSR506-W
https://i-pro.com/products_and_solutions/ja/surveillance/contact-us
https://i-pro.com/products_and_solutions/ja/surveillance/learning-and-support/knowledge-base/technical-information


i-PRO株式会社
https://www.i-pro.com/
注意:
natural_image
Technical line drawing of a mechanical assembly with no visible text or symbols

- Mount Bracket
- Caution:
- Notice:
- Precautions
- Preface
- Precautions for installation
- Standard Accessories
- Other items that are needed (not included)
- Common
- QSR506
- QSR506F QSR506M QSR506F1 QSR506M1
- Installation
- Step 1
- ■ Check of combination of brackets
- - Brackets with normal specification
- - Brackets with heavy salt damage resistance specification
- Step 2
- Step 3
- Step 4
- Step 5
- Step 6
- Step7
- 取扱説明書
- 設置ガイド
- 吊り下げ金具
- 品番 WV-QSR506
- i-PRO株式会社
- 注意:
Brand : i-PRO
Model : WV-QSR506
Category : Mounting bracket