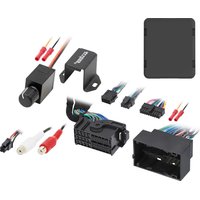
AXSUB-CH5 - Car audio interface Axxess - Free user manual and instructions
Find the device manual for free AXSUB-CH5 Axxess in PDF.


| Product Type | Car Audio Subwoofer |
| Size | 12 inches (30.5 cm) |
| Power Handling (RMS) | 500 Watts |
| Power Handling (Peak) | 1000 Watts |
| Impedance | 4 Ohms Dual Voice Coil (DVC) |
| Frequency Response | 20 Hz - 200 Hz |
| Sensitivity | 88 dB @ 1W/1m |
| Mounting Depth | 6.5 inches (16.5 cm) |
| Mounting Diameter | 11.3 inches (28.7 cm) |
| Recommended Enclosure Volume (Sealed) | 1.0 cu. ft. (28.3 liters) |
| Recommended Enclosure Volume (Ported) | 1.5 cu. ft. (42.5 liters) |
| Voice Coil Configuration | Dual 4 Ohm |
| Woofer Cone Material | Injection Molded Polypropylene |
| Surround Material | Rubber |
| Basket Material | Stamped Steel |
| Net Weight | 12.5 lbs (5.7 kg) |
| Terminal Type | Nickel-Plated Push Terminals |
| Overall Dimensions (Diameter x Depth) | 12.5 x 7.2 inches |
| Warranty | 1 Year Limited |
| Compliance | CE, RoHS |
Frequently Asked Questions - AXSUB-CH5 Axxess
User questions about AXSUB-CH5 Axxess
0 question about this device. Answer the ones you know or ask your own.
Ask a new question about this device
Download the instructions for your Car audio interface in PDF format for free! Find your manual AXSUB-CH5 - Axxess and take your electronic device back in hand. On this page are published all the documents necessary for the use of your device. AXSUB-CH5 by Axxess.
USER MANUAL AXSUB-CH5 Axxess
CHRYSLER (Add a SUB) Interface 2013-UP
Visit AxxessInterfaces.com for more detailed information about the product and up-to-date vehicle specific applications
INTERFACE FEATURES
- Can be used in amplified and non-amplified models
- Easy behind the radio installation with pre-wired harness
- Bass knob included for level control of subwoofer amp
- Micro-B USB updatable
INTERFACE COMPONENTS
- AXSUB-CH5 interface
• AXDSPX-CH5 vehicle T-harness (LD-DSP-CH5) - Bass knob (LD-BASSKNOB)
- ANC-CHH2 ANC bypass harness
www.AxxessInterfaces.com
If the vehicle is equipped with Active noise cancellation (ANC) microphones, they will need to be bypassed. Please refer to www.
Axxessinterfaces.com for ANC bypass harnesses offered for select vehicles.

MetraOnline.com may be used to assist with dash assembly instructions. Simply enter your Year, Make, Model vehicle into the vehicle fit guide and look for the Dash Kit Installation Instructions.
www.MetraOnline.com

TABLE OF CONTENTS
Connections....2
Programming....3
Testing....3
Specifications....3
Troubleshooting....4
TOOLS REQUIRED
- Crimping tool and connectors, or solder gun, solder, and heat shrink
- Tape
- Wire cutter
- Zip ties
- Multimeter
ANC-CHH2 info

ATTENTION: With the key out of the ignition, disconnect the negative battery terminal before installing this product. Ensure that all installation connections, especially the air bag indicator lights, are plugged in before reconnecting the battery or cycling the ignition to test this product.
NOTE: Refer also to the instructions included with the aftermarket radio.
CONNECTIONS
![graph TD A["Factory Radio"] --> B["LD-DSP-CH5"] B --> C["Blue/White - Amp Turn-On Wire"] C --> D["RCA Jacks (sold separately)"] D --> E["AXX255"] E --> F["Sub OUT"] G["Factory Radio Harness"] --> H["4-Pin"] H --> I["Interface"] I --> J["20-Pin"] J --> K["LD-BASSKNOB"] K --> L["To Chassis ground"] L…](/content/2026/05/1064189/images/8085609fbd199dda42468589afb462dd4d9b8e75bbd361f367ee6266c53a1d18.jpg)
PROGRAMMING
- With everything plugged in Turn on ignition and make sure audio volume is turned all the way down. Also ensure that your LD-BASSKNOB is turned all the way to the left.
- Increase audio volume to desired listening level.
- Wait for aftermarket amp to turn on (up to 15 seconds).
- You are now programmed.
TESTING
- Turn on audio and increase volume to desired level.
- Rotate the LD-BASSKNOB to the right to increase SUB level. Turn to the left to decrease SUB level.
NOTE: Lowering the bass or volume knob completely will deactivate the aftermarket amplifier. Similarly, muting the radio will also result in turning off the aftermarket amplifier.
SPECIFICATIONS
• 2 Channel non-fading 5V RMS output
• Fixed low pass frequency of 234Hz
• 250mA remote turn on output
TROUBLESHOOTING
- Not getting sound from Factory radio's speakers.
A) Make sure Factory Volume isn't set to zero or a mute button has been pressed on radio.
B) Make sure 8-pin male and female connectors are plugged in to each other.
- Not getting 12v on the Amp on out to amp
A) Make sure LD-BASSKNOB isn't turned all the way down(to left)
B) Your Orange and Black wires are properly connected from AXSUB-INTERFACE to LD-BASSKNOB
- Not getting 12v on the Amp on out to amp
A) Make sure the t-harness is seated properly at the radio and OE harness.
B) Make sure the RCAs are connected to aftermarket amplifier.
Having difficulties? We're here to help.


techsupport@metra-autosound.com
Tech Support Hours (Eastern Standard Time)
Monday - Friday: 9:00 AM - 7:00 PM
Saturday: 10:00 AM - 5:00 PM
Sunday: 10:00 AM - 4:00 PM

Metra recommends MECP certified technicians

CHRYSLER Interfaz Chrysler (agregar una SUB) 2013-más



Brand : Axxess
Model : AXSUB-CH5
Category : Car audio interface