KAMN30F2CULA - Monitor Kogan - Free user manual and instructions
Find the device manual for free KAMN30F2CULA Kogan in PDF.


| Product Type | Monitor |
| Brand | Kogan |
| Model | KAMN30F2CULA |
| Screen Size | 30 inches |
| Resolution | 2560 x 1600 (WQXGA) |
| Panel Type | IPS |
| Aspect Ratio | 16:10 |
| Refresh Rate | 60 Hz |
| Response Time | 5 ms (GTG) |
| Brightness | 300 cd/m² |
| Contrast Ratio | 1000:1 (static) |
| Viewing Angle | 178° / 178° |
| Connectivity | 1x HDMI 1.4, 1x DisplayPort 1.2, 1x DVI-D, 1x VGA, 1x Audio Out |
| VESA Mount | 100 x 100 mm |
| Speakers | 2 x 3W built-in |
| Power Supply | AC 100-240V, 50/60 Hz |
| Power Consumption | Typical: 45W, Standby: <0.5W |
| Dimensions (with stand) | 684 x 468 x 210 mm |
| Weight (with stand) | 7.2 kg |
| Tilt Adjustment | -5° to +20° |
| Cleaning Instructions | Unplug monitor, wipe with soft dry cloth, avoid solvents. Use mild detergent if needed. |
| Repairability | Disassembly requires screwdrivers, spare parts available via Kogan support. |
Frequently Asked Questions - KAMN30F2CULA Kogan
User questions about KAMN30F2CULA Kogan
0 question about this device. Answer the ones you know or ask your own.
Ask a new question about this device
Download the instructions for your Monitor in PDF format for free! Find your manual KAMN30F2CULA - Kogan and take your electronic device back in hand. On this page are published all the documents necessary for the use of your device. KAMN30F2CULA by Kogan.
USER MANUAL KAMN30F2CULA Kogan
natural_image
Modern computer monitor with a tripod stand, no visible text or symbols on the screen or legs30" Curved Ultrawide 1ms FreeSync Gaming Monitor
(2560 x 1080, 1500r, 200Hz, 21:9)
KAMN30F2CULA
Safety & Warnings 3
Components 4
Overview 5
Assembly 6
VESA Mount 7
Connectivity 8
Operation 10
ECO Modes & Gameplus 14
Specifications 15
SAFETY & WARNINGS
- Read all instructions before using the appliance and retain for reference.
- This monitor is designed with ventilation holes on the back of the casing. Do not cover or block them.
- Do not insert any object or spray any liquid into the vents.
- Avoid placing the monitor near heaters, stoves, fireplaces or other sources of heat, as well as in rooms lacking adequate ventilation.
- Do not position the monitor in unsafe locations. If the monitor falls, it may be damaged and may injure nearby people.
- Unplug the monitor if it is not going to be used for an extended period.
- Do not place heavy objects on the monitor, its power cord or any connected cable.
- Do not open the back panel of the monitor, as it contains a high-voltage current even when not plugged in.
- There is a polarizer layer (not a protective film) on the surface of the screen. Do not peel it off, or the product may be damaged and the warranty will be invalid.

HIGH-DEFINITION MULTIMEDIA INTERFACE
The terms HDMI and HDMI High-Definition Multimedia Interface, and the HDMI Logo are trademarks or registered trademarks of HDMI Licensing Administrator, Inc. in the United States and other countries.
COMPONENTS
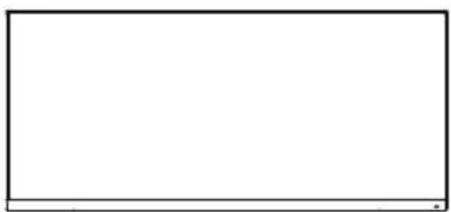
natural_image
Empty white rectangle with black border (no text or symbols)Monitor Stand Stem
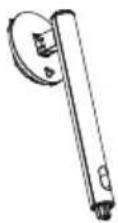
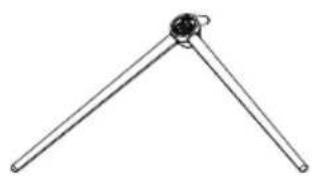
natural_image
Simple line drawing of a tripod-like structure with a central circular element (no text or symbols)Stand Base
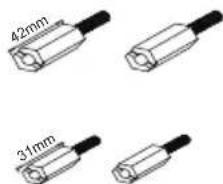
VESA connectors
natural_image
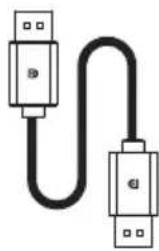
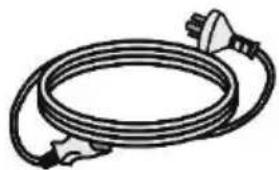
Pure diagram of two USB connectors without any text, numbers, or symbolsDP Cable Power Cable
natural_image
Illustration of a coiled electrical plug with two terminal connectors (no text or symbols)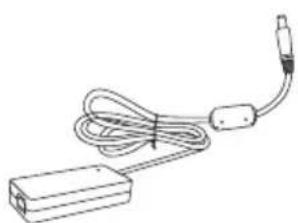
natural_image
Line drawing of a cable and plug assembly (no text or symbols)Power Adapter User Guide
![USER GUIDE kogan.com 30" Curved Ultrawide 200Hz 1ms FreeSync Gaming Monitor [美] 罗伯特·罗伯特, 200MHz, 中国 JUNIN.COM](/content/2026/05/1063913/images/ea202d01498f0afcafdd9cc680188ff03dcc89f59fef480aad58877fccebee77.jpg)
OVERVIEW
Controls
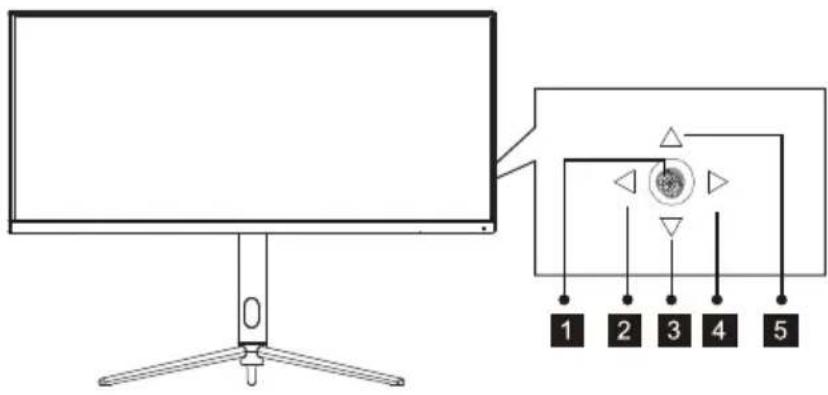
- Power button
- RGB Range/Exit
- Game Crosshair Mode/Down
- Menu/Enter
- Contextual Mode/Up
Ports
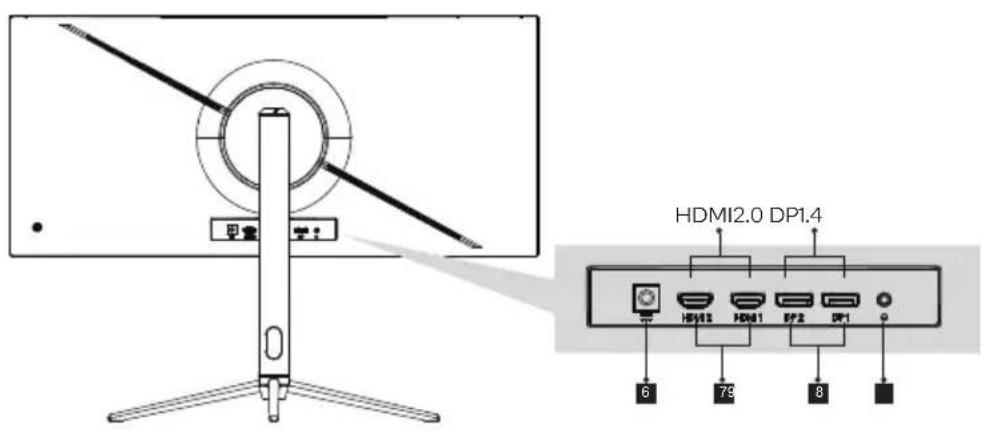
- Power Input
- HDMI Input
- DisplayPort Input
- Audio Output
ASSEMBLY
Before disposing of any packaging, place all items on a soft, clean and flat surface to ensure all components are accounted for.
WARNING: The panel of the monitor is fragile. Keep the foam underneath the monitor screen while assembling the stand.
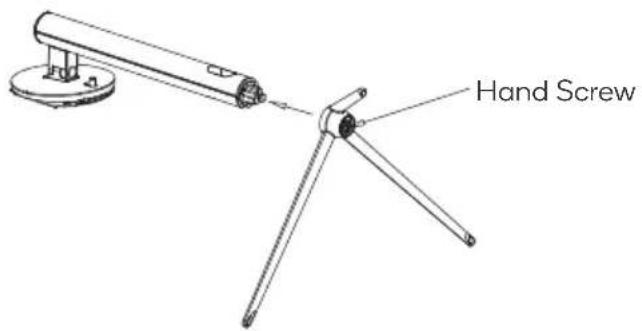
Installing the Stand Base
- Lay the monitor screen facing down on a table with the monitor still resting on the packing foam. Attach the display base and attach it to the display neck. While the neck is attached to the base, insert, and tighten the base screws to the underside of the base.
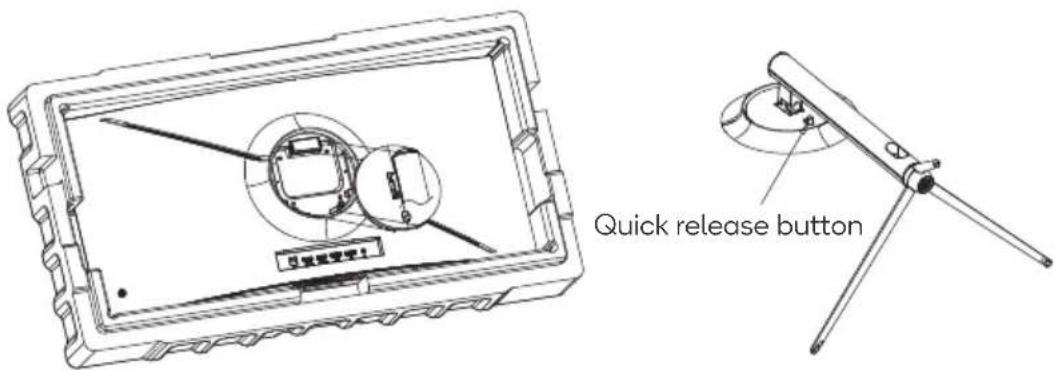
- Open the packing foam with the monitor resting facing downwards. Take the assembled stand piece and insert it headfirst into the circular opening on the back of the monitor. Once it is inserted press downwards on the neck until you hear a 'click' sound.
VESA MOUNT
Follow the steps below to install onto a monitor arm or wall mount (not included)
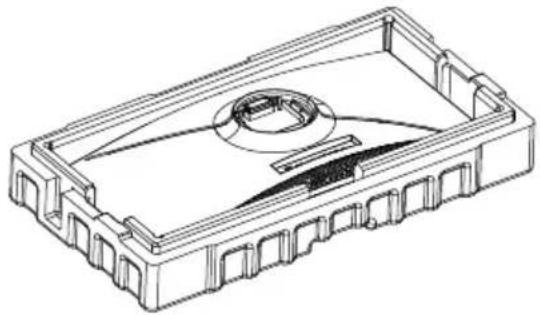
- Lay the monitor screen facing down on a table with the monitor still resting on the packing foam.
natural_image
Isometric line drawing of a rectangular electronic component with internal channels and a central circular feature (no text or symbols)- With the circular indentation now open to you.
- Install VESA connectors the back of the monitor using the provided.
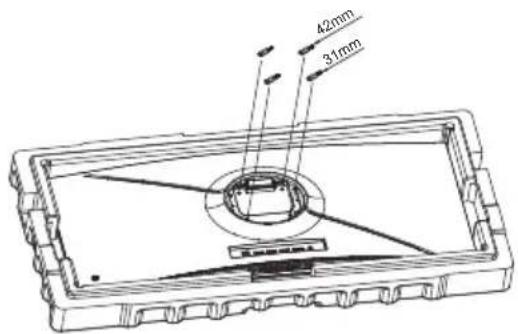
- Once the VESA adapter is installed, the monitor is ready to be wall mounted. The mounting pattern is 75mm x 75mm.
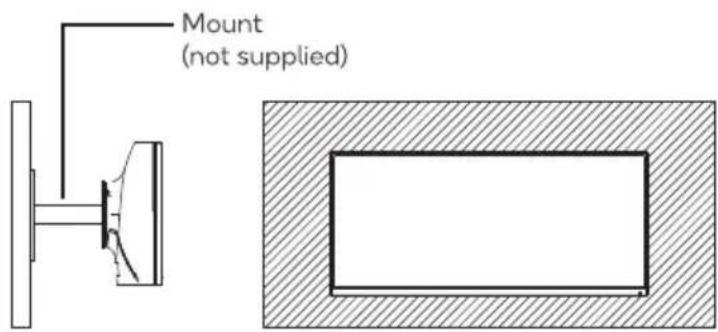
Notes: To prevent the monitor on the mount from failing, please install it firmly and protect it fully. Do not place or hang any object on the mount, and the using height of the mount should be less than 2 meters.
ADJUSTMENT
natural_image
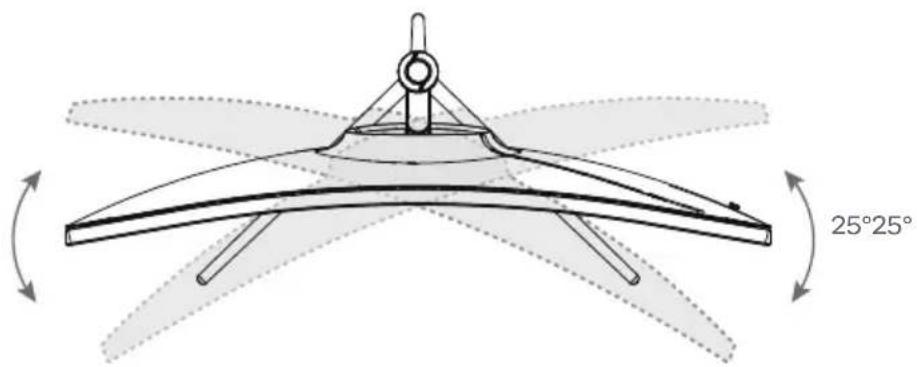
Technical line drawing of a four-axial fan or propeller with angular annotations (25° and 25°) indicating rotation directions, no text or symbols present.Rotation angle
±25°(±2.0°)
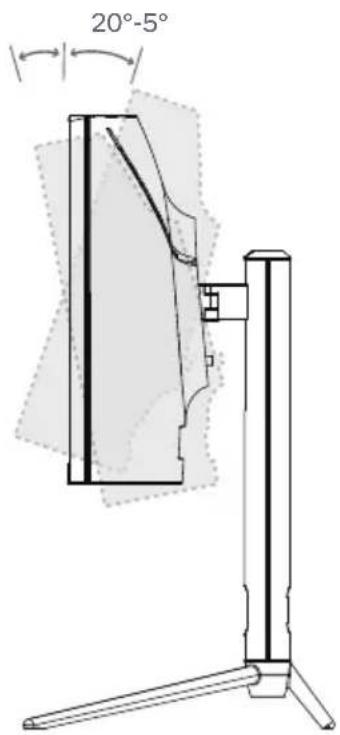
Tilting angle
-5.0^(± 2.0^) - + 20^(± 2.0^)
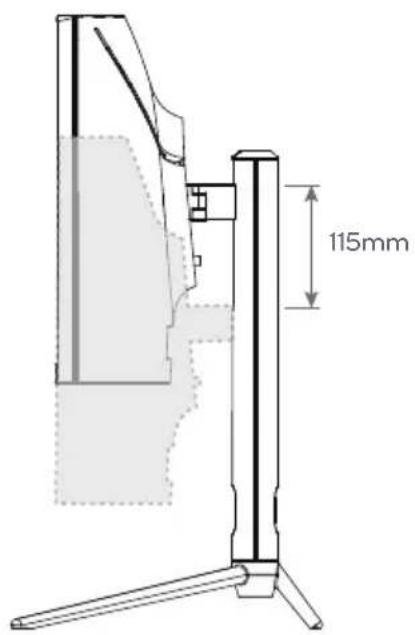
Height adjustment
115mm(±5mm)
CONNECTIVITY
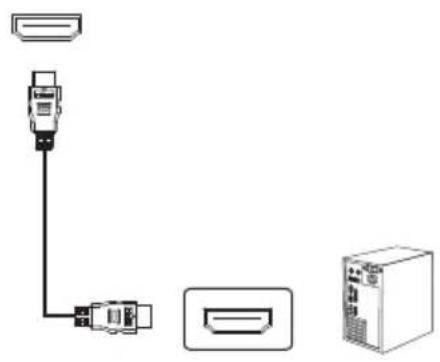
HDMI
Connect the provided HDMI cable from the computer's HDMI port to the monitor's HDMI port.
natural_image
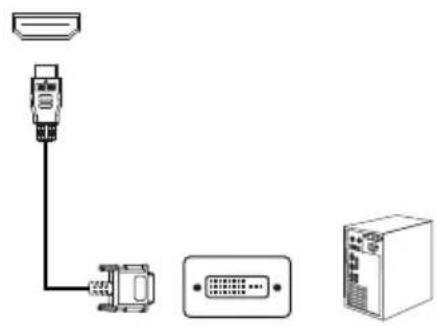
Pure electrical connector diagram without any text, numbers, or symbolsHDMI to DVI
Connect an HDMI to DVI cable (not provided) from the monitor's HDMI port to the computer's DVI port. Note: Audio cannot always be transferred through a DVI port.
natural_image
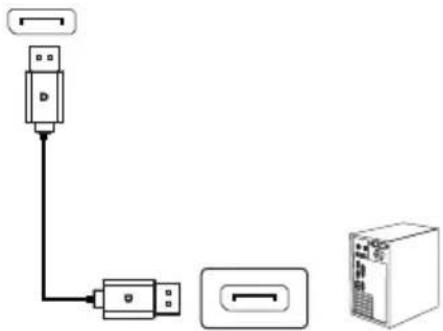
Pure electrical connector diagram without any text, numbers, or symbolsDisplayPort
Connect ta DisplayPort cable (not provided) from the computer's DisplayPort to the monitor's DisplayPort.
natural_image
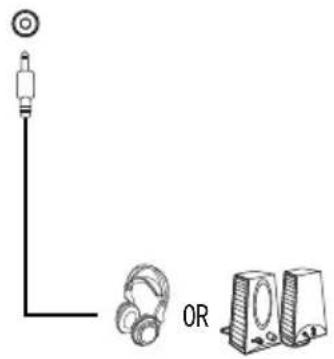
Pure diagram of connected devices without any text, numbers, or symbolsAudio Out
Connect an audio output device (speakers, headphones etc.) to the audio port on the monitor. The monitor may need to be set as the computer's default sound output device.
natural_image
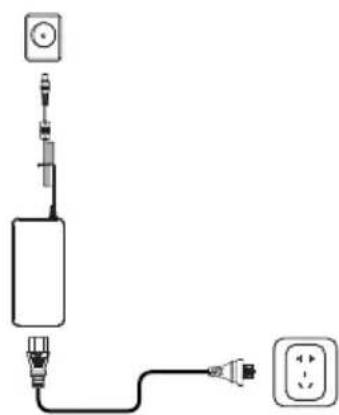
Simple line drawing of a device with a bulb, earphones, and two speakers (no text or symbols)Power Adapter
Please connect the power adapter to the power cable, connect the power adapter plug to the corresponding power port of the monitor, and then connect the power cable to a properly grounded power outlet.
natural_image
Pure electrical circuit lines without any symbolsOPERATION
- The color and shape of the OSD menu may be slightly different of shown.
- OSD menu may changed by function improvements.
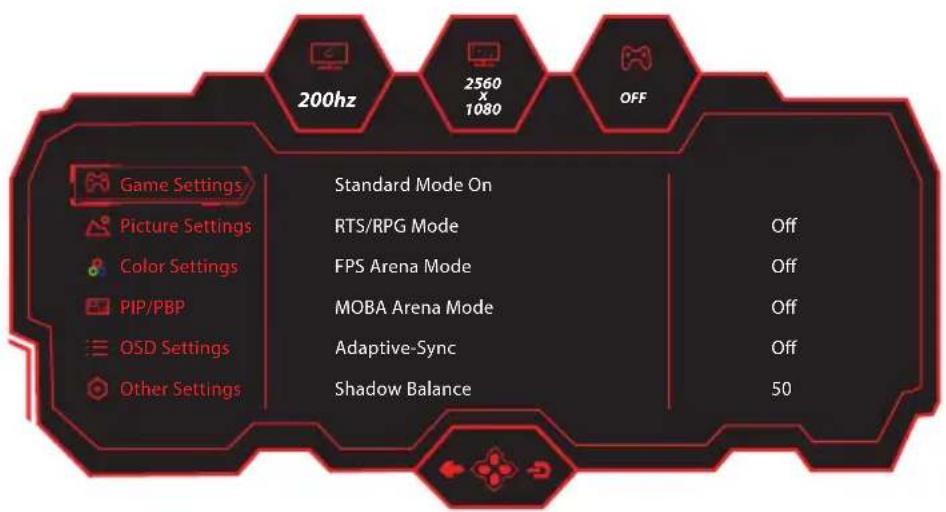
The On-Screen Display (OSD) menu allows you to adjust the monitor settings, turn on the monitor, and press any of the rocker buttons to display the navigation interface.
- Press any rocker button to enter the OSD main menu or enter sub-menus.
-
Push the rocker buttons ▲ or ▼ or ▶ to scroll through the functions.
-
Select the desired function, then push the rocker buttons center to enter the submenu.
- Push the rocker buttons ▲ or ▼ or ▶ to scroll through sub-menus, and push the rocker buttons center ○ to select and confirm the desired function.
-
Push the rocker buttons ▲ or ▼ or ▶ to select one option, and push the rocker buttons center ○ to confirm settings and exit from the current menu.
-
Push the rocker buttons ◀ to exit from the menu screen.
- Functions of the monitor vary with models, and the functions in this manual are for reference only.
| Main Menu Sub | Menu Option | |
| Game Settings | Standard Mode | Off/On |
| RTS/RPG Mode | Off/On | |
| FPS Arena Mode | Off/On | |
| MOBA Arena Mode | Off/On | |
| Adaptive-Sync | Off/On | |
| Shadow Balance | 0-100 | |
| Response Time | Off/Normal/Fast/Ultrafast | |
| Refresh Rate | Off/On/Position (Top Right/Top Left/Bottom Right/Bottom Left) | |
| Game Crosshair | Off/Crosshair1/Crosshair2/Crosshair3/Crosshair4/Crosshair5/Crosshair6 | |
| Game Time | Off/15:00/30:00/45:00/60:00 | |
| Dynamic Brightness | Off/Normal/Expert/Elaboration | |
| Off/OnMPRT | ||
| Ambient Lighting | Off/On | |
| Picture Settings | 0-100Brightness | |
| Contrast | 0-100 | |
| DCR | Off/On | |
| Contextual Model | Off/Movie Mode/Reading Mode/Night mode | |
| Low Blue Light | 0-100 | |
| Sharpness | 0-5 | |
| Gamma | 1.8/2.0/2.2/2.4/2.6/S.curve | |
| Aspect Ratio | Wide Screen/4:3/1:1/Auto | |
| Color Settings | Warm | Off/On |
| Natural | Off/On | |
| Cool | Off/On | |
| User1 | Off/On:0-100(R/G/B) | |
| User2 | Off/On:0-100(R/G/B) | |
| User3 | Off/On:0-100(R/G/B) | |
| Hue | 0-100(R/G/B/C/M/Y) | |
| Saturation | 0-100(R/G/B/C/M/Y) |
- Functions of the monitor vary with models, and the functions in this manual are for reference only.
| Main Menu Sub | Menu Option | |
| PIP/PBP | PIP/PBP Mode | Off/PIP Mode/PBP 2Win 1:1/PBP 2Win2:1/PBP 2Win1:2 |
| Sub-Signal Source | DP1/DP2/HDMI1/HDMI2 | |
| Audio Source | Auto/DP1/DP2/HDMI1/HDMI2 | |
| PIP Position | Top Right/Top Left/Bottom Right/Bottom Left | |
| PIP Size | Small/Medium/Large | |
| Window Swap | Off/On | |
| OSD Settings | Language | 简体中文/English/한국어/ Portuguese/Portugues do Brasilazil/Deutsch/Nederland/Suomi/Français/Ελληνικά/Indonesia/Italiano/日本語/Malaysia/Polskie/Português/Русский/Espanol/ไทย/Українська/Tiếng Việt/繁体中文/Türkçe |
| 5-60OSD Time Out | ||
| 0-100OSD H-Position | ||
| 0-100OSD V-Position | ||
| 0-5OSD Transparency | ||
| Hotkey1Settings | Bightness/Contrast/Volume/Mute/Shadow Blance/Game Crosshair/Refresh Rate/Game Time/Contextual Model/PIP/PBP Mode/Input Signal/Dynamic Brightness/Ambient Lighting | |
| Hotkey2Settings | ||
| Hotkey3Settings | ||
| OSD Lock | Off/On | |
| Other Settings | Input Signal | Auto/DP1/DP2/HDMI1/HDMI2 |
| Volume | 0-100 | |
| Mute | Off/On | |
| Eyeshield Remind | Off/On | |
| Reset | No/Yes | |
| Input Source: /Resolution: /Mode: Information |
SPECIFICATIONS
| Product model | KAMN30F2CULA | |
| Product name | Liquid Crystal Display | |
| Screen size | 30inch | |
| Aspect ratio | 21:9 | |
| Viewing angle | 178°(H) / 178°(V) | |
| Contrast ratio | 3000:1(TYP) | |
| Color | 16.7M | |
| Resolution | 2560 x 1080 | |
| Refresh rate | 200Hz | |
| Power input | 12V =4.0AThe standard voltage and power supply may vary with countries, please refer to the label at the back of the product. | |
| Product dimensions | Without stand | 701.1x317.6x121.7mm |
| With stand | 701.1x536.3x269.3mm | |
| Tilting angle | Forward tilting -5°(±2.0°); Backward tilting 20°(±2.0°) | |
| Height range | 115±5mm | |
| Rotation angle | ±25°(±2.0°) | |
| Environmental conditions | Action | Temperature: 0°C~ 40°C (32°F ~ 104°F)Humidity: 10%~90% RH (non-condensing) |
| Storage | Temperature: -20°~ 60° (-4°F ~ 140°F)Humidity: 5%~95% RH (non-condensing) | |
NOTES
Need more information?
We hope that this user guide has given you the assistance needed for a simple set-up.
For the most up-to-date guide for your product, as well as any additional assistance you may require, head online to help.kogan.com
kogan.com
- 30" Curved Ultrawide 1ms FreeSync Gaming Monitor
- SAFETY & WARNINGS
- COMPONENTS
- OVERVIEW
- Controls
- Ports
- ASSEMBLY
- Installing the Stand Base
- VESA MOUNT
- Follow the steps below to install onto a monitor arm or wall mount (not included)
- ADJUSTMENT
- CONNECTIVITY
- HDMI
- HDMI to DVI
- DisplayPort
- Audio Out
- Power Adapter
- OPERATION
- SPECIFICATIONS
- NOTES
- Need more information?
Brand : Kogan
Model : KAMN30F2CULA
Category : Monitor