MDB-30CF09 - Ventilateur domestique MISTRAL - Free user manual and instructions
Find the device manual for free MDB-30CF09 MISTRAL in PDF.

User questions about MDB-30CF09 MISTRAL
0 question about this device. Answer the ones you know or ask your own.
Ask a new question about this device
Download the instructions for your Ventilateur domestique in PDF format for free! Find your manual MDB-30CF09 - MISTRAL and take your electronic device back in hand. On this page are published all the documents necessary for the use of your device. MDB-30CF09 by MISTRAL.
USER MANUAL MDB-30CF09 MISTRAL
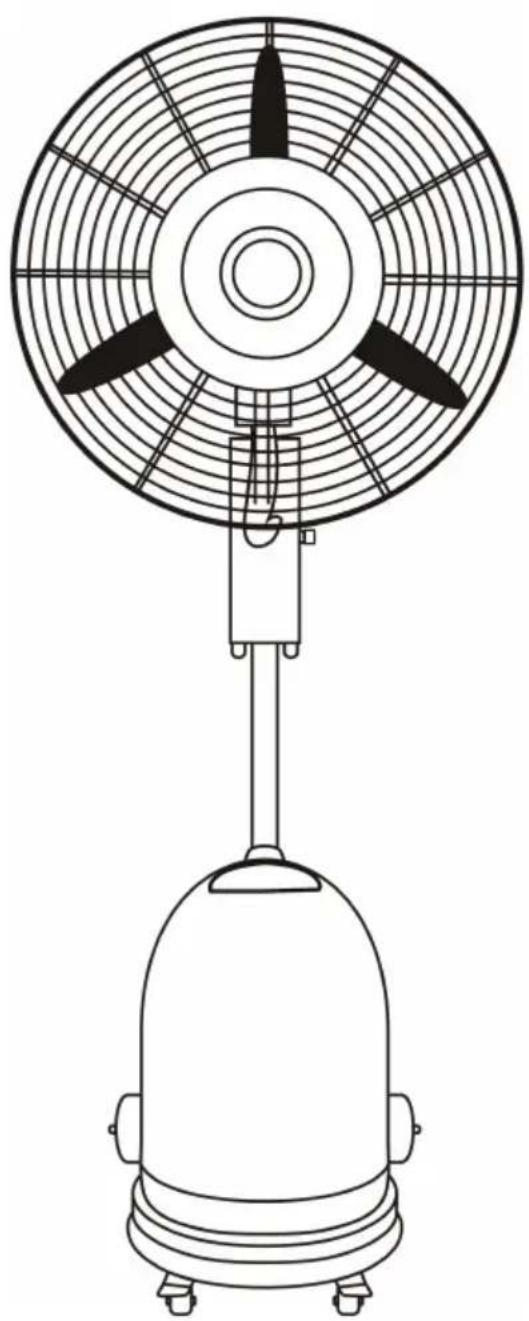
75cm Commercial Mist Fan
natural_image
Line drawing of a portable air conditioner with fan and base mount (no text or symbols)Instruction Manual
Model: MDB-30F09
Important Safeguards
When using electrical appliances, in order to reduce the risk of fire, electric shock and/or injury, these basic safety precautions should always be followed:
For Your Safety
Read all instructions carefully, even if you are familiar with the appliance.
- To protect against the risk of electric shock, DO NOT IMMERSE power cord or plug in water or any other liquid.
- This appliance is not intended for use by persons (including children) with reduced physical, sensory and mental capabilities, or lack of experience and knowledge, unless they have been given supervision or instruction concerning use of the appliance by a person responsible for their safety.
• Children should be supervised to ensure that they do not play with the appliance.
• Always unplug the unit when not in use.
- Do not operate unit with a damaged power cord or plug, or after a malfunction, has been dropped or is damaged in any manner. Return the unit to an authorised service facility for examination.
- Do not run the power cord under carpeting or cover the power cord with throw rugs, runners or the like. Arrange the power cord away from traffic areas and where it will not be tripped over.
- Do not place the power cord over any part of the unit.
- Do not plug this unit into an extension lead, double adapter or power board.
- This unit has hot electrical parts inside. DO NOT use it in areas where gasoline, paint or flammable liquids are used or stored.
- To disconnect the unit set main switch to OFF then remove the plug from the outlet.
- DO NOT use it in areas where gasoline, paint or flammable liquids are used or stored.
- Do not insert or allow foreign objects to enter any ventilation or exhaust opening as this may cause an electric shock, fire or could damage the unit.
- Use the unit only as described in this booklet Any other use not recommended by the manufacturer may cause fire, electric shock or injury to persons.
- Fully remove the power cord from the power cord tidy before use. Always uncoil the power cord before applying power.
- This product must always be used AND STORED in the upright position.
- Do not use this unit with a programmer, timer or any other device that switches the unit on automatically, since a fire risk exists if the unit is covered or positioned incorrectly.
• This appliance is suitable for outdoor use. - If it is necessary to move the unit after the water has been added, roll gently to the required position.
- Do not move the machine when it is in use.
• Always ensure that there is enough water in the tank when in use for cooling. - Do not block air circulation.
- Do not use hot water.
- Place the machine on a level surface.
- Unplug the appliance during filling and cleaning.
Warning
If the supply power cord is damaged, the power cord must be replaced by the manufacturer, its service agent or similarly qualified persons in order to avoid a hazard.
This product has not been designed for any uses other than those specified in this booklet.
Save These Instructions
Features of Your Misting Fan
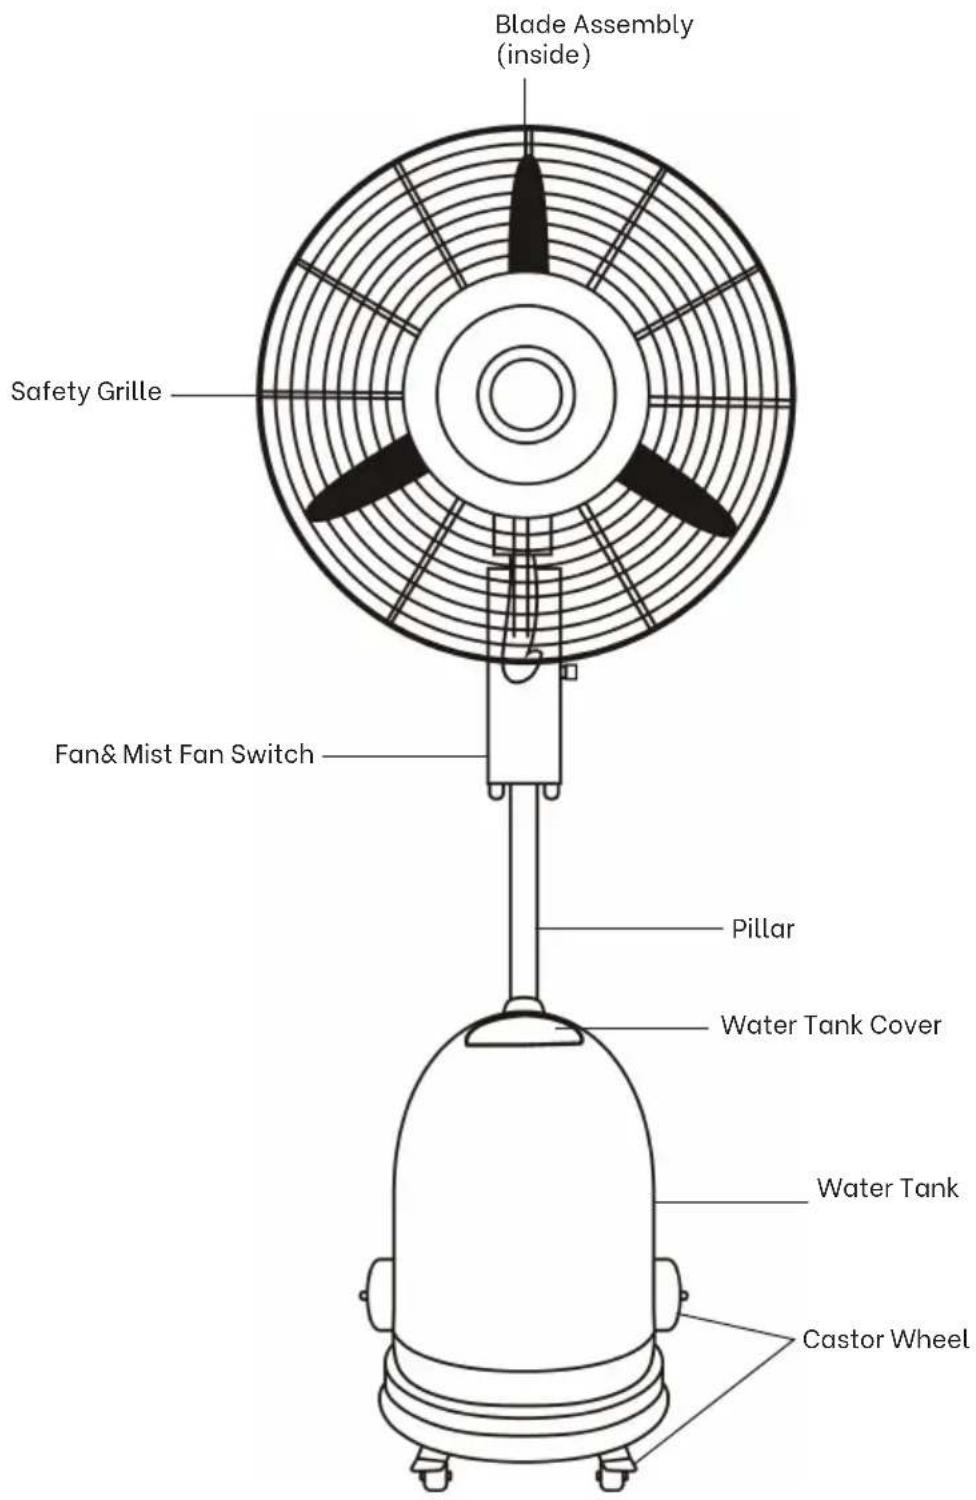
Your 75cm Commercial Mist Fan
Congratulations on the purchase of your new Commercial Mist Fan.
Before first using your Commercial Mist Fan it is most important that you read and follow the instructions in this use and care booklet, even if you feel you are quite familiar with this type of appliance.
Your attention is drawn particularly to the section dealing with IMPORTANT SAFEGUARDS. Find a place and keep this booklet handy for future reference.
Your Commercial Mist Fan is safe and easy to use. It has been designed to function quietly and safely under normal circumstances.
Assembly of Your Misting Fan
Your Misting Fan has been boxed unassembled to minimize packaging waste. Each part is designed to fit together and be disassembled easily for cleaning or storage.
Accessory list
| ITEM DESCRIPTION PHOTO QTY | |||
| Rear wheel screw: Axles 2PCS | 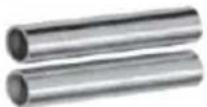 | ||
| Nut: M12 2PC | 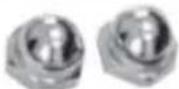 | ||
| Washer φ 12 4PCS |  | ||
| Front wheel screw M6X 12 8PCS | 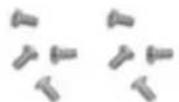 | ||
| Washer φ 6 8PCS | 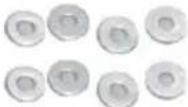 | ||
| Straight Pillar screw: M6 X 20 4PCS | 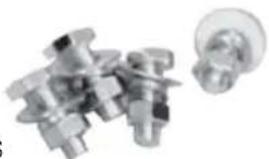 | ||
| washer φ 6 4PCS | |||
| spring washer φ 6 4PCS | |||
| Nut: M6 4PCS | |||
| Water tank screw M8X 10 | 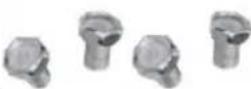 8PCS 8PCS | ||
| Washer φ 8 4PCS | 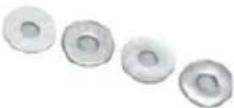 |
Tips:
Because the mist fan is heavy, so when assembling, it may require additional people to assist.
Carefully remove the Mist fan & accessories from the plasticbag and carton. And taking out the mist fan, please handle with care in order to avoid the damage of product.
Place the Mist fan & accessories on a soft cloth or carpet (To avoid causing any damage during assembly of the support tube).
Step 1: Assembling cart
-
Fit rear wheels to the cart Insert plastic washer(12 MM Dia.) and axle onto to the round tube on either side of the cart, position the wheels on the axles and secure wheels with M12 Washer and M12 nuts.
-
Fit 2 casters to the front of the cart. Use 4 M6 and M6 Screws for each caster and tighten to secure.
-
Fit the pillar to the cart base and secure with 4 M6 x 20mm screws.
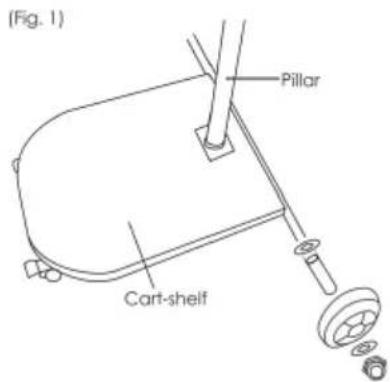
Step 2: Install fan head mounting post
Loosen post retention knob (A) on the pillar, insert Stainless Steel tube(B) and switch control box into pillar and fasten with retention knob to secure in place.
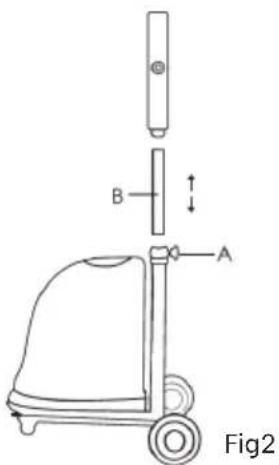
Step 3: Mounting fan motor assembly
Unscrew the 3 screws on the motor support collar and position the fan motor assembly onto the post protruding from the switch control box and tighten the 3 screws to secure the fan motor assembly (see Fig.3)
natural_image
Diagram showing a mechanical device before and after assembly, with no visible text or symbolsFig3
Step 4: Fitting the rear safety grille.
Unscrew and remove the 4 grille retaining screws from the fan motor head assembly.
Position the rear safety grille on the fan motor head and align the holes on the grille with screw holes on the fan motor head and secure the grille with the 4 screws. (See Fig.4)

natural_image
Diagram showing airflow or particle movement between two fan-shaped devices (no text or symbols present)Fig4
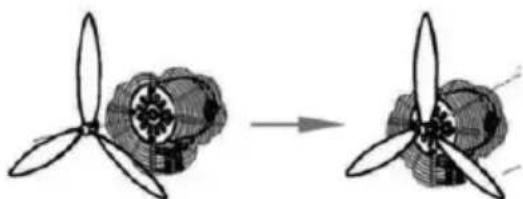
Step 5: Fitting the fan blade
Position the blade onto the motor shaft and secure by tightening the blade retention screw. (see Fig. 5)
natural_image
Diagram showing a propeller being converted to a fan blade (no text or symbols present)Fig5
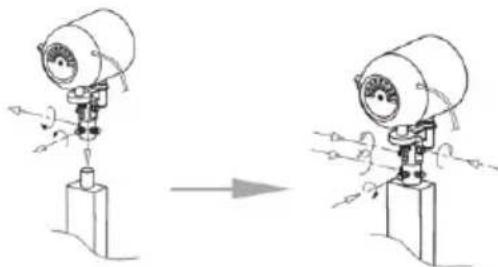
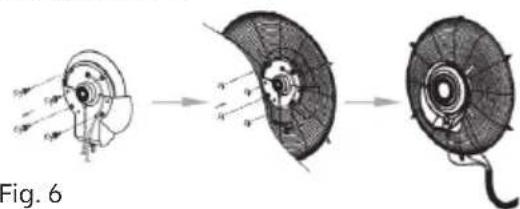
Step 6: Fitting misting plate to front safety grille.
Unscrew and remove the 4 retaining screws from the mist plate assembly.
Position the mist plate onto the front safety grille and secure it to the safety grille with 4 screws and tighten. (see Fig. 6)
natural_image
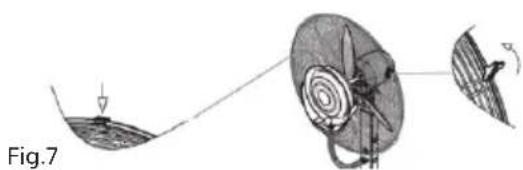
Diagram of a mechanical device showing three stages: before, mid, and after assembly (no text or symbols)Step 7: Fitting front safety grille/mist plate assembly to the rear safety grille.
Unhinge the grille retaining clips from around the front safety grille parameter.
Clip the retaining bracket over the rear grille and hinge the retaining clips to the closed position to capture the rim of the rear safety grille with the hinge clips until all closed.
Finally secure grille into place with the safety screw and nut on the bottom of grille assembly. (See Fig.7)
natural_image
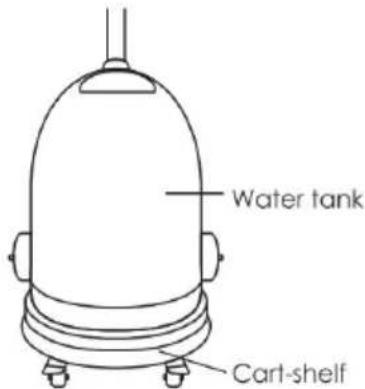
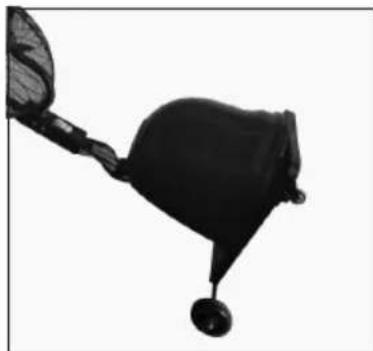
Diagram of a medical procedure showing a surgical tool interacting with a patient's ear and surrounding tissue (no text or labels)Step 8: Fitting water tank to the cart
Fix water tank on the cart-shelf with nominated screws and nuts (Fig8)
a. Tip fan assembly slowly backwards to lay on the floor to gain access to the screw holes on the bottom of the cart tank shelf.
b. Secure the tank to the cart-shelf with 4 x M8 washers and M8 x 10mm screws and tighten them with a spanner.
c. Position the fan assembly upright.
natural_image
Black and white photo of a fishing net with a hook, no visible text or symbols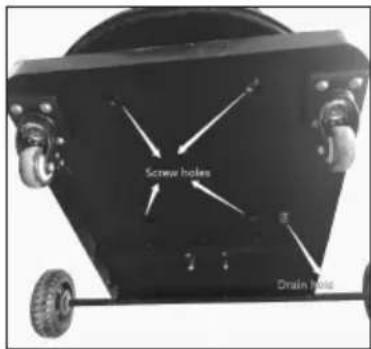
natural_image
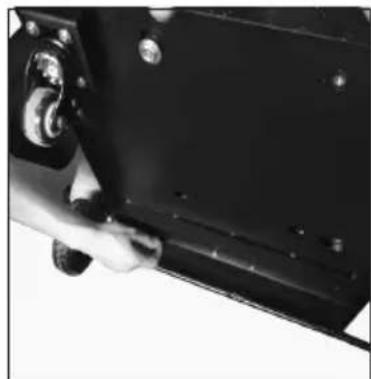
Close-up of a hand operating a black mechanical component with bolts and a handle (no visible text or symbols)Note: If you do not use mist fan for a long time, please unscrew the drain hole at the bottom of the water tank, and when the water is drained, tighten it again.
Operation
-
After assembly this misting fan, before connect to power supply, need remove the protection red wires from the grilles;
-
Open water tank cover, pour enough clean water into tank then cover it;
-
Connect power supply, turn on fan switch first(this switch is underneath the protection cover), then turn on pump switch, the misting volume could be adjusted according to the misting volume indication.
-
Three speed for the fan setting, 0 for off, 1 for Low, 2 for Medium and 3 for High.
©
Technical Specifications
| Model No. MDB-30F09 | |
| Rating 220-240V~, 50Hz | |
| Power 260W | |
| Protection Class I | |
Note: As a result of continual improvements, the design and
specifications of the product within may differ slightly to the unit illustrated on the packaging.
DISPOSAL
Do not dispose of packaging or the product through your household waste! The product and packaging are made from recyclable materials (plastics, metals, paper).
If the product is no longer suitable for use dispose of it in an environmentally friendly manner in accordance with your local council.
Warranty Conditions For Purchase In Australia
Any claim under this warranty must be made within 2 years of the date of purchase of the product.
To make a claim under the warranty in Australia, take the product (with proof of purchase) to Place of Purchase.
GSM Retail Group bears reasonable, direct, expenses of claiming under the warranty in Australia. You maybe requested to submit details and proof to outlet for consideration or contact Consumer Service Centre phone number below.
This warranty is provided in addition to other rights and remedies you may have under law: our goods
come with guarantees which cannot be excluded under the Australian Consumer Law (if purchased in
Australia). You are entitled to replacement or refund for a major failure and to compensation for other
reasonably foreseeable loss or damage. You are also entitled to have the goods repaired or replaced if
the goods fail to be of acceptable quality and the failure does not amount to a major failure.
The warranty excludes damage resulting from product misuse or product neglect. The warranty covers
domestic use only and does not apply to commercial applications.
This warranty is given by GSM Retail Group
ABN: 53007682475
For Warranty and technical queries 1300 941 901
Warranty Exclusions
Damage to the appliance or any part through accident, misuse or negligence.

Gerard Sourcing & Manufacturing
GSM Retail Group
Consumer Service Centre : 1300 941 901
GSM Retail Group has a policy of continual improvement throughout the product range. As such the unit contained within may differ slightly from the unit illustrated on the pack.
MADE IN CHINA for GSM Retail Group Mistral is a registered trademark of GSM Retail Group

Cat. No. MDB-30F09 July 2021