
V-4 - Blender ROLAND - Free user manual and instructions
Find the device manual for free V-4 ROLAND in PDF.


| Product Type | Video Mixer / Effects Processor |
| Brand | Roland (Edirol) |
| Model | V-4 |
| Video Inputs | 4 composite (BNC) + 2 S-Video (4-pin mini DIN); S-Video priority on channels 1/2 |
| Video Outputs | 3 composite (BNC) + 1 S-Video (4-pin mini DIN); 1 preview composite (BNC) |
| Frame Synchronizers | 2 independent frame synchronizers for unstable signals |
| Digital Effects | Cut, Dissolve, Wipe, Special Wipe/Slide, Picture in Picture, Chroma Key, Luminance Key, Mirror, Multi, Strobe, Negative, Colorize, Still, Posterize, etc. |
| Transition Effects | Over 200 patterns (including Mix, Wipe, Slide) selectable per memory |
| Control Interfaces | MIDI IN/OUT, V-LINK, BPM sync via Tap button |
| Video Fader | T-bar type; orientation can be changed (vertical/horizontal) |
| Memory | 8 memory dial positions (1 fixed factory preset, 2-8 user programmable) |
| Video Standards | NTSC or PAL (switchable) |
| Power Supply | AC adaptor (supplied); input voltage 100-240 V, 50/60 Hz |
| Power Consumption | Approximately 15 W (estimated) |
| Dimensions (approx.) | 365 x 248 x 107 mm (14.4 x 9.8 x 4.2 inches) |
| Weight (approx.) | 3.5 kg (7.7 lbs) |
| Maintenance | Clean with soft, dry cloth; mild detergent for stubborn dirt. Do not use benzine, thinners, or alcohol. |
| Safety Precautions | Use only supplied AC adaptor; avoid moisture, heat, and vibration; do not disassemble; unplug during lightning or long inactivity. |
| Included Accessories | AC adaptor, power cord, owner's manual, list of transition effects, screws for video fader |
| Optional Accessories | Not listed; standard video cables required (not included) |
| Repairability | Refer servicing to Roland/Edirol Service Center or authorized distributor; no user-serviceable parts inside |
Frequently Asked Questions - V-4 ROLAND
User questions about V-4 ROLAND
0 question about this device. Answer the ones you know or ask your own.
Ask a new question about this device
Download the instructions for your Blender in PDF format for free! Find your manual V-4 - ROLAND and take your electronic device back in hand. On this page are published all the documents necessary for the use of your device. V-4 by ROLAND.
USER MANUAL V-4 ROLAND
Before using this unit, carefully read the sections entitled: "USING THE UNIT SAFELY" and "IMPORTANT NOTES" (Owner's Manual p. 3-4; Owner's Manual p. 5-6). These sections provide important information concerning the proper operation of the unit. Additionally, in order to feel assured that you have gained a good grasp of every feature provided by your new unit, Owner's manual should be read in its entirety. The manual should be saved and kept on hand as a convenient reference.
For the U.K.
IMPORTANT: THE WIRES IN THIS MAINS LEAD ARE COLOURED IN ACCORDANCE WITH THE FOLLOWING CODE.
BLUE: NEUTRAL
BROWN: LIVE
As the colours of the wires in the mains lead of this apparatus may not correspond with the coloured markings identifying the terminals in your plug, proceed as follows:
The wire which is coloured BLUE must be connected to the terminal which is marked with the letter N or coloured BLACK.
The wire which is coloured BROWN must be connected to the terminal which is marked with the letter L or coloured RED.
Under no circumstances must either of the above wires be connected to the earth terminal of a three pin plug.

For EU Countries
This product complies with the requirements of European Directive 89/336/EEC.
For the USA
FEDERAL COMMUNICATIONS COMMISSION RADIO FREQUENCY INTERFERENCE STATEMENT
This equipment has been tested and found to comply with the limits for a Class B digital device, pursuant to Part 15 of the FCC Rules. These limits are designed to provide reasonable protection against harmful interference in a residential installation. This equipment generates, uses, and can radiate radio frequency energy and, if not installed and used in accordance with the instructions, may cause harmful interference to radio communications. However, there is no guarantee that interference will not occur in a particular installation. If this equipment does cause harmful interference to radio or television reception, which can be determined by turning the equipment off and on, the user is encouraged to try to correct the interference by one or more of the following measures:
– Reorient or relocate the receiving antenna.
– Increase the separation between the equipment and receiver.
- Connect the equipment into an outlet on a circuit different from that to which the receiver is connected.
- Consult the dealer or an experienced radio/TV technician for help.
This device complies with Part 15 of the FCC Rules. Operation is subject to the following two conditions:
(1) This device may not cause harmful interference, and
(2) This device must accept any interference received, including interference that may cause undesired operation.
Unauthorized changes or modification to this system can void the users authority to operate this equipment.
This equipment requires shielded interface cables in order to meet FCC class B Limit.
For Canada
NOTICE
This Class B digital apparatus meets all requirements of the Canadian Interference-Causing Equipment Regulations.
AVIS
USING THE UNIT SAFELY
INSTRUCTIONS FOR THE PREVENTION OF FIRE, ELECTRIC SHOCK, OR INJURY TO PERSONS
About ⚠️ WARNING and ⚠️ CAUTION Notices
 | Used for instructions intended to alert the user to the risk of death or severe injury should the unit be used improperly. |
 | Used for instructions intended to alert the user to the risk of injury or material damage should the unit be used improperly.* Material damage refers to damage or other adverse effects caused with respect to the home and all its furnishings, as well to domestic animals or pets. |
About the Symbols
| The △ symbol alerts the user to important instructions or warnings. The specific meaning of the symbol is determined by the design contained within the triangle. In the case of the symbol at left, it is used for general cautions, warnings, or alerts to danger. | |
| The ⊗ symbol alerts the user to items that must never be carried out (are forbidden). The specific thing that must not be done is indicated by the design contained within the circle. In the case of the symbol at left, it means that the unit must never be disassembled. | |
| The ● symbol alerts the user to things that must be carried out. The specific thing that must be done is indicated by the design contained within the circle. In the case of the symbol at left, it means that the power-cord plug must be unplugged from the outlet. |
ALWAYS OBSERVE THE FOLLOWING
WARNING
- Before using this unit, make sure to read the instructions below, and the Owner's Manual.

- Do not open or perform any internal modifications on the unit or its AC adaptor. (The only exception would be where this manual provides specific instructions.)

- Do not attempt to repair the unit, or replace parts within it (except when this manual provides specific instructions directing you to do so). Refer all servicing to your retailer, the nearest Roland/Edirol Service Center, or an authorized Roland/Edirol distributor, as listed on the "Information" page.

- Never use or store the unit in places that are:
- Subject to temperature extremes (e.g., direct sunlight in an enclosed vehicle, near a heating duct, on top of heat-generating equipment); or are
- Damp (e.g., baths, washrooms, on wet floors); or are
- Humid; or are
- Exposed to rain; or are
- Dusty; or are
- Subject to high levels of vibration.
- Make sure you always have the unit placed so it is level and sure to remain stable. Never place it on stands that could wobble, or on inclined surfaces.


- Be sure to use only the AC adaptor supplied with the unit. Also, make sure the line voltage at the installation matches the input voltage specified on the AC adaptor's body. Other AC adaptors may use a different polarity, or be designed for a different voltage, so their use could result in damage, malfunction, or electric shock.


- Use only the attached power-supply cord.

- Do not excessively twist or bend the power cord, nor place heavy objects on it. Doing so can damage the cord, producing severed elements and short circuits. Damaged cords are fire and shock hazards!

- Do not allow any objects (e.g., flammable material, coins, pins); or liquids of any kind (water, soft drinks, etc.) to penetrate the unit.

- Immediately turn the power off, remove the AC adaptor from the outlet, and request servicing by your retailer, the nearest Roland/Edirol Service Center, or an authorized Roland/Edirol distributor, as listed on the "Information" page when:


• The AC adaptor, the power-supply cord, or the plug has been damaged; or
• If smoke or unusual odor occurs
- Objects have fallen into, or liquid has been spilled onto the unit; or
- The unit has been exposed to rain (or otherwise has become wet); or
- The unit does not appear to operate normally or exhibits a marked change in performance.
• In households with small children, an adult should provide supervision until the child is capable of following all the rules essential for the safe operation of the unit.

- Protect the unit from strong impact. (Do not drop it!)

- Do not force the unit's power-supply cord to share an outlet with an unreasonable number of other devices. Be especially careful when using extension cords—the total power used by all devices you have connected to the extension cord's outlet must never exceed the power rating (watts/amperes) for the extension cord. Excessive loads can cause the insulation on the cord to heat up and eventually melt through.

- Before using the unit in a foreign country, consult with your retailer, the nearest Roland/Edirol Service Center, or an authorized Roland/Edirol distributor, as listed on the "Information" page.

• Always turn the unit off and unplug the AC adaptor before attempting installation of the Video Fader.

CAUTION
- The unit and the AC adaptor should be located so their location or position does not interfere with their proper ventilation.

• Always grasp only the plug on the AC adaptor cord when plugging into, or unplugging from, an outlet or this unit.

- Any accumulation of dust between the AC adaptor and the power outlet can result in poor insulation and lead to fire. Periodically wipe away such dust with a dry cloth. Also, disconnect the power plug from the power outlet whenever the unit is to remain unused for an extended period of time.

- Try to prevent cords and cables from becoming entangled. Also, all cords and cables should be placed so they are out of the reach of children.

- Never climb on top of, nor place heavy objects on the unit.

- Never handle the AC adaptor or its plugs with wet hands when plugging into, or unplugging from, an outlet or this unit.

- Before moving the unit, disconnect the AC adaptor and all cords coming from external devices.

- Before cleaning the unit, turn off the power and unplug the AC adaptor from the outlet.

- Whenever you suspect the possibility of lightning in your area, disconnect the AC adaptor from the outlet.

- For installation of the Video fader, remove only the specified screws.

- Should you remove screws, make sure to put them in a safe place out of children's reach, so there is no chance of them being swallowed accidentally.

In addition to the items listed under "USING THE UNIT SAFELY" on page 3-4, please read and observe the following:
Power Supply
- Do not use this unit on the same power circuit with any device that will generate line noise (such as an electric motor or variable lighting system).
- The AC adaptor will begin to generate heat after long hours of consecutive use. This is normal, and is not a cause for concern.
- Before connecting this unit to other devices, turn off the power to all units. This will help prevent malfunctions and/or damage to other devices.
Placement
- Using the unit near power amplifiers (or other equipment containing large power transformers) may induce noise or unstable image on video output. To alleviate the problem, change the orientation of this unit; or move it farther away from the source of interference.
- This device may interfere with radio and television reception. Do not use this device in the vicinity of such receivers.
- Noise may be produced if wireless communications devices, such as cell phones, are operated in the vicinity of this unit. Such noise could occur when receiving or initiating a call, or while conversing. Should you experience such problems, you should relocate such wireless devices so they are at a greater distance from this unit, or switch them off.
- When moved from one location to another where the temperature and/or humidity is very different, water droplets (condensation) may form inside the unit. Damage or malfunction may result if you attempt to use the unit in this condition. Therefore, before using the unit, you must allow it to stand for several hours, until the condensation has completely evaporated.
Maintenance
- For everyday cleaning wipe the unit with a soft, dry cloth or one that has been slightly dampened with water. To remove stubborn dirt, use a cloth impregnated with a mild, non-abrasive detergent. Afterwards, be sure to wipe the unit thoroughly with a soft, dry cloth.
- Never use benzine, thinners, alcohol or solvents of any kind, to avoid the possibility of discoloration and/or deformation.
Additional Precautions
- Please be aware that the contents of memory can be irretrievably lost as a result of a malfunction, or the improper operation of the unit. To protect yourself against the risk of losing important data, we recommend to take memo of your important data (settings etc.) you have stored in the unit's memory dial.
- Unfortunately, it may be impossible to restore the contents of data that was stored in memory dial once it has been lost. Roland Corporation/Edirol Corporation assumes no liability concerning such loss of data.
- Use a reasonable amount of care when using the unit's buttons, sliders, or other controls; and when using its jacks and connectors. Rough handling can lead to malfunctions.
- When connecting / disconnecting all cables, grasp the connector itself—never pull on the cable. This way you will avoid causing shorts, or damage to the cable's internal elements.
- To avoid disturbing your neighbors, try to keep the audio volume at reasonable levels (especially when it is late at night) if you enjoy listening to music.
- When you need to transport the unit, package it in the box (including padding) that it came in, if possible. Otherwise, you will need to use equivalent packaging materials.
Copyright
- Unauthorized recording, distribution, sale, lending, public performance, broadcasting, or the like, in whole or in part, of a work (musical composition, video, broadcast, public performance, or the like) whose copyright is held by a third party is prohibited by law.
- Do not use this unit for purposes that could infringe on a copyright held by a third party. We assume no responsibility whatsoever with regard to any infringements of third-party copyrights arising through your use of this unit.
Installation of Video Fader
- Do not touch any of the printed circuit pathways or connection terminals.
(French)
- When circuit board installation is complete, double-check your work.
(French)
* In some cases, depending on the environment in which the unit is installed, the surface of the panel may sometimes feel rough and grainy. This is due to an infinitesimal electrical charge, which is absolutely harmless. However, if you are concerned about this, connect the ground terminal (see figure on p.16) with an external ground. When the unit is grounded, a slight noise may appear, depending on the particulars of your installation. If you are unsure of the connection method, contact the nearest Roland Service Center, or an authorized Roland distributor, as listed on the "Information" page.
Unsuitable places for connection
- Water pipes (may result in shock or electrocution)
- Gas pipes (may result in fire or explosion)
- Telephone-line ground or lightning rod (may be dangerous in the event of lightning)
About turning the power on
- Once the connections have been completed (p. 19), turn on power to your various devices in the order specified. By turning on devices in the wrong order, you risk causing malfunction and/or damage to other devices.
- This unit is equipped with a protection circuit. A brief interval (a few seconds) after power up is required before the unit will operate normally.
About specifications
* In the interest of product improvement, the specifications and/or appearance of this unit are subject to change without prior notice.
Other important notes
- The explanations in this manual include illustrations that depict what should typically be shown by the display. Note, however, that your unit may incorporate a newer, enhanced version of the system (e.g., includes newer software), so what you actually see in the display may not always match what appears in the manual.
• Security Slot (

http://www.kensington.com/
- This product is compatible with regular NTSC or PAL video signal. In case irregular signal is input, it may obstruct stable operation of this product.
- It is possible on this product to create video sequence with extremely quick switching or ON/OFF of effects. Depending on your physical conditions, such video sequence may cause medical problem like headache etc. It is prohibited to create video sequence that may cause such problem. Roland or Edirol is not responsible to any medical problem of yourselves or audiences/spectators caused by such video sequence.
Contents
USING THE UNIT SAFELY....3
IMPORTANT NOTES ....5
Contents 7
Welcome 9
Features of the V-4....10
Four-channels of video inputs....10
Two independent frame synchronizers....10
High-quality digital effects....10
Simple operation....10
Preview function 10
Switching and effects synchronized to music....10
Control from external MIDI devices 10
What is V-LINK?......11
Before you begin....12
Check the included items....12
Names of things and what they do....13
About Ground Terminal 16
Connecting peripheral devices....17
Typical connection example 17
Video signal flow 18
Turning the power on/off....19
Turning the power on....19
Turning the power off 19
Checking the inputs and outputs....20
Checking the final output 20
Checking the output to the preview monitor 20
About the display on preview monitor 21
About the Memory dial (MEMORY)....22
Switching two images ....23
Switching by Cut....23
Switching with dissolve 24
Switching with Wipe 24
Using fade-to-white or fade-to-black 25
Compositing two images ....26
Using Picture In Picture to composite images 26
Using Chroma Key to composite images 27
Using Luminance Key to composite images....28
Changing the color of the image....31
Applying the Negative effect 31
Applying the Colorize effect....32
Changing the motion of the image....34
Applying strobe motion....34
Applying the Multi or Mirror effects ....35
Contents
Applying the Multi effect....35
Applying the Mirror effect....36
Switching in synchronization with music....37
Using BPM sync to switch images....37
Using the tap (TAP) function to switch images.... 37
Applying an effect on the music....39
Using BPM sync to apply an effect....39
Using the tap (TAP) function to apply an effect....39
Editing the front panel assignments....40
Changing the assignment of the mix button (MIX) 42
Changing the assignment of the wipe button (WIPE) 43
Changing the assignment of the EFX button (EFX) 44
Changing the assignment of the output fade dial (OUTPUT FADE)....46
Changing the assignments of the channel A and B effect buttons (EFFECTS) 48
Changing the assignment of the BPM sync button (BPM SYNC)....50
Changing the assignment of the channel A/channel B transformer buttons (TRANSFORMER)....51
Protecting the memory....53
Copying or exchanging memories....54
Recalling the factory settings....55
Control the V-4 from an external device....57
Using V-LINK to control the V-4 57
Using MIDI to control the V-4....58
Making various settings....64
Calibrating the video fader....66
Using the V-4 in Presentation mode ....68
What is Presentation mode? 68
Switching to Presentation mode 69
Presentations using two screens with Picture In Picture 69
Switching between NTSC and PAL 71
Changing the video fader orientation ....72
Troubleshooting....74
Menu List 75
Main specifications....83
Examples of using the V-4 85
Using the V-4 at an event 85
Using the V-4 at a concert or VJ performance....86
Using the V-4 at a presentation....87
Using BGV output with a musical performance (example of using V-LINK) 88
MIDI implementation....89
Index....98
Welcome
Thank you, and congratulations on your choice of the Edirol V-4. The V-4 is a video mixer/effects processor that delivers image quality rivaling professional equipment, and provides four channels of video input.
With a rich array of inputs and easy operation, the V-4 allows performances and presentations that include images to be made more expressive than ever before.
The V-4 can also be controlled from external MIDI devices. Images projected on the stage can be controlled while you play an instrument, adding impressive impact to a stage performance.
We hope you will enjoy the V-4's versatile video functionality in a wide range of applications.
Features of the V-4
Four-channels of video inputs
The V-4 provides two S-video inputs and four video (composite) inputs. Of the four channels 1 through 4, S-video can be used for inputs 1 and 2. If both S-video and video (composite) are input to channels 1/2, the S-video input will take priority and will be automatically selected.
Two independent frame synchronizers
Even when using unstable video input signals such as VHS and Hi-8, the frame synchronizers within the V-4 will correct the synchronization signal. This means you can use a wide range of image sources without worrying about noise produced by degradation of the synchronization signals.
High-quality digital effects
Effects are processed digitally. Diverse and high-quality effects such as Picture In Picture, Mirror, and Multi can be independently applied to both channels A and B.
Simple operation
Switching and mixing video sources is extremely easy. The T-bar type video fader can be installed in either the horizontal or vertical orientation, whichever you prefer.
Preview function
Before switching sources, you can use a preview TV screen to view the images being input on each channel without affecting the output image.
Switching and effects synchronized to music
The V-4 lets you tap BPM (Beats Per Minute) to switch images or control effects. This is particularly useful when music and video need to be synchronized, such as in a video jockey performance.
Control from external MIDI devices
The V-4 provides MIDI connectors. An external MIDI device can control effects and switching images. Setup is particularly easy if a Roland or Edirol product that supports V-LINK is connected—simply press the V-LINK button on the control device.
What is V-LINK?
V-LINK (V-Lanchot that links music and video performance, making it easy to create a variety of visual effects linked to the expressive elements of a performance.
By using V-LINK, musical instruments and music production equipment manufactured by Roland or Edirol can control video images without experiencing any loss in the quality of their inherent function (i.e., producing sound).
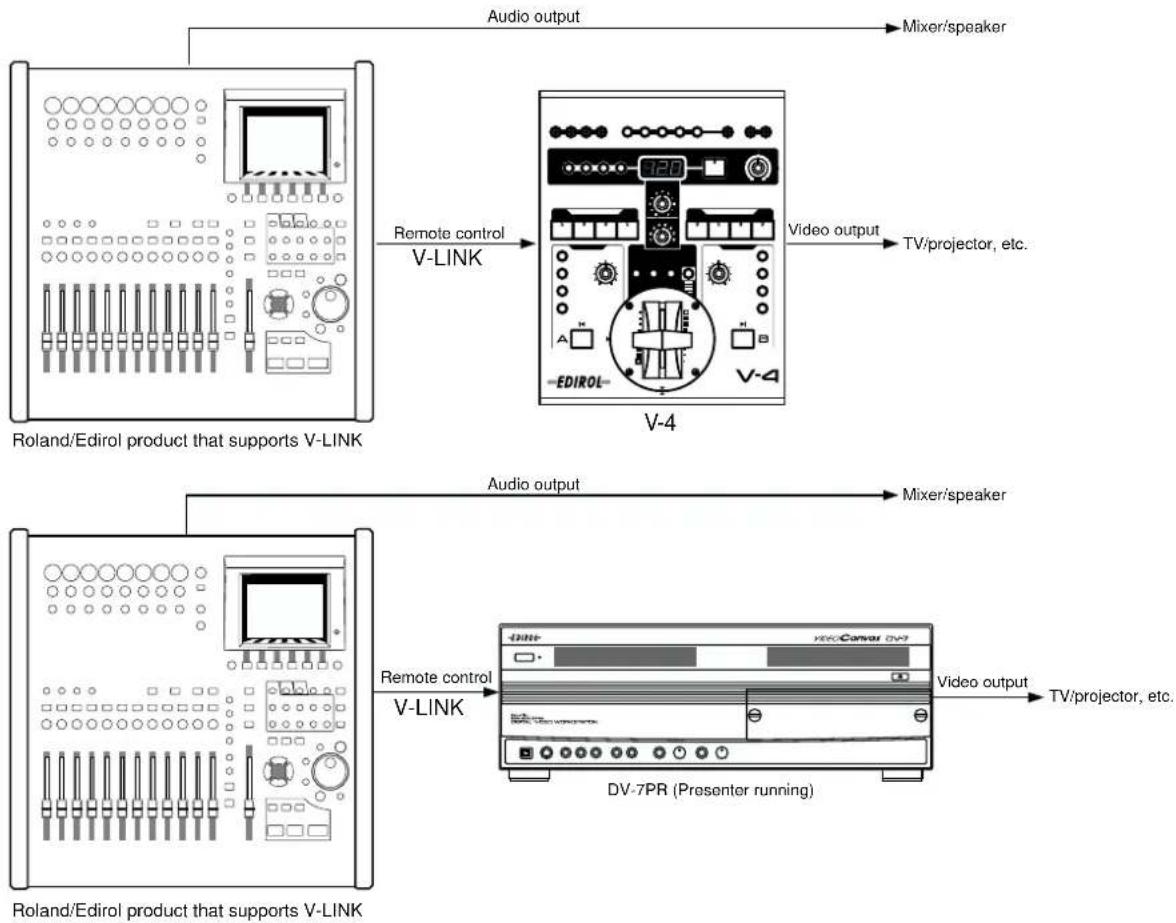
flowchart
graph TD
    A["Roland/Edirol product that supports V-LINK"] -->|Audio output| B["Mixer/speaker"]
    A -->|Remote control V-LINK| C["V-4"]
    C -->|Video output| D["TV/projector, etc."]
    E["Roland/Edirol product that supports V-LINK"] -->|Audio output| F["Mixer/speaker"]
    E -->|Remote control V-LINK| G["DV-7PR (Presenter running)"]
    G -->|Video output| H["TV/projector, etc."]
Before you begin
Check the included items
The V-4 is shipped with the following items. Please make sure that nothing is missing.
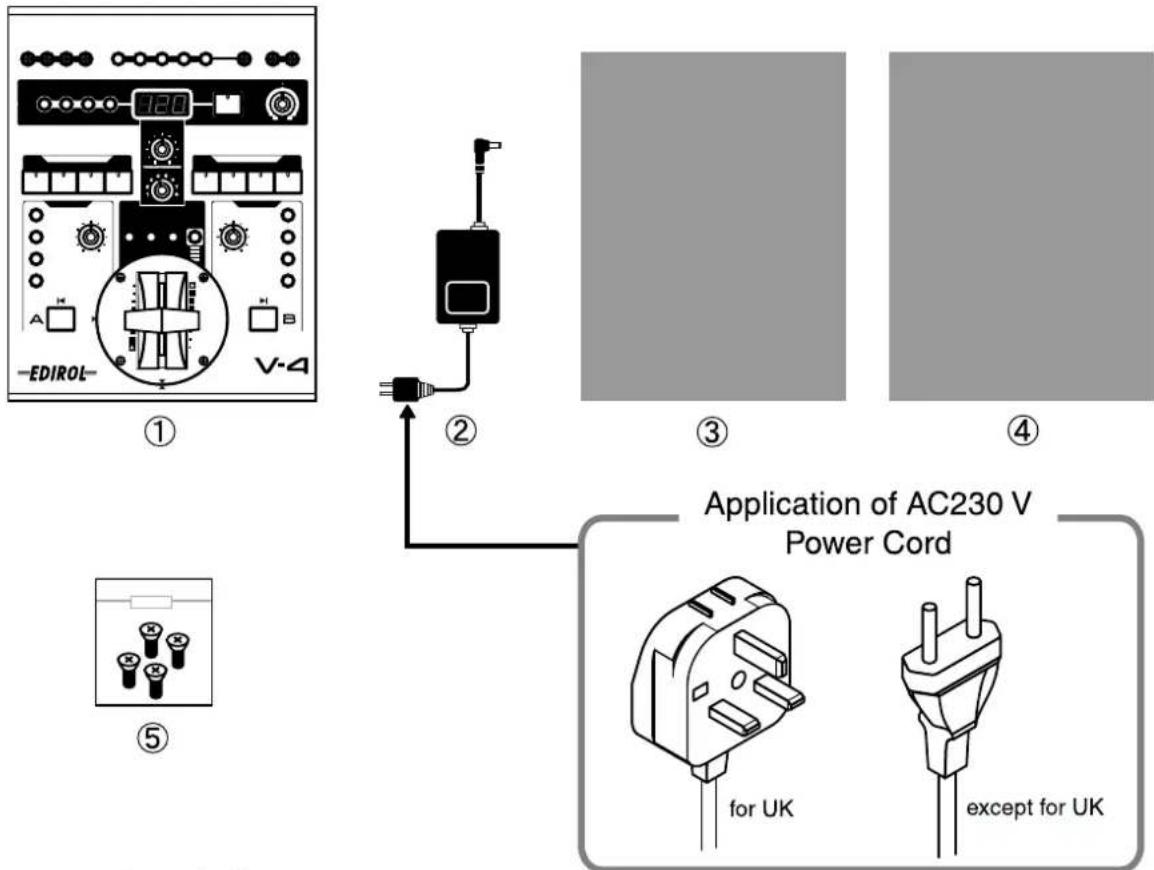
Power Cord
For 230 V, this box contains continental and British power cables. Please select the correct type for your country.
Netzkabel
- The V-4 itself
- AC adaptor and power cable
- Owner's manual
- List of Transition Effects patterns
- Four screws to affix Video Fader (spare)
Names of things and what they do
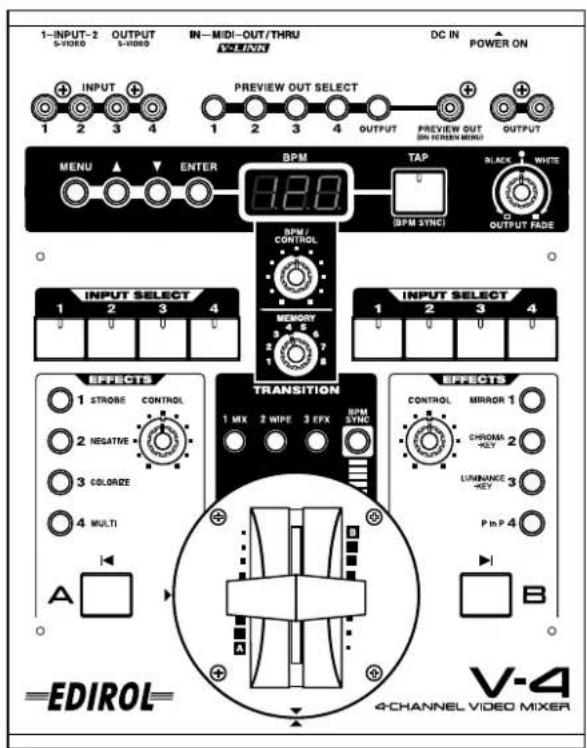
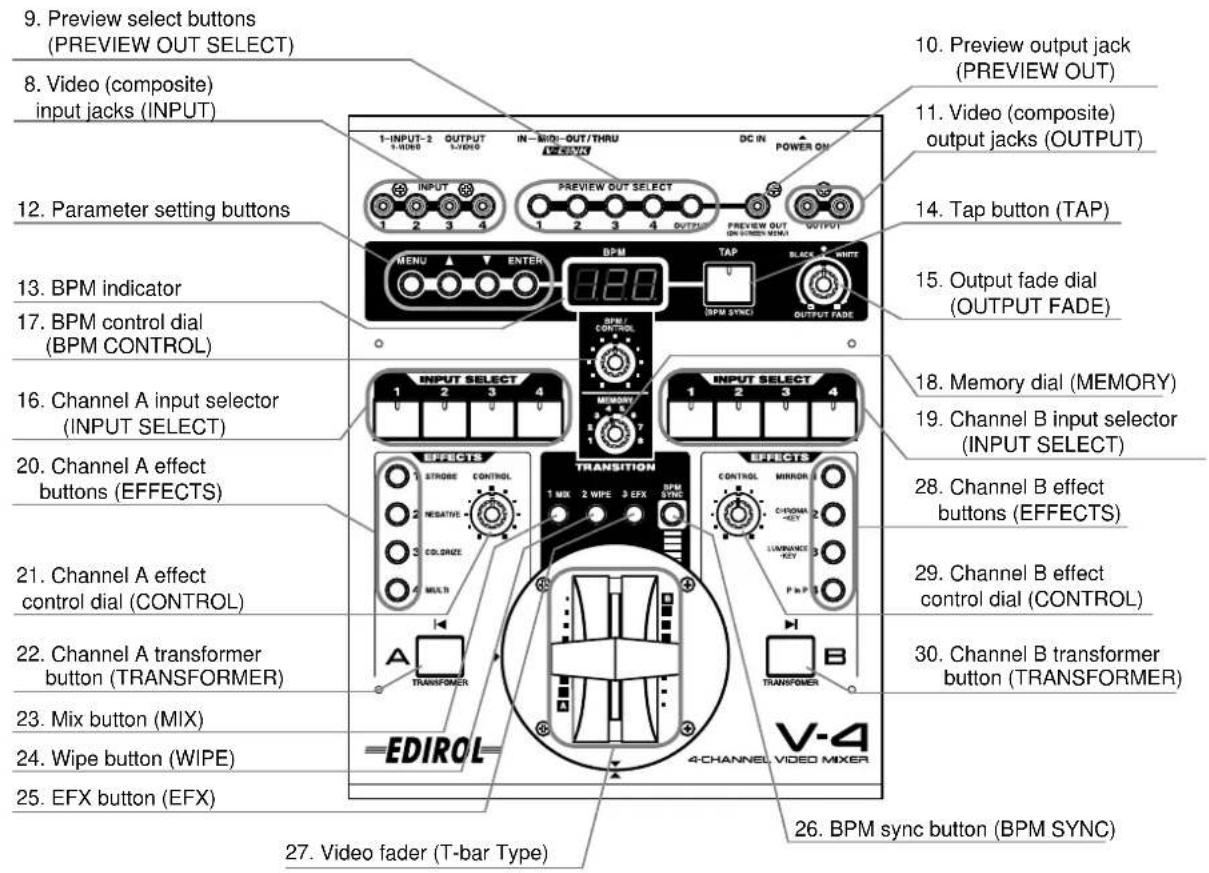
Front Panel
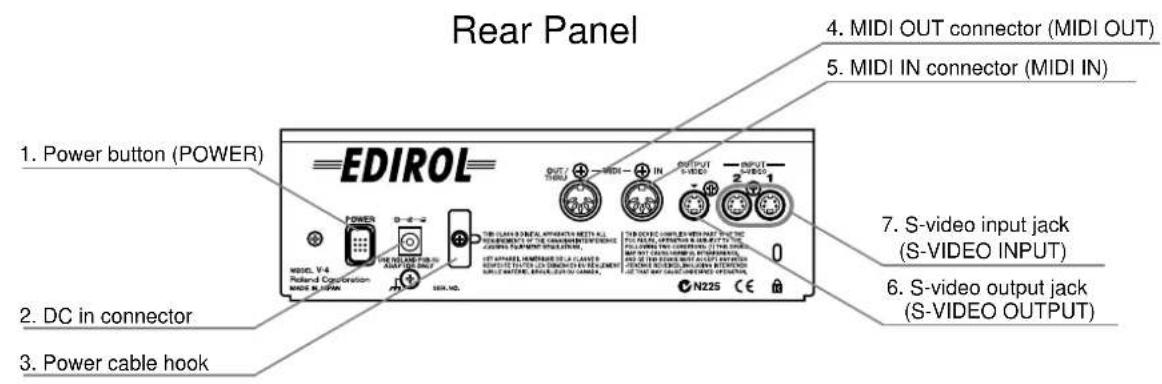
Rear Panel
- Power button (POWER)
This button turns on the power of the V-4 (p. 19)
Before you begin
2. DC in connector
Connect the power cable (DC) from the AC adaptor to this connector.
3. Power cable hook
Use this hook to retain the power cable so that it will not be accidentally unplugged.
4. MIDI OUT connector (MIDI OUT)
MIDI messages input from an external device are output without change ("thru-ed") from this connector. When using V-LINK to control both the V-4 and a DV-7PR, connect this output to the input of the DV-7PR.
5. MIDI IN connector (MIDI IN)
Use this connector to input control signals sent from an external device to the V-4.
6. S-video output jack (S-VIDEO OUTPUT)
This jack outputs a S-video signal.
7. S-video input jacks (S-VIDEO INPUT)
These jacks input S-video signals.
Front Panel
8. Video (composite) input jacks (INPUT)
These jacks input video (composite) signals. If both video (composite) and S-video signals are input simultaneously to the same channel (channel 1 or 2 only), the S-video signal will take priority, and the video (composite) signal will be ignored.
9. Preview select buttons (PREVIEW OUT SELECT) (see p. 20)
These buttons select the image that will be output to the preview monitor. You can select one of the input signals of channels 1 through 4, or the mixed output signal.
10. Preview output jack (PREVIEW OUT)
This jack outputs the preview monitor signal. Simultaneously, MIDI and effect parameters are also output to the preview monitor.
11. Video (composite) output jacks (OUTPUT)
These jacks output video (composite) signals. In conjunction with the S-video output jack, these jacks let you simultaneously output to three TV monitors or projectors.
12. Parameter setting buttons
These buttons are used to set various parameters for each button. The parameters are displayed on the TV monitor connected to the preview output jack.
13. BPM indicator (see p. 39)
This displays the current BPM (Beats Per Minute) setting. You can turn the dial below to change the displayed setting.
14. Tap button (TAP) (see p. 39)
This button is used to control BPM. The speed at which this button is tapped affects the BPM setting.
- Output fade dial (OUTPUT FADE) (see p. 25)
This dial is used to apply fade-to-white or fade-to-black to the final output. Turn the dial toward WHITE to fade the final output to white. Turn the dial toward BLACK to fade the final output to black.
- Channel A input selector (INPUT SELECT) (see p. 23)
This button selects the image that will be input to channel A of the video mixer.
- BPM control dial (BPM CONTROL)
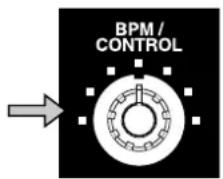
This dial adjusts the BPM value. On the V-4, you can switch images or effects in synchronization with the BPM.
- Memory dial (MEMORY) (see p. 22)
The V-4 can store eight different states of the panel (e.g., effect assignments). By turning this dial you can select one of these eight panel states. You can store various effect patterns such as wipes, and then turn this dial to select the desired pattern. However, number 1 is fixed (non-writeable) as a factory setting. You can make user settings for numbers 2 through 8.
- Channel B input selector (INPUT SELECT) (see p. 23)
Selects the image that will be input to channel B of the video mixer.
- Channel A effect buttons (EFFECTS)
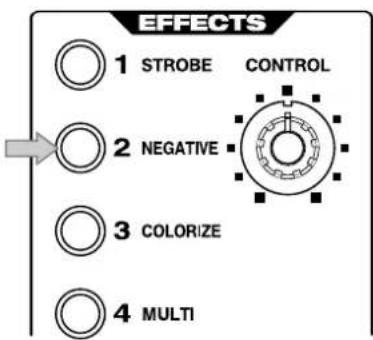
These buttons apply effects to the image of video mixer channel A. With the factory settings, the buttons are assigned (from top to bottom) the Strobe, Negative, Colorize, and Multi effects. You may edit the settings to assign different effects if desired.
- Channel A effect control dial (CONTROL)
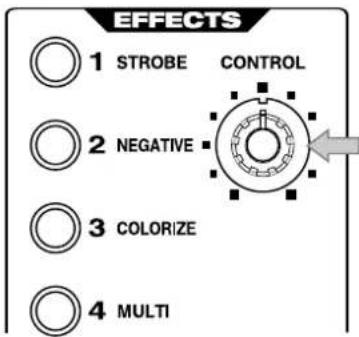
This dial lets you smoothly control a parameter of an effect that is being applied to the image of channel A. The dial will adjust an effect parameter of the effect button that is blinking.
- Channel A transformer button (TRANSFORMER) (see p. 23)
This button lets you switch between channel A and B without using the video fader. With the factory settings, the switch to the channel A image will be instant. You can also change the settings to make the change occur gradually if desired.
- Mix button (MIX) (see p. 24)
This button switches the function of the video fader to Mix. When you operate the video fader, you will fade smoothly from the image selected for channel A to the image selected for channel B, dissolving the two images. Press this button if you want to switch between channels A and B with dissolve.
- Wipe button (WIPE) (see p. 24)
This button switches the function of the video fader to Wipe. Press this button if you want to switch between channels A and B by wiping between them. If desired, you can change the settings to assign an effect other than Wipe to this button.
- EFX button (EFX)
This button switches the function of the video fader to Special Wipe or Slide. Press this button if you want to switch between channels A and B with Special Wipe or Slide. If desired, you can change the settings to assign an effect other than Special Wipe or Slide to this button.
- BPM sync button (BPM SYNC) (see p. 39)
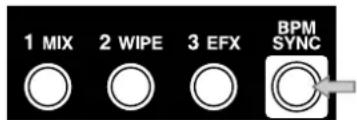
Press this button if you want to switch images or turn effects on/off in synchronization with the BPM.
- Video fader (T-bar type)
This is a T-bar type video fader. You can use it to switch between channels A and B, or to adjust the keying level, etc. According to your preference, you can change the orientation 90 degrees from up and down to left to right. For details on how to change the orientation, refer to p. xxx.
- Channel B effect buttons (EFFECTS)
These buttons apply effects to the image of video mixer channel B. With the factory settings, the buttons are assigned (from top to bottom) the Mirror, Chroma Key, Luminance Key, and P in P (Picture In Picture) effects. You may edit the settings to assign different effects to these buttons if desired.
- Channel B effect control dial (CONTROL)
This dial lets you smoothly control a parameter of an effect that is being applied to the image of channel B. The dial will adjust an effect parameter of the effect button that is blinking.
- Channel B transformer button (TRANSFORMER) (see p. 23)
This button lets you switch between channels A and B without using the video fader.
About Ground Terminal
In some cases, depending on the environment in which the unit is installed, the surface of the panel may sometimes feel rough and grainy. This is due to an infinitesimal electrical charge, which is absolutely harmless. However, if you are concerned about this, connect ground terminal (see figure) with an external ground. When the unit is grounded, a slight noise may result, depending on the particulars of your installation. If you are unsure of the connection method, contact nearest Edirol Service Center, or authorized Edirol/Roland distributor, as listed on the "Information" page.
![EDIROL OUT / THRU MIDI IN OUTPUT S-VIDEO INPUT 2 1 2 1 POWER USE ROLLAND PAB/1U ADAPTER ONLY SER. NO. THIS CLASS B DIGITAL APPARATUS MEETS ALL REQUIREMENTS OF THE CANADIAN INTERFERENCE -CAUSING EQUIPMENT REGULATIONS. CET APPAROL NUMERATURE DE LA CLASSE B RESPECTE TO YUES LES EXAMENCES DU RESILUENT OUR LE WATTLENE, SHIVILLIER DU CANADA. THIS DEVICE COMPLIES WITH PART IS OF THE PEQ RULES, OPERATION IS SUBJECT TO THE POLLURING TWO CONDITIONS: (1) THIS DEVICE WAY NOT CAUSE HAWNTLE INTERFERENCE, ANY NOT CAUSE HAWNTLE INTERFERENCE, AND [2] THIS DEVICE MUST ACCEPT ANY AFTER PERFORMANCE PROCESSED, INCLUDING INTERFERENCE, CET THAT WAY CANAL UNNEERED OPERATION. N225 CE R Ground Terminal](/content/2026/05/1063089/images/cd05e383cf8f2dbce5c98ea1a2329ba9d40d759f2829cdcf8359dc2f0d15f28b.jpg)
Unsuitable places for connection
• Water pipes (may result in shock or electrocution)
• Gas pipes (may result in fire or explosion)
- Telephone-line ground or lightning rod (may be dangerous in the event of lightning)
Connecting peripheral devices
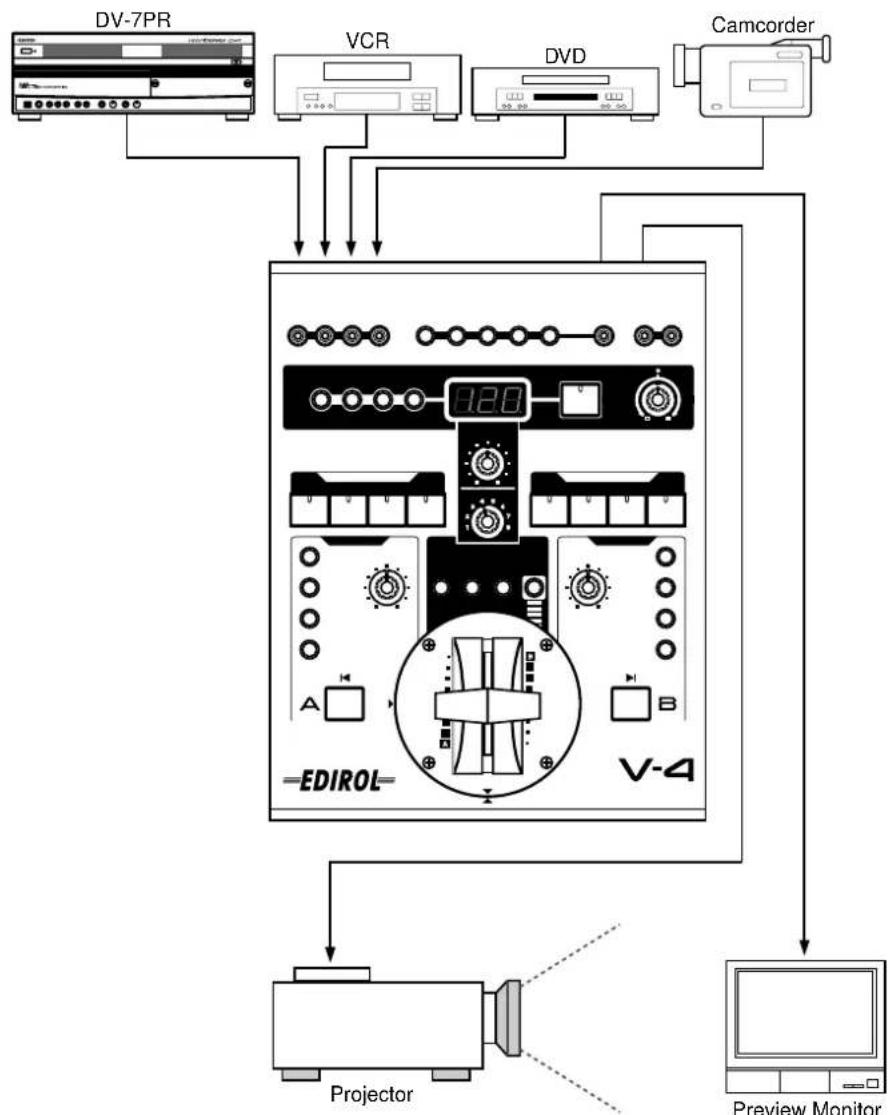
This section explains how to connect your peripheral devices to the V-4. You can connect up to four video playback devices (sources). Here's how to connect sources such as a video camcorder, VCR, DVD player, or DV-7PR, and play them back to create an impressive video performance. To prevent malfunction and/or damage to other devices, always turn down the volume, and turn off the power on all devices before making any connections.
Typical connection example
flowchart
graph TD
    A["DV-7PR"] --> B["EDIROL"]
    C["VCR"] --> B
    D["DVD"] --> B
    E["Camcorder"] --> B
    B --> F["Projector"]
    B --> G["Preview Monitor"]
    style A fill:#f9f,stroke:#333
    style C fill:#f9f,stroke:#333
    style D fill:#f9f,stroke:#333
    style E fill:#f9f,stroke:#333
    style B fill:#ccf,stroke:#333
    style F fill:#cff,stroke:#333
    style G fill:#cff,stroke:#333
* The V4 does not have audio inputs so will not mix audio. Audio outputs can be connected directly to speakers or via an audio mixer if mixing of audio from multiple devices is necessary.
* No video cables come with this product. Please use appropriate video cables for connection with source devices or TV monitor/Projector.
* It is recommended to use composite cable rather than S-video cable where you need to connect devices long distances (unless using S-video amplifiers). If devices are installed closer to the V-4, it is recommended to use S-video cables so that you can obtain better image quality.
* If both video (composite) and S-video signals are input simultaneously to the same channel (channel 1 or 2 only), the S-video signal will take priority.
Connecting peripheral devices
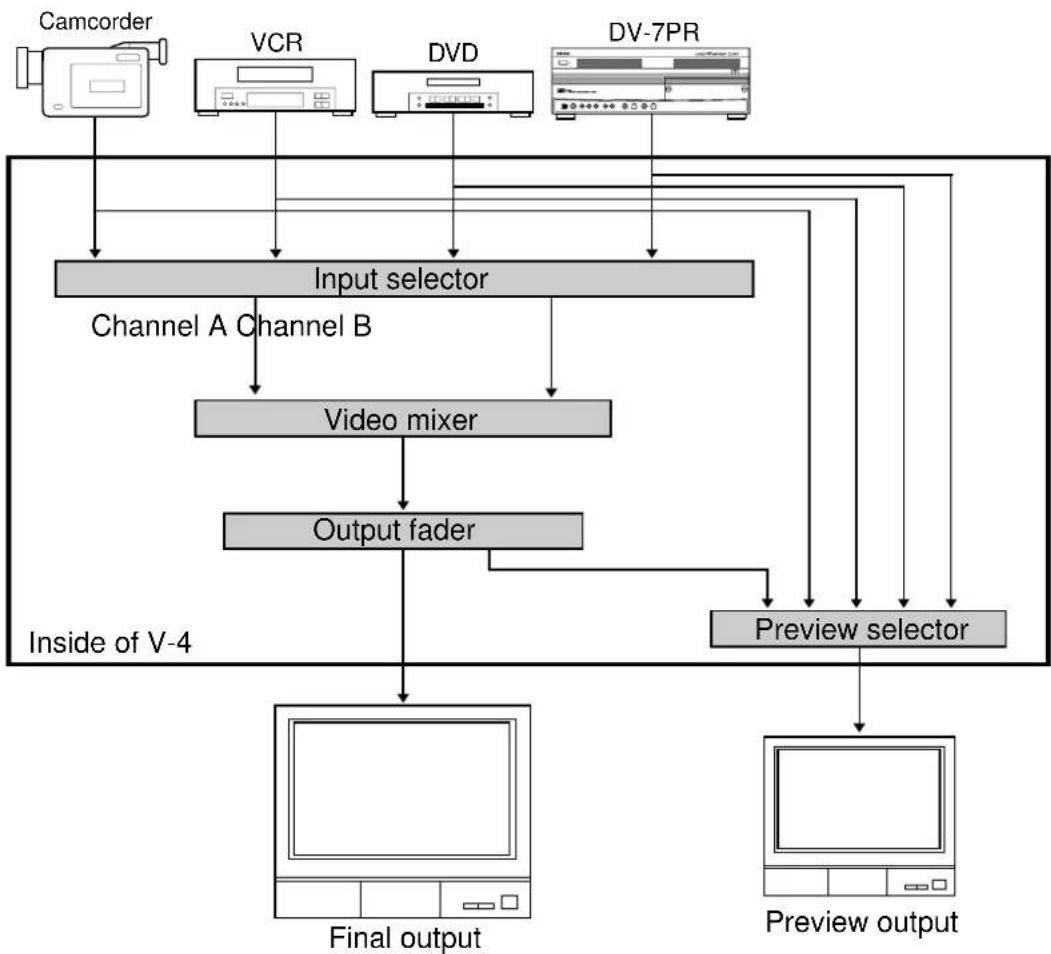
Video signal flow
The video signals received from the four input jacks are assigned to channels A or B of the video mixer. (These assignments are made manually.) The signal of A and B channels are processed by the video mixer section, and sent via the output fader to the output jack.
flowchart
graph TD
    A["Camcorder"] --> B["Input selector"]
    C["VCR"] --> B
    D["DVD"] --> B
    E["DV-7PR"] --> B
    B --> F["Channel A Channel B"]
    F --> G["Video mixer"]
    G --> H["Output fader"]
    H --> I["Preview selector"]
    I --> J["Preview output"]
    K["Inside of V-4"] --> L["Final output"]
    L --> M["Video mixer"]
    M --> N["Output fader"]
    N --> O["Preview selector"]
* Various setting menus like effect parameters are displayed on preview monitor.
* If both video (composite) and S-video signals are input simultaneously to the same channel (channel 1 or 2 only), the S-video signal will take priority.
* When switching on Preview Selector is done, image on preview monitor may flicker briefly. This does not affect image from output jacks.
Turning the power on/off
Turning the power on
- Check the power cable
Make sure that the cable from the AC adaptor is firmly plugged into the V-4.
- Press the POWER button.
Press the POWER button located on the rear panel of the V-4. It will take approximately five seconds for the V-4 to initialize itself and begin operating.
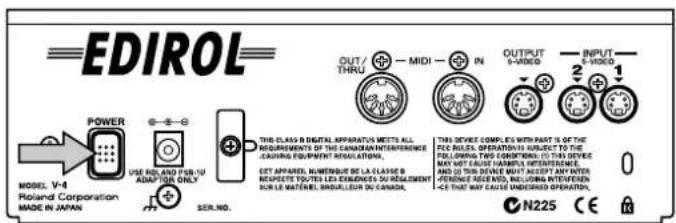
* To prevent the inadvertent disruption of power to your unit (should the plug be pulled out accidentally), and to avoid applying undue stress to the AC adaptor jack, anchor the power cord using the cord hook, as shown in the illustration.
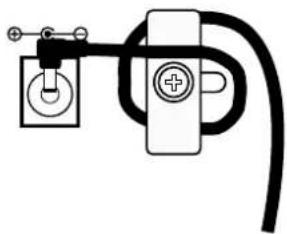
natural_image
Pure electrical circuit lines without any symbolsTurning the power off
- Press the POWER button.
Press the POWER button located on the rear panel of the V-4. All of the front panel LEDs will go dark.
Checking the inputs and outputs
Checking the final output
Here's how to check that the signal from each source device is correctly being input to the V-4, and is correctly being output to the TV or projector as final output.
- Play back the source device.
Operate the source device (e.g., camcorder, VCR, DVD player, DV-7PR) connected to the V-4 so that it will output video.
- Check the output monitor.
Power-on the TV monitor or projector that is connected to the output jack of the V-4, and verify that the image being output from the V-4 is displayed correctly.
- Switching the input channel
Now, try switching the V-4's input channel. Move the T-bar all the way toward the channel A or channel B position. If you moved the T-bar toward channel A, press the left input selector (INPUT SELECT). If you moved the T-bar toward channel B, press the right input selector. Successively press buttons 1 through 4 to switch inputs. Confirm that the image shown on your TV monitor or projector changes accordingly.
In the case you do not see output on TV/Projector
- Check that outputs from source devices are correctly connected to inputs of V-4.
- Check that output from V-4 is correctly connected to input of TV or Projector.
- Check that input selection of TV or Projector is set correctly.
When the channel selected has no signal input, a blue image is output to the TV/Projector. You can turn On/Off the blue image output by changing the parameter on P.75 or later.
Checking the output to the preview monitor
Next, you should check whether the image is being correctly output to the preview TV monitor.
- Play back your source device
Operate the source device (e.g., camcorder, VCR, DVD player, DV-7PR) connected to the V-4 so it outputs video.
- Check the preview output
Turn on the power of the TV monitor that is connected to the preview output jack of the V-4, and verify that the image output from the V-4 is displayed correctly.
3. Switch the output channel
Try switching the channel that is being output to the V-4's preview monitor. Press the preview select buttons (1 through 4 and OUTPUT) one after another, and verify that the image being output to your TV monitor changes accordingly.
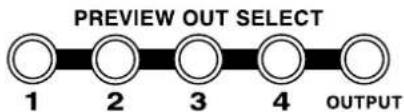
flowchart
graph LR
    A[" "] --> B["2"]
    B --> C["3"]
    C --> D["4"]
    D --> E["OUTPUT"]
About the display on preview monitor
Information about settings of V-4 is displayed to the Preview Monitor as below.
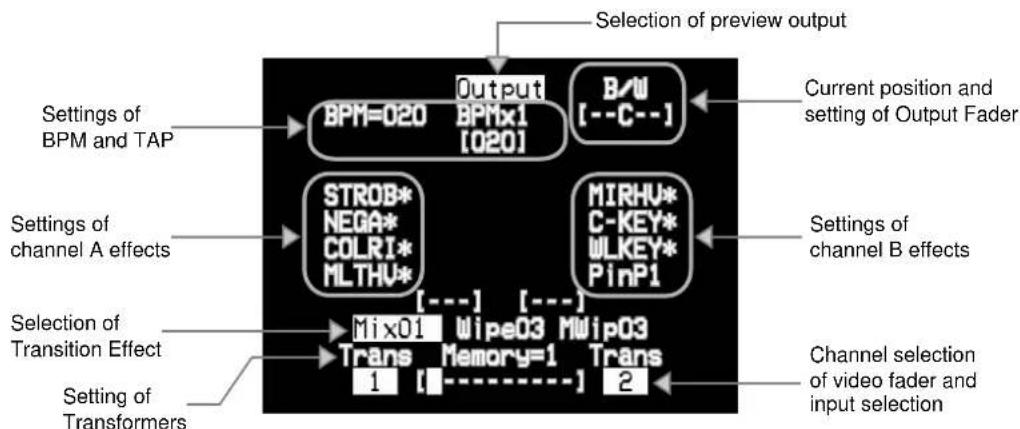
flowchart
graph TD
    A["Settings of BPM and TAP"] --> B["BPM=020"]
    B --> C["Output BPMx1 [020"]]
    C --> D["B/W [--C--"]]
    D --> E["Current position and setting of Output Fader"]
    F["Settings of channel A effects"] --> G["STROB* NEGA* COLRI* MLTHV*"]
    G --> H["[---"]] [---]]
    H --> I["MIRHU* C-KEY* WLKEY* PinP1"]
    I --> J["Settings of channel B effects"]
    K["Selection of Transition Effect"] --> L["Mix01 Wipe03 MWip03"]
    L --> M["Trans Memory=1 Trans 1 2"]
    M --> N["Channel selection of video fader and input selection"]
    O["Setting of Transformers"] --> P["Setting of Channel Effects"]
- If name of the effect is highlighted, this is the effect selected
- If * mark is displayed after effect name, the effect parameter can be changed with the control dial.
- If ball mark is displayed aside highlighted effect names, it means the effect parameter can be changed with the control dial.
You can add or reduce the information displayed on the preview monitor by changing the settings of the V-4 as described on P. 75 or later.
![Menu-Transition1[Mem1] 1.Mix 001:Mtx01 002:Wipe01 003:Wipe02 004:Wipe03 005:Wipe04 006:Wipe05 007:Wipe06 008:Wipe07 009:Wipe08 ↓ ** Preset **](/content/2026/05/1063089/images/47cdaa0e3cf51cb79bc6a050396d462ad28ecdc89e83a6d89426add305ead128.jpg)
![Menu-Transition1 [Mem2] 1.Mix 001:Mtx01 002:Wipe01 003:Wipe02 004:Wipe03 005:Wipe04 006:Wipe05 007:Wipe06 008:Wipe07 009:Wipe08 *Protect On*](/content/2026/05/1063089/images/20ef72f541943d26fe27c5c946580e646196bfbd4aaaa02695c55493cec74966.jpg)
- [**Preset**] is displayed when position 1 of Memory Dial is selected. The 1st setting is fixed to the factory preset and cannot be changed.
- [*Protect On*] is displayed when Memory Protection is enabled. If this message appears, settings cannot be changed.
About the Memory dial (MEMORY)
The V-4 has a memory dial that lets you store up to eight states of the panel settings. Setting 1 is fixed at the factory settings, but you can store user settings in 2 through 8. When the memory dial is at 1, the effect names printed on the panel will match the actual functions. (The names of various effects (e.g., Mix, Wipe, Multi, P in P) are printed on the panel of the V-4.) Set the memory dial to 1 so that you can start by becoming familiar with the factory settings.
For details on how to change these settings, refer to p. xxx.
Conceptual diagram of the Memory dial
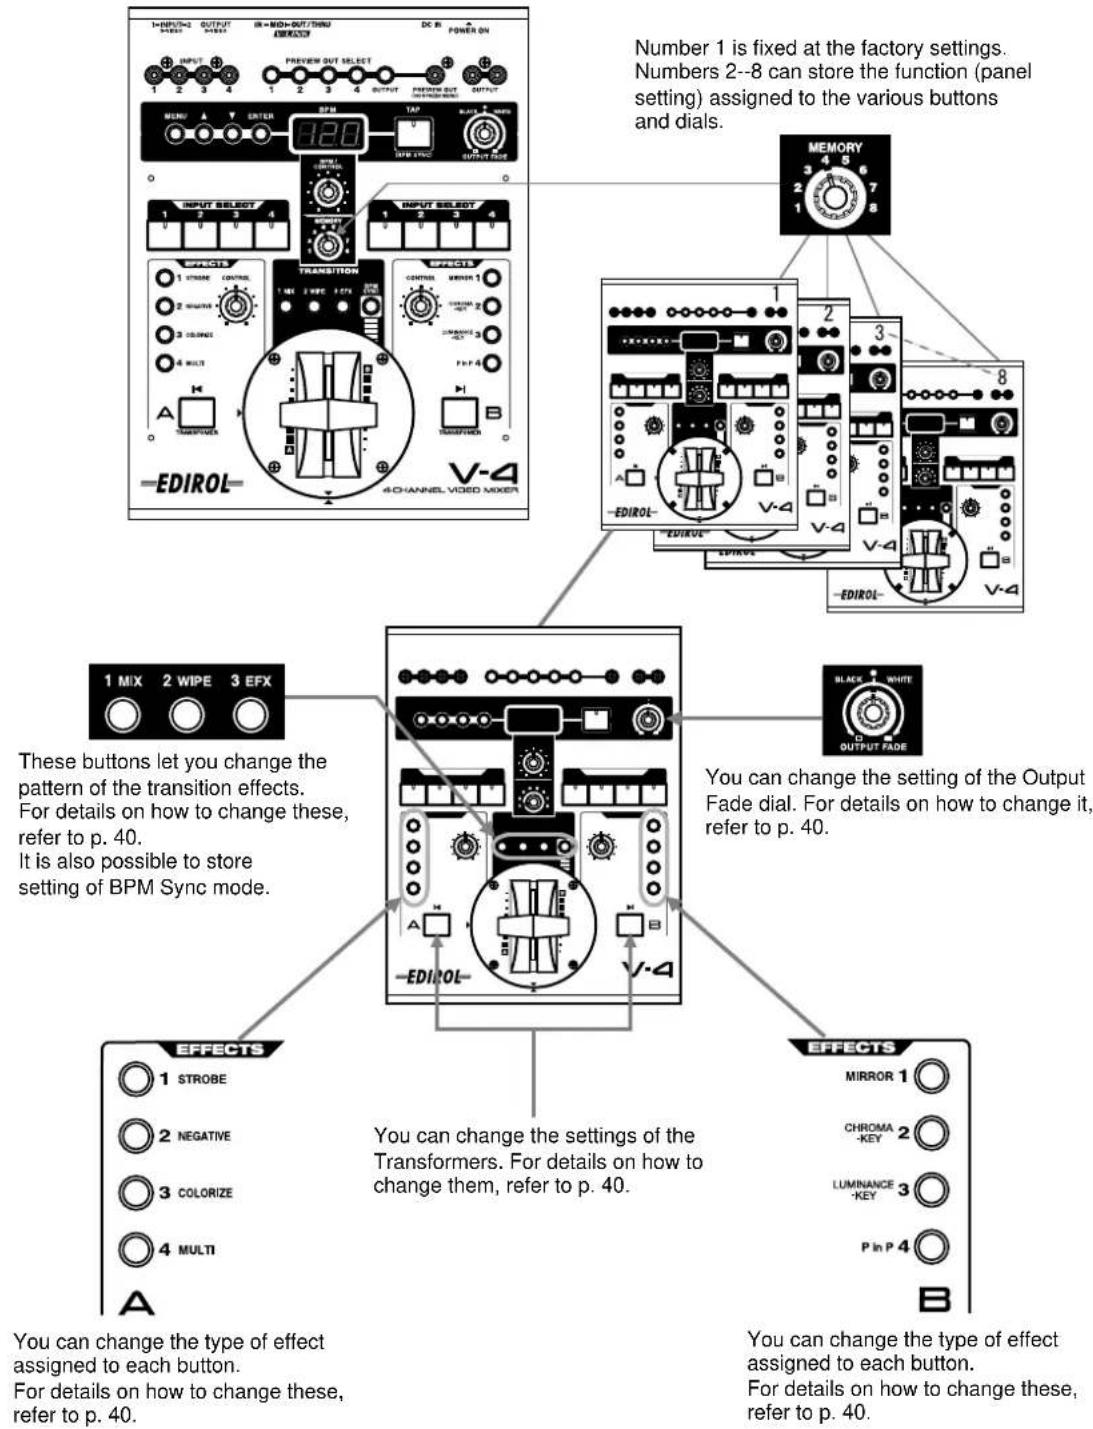
Switching two images
Here's how to switch the images being input to channel A and channel B.
Switching by Cut
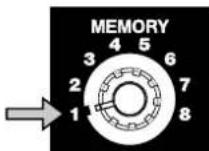
- Set the memory dial (MEMORY) to 1.
To return the V4 state to the factory settings, turn the dial all the way to the left to select the #1 position.
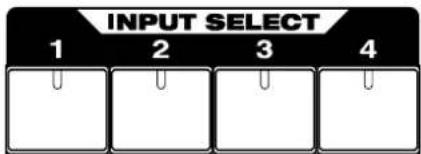
- Select the input images for A and B.
From inputs 1 through 4, select the images that will be input to channel A and channel B. If the same image is being input to both channels A and B, you will not notice any change when you switch between channels. For example, if you have selected input image 1 for channel A, you should choose from images 2 through 4 for channel B.
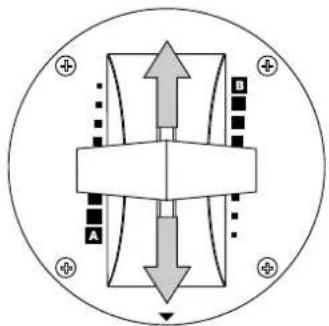
- Output either channel A or channel B.
Move the video fader all the way to the channel A or channel B position. Watch the final output on your TV monitor or projector.
natural_image
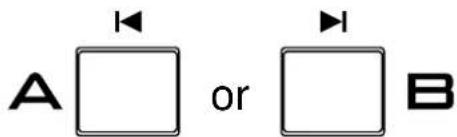
Pure electrical circuit lines without any symbols- Press a transformer button (TRANSFORMER).
If you have moved the video fader to the channel A position, press the channel B transformer button. If you have moved the video fader to the channel B position, press the channel A transformer button. Notice that the output displayed on your TV monitor or projector has changed.
5. Release the transformer button (TRANSFORMER)
Release your finger from the transformer button you pressed. Notice that the image displayed on your TV monitor (or projector) has returned to the previous image.
Switching with dissolve
"Dissolve" is the effect of switching images using a gradual fade. You can create this effect by mixing two images. If you stop mid-way during this change (i.e., with the video fader in the center position), you will see a double-exposure of images A and B.
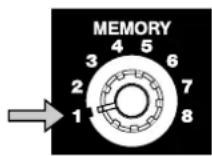
1. Set the memory dial (MEMORY) to 1.
Turn the dial all the way to the left to select the 1 position.
2. Select the input images for A and B.
From inputs 1 through 4, select the images that will be input to channel A and channel B. If the same image is being input to both A and B channels, you will not notice any change when you switch between channels. For example, if you have selected input image 1 for channel A, you should choose from images 2 through 4 for channel B.
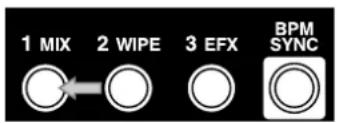
3. Press the mix button (MIX).
Press the mix button (MIX) located above the video fader. The button will light.
4. Move the video fader.
Move the video fader. On your TV monitor (or projector), notice how images A and B are mixed while the change occurs.
Switching with Wipe
"Wipe" is the effect of switching between images by "wiping away" the previous image. If you stop midway during this change (i.e., with the video fader in the center position), the two images will both be partially displayed.
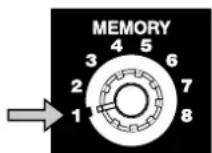
1. Set the memory dial (MEMORY) to 1.
Turn the dial all the way to the left to select the 1 position.
- Select the input images for A and B.
From inputs 1 through 4, select the images that will be input to channel A and channel B. If the same image is being input to both channels A and B, you will not notice any change when you switch between channels. For example, if you have selected input image 1 for channel A, you should choose from images 2 through 4 for channel B.
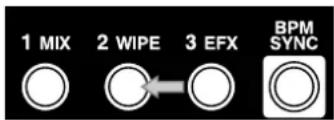
- Press the wipe button (WIPE).
Press the wipe button (WIPE) located above the video fader. The button will light.
- Move the video fader.
Move the video fader. On your TV monitor (or projector), notice how the previous image is wiped away as you change between images A and B.
Using fade-to-white or fade-to-black
On the V-4 you can fade an image to white or black simply by turning a dial. If you fade-to-white, the monitor output image will gradually turn white. If you fade-to-black, the monitor output image will gradually turn black.
- Set the memory dial (MEMORY) to 1.
Turn the dial all the way to the left to the 1 position.
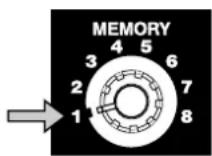
- Output an image.
Output an image from a source device. If desired, you may stop the video fader in the middle of dissolve or wipe.
- Turn the output fade dial (OUTPUT FADE).
Turn the output fade dial located in the upper right of the V-4's panel. Turning the dial toward "WHITE" will fade the image to white, and turning it toward "BLACK" will fade the image to black. If you want to create a gradual fade, turn the dial slowly.
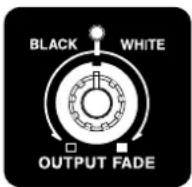
The output fade dial is equipped with LED that shows status. When it is at center the LED is green. When it is non-centered the LED blinks red.
Compositing two images
On the V-4 you can use Picture In Picture or Chroma Key/Luminance Key to composite the images of channels A and B.
Using Picture In Picture to composite images
Here's how you can miniaturize the image of channel B and overlay it on the channel A image. Use this when you want to output two images simultaneously.
- Set the memory dial (MEMORY) to 1.
Turn the dial all the way to the left to select the 1 position.
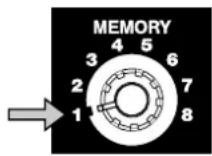
- Play back the two images.
Play back the image that you want to use as the background and the image that you want to miniaturize.
- Select the channel A input.
Input the background image into channel A. Use the channel A input select buttons to make your choice.
- Select the channel B input.
Input the image that you want to miniaturize into channel B. Use the channel B input select buttons to make your choice.
- Press the P in P button.
Press the channel B "P in P" button.
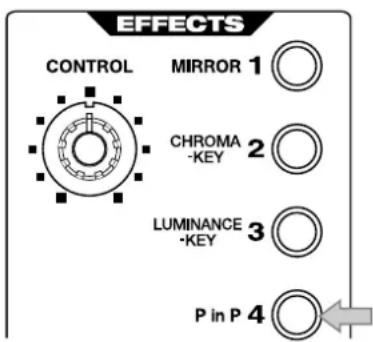
- Move the video fader.
Moving the video fader will control the level of the channel B image (the secondary image). If you move the video fader all the way to the channel A position, the channel B image level will be 0%. If you move the video fader all the way to the channel B position, the channel B image level will be 100%. By moving the video fader from the A to the B position, you can fade-in the secondary image. Moving the video fader toward A will fade-out the secondary image.
7. Turn the effect off
Press the button again to turn the effect off.
Some effects cannot be used simultaneously.
You can change the P in P effect settings to modify the location and size of the superimposed image (the secondary image). For details, refer to p. 75 or later.
Using Chroma Key to composite images
You can composite two images by extracting a specified color from one image and replacing it with the other image. Such a composition effect is called Chroma Key. Here's how you can composite the image from channel B and overlay it on the channel A image.
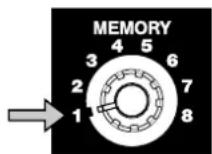
1. Set the memory dial (MEMORY) to 1.
Turn the dial all the way to the left to select the 1 position.
2. Select channel A image.
Play back the image that you want to use as the background.
3. Select channel B image.
Input image to overlay into channel B. The image for Chroma Key is generally shot with blue or green background.
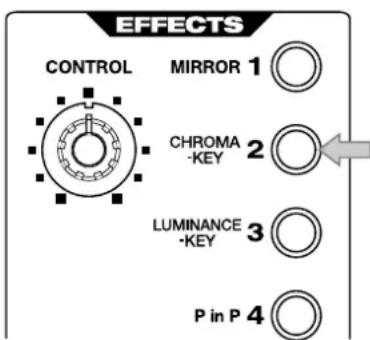
4. Press the Chroma Key button.
Press the channel B "Chroma Key" button.
5. Move the video fader to channel B.
The blue part of channel B image is extracted and the channel A image appears.
Compositing two images
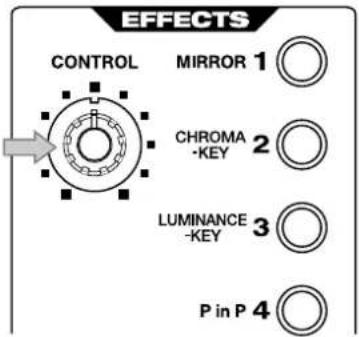
6. Turn the control dial.
Parameter of Chroma Key (level of extraction) gradually changes. If Chroma Key button is not blinking, you cannot change the parameter with the control dial.
7. Move the video fader
Moving the video fader will control the appearance and disappearance of the background image.
8. Turn the effect off
Press the button again to turn the effect off.
Some effects cannot be used simultaneously.
You cannot composite images if you image has no consistent color that can be extracted with Chroma Key. It is also difficult to extract correctly if the blue/green contrast of color is not sufficient and consistent.
The default Chroma Key status of V-4 is set to extract the blue part of the image. It is possible to change this setting to extract a different color. It is also possible to adjust setting of the extraction level and blur level of edges. For details, refer to p. 75 or later.
Using Luminance Key to composite images
You can composite two images by extracting the light or dark part from one the image and replacing it with the other image. Such a composition effect is called Luminance Key. Here's how you can composite image from channel B and overlay it on the channel A image.
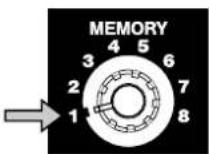
1. Set the memory dial (MEMORY) to 1.
Turn the dial all the way to the left to select the 1 position.
- Select channel A image.
Play back the image that you want to use as the background.
- Select channel B image.
Input image to overlay into channel B. The image for Luminance Key should have clear contrast of light and dark.
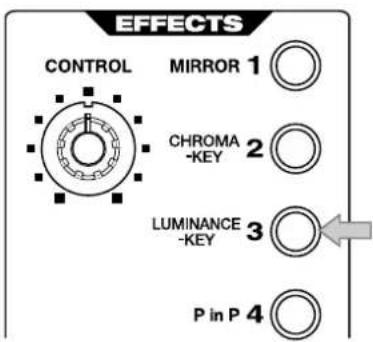
- Press the Luminance Key button.
Press the channel B "Luminance Key" button.
- Move the video fader to channel B.
The light or dark part of the channel B image is extracted and the image from channel A appears.
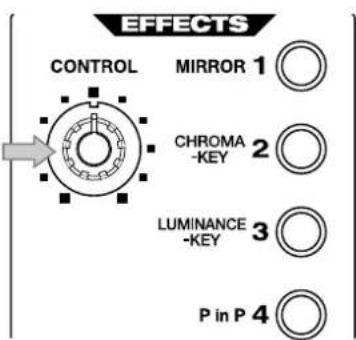
- Turn the control dial.
Parameter of Luminance Key (level of extraction) gradually changes. If Luminance Key button is not blinking, you cannot change the parameter with control dial.
- Move the video fader
Moving the video fader will control appearance and disappearance of image after extraction.
- Turn the effect off
Press the button again to turn the effect off.
Some effects cannot be used simultaneously.
Compositing two images
You cannot composite images via Luminance Key if there is no light or dark aspects in the image to key off of. It may be difficult to extract correctly if contrast of light/dark is not sufficient or consistent.
The default status of the Luminance Key of V-4 is set to extract the light part of the image. It is possible to change setting to extract dark part. It is also possible to adjust the extraction level of blur level of edges. For details, refer to p. 75 or later.
Changing the color of the image
Applying the Negative effect
Here's how to apply the Negative effect to the image being input to channel A. The "Negative" effect inverts the brightness and color of the image from positive to negative.
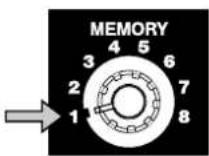
- Set the memory dial (MEMORY) to 1.
Turn the dial all the way to the left to select the 1 position.
- Play back the image to which you want to apply the effect.
Play back the desired image, and input it to the V-4.
- Select the input for channel A.
Input the image being played back into channel A. Use the channel A input select buttons to make your choice.
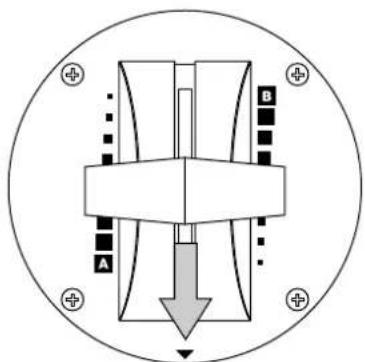
- Move the video fader to channel A.
To output the image of channel A, move the video fader to channel A.
natural_image
Pure mechanical diagram showing a central shaft with cross-sections and a downward arrow, enclosed in a circle (no text or symbols)- Press the NEGATIVE button.
Press the channel A "NEGATIVE" button. This is the second effect button from the top on the channel A side.
Changing the color of the image
6. Turn the control dial.
Turn the control dial. The brightness and color of the image will be inverted to a negative.
7. Turn the effect off
Press the button again to turn the effect off.
Applying the Colorize effect
Here's how to apply the Colorize effect to the image being input to channel A. The "Colorize" effect colors the image to produce a paint-like impression.
- Set the memory dial (MEMORY) to 1.
Turn the dial all the way to the left to select the 1 position.
- Play back the image to which you want to apply the effect.
Play back the image that you want to colorize, and input it to the V-4.
- Select the input for channel A.
Input the image being played back into channel A. Use the channel A input select buttons to make your choice.
- Move the video fader to channel A.
To output the image of channel A, move the video fader to channel A.
- Press the COLORIZE button.
Press the channel A "COLORIZE" button. This is the third effect button from the top on the channel A side.
- Turn the control dial.
Turn the control dial. The colorize parameters will be adjusted to change the way in which the image is colored.
- Turn the effect off
Press the button again to turn the effect off.
Some effects cannot be used simultaneously.
In addition to the Negative and Colorize effects, the color of the image can also be modified using the Posterize effect. To use the Posterize effect, you will need to assign it to an effect button of channel A or channel B. For details on making this assignment, refer to p. 75 or later.
Changing the motion of the image
Applying strobe motion
Here's how to apply a Strobe Motion effect to the image being input to channel A. "Strobe Motion" is an effect that thins-out the frames of the image, producing the impression that the motion is being halted at intervals.
- Set the memory dial (MEMORY) to 1.
Turn the dial all the way to the left to select the 1 position.
- Play back the image to which you want to apply the effect.
Play back the image that you want to strobe, and input it to the V-4.
- Select the input for channel A.
Input the image being played back into channel A. Use the channel A input select buttons to make your choice.
- Move the video fader to channel A.
To output the image of channel A, move the video fader to channel A.
- Press the STROBE button.
Press the channel A "STROBE" button. This is the top effect button on the channel A side.
- Turn the control dial.
Turn the control dial. The strobe settings will be adjusted and the spacing of the frames will change from fast to slow strobing.
- Turn the effect off
Press the button again to turn the effect off.
Some effects cannot be used simultaneously.
In addition to the Strobe effect, the motion of an image can also be modified using the Still (freeze) effect. To use the Still effect, you will need to assign it to an effect button of channel A or channel B. For details on making this assignment, refer to p. 75 or later.
Applying the Multi or Mirror effects
Applying the Multi effect
Here's how the image that is input to channel A can be divided on the screen. You can divide the image vertically, horizontally, or both vertically and horizontally.
- Set the memory dial (MEMORY) to 1.
To restore the factory-set state, turn the dial all the way to the left to select the #1 position.
- Play back the image to which you want to apply the effect.
Play back the image that you want to divide on the screen and input it to the V-4.
- Select the input for channel A.
Input the image being played back into channel A. Use the channel A input select buttons to make your choice.
- Move the video fader to channel A.
To output the image of channel A, move the video fader to channel A.
- Press the MULTI button.
Press the channel A "MULTI" button. This is the bottom effect button on the channel A side. With the factory settings, the image will be divided in the XX direction.
- Turn the control dial.
Turn the control dial. The multi effect parameters will be adjusted, changing the number of parts into which the screen is divided.
- Turn the effect off
Press the button again to turn the effect off.
Some effects cannot be used simultaneously.
If you want to change the direction in which the image is divided, you will need to edit the parameter settings. For details on making this change, refer to p. 75 or later.
Applying the Mirror effect
Here's how the image that is input to channel B can be divided and inverted. The result is as though a mirror were placed in the center of the screen. The image can be inverted vertically, horizontally, or both vertically and horizontally.
- Set the memory dial (MEMORY) to 1.
To restore the factory-set state, turn the dial all the way to the left to select the 1 position.
- Play back the image to which you want to apply the effect.
Play back the image to which you want to apply the mirror effect, and input it to the V-4.
- Select the input for channel B.
Input the image being played back into channel B. Use the channel B input select buttons to make your choice.
- Move the video fader to channel B.
To output the image of channel B, move the video fader to channel B.
- Press the MIRROR button.
Press the channel B "MIRROR" button. This is the top effect button on the channel B side. With the factory settings, the image will be inverted in the XX direction.
- Turn the control dial.
Turn the control dial. The mirror effect parameters will be adjusted, changing the number of parts into which the screen is divided. The result is as though a greater number of mirrors were placed against the screen.
- Turn the effect off
Press the button again to turn the effect off.
Some effects cannot be used simultaneously.
If you want to change the direction in which the image is inverted, you will need to edit the parameter settings. For details on making this change, refer to p. 75 or later.
Switching in synchronization with music
The V-4 can switch images in synchronization with the beat of the music. You can use the BPM or TAP functions to switch images as you see in VJ performances.
Using BPM sync to switch images
You can use BPM (Beats Per Minute) to specify the timing at which images will be switched. The V-4 will switch automatically, without you having to operate the video fader or the transformer buttons.
- Input images to channels A and B.
Use the channel A and B input selectors to input images into each channel. Input different images into channels A and B.
- Set the BPM.
Turn the BPM control dial (BPM CONTROL) to set the BPM. Smaller values will cause the images to be switched more slowly, and greater values will cause faster switching.
- Press the BPM sync button (BPM SYNC).
Press the BPM sync button. Notice that the images switch in time with the BPM you specified. You may also turn the BPM dial at this time to change the timing.
Using the tap (TAP) function to switch images
As an alternative to specifying the BPM numerically, you can use the tap button (TAP) to specify the timing at which the images will switch.
- Input images to channels A and B.
Use the channel A and B input selectors to input images into each channel. Input different images into channels A and B.
- Press the BPM sync button (BPM SYNC).
Press the BPM sync button. The images will begin switching at the BPM timing shown in the BPM indicator.
Switching in synchronization with music
3. Press the tap button (TAP) in time with the music.
Play back the desired background music, and press the tap button in time with the beat. The BPM readout will be constantly updated to reflect the timing you use while tapping the button, and the images will switch according to this BPM.
Applying an effect on the music
The V-4 cannot only switch images but can also apply effects in time with music. You can use the BPM or TAP functions to apply effects that are synchronized with the music, as in a VJ performance.
Using BPM sync to apply an effect
You can use BPM (Beats Per Minute) to specify the timing at which an effect will be turned on/off. The V-4 will apply the effect automatically, without the need for you to operate the buttons manually.
- Input the same image into channels A and B.
Use the channel A and B input selectors to input the same image into both channels. If you choose input select button 1 for channel A, choose button 1 for channel B as well.
- Select the type of effect.
Decide whether you will use a channel A effect or a channel B effect.
- Set the BPM.
Turn the BPM control dial (BPM CONTROL) to set the BPM. Smaller values will cause the effect to be switched on/off more slowly, and greater values will cause it to switch more rapidly.
- Press the BPM sync button (BPM SYNC).
Press the BPM sync button. Notice that the effect is applied to the image in synchronization with the BPM you specified. You may also turn the BPM dial at this time to adjust the timing.
Using the tap (TAP) function to apply an effect
As an alternative to specifying the BPM numerically, you can use the tap button (TAP) to manually specify the timing at which the effect will be switched on/off. In this case you will use the tap button (TAP) to specify the timing.
- Input the same image to channels A and B.
Use the channel A and B input selectors to input the same image into each channel. If you choose input select button 1 for channel A, choose button 1 for channel B as well.
- Select the type of effect.
Decide whether you will use a channel A effect or a channel B effect.
- Press the BPM sync button (BPM SYNC).
Press the BPM sync button. The effect will begin switching on/off at the BPM timing shown in the BPM indicator.
- Press the tap button (TAP) in time with the music.
Play back the desired background music, and press the tap button in time with the beat. The BPM readout will be constantly updated to reflect the timing you use while tapping the button, and the effect will switch on/off according to this BPM.
Editing the front panel assignments
As explained earlier, the functions assigned to the buttons and dials of the V-4 can be stored in memory and accessed via the memory dial (MEMORY). (Note: The assignment for dial position number 1 is fixed at the factory and not assignable.) You can edit and save the assignments of the following buttons and dials:
- Output fade dial
- Mix button (MIX)
- Wipe button (WIPE)
- EFX button (EFX)
• BPM sync button (BPM SYNC) - Channel A effect buttons (four buttons)
- Channel B effect buttons (four buttons)
- Channel A transformer buttons (TRANSFORMER)
• Channel B transformer buttons (TRANSFORMER)
Settings and menu information is displayed on the TV monitor connected to the preview output. If you need to change settings, the operation can be executed by viewing the information and menu displayed on the preview monitor. You can change settings by using the following buttons.
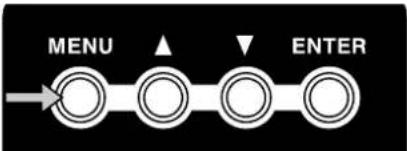
Menu Button (MENU)
When pressed, the button lights up and the menu is displayed on the preview monitor.
Cursor Buttons( )▲▼
These buttons are used to select desired menu and to change value.
Enter Button (ENTER)
Where there are multiple setting menus under the top menu, this button can be pressed to select the subsequent menu. If you need to return to the upper level menu, press Menu Button.
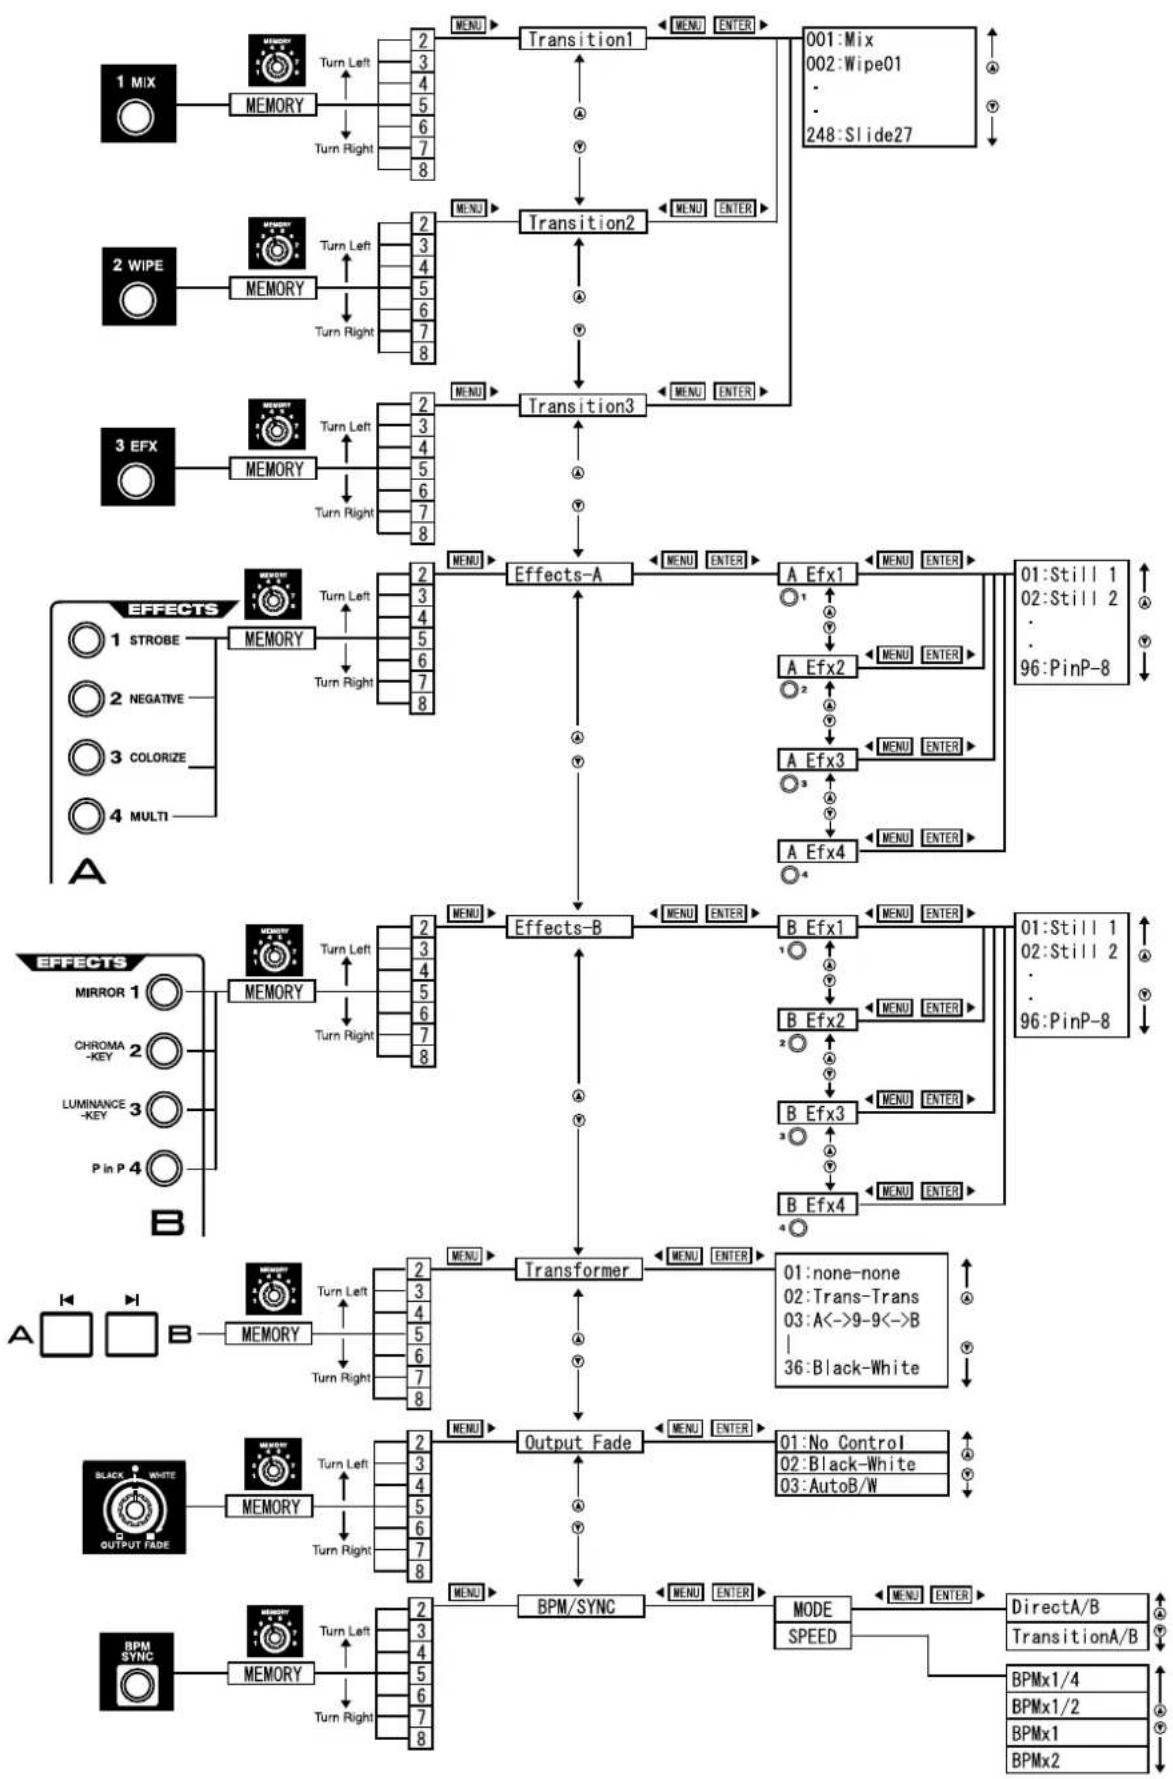
flowchart
graph TD
    A["1 MIX"] --> B["MEMORY"]
    B --> C["Turn Left"]
    C --> D["2"]
    D --> E["TRANSITION1"]
    E --> F["MENU ENTER"]
    F --> G["001:Mix"]
    G --> H["002:Wipe01"]
    H --> I["248:Slide27"]
    J["2 WIPE"] --> K["MEMORY"]
    K --> L["Turn Left"]
    L --> M["2"]
    M --> N["TRANSITION2"]
    N --> O["MENU ENTER"]
    O --> P["3 EFX"]
    P --> Q["MEMORY"]
    Q --> R["Turn Left"]
    R --> S["2"]
    S --> T["TRANSITION3"]
    T --> U["MENU ENTER"]
    U --> V["01:Still 1"]
    V --> W["02:Still 2"]
    W --> X["96:PinP-8"]
    Y["EFFECTS"] --> Z["1 STROBE"]
    Y --> AA["2 NEGATIVE"]
    Y --> AB["3 COLORIZE"]
    Y --> AC["4 MULTI"]
    AD["EFFECTS"] --> AE["MIRROR 1"]
    AD --> AF["CHROMA -KEY"]
    AD --> AG["LUMINANCE -KEY"]
    AD --> AH["P in P 4"]
    AI["A"] --> AJ["B"]
    AK["A"] --> AL["BPMSYNC"]
    AL --> AM["MEMORY"]
    AM --> AN["Turn Left"]
    AN --> AO["2"]
    AO --> AP["TRANSFORMER"]
    AP --> AQ["MENU ENTER"]
    AQ --> AR["01:none-none"]
    AQ --> AS["02:Trans-Trans"]
    AQ --> AT["03:A<->9-9<->B"]
    AQ --> AU["36:Black-White"]
    AV["A"] --> AW["B"]
    AX["A"] --> AY["BPMSYNC"]
    AY --> AZ["OUTPUT FADE"]
    AZ --> BA["MENU ENTER"]
    BA --> BB["01:No Control"]
    BA --> BC["02:Black-White"]
    BA --> BD["03:AutoB/W"]
    BE["BPMSYNC"] --> BF["MEMORY"]
    BF --> BG["Turn Left"]
    BG --> BH["2"]
    BH --> BI["BPM/SYNC"]
    BI --> BJ["MENU ENTER"]
    BJ --> BK["MODE SPEED"]
    BK --> BL["MENU ENTER"]
    BL --> BM["DirectA/B TransitionA/B"]
    BN["BPMx1/4"] --> BO["BPMx1/2"]
    BN --> BP["BPMx1"]
    BN --> BQ["BPMx2"]
Changing the assignment of the mix button (MIX)
With the factory settings, mix (MIX: dissolve) is assigned to this button for all eight positions of the memory dial. Here's how to assign a different type of transition effect to the mix button for one of the dial positions.
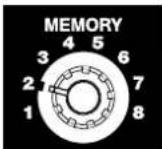
- Set the memory dial to the number whose settings you want to change.
Set the memory dial to the number (2 through 8) whose settings you want to change.
- Press the mix button(MIX)
The button lights up when pressed.
- Press the menu button (MENU).
Press the menu button (MENU) located in the upper left of the panel. The settings edit menu will appear on the TV screen connected to the preview output.
flowchart
graph LR
    A[" "] --> B[" "]
    B --> C[" "]
    C --> D[" "]
    D --> E[" "]
    style A fill:#fff,stroke:#000
    style B fill:#fff,stroke:#000
    style C fill:#fff,stroke:#000
    style D fill:#fff,stroke:#000
    style E fill:#fff,stroke:#000
- Select "MIX."
Use the cursor buttons to select "Mix (Trans1)." It will blink when you select it. The memory dial number you select is displayed following "Mix (Trans1)." If you have selected memory number 2, this will indicate [Mem2].
![Menu 1.Mix (Trans1) [Mem2] 2.Wipe(Trans2) [Mem2] 3.Efx (Trans3) [Mem2] Effects-A [Mem2] Effects-B [Mem2] Transformer [Mem2] Output Fade [Mem2] BPM/SYNC [Mem2] PinP1 Setup](/content/2026/05/1063089/images/45b09f55a643bba0a8864e100fd32628e2255901d182ee29b2f7d0030194b247.jpg)
- Press the enter button (ENTER).
Press the enter button (located at the right of the cursor buttons) to make your selection. The preview screen display will change.
flowchart
graph LR
    A[" "] --> B[" "]
    B --> C[" "]
    C --> D[" "]
    style A fill:#fff,stroke:#000
    style B fill:#fff,stroke:#000
    style C fill:#fff,stroke:#000
    style D fill:#fff,stroke:#000
6. Select the transition effect.
Use the cursor buttons to select the type of transition effect. With an effect selected (blinking) and the video fader set in the center position, the output screen will show the type of transition effect that is selected. Operate the video fader to see the result.
![Menu-Transition1 [Mem2] 1.Mix 001:Mix01 002:Wipe01 003:Wipe02 004:Wipe03 005:Wipe04 006:Wipe05 007:Wipe06 008:Wipe07 009:Wipe08 ↓](/content/2026/05/1063089/images/be7348b467f6abbf05a4eec6f7e39ffa77f6ce68ee683c689e5f4f8ff9c439b2.jpg)
7. Return to the previous screen.
When you have selected an effect, press the menu button to return to the previous screen. Press the button twice to exit the menu screen and return to the previous screen.
Changing the assignment of the wipe button (WIPE)
With the factory settings, eight basic wipes are assigned to this button for the eight settings of the memory dial. Here's how to assign a different type of transition effect to the wipe button.
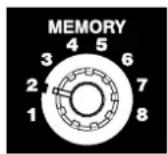
1. Set the memory dial to the number whose assignment you want to change.
Operate the video fader while you turn the memory dial to different positions. Notice how the dial selects different wipe patterns. Set the memory dial to the number (2 through 8) whose settings you want to change.
2. Press the wipe button (WIPE)
The button lights up when pressed.
3. Press the menu button (MENU).
Press the menu button (MENU) located in the upper left of the panel. The settings edit menu will appear on the TV screen connected to the preview output.
flowchart
graph LR
    A[" "] --> B[" "]
    B --> C[" "]
    C --> D[" "]
    style A fill:#fff,stroke:#000
    style B fill:#fff,stroke:#000
    style C fill:#fff,stroke:#000
    style D fill:#fff,stroke:#000
4. Select "WIPE."
Use the cursor buttons to select "WIPE." It will blink when you select it. The memory dial number you select is displayed following "WIPE (Trans1)." If you have selected memory number 2, this will indicate [Mem2].
Editing the front panel assignments
![Menu 1.Mix (Trans1) [Mem2] 2.Wipe(Trans2) [Mem2] 3.Efx (Trans3) [Mem2] Effects-A [Mem2] Effects-B [Mem2] Transformer [Mem2] Output Fade [Mem2] BPM/SYNC [Mem2] PinP1 Setup ↓](/content/2026/05/1063089/images/f223ee5de9e142ac5c2e6f6f3381974d8f9d9e7b037ab6c4d2138f2837835093.jpg)
5. Press the enter button (ENTER).
Press the enter button (located at the right of the cursor buttons) to make your selection. The preview screen display will change.
flowchart
graph LR
    A[" "] --> B[" "]
    B --> C[" "]
    C --> D[" "]
    D --> E["→"]
6. Select the transition effect.
Use the cursor buttons to select the type of transition effect. With an effect selected (blinking) and the video fader set in the center position, the output screen will show the type of transition effect that is selected. Operate the T-bar to see the result.
![Menu-Transition2[Mem2] ↑ 2.Wipe 002:Wipe01 003:Wipe02 004:Wipe03 005:Wipe04 006:Wipe05 007:Wipe06 008:Wipe07 009:Wipe08 010:Wipe09 ↓](/content/2026/05/1063089/images/3dde656763d79e74745dda0079893bb9f672235ebd91bdee3ae5a006fc4790ab.jpg)
7. Return to the previous screen.
When you have selected an effect, press the menu button to return to the previous screen. Press the button twice to exit the menu screen and return to the previous screen.
Changing the assignment of the EFX button (EFX)
With the factory settings, various special wipes and basic slides are assigned to this button for the eight settings of the memory dial. Here's how to assign a different type of transition effect to the EFX button.
1. Set the memory dial to the number whose assignment you want to change.
Operate the T-bar while you turn the memory dial to different positions. Notice how the dial selects different transition effect patterns. Set the memory dial to the number (2 through 8) whose settings you want to change.
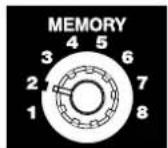
- Press the EFX button (EFX)
The button lights up when pressed.
- Press the menu button (MENU).
Press the menu button (MENU) located in the upper left of the panel. The settings edit menu will appear on the TV screen connected to the preview output.
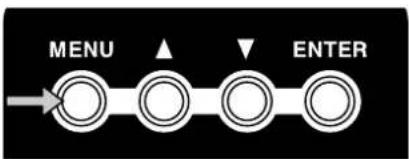
flowchart
graph LR
    A[" "] --> B[" "]
    B --> C[" "]
    C --> D[" "]
    style A fill:#fff,stroke:#000
    style B fill:#fff,stroke:#000
    style C fill:#fff,stroke:#000
    style D fill:#fff,stroke:#000
- Select "EFX."
Use the cursor buttons to select "EFX." It will blink when you select it. The memory dial number you select is displayed following "EFX." If you have selected memory number 2, this will indicate [Mem2].
![Menu 1.Mix (Trans1) [Mem2] 2.Wipe(Trans2) [Mem2] 3.Efx (Trans3) [Mem2] Effects-A [Mem2] Effects-B [Mem2] Transformer [Mem2] Output Fade [Mem2] BPM/SYNC [Mem2] PinP1 Setup](/content/2026/05/1063089/images/8f31f12e827f2f4f16a2f7b1970034aad2bbaa8e70d86e5dc6c96efdcc7b5c95.jpg)
- Press the enter button (ENTER).
Press the enter button (located at the right of the cursor buttons) to make your selection. The preview screen display will change.
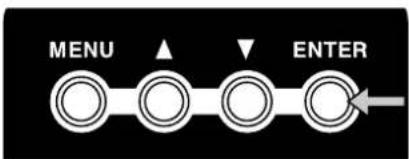
flowchart
graph LR
    A["MENU"] --> B["△"]
    B --> C["▼"]
    C --> D["ENTER"]
- Select the transition effect.
Use the cursor buttons to select the type of transition effect. With an effect selected (blinking) and the video fader set in the center position, the output screen will show the type of transition effect that is selected. Operate the T-bar to see the result.
Editing the front panel assignments
![Menu-Transition3[Mem2] 3.Efx 001:Mix01 002:Wipe01 003:Wipe02 004:Wipe03 005:Wipe04 006:Wipe05 007:Wipe06 008:Wipe07 009:Wipe08](/content/2026/05/1063089/images/8f1c6fb494a113abd27dc78de623bcc1a26c87cc0f5f9cb9e454f554a16e414f.jpg)
7. Return to the previous screen.
When you have selected an effect, press the menu button to return to the previous screen. Press the button twice to exit the menu screen and return to the previous screen.
Changing the assignment of the output fade dial (OUTPUT FADE)
With the factory settings, and when the memory dial is set to number 1, turning the output fade dial toward the left will fade-to-black, and turning it toward the right will fade-to-white.
1. Set the memory dial to the number whose assignment you want to change.
Operate the output fade dial while you turn the memory dial to different positions. Set the memory dial to the number (2 through 8) whose settings you want to change.
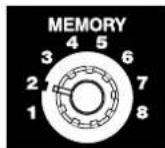
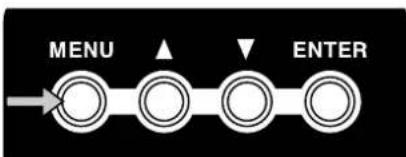
2. Press the menu button (MENU).
Press the menu button (MENU) located in the upper left of the panel. The settings edit menu will appear on the TV screen connected to the preview output.
flowchart
graph LR
    A[" "] --> B[" "]
    B --> C[" "]
    C --> D[" "]
    style A fill:#fff,stroke:#000
    style B fill:#fff,stroke:#000
    style C fill:#fff,stroke:#000
    style D fill:#fff,stroke:#000
3. Select "Output Fade".
Use the cursor buttons to select "Output Fade." It will blink when you select it. The memory dial number you select is displayed following "Output Fade." If you have selected memory number 2, this will indicate [Mem2].
![Menu 1.Mix (Trans1) [Mem2] 2.Wipe(Trans2) [Mem2] 3.Efx (Trans3) [Mem2] Effects-A [Mem2] Effects-B [Mem2] Transformer [Mem2] Output Fade [Mem2] BPM/SYNC [Mem2] PinP1 Setup ↓](/content/2026/05/1063089/images/4d1ce6009ac5cbfd1313b34cac510306c37e492d65eb1fd5578cba1d951c8cec.jpg)
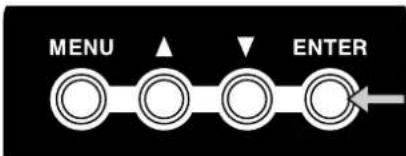
- Press the enter button (ENTER).
Press the enter button (located at the right of the cursor buttons) to make your selection. The preview screen display will change.
flowchart
graph LR
    A["MENU"] --> B["ENTER"]
    B --> C["Arrow pointing right"]
- Select the fade pattern.
Use the cursor buttons to select the type of fade pattern. With a pattern selected (blinking), turn the output fade dial to see the currently selected fade pattern occur in the output screen. If you select "No Control," turning the dial in either direction will not produce a fade.
![Menu-OutputFader[Mem2] Out-Fade 01:No Control 02:Black-White 03:AutoB/W](/content/2026/05/1063089/images/4fd2c356065ce26f2dbbf1a3782e5a60c5ec63abe7a1a43da150bfc1d8225cde.jpg)
- Return to the previous screen.
When you have selected a fade pattern, press the menu button to return to the previous screen. Press the button twice to exit the menu screen and return to the previous screen.
Changing the assignments of the channel A and B effect buttons (EFFECTS)
With the factory settings, effect buttons 1 through 4 of channels A and B are assigned the following effects:
Channel A: 1 Strobe (STROBE)
2 Negative (NEGATIVE)
3 Colorize (COLORIZE)
4 Multi (MULTI)
Channel B: 1 Mirror (MIRROR)
2 Chroma key (CHROMA KEY)
3 Luminance key (LUMINANCE KEY)
4 Picture in picture (PinP)
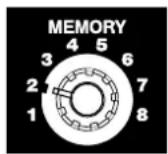
- Turn the memory dial.
Turn the memory dial to the number (2 through 8) whose assignment you want to change.
- Choose the effect button whose assignment you want to change.
Press the effect button (channel A buttons 1-4, channel B buttons 1-4) whose assignment you want to change. The effect will be applied.
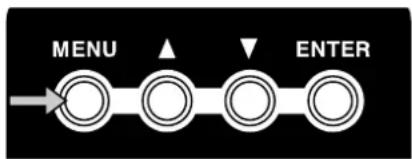
- Press the menu button (MENU).
Press the menu button (MENU) located in the upper left of the panel. The settings edit menu will appear on the TV screen connected to the preview output.
flowchart
graph LR
    A[" "] --> B[" "]
    B --> C[" "]
    C --> D[" "]
    style A fill:#fff,stroke:#000
    style B fill:#fff,stroke:#000
    style C fill:#fff,stroke:#000
    style D fill:#fff,stroke:#000
- Select either "Effects-A" or "Effects-B."
Select "Effects-A" if you want to edit the channel A settings. Select "Effects-B" if you want to edit the channel B settings. Use the cursor buttons to make your selection. The selection will blink. The memory dial number you select is displayed following "Effects-A" or "Effects-B." If you have selected memory number 2, this will indicate [Mem2].
![Menu 1.Mix (Trans1) [Mem2] 2.Wipe(Trans2) [Mem2] 3.Efx (Trans3) [Mem2] Effects-A [Mem2] Effects-B [Mem2] Transformer [Mem2] Output Fade [Mem2] BPM/SYNC [Mem2] PinP1 Setup ↓](/content/2026/05/1063089/images/200f61207ade80b8de44309a16b0b77a39ea4d60df51020980f348f5ba7af78e.jpg)
5. Press the enter button (ENTER).
Press the enter button (located at the right of the cursor buttons) to make your selection. The preview screen display will change displaying a screen where you can choose the button whose assignment will be changed.
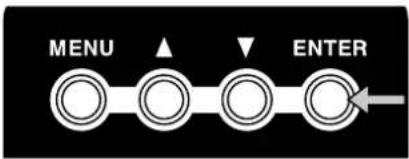
flowchart
graph LR
    A["MENU"] --> B["ENTER"]
    B --> C["Arrow"]
6. Select a button.
If you have selected channel A, the screen will show A-Efx1 through A-Efx4. If you have selected channel B, the screen will show B-Efx1 through B-Efx4. Select the button whose assignment you want to change. For example, if you want to change the assignment of channel A button 2, you would select A-Efx2. Press the enter button to go to the effect setting screen.
![Menu-Effects A [Mem2] A-Efx1 12:STROBE* A-Efx2 20:NEGATIVE* A-Efx3 29:COLRIZE* A-Efx4 73:MULTI-HV* or Menu-Effects B [Mem2] B-Efx1 88:MIRROR-HV* B-Efx2 58:CHROMAKEY* B-Efx3 54:W-LUMIKEY* B-Efx4 89:PinP-1](/content/2026/05/1063089/images/0fe1ae98b69151465b74492bb96420f374f682c09e886b49566f2d6866a7becb.jpg)
7. Select the type of effect.
Use the cursor buttons to select the effect that you want to assign. (The selected effect will blink.) The type of effect in the output screen will change.
![Menu-Effects A [Mem2] A-Efx1 01: STILL1 02: STILL2 03: STROBE1 04: STROBE2 05: STROBE3 06: STROBE4 07: STROBE5 08: STROBE6 09: STROBE7](/content/2026/05/1063089/images/afbc7275a0388059cdcdc274d004a566bd516641652ad58c4a1c53d737ef4606.jpg)
If you select an effect with the “*” mark after the effect name, the effect value can be changed with the control dial.
- Return to the previous screen.
When you have made your selection, press the menu button to return to the previous screen. Press the button three times to exit the menu screen and return to the previous screen.
Changing the assignment of the BPM sync button (BPM SYNC)
With the factory settings, and when the memory dial is set to 1, BPM sync is set to switch between A and B by using a transition effect. The transition speed will be the BPM shown in the BPM indicator.
- Turn the memory dial.
Select the memory number (2 through 8) whose assignments you want to change.
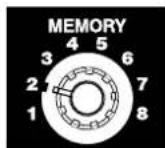
- Press the menu button (MENU).
Press the menu button (MENU) located in the upper left of the panel. The settings edit menu will appear on the TV screen connected to the preview output.
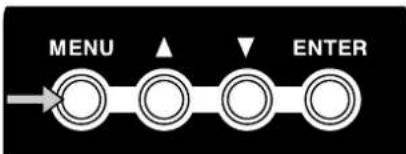
flowchart
graph LR
    A[" "] --> B[" "]
    B --> C[" "]
    C --> D[" "]
    style A fill:#fff,stroke:#000
    style B fill:#fff,stroke:#000
    style C fill:#fff,stroke:#000
    style D fill:#fff,stroke:#000
- Select "BPM/SYNC."
Use the cursor buttons to select "BPM/SYNC." The memory dial number you select is displayed following "BPM/SYNC." If you have selected memory number 2, this will indicate [Mem2].
![Menu ↑ Effects-A [Mem2] Effects-B [Mem2] Transformer [Mem2] Output Fade [Mem2] BPM/SYNC [Mem2] PinP1 Setup PinP2 Setup PinP3 Setup PinP4 Setup ↓](/content/2026/05/1063089/images/127fb0232275563ba299d1e5811d89e5deebffd65f77c6819d49dd3bb6077b8d.jpg)
- Press the enter button (ENTER)
Press the enter button to proceed to the setting screen.
5. Select "MODE" or "SPEED."
Use the cursor buttons to choose whether it is the mode or the speed of the transition that you want to change. Choose "MODE" if you want to change the transition from a "cut" to one that incorporates some kind of effect, such as "wipe." Choose "SPEED" if you want to change the speed of the transition. Then press the enter button to proceed to the following setting screen.
![Menu-BPM/SYNC [Mem2] Mode TransitionA/B Speed BPMx1](/content/2026/05/1063089/images/942c3d589267db77e0beca2cd622420ebfbae18ede664d8058ed10ea4ff78afe.jpg)
6. Select the operating mode or speed.
If you are changing the operating mode, use the cursor buttons to change "Transition A/B" to "Direct A/B." If you are changing the speed, select either "BPM x 1/4," "BPM x 1/2," "BPM x 1," or "BPM x 2."
7. Return to the previous screen.
When you have finished making settings, press the menu button to return to the previous screen. Press the button three times to exit the menu screen and return to the previous screen.
Changing the assignment of the channel A/ channel B transformer buttons (TRANSFORMER)
With the factory settings, and when the memory dial is set to 1, the switch to image A or B takes place immediately when you press the channel A or B transformer buttons (TRANSFORMER).
1. Press the transformer buttons while turning the memory dial.
Press the transformer buttons while turning the memory dial to various settings, and choose the memory number whose assignments you want to change.
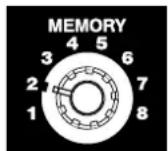
2. Press the menu button (MENU).
Press the menu button (MENU) located in the upper left of the panel. The settings edit menu will appear on the TV screen connected to the preview output.
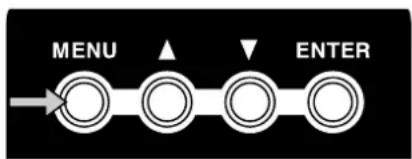
flowchart
graph LR
    A[" "] --> B[" "]
    B --> C[" "]
    C --> D[" "]
    style A fill:#fff,stroke:#000
    style B fill:#fff,stroke:#000
    style C fill:#fff,stroke:#000
    style D fill:#fff,stroke:#000
Editing the front panel assignments
3. Select "Transformer."
Use the cursor buttons to select "Transformer." The memory dial number you select is displayed following "Transformer." If you have selected memory number 2, this will indicate [Mem2].
![Menu 1.Mix (Trans1) [Mem2] 2.Wipe(Trans2) [Mem2] 3.Efx (Trans3) [Mem2] Effects-A [Mem2] Effects-B [Mem2] Transformer [Mem2] Output Fade [Mem2] BPM/SYNC [Mem2] PinP1 Setup](/content/2026/05/1063089/images/6a8fe3bee2adcfb44e3bec6c28c6e5fc6b65b312007e9367195af073cdea1f8d.jpg)
4. Press the enter button (ENTER).
Press the enter button (located at the right of the cursor buttons) to make your selection. The preview screen display will change to a screen where you can choose the parameter to be assigned.
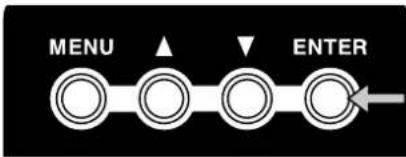
flowchart
graph LR
    A["MENU"] --> B["ENTER"]
    B --> C["Arrow pointing right"]
5. Select a pattern.
Select a pattern from the range of "01: none-none" to "36: Black-White." If you select "01: none-none," the transformer buttons will have no effect; you will not be able to switch between images A/B or fade to white/black by pressing these buttons. For details on the operation and times of these parameters, refer to the menu list on p. 78.
![Menu-Transformer [Mem2] Transform 01:none -none 02:Trans-Trans 03:A<->9-9<->B 04:A<->8-8<->B 05:A<->7-7<->B 06:A<->6-6<->B 07:A<->5-5<->B 08:A<->4-4<->B 09:A<->3-3<->B](/content/2026/05/1063089/images/a5521df0c1eb13e63271b6430a5c8275c640d62c241bc0307ca4d69c01e04dd0.jpg)
6. Return to the previous screen.
When you have finished making the settings, press the menu button to return to the previous screen. Press the button twice to exit the menu screen and return to the previous screen.
Protecting the memory
By turning on Memory Protect, you can prevent any accidental changes from being made to the assignments you made for memory numbers 2 through 8.
- Press the menu button (MENU).
Press the menu button (MENU) located in the upper left of the panel. The menu will appear on the TV screen connected to the preview output.
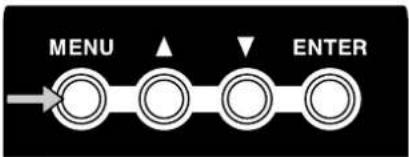
flowchart
graph LR
    A[" "] --> B[" "]
    B --> C[" "]
    C --> D[" "]
    style A fill:#fff,stroke:#000
    style B fill:#fff,stroke:#000
    style C fill:#fff,stroke:#000
    style D fill:#fff,stroke:#000
- Select "Utility."
Use the cursor buttons to select "Utility." Then press the enter button (ENTER) to move to the following screen.
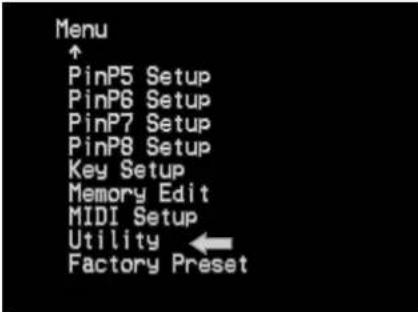
- Select "Memory Protect."
Use the cursor buttons to select "Memory Protect." Then press the enter button (ENTER) to move to the following screen.
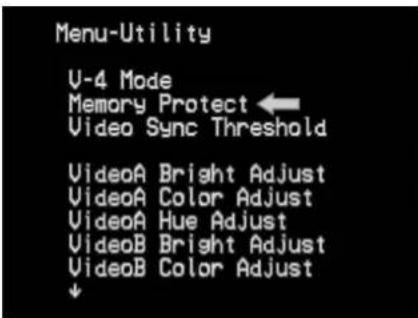
- Turn the setting "On."
Use the cursor buttons to select "On" or "Off." Selecting "On" turns memory protection on so you will be unable to modify the memory contents. Selecting "Off" turns memory protection off so that modifications will be permitted.
Editing the front panel assignments
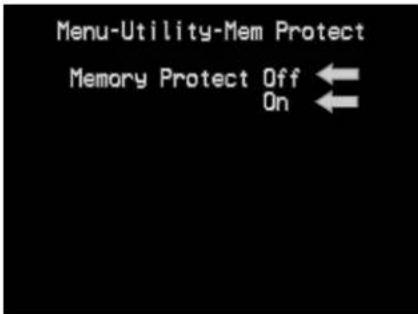
- Return to the previous screen.
When you have finished making settings, press the menu button to return to the previous screen. Press the button three times to exit the menu screen and return to the previous screen.
Copying or exchanging memories
You can copy the contents of the currently selected memory to another memory, or exchange them with another memory.
- Press the menu button (MENU).
Press the menu button. The menu will appear on the TV screen connected to the preview output.
flowchart
graph LR
    A[" "] --> B[" "]
    B --> C[" "]
    C --> D[" "]
    style A fill:#fff,stroke:#000
    style B fill:#fff,stroke:#000
    style C fill:#fff,stroke:#000
    style D fill:#fff,stroke:#000
- Select "Memory Edit."
Use the cursor buttons to select "Memory Edit." Press the enter button (ENTER) to move to the following screen.
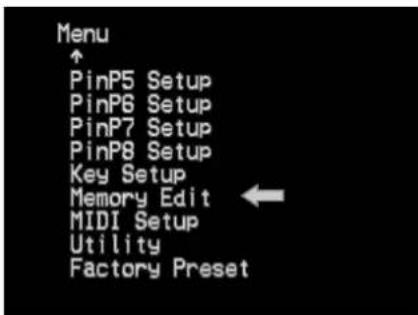
- Select the operation.
Use the cursor buttons to select the operation. For example, if you want to copy memory number 8 to memory number 2, select "Copy Mem8->Mem2." If you want to exchange memory numbers 8 and 2, select "Exchange Mem8<->Mem2." You can turn the memory dial to change the copy-source number.
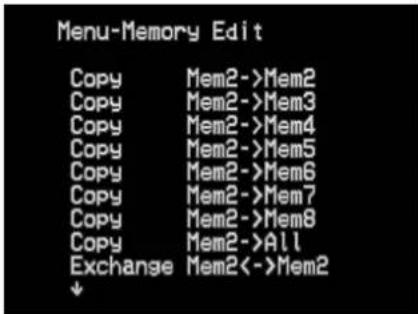
- Press the enter button (ENTER).
When you have specified the operation, press the enter button. The display will indicate "Push [ENTER]" so press the enter button once again. The selected operation will be executed.
- Return to the previous screen.
After you have executed the operation, press the menu button to return to the previous screen. Press the button twice to exit the menu screen and return to the previous screen.
Recalling the factory settings
You can recall factory settings with the following operation. Any change of settings or adjustments you have made will be cleared with this operation. Do not execute this function if you want to retain any of your saved settings. If it is necessary to execute the recall function, you should write down the settings of your memory first.
- Press the menu button (MENU).
Press the menu button. The menu will appear on the TV screen connected to the preview output.
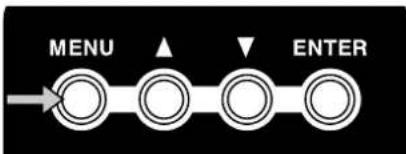
flowchart
graph LR
    A[" "] --> B[" "]
    B --> C[" "]
    C --> D[" "]
    style A fill:#fff,stroke:#000
    style B fill:#fff,stroke:#000
    style C fill:#fff,stroke:#000
    style D fill:#fff,stroke:#000
- Select "Factory Preset."
Use the cursor buttons to select "Factory Preset." Press the enter button (ENTER) to move to the following screen.
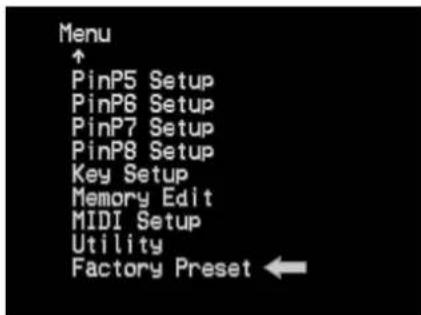
- Select "Yes[ENTER]SW."
Use the cursor buttons to select "Yes[ENTER]SW."
Editing the front panel assignments
4. Press the enter button (ENTER)
Pressing the enter button will reinitialize the V4 to its Factory Presets. All the settings and adjustments will return to factory preset status.
Control the V-4 from an external device
Using V-LINK to control the V-4
You can connect the V-4 with a V-LINK compatible device made by Roland or Edirol, and control the V-4 remotely.
■ What is V-LINK?
V-LINK (V-LINK) on that allows images to be synchronized to music. V-LINK makes it easy to manipulate images in a variety of ways, while linking them to the expressive elements of a performance.
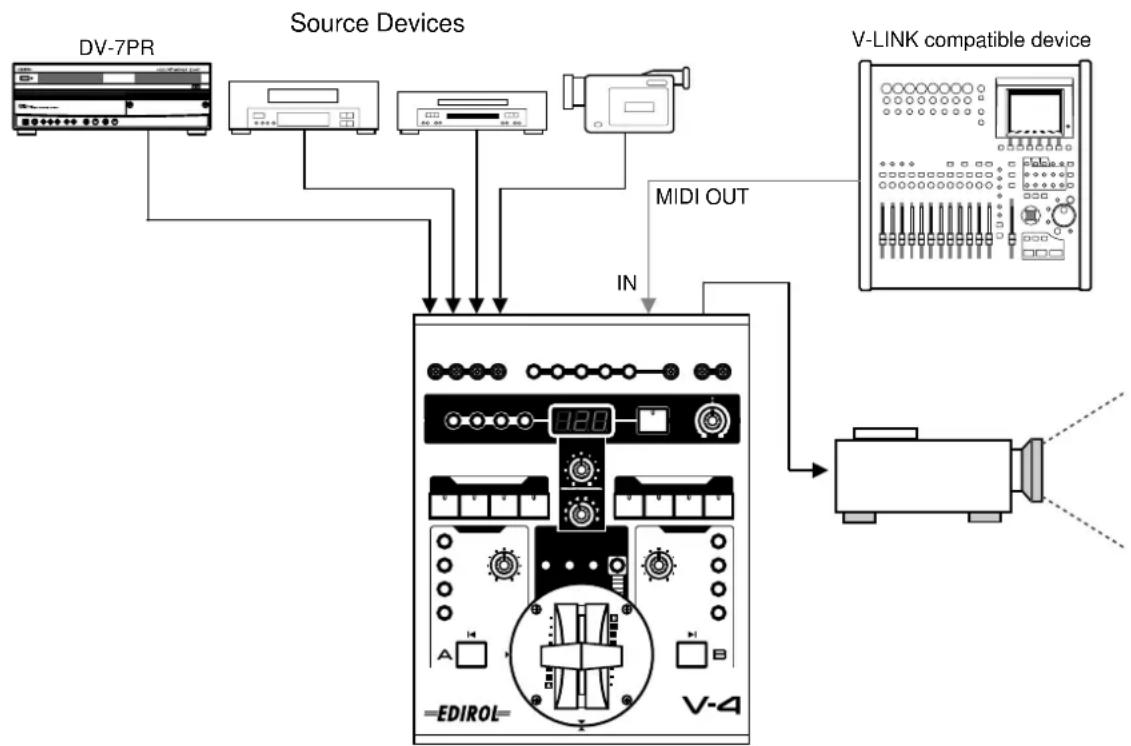
flowchart
graph TD
    A["DV-7PR"] --> B["Source Devices"]
    B --> C["MIDI OUT"]
    C --> D["V-LINK compatible device"]
    D --> E["EDIROL"]
    E --> F["In"]
(Example) When using a Roland MC-909 in conjunction with the V-4:
- You can make settings for controlling the V-4 from the MC-909 (remote settings).
- You can use the MC-909's sequencer to control video switching on the V-4 to create performances that link images with music.
- You can use the MC-909's velocity pads to control the V-4's input selectors and switch among images from various source devices.
- You can use the MC-909's knobs to adjust the time settings of transition effects (such as overlap or wipe).
(Example) When using an Edirol PCR-30/50 in conjunction with the V-4:
- You can make settings for controlling the V-4 from the PCR-30/50 (remote settings).
- You can use the PCR-30/50 to control the V-4's input selectors to switch between images from various source devices.
- You can use the PCR-30/50 to adjust the time settings of transition effects (such as overlap or wipe).
■ Using V-LINK
For details on how to turn V-LINK on/off, refer to the owner's manual of the V-LINK compatible device that you intend to connect to the V-4. When you turn V-LINK on, the indication "V-LINK" will appear in the preview monitor. When you turn V-LINK off, this indication will disappear.
![U-LINK Output B/W [--C--] STROB* NEGA* COLRI* MLTHV* MIRHU* C-KEY* WLKEY* PinP1 Mix01 Wipe03 MWip03 Trans Memory=1 Trans 1 [----] 2](/content/2026/05/1063089/images/7ad193ee737c6ad204345cb5f6fe1504b1242ddf4187f82d35795a6365fc73eb.jpg)
When you turn on V-LINK on the connected device, the V-4 will switch to "Presentation mode." If the V-4 is operating in normal mode and receives a V-LINK "On" signal, the function of its buttons and other controls will change. (For details on Presentation mode, refer to p. 68.) When V-LINK is turned off, the V-4 will return to its previous settings.
For details on the functions that can be controlled from an external device via V-LINK, refer to MIDI Implementation (p. 89) and to the MIDI implementation of the device you have connected. The functions that can be controlled will differ depending on the device that is connected and on its settings.
Using MIDI to control the V-4
You can connect the V-4 with various MIDI devices for a wide range of remote control functionality.
■ What is MIDI?
MIDI stands for “Musical Instrument Digital Interface”—a worldwide standard that allows performance data and other information to be exchanged among musical instruments. MIDI-compatible devices can be connected together easily using MIDI cables. Once connected, performance data can readily be communicated between the two devices; or one can make settings for, as well as control the operation of the other device.
* System for auto switching and effects controlled by MIDI sequencer
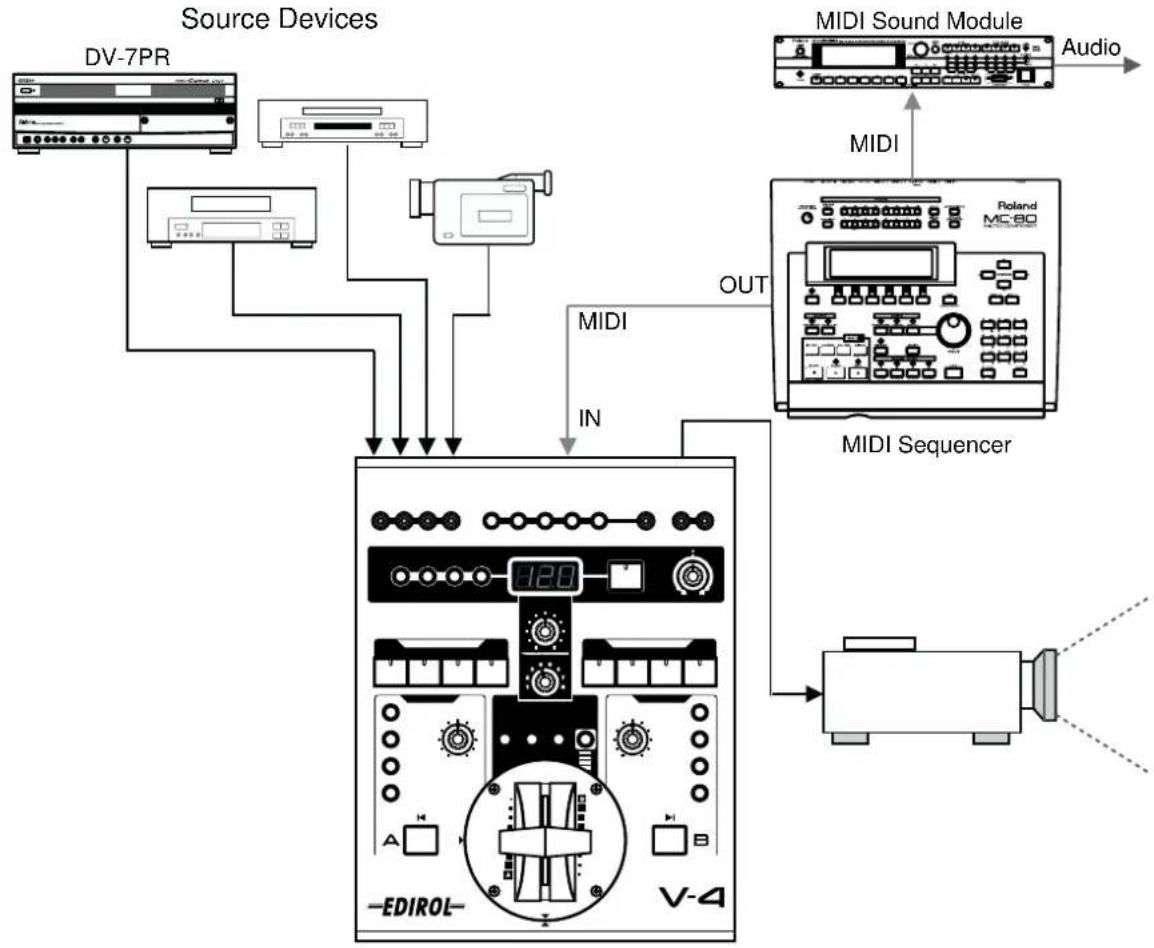
flowchart
graph TD
    A["Source Devices"] --> B["DV-7PR"]
    A --> C["Audio"]
    A --> D["MDI"]
    D --> E["MIDI Sound Module"]
    E --> F["Audio"]
    A --> G["MDI Sequencer"]
    G --> H["Out"]
    G --> I["IN"]
    G --> J["EDIROL-"]
    J --> K["120"]
    K --> L["Control Panel"]
    L --> M["Inverter"]
    M --> N["Output"]
V-LINK makes it easy to control the basic functions of the V-4. Even if you are using a device that does not support V-LINK, you can make transmission and reception settings so that the V-4 can be controlled from a musical instrument or other external device. For details on the functionality that can be controlled via MIDI from an external device, refer to p. 89 of this manual, and to the MIDI implementation of the device you have connected.
■ MIDI settings
You will need to make settings on the V-4 so that it will receive control messages from an external MIDI device. The procedure is as follows.
■ Setting the MIDI transmit channel (MIDI Tx Channel)
This setting specifies the MIDI channel that will be used to send control messages.
- Press the menu button (MENU).
Press the menu button to display the V-4 menu on the preview screen.
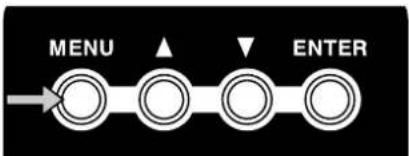
flowchart
graph LR
    A[" "] --> B[" "]
    B --> C[" "]
    C --> D[" "]
    style A fill:#fff,stroke:#000
    style B fill:#fff,stroke:#000
    style C fill:#fff,stroke:#000
    style D fill:#fff,stroke:#000
- Select "MIDI Setup."
Use the cursor buttons to select "MIDI Setup." Press the enter button (ENTER) to enter the MIDI setting screen.
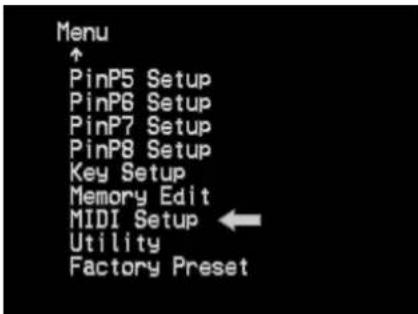
- Select "MIDI Tx Channel."
Use the cursor buttons to select "MIDI Tx Channel." Press the enter button (ENTER) to enter the transmit channel setting screen.
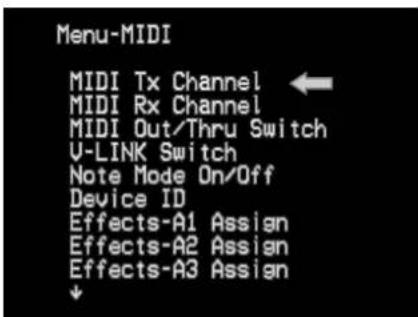
- Specify the transmit channel.
Use the cursor buttons to select the transmit channel.
- Return to the previous screen.
When you have finished making settings, press the menu button to return to the previous screen. If you press the button three times, you will exit the menu screens and return to the previous screen.
■ Setting the MIDI receive channel (MIDI Rx Channel)
This setting specifies the MIDI channel that will be used to receive control messages.
- Press the menu button (MENU).
Press the menu button to display the V-4 menu on the preview screen.
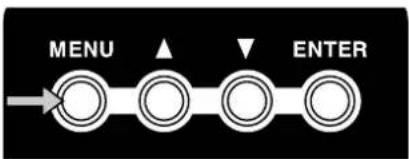
flowchart
graph LR
    A[" "] --> B[" "]
    B --> C[" "]
    C --> D[" "]
    style A fill:#fff,stroke:#000
    style B fill:#fff,stroke:#000
    style C fill:#fff,stroke:#000
    style D fill:#fff,stroke:#000
- Select "MIDI Setup."
Use the cursor buttons to select "MIDI Setup." Press the enter button (ENTER) to enter the MIDI setting screen.
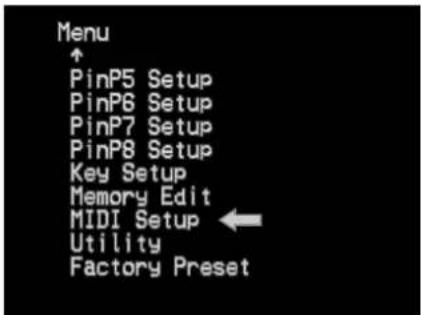
- Select "MIDI Rx Channel."
Use the cursor buttons to select "MIDI Rx Channel." Press the enter button (ENTER) to enter the receive channel setting screen.
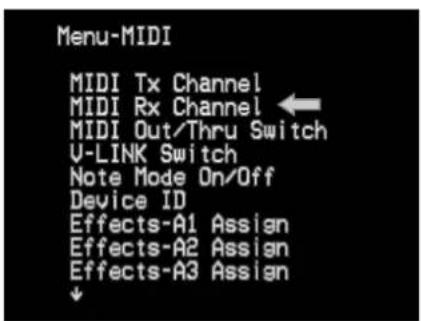
- Specify the receive channel.
Use the cursor buttons to select the receive channel.
- Return to the previous screen.
When you have finished making settings, press the menu button to return to the previous screen. If you press the button three times, you will exit the menu screens and return to the previous screen.
■ Making other MIDI settings
You can use the same procedure to make other MIDI settings. In particular, the following buttons and dials can be controlled via MIDI:
- Channel A effect buttons 1–4
- Channel B effect buttons 1–4
- Video fader
- Channel A/B transformer buttons
- BPM/SYNC button
- Output fader
In addition, the duration of a transition effect can also be controlled via MIDI. Refer to the following table for more about MIDI settings.
MIDI Setup
| MIDI Tx Channel | 1 - 16 | MIDI transmit channel setting |
| MIDI Tx Channel | 1 - 16/OFF | MIDI receive channel settings |
| MIDI Out/Thru Switch | Out/Thru | MIDI out/thru setting |
| V-LINK Switch | Off/On | V-LINK on/off setting |
| Note Mode On/Off | Off/On | Note mode on/off setting |
| Device ID | 0x00 - 0x1f | Device ID No. setting |
| Effects-A1 Assign | OFF/CC 01 - CC 95/ChAftTt/PitchBD | MIDI message that operates Ch.A effect button 1 |
| Effects-A2 Assign | OFF/CC 01 - CC 95/ChAftTt/PitchBD | MIDI message that operates Ch.A effect button 2 |
| Effects-A3 Assign | OFF/CC 01 - CC 95/ChAftTt/PitchBD | MIDI message that operates Ch.A effect button 3 |
| Effects-A4 Assign | OFF/CC 01 - CC 95/ChAftTt/PitchBD | MIDI message that operates Ch.A effect button 4 |
| Effects-B1 Assign | OFF/CC 01 - CC 95/ChAftTt/PitchBD | MIDI message that operates Ch.B effect button 1 |
| Effects-B2 Assign | OFF/CC 01 - CC 95/ChAftTt/PitchBD | MIDI message that operates Ch.B effect button 2 |
| Effects-B3 Assign | OFF/CC 01 - CC 95/ChAftTt/PitchBD | MIDI message that operates Ch.B effect button 3 |
| Effects-B4 Assign | OFF/CC 01 - CC 95/ChAftTt/PitchBD | MIDI message that operates Ch.B effect button 4 |
| Video Fader Assign | OFF/CC 01 - CC 95/ChAftTt/PitchBD | MIDI message that operates the video fader |
| Transition Assign | OFF/CC 01 - CC 95/ChAftTt/PitchBD | MIDI message that operates the transition effect |
| Transformer-A Assign | OFF/CC 01 - CC 95/ChAftTt/PitchBD | MIDI message that operates the Transformer-A button |
| Transformer-B Assign | OFF/CC 01 - CC 95/ChAftTt/PitchBD | MIDI message that operates the Transformer-B button |
| BPM/Sync Assign | OFF/CC 01 - CC 95/ChAftTt/PitchBD | MIDI message that operates the BPM/SYNC button |
| Transition Time Assign | OFF/CC 01 - CC 95/ChAftTt/PitchBD | MIDI message that controls the duration of the transition effect |
| Output Fade Assign | OFF/CC 01 - CC 95/ChAftTt/PitchBD | MIDI message that operates the output fader |
Making various settings
The V-4's video mixer lets you adjust the brightness and color of channels A and B independently. With the factory settings, both channels are set to typical settings, and you do not need to change these settings unless you wish. However, if you want to change the settings, you can use the following procedure. Although these settings can be made independently for channels A and B, they cannot be made independently for each input. You can also use the same procedure to change the output position of the image, or switch the video fader mode.
- Press the menu button.
Press the menu button (MENU). The menu will appear in the preview screen.
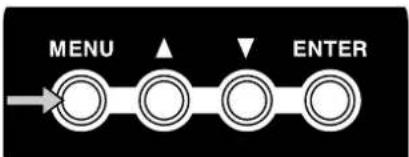
flowchart
graph LR
    A[" "] --> B[" "]
    B --> C[" "]
    C --> D[" "]
    style A fill:#fff,stroke:#000
    style B fill:#fff,stroke:#000
    style C fill:#fff,stroke:#000
    style D fill:#fff,stroke:#000
- Select "Utility."
Use the cursor buttons to select "Utility." Press the enter button (ENTER) to move to the following screen.
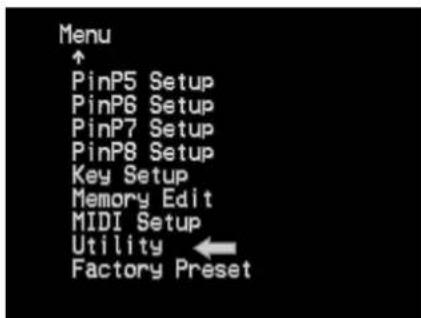
- Select the item that you want to set.
Use the cursor buttons to select the item that you want to set. For the settings that can be adjusted, refer to p.81-82. After you have selected the item, press the enter button (ENTER) to enter the setting screen for that item.
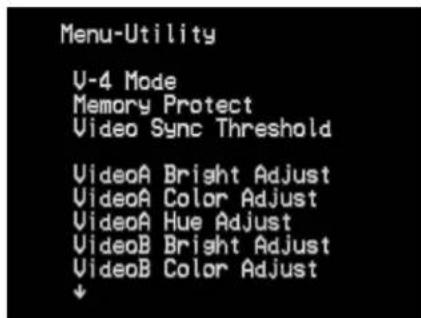
- Change the setting.
Use the cursor buttons to set the parameter.
5. Return to the previous screen.
When you have finished making the setting, press the menu button to return to the previous screen. If you press the menu button three times, you will exit the menu screens and return to the previous screen.
Calibrating the video fader
With the factory settings, moving the V-4's video fader all the way to the A position will output 100% of channel A, and moving it all the way to the B position will output 100% of channel B. If for some reason, moving the video fader all the way to A or B does not output 100% of the image, you can use the following procedure to automatically calibrate the fader.
- Move the video fader all the way to the A position.
First you will calibrate the channel A setting. Move the video fader all the way to the A position.
- Press the menu button (MENU).
Press the menu button to display the menu in the preview screen.
flowchart
graph LR
    A[" "] --> B[" "]
    B --> C[" "]
    C --> D[" "]
    style A fill:#fff,stroke:#000
    style B fill:#fff,stroke:#000
    style C fill:#fff,stroke:#000
    style D fill:#fff,stroke:#000
- Select "Utility."
Use the cursor buttons to select "Utility." Then press the enter button to display the "Utility" settings.
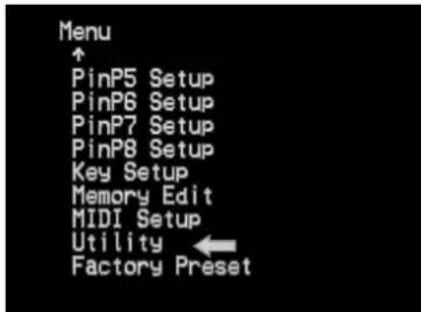
- Select "Video Fader Calibrate A."
Use the cursor buttons to select "Video Fader Calibrate A." The display will indicate "V Fader [A] set [ENTER] SW."
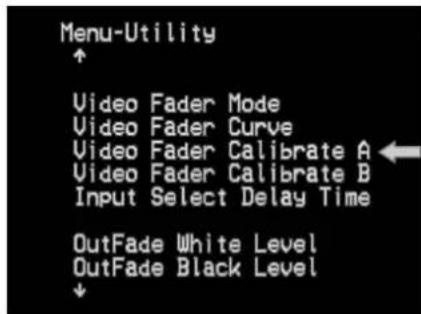
- Press the enter button (ENTER).
Press the enter button. The channel A position will be calibrated automatically.
- Move the video fader all the way to the B position.
Next, you will calibrate the channel B setting. Move the video fader all the way to the B position.
- Press the menu button (MENU).
Press the menu button to display the menu in the preview screen.
- Select "Utility."
Use the cursor buttons to select "Utility." Then press the enter button to display the "Utility" settings.
- Select "Video Fader Calibrate B."
Use the cursor buttons to select "Video Fader Calibrate B." The display will indicate "V Fader [B] set [ENTER] SW."
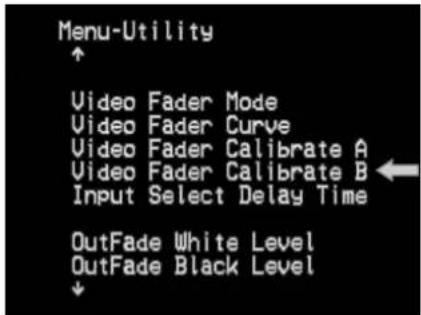
- Press the enter button (ENTER).
Press the enter button. The channel B position will be calibrated automatically.
- Return to the previous screen.
When you are finished, press the menu button to return to the previous screen. If you press the menu button twice, you will exit the menu screens and return to the previous screen.
Using the V-4 in Presentation mode
The V-4 has two modes; Normal mode and Presentation mode. The preceding chapters have explained operation in Normal mode. This chapter explains how to use the V-4 in Presentation mode.
What is Presentation mode?
Presentation mode is ideal when using the V-4 in a presentation such as a meeting or exhibition. Using the V-4 in Presentation mode makes it easy to switch between inputs 1-4 or composite images using the Picture In Picture function.
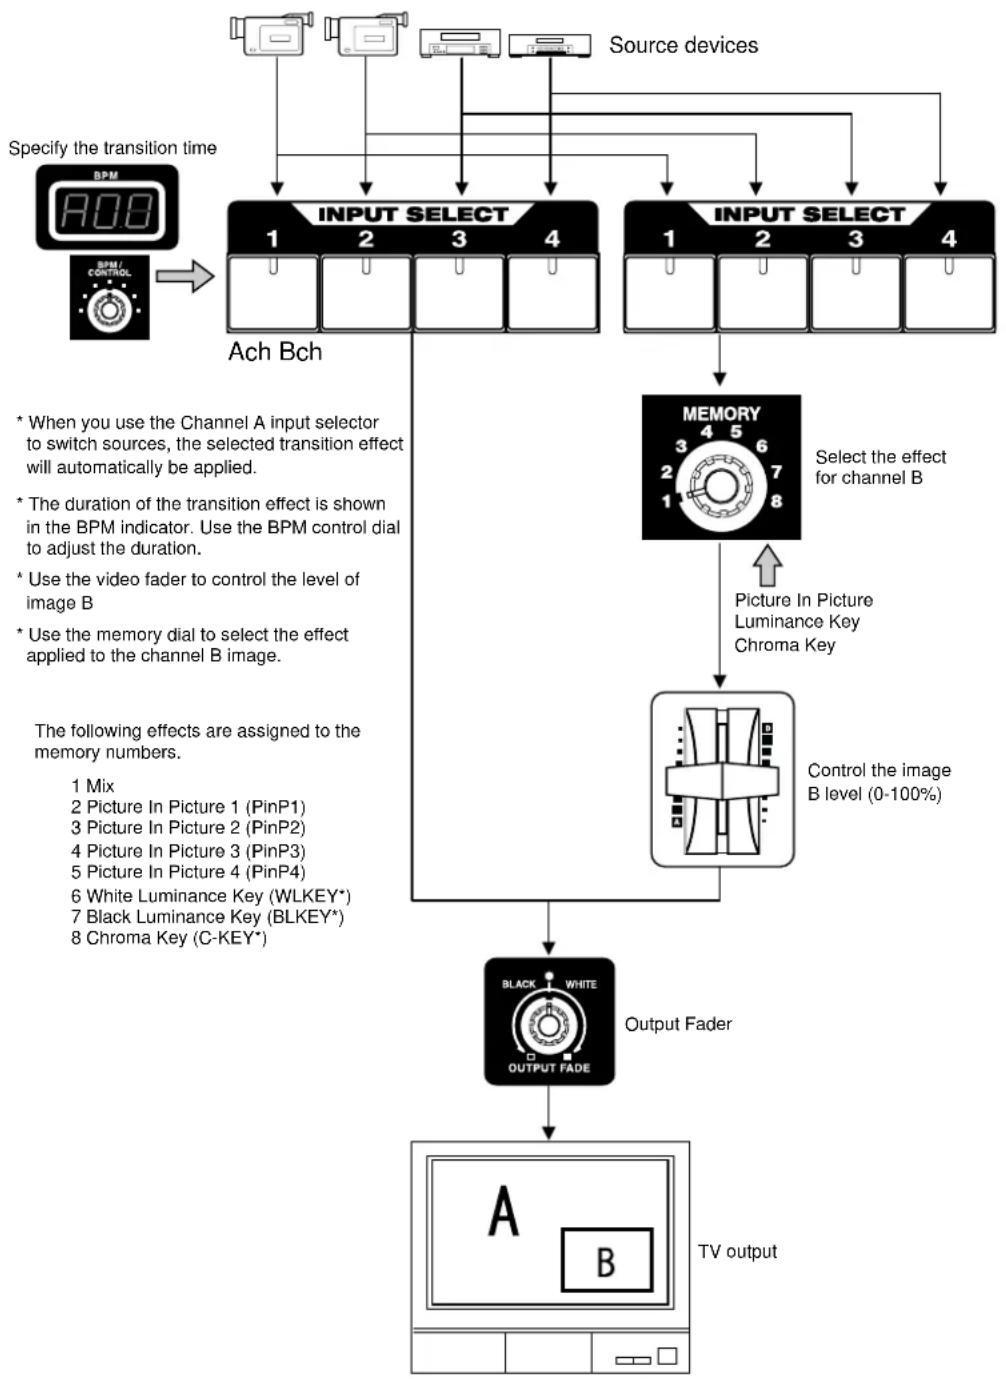
flowchart
graph TD
    A["Input Select"] --> B["Chromatometer 1"]
    A --> C["Chromatometer 2"]
    A --> D["Chromatometer 3"]
    A --> E["Chromatometer 4"]
    F["Input Select"] --> G["Chromatometer 1"]
    F --> H["Chromatometer 2"]
    F --> I["Chromatometer 3"]
    F --> J["Chromatometer 4"]
    K["Memory"] --> L["Select the effect for channel B"]
    L --> M["Picture In Picture Luminance Key Chroma Key"]
    M --> N["Control the image B level (0-100%)"]
    O["Black White Output Fade"] --> P["TV output"]
    Q["A"] --> P
    R["B"] --> P
    S["BPM"] --> T["ACB"]
    U["BPM/CONTROL"] --> V["Ach Bch"]
    W["When using Channel A input selector to switch sources, then selecting transition effect will automatically be applied."]
    X["Duration of transition effect is shown in the BPM indicator. Use the BPM control dial to adjust the duration."]
    Y["Use video fader to control the level of image B"]
    Z["Use memory dial to select the effect applied to the channel B image."]
    AA["The following effects are assigned to the memory numbers."]
    AB["1 Mix"] --> AC["2 Picture In Picture 1 (PinP1)"]
    AD["3 Picture In Picture 2 (PinP2)"]
    AE["4 Picture In Picture 3 (PinP3)"]
    AF["5 Picture In Picture 4 (PinP4)"]
    AG["6 White Luminance Key (WLKEY*)"]
    AH["7 Black Luminance Key (BLKEY*)"]
    AI["8 Chroma Key (C-KEY*)"]
Switching to Presentation mode
To switch from Normal mode to Presentation mode, turn off the power of the V-4. Then hold down channel A input select buttons 1 and 4, and press the power button.

Once you switch to Presentation mode, that setting will be preserved. The next time you start up the V-4, you can simply press the power button and the V-4 will start up in Presentation mode. If you want to start up in Normal mode, hold down the channel A input select buttons 1 and 4 while you press the power button.
■ The function of the input selector
Presentation mode assumes that you will be combining two screens. Use the channel A input selector to switch the background image. When you switch the background image in Presentation mode, the currently selected transition effect will automatically be applied.
Use the channel B input selector to switch the image of the secondary screen, the screen overlays on background.
■ The function of the BPM/CONTROL dial
Use the BPM/CONTROL dial to set the duration of the transition effect. If this dial is set to the far left, the transition effect will have a duration of 0 seconds. If set to the far right, the transition effect will have a duration of 4 seconds.
Presentations using two screens with Picture In Picture
Here's how you can composite two screens, a technique frequently used in presentations.
- Switch the V-4 to Presentation mode.
Start up the V-4 in Presentation mode as described above.

If you want to start up in Normal mode and then switch to Presentation mode by making a menu setting, choose the "Utility" menu item "V-4 Mode" and then select "Presentation."
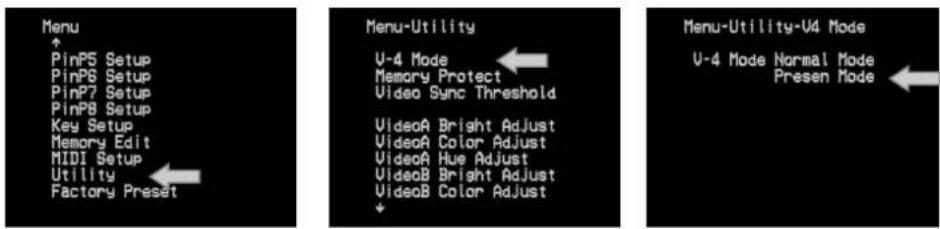
Using the V-4 in Presentation mode
2. Switch the background image.
Successively press the channel A input select buttons 1 through 4 to switch the image.
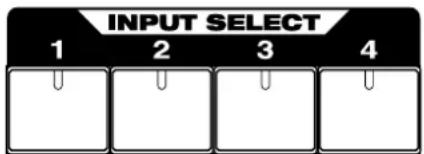
3. Apply the Picture In Picture function.
Set the memory dial to number 2. Picture In Picture will be applied.
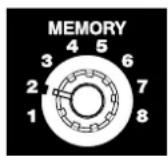
4. Apply other effects to composite two images.
Turn the memory dial to other positions to try out other types of effects. Numbers 2 - 5 change the location of the secondary screen of the Picture In Picture function. Numbers 6-8 apply other effects (luminance key/chroma key).
5. Switch the secondary image.
Press the channel B input selector buttons to switch the secondary image.
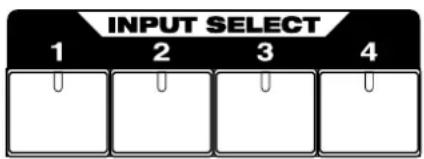
Switching between NTSC and PAL
The V-4 can be switched to support either NTSC or PAL format signals. To start up in PAL mode, hold down preview select button 1 and "OUTPUT," and press the power button.

flowchart
graph LR
    A["Preview OUT SELECT"] --> B["1"]
    B --> C["2"]
    C --> D["3"]
    D --> E["4"]
    E --> F["OUTPUT"]
    G["EDIROL"] --> H["POWER"]
    H --> I["IN"]
    I --> J["OUTPUT"]
    J --> K["1"]
    K --> L["0"]
    M["INDIA: Redund Corporation, INCH. Germany"] --> N["Power Unit 1"]
    O["INCH. Germany"] --> P["Power Unit 2"]
    Q["N225 CE"] --> R["Output Comparison"]
The next time you start up, you can simply press the power button to start up in PAL mode. If you want to return to NTSC mode, once again hold down preview select button 1 and "OUTPUT", and press the power button.
When the V-4 starts up, an indication of whether it is starting up in NTSC mode or PAL mode will appear for several seconds in the preview screen.
Changing the video fader orientation
The V-4's T-bar style video fader may be installed in either the horizontal or vertical orientation depending on your preference. When shipped, the video fader is installed for vertical operation. If you prefer to operate the fader horizontally, you can turn the video fader 90 degrees.
- Remove the screws.
Four screws fasten the video fader. Remove these four screws from the round video fader mounting plate, being careful not to lose them.
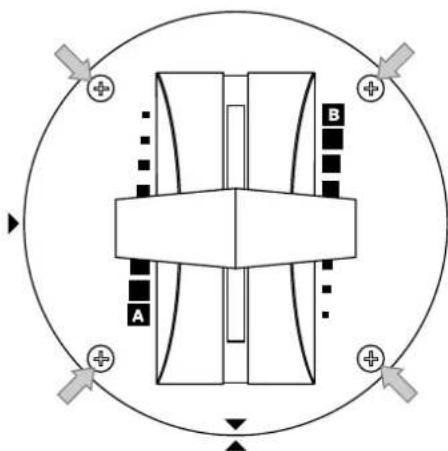
natural_image
Pure mechanical component diagram without any text, numbers, or symbols- Reposition the video fader.
Turn the video fader 90 degrees. Align the triangle printed on the round mounting plate of the video fader with the triangle printed on the panel of the V-4.
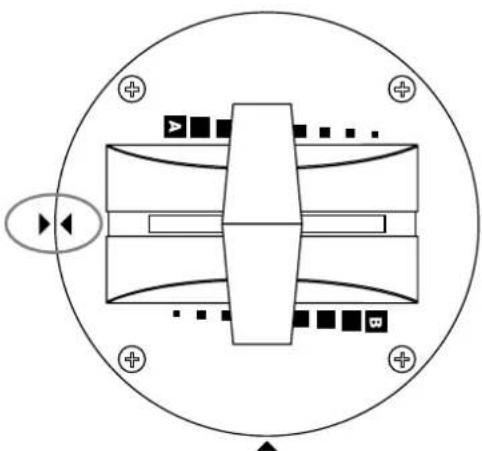
natural_image
Pure electrical circuit lines without any symbols- Fasten the screws.
Fasten the video fader to the panel, using the screws that you removed earlier. Firmly tighten all four screws.
The cable that connects the video fader to the V-4 may become disconnected if you pull strongly when unfastening the video fader panel. Please use caution when pulling the T-bar away from the panel.
If you attempt to rotate the vide fader panel further than 90 degrees, the internal cable may be damaged. Note the location of the triangle symbols, and do not rotate the video fader panel further than 90 degrees.
To remove the screws, use a screwdriver that matches the screw heads, and work carefully. If the screw heads become damaged, you will be unable to fasten the video fader in place.
Troubleshooting
If you suspect a malfunction, please check your system once again, taking note of the points listed below. If it still does not function correctly, contact an Edirol Service Center or the dealer where you purchased the unit.
Operating the video fader does not switch the image
If the same image is being input to channels A and B, operating the T-bar will not produce any change in the output image. You must input different images into channels A and B.
Operating the transformer buttons (TRANSFORMER) does not switch the image
With the factory settings, when the memory dial is set to 1, these buttons will "cut" between images. Check the position of the memory dial.
No image is output even though you play back the source device
Make sure that the output fade dial is set to the center position (green LED lit). With the factory settings, turning the dial toward the left will fade to black, and turning it toward the right will fade to white. If the dial is set all the way to left or right, no image will be output. Also make sure that the input select setting is correct.
Turning the control dial does not change the effect
Not all effects have parameters that can be modified by the control dial. If you have selected an effect whose parameter can be modified by the control dial, the channel A/B effect button will blink. If the button is only lit (not blinking), the control dial will not affect the parameter.
Image does not switch (effect not applied) in time with the BPM
Did you press the BPM sync button (BPM SYNC)? The BPM sync button (BPM SYNC) must be pressed if you want to switch the image or apply an effect in time with the BPM.
Image does not switch (effect does not apply) in time with TAP
Did you press the BPM sync button (BPM SYNC)? The BPM sync button (BPM SYNC) must be pressed if you want to use the TAP button to switch the image or apply an effect.
Operating the video fader does not switch the image in the expected direction
It is possible that if you detached the video fader to reposition it by 90 degrees, the internal connector may have been pulled out and re-inserted in the opposite orientation. Detach the video fader with its mounting plate, and try reinserting the connector in the opposite orientation.
Menu List
| Mix (Trans1) [Mem2-8] | 001:Mix | Mix(Dissolve) | |
| Wipe (Trans2) [Mem2-8] | 002:Wipe01|073:Wipe72 | Hard-edged wipes | |
| Efx (Trans3) [Mem2-8] | 074:SWipe01|145:SWipe72 | Soft-edged wipes | |
| 146:MWipe01|217:MWipe72 | Multi-border wipes | ||
| 218:Key01|221:Key04 | Transition effectsusing key extraction | ||
| 222:Slide01|248:Slide27 | Slide in/out |
Parameter of effects marked by an asterisk* can be varied by the control dial
| Effects-A [Mem2-8] | A-Efx1 | |
| A-Efx2 | ||
| A-Efx3 | ||
| A-Efx4 | ||
| Effects-B [Mem2-8] | B-Efx1 | |
| B-Efx2 | ||
| B-Efx3 | ||
| B-Efx4 |
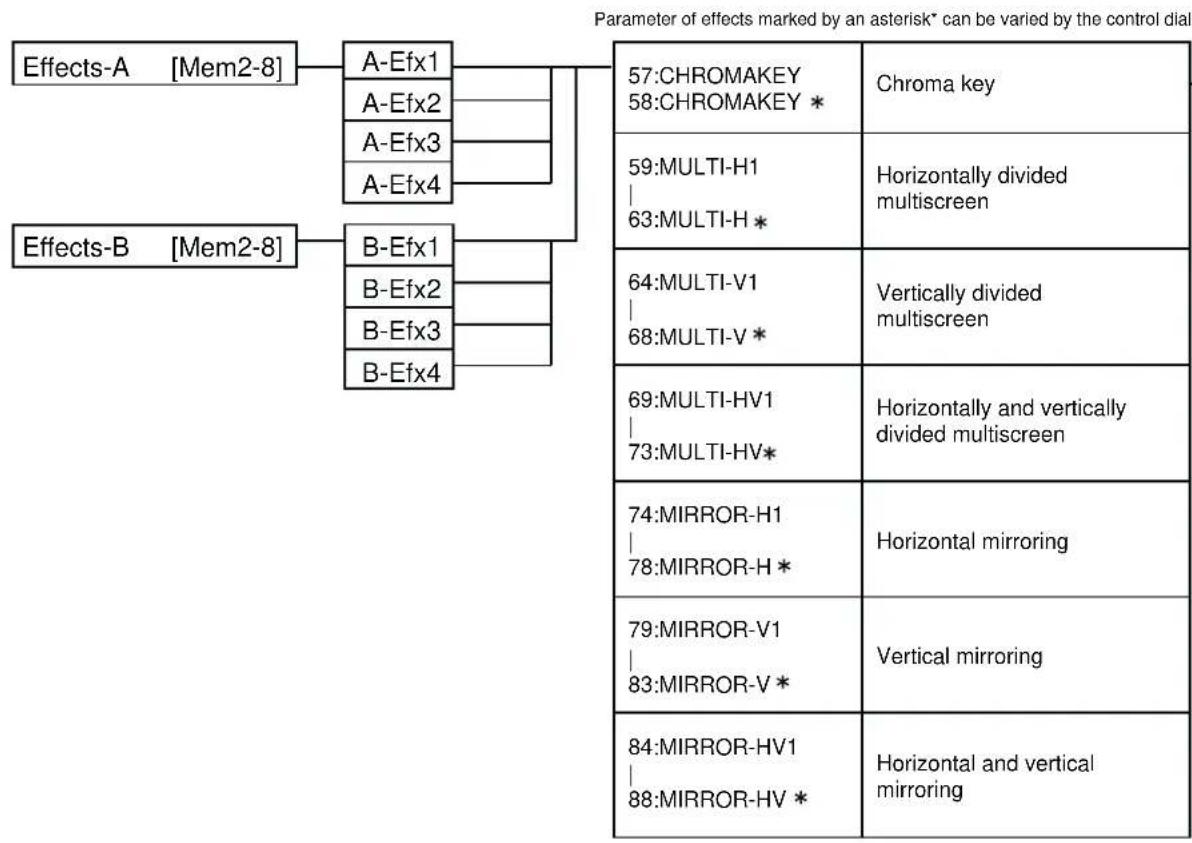
flowchart
graph TD
    A["Effects-A [Mem2-8"]] --> B["A-Efx1"]
    A --> C["A-Efx2"]
    A --> D["A-Efx3"]
    A --> E["A-Efx4"]
    F["Effects-B [Mem2-8"]] --> G["B-Efx1"]
    F --> H["B-Efx2"]
    F --> I["B-Efx3"]
    F --> J["B-Efx4"]
    B --> K["57:CHROMAKEY\n58:CHROMAKEY *"]
    C --> L["59:MULTI-H1\n63:MULTI-H *"]
    G --> M["64:MULTI-V1\n68:MULTI-V *"]
    G --> N["69:MULTI-HV1\n73:MULTI-HV*"]
    G --> O["74:MIRROR-H1\n78:MIRROR-H *"]
    G --> P["79:MIRROR-V1\n83:MIRROR-V *"]
    G --> Q["84:MIRROR-HV1\n88:MIRROR-HV *"]
    K --> R["Chroma key"]
    L --> S["Horizontally divided multiscreen"]
    M --> T["Vertically divided multiscreen"]
    O --> U["Horizontally and vertically divided multiscreen"]
    P --> V["Vertical mirroring"]
    Q --> W["Horizontal and vertical mirroring"]
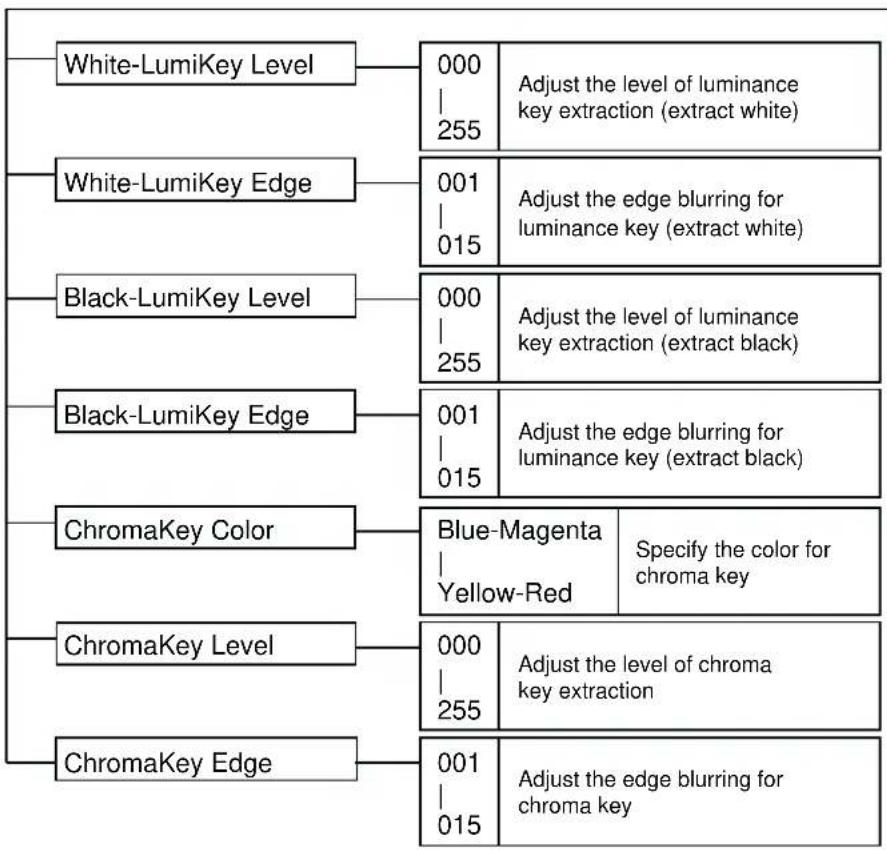
flowchart
graph TD
    A["White-LumiKey Level"] --> B["000 | 255"]
    C["White-LumiKey Edge"] --> D["001 | 015"]
    E["Black-LumiKey Level"] --> F["000 | 255"]
    G["Black-LumiKey Edge"] --> H["001 | 015"]
    I["ChromaKey Color"] --> J["Blue-Magenta | Yellow-Red"]
    K["ChromaKey Level"] --> L["000 | 255"]
    M["ChromaKey Edge"] --> N["001 | 015"]
    B --> O["Adjust the level of luminance key extraction (extract white)"]
    D --> P["Adjust the edge blurring for luminance key (extract white)"]
    F --> Q["Adjust the level of luminance key extraction (extract black)"]
    H --> R["Adjust the edge blurring for luminance key (extract black)"]
    J --> S["Specify the color for chroma key"]
    L --> T["Adjust the level of chroma key extraction"]
    N --> U["Adjust the edge blurring for chroma key"]
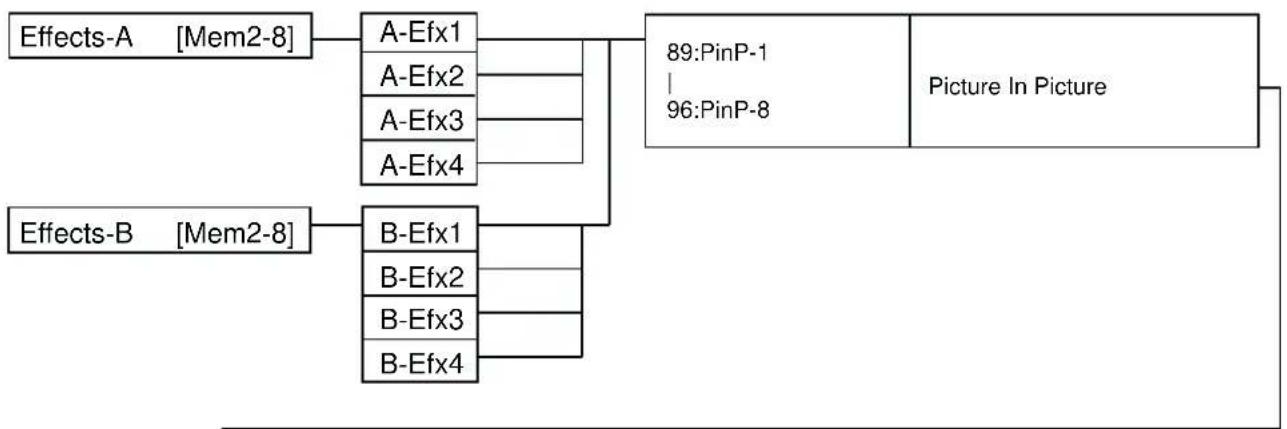
flowchart
graph TD
    A["Effects-A [Mem2-8"]] --> B["A-Efx1"]
    A --> C["A-Efx2"]
    A --> D["A-Efx3"]
    A --> E["A-Efx4"]
    F["Effects-B [Mem2-8"]] --> G["B-Efx1"]
    F --> H["B-Efx2"]
    F --> I["B-Efx3"]
    F --> J["B-Efx4"]
    B --> K["89:PinP-1\n96:PinP-8"]
    G --> K
    K --> L["Picture In Picture"]
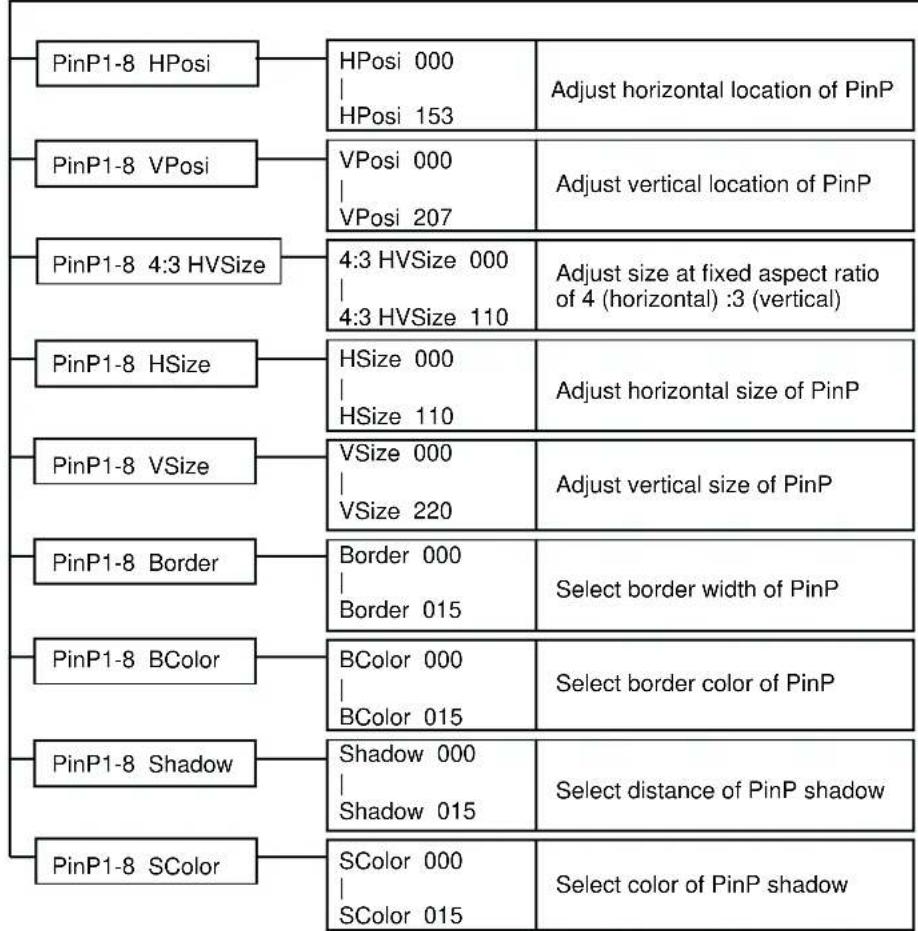
flowchart
graph TD
    A["PinP1-8 HPosi"] --> B["HPosi 000 | HPosi 153"]
    C["PinP1-8 VPosi"] --> D["VPosi 000 | VPosi 207"]
    E["PinP1-8 4:3 HVSize"] --> F["4:3 HVSize 000 | 4:3 HVSize 110"]
    G["PinP1-8 HSize"] --> H["HSize 000 | HSize 110"]
    I["PinP1-8 VSize"] --> J["VSize 000 | VSize 220"]
    K["PinP1-8 Border"] --> L["Border 000 | Border 015"]
    M["PinP1-8 BColor"] --> N["BColor 000 | BColor 015"]
    O["PinP1-8 Shadow"] --> P["Shadow 000 | Shadow 015"]
    Q["PinP1-8 SColor"] --> R["SColor 000 | SColor 015"]
    B --> S["Adjust horizontal location of PinP"]
    D --> T["Adjust vertical location of PinP"]
    F --> U["Adjust size at fixed aspect ratio of 4 (horizontal) :3 (vertical)"]
    H --> V["Adjust horizontal size of PinP"]
    J --> W["Adjust vertical size of PinP"]
    L --> X["Select border width of PinP"]
    N --> Y["Select border color of PinP"]
    P --> Z["Select distance of PinP shadow"]
    R --> AA["Select color of PinP shadow"]
| Transformer [Mem2-8] 01: none | No function |
| 02:Trans-Trans | Output the image of pressed channel as long as button is held. |
| 03:A<->9-9<->B | Switch between A and B each time you press the button.0--9 indicates the duration of the transition.Higher numbers produce a longer transition. |
| 04:A<->8-8<->B | |
| 05:A<->7-7<->B | |
| 06:A<->6-6<->B | |
| 07:A<->5-5<->B | |
| 08:A<->4-4<->B | |
| 09:A<->3-3<->B | |
| 10:A<->2-2<->B | |
| 11:A<->1-1<->B | |
| 12:A<->0-0<->B | |
| 13:A<-9 - 9->B | Switch to the image of the channel (A or B) you press.0--9 indicates the duration of the transition.Higher numbers produce a longer transition. |
| 14:A<-8 - 8->B | |
| 15:A<-7 - 7->B | |
| 16:A<-6 - 6->B | |
| 17:A<-5 - 5->B | |
| 18:A<-4 - 4->B | |
| 19:A<-3 - 3->B | |
| 20:A<-2 - 2->B | |
| 21:A<-1 - 1->B | |
| 22:A<-0 - 0->B | |
| 23:A->9 - 9<-B | Switch to the image of the opposite channel (A or B) from the one you press.0--9 indicates the duration of the transition.Higher numbers produce a longer transition. |
| 24:A->8 - 8<-B | |
| 25:A->7 - 7<-B | |
| 26:A->6 - 6<-B | |
| 27:A->5 - 5<-B | |
| 28:A->4 - 4<-B | |
| 29:A->3 - 3<-B | |
| 30:A->2 - 2<-B | |
| 31:A->1 - 1<-B | |
| 32:A->0 - 0<-B | |
| 33:White-White | Fade both channels to white |
| 34:Black-Black | Fade both channels to black |
| 35:White-Black | Fade channel A to white/channel B to black |
| 36:Black-White | Fade channel A to black/channel B to white |
| Output Fade [Mem2-8] 01.No Control | No function |
| 02:Black-White | Left: black/Right: fade to white |
| 03:AutoB/W | Auto fade |
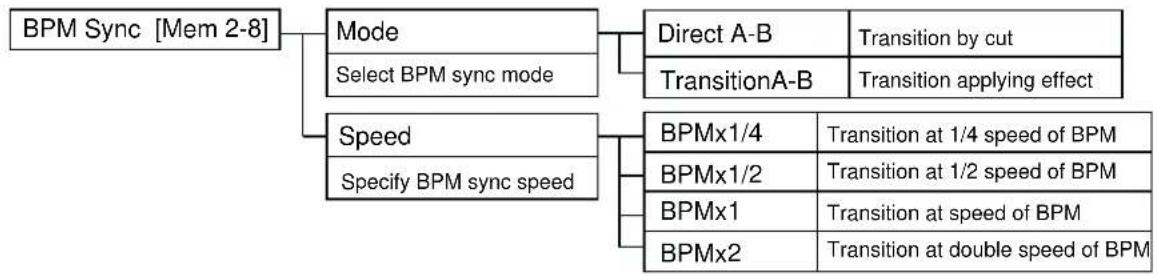
flowchart
graph TD
    A["BPM Sync [Mem 2-8"]] --> B["Mode"]
    B --> C["Select BPM sync mode"]
    B --> D["Speed"]
    D --> E["Specify BPM sync speed"]
    C --> F["Direct A-B"]
    C --> G["TransitionA-B"]
    F --> H["Transition by cut"]
    G --> I["Transition applying effect"]
    D --> J["BPMx1/4"]
    D --> K["BPMx1/2"]
    D --> L["BPMx1"]
    D --> M["BPMx2"]
    J --> N["Transition at 1/4 speed of BPM"]
    K --> O["Transition at 1/2 speed of BPM"]
    L --> P["Transition at speed of BPM"]
    M --> Q["Transition at double speed of BPM"]
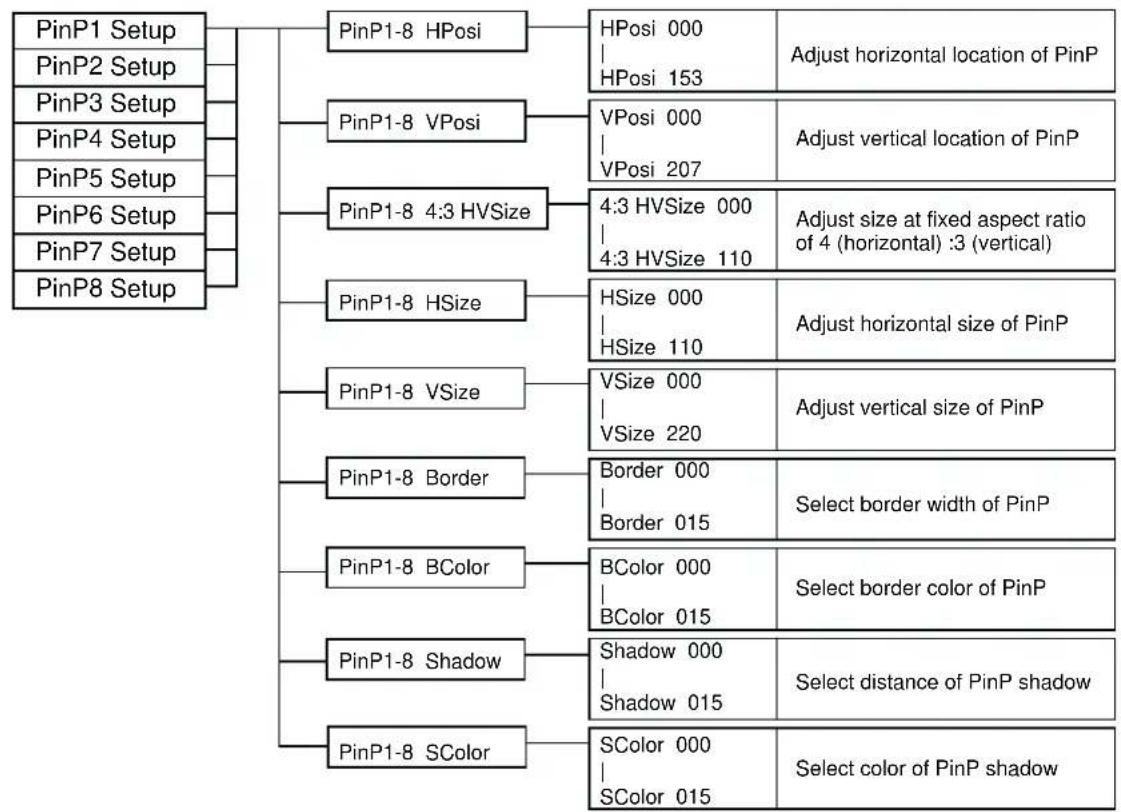
flowchart
graph TD
    A["PinP1 Setup"] --> B["PinP1-8 HPosi"]
    C["PinP2 Setup"] --> D["PinP1-8 VPosi"]
    E["PinP3 Setup"] --> F["PinP1-8 4:3 HVSize"]
    G["PinP4 Setup"] --> F
    H["PinP5 Setup"] --> I["PinP1-8 HSize"]
    J["PinP6 Setup"] --> K["PinP1-8 VSize"]
    L["PinP7 Setup"] --> M["PinP1-8 Border"]
    N["PinP8 Setup"] --> O["PinP1-8 BColor"]
    P["PinP1-8 Shadow"] --> Q["PinP1-8 SColor"]
    R["PinP1-8 HPosi"] --> S["HPosi 000 | HPosi 153"]
    T["PinP1-8 VPosi"] --> U["VPosi 000 | VPosi 207"]
    V["PinP1-8 4:3 HVSize 000 | 4:3 HVSize 110"]
    W["PinP1-8 HSize"] --> X["HSize 000 | HSize 110"]
    Y["PinP1-8 VSize"] --> Z["VSize 000 | VSize 220"]
    AA["PinP1-8 Border"] --> AB["Border 000 | Border 015"]
    AC["PinP1-8 BColor"] --> AD["BColor 000 | BColor 015"]
    AE["PinP1-8 Shadow"] --> AF["Shadow 000 | Shadow 015"]
    AG["PinP1-8 SColor"] --> AH["SColor 000 | SColor 015"]
    AI["Adjust horizontal location of PinP"] --> AJ["Adjust vertical location of PinP"]
    AK["Adjust size at fixed aspect ratio of 4 (horizontal) :3 (vertical)"] --> AL["Adjust horizontal size of PinP"]
    AM["Adjust vertical size of PinP"] --> AN["Select border width of PinP"]
    AO["Select border color of PinP"] --> AP["Select distance of PinP shadow"]
    AQ["Select color of PinP shadow"] --> AR["Select color of PinP shadow"]
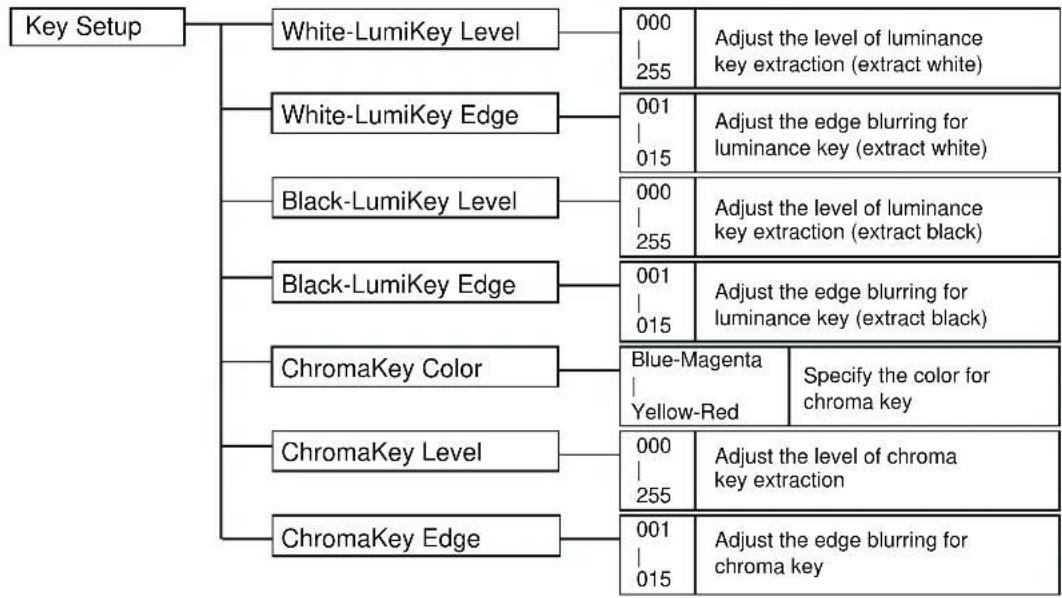
flowchart
graph TD
    A["Key Setup"] --> B["White-LumiKey Level"]
    A --> C["White-LumiKey Edge"]
    A --> D["Black-LumiKey Level"]
    A --> E["Black-LumiKey Edge"]
    A --> F["ChromaKey Color"]
    A --> G["ChromaKey Level"]
    A --> H["ChromaKey Edge"]

    B --> I["000 255"]
    C --> J["001 015"]
    D --> K["000 255"]
    E --> L["001 015"]

    I --> M["Adjust the level of luminance key extraction (extract white)"]
    J --> N["Adjust the edge blurring for luminance key (extract white)"]
    K --> O["Adjust the level of luminance key extraction (extract black)"]
    L --> P["Adjust the edge blurring for luminance key (extract black)"]

    F --> Q["Blue-Magenta  Yellow-Red"]
    G --> R["000 255"]
    H --> S["001 015"]

    T["Select the color for chroma key"]
    U["Adjust the level of chroma key extraction"]
    V["Adjust the edge blurring for chroma key"]
Menu List
| Memory Edit | Copy Mem1->Mem2|Copy Mem8->Mem8 | Copy the contents of the selected memory dial setting to another number |
| Copy Mem1->All | Copy the contents of the selected memory dial setting to all numbers | |
| Exchange Mem1->Mem2|Exchange Mem8->Mem8 | Exchange the contents of the selected memory dial setting with another number |
| MIDI Setup | MIDI Tx Channel | 1 - 16 | MIDI transmit channel setting |
| MIDI Tx Channel | 1 - 16/OFF | MIDI receive channel settings | |
| MIDI Out/Thru Switch | Out/Thru | MIDI out/thru setting | |
| V-LINK Switch | Off/On | V-LINK on/off setting | |
| Note Mode On/Off | Off/On | Note mode on/off setting | |
| Device ID | 0x00 - 0x1f | Device ID No. setting | |
| Effects-A1 Assign | OFF/CC 01 - CC 95/ChAftTt/PitchBD | MIDI message that operates Ch.A effect button 1 | |
| Effects-A2 Assign | OFF/CC 01 - CC 95/ChAftTt/PitchBD | MIDI message that operates Ch.A effect button 2 | |
| Effects-A3 Assign | OFF/CC 01 - CC 95/ChAftTt/PitchBD | MIDI message that operates Ch.A effect button 3 | |
| Effects-A4 Assign | OFF/CC 01 - CC 95/ChAftTt/PitchBD | MIDI message that operates Ch.A effect button 4 | |
| Effects-B1 Assign | OFF/CC 01 - CC 95/ChAftTt/PitchBD | MIDI message that operates Ch.B effect button 1 | |
| Effects-B2 Assign | OFF/CC 01 - CC 95/ChAftTt/PitchBD | MIDI message that operates Ch.B effect button 2 | |
| Effects-B3 Assign | OFF/CC 01 - CC 95/ChAftTt/PitchBD | MIDI message that operates Ch.B effect button 3 | |
| Effects-B4 Assign | OFF/CC 01 - CC 95/ChAftTt/PitchBD | MIDI message that operates Ch.B effect button 4 | |
| Video Fader Assign | OFF/CC 01 - CC 95/ChAftTt/PitchBD | MIDI message that operates the video fader | |
| Transition Assign | OFF/CC 01 - CC 95/ChAftTt/PitchBD | MIDI message that operates the transition effect | |
| Transformer-A Assign | OFF/CC 01 - CC 95/ChAftTt/PitchBD | MIDI message that operates the Transformer-A button | |
| Transformer-B Assign | OFF/CC 01 - CC 95/ChAftTt/PitchBD | MIDI message that operates the Transformer-B button | |
| BPM/Sync Assign | OFF/CC 01 - CC 95/ChAftTt/PitchBD | MIDI message that operates the BPM/SYNC button | |
| Transition Time Assign | OFF/CC 01 - CC 95/ChAftTt/PitchBD | MIDI message that controls the duration of the transition effect | |
| Output Fade Assign | OFF/CC 01 - CC 95/ChAftTt/PitchBD | MIDI message that operates the output fader |
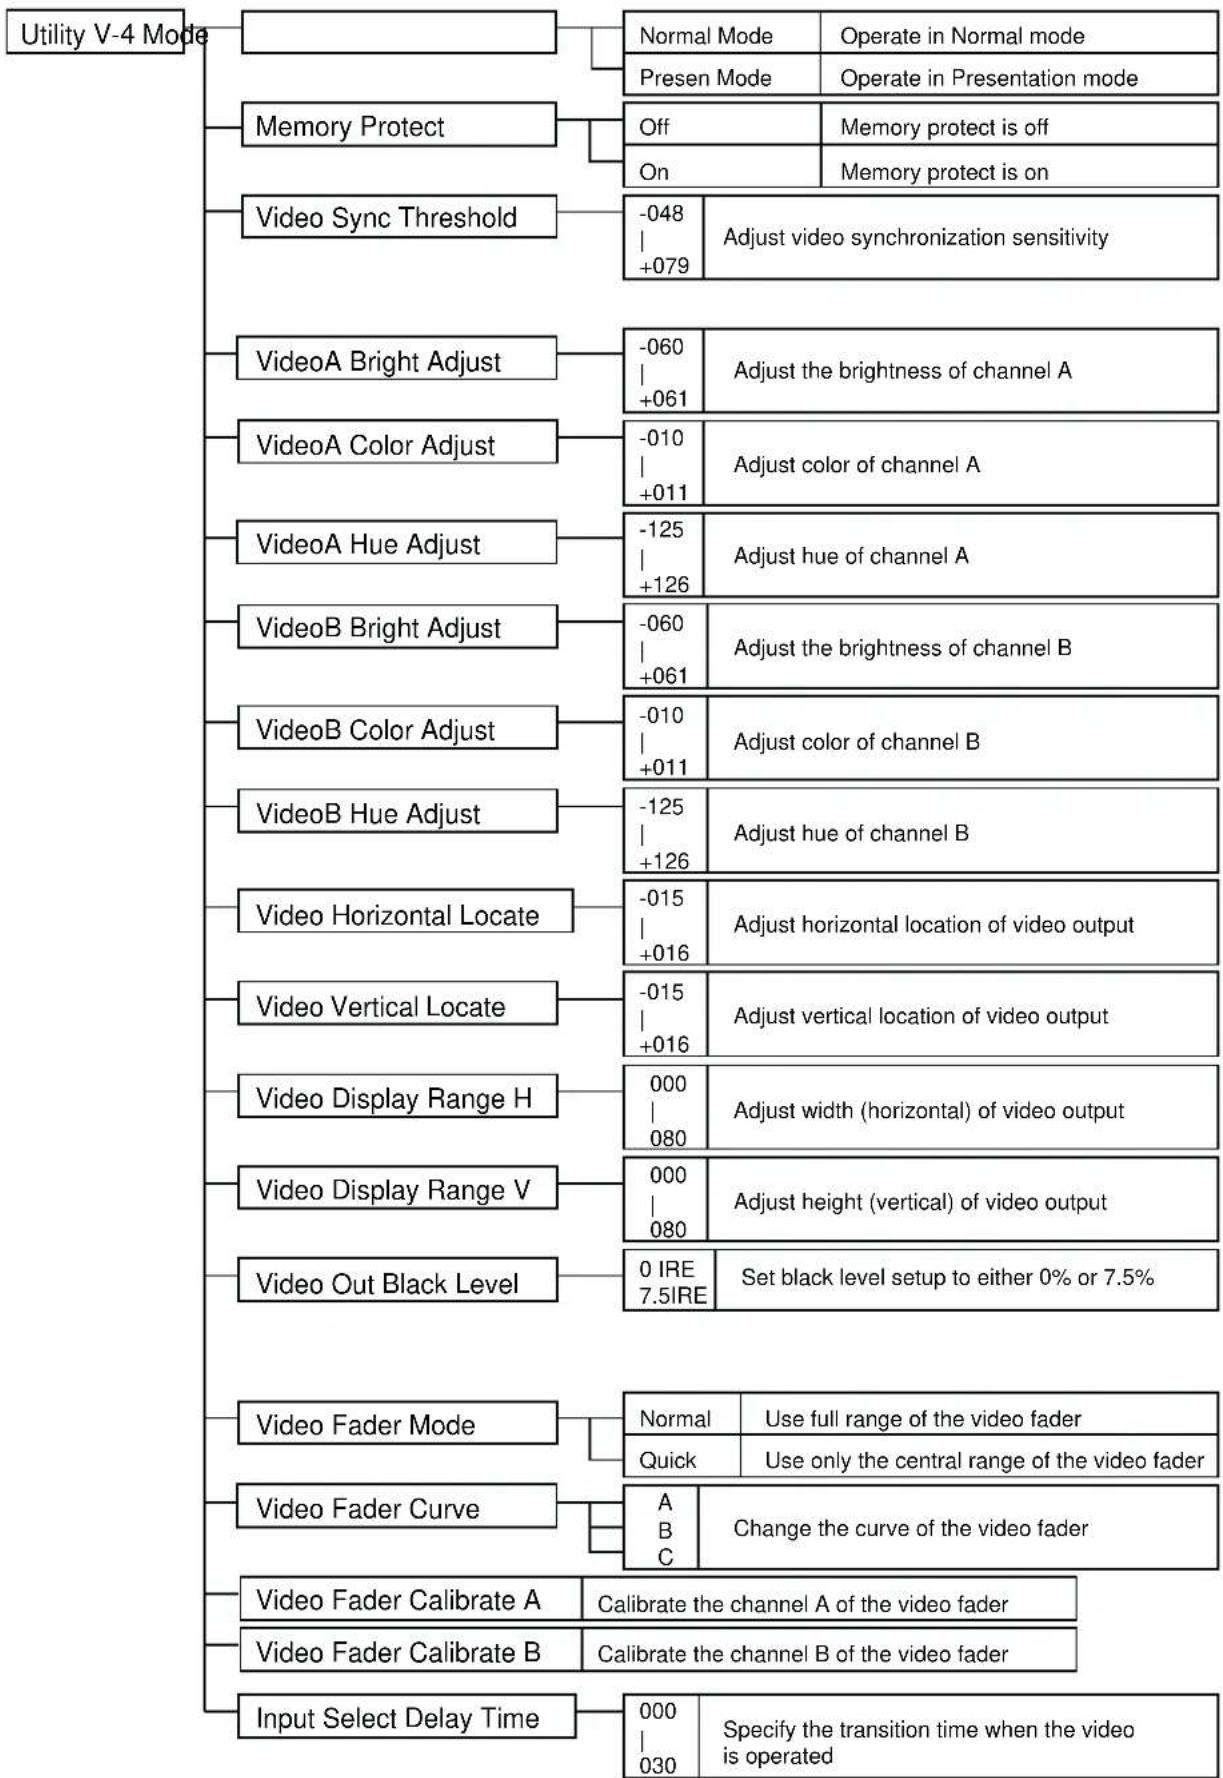
Menu List
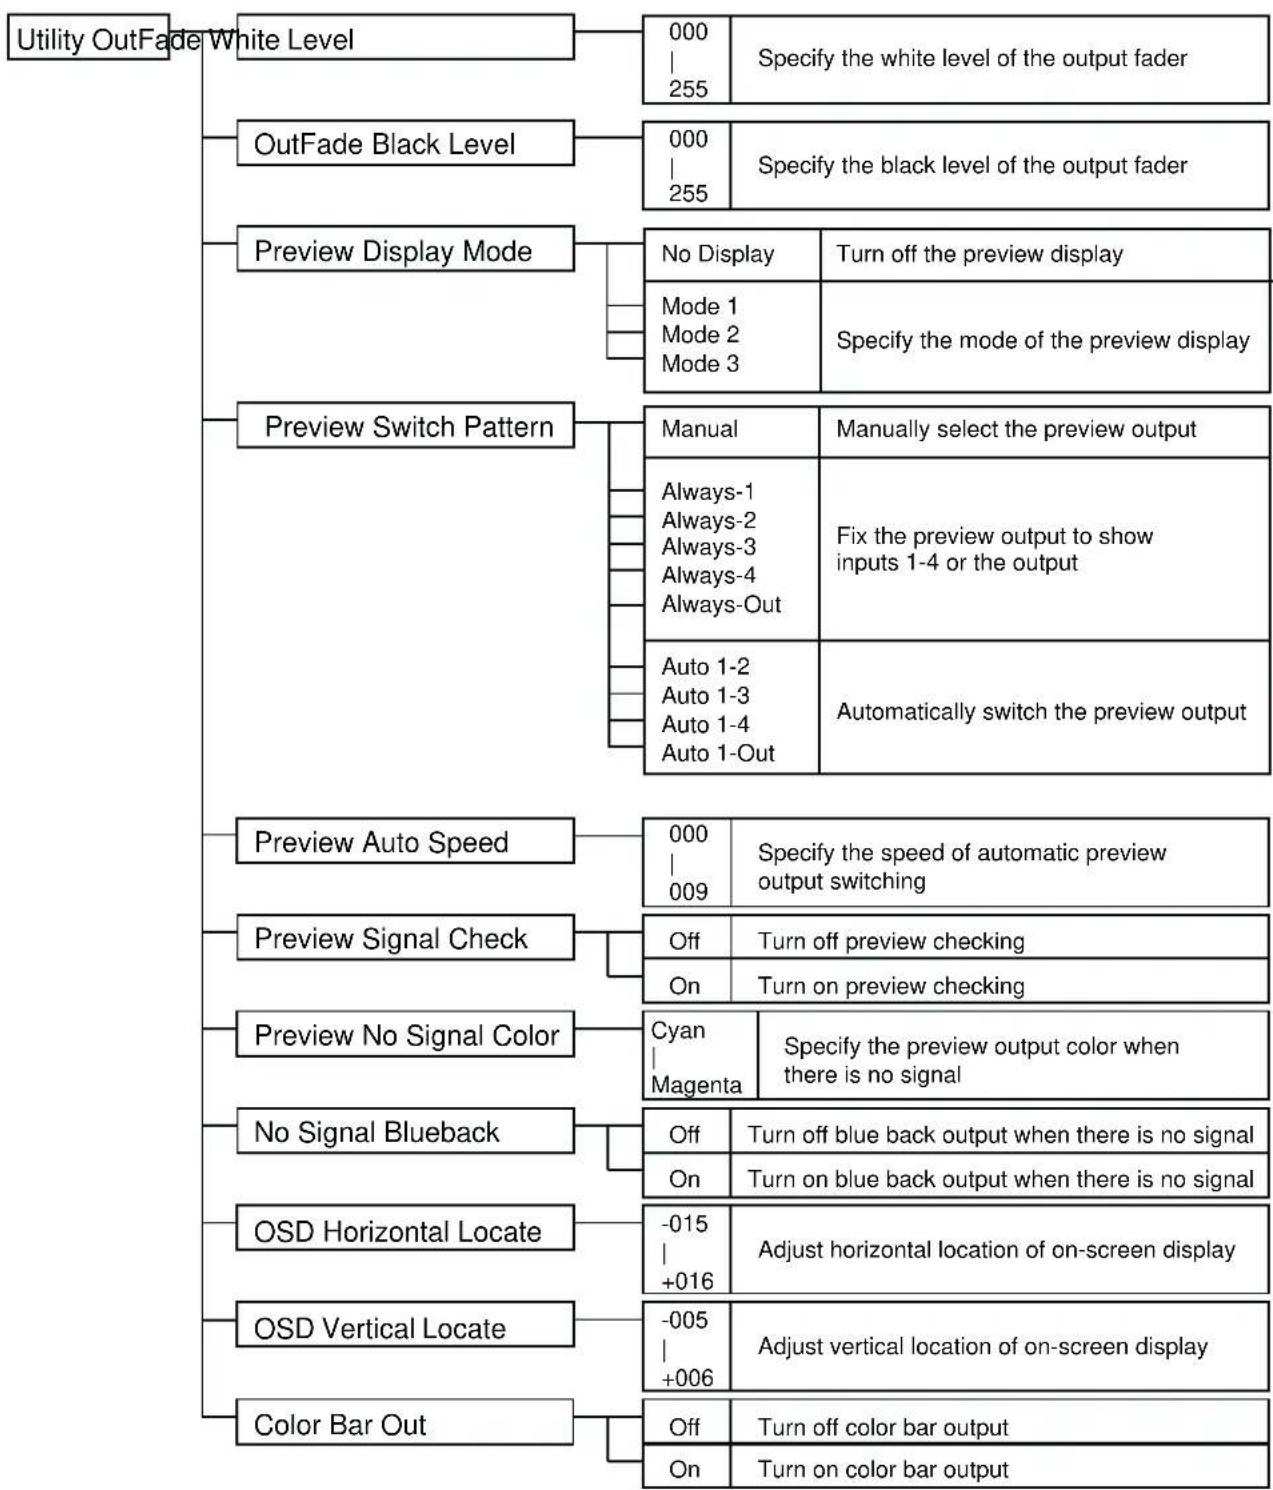
flowchart
graph TD
    A["Utility OutFade White Level"] --> B["000 | 255"]
    A --> C["OutFade Black Level"]
    C --> D["000 | 255"]
    D --> E["Specify the white level of the output fader"]
    F["Preview Display Mode"] --> G["No Display"]
    F --> H["Mode 1<br>Mode 2<br>Mode 3"]
    F --> I["Turn off the preview display"]
    F --> J["Specify the mode of the preview display"]
    K["Preview Switch Pattern"] --> L["Manual"]
    K --> M["Always-1<br>Always-2<br>Always-3<br>Always-4<br>Always-Out"]
    K --> N["Fix the preview output to show inputs 1-4 or the output"]
    K --> O["Automatically switch the preview output"]
    P["Preview Auto Speed"] --> Q["000 | 009"]
    P --> R["Preview Signal Check"]
    R --> S["Off"]
    R --> T["On"]
    R --> U["Cyan | Magenta"]
    U --> V["Specify the preview output color when there is no signal"]
    W["Preview No Signal Color"] --> X["On"]
    W --> Y["Cyan | Magenta"]
    W --> Z["Off"]
    W --> AA["Turn off blue back output when there is no signal"]
    AB["No Signal Blueback"] --> AC["On"]
    AB --> AD["Turn on blue back output when there is no signal"]
    AE["OSD Horizontal Locate"] --> AF["-015 | +016"]
    AE --> AG["Adjust horizontal location of on-screen display"]
    AH["OSD Vertical Locate"] --> AI["-005 | +006"]
    AH --> AJ["Adjust vertical location of on-screen display"]
    AK["Color Bar Out"] --> AL["Off"]
    AK --> AM["Turn off color bar output"]
    AK --> AN["On"]
    AK --> AO["Turn on color bar output"]
| Factory Preset | Return all settings to the factory-set condition |
Main specifications
Video format
NTSC or PAL (ITU601)
Video sampling rate
13.5 MHz, 4:2:2 (Y: B-Y:R-Y), 8-bit
Video input
S-video: 4-pin mini DIN type x 2 jacks (inputs 1 or 2)
Video (composite): RCA pin type x 4 (inputs 1-4; however if S-video is simultaneously input to 1/
2, S-video takes priority)
Video output
Video (composite): RCA pin type x 2 jacks
Preview output
Video (composite): RCA pin type x 1 jack
Input level and impedance
S-video output: luminance signal: 1 Vp-p, 75 ohm; chrominance signal: 0.286 mVp-p, 75 ohm
(NTSC), 0.3 mVp-p, 75 ohm (PAL)
Video (composite) output: 1 Vp-p, 75 ohm
Output level and impedance
S-video output: luminance signal: 1 Vp-p, 75 ohm; chrominance signal: 0.286 mVp-p, 75 ohm
(NTSC), 0.3 mVp-p, 75 ohm (PAL)
Video (composite) output (final output and preview output): 1 Vp-p, 75 ohm
Control connectors
MIDI IN: 5-pin DIN type
MIDI OUT: 5-pin DIN type
Transition effects
Mix(Dissolve)
Wipe: hard edge wipe, soft edge wipe, multi-border wipe (more than 200 types)
Video effects
strobe, still, negative, colorize, solarization, mirror, multi, shake
Compositing effects
Picture-in-picture, luminance key, chroma key
Power supply
Dedicated AC adaptor
Current consumption
1500 mA
Main specifications
Dimensions
225 mm (W) × 295 mm (D) × 105 mm (H)
Weight
2.3 kg
Included items
AC adaptor
Owner's manual
Transition effect list
T-bar attachment screws x 4 pcs. (spares)
Examples of using the V-4
Using the V-4 at an event
Here's an example of using the V-4 to switch between multiple live images and sources such as a video tape, as might be used at events such as exhibitions or performances.
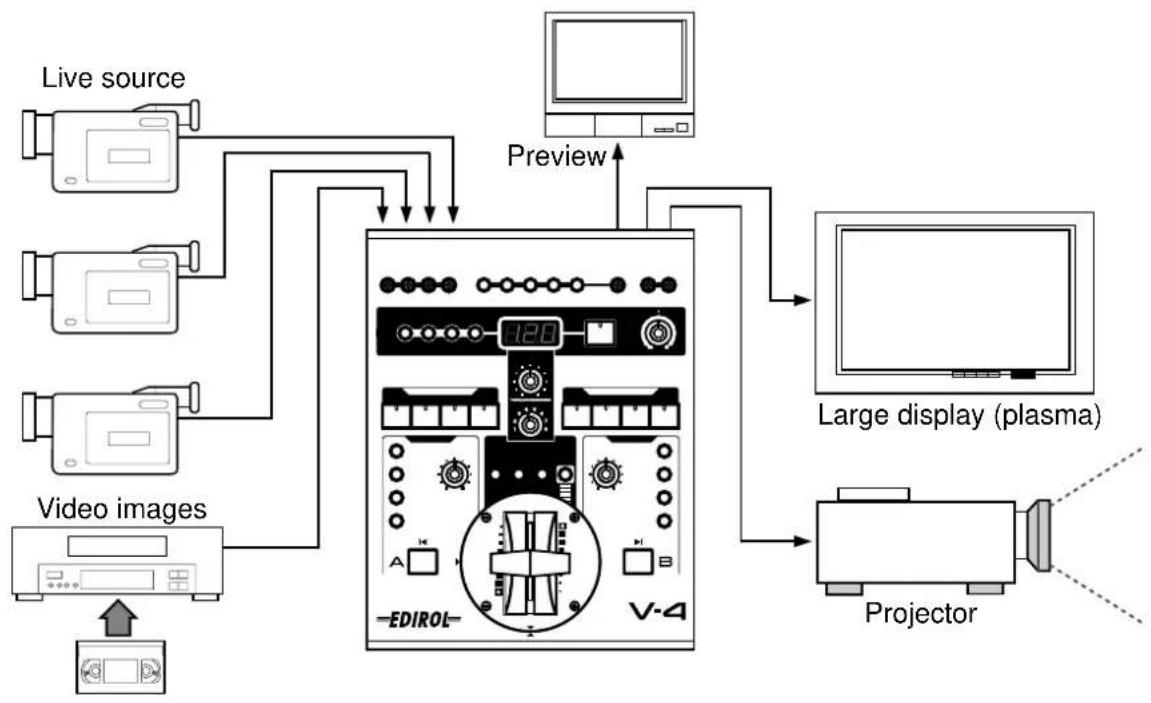
flowchart
graph TD
    A["Live source"] --> B["EDIROL- V-A"]
    C["Video images"] --> B
    D["Large display (plasma)"] --> B
    E["Projector"] --> B
    B --> F["Preview"]
    B --> G["Video image"]
Advantages of using the V-4
- Two images (two live images, or live video + recorded video) can be mixed
- Use picture-in-picture to display two screens simultaneously
* For details on switching images, refer to p. 23.
* For details on using picture-in-picture, refer to p. 26.
Using the V-4 at a concert or VJ performance
You can project the output image on a large screen such as the stage backdrop, and create a video performance that follows the music. Images from the DV-7PR can be mixed with multiple live images.
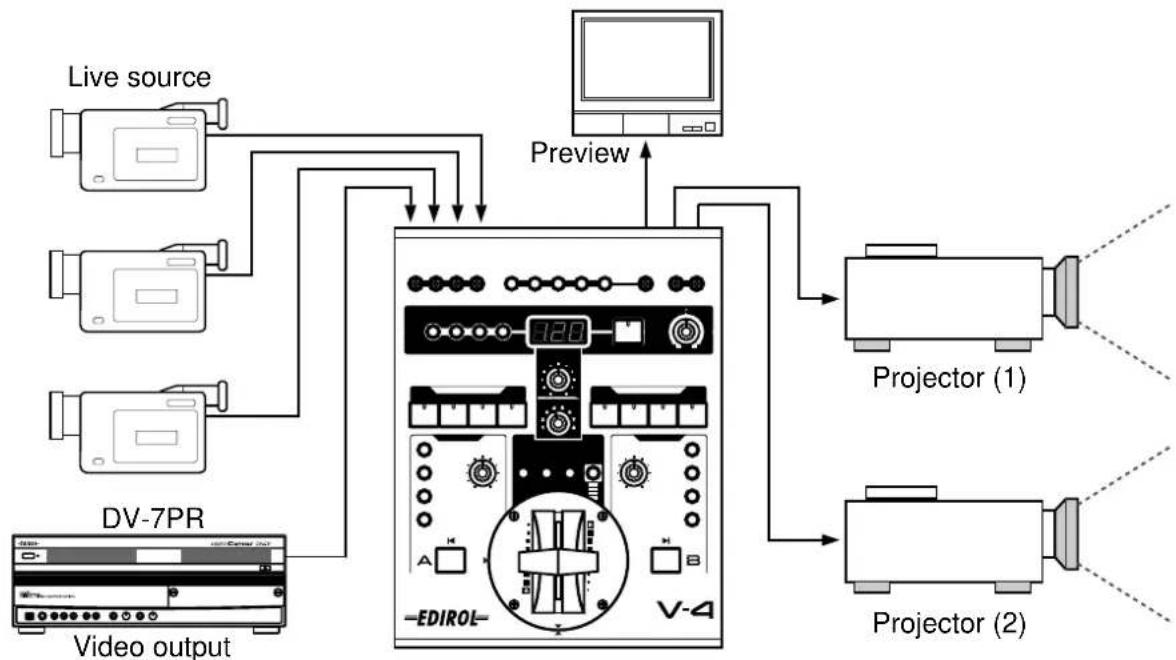
flowchart
graph TD
    A["Live source"] --> B["Preview"]
    C["DV-7PR Video output"] --> B
    B --> D["Projector (1)"]
    B --> E["Projector (2)"]
Advantages of using the V-4
- Use BPM/TAP to switch images in time with the music
- Use numerous effects such as mirror, strobe, or colorize
* For details on using BPM/TAP, refer to p. 37.
* For details on using strobe, refer to p. 34.
* For details on using colorize, refer to p. 32.
Using the V-4 at a presentation
You can use the V-4 to switch between live images and VTR/DVD output, or add images/text from a personal computer.
* If you are using a personal computer that does not have a video output, you will need to use a scan converter to convert the computer's VGA output into a video signal.
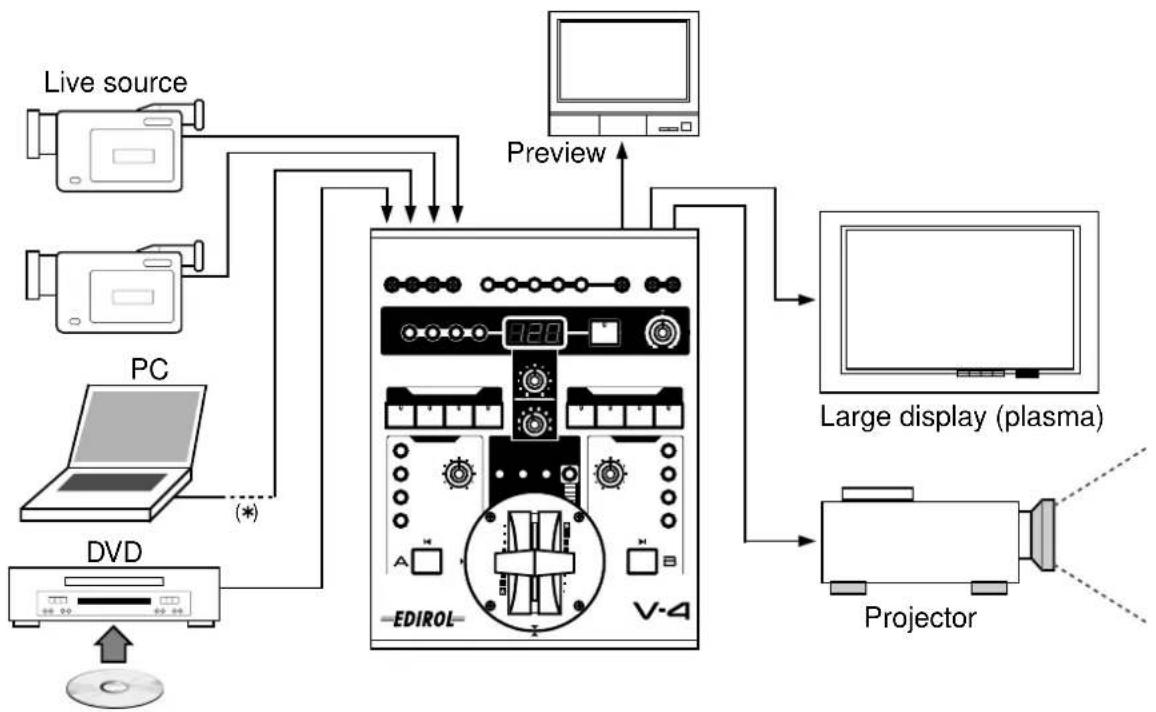
flowchart
graph TD
    A["Live source"] --> B["PC"]
    B --> C["DVD"]
    C --> D["EDIROL"]
    D --> E["Large display (plasma)"]
    E --> F["Projector"]
    F --> G["Preview"]
    G --> H["Computer"]
Advantages of using the V-4
- Use picture-in-picture to display two screens simultaneously
- Use luminance key to superimpose text or graphics on the image
- Easy operation in Presentation mode
* For details on using picture-in-picture, refer to p. 26.
* For details on using luminance key, refer to p. 28.
* For details on Presentation mode, refer to p. 68.
Using BGV output with a musical performance (example of using V-LINK)
Background video (BGV) can be controlled while you play a musical instrument. You can control images without affecting the normal capabilities of the instrument. In particular if you are using a device that supports Roland/Edirol V-LINK () V-LINVless a single button to quickly and easily make settings for controlling images.
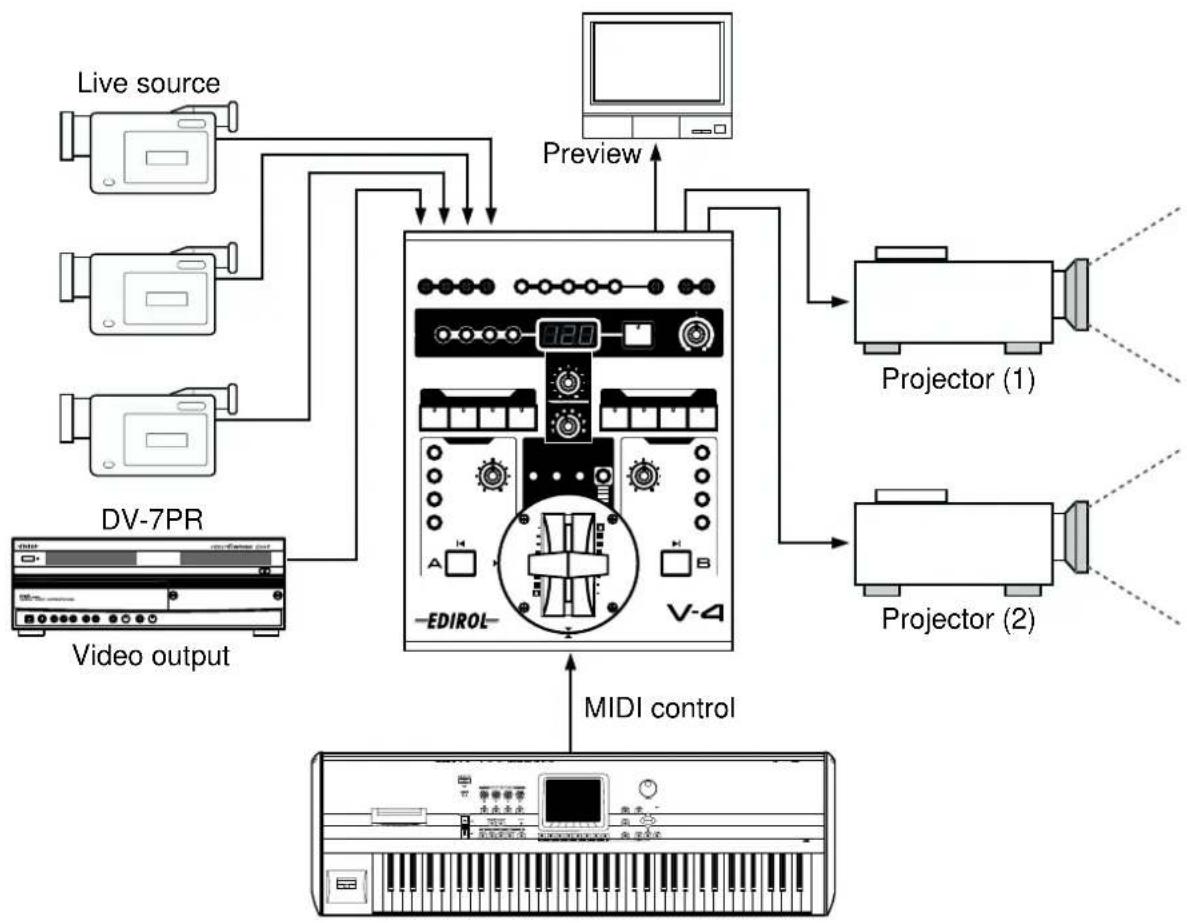
flowchart
graph TD
    A["Live source"] --> B["EDIROL"]
    C["DV-7PR Video output"] --> B
    D["Preview"] --> B
    B --> E["Projector (1)"]
    B --> F["Projector (2)"]
    B --> G["MIDI control"]
    G --> H["Audio Player"]
Advantages of using the V-4
- When used in conjunction with the DV-7PR, a single instrument can control the live video and the video from the DV-7PR
• Video effects can be turned on/off from the musical instrument - If you are using a V-LINK compatible device, MIDI settings can be made very simply
* For details on controlling the V-4 from an external device, refer to p. 57.
MIDI implementation
Model: V-4 Version: 1.000 Date: Dec.10.2002
Symbol Meaning Range
n: MIDI channel 0H--FH (ch.1--ch.16)
vv: control value, velocity value, etc. 00H--7FH (0--127)
only in the case of Note-on Velocity 01H--7FH (1--127)
kk: note number 00H--7FH (0--127)
xx: on/off switch 00H--3FII (0--63): OFF
40H--7FH (64--127): ON
1. MIDI messages received at MIDI IN
* If MIDI Thru is ON, MIDI messages received at MIDI IN will be retransmitted without change from MIDI OUT.
■Channel voice messages
- Note-on
Status 2nd byte 3rd byte ____ ____
9nH kkH vvH
* Received only if Note Mode is ON.
* The input of each channel is selected. Ignored if a non-selectable note message is received.
* When Presentation mode is ON, the transition time will change according to the velocity value (channel A only).
* Inputs correspond to note numbers as follows.
Note No. Input
24H A Ch, 1
26H A Ch, 2
28H A Ch, 3
29H A Ch, 4
2BH B Ch, 1
2DH B Ch, 2
2FH B Ch, 3
30H B Ch, 4
•Control Change
* By making settings in MIDI Setup, you can use these messages to control a wide variety of things. The control changes that can be used are CC#1--5, 7--31, and 64--95. For details on the factory settings, refer to "Settings Transmitted/Received Using MIDI" (p.95).
○Bank Select (controller numbers 0, 32)
Status 2nd byte 3rd byte ____
BnH 00H mmH
BnH 20H11H
mm, ll= bank number:00 00H - 7F 7FH(bank, 1 - bank, 16384)
* Bank Select LSB will be ignored.
* Processing of a Bank Select message is suspended until a subsequent Program Change is received.
* If a non-selectable Bank Select is received, it will be ignored, and only the Program Change will be received.
* Bank Select data that is received will be maintained until a subsequent Bank Select is received.
* These messages select inputs for each channel, set memories, and specify how the sub-channel is mixed in Presentation mode.
Controls correspond to bank select messages as follows.
Bank Select Program No. Control
MSB/LSB
| 50H/00H | 00H - 07H | MEMORY 1-8 |
| 00H/00H | 00H - 03H | A ch, INPUT 1-4 |
| 01H/00H | 00H - 03H | B ch, INPUT 1-4 |
○Modulation (controller number 1)
Status 2nd byte 3rd byte ____
Bnll 0111 vvll
○Breath-type (controller number 2)
Status 2nd byte 3rd byte ____ ____
BnH 02H vvH
○Foot-type (controller number 4)
Status 2nd byte 3rd byte ____ ____
BnH 04H vvH
○Portamento Time (controller number 5)
Status 2nd byte 3rd byte ____ ____
BnH 05H vvH
○Volume (controller number 7)
Status 2nd byte 3rd byte ____ ____
BnH 07H vvH
○Balance (controller number 8)
Status 2nd byte 3rd byte ____ ____
BnH 08H vvH
○Panpot (controller number 10)
Status 2nd byte 3rd byte ____ ____
BnH 0AH vvH
○Expression (controller number 11)
Status 2nd byte 3rd byte ____ ____
BnH 0BH vvH
○Effect Control 1 (controller number 12)
Status 2nd byte 3rd byte ____ ____
BnH 0CH vvH
○Effect Control 2 (controller number 13)
Status 2nd byte 3rd byte ____ ____
BnH 0DH vvH
○General Purpose Controllers 1--4 (controller numbers 16-19)
Status 2nd byte 3rd byte ____ ____
BnH 10H - 13H vvH
○Hold 1 (controller number 64)
Status 2nd byte 3rd byte ____ ____
BnH 40H xxH
○Portamento (controller number 65)
Status 2nd byte 3rd byte ____ ____
BnH 41H xxH
Status 2nd byte 3rd byte
BnH 44H xxH
○Hold 2 (controller number 69)
Status 2nd byte 3rd byte
BnH 45H xxH
○Sound Controllers 1--10 (controller numbers 70--79)
Status 2nd byte 3rd byte
BnH 46-4FH vvH
○General Purpose Controllers 5--8 (controller numbers 80--83)
Status 2nd byte 3rd byte
BnH 50 - 53FH vvH
○Portamento Control (controller number 84)
Status 2nd byte 3rd byte
BnH 54H vvH
○Effect Depth 2-5 (controller number 92-95)
Status 2nd byte 3rd byte
BnH 5C - 5FH vvH
- Program Change
Status 2nd byte
CnH ppH
pp= program number
* These messages select channel A and channel B inputs, memory settings, and how the sub channel is mixed in Presentation mode. For details, refer to the section on Bank Select.
* If a non-selectable Program Change is received, it will be ignored.
- Channel Pressure
Status 2nd byte
DnH vvH
* Just as for Control Change messages, you can make settings in MIDI Setup to use Channel Pressure messages to control a wide variety of things. For details on the factory settings, refer to "Settings Transmitted/Received Using MIDI" (p. 95).
- Pitch Bend Change
Status 2nd byte 3rd byte
EnH llll mmH
mm, ll= pitch bend value:00 00H - 40 00H - 7F 7FH (-8192 - 0 - +8191)
* Just as for Control Change messages, you can make settings in MIDI Setup to use Pitch Bond Change messages to control a wide variety of things. For details on the factory settings, refer to "Settings Transmitted/Received Using MIDI" (p. 95).
■System realtime messages
•Active Sensing
Status
FEH
* Once an Active Sensing message is received, the system will begin monitoring the interval between all subsequent messages. If there is an interval of greater than approximately 400 ms between messages while monitoring is occurring, the system will perform reception error processing and will then stop monitoring the message interval.
- Timing Clock
Status
FSH
* Used to synchronize BPM SYNC.
- Start
Status
FAH
* Specifies the beginning of the beat for BPM SYNC.
- Continue
Status
FBH
* Specifies the beginning of the beat for BPM SYNC.
■System exclusive messages
Status Data bytes Status
F0H iiH, ddH,...,eeH F7H
FOH: System Exclusive Message status
ii= ID number: An ID number (manufacturer ID) that indicates the manufacturer to which the exclusive message belongs. Roland's manufacturer ID is 41H. ID numbers 7EH and 7FH are used for Universal Non-realtime Messages (7EH) and Universal Realtime Messages (7FH) to extend the MIDI specification.
dd, ... ee= data: 00H--7FII (0--127)
F7H: EQX (End Of Exclusive)
- Data Set 1 (DT1)
This is the message that transfers actual data, and is used to specify data for a device.
Status Data bytes Status
F0H 41H, dev, 00H, 5BH, 12H, F7H
aaH, bbH, ccH, ddH,...eeH, sum
Byte Explanation
FOH Exclusive status
41H ID number (Roland)
dev Device ID (dev: 00H--1FH, factory setting is 00H)
00H Upper byte of model ID (V-4, V-LINK message is 00H)
5BI1 Lower byte of model ID (V-4, V-LINK message is 51H)
12H Command ID (DT1)
aaH Upper byte of address
bbl1 Address
ccH Address
ddH Data: the actual data to be transmitted. Multi-byte data is transmitted in the order of the address.
:
eeH
Data
sum Checksum
F7H EOX (End Of Exclusive)
* For details on setting the address, size, and checksum, refer to "Example of exclusive message and checksum calculation" (p. 95).
* Data that exceeds 256 bytes must be divided into packets of 256 bytes or less for transmission. If a subsequent "Data Set 1" message is transmitted, an interval of at least 20 ms must be left between packets.
2. MIDI messages transmitted from MIDI OUT
* If MIDI Thru is ON, MIDI messages received at MIDI IN are re-transmitted without change from MIDI OUT.
* If MIDI Thru is ON, messages from the V-4 itself will not be transmitted.
■Channel voice messages
• Control Change
* The messages assigned in MIDI Setup will be transmitted when you operate the panel. The control changes that can be used are CC#1-5, 7-31, and 64-95. For the factory settings, refer to "Settings Transmitted/Received Using MIDI" (p. 95).
○Bank Select (controller numbers 0, 32)
Status 2nd byte 3rd byte ____
BnH 00H mmH
BnH 20H 11H
mm, ll= bank number:
* When you select channel A or channel B inputs, make memory settings, or specify how sub-channels are mixed in Presentation mode, these messages will be transmitted in conjunction with Program Changes.
* The following controls correspond to each Bank Select message.
Bank Select Program No. Control
MSB/LSB
50H/00H 00H - 07H MEMORY 1-8
00H/00H 00H-03H A ch, INPUT 1-4
0111/0011 0011 - 0311 B ch, INPUT 1-4
○Modulation (controller number 1)
Status 2nd byte 3rd byte ____ ____
BnH 01H vvH
○Breath-type (controller number 2)
Status 2nd byte 3rd byte ____
BnH 02H vvH
○Foot-type (controller number 4)
Status 2nd byte 3rd byte ____ ____
BnH 04H vvH
○Portamento Time (controller number 5)
Status 2nd byte 3rd byte ____
BnH 05H vvH
○Volume (controller number 7)
Status 2nd byte 3rd byte ____ ____
BnH 07H vvH
○Balance (controller number 8)
Status 2nd byte 3rd byte ____
BnH 08H vvH
○Panpot (controller number 10)
Status 2nd byte 3rd byte ____ ____
BnH 0AH vvH
○Expression (controller number 11)
Status 2nd byte 3rd byte ____ ____
BnI10Bl1vvH
○Effect Control 1 (controller number 12)
Status 2nd byte 3rd byte ____ ____
BnH (ICH vvH
○Effect Control 2 (controller number 13)
Status 2nd byte 3rd byte ____ ____
BnH (DH vvH
○General Purpose Controllers 1--4 (controller numbers 16-19)
Status 2nd byte 3rd byte ____ ____
BnH 10H - 13H vvH
○Hold 1 (controller number 64)
Status 2nd byte 3rd byte ____ ____
BnI 40H xxII
○Portamento (controller number 65)
Status 2nd byte 3rd byte ____ ____
BnH 41H xxH
* When you select channel A or channel B inputs, make memory settings, or specify how sub-channels are mixed in Presentation mode, these messages will be transmitted in conjunction with Bank Select messages. For details, refer to the section on Bank Select.
•Channel Pressure
Status 2nd byte
DnH vvH
* Just as for Control Changes, the messages assigned in MIDI Setup will be transmitted when you operate the panel. For the factory settings, refer to "Settings Transmitted/Received Using MIDI" (p. 95).
- Pitch Bend Change
Status 2nd byte 3rd byte
EnH 11H mmH
mm, ll= pitch bend value:00 00H - 40 00H - 7F 7FH (-8192 - 0 - +8191)
* Just as for Control Changes, the messages assigned in MIDI Setup will be transmitted when you operate the panel. For the factory settings, refer to "Settings Transmitted/Received Using MIDI" (p. 95).
3. Parameter Address Map
■3-1. V-4 (Model ID= 00H 5BH)
* Addresses marked by # are sent as two bytes; an upper nibble (upper 4 bits) and lower nibble (lower 4 bits).
Example) If the original data is channel B, 0BH is transmitted as the first byte. The next byte transmitted is 0CH. For reception, this is ignored if two bytes are not received together.
| Start Address | Description |
| 00H 00H 00H | System Common Preference Area (See 3-1-1) |
| 01H 00H 00H | Fader Control Preference Area (See 3-1-2) |
| 02H 00H 00H | Effects Control Preference Area (See 3-1-3) |
| 03H 00H 00H | Reserved Area |
| 12H 00H 00H | Fader Control Parameter Area (See 3-1-4) |
| 13H 00H 00H | Effects Control Parameter Area (See 3-4-5) |
| 14H 00H 00H | Reserved Area |
3-1-1 System Common Preference
| Address |Parameter Name |Sys Ex. Value |Meaning of Value | | ||||||
| 00H 00H 00H | MIDI Receive Channel | 00H - 10H | 1 - 16 ch., OFF | | | ||
3-1-2 Fader Control Preference
| Address | Parameter Name | Sys Ex. Value | Meaning of Value | ||||
| #01H 10H 00H | Tx/Rx Setting (Transition Time) | 01H-05H, 07H-1FH,40H-5FH, DOH, EOH, EFH | Control Change,Channel Press, Pitch Bend, OFF | |
| #01H 10H 02H | Tx/Rx Setting (Video Fader) | 01H-05H, 07H-1FH,40H-5FH, DOH, EOH, EFH | Control Change,Channel Press, Pitch Bend, OFF | |
| #01H 10H 04H | Tx/Rx Setting (Transition Select) | 01H-05H, 07H-1FH,40H-5FH, DOH, EOH, EFH | Control Change,Channel Press, Pitch Bend, OFF | |
| #01H 10H 06H | Tx/Rx Setting (Transformer A) | 01H-05H, 07H-1FH,40H-5FH, DOH, EOH, EFH | Control Change,Channel Press, Pitch Bend, OFF | |
| #01H 10H 08H | Tx/Rx Setting (Transformer B) | 01H-05H, 07H-1FH,40H-5FH, DOH, EOH, EFH | Control Change,Channel Press, Pitch Bend, OFF | |
| #01H 10H 0AH | Tx/Rx Setting (Output Fade) | 01H-05H, 07H-1FH,40H-5FH, DOH, EOH, EFH | Control Change,Channel Press, Pitch Bend, OFF | |
| #01H 10H 0CH | Tx/Rx Setting (BPM sync) | 01H-05H, 07H-1FH,40H-5FH, DOH, EOH, EFH | Control Change,Channel Press, Pitch Bend, OFF | |
3-1-3 Effects Control Preference
| Address | Parameter Name | Sys Ex. Value | Meaning of Value |
| #02H 10H 00H | Tx/Rx Setting (A ch Effect 1) | 01H-05H, 07H-1FH, | Control Change, |
| 40H-5FH, DOH, EOH, EFH | Channel Press, Pitch Bend, OFF | ||
| #02H 10H 02H | Tx/Rx Setting (A ch Effect 2) | 01H-05H, 07H-1FH, | Control Change, |
| 40H-5FH, DOH, EOH, EFH | Channel Press, Pitch Bend, OFF | ||
| #02H 10H 04H | Tx/Rx Setting (A ch Effect 3) | 01H-05H, 07H-1FH, | Control Change, |
| 40H-5FH, DOH, EOH, EFH | Channel Press, Pitch Bend, OFF | ||
| #02H 10H 06H | Tx/Rx Setting (A ch Effect 4) | 01H-05H, 07H-1FH, | Control Change, |
| 40H-5FH, DOH, EOH, EFH | Channel Press, Pitch Bend, OFF | ||
| #02H 10H 08H | Tx/Rx Setting (B ch Effect 1) | 01H-05H, 07H-1FH, | Control Change, |
| 40H-5FH, DOH, EOH, EFH | Channel Press, Pitch Bend, OFF | ||
| #02H 10H 0AH | Tx/Rx Setting (B ch Effect 2) | 01H-05H, 07H-1FH, | Control Change, |
| 40H-5FH, DOH, EOH, EFH | Channel Press, Pitch Bend, OFF | ||
| #02H 10H 0CH | Tx/Rx Setting (B ch Effect 3) | 01H-05H, 07H-1FH, | Control Change, |
| 40H-5FH, DOH, EOH, EFH | Channel Press, Pitch Bend, OFF | ||
| #02H 10H 0EH | Tx/Rx Setting (B ch Effect 4) | 01H-05H, 07H-1FH, | Control Change, |
| 40H-5FH, DOH, EOH, EFH | Channel Press, Pitch Bend, OFF |
■3-2. V-LINK (Model ID= 00H 51H)
* Addresses marked by # are sent as two bytes; an upper nibble (upper 4 bits) and lower nibble (lower 4 bits).
Example) If the original data is channel B, 0BH is transmitted as the first byte. The next byte transmitted is 0CH. For reception, this is ignored if two bytes are not received together.
* If -- is shown in the value field, the V-4 does not have a corresponding parameter. This will be ignored if received.
| Start Address | Description |
| 00H 00H 00H | DV-7PR Presenter Reserved Area |
| 10H 00H 00H | V-LINK System Preference Area(See 3-2-1) |
| 10H 10H 00H | V-LINK Clip Control Preference Area(See 3-2-2) |
| 10H 20H 00H | V-LINK Effects Control Preference Area(See 3-2-3) |
| 10H 30H 00H | V-LINK Reserved Area |
| 11H 30H 00H | DV-7PR Presenter Reserved Area |
3-2-1 System Common Preference
| Address | Parameter Name | Sys Ex. Value | Meaning of Value |
| 10H 00H 00H | V-LINK Enabled | 00H - 01H | OFF, ON |
| 10H 00H 01H | V-LINK MIDI Rx Channel (Clip) | 00H - 10H | 1-16 ch, OFF |
| 10H 00H 02H | V-LINK MIDI Rx Channel (Color) | — | — |
| 10H 00H 03H | V-LINK Note Message Enabled | 00H - 01H | Note Mode : OFF, ON |
| 10H 00H 04H | V-LINK Fast Control Enabled | — | — |
| 10H 00H 05H | V-LINK MMC Control Mode | — | — |
| 10H 00H 06H | V-LINK MIC Control Mode | — | — |
MIDI Implementation
|10H 00H 07H |V-LINK Auto Mix Mode
00H - 01H
|Presentation Mode : OFF, ON
3-2-2 Clip Control Preference
| Address | Parameter Name | Sys Ex. Value | Meaning of Value | | ||||
| #10H 10H 00H | V-LINK Rx Setting (Playback Speed) | — | — | | |
| #10H 10H 02H | V-LINK Rx Setting (Dissolve Time) | 01H-05H, 07H-1FH,40H-5PH, DOH, EOH, EFH | Transition Time:Control ChangeChannel Press, Pitch Bend, OFF | |
| #10H 10H 04H | V-LINK Rx Setting (Audio Level) | — | — | |
| #10H 10H 06H | V-LINK Rx Setting (I-Bar Control) | 01H-05H, 07H-1FH,40H-5PH, DOH, EOH, EFH | Video Fader : Control Change,Channel Press, Pitch Bend, OFF | |
| #10H 10H 08H | V-LINK Rx Setting (Dual Stream) | — | — | |
| #10H 10H 0AH | V-LINK Reserved | — | — | |
| #10H 10H 0CH | V-LINK Reserved | — | — | |
| #10H 10H 05H | V-LINK Reserved | — | — | |
| #10H 10H 10H | V-LINK Rx Setting (Transition Select) | 01H-05H, 07H-1FH,40H-5PH, DOH, EOH, EFH | Control Change,Channel Press, Pitch Bend, OFF | |
| #10H 10H 12H | V-LINK Rx Setting (Transformer A) | 01H-05H, 07H-1FH,40H-5PH, DOH, EOH, EFH | Control Change,Channel Press, Pitch Bend, OFF | |
| #10H 10H 14H | V-LINK Rx Setting (Transformer B) | 01H-05H, 07H-1FH,40H-5PH, DOH, EOH, EFH | Control Change,Channel Press, Pitch Bend, OFF | |
| #10H 10H 16H | V-LINK Rx Setting (BPM Sync) | 01H-05H, 07H-1FH,40H-5PH, DOH, EOH, EFH | Control Change,Channel Press, Pitch Bend, OFF | |
3-2-3 Color CControl Preference
| Address | Parameter Name | Sys Ex. Value | Meaning of Value | ||||
| #10H 20H 00H | V-LINK Rx Setting (Color Cb) | — | — | |
| #10H 20H 02H | V-LINK Rx Setting (Color Cr) | — | — | |
| #10H 20H 04H | V-LINK Rx Setting (Brightness) | — | Ach Effect 1 : Control Change, Channel Press, Pitch Bend, OFF | |
| #10H 20H 06H | V-LINK Rx Setting (VFX A1) | 01H-05H, 07H-1FH, 40H-5FH, DOH, EOH, EFH | Ach Effect 2 : Control Change, Channel Press, Pitch Bend, OFF | |
| #10H 20H 08H | V-LINK Rx Setting (VFX A2) | 01H-05H, 07H-1FH, 40H-5FH, DOH, EOH, EFH | Ach Effect 3 : Control Change, Channel Press, Pitch Bend, OFF | |
| #10H 20H 0AH | V-LINK Rx Setting (VFX A3) | 01H-05H, 07H-1FH, 40H-5FH, DOH, EOH, EFH | Ach Effect 4 : Control Change, Channel Press, Pitch Bend, OFF | |
| #10H 20H 0CH | V-LINK Rx Setting (VFX A4) | 01H-05H, 07H-1FH, 40H-5FH, DOH, EOH, EFH | — | |
| #10H 20H 0EH | V-LINK Reserved | — | — | |
| #10H 20H 10H | V-LINK Reserved | — | — | |
| #10H 20H 12H | V-LINK Reserved | — | — | |
| #10H 20H 14H | V-LINK Reserved | — | — | |
| #10H 20H 16H | V-LINK Rx Setting (VFX B1) | 01H-05H, 07H-1FH, 40H-5FH, DOH, EOH, EFH | Bch Effect 1 : Control Change, Channel Press, Pitch Bend, OFF | |
| #10H 20H 18H | V-LINK Rx Setting (VFX B2) | 01H-05H, 07H-1FH, 40H-5FH, DOH, EOH, EFH | Bch Effect 2 : Control Change, Channel Press, Pitch Bend, OFF | |
| #10H 20H 1AH | V-LINK Rx Setting (VFX B3) | 01H-05H, 07H-1FH, 40H-5FH, DOH, EOH, EFH | Bch Effect 3 : Control Change, Channel Press, Pitch Bend, OFF | |
| #10H 20H 1CH | V-LINK Rx Setting (VFX B4) | 01H-05H, 07H-1FH, 40H-5FH, DOH, EOH, EFH | Bch Effect 4 : Control Change, Channel Press, Pitch Bend, OFF | |
| #10H 20H 1EH | V-LINK Reserved | — | — | |
| #10H 20H 20H | V-LINK Rx Setting (Output Fader) | 01H-05H, 07H-1FH, 40H-5FH, DOH, EOH, EFH | Control Change, Channel Press, Pitch Bend, OFF | |
4. Appendices
■Decimal and hexadecimal conversion table
(The letter "II" follows numbers in hexadecimal notation.)
MIDI uses hexadecimal notation in 7-bit units to indicate data values and addresses and sizes within an exclusive message. Hexadecimal and decimal numbers correspond as follows.
| Deci | Hexa | Deci | Hexa | Deci | Hexa | Deci | Hexa |
| 0 | 00H | 32 | 20H | 64 | 40H | 96 | 60H |
| 1 | 01H | 33 | 21H | 65 | 41H | 97 | 61H |
| 2 | 02H | 34 | 22H | 66 | 42H | 98 | 62H |
| 3 | 03H | 35 | 23H | 67 | 43H | 99 | 63H |
| 4 | 04H | 36 | 24H | 68 | 44H | 100 | 64H |
| 5 | 05H | 37 | 25H | 69 | 45H | 101 | 65H |
| 6 | 06H | 38 | 26H | 70 | 46H | 102 | 66H |
| 7 | 07H | 39 | 27H | 71 | 47H | 103 | 67H |
| 8 | 08H | 40 | 28H | 72 | 48H | 104 | 68H |
| 9 | 09H | 41 | 29H | 73 | 49H | 105 | 69H |
| 10 | 0AH | 42 | 2AH | 74 | 4AH | 106 | 6AH |
| 11 | 0BH | 43 | 2BH | 75 | 4BH | 107 | 6BH |
| 12 | 0CH | 44 | 2CH | 76 | 4CH | 108 | 6CH |
| 13 | 0CH | 45 | 2DH | 77 | 4DH | 109 | 6DH |
| 14 | 0EH | 46 | 2EH | 78 | 4EH | 110 | 6EH |
| 15 | 0FH | 47 | 2FH | 79 | 4FH | 111 | 6FH |
| 16 | 10H | 48 | 30H | 80 | 50H | 112 | 70H |
| 17 | 11H | 49 | 31H | 81 | 51H | 113 | 71H |
| 18 | 12H | 50 | 32H | 82 | 52H | 114 | 72H |
| 19 | 13H | 51 | 33H | 83 | 53H | 115 | 73H |
| 20 | 14H | 52 | 34H | 84 | 54H | 116 | 74H |
| 21 | 15H | 53 | 35H | 85 | 55H | 117 | 75H |
| 22 | 16H | 54 | 36H | 86 | 56H | 118 | 76H |
| 23 | 17H | 55 | 37H | 87 | 57H | 119 | 77H |
| 24 | 18H | 56 | 38H | 88 | 58H | 120 | 78H |
| 25 | 19H | 57 | 39H | 89 | 59H | 121 | 79H |
| 26 | 1AH | 58 | 3AH | 90 | 5AH | 122 | 7AH |
| 27 | 1BH | 59 | 3BH | 91 | 5BH | 123 | 7BH |
| 28 | 1CH | 60 | 3CH | 92 | 5CH | 124 | 7CH |
| 29 | 1DH | 61 | 3DH | 93 | 5DH | 125 | 7DH |
| 30 | 1EH | 62 | 3EH | 94 | 5EH | 126 | 7EH |
| 31 | 1FH | 63 | 3FH | 95 | 5FH | 127 | 7FH |
* Decimal expressions used for MIDI channel, bank select, and program change are 1 greater than the decimal value shown in the above table.
* Hexadecimal values in 7-bit units can express a maximum of 128 levels in one byte of data. If the data requires greater resolution, two or more bytes are used. For example, a value indicated by a hexadecimal expression in two 7-bit bytes "aa bb" would be "aa x 128 + bb."
From the above table, 5AH = 90.
expression in two 7-bit bytes "12H 34H"?
From the above table, 12H = 18, and 34H = 52. Thus,
18 × 128 + 52 = 2356
■Examples of MIDI messages
9n is the Note-on status, and n is the MIDI channel number.
2H = 2, 3EH = 62, and 5FH = 95. Thus, this is a Note-on message of MIDI CH= 3, note number 62 (note name D4), and velocity 95.
CnH is the Program Change status, and n is the M1D1 channel number.
EH = 14, and 49H = 73. Thus, this is a Program Change message of MIDI CH= 15, program number 74 (in the GS sound map, Flute).
EnH is the Pitch Bend Change status, and n is the MIDI channel number.
The second byte (00H=0) is the lower byte of the pitch bend value, and the third byte (28H=40) is the upper byte. Since the pitch bend value is a signed value with 40H 00H (=64 x 128 + 0 = 8192) corresponding to 0, the pitch bend value in this case is:
28H 00H - 40H 00H = 40 x 128 + 0 - (64 x 128 + 0) = 5120 - 8182 - -3072
If the Pitch Bend Sensitivity is set to two semitones, a pitch change of -8192 (00II 00II) would change the pitch by -200 cents, so in this case, a pitch bend of -200 x (-3072) / (-8192)
= -75 cents is being designated on MIDI channel 11.
■Exclusive message examples and checksum calculation
Roland exclusive messages (RQ1, DT1) contain a checksum following the data (after F7), which can be used to check whether the message was received correctly. The checksum value is derived from the address and data (or size) of the transmitted exclusive message.
- Calculating the checksum ('H' is appended to hexadecimal numbers)
The checksum is a value that produces a lower 7 bits of zero when the address, size, and checksum itself are summed. If the exclusive message to be transmitted has an address of aaH bbH ccH and the data is ddH ccH, the actual calculation would be as follows:
aa + bb + cc + dd + ee = sum
sum / 128 = quotient ÅEremainder
128 - remainder = checksum
From the "Parameter address map," the Tx/Rx Setting transition effect time has a start address of 01H 10H 00H, and the Modulation control change has a parameter value 01H. Thus,
F0H 41H 10H 00H 5BH 12H 01H 10H 00H 01H ??H 7FH
(5) Command ID (DT1) (6) Address
(7) Data (8) Checksum
(9) EOX
Next, we calculate the checksum.
01H + 10H + 00H + 01H = 1 + 16 + 0 + 1 = 18 (sum)
18 (sum) / 128 = 0 (quotient) ÅE18 (remainder)
Checksum = 128 - 18 (remainder) = 110 = 6EH
Thus, the message to be transmitted is F0H 41H 10H 00H 5BH 12H 01H 10H 00H 01H 6EH 7FH
■Settings Transmitted/Received Using MIDI
•MIDI Tx Channel
This sets the MIDI transmitting channel of V-4.
With the factory settings this is assigned to 1.
Values are 1-16.
•MIDI Rx Channel
This sets the MIDI receiving channel of V-4.
With the factory settings this is assigned to 1.
Values are 1-17, corresponding to 1-16 and OFF.
- Note Mode
This sets whether the unit switch the input channel or not on receipt of Note On message.
With the factory settings this is assigned to OFF.
Values are 0-1, corresponding to OFF and ON.
- Transition Time
This sets the duration of transition effects in Presentation mode.
With the factory settings this is assigned to CC#7 (Volume).
The values are 0--127, corresponding to 0.0 sec-4.0 sec.
• A ch effect 1
This specifies effect 1 on/off and the parameter for channel A in Normal mode or the base channel in Presentation mode.
With the factory settings this is unassigned.
Values are 0, 1--127, corresponding to OFF, ON:0--Max.
- A ch effect 2
This specifies effect 2 on/off and the parameter for channel A in Normal mode or the base channel in Presentation mode.
With the factory settings this is unassigned.
Values are 0, 1--127, corresponding to OFF, ON:0--Max.
- A ch effect 3
This specifies effect 3 on/off and the parameter for channel A in Normal mode or the base channel in Presentation mode.
With the factory settings this is unassigned.
Values are 0, 1--127, corresponding to OFF, ON:0--Max.
MIDI Implementation
•A ch effect 4
This specifies effect 4 on/off and the parameter for channel A in Normal mode or the base channel in Presentation mode.
With the factory settings this is unassigned.
Values are 0, 1--127, corresponding to OFF, ON:0-Max.
•B ch effect 1
This specifies effect 1 on/off and the parameter for channel B in Normal mode.
With the factory settings this is unassigned.
Values are 0, 1--127, corresponding to OFF, ON:0--Max.
•B ch effect 2
This specifies effect 2 on/off and the parameter for channel B in Normal mode.
With the factory settings this is unassigned.
Values are 0, 1--127, corresponding to OFF, ON:0-Max.
•B ch effect 3
This specifies effect 3 on/off and the parameter for channel B in Normal mode.
With the factory settings this is unassigned.
Values are 0, 1--127, corresponding to OFF, ON:0--Max.
•B ch effect 4
This specifies effect 4 on/off and the parameter for channel B in Normal mode.
With the factory settings this is unassigned.
Values are 0, 1--127, corresponding to OFF, ON:0-Max.
•Transition Select
Selects the type of transition.
With the factory settings this is unassigned.
Values are 0-2, corresponding to Transition 1, Transition 2 and Transition 3.
-Transformer A
Turns channel A TRANSFORMER on/off.
With the factory settings this is unassigned.
Values are 0-63 and 64-127, corresponding to OFF and ON.
-Transformer B
Turns channel B TRANSFORMER on/off.
With the factory settings this is unassigned.
Values are 0–63 and 64–127, corresponding to OFF and ON.
- Output Fade
Controls OUTPUT FADE.
With the factory settings this is unassigned.
Values are 0 - 64 - 127, corresponding to Black - Center - White.
•BPM Sync
Switches BPM SYNC on/off.
With the factory settings this is unassigned.
Values are 0-63 and 64-127, corresponding to OFF and ON.
- Video Fader
Controls the VIDEO FADER.
With the factory settings this is assigned to CC#11 (Expression).
Values are 0-127, corresponding to A (base)-B (sub).
■Factory Setting of V-LINK
The factory setting of V-LINK (receipt of V-LINK ON message only) is as follows.
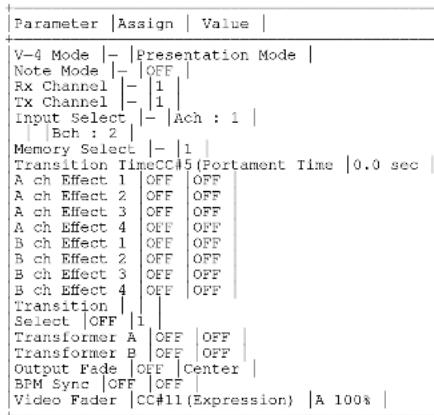
* When V-LINK is off, V-LINK message will be ignored.
* The changes of setting done while V-LINK is on will not be saved.
* When V-LINK is turned off, the setting before V-LINK turned on will be recalled.
MIDI Implementation
4-Channel Video Mixer
Model V-4
MIDI Implementation Chart
Date : Dec. 13, 2002
Version : 1.00
| Function... Transmitted Recognized Remarks | ||||
| Basic Channel | Default Changed | 1-16 1-16 | 1-16 1-16 | |
| Mode | Default Messages Altered | Mode 3 X********** | Mode 3 X | |
| Note Number : True Voice | X X | O 36, 38, 40, 41, 43, 45, 47, 48 | Operational only when Note Mode is ON | |
| Velocity | Note ON Note OFF | X X | O X | Operational only when Presentation Mode is ON |
| After Touch | Key's Ch's | X O | X O | Control Various Values |
| Pitch Bend O O Control Various Values | ||||
| Control Change | 0,32 1-5 7-31 64-95 | O O O O | O O O O | Bank Select Control Various Values Control Various Values Control Various Values |
| Program Change : True # | O 0 - 3, 0 - 7 | O 0 - 3, 0 - 7 | Input select : 1-4 Memory Select : 1-8 | |
| System Exclusive X O Control Various Values, V-LINK | ||||
| Common :Song Pos :Song Sel :Tune | X X X | X X X | ||
| Real-Time :Clock :Commands | X X | O O | Start, Continue | |
| Others :All sound OFF :Reset all controller :Local ON/OFF :All Notes OFF :Active Sense :Reset | X X X X X O X | X X X X X O X | ||
| Notes | ||||
Mode 1 : OMNI ON, POLY
Mode 2 : OMNI ON, MONO
O: Yes
Mode 3 : OMNI OFF, POLY
Mode 4 : OMNI OFF, MONO
X : No
Index
B
BPM control dial 15
BPM indicator 14
BPM sync 37
BPM sync button 16
C
Calibrating 66
Chroma Key 27
color 31
Colorize 32
Compositing 26
Copying 54
D
dissolve 24
E
effect buttons 15
effect control dial 15
EFX button 15
exchanging 54
F
factory settings 55
fade-to-black 25
fade-to-white 25
G
Ground Terminal 16
L
Luminance Key 28
M
MC-909 57
Memory dial 15
Menu List 75
MIDI Rx Channel 61
MIDI settings 60
MIDI Tx Channel 60
Mirror 36
Mix button 15
motion 34
Multi 35
N
Negative 31
NTSC 71
0
Output fade dial 15
P
PAL 71
panel assignments 40
PCR-30/50 57
Picture In Picture 26
Presentation mode 68
preview monitor 21
Preview select buttons 14
Protecting the memory 53
S
signal flow 18
specifications 83
strobe motion 34
S-video 14
synchronization 37
T
tap (TAP) function 37
Tap button 14
transformer 15
Typical connection 17
V
Video (composite) 14
Video fader 16
V-LINK 11
W
Wipe 24
Wipe button 15
Information
When you need repair service, call your nearest EDIROL/Roland Service Center or authorized EDIROL/Roland distributor in your country as shown below.
EDIROL
EUROPE
EDIROL (Europe) Ltd.
Studio 3.4 114 Power Road
London W4 5PY
U.K.
TEL: +44 (0)20 8747 5949
FAX:+44 (0)20 8747 5948
http://www.edirol.com/europe
Deutschland
TEL: 0700 33 47 65 20
France
TEL: 0810 000 371
Italia
TEL: 02 93778329
U. S. A. / CANADA
EDIROL Corporation North
America
425 Sequoia Drive, Suite 114
Bellingham, WA 98226
U.S.A.
TEL: (360) 594-4276
FAX: (360) 594-4271
http://www.edirol.com/
Roland
ASIA
TAIWAN
ROLAND TAIWAN
ENTERPRISE CO., LTD.
Room 5, 9fl. No. 112 Chung Shan
N.Road Sec.2, Taipei, TAIWAN,
R.O.C.
TEL: (02) 2561 3339
EUROPE
AUSTRIA
Roland Austria GES.M.B.H.
Siemensstrasse 4, P.O. Box 74,
A-6063 RUM, AUSTRIA
TEL: (0512) 26 44 260
BELGIUM/ HOLLAND/ LUXEMBOURG
Roland Benelux N. V.
Houtstraat 3, B-2260, Oevel
(Westerlo) BELGIUM
TEL: (014) 575811
DENMARK
Roland Scandinavia A/S
Nordhavnsvej 7, Postbox 880,
DK-2100 Copenhagen
DENMARK
TEL: 3916 6200
FRANCE
Roland France SA
4, Rue Paul Henri SPAAK,
Parc de l'Esplanade, F 77 462 St.
Thibault, Lagny Cedex FRANCE
TEL: 01 600 73 500
FINLAND
Roland Scandinavia As,
Filial Finland
Lauttasaarentie 54 B
Fin-00201 Helsinki, FINLAND
TEL: (0)9 68 24 020
GERMANY
155, New National Road
Patras 26442, GREECE
TEL: 2610 435400
HUNGARY
Roland East Europe Ltd.
Warehouse Area 'DEPO' Pf.83
H-2046 Torokbalint, HUNGARY
TEL: (23) 511011
IRELAND
Roland Ireland
Audio House, Belmont Court,
Donnybrook, Dublin 4.
Republic of IRELAND
TEL:(01)2603501
ITALY
Roland Italy S. p. A.
Danvik Center 28, 2 tr
S-131 30 Nacka SWEDEN
TEL: (0)8 702 00 20
SWITZERLAND
Roland (Switzerland) AG
Atlantic Close, Swansea
Enterprise Park, SWANSEA
SA7 9FJ,
UNITED KINGDOM
TEL: (01792) 700139
- FEDERAL COMMUNICATIONS COMMISSION RADIO FREQUENCY INTERFERENCE STATEMENT
- NOTICE
- AVIS
- USING THE UNIT SAFELY
- INSTRUCTIONS FOR THE PREVENTION OF FIRE, ELECTRIC SHOCK, OR INJURY TO PERSONS
- ALWAYS OBSERVE THE FOLLOWING
- WARNING
- CAUTION
- Power Supply
- Placement
- Maintenance
- Additional Precautions
- Copyright
- Installation of Video Fader
- (French)
- Unsuitable places for connection
- About turning the power on
- About specifications
- Other important notes
- • Security Slot (
- Contents
- USING THE UNIT SAFELY....3
- IMPORTANT NOTES ....5
- Contents 7
- Welcome 9
- Features of the V-4....10
- What is V-LINK?......11
- Before you begin....12
- Connecting peripheral devices....17
- Turning the power on/off....19
- Checking the inputs and outputs....20
- About the Memory dial (MEMORY)....22
- Switching two images ....23
- Compositing two images ....26
- Changing the color of the image....31
- Changing the motion of the image....34
- Applying the Multi or Mirror effects ....35
- Switching in synchronization with music....37
- Applying an effect on the music....39
- Editing the front panel assignments....40
- Control the V-4 from an external device....57
- Making various settings....64
- Calibrating the video fader....66
- Using the V-4 in Presentation mode ....68
- Switching between NTSC and PAL 71
- Changing the video fader orientation ....72
- Troubleshooting....74
- Menu List 75
- Main specifications....83
- Examples of using the V-4 85
- MIDI implementation....89
- Index....98
- Welcome
- Features of the V-4
- Four-channels of video inputs
- Two independent frame synchronizers
- High-quality digital effects
- Simple operation
- Preview function
- Switching and effects synchronized to music
- Control from external MIDI devices
- What is V-LINK?
- Before you begin
- Check the included items
- Power Cord
- Netzkabel
- Rear Panel
- DC in connector
- Power cable hook
- MIDI OUT connector (MIDI OUT)
- MIDI IN connector (MIDI IN)
- S-video output jack (S-VIDEO OUTPUT)
- S-video input jacks (S-VIDEO INPUT)
- Front Panel
- Video (composite) input jacks (INPUT)
- Preview select buttons (PREVIEW OUT SELECT) (see p. 20)
- Preview output jack (PREVIEW OUT)
- Video (composite) output jacks (OUTPUT)
- Parameter setting buttons
- BPM indicator (see p. 39)
- Tap button (TAP) (see p. 39)
- About Ground Terminal
- Connecting peripheral devices
- Typical connection example
- Video signal flow
- Turning the power on/off
- Turning the power on
- Turning the power off
- Checking the inputs and outputs
- Checking the final output
- Checking the output to the preview monitor
- Switch the output channel
- About the display on preview monitor
- About the Memory dial (MEMORY)
- Switching two images
- Switching by Cut
- Release the transformer button (TRANSFORMER)
- Switching with dissolve
- Set the memory dial (MEMORY) to 1.
- Select the input images for A and B.
- Press the mix button (MIX).
- Move the video fader.
- Switching with Wipe
- Using fade-to-white or fade-to-black
- Compositing two images
- Using Picture In Picture to composite images
- Turn the effect off
- Using Chroma Key to composite images
- Select channel A image.
- Select channel B image.
- Press the Chroma Key button.
- Move the video fader to channel B.
- Turn the control dial.
- Move the video fader
- Turn the effect off
- Using Luminance Key to composite images
- Changing the color of the image
- Applying the Negative effect
- Applying the Colorize effect
- Changing the motion of the image
- Applying strobe motion
- Applying the Multi or Mirror effects
- Applying the Multi effect
- Applying the Mirror effect
- Switching in synchronization with music
- Using BPM sync to switch images
- Using the tap (TAP) function to switch images
- Press the tap button (TAP) in time with the music.
- Applying an effect on the music
- Using BPM sync to apply an effect
- Using the tap (TAP) function to apply an effect
- Editing the front panel assignments
- Menu Button (MENU)
- Cursor Buttons( )▲▼
- Enter Button (ENTER)
- Changing the assignment of the mix button (MIX)
- Select the transition effect.
- Return to the previous screen.
- Changing the assignment of the wipe button (WIPE)
- Set the memory dial to the number whose assignment you want to change.
- Press the wipe button (WIPE)
- Press the menu button (MENU).
- Select "WIPE."
- Press the enter button (ENTER).
- Changing the assignment of the EFX button (EFX)
- Changing the assignment of the output fade dial (OUTPUT FADE)
- Press the menu button (MENU).
- Select "Output Fade".
- Changing the assignments of the channel A and B effect buttons (EFFECTS)
- Select a button.
- Select the type of effect.
- Changing the assignment of the BPM sync button (BPM SYNC)
- Select "MODE" or "SPEED."
- Select the operating mode or speed.
- Changing the assignment of the channel A/ channel B transformer buttons (TRANSFORMER)
- Press the transformer buttons while turning the memory dial.
- Select "Transformer."
- Press the enter button (ENTER).
- Select a pattern.
- Return to the previous screen.
- Protecting the memory
- Copying or exchanging memories
- Recalling the factory settings
- Press the enter button (ENTER)
- Control the V-4 from an external device
- Using V-LINK to control the V-4
- ■ What is V-LINK?
- (Example) When using a Roland MC-909 in conjunction with the V-4:
- (Example) When using an Edirol PCR-30/50 in conjunction with the V-4:
- ■ Using V-LINK
- Using MIDI to control the V-4
- ■ What is MIDI?
- ■ MIDI settings
- ■ Setting the MIDI transmit channel (MIDI Tx Channel)
- ■ Setting the MIDI receive channel (MIDI Rx Channel)
- ■ Making other MIDI settings
- Making various settings
- Return to the previous screen.
- Calibrating the video fader
- Using the V-4 in Presentation mode
- What is Presentation mode?
- Switching to Presentation mode
- ■ The function of the input selector
- ■ The function of the BPM/CONTROL dial
- Presentations using two screens with Picture In Picture
- Switch the background image.
- Apply the Picture In Picture function.
- Apply other effects to composite two images.
- Switch the secondary image.
- Switching between NTSC and PAL
- Changing the video fader orientation
- Troubleshooting
- Operating the video fader does not switch the image
- Operating the transformer buttons (TRANSFORMER) does not switch the image
- No image is output even though you play back the source device
- Turning the control dial does not change the effect
- Image does not switch (effect not applied) in time with the BPM
- Image does not switch (effect does not apply) in time with TAP
- Operating the video fader does not switch the image in the expected direction
- Menu List
- Main specifications
- Video format
- Video sampling rate
- Video input
- Video output
- Preview output
- Input level and impedance
- Output level and impedance
- Control connectors
- Transition effects
- Video effects
- Compositing effects
- Current consumption
- Dimensions
- Weight
- Included items
- Examples of using the V-4
- Using the V-4 at an event
- Advantages of using the V-4
- Using the V-4 at a concert or VJ performance
- Using the V-4 at a presentation
- Using BGV output with a musical performance (example of using V-LINK)
- MIDI implementation
- MIDI messages received at MIDI IN
- ■Channel voice messages
- - Note-on
- •Control Change
- ○Bank Select (controller numbers 0, 32)
- ○Hold 2 (controller number 69)
- ○Sound Controllers 1--10 (controller numbers 70--79)
- ○General Purpose Controllers 5--8 (controller numbers 80--83)
- ○Portamento Control (controller number 84)
- ○Effect Depth 2-5 (controller number 92-95)
- - Program Change
- - Channel Pressure
- - Pitch Bend Change
- ■System realtime messages
- •Active Sensing
- - Timing Clock
- - Start
- - Continue
- ■System exclusive messages
- - Data Set 1 (DT1)
- MIDI messages transmitted from MIDI OUT
- • Control Change
- ○Modulation (controller number 1)
- ○Breath-type (controller number 2)
- ○Foot-type (controller number 4)
- ○Portamento Time (controller number 5)
- ○Volume (controller number 7)
- ○Balance (controller number 8)
- ○Panpot (controller number 10)
- ○Expression (controller number 11)
- ○Effect Control 1 (controller number 12)
- ○Effect Control 2 (controller number 13)
- ○General Purpose Controllers 1--4 (controller numbers 16-19)
- ○Hold 1 (controller number 64)
- ○Portamento (controller number 65)
- •Channel Pressure
- Parameter Address Map
- ■3-1. V-4 (Model ID= 00H 5BH)
- 3-1-1 System Common Preference
- 3-1-2 Fader Control Preference
- 3-1-3 Effects Control Preference
- ■3-2. V-LINK (Model ID= 00H 51H)
- 3-2-1 System Common Preference
- Appendices
- ■Decimal and hexadecimal conversion table
- ■Examples of MIDI messages
- ■Exclusive message examples and checksum calculation
- - Calculating the checksum ('H' is appended to hexadecimal numbers)
- ■Settings Transmitted/Received Using MIDI
- •MIDI Tx Channel
- •MIDI Rx Channel
- - Note Mode
- - Transition Time
- • A ch effect 1
- - A ch effect 2
- - A ch effect 3
- •A ch effect 4
- •B ch effect 1
- •B ch effect 2
- •B ch effect 3
- •B ch effect 4
- •Transition Select
- -Transformer A
- -Transformer B
- - Output Fade
- •BPM Sync
- - Video Fader
- ■Factory Setting of V-LINK
- Index
- B
- C
- D
- E
- F
- G
- L
- M
- N
- 0
- P
- S
- T
- V
- W
- Information
- EDIROL
- EUROPE
- S. A. / CANADA
- Roland
- ASIA
- TAIWAN
- AUSTRIA
- BELGIUM/ HOLLAND/ LUXEMBOURG
- DENMARK
- FRANCE
- FINLAND
- GERMANY
- HUNGARY
- IRELAND
- ITALY
- SWITZERLAND
Brand : ROLAND
Model : V-4
Category : Blender