
NI-JW900 - Iron PANASONIC - Free user manual and instructions
Find the device manual for free NI-JW900 PANASONIC in PDF.


| Product Type | Steam Iron |
| Brand | Panasonic |
| Model | NI-JW900 (also NI-JW900C) |
| Power Consumption | 2000-2400 W |
| Voltage / Frequency | 220-240 V~ 50-60 Hz |
| Weight | Approx. 1.5 kg |
| Dimensions (W x D x H) | 307 x 139 x 151 mm |
| Water Tank Capacity | Approx. 310 mL |
| Soleplate Material | Stainless steel (presumed) |
| Steam Settings | Low steam (for delicate), High steam (for thick fabrics) |
| Jet of Steam (Power Shot) | Yes, for stubborn wrinkles; use at MAX temperature |
| Vertical Steam Function | Yes, for hanging garments and curtains |
| Spray Mist Function | Yes, for extra dampening |
| Dry Ironing | Yes, by setting Steam/Dry Selector to Dry |
| Self-Cleaning Function | Yes, 3-way cleaning: self-cleaning button, jet of steam, anti-calc system |
| Anti-Drip System | Yes, automatically stops water flow when soleplate temperature drops below 115°C |
| Anti-Calc System | Yes, built-in to reduce scale buildup |
| Auto Shut-Off | Not available on NI-JW900 (only on NI-JW950A) |
| Temperature Control | Thermostat with 3 temperature ranges (low, medium, high) and steam zones |
| Indicator Light | Thermostat operating indicator light (goes on/off during heating) |
| Cord Length | Not specified (approx. 2 m typical) |
| Intended Use | Household only |
Frequently Asked Questions - NI-JW900 PANASONIC
User questions about NI-JW900 PANASONIC
0 question about this device. Answer the ones you know or ask your own.
Ask a new question about this device
Download the instructions for your Iron in PDF format for free! Find your manual NI-JW900 - PANASONIC and take your electronic device back in hand. On this page are published all the documents necessary for the use of your device. NI-JW900 by PANASONIC.
USER MANUAL NI-JW900 PANASONIC
Operating Instructions
(Household) STEAM IRON Model No. NI-JW950A, NI-JW900C
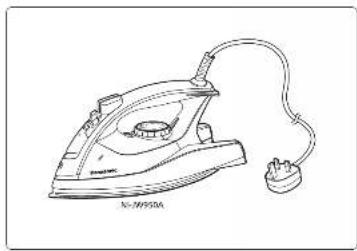
- Before operating this product, please read the instructions carefully, and save this manual for future use.
8200-0F25A
English
6-13
1

2

3


2


English
HOUSEHOLD USE ONLY
SAFE USE OF THE IRON
Your safety and the safety of others is very important.
We have provided important safety messages in this manual and on your appliance. Always read and obey all safety messages.

This is the safety alert symbol. It is used to alert you to potential hazards that can kill or injure you and others. The safety messages will follow the safety alert symbol and either the word "WARNING" or "CAUTION". These words mean:

WARNING
This describes issues which could cause death or serious injury.

CAUTION
This describes issues which could cause minor injury or damage your belongings.
The safety messages will tell you what the potential hazard is, how to avoid and reduce the chance of getting injured, and what can happen if the instructions are not followed.
Thank you for buying a Panasonic Iron
IMPORTANT SAFETY INSTRUCTIONS
When using your iron, basic safety precautions should always be followed, including the following:

WARNING
To reduce the risk of burns, electric shock, fire, or injury to persons:
READ ALL INSTRUCTIONS BEFORE USING THE IRON
- To avoid any circuit overload, do not operate another high wattage appliance on the same circuit.
- The input voltage must match the rated voltage marked on the iron.
- Use the iron only for its intended purpose, for ironing fabrics. To protect against burns or injury to persons, do not iron or steam fabrics while being worn on the body.
- Do not leave the iron unattended while it is connected to the mains.
- This iron must be filled or emptied only when the power plug is disconnected.
- When leaving the room even for a short time, disconnect the power plug. Keep it away from children.
- To protect against any risk of electric shock, do not immerse the iron or supply cord in water or other liquids.
- If the supply cord or plug is damaged, it must be replaced by the manufacturer or their authorised service agent to avoid a hazard.
- Do not allow the supply cord to touch hot surfaces. Allow the iron to cool down completely before storing.
● Burns can occur from touching hot metal parts, hot water, or steam. Use with caution when filling or turning the steam iron upside down. Hot water may leak from the iron. - The iron must be used and rested on a stable surface. When placing the iron on its Heel Rest, ensure that the surface on which the Heel Rest is placed is stable.
-
The iron should not be used if it has been dropped, if there are visible signs of damage or if it is leaking.
-
Do not use the appliance with the supply cord entangled. The supply cord might be damaged as a result.
- If you notice any smoke or fire coming out from the product, stop using it immediately and unplug the unit from the electrical outlet to avoid fire or electric shock. Contact your dealer or service agent to seek further assistance.
- This appliance is not intended for use by persons (including children) with reduced physical, sensory or mental capabilities, or lack of experience and knowledge, unless they have been given supervision or instruction concerning use of the appliance by a person responsible for their safety.
● Children should be supervised to ensure that they do not play with the appliance. - Be sure the iron is unplugged from the household mains socket before filling water.
● Never iron clothes on the body or point your iron at anyone when steaming. - Keep hands and body away from steam areas while using vertical steam feature.
● Hot water and steam will come out from the Soleplate when using the Self-Cleaning feature and the Jet of Steam feature. - The Auto Shut-Off feature (or setting the Temperature Selector to "0") is not intended to take the place of unplugging the supply cord. Disconnect the electric iron when it is not in use. Even though the iron is unplugged, the Soleplate is still hot. Be sure to rest the iron on its heel and keep it away from fabric.

CAUTION
To reduce the risk of personal injury and damage to your iron:
- Do not use water additives or substitute water such as scented water in the steam iron. They can stain fabrics.
- If the Steam/Dry Selector is not at Dry position after using, remaining water will move into the Soleplate and can result in burns when the iron is used next time.
- Do not use the Steam or the Jet of Steam while the supply cord is unplugged, water will remain inside the Soleplate and cause staining.
Do not use the Steam or the Jet of Steam while the Temperature Selector is set to "0" - Most tap water can be used in this iron. If water is very hard, distilled or demineralized water should be used. Do not use water processed through home water softening systems because this water contains minerals that may be harmful to the iron. Do not use water additives or substitute water such as linen or scented water in the steam iron. They can stain fabrics or damage the iron.
- When adding water to the iron, please hold the iron firmly to avoid dropping, or it may result in injury
- Do not set the Steam/Dry Selector to the steam position unless the iron is sufficiently hot to produce steam, otherwise water will leak out through the vents instead.
- Do not use the "Jet of Steam Button" until the Thermostat Operating Indicator Light turns off after setting the Temperature Selector to "MAX". Hot water may leak from the Soleplate and burns may be resulted, and it may cause corrosion.
- If synthetics are being ironed on a higher temperature level than instructed, not only will the fabric be ruined, but the Soleplate will often be covered with the melted remains of the synthetic fabric.
- Do not insert pins or wires to the iron. And please don't iron clothes with sewing needle or similar thing.
READ THESE INSTRUCTIONS
For proper use of your iron, read the remaining safety cautions and operation instructions.
COMPONENTS IDENTIFICATION
① Steam/Dry Selector
② Spray Mist Button
③ Jet of Steam Button(Vertical Steam Button)
④ Water Fill Cover
⑤ Spray Nozzle
⑥ Soleplate
⑦ Maximum Water Level Indication
⑧ Water Tank(Water Window)
⑨ Self-Cleaning Button
⑩ Handle
⑪ Thermostat Operating Indicator Light (Temperature Select Indicator)
⑫ Temperature Selector
⑬ Heel Rest
⑭ Supply Cord
⑮ Plug (Plug type to comply with respective countries or region requirement.)
⑧ HELPFUL IRONING TIPS
The Temperature Selector has words, dots and steam symbols. The dots are symbols for 3 temperature ranges:
- Low Temperature
•• Medium Temperature
••• High Temperature
Some fabrics are labeled with these dots as a guide for selecting the proper ironing temperature setting.
Note: The Thermostat Operating Indicator Light goes on and off alternately to indicate the changing temperature of Soleplate. If you turn the Temperature Selector from a high temperature to a lower temperature, wait until the indicator light turns on before using the iron.
© HOW TO FILL WATER
- Set the Steam/Dry Selector to the Dry position to avoid water leakage.
Open the Water Fill Cover, hold the iron as shown and fill the iron with water up to "MAX" dot (about 310 mL). Use a cup for filling (see Note). - Check for the correct water fill level with the iron in the vertical position
- Close the Water Fill Cover, or water will splash from the Water Tank when ironing.
Note: Do not overfill the Water Tank. The steam will release through the vents when the iron is positioned vertically
D HOW TO USE AS A STEAM IRON
- Fill the iron as described in "HOW TO FILL WATER".
- Position the iron vertically and be sure the Temperature Selector is set to "0".
- Plug the supply cord into the household mains socket.
- Set the Temperature Selector to the steam zone (" 🔊 " to " 🔊"). The Thermostat Operating Indicator Light goes on.
If the temperature of Soleplate is high, the light does not go on.
* zone: Low steam, for thin or delicate fabrics requiring a small amount of steam.
* zone: High steam, for fabrics requiring a lot of steam. (i.e. thick materials, items with stubborn wrinkles).
- Preheat the iron until the Indicator Light goes out, usually it takes about 1 minute.
The light will go on and off while ironing to indicate the temperature chosen by the Temperature Selector is being maintained. - Hold the iron horizontally and set the Steam/Dry Selector to the steam position.
- Whenever the iron is positioned vertically, the steaming action will stop.
Note: The Anti-Drip System will activate when the temperature of the Soleplate's surface drops. At the same time, the steam will stop. It is not a sign of malfunction when you hear a clicking sound. The Thermostat Operating Indicator Light will be on. Wait until the Thermostat Operating Indicator Light goes out.
E HOW TO USE THE "JET OF STEAM" (POWER SHOT) FEATURE
The "Jet of Steam" feature provides extra steam which goes deep into the garment and is helpful for removing stubborn wrinkles. The "Jet of Steam" feature operates properly only in the "MAX" position of the Temperature Selector when steam or dry ironing (If used at lower setting, water spotting will occur because the iron is not hot enough to change water to steam). If you have not used the "Jet of Steam" feature for a long time, it is necessary to clean the inside of the iron before using this feature on any clothes to be ironed. Simply test the "Jet of Steam" feature several times away from the ironing board and clothes to be ironed. This will prevent brown spotting or water spotting on the clothes.
- Fill the iron as described in "HOW TO FILL WATER".
- Position the iron vertically and be sure the Temperature Selector is set to "0"
- Plug the supply cord into the household mains socket.
- Set the Temperature Selector to the "MAX" position.
- Preheat the iron until the Thermostat Operating Indicator Light goes out, usually it takes about 1 minute.
- Simply pump the "Jet of Steam Button" when steam is desired. Pump the "Jet of Steam Button" several times at the beginning of each ironing session.
- Press the "Jet of Steam Button" in intervals of at least 5 seconds between use to prevent water spotting. Use a press cloth if necessary.
F HOW TO USE THE "VERTICAL STEAM" FEATURE
To get better results when using vertical steam, hang the garment on a clothes hanger. Curtains and drapes may also be steamed once they are hung. Hold the iron away from your body, close to but not touching the fabric. Pull the fabric tightly with your free hand and pump the Vertical Steam Button (Jet of Steam Button) at 5 seconds intervals as you press the iron over the wrinkled fabric.
G HOW TO USE THE "SPRAY" FEATURE
Note: Before using the spray feature, check the fabric label for ironing instructions. Some fabrics may become spotted or stained with moisture.
The spray feature is particularly helpful for removing stubborn wrinkles and where extra dampening is needed.
The spray may be used with steam or dry ironing.
- Simply pump the Spray Mist Button whenever spray is desired. If the spray doesn't work immediately, keep pumping until it does.
- To get a finer spray, pump the Button repeatedly. To get a more powerful spray, pump the Button more slowly. For best results, use a quick, full stroke.
H HOW TO USE AS A DRY IRON
- Set the Steam/Dry Selector to the Dry position.
- Position the iron vertically, set the Temperature Selector to "0"
-
Plug the supply cord into the household mains socket.
-
Set the Temperature Selector to the desired position. The Thermostat Operating Indicator Light goes on.
- If the temperature of Soleplate is high, the light does not go on.
- Preheat the iron until the Thermostat Operating Indicator Light goes out, usually it takes about 1 minute.

3-WAY CLEANING
WAY(1) Using the Self-Cleaning feature
-
Fill the iron as described in "HOW TO FILL WATER".
-
Set the Temperature Selector to the "0" position.
-
Plug the supply cord into the household mains socket.
-
Set the Temperature Selector to the "MAX" position.
-
Unplug the iron after the Thermostat Operating Indicator Light has gone out.
-
Hold the iron horizontally over the sink, press and hold the Self-Cleaning Button and gently shake the iron to and fro. Impurities and scale (if any), together with steam and boiling water, will be flushed out.
Then, turn to WAY (2).
WAY(2) Using the Jet of Steam feature
-
Repeat step 1 to 4 as described above
-
Hold the iron horizontally over the sink after the Thermostat Operating Indicator Light has gone out.
-
Pump the "Jet of Steam Button" quickly (at least 3 times per second) about 20-30 times. While pumping, tilt the iron up and down slowly to help clean the entire inside and let the water drip out of the soleplate vents.
-
Preheat the iron for about 5 minutes at "MAX" temperature when the iron has cooled without button operation.
-
Unplug the iron.
-
Do not store the iron with water in it.
-
Iron on a used cloth to remove any impurities on the Soleplate.
- Repeat WAY(1) and WAY(2) if the iron still contains a lot of impurities.
- Use both ways once every two weeks. If the water in your area is very hard (i.e. Steam holes on the Soleplate are easily blocked by impurities), both ways should be used more frequently.
- Let the iron cool down on its Heel Rest and follow the instructions " AFTER EACH USE "
WAY(3) Anti Calc System (Stay Clean Vents)
The built-in Anti Calc System in the Water Tank continuously reduces scale build up in the vaporizing chamber of the iron.
This system makes it possible to use the steam function for a long period of time and prevents steam vents from clogging.

ANTI-DRIP SYSTEM (AUTOMATIC WATER SEAL)
This model has an Anti-Drip System. When the temperature of the Soleplate's surface drops below 115°C (238°F) , the valve for the vaporizing chamber in the iron automatically closes and stops the water from flowing. This prevents hot unvaporized water from spewing out from the Soleplate when the iron has cooled down. With this System, it is unnecessary for you to wait until the inside of the vaporizing chamber dries completely when you store the iron.
Note: It is not a sign of malfunction when you hear a clicking sound. This sound can be heard whenever this system is activated.

ELECTRONIC 3-WAY AUTO SHUT-OFF FUNCTION (NI-JW950A only)
- When the iron is left unmoved with its Soleplate facing down or on its side for approx. 1 minute, the iron will automatically shut off.
- When the iron is left unmoved with its Heel Rest facing down or on its side for approx.10 minutes, the iron will automatically shut off.
- To resume ironing and turn the iron on, simply move the iron in any manner. If the iron has been left in the auto shut off mode for more than 10 minutes. Allow the iron to reheat until the Indicator Light goes out.
Note: The Auto Shut-Off system works regardless of position of the Temperature Selector. Always unplug the iron when you finish ironing.

HOW TO CARE FOR YOUR IRON
AFTER EACH USE
- Set the Temperature Selector to "0".
- Turn the iron off and unplug
- Empty the iron immediately after using. Do not store the iron with water in it. If you empty the iron after it has cooled, heat the iron for about 5 minutes at "MAX" temperature.
- Set the Steam/Dry Selector to the Dry position. If the Steam/Dry Selector is not at Dry position after using, remaining water will move into the Soleplate and can result in burns when the iron is used next time.
- Do not use the Steam or the Jet of Steam while the supply cord is unplugged or the Temperature Selector is set to "0", water will remain inside the Soleplate and cause staining.
- Do not wind the supply cord around the iron, it may be damaged by the hot Soleplate.
- Wait until the iron has cooled before storing it, and always set it on the Heel Rest to protect the Soleplate from scratches, corrosion or stains.
OUTSIDE SURFACE OF IRON
• After unplugging and cooling the iron, simply wipe off with a damp cloth and if necessary, use a mild detergent.
- Never use any harsh cleaners.
SOLEPLATE
- Starch and other residue may be easily removed from the Soleplate with a damp cloth.
• To avoid scratching the finish, never use a metallic pad to clean the Soleplate, and never place the iron on a rough surface. - The best way to remove synthetic residue from the Soleplate is to iron over an old cotton cloth rag after heating the iron.
Note: Never use cleaners in the iron, since they may damage the working parts of the iron. Some smells may be released during initial use of the iron, however, this is normal and the smells won't attach to your clothes. Never use steam iron cleaning products in the iron, as they may damage working parts of the iron.
Q&A / TROUBLE-SHOOTING GUIDE
| Question | Answer |
| Why can a clicking or a metallic sound be heard while using or shaking the iron? | These sounds are made by the internal parts of the iron, spray mechanism, leakage prevention, etc, moving slightly. This is normal. |
| Why do the clothes sometimes become brown after being ironed? | Set the temperature correctly according to the fabric being ironed. If there is cleaning residue remaining on the fabric, the clothes may become brown after being ironed. |
| Why are there white powder/particles coming out of the steam vents while using the steam function (especially when using Jet of Steam)? | The powder/particles are impurities and minerals found in hard water. The powder/particles can be brushed off clothing. |
| Problem | Causes, Solution |
| No heating | Make sure the supply cord is plugged into the household mains socket. |
| No steamPoor steaming force | Fill the iron with water up to "MAX" dot. |
| If there is no steam, set the Steam/Dry Selector to the steam position, or set the Temperature Selector to the steam zone ("", "to ""). | |
| For poor steam, move the Steam/Dry Selector several times, then reset to the steam position. | |
| Press the Jet of Steam Button several times when the Jet of Steam appears insufficient. | |
| Wait until the indicator light goes out before using the iron. | |
| Set the Temperature Selector to "MAX" position when using the high steam. | |
| No spray | Press the Spray Mist Button several times. |
| Fill the iron with water up to "MAX" dot. | |
| Water leaks from steam vents | Set the Temperature Selector to the steam zone. |
| Press the "Jet of Steam Button" in intervals of at least 5 seconds when using the Jet of Steam. | |
| Wait until the indicator light goes out before using the iron. | |
| Clothes are marked | Empty the iron and fill it with clean water. There may be contaminants in the iron/cup. |
| Burnt cloth | Wait until the indicator light turns on after turning the Temperature Selector from a high temperature to a lower temperature. |
| Set the Temperature Selector to appropriate position, or use a press cloth if necessary. |
SPECIFICATIONS
| Model No. | NI-JW950A | NI-JW900C |
| Power Source | 220-240 V~ 50-60 Hz | |
| Power Consumption | 2000-2400 W (9.1-10.0 A) | |
| Mass (approx.) | 1.5 kg | |
| Dimension (approx.) | 307 mm ×139 mm ×151 mm | |
- ENGLISH
- HOUSEHOLD USE ONLY
- SAFE USE OF THE IRON
- IMPORTANT SAFETY INSTRUCTIONS
- READ ALL INSTRUCTIONS BEFORE USING THE IRON
- READ THESE INSTRUCTIONS
- COMPONENTS IDENTIFICATION
- ⑧ HELPFUL IRONING TIPS
- © HOW TO FILL WATER
- D HOW TO USE AS A STEAM IRON
- E HOW TO USE THE "JET OF STEAM" (POWER SHOT) FEATURE
- F HOW TO USE THE "VERTICAL STEAM" FEATURE
- G HOW TO USE THE "SPRAY" FEATURE
- H HOW TO USE AS A DRY IRON
- 3-WAY CLEANING
- WAY(1) USING THE SELF-CLEANING FEATURE
- WAY(2) USING THE JET OF STEAM FEATURE
- WAY(3) ANTI CALC SYSTEM (STAY CLEAN VENTS)
- ANTI-DRIP SYSTEM (AUTOMATIC WATER SEAL)
- ELECTRONIC 3-WAY AUTO SHUT-OFF FUNCTION (NI-JW950A ONLY)
- HOW TO CARE FOR YOUR IRON
- AFTER EACH USE
- OUTSIDE SURFACE OF IRON
- SOLEPLATE
Brand : PANASONIC
Model : NI-JW900
Category : Iron