Naxa Dancing Water NHS-2009 - Soundbar

Dancing Water NHS-2009 - Soundbar Naxa - Free user manual and instructions

Find the device manual for free Dancing Water NHS-2009 Naxa in PDF.

📄 1 pages English EN Download 💬 AI Question 10 questions ⚙️ Specs
Notice Naxa Dancing Water NHS-2009 - page 1
Pick your language and provide your email: we'll send you a specifically translated version.
Product Type Soundbar
Brand Naxa
Model Dancing Water NHS-2009
Dimensions (W x H x D) Approx. 800 x 60 x 80 mm
Weight Approx. 1.5 kg
Power Supply DC 5V, 1A via USB cable (adapter not included)
Bluetooth Version 5.0
Bluetooth Range Up to 10 meters (33 feet)
Audio Input Bluetooth, USB, AUX 3.5mm
Speaker Drivers 2 x Full-range drivers
Total Output Power 20W RMS
Frequency Response 100 Hz - 20 kHz
Remote Control Included (CR2025 battery)
LED Indicators Multi-color LED light effects
Mounting Options Desktop placement or wall mount (brackets included)
Cleaning Instructions Wipe with a soft, dry cloth. Do not use liquids or abrasives.
Safety Precautions Do not expose to water, heat, or direct sunlight. Keep away from children.
Spare Parts / Repairability No user-serviceable parts inside. Contact Naxa support for repairs.
Package Contents Soundbar, USB charging cable, AUX cable, remote control, user manual

Frequently Asked Questions - Dancing Water NHS-2009 Naxa

How do I pair my phone via Bluetooth?
Turn on the soundbar, press the Bluetooth button on the remote or unit. Enable Bluetooth on your phone and select 'NHS-2009' from the list. Pairing is complete when the LED stops flashing.
Why is there no sound from the soundbar?
Check that the soundbar is powered on and the volume is not muted. Ensure the audio source is properly connected via Bluetooth, AUX, or USB. Try pressing the 'Mode' button to cycle inputs.
How do I reset the soundbar to factory settings?
Press and hold the 'Volume -' and 'Source' buttons simultaneously for 5 seconds until the LED flashes rapidly. The soundbar will restart.
Can I use the soundbar while charging?
Yes, the soundbar can be used while plugged into a USB power source. However, for optimal performance, charge fully before first use.
What is the battery life?
The built-in rechargeable battery provides up to 4 hours of playback at moderate volume. Battery life varies with volume and usage.
How do I clean the soundbar?
Use a soft, dry microfiber cloth to gently wipe the surface. Do not use any liquid cleaners, sprays, or abrasive materials. Ensure the device is unplugged during cleaning.
Does the soundbar support hands-free calling?
Yes, when connected via Bluetooth, you can answer incoming calls. Press the 'Play/Pause' button to answer or end a call. The built-in microphone picks up your voice.
Can I connect multiple devices at once?
The soundbar can remember up to 8 paired devices, but only one can be active at a time. To switch, disconnect the current device and connect the new one.
What should I do if the remote control stops working?
First, check the battery (CR2025) and replace if needed. Ensure the remote is pointed at the IR sensor on the soundbar within a 5-meter range. Remove any obstacles between the remote and the soundbar.
Where can I find the user manual?
The user manual is included in the package in printed form. You can also download a PDF version from the Naxa support website or scan the QR code on the box.

User questions about Dancing Water NHS-2009 Naxa

0 question about this device. Answer the ones you know or ask your own.

Ask a new question about this device

The email remains private: it is only used to notify you if someone responds to your question.

No questions yet. Be the first to ask one.

Download the instructions for your Soundbar in PDF format for free! Find your manual Dancing Water NHS-2009 - Naxa and take your electronic device back in hand. On this page are published all the documents necessary for the use of your device. Dancing Water NHS-2009 by Naxa.

USER MANUAL Dancing Water NHS-2009 Naxa
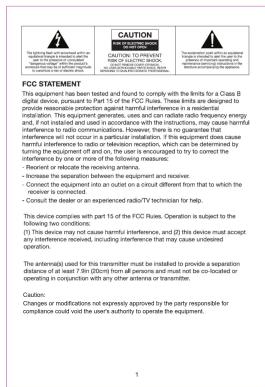
FCC STATEMENT This equipment has been tested and found to comply with the limits for a Class B digital device, pursuant to Part 15 of the FCC Flues. These limits are designed to provide reasonable protection against harmful interference in a residential installation. This equipment generates, uses and can radiate radio frequency energy and, if necessary, and used in the equipment instructions, or which harmful interference to radio communications. However, there is no guarantee that interference is not suitable for a specific equipment. This equipment does cause harmful interference to radio or television reception, which can be determined by further equipment off-end on, the user is encouraged to to correct the interference by one or more of the following measures: - Reorient or relocate the receiving antenna. - Increase the separation between the equipment and receiver. - Connect the equipment into an outlet on a circuit different from that to which the receiver is connected. - Consult the dealer or an experienced radio/TV technician for help. This device complies with part 15 of the FCC Flue. Operation is subject to the following two conditions: (1) This device must cause harmful interference, and (2) this device must accept any interference-received, including interference that may cause undesired operation. The action(s) used by this transmitter must be installed to provide a separation distance of at least 7 (in 20cm) from all persons and must not be co-localized or operating in conjunction with any other antennas or transmitters. Caution: Changing modifications not expressly approved by the party responsible for compliance could visit the user's authority to operate the equipment.

Important Safety Instructions
1. Read these instructions. 2. Keep these instructions. 3. Need all warnings. 4. Make the errors of the instruments. 5. Do not use this apparatus near water. This apparatus shall not be exposed to discharging, and no objects filed with liquids, such as vials, shall be paved on the apparatus. 6. Clean only with a dry cloth. 7. Do not break any ventilation openings. Install in accordance with the manufacturer's instructions. The apparatus should not be situated on a bed, or sit above the surface of the equipment. If it is not open the apparatus must not be placed in a built-in installation, such as a cross-branded structure or greater than 100 degrees Fahrenheit, if at or after the opening of the third open openings. Ventilation should not be impeded by covering the openings with the first open openings. See the details of the device, etc.
8. Do not install near any heat sources such as radiation, heat registers, stoves, or other apparatus (including amplifiers) that produce heat. Extended exposure to heating or pumping that 170 degrees Fahrenheit, for example it lacks a closed vehicle during the summer, may result in damage for your product. 9. Do open flame sources, such as ignalectures, should be placed on the apparatus.
10. Do not take the safety purpose of the oriented or grounding type plug. A positioned plug has both sides with one wider than the other. A grounding type plug is placed on the surface of the instrument. If there are no clear contact between the two devices, please provide an offer for your safety. If the provided plug does not fit into your outlet, unless otherwise selection for the replacement, please decide without access. 11. Do not check the cold front of the device, so much more frequently as plugs, convenience receptacles, and the point where they exit from the apparatus. 12. Do not install in an area which impedes the access to the power plug. Disconnecting the power plug is the only way to completely remove power to the product and must be realized in times. 13. Power source – Use only power supplies of the type specified in operating instructions. Use only power supplies of the equipment is included with this apparatus, do not substitute with any other power supply – use only manufacturer-provided power supplies. 14. Use only apparatus during lighting storms or when unused for long periods of time. 15. Do not will be unused for long periods of time, the batteries should be removed.
2

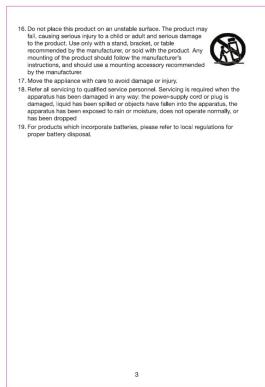
16. Do not place this product on an unstable surface. The product may fail, causing venous injury to a child or adult and service damage to the product. Use only with a label, bracket, or table recommended by the manufacturer; or avoid with the product. Any mounting of the product should follow the manufacturer's instructions, and should use a protection accessory recommended by the manufacturer. 17. Move the appliance with care to avoid damage or injury. 18. Refer all servicing to qualified service personnel. Servicing is required when the apparatus has been damaged in any way; the power-supply coil in drug is damaged, liquid has been spiked or objects have fallen into the apparatus, the apparatus has been engrossed to turn or moisture, does not operate normally, or has been dropped. 19. For products which incorporate batteries, please refer to local regulations for proper battery disposal. 3

PRODUCT OVERVIEW Front View 4 5 6 7 8 9 10 11 12 13 14 Rear View 1. Water Dancing Cover 2. Remote Sensor 3. Speakers 4. Indicator 5. d (Power) Button 6. w/ TUNE - Button 7. w/ TUNE + Button 8. w/ (Play/Pass) Button 9. VOL. (Volume Down) 10. VOL. (Volume Up) 11. SOURCE Button 12. DC IN Jack 13. AUX IN Jack 14. FM ANT(Antenna)

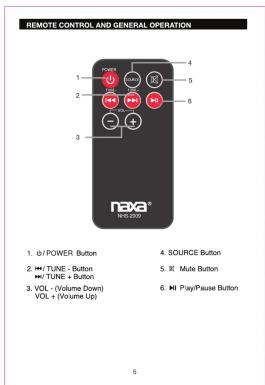
REMOTE CONTROL AND GENERAL OPERATION 1. o/POWER Button 2. ⏻/TUNE - Button ⏻/ TUNE + Button 3. VOL - (Volume Down) VOL + (Volume Up) 4. SOURCE Button 5. ⏻/ Mute Button 6. ⏻/ Pay/Pause Button 5

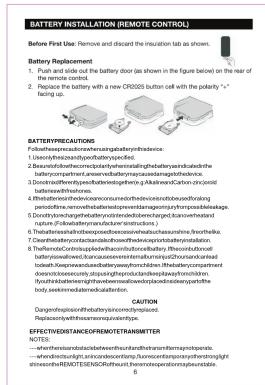
BATTERY INSTALLATION (REMOTE CONTROL) Before First Use: Remove and discard the insulation tab as shown. Battery Replacement 1. Put a disc side of the battery door (as shown in the figure below) on the rear of the remote control. 2. Replace the battery with a new CROZS button cell with the polarity "a" facing up. BATTERY PRECAUTIONS Follopurine/ultralbene/ultralbene/galactyrane/indexoside: 1. Use an/spruce/benzenesylbenzene/benzenesylsphenol 2. Use an/spruce/benzenesylbenzene/galactyrane/galactyrane 3. Use an/spruce/benzenesylbenzene/galactyrane/galactyrane 4. Use an/spruce/benzenesylbenzene/galactyrane/galactyrane 5. Use an/spruce/benzenesylbenzene/galactyrane/galactyrane 6. Use an/spruce/benzenesylbenzene/galactyrane/galactyrane 7. Use an/spruce/benzenesylbenzene/galactyrane/galactyrane 8. Use an/spruce/benzenesylbenzene/galactyrane/galactyrane 9. Use an/spruce/benzenesylbenzene/galactyrane/galactyrane 10. Use an/spruce/benzenesylbenzene/galactyrane/galactyrane 11. Use an/spruce/benzenesylbenzene/galactyrane/galactyrane 12. Use an/spruce/benzenesylbenzene/galactyrane/galactyrane 13. Use an/spruce/benzenesylbenzene/galactyrane/galactyrane 14. Use an/spruce/benzenesylbenzene/galactyrane/galactyrane 15. Use an/spruce/benzenesylbenzene/galactyrane/galactyrane 16. Use an/spruce/benzenesylbenzene/galactyrane/galactyrane 17. Use an/spruce/benzenesylbenzene/galactyrane/galactyrane 18. Use an/spruce/benzenesylbenzene/galactyrane/galactyrane 19. Use an/spruce/benzenesylbenzene/galactyrane/galactyrane 20. Use an/spruce/benzenesylbenzene/galactyrane/galactyrane 21. Use an/spruce/benzenesylbenzene/galactyrane/galactyrane 22. Use an/spruce/benzenesylbenzene/galactyrane/galactyrane 23. Use an/spruce/benzenesylbenzene/galactyrane/galactyrane 24. Use an/spruce/benzenesylbenzene/galactyrane/galactyrane 25. Use an/spruce/benzenesylbenzene/galactyrane/galactyrane 26. Use an/spruce/benzenesylbenzene/galactyrane/galactyrane 27. Use an/spruce/benzenesylbenzene/galactyrane/galactyrane 28. Use an/spruce/benzenesylbenzene/galactyrane/galactyrane 29. Use an/spruce/benzenesylbenzene/galactyrane/galactyrane 30. Use an/spruce/benzenesylbenzene/galactyrane/galactyrane 31. Use an/spruce/benzenesylbenzene/galactyrane/galactyrane 32. Use an/spruce/benzenesylbenzene/galactyrane/galactyrane 33. Use an/spruce/benzenesylbenzene/galactyrane/galactyrane 34. Use an/spruce/benzenesylbenzene/galactyrane/galactyrane 35. Use an/spruce/benzenesylbenzene/galactyrane/galactyrane 36. Use an/spruce/benzenesylbenzene/galactyrane/galactyrane 37. Use an/spruce/benzenesylbenzene/galactyrane/galactyrane 38. Use an/spruce/benzenesylbenzene/galactyrane/galactyrane 39. Use an/spruce/benzenesylbenzene/galactyrane/galactyrane 40. Use an/spruce/benzenesylbenzene/galactyrane/galactyrane 41. Use an/spruce/benzenesylbenzene/galactyrane/galactyrane 42. Use an/spruce/benzenesylbenzene/galactyrane/galactyrane 43. Use an/spruce/benzenesylbenzene/galactyrane/galactyrane 44. Use an/spruce/benzenesylbenzene/galactyrane/galactyrane 45. Use an/spruce/benzenesylbenzene/galactyrane/galactyrane 46. Use an/spruce/benzenesylbenzene/galactyrane/galactyrane 47. Use an/spruce/benzenesylbenzene/galactyrane/galactyrane 48. Use an/spruce/benzenesylbenzene/galactyrane/galactyrane 49. Use an/spruce/benzenesylbenzene/galactyrane/galactyrane 50. Use an/spruce/benzenesylbenzene/galactyrane/galactyrane 51. Use an/spruce/benzenesylbenzene/galactyrane/galactyrane 52. Use an/spruce/benzenesylbenzene/galactyrane/galactyrane 53. Use an/spruce/benzenesylbenzene/galactyrane/galactyrane 54. Use an/spruce/benzenesylbenzene/galactyrane/galactyrane 55. Use an/spruce/benzenesylbenzene/galactyrane/galactyrane 56. Use an/spruce/benzenesylbenzene/galactyrane/galactyrane 57. Use an/spruce/benzenesylbenzene/galactyrane/galactyrane 58. Use an/spruce/benzenesylbenzene/galactyrane/galactyrane 59. Use an/spruce/benzenesylbenzene/galactyrane/galactyrane 60. Use an/spruce/benzenesylbenzene/galactyrane/galactyrane 61. Use an/spruce/benzenesylbenzene/galactyrane/galactyrane 62. Use an/spruce/benzenesylbenzene/galactyrane/galactyrane 63. Use an/spruce/benzenesylbenzene/galactyrane/galactyrane 64. Use an/spruce/benzenesylbenzene/galactyrane/galactyrane 65. Use an/spruce/benzenesylbenzene/galactyrane/galactyrane 66. Use an/spruce/benzenesylbenzene/galactyrane/galactyrane 67. Use an/spruce/benzenesylbenzene/galactyrane/galactyrane 68. Use an/spruce/benzenesylbenzene/galactyrane/galactyrane 69. Use an/spruce/benzenesylbenzene/galactyrane/galactyrane 70. Use an/spruce/benzenesylbenzene/galactyrane/galactyrane 71. Use an/spruce/benzenesylbenzene/galactyrane/galactyrane 72. Use an/spruce/benzenesylbenzene/galactyrane/galactyrane 73. Use an/spruce/benzenesylbenzene/galactyrane/galactyrane 74. Use an/spruce/benzenesylbenzene/galactyrane/galactyrane 75. Use an/spruce/benzenesylbenzene/galactyrane/galactyrane 76. Use an/spruce/benzenesylbenzene/galactyrane/galactyrane 77. Use an/spruce/benzenesylbenzene/galactyrane/galactyrane 78. Use an/spruce/benzenesylbenzene/galactyrane/galactyrane 79. Use an/spruce/benzenesylbenzene/galactyrane/galactyrane 80. Use an/spruce/benzenesylbenzene/galactyrane/galactyrane 81. Use an/spruce/benzenesylbenzene/galactyrane/galactyrane 82. Use an/spruce/benzenesylbenzene/galactyrane/galactyrane 83. Use an/spruce/benzenesylbenzene/galactyrane/galactyrane 84. Use an/spruce/benzenesylbenzene/galactyrane/galactyrane 85. Use an/spruce/benzenesylbenzene/galactyrane/galactyrane 86. Use an/spruce/benzenesylbenzene/galactyrane/galactyrane 87. Use an/spruce/benzenesylbenzene/galactyrane/galactyrane 88. Use an/spruce/benzenesylbenzene/galactyrane/galactyrane 89. Use an/spruce/benzenesylbenzene/galactyrane/galactyrane 90. Use an/spruce/benzenesylbenzene/galactyrane/galactyrane 91. Use an/spruce/benzenesylbenzene/galactyrane/galactyrane 92. Use an/spruce/benzenesylbenzene/galactyrane/galACTYRENTEDIAISE/REMOTE/RENTEDIATION/ NOTES: --whorristhenisulce/dialeverneunrundlandfranthermuregionalpolarite; --whorristhenisulge/diaunrundlandfranthermuregionalpolarite; --whorristhenisulge/diaunrundlandfranthermuregionalpolarite; --whorristhenisulge/diaunrundlandfranthermuregionalpolarite; --whorristhenisulge/diaunrundlandfranthermuregionalpolarite; --whorristhenisulge/diutrihunrundlandfranthermuregionalpolarite; --whorristhenisulge/diaunrundlandfranthermuregionalpolarite; --whorristhenisulge/diaunrundlandfranthermuregionalpolarite; --whorristhenisulge/diaunrundlandfranthermuregionalpolarite; --whorristhenisulge/dieutrihunrundlandfranthermuregionalpolarite; --whorristhenisulge/dieutrihunrundlandfranthermuregionalpolarite; --whorristhenisulge/dieutrihunrundlandfranthermuregionalpolarite; --whorristhenisulge/dieutrihunrundlandfranthermuregionalpolarite; -

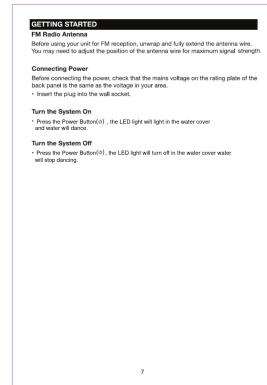
GETTING STARTED FM Radio Antenna Before using your unit for FM reception, unmap and fully retent the antenna wire. You may need to adjust the position of the antenna wire for maximum signal strength. Connecting Power Before connecting the power, check that the mains voltage on the rating plate of the back panel is the same as the voltage in your area. • Insert the plug into the wall socket. Turn the System On • Press the Power Button(s), the LED light will turn in the water cover and water will dance. Turn the System Off • Press the Power Button(s), the LED light will turn off in the water cover water will step dancing.

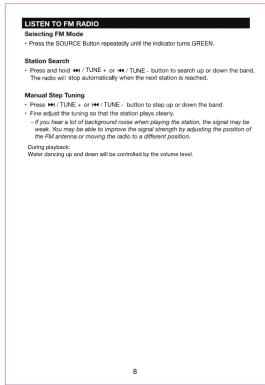
LISTEN TO FM RADIO Selecting FM Mode • Press the SOURCE Button repeatedly until the Indicator turns GREEN. Station Search • Press and how ↑/TUNE + or ↔/TUNE button to restart up or down the band. The radio will stop automatically when the next station is reached. Manual Step Tuning • Press ↔/TUNE + or ↔/TUNE - button to step up or down the band. • Free adjust the tuning to that the station plays clearly. - If you have a list of background noise when playing the station, the signal may be weak. You may be able to improve the signal strength by adjusting the position of the FM audience or moving the radio to a different position. During playback: Water dancing up and down will be controlled by the volume level. 8

PLAYING AUDIO VIA BLUETOOTH SOURCE
Your Token Speaker also includes Bluetooth connectivity. You can connect Bluetooth equipped with mobile phones, tablets and laptop computers to play through your audio system.
Selecting Bluetooth Mode:• Press the SOURCE button until the indicator turns BLUE.• The system will do st matching to the device had connected, if the device is found the system will reconstruct the device automatically.• Please note, only one Bluetooth device can be connected to the unit at one time.
• Activities on your device (smartphone, tablet, computer etc.).• In the Bluetooth menu for your device, there should an option to search for Bluetooth devices. Select this option.You device will now soon run for other Bluetooth devices and should find the unit, identified as "NAVA NHS-2009."• Choose to pair with "NAVA NHS-2009"; if selected by a password, please enter "0000"• Your Bluetooth device will now be connected. Once a connection has been established, the indicator will stay it.After gaining for the first time, the audio system will appear on the connection menu of your Bluetooth device.
• If you want to connect another Bluetooth device to the unit, deactivate the current connection. Follow the steps to connect the new device.
During playing:• Push it button to change between Play and Pause mode at any time.• Push it out it button to select the next or previous track.• Three functions may not be available for all Bluetooth sources.• Push it button on the remote control to turn off sound, press again to resume.• Water dancing up and steam will be controlled by the volume level.
9

PLAYING AUDIO VIA AUX-IN SOURCE Connecting to AUX IN • Connect one end of the supplied 3.5mm stereo mini jack cable to the line or headphone jack of the source (prangphone, tablet, etc.) • Connect the other end of the cable to the AUX IN jack on the back panel of the Bluetooth Tower Speaker. Playing an AUX Source: • Press the SOURCE button repeatedly until the indicator turns ORANGE. • Set the source to play. • Press I/OJ is to adjust volume. • Press. R. button on sample control to turn off sound, press again to resume. • Water dancing up and down will be controlled by the volume level. 10

TROUBLESHOOTING GUIDE
If you have arising problems with your unit, please review the image below before requesting service.
SYMPTOMPOSSIBLE CAUSEPOSSIBLE SOLUTION
No powerPower plug is not plugged into a wall outlet.Plug into the wall outlet properly
The unit is in standby modePress the ID button to turn on pressing the unit more standby mode
No soundVolume is set to minimumIncrease volume levels by pressing the VOLs button
The connected device is set in playing modePlay the music from the connected device
Sound output of the connected device is set too lowIncrease the volume level of the connected device
Input source is incorrectPress the SOURCE button repeatedly until indentation turns to correct color
Sound distortionVolume level is too highReduce the volume level by function of VOLs button
Volume level of the connected device is set too highReduce the volume level of the connected device
Weak radio receptionExtend the FM antenna wire on the rear of the line and mislociate it to get better reception
Remote not functioningOut of rangePoint the remote control to the remote sensor on the unit within 20 feet (int) +/- 30 degrees
The batteries in the remote control are deadReplace with new batteries

SPECIFICATIONS Power Source....5.8V 2A-Φ-Φ Power Consumption....11.6W Bluetooth Working Range...up to 320(1lm) FM Coverage....87.5-108.0MHz Accessories - Instruction Manual - AUX Rx Color - Remote Control with Battery - AC Adapter Support Please visit us on the web at www.naxa.com to get up to the minute news, <|vision_start|> Auto, and documentation for your device. For additional assistance, please contact Nava Technical Support. NAVA Technical Support 2020 Ever 4891 S Vernon, CA 00508 http://www.naxa.com/naxa_support/ 12

Manual assistant
Powered by Anthropic
Waiting for your message
Product information

Brand : Naxa

Model : Dancing Water NHS-2009

Category : Soundbar