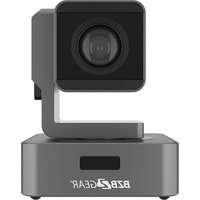
BG-VPTZ-30HSU3 - Security Camera BZBGear - Free user manual and instructions
Find the device manual for free BG-VPTZ-30HSU3 BZBGear in PDF.


| Product Type | PTZ Security Camera |
| Brand | BZBGear |
| Model | BG-VPTZ-30HSU3 |
| Image Sensor | 1/2.8" Progressive Scan CMOS |
| Resolution | 1920 x 1080 (Full HD) |
| Optical Zoom | 30x |
| Pan Range | 360° continuous |
| Tilt Range | -5° to 90° |
| Night Vision | Up to 100m IR distance |
| Video Output | HDMI, USB 3.0 |
| Power Supply | DC 12V 2A or PoE+ (802.3at) |
| Dimensions (W x H x D) | 200 x 150 x 250 mm |
| Weight | 2.5 kg |
| Operating Temperature | -10°C to 50°C |
| Weatherproof Rating | IP66 |
| Mounting Type | Ceiling or wall mount |
| Storage | MicroSD slot (up to 128GB) or NVR |
| Compliance | CE, FCC, RoHS |
| Repairability | Spare parts available via manufacturer |
| Maintenance | Clean lens with soft cloth; check connections regularly |
Frequently Asked Questions - BG-VPTZ-30HSU3 BZBGear
User questions about BG-VPTZ-30HSU3 BZBGear
0 question about this device. Answer the ones you know or ask your own.
Ask a new question about this device
Download the instructions for your Security Camera in PDF format for free! Find your manual BG-VPTZ-30HSU3 - BZBGear and take your electronic device back in hand. On this page are published all the documents necessary for the use of your device. BG-VPTZ-30HSU3 by BZBGear.
USER MANUAL BG-VPTZ-30HSU3 BZBGear
User Manual
Content
-
Warnings.... 3
-
Product Introduction...... 4
2.1 Technical Specifications .... 4
2.2 Product Features....5
- Camera Overview....6
3.1 Connections Overview 6
3.2 RS232 Interface Specifications....7
3.3 Camera Dimensions....8
3.4 Remote Control....9
- Operation Instructions.... 10
4.1 Camera ID Select.... 10
4.2 Pan/Tilt Control.... 10
4.3 Menu Display 10
4.4 Focus....10
4.5 Backlight.... 11
4.6 Zoom 11
4.7 Setting, Recalling, and Erasing Presets 11
4.8 Image Flip & P/T Reset.... 11
- Menu Settings ...... 12
5.1 Exposure 12
5.2 Color....13
5.3 Picture....13
5.4 P/T/Z 14
5.5 Noise Reduction.... 14
5.6 Video Format .... 15
5.7 System Setting 15
5.8 Restore Default....15
-
Network Connection .... 16
-
Installation Instruction.... 23
-
Tech Support 24
-
Warranty....24
-
Mission Statement....24
1. Warnings
Electrical Safety
Confirm country and local electrical safety standards when using or installing the product. The product has no power switch. Remove power immediately if camera is not in proper working condition to avoid electrical shock.
Handle with Care
Product should be protected against extremes of stress, vibration and moisture in transport, storage and installation. It is transported by integrated packing style.
Do not turn camera head manually. Doing so may result in mechanical damage. Camera should only be placed on a stable horizontal surface and cannot be installed at an angle.
Make sure there are no obstacles within the camera's rotational range when installing. Never power on before installation has been completed.
Unauthorized Disassembly will void your warranty
There are no client serviceable parts in this camera. BZBGEAR is not responsible for any unauthorized modification or dismantling.
2. Product Introduction
2.1 Technical Specifications
| Model | BG-VPTZ-10HSU3 | BG-VPTZ-20HSU3 | BG-VPTZ-30HSU3 |
| Camera Parameters | |||
| CMOS Sensor | 1/2.7" Exmor CMOS | 1/2.8"Exmor CMOS | 1/2.8"Exmor CMOS |
| Effective Pixels | 2.7 Megapixels | 2.38 Megapixels | 2.7 Megapixels |
| Video Format | 1080P60/59.94/50/30/29.97/25; 1080I60/59.94/50/30/29.97/25; 720P60/50/30/25, 480I60, 576I50 | ||
| Optical Zoom | 10X Optical; 12X Digital Zoom | 20X Optical; 12X Digital Zoom | 30X Optical |
| Focus | f=5.1mm~51mm | f=4.7mm~94.0mm | f=5.2mm~148.4mm |
| HOV | 72° | 65° | 65.4° |
| F-number | F=1.6(W)-3.5(T) | F=1.6(W)-3.5(T) | F=1.3(W)-4.8(T) |
| Min. Illumination | 0.005Lux (F1.8,AGC:ON) | ||
| Digital Noise Reduction | 2D & 3D | ||
| White Balance | Auto/Manual/Indoor/outdoor/White Balance/3000K/4000K/5000K/6500K | ||
| Focus | Auto/Manual | ||
| Iris | Auto/Manual | ||
| Backlight Compensation | 1-7/Off | ||
| Control Panel | Brightness, Hue, Saturation, Contrast, Sharpness | ||
| Interface Parameters | |||
| Video Output Interface | HDMI, 3G-SDI, IP Streaming, USB3.0 | ||
| Video Network Coding | H.265, H.264, MJPEG | ||
| Communication | 1X RS232 IN, 1X RS232 Out, 1X RJ45, RS485 | ||
| Control Protocol | VISCA/PELCO-D/PELCO-P/Visca Over IP/ONVIF | ||
| Baud Rate | 2400/4800/9600/115200 | ||
| Audio Input | 1-ch 3.5mm audio interface, Line In | ||
| Audio Compression Format | G.711, G.722, G.722.1, G.728, G.722.1C AAC | ||
| Network Interface | 100M internet access (10/100BASE-TX) | ||
| Network Protocol | TCP/IP, HTTP, RTSP, RTMP, RTMPS, ONVIF, DHCP, Multicast | ||
| Power Interface | JEITA type (DC IN 12V) / POE | ||
| Mechanical Parameters | |||
| Pan Rotation Angle | -178°~ +178° | ||
| Vertical Angle of View | -30°~ +90° | ||
| Pan Speed Range(per second) | 0.1~180°/s | ||
| Tilt Speed Range(per second) | 0.1~120°/s | ||
| Presets | 255 | ||
| Other Parameters | |||
| Power Adapter | AC100V~AC240V in, DC12V/2A out | ||
| Input Voltage | DC 12V | ||
| Power Consumption | 12W | ||
| Storage Environment | -10°C ~ +60°C / 20% ~ 95% | ||
| Working Environment | -10°C ~ +50°C / 20% ~ 80% | ||
| Standard Accessories | 1x IR Remote Control; 1x RS-232 (Mini DIN 8pin Female) to DB 9pin COM (Male) adapter withdaisy-chain output; 1x RS-232 (Mini DIN 8pin) Male to 2 pin RS485 adapter; 1x 12V /2.0 A DC Power Adapter; 1x User Manual | ||
| Optional Accessories | Wall mount (BG-VPTZ-WM); ceiling mount (BG-VPTZ-CM) | ||
2.2 Product Features
1080P Full High-definition
1/2.8" high quality CMOS sensor (1/2.7" sensor on 10x), can reach maximum 1920 x 1080 resolutions and output frame rate up to 60fps.
10/20/30X Optical Zoom with 72°/65°/65.4° horizontal field of view
Equipped with advanced image processing technology and a full HD 1/2.8" CMOS Sensor (1/2.7" sensor on 10x), 10/20/30X Optical Zoom, and a maximum resolution of 1080P@60fps.
Low Video Noise
The inclusion of a high SNR (Signal to Noise Ratio) CMOS sensor combined with 2D and 3D noise reduction functions reduces video noise to provide a clear image, even under low-light conditions.
Multiple Simultaneous Outputs
Equipped with simultaneous USB3.0, 3G-SDI, HDMI, and 4 channels of IP streaming outputs (RTSP/RTMP/RTMPS).
Quiet Pan and Tilt Movement
High-precision stepper motors and an advanced motor drive processor ensure smooth, quiet, and responsive camera movement.
Multiple Control Options
The camera can be operated via RS232, RS485, LAN, or IR remote control. Supported protocols include VISCA, PELCO-P/D, ONVIF, and VISCA over IP.
Preset Image Freeze
When enabled, this function captures a still image and holds it until the camera has moved to the next selected preset, eliminating jarring transitions.
Multi-preset
Supports up to 255 presets. (Remote control can only set and recall 9 presets.)
Suitable for a wide variety of applications
The compact footprint makes this camera an ideal fit for education, conferencing, telemedicine, houses of worship, and any other scenario where space is limited but high-quality video is required.
Multiple Network Protocols
Supports ONVIF, RTSP, RTMP, and RTMPS protocols.
3. Camera Overview
3.1 Connections Overview


- Lens
- IR receiver
- Power indicator
- DC12V Input
-
COM Port (RS485/RS232)
-
LAN (PoE)
- 3G-SDI Output
- HDMI Output
- USB 3.0 Type-B
- 3.5mm Audio-Input
3.2 RS232 Interface Specifications
For serial connection to computers or joystick controllers.

![graph LR A["CAMERA"] --> B["DTR"] A --> C["DSR"] A --> D["TXD"] A --> E["GND"] A --> F["RXD"] A --> G["GND"] A --> H["IR OUT"] A --> I["NC 8. CTS"] J["DB-9"] --> K["DCD"] J --> L["RXD"] J --> M["TXD"] J --> N["DTR"] J --> O["GND"] J --> P["DSR"] J --> Q["RTS"]](/content/2026/05/1059319/images/03cfeae5dd52540b54832bf7eab9faeb821c568d4c9522f5ed819c4316059346.jpg)
| RS232INPUT | ||
| NO. | Function | Definition |
| 1 | DTR | Data Terminal Ready |
| 2 | DSR | Data Set Ready |
| 3 | TXD | Transmit Data |
| 4 | GND | Ground |
| 5 | RXD | Receive Data |
| 6 | GND | Ground |
| 7 | IR OUT | IR Signal Output |
| 8 | NC | No Connection |
![graph LR A["CAMERA Mini DIN"] --> B["DTR"] A --> C["DSR"] A --> D["TXD"] A --> E["GND"] A --> F["RXD"] A --> G["GND"] A --> H["IR OUT"] A --> I["NC"] B --> J["DTR"] B --> K["DSR"] B --> L["TXD"] C --> M["GND"] C --> N["RXD"] D --> O["GND"] D --> P["RXD"] E --> Q["GND"] E --> R["RXD"] F --> S["GND"]…](/content/2026/05/1059319/images/d43ab304e17f99ed6c8454a6e79b5e88bcc4a09e53f434f1f9737be13e59efa1.jpg)
![graph LR A["Camera RS232 Input (IN)"] --> B["MD8M (Needle)"] B --> C["DB9F (Aperture)"] C --> D["RS232 Interface for Computer or Control Keyboard"]](/content/2026/05/1059319/images/ea5bac3291c06f22c4c3c079d220c98831aa3213550f28f04d04b950f7682de7.jpg)
3.3 Camera Dimensions

3.4 Remote Control

| Key | Function | |
| 1 | Power Key | After pressing, the camera enters standby mode |
| 2 | P/T RST Key | After pressing, the camera enters self-check |
| 3 | Flip Key | Set the camera image to flip |
| 4 | Camera Select Key | Select the camera to be controlled |
| 5 | BLC Key | Turn on/off BLC |
| 6 | Menu Key | Enter/Exit Menu |
| 7 | Camera PTZ Control Key | Press the HOME button to return the camera to the center position |
| 8 | Preset Erase Key | Press "Reset"+ Number (1-9) to erase the corresponding Preset |
| 9 | Preset Setting Key | Press "Preset"+ Number (1-9)to save the corresponding preset |
| 10 | Focus Key | [AUTO]: Automatic focus[MANUAL]: Manual focus[FAR]: Manual focus on distant objects[NEAR]: Manual focus on nearby objects |
| 11 | Zoom Key | + increase, - decrease |
| 12 | Number Key | Used for setting and recalling Presets |
Note:
Always maintain a direct and unobstructed line of sight between the remote control and the sensor on the front of the camera.
4. Operation Instructions
4.1 Camera ID Select

Select the target camera ID (from No.1 to No.4)
4.2 Pan/Tilt Control

Move camera lens up ▲ Move camera lens down ▼ Move camera lens to the left ◀ Move camera lens to the right ▶ Return camera lens to center [HOME]
Tip: Pressing the directional button will rotate the camera lens slowly. Pressing and holding the button will rotate it faster.
4.3 Menu Display

Click the [MENU] button to display the on-screen menu. To exit, press [MENU] again.
4.4 Focus

[AUTO] Enable auto focus
[MANUAL] Switch to manual focus mode
[FAR] Manually focus on a distant object
[NEAR] Manually focus on a nearby object
4.5 Back Light Compensation

Strong background light can create unwanted shadows. Press [BLC] to activate backlight compensation mode. Press [BLC] again to deactivate.
4.6 Zoom

Click the [+] Button, to zoom in. Click the [-] Button, to zoom out.
4.7 Setting, Recalling, and Erasing Presets

- To save a preset, press [PRESET] then press any of the numbers (no. 1–9). You can save up to 9 presets.
- To call a preset, press the saved preset number (no. 1–9).
- To reset a preset, press [RESET] then press the preset number (no. 1–9) you want to reset.
4.8 Image Flip & P/T Reset

Click the [FLIP] button to invert the image for ceiling applications.
Click the [P/T RST] button to automatically recalibrate the PTZ controls.
5. Menu Settings
- Press the [MENU] button on the remote control to display the OSD menu.
- Use the arrow keys to navigate the menu, press left and right buttons to adjust the settings.
5.1 Exposure
Press the [MENU] button to display the OSD menu, press arrow keys to highlight EXPOSURE and then press right to enter the sub-menu.
• [AE MODE]: AUTO/SHUTTER/IRIS
Press right button to select options as defined below:
• [AUTO]: N/A
● [SHUTTER]: Shutter priority
mode: 1/1 - 1/10000
● [IRIS]: priority mode: F1.6 - F24
● [EXPCOMP]: -3.5DB - +3.5DB, OFF
- [BACKLIGHT]: 1-7 / OFF
● [FLICKER]: 50HZ, 60HZ, OFF
• [GAMMA]: 0-9
MAIN MENU
EXPOSURE
COLOR
PICTURE
P/T/Z
NOISE REDUCE
VIDEO OUT
SYSTEM SETUP
DEFAULT SETUP
EXIT
EXPOSURE
AE MODE: AUTO
AE LEVEL: N/A
EXPCOMP: OFF
BACKLIGHT: OFF
FLICKER: 50HZ
GAMMA: 5
BACK
EXIT
5.2 Color
Press the [MENU] button to display the OSD menu, press
arrow keys to highlight COLOR and then press right to enter
the sub menu.
● [WB MODE]: AUTO/ONE-SHOT/ATW/
MANUAL/3000K/
4000K/5000K/6500K
• [R TUNING]: 0-32
• [B TUNING]: 0-32
• [G TUNING]: 0-32
• [SATURATION]: 60%-200%
• [COLOR HUE]: 0-14
● [AWB SENS]: HIGH/NORMAL/LOW
- [RED GAIN]: 0-255
(only under MANUAL)
(only under MANUAL)
COLOR
| WB MODE: | AUTO |
| R TUNING: | 18 |
| B TUNING: | 16 |
| G TUNING: | 11 |
| SATURATION | 100% |
| COLOR HUE: | 7 |
| AWB SENS: | NORMAL |
| BACK | |
| EXIT |
5.3 Picture
Press the [MENU] button to display the OSD menu, press the arrow keys to highlight [PICTURE] and then press the right button to enter sub-menu.
• [BRIGHT]: 0-14
• [CONTRAST]: 0-14
● [SHARPNESS]: 0-15
- [ICR]: COLOR/BLACK/AUTO
• [STYLE]: STANDARD/BRIGHT/RTSP/SOFT
PICTURE
| BRIGHT: | 8 |
| CONTRAST: | 7 |
| SHARPNESS: | 5 |
| ICR: | COLOR |
| STYLE: | STANDARD |
| BACK | |
| EXIT |
5.2 P/T/Z
Press the [MENU] button to display the OSD
menu, then press the arrow keys to highlight [P/T/Z] and press right to enter the sub-menu.
• [FILP]: ON/OFF
• [L/R DIRECTION]: ON/OF
● [AF MODE]: AUTO/MANUAL/ZOOM
● [AF SENS]: HIGH/NORMAL/LOW
• [PRESET FREEZE]: ON/OFF
• [D ZOOM]: ON/OFF
P/T/Z
| FLIP: | OFF |
| L/R DIRECTION: | OFF |
| AF MODE: | AUTO |
| AF SENS: | NORMAL |
| PRESET FREEZE: | OFF |
| D ZOOM: | ON |
| BACK | |
| EXIT |
5.3 Noise Reduction
Press the [MENU] button to display the OSD menu, press the arrow keys to highlight [NOISE REDUCTION], then press right to enter the sub-menu.
• [2D NR]: 0-5 / OFF
• [3D NR]: 0-5 / OFF
• [DYN HOT PIXEL]: ON/OFF
NOISE REDUCE
| 2D NR: 2 |
| 3D NR: 3 |
| DYN HOT PIXEL: OFF |
| BACK |
| EXIT |
5.4 Video Format
Press the [MENU] button to display the OSD menu, press the arrow keys to highlight [VIDEO OUT], then press right to enter the sub-menu.
• [VIDEO OUT]:
1080P60/59.9 4/50/30/29.97/25
1080160/59.94/50/30/25
720P/60/50
VIDEO OUT
VIDEO OUT: 720P50
720P60
1080125
1080130
1080150
1080|59.94
1080160
1080P25
1080P29.97
1080P30
1080P50
1080P59.94
1080P60
BACK
5.5 System Settings
Press the [MENU] button to display the OSD menu, press the arrow keys to highlight [SYSTEM SETTING], then press right to enter the sub-menu.
●[SYSTEM INFO]: press right button to the sub menu, as the right picture shown
• [LANGUAGE]: CHINESE/ENGLISH
• [ZOOM LEVEL]: ON/OFF
● [PROTOCOL]: VISCA/PELCO-D/PELCO-P
- [ADDRESS]: 1-255
● [BAUDRATE]:2400/4800/9600/19200/38400
SYSTEM SETUP
| SYSTEM INFO | |
| LANGUAGE: | CHINESE |
| ZOOM LEVEL: | ON |
| PROTOCOL: | VISCA |
| ADDRESS: | AUTO |
| BAUDRATE: | 9600 |
| BACK | |
| EXIT | |
5.6 Restore Default
Press the [MENU] button to display the OSD menu, press the arrow keys to move to [DEFAULT], press right button to make the OSD parameters return to default.
DEFAULT SETUP
FACTORY DEFAULT
BACK
6. Network Connection
To successfully complete this process, you will need several pieces of information. The first is the IP address of your computer. You will also need to select an unused IP address on your local network (This is the address you will set the camera to). The third piece is the default IP address of your camera. Finally, you will need the IP address of your Default Gateway/Router.
All versions of the BZBGEAR VPTZ Series cameras have the following default IP address:
192.168.1.162
The computer must be on the same subnet as the camera to connect successfully, therefore the computer must be connected to the 192.168.1.x subnet. If your network is already using this IP address pool, simply enter the cameras IP address to connect. If it is not this can be achieved via the Local Area Network Properties on the computer.
- Right-click on the internet connection in the lower right corner of the desktop and select "Open Network & Internet Settings".

- Select "Change Adapter Options".

- Right-click on your connection (Wi-Fi or Ethernet) and select "Properties."
- Select "Internet protocol version 4 (TCP/IPv4)" as shown below and click "Properties."

- For the following steps refer to the diagram below. Select "Use the following IP address."
- In the IP address field enter a non-conflicting IP address on the same subnet as the camera. If there is another device with the same IP address you will not be able to connect. In the example below we are using 192.168.1.200
- In the Subnet mask field enter 255.255.255.0 In the Default gateway field type 192.168.1.1 You can leave the DNS fields blank.

NOTE: When you are finished configuring the camera you will need to return to this screen and select "Obtain an IP address automatically" and "Obtain DNS server automatically" to restore internet connectivity to your computer. Also make sure to reconnect any ethernet cables you may have unplugged.
- Click OK to apply your settings.
- Click OK to close the network properties screen.
- Once you have applied your settings open your web browser and enter the IP address of your camera.
- Enter the login information to access the interface. The username and password should both be admin for a default camera. You will now be looking at the camera preview window. At the top left of your screen select Config.

- On the left side of your screen select Network. In the IP address field, you will enter the unused IP address you selected at the beginning. Our example will use an address of 192.168.20.186.
*This address MUST NOT be in use by any other device on your network or you will create an IP conflict and be unable to access your camera. *
- In the Subnet Mask field enter 255.255.255.0 the enter the IP address of your Default Gateway in the field below. Double-check your values and click the Save Button.
- Unless you are given different information by your network administrator you should enter 8.8.8.8 for DNS1 and 8.8.4.4 for DNS2. Click Save.

- Once you complete the camera setup, repeat the steps on your computer to adjust "Internet Protocol Version 4 (TCP/IPV4) Properties" and select "Obtain IP address automatically" and "Obtain DNS server address automatically." Click OK to close all network-related screens.

- Your computer and camera should now be on your network. Open your web browser and enter the IP address you assigned to your camera and your setup is complete.
6.1 Camera Web Interface
From the Web Interface you can control the camera, view the video feed, and adjust various camera settings and functions.
Preview Screen
From the preview screen you can view the live video feed, preview the embedded audio, and adjust PTZ, Focus, and Iris controls.
Directional Arrows: Use the Up/Down/Left/Right/Diagonal buttons to rotate the camera.
Home Button: Use the Home button to return the camera to the Home position.
Zoom In/Out: Use the Zoom buttons to adjust the zoom level of the camera.
Focus In/Out: Use the Focus buttons to manually adjust the camera's focus.
Speed Control: Use the slider to adjust the PTZ speed of the camera.
Preset Tab: Use the Preset tabs to Set, Recall, and Delete Preset positions. To record a preset, adjust the camera to the desired location and zoom level. Highlight the preset number you wish to record and click the "Set" button. To recall a preset, highlight the preset number you wish to recall and click the "Call" button. To delete a preset, highlight the preset number you with to recall and click "Delete".
Configuration Screen
From the configuration screen you can set and adjust all the functions and parameters of the camera.
System Page
The system page contains information regarding the camera, time settings, firmware, and main video output resolution.
Version Tab: The version tab contains camera information including model number, serial number, firmware and hardware versions, and MAC address.
Time Tab: The time tab allows you to adjust time, date, and time zone settings.
Maintain Tab: This tab allows you to reboot, restore factory default settings, and update the firmware.
Config Tab: Name the camera, select menu language, select Video Standard (not used), set output resolution, and enable/disable UVC (USB) video output.
Network Page
The network page includes network settings, port settings, and streaming settings.
ETH Tab: Select static (Config IP Address) or DHCP (Auto IP Address), select Auto or Manual DNS settings.
Service Tab
MSG Port: default 8080
RTSP Port: default 554
HTTP Port: default 80
VISCA Port: default 52381
WebSocket Port: default 8880
Note: Changing the port number requires restarting the camera to valid. In order to avoid port conflicts, please be careful to modify.
RTMP Tab
Enable RTMP: (Check box)
Server: Enter the server URL and Stream Key of your streaming platform in the format of :rtmp://serverURL/StreamKey.
(Ex. rtmp://a.rtmp.youtube.com/live2/du36-z46c-1p31-4kxw-29yx)
Port: Set according to your streaming platform (YouTube=1935, Facebook=443)
Stream Type: Select desired stream
ONVIF Configuration Tab
ONVIF Authentication: Authentication enable, default disable.
ONVIF Server Port: default 8554.
ONVIF RTSP Authentication: Authentication enable, default disable.
RTSP Port: ONVIF RTSP Port, default 8554.
AV Page
The AV page is where you will find all the audio and video settings for stream encoding.
Stream Type: Use the pull-down to select which of the 3 streams you wish to adjust. When you select a stream, all options and settings on the page affect the selected stream.
Stream Key: This shows the address information for your streaming output. This is not adjustable and should be added to the end of your camera's IP address as shown below:
Default Main Stream: rtsp://192.168.1.162:554/0/0/0
Default Sub-Stream: rtsp://192.168.1.162:554/0/0/1
Frame Rate: Specify frame rate (1-30). Frame Rate Priority prioritizes frame rate over image quality when VBR mode is enabled.
GOP: Frame interval (1-60). Default is 30.
Bitrate: Video Bit Rate (1-10240). Default is 4096
Resolution: Set streaming video resolution
Stream Mix Type: Select Complex or Video Stream. Complex Stream includes audio.
Encode Type: Select video encoding format.
Bitrate Type: CBR (Coded Bit Rate), VBR (Variable Bit Rate), Fix QP (Fixed Bit Rate).
-When CBR is selected stream quality, IFrame, and PFrame settings are unavailable.
-When VBR is selected IFrame and PFrame settings are unavailable.
-When Fix QP is selected stream quality setting is unavailable.
Audio Encode Type: Select audio encoding format. AAC is recommended for most streaming platforms.
Audio Input Mode: Select Mic Level or Line Level
Audio Input Gain: Set the audio input gain level (1-10, mute)
Audio Quality: Select High or Low
Image Page
On the image page you will find all the image, iris, and focus settings for adjusting the camera's picture.
Display Tab-
Brightness: Brightness adjustment slider
Contrast: Contrast adjustment slider
Hue: Hue adjustment slider
Saturation: Color saturations adjustment slider
Sharpness: Video sharpness adjustment slider
Mirror: Horizontal image reverse
Flip: Vertical image reverse
Flicker: Lighting flicker compensation
AWB Mode: Auto White Balance Mode settings
BLC: Backlight Compensation adjustment
DNR(3D): 3D Digital Noise Reduction Control
Camera Tab-
Focus Mode: Change camera focusing mode
Near Limit: Set the distance from the lens for auto focusing. The camera will not focus on anything closer than the set value.
Sensitivity: Auto focus sensitivity level
ICR Mode: Infrared Cut Filter Removal Mode
AE Mode: Auto Exposure Mode
AE Level: Auto Exposure Level adjustment
HLC: Highlight Compensation Level
DNR(2D): 2D Digital Noise Reduction adjustment
Gamma: Gamma adjustment
Safety Page
From this screen you can modify the login information
PTZ Page
From this screen you can view and modify the PTZ control settings of the camera.
PTZ Address: Set the PTZ control address of the camera
Protocol: Set the serial control protocol
Baud Rate: Set the serial control baud rate
LR-Direction: Reverse the left and right controls
Vertical Axis: Reverse the up and down controls
Display Mag: Display current magnification (zoom) level
Status Page
On this screen you can view the current bit rates of the 3 IP streams.
7. Installation Instructions

8. Tech Support
Before contacting tech support, your questions may have been answered already! Visit our BZBGEAR support page at bzbgear.com/support for valuable information on our products.
Here you will find our Knowledge Base (bzbgear.com/knowledge-base) consisting of tutorials, quick start guides, and step-by-step troubleshooting instructions. Also visit our YouTube channel BZB TV at youtube.com/c/BZBTVchannel for help setting up, connecting, and other how-to videos regarding our products.
If you still need answers, please call 1.888.499.9906, email support@bzbgear.com, or chat at bzbgear.com.
9. Warranty
BZBGEAR Pro AV products and Cameras come with a three-year warranty. An extended two-year warranty is available for our Cameras upon registration for a total of five years.
For an extended two-year warranty on our Cameras, follow these steps:
-
Register your Camera within 90 days of purchase by visiting bzbgear.com/warranty.
-
Complete the registration form. Provide all necessary proof of purchase details, including serial number and a copy of your sales receipt.
For complete warranty information, please visit bzbgear.com/warranty or scan the QR code.

10. Mission Statement
BZBGEAR manifests from the competitive nature of the audiovisual and live streaming industry to innovate while keeping the customer in mind. AV solutions can cost a pretty penny, and new technology only adds to it. We believe everyone deserves to see, hear, and feel the advancements made in today's AV world without having to break the bank. BZBGEAR is your answer for applications requiring the latest pro AV and live streaming solutions.
You'll notice comparably lower prices with BZBGEAR while the performance and quality are on par with the top brands in the industry. Our team offers system design consultation and expert tech support seven days a week for all BZBGEAR products. Our unparalleled support is our way of showing we care for every one of our customers. Whether you're an integrator, home theater enthusiast, or a do-it-yourselfer, BZBGEAR offers solutions allowing you to focus on your project and not your budget.
- CONTENT
- WARNINGS
- ELECTRICAL SAFETY
- HANDLE WITH CARE
- UNAUTHORIZED DISASSEMBLY WILL VOID YOUR WARRANTY
- PRODUCT INTRODUCTION
- 2.1 TECHNICAL SPECIFICATIONS
- 2.2 PRODUCT FEATURES
- 1080P FULL HIGH-DEFINITION
- 10/20/30X OPTICAL ZOOM WITH 72°/65°/65.4° HORIZONTAL FIELD OF VIEW
- LOW VIDEO NOISE
- MULTIPLE SIMULTANEOUS OUTPUTS
- QUIET PAN AND TILT MOVEMENT
- MULTIPLE CONTROL OPTIONS
- PRESET IMAGE FREEZE
- MULTI-PRESET
- SUITABLE FOR A WIDE VARIETY OF APPLICATIONS
- MULTIPLE NETWORK PROTOCOLS
- CAMERA OVERVIEW
- 3.1 CONNECTIONS OVERVIEW
- 3.2 RS232 INTERFACE SPECIFICATIONS
- 3.3 CAMERA DIMENSIONS
- 3.4 REMOTE CONTROL
- NOTE
- OPERATION INSTRUCTIONS
- 4.1 CAMERA ID SELECT
- 4.2 PAN/TILT CONTROL
- 4.3 MENU DISPLAY
- 4.4 FOCUS
- 4.5 BACK LIGHT COMPENSATION
- 4.6 ZOOM
- 4.7 SETTING, RECALLING, AND ERASING PRESETS
- 4.8 IMAGE FLIP & P/T RESET
- MENU SETTINGS
- 5.1 EXPOSURE
- MAIN MENU
- EXPOSURE
- 5.2 COLOR
- 5.3 PICTURE
- 5.2 P/T/Z
- P/T/Z
- 5.3 NOISE REDUCTION
- NOISE REDUCE
- 5.4 VIDEO FORMAT
- 5.5 SYSTEM SETTINGS
- 5.6 RESTORE DEFAULT
- NETWORK CONNECTION
- 192.168.1.162
- THIS ADDRESS MUST NOT BE IN USE BY ANY OTHER DEVICE ON YOUR NETWORK OR YOU WILL CREATE AN IP CONFLICT AND BE UNABLE TO ACCESS YOUR CAMERA
- 6.1 CAMERA WEB INTERFACE
- PREVIEW SCREEN
- CONFIGURATION SCREEN
- SYSTEM PAGE
- NETWORK PAGE
- SERVICE TAB
- RTMP TAB
- ONVIF CONFIGURATION TAB
- AV PAGE
- IMAGE PAGE
- DISPLAY TAB
- CAMERA TAB
- SAFETY PAGE
- PTZ PAGE
- STATUS PAGE
- INSTALLATION INSTRUCTIONS
- TECH SUPPORT
- WARRANTY
- MISSION STATEMENT
Brand : BZBGear
Model : BG-VPTZ-30HSU3
Category : Security Camera