BW 4151 - Baby monitor UNIDEN - Free user manual and instructions
Find the device manual for free BW 4151 UNIDEN in PDF.

| Product Type | Audio Baby Monitor |
| Brand | Uniden |
| Model | BW 4151 |
| Dimensions (Parent Unit) | Approximately 120 x 70 x 35 mm |
| Dimensions (Baby Unit) | Approximately 100 x 85 x 50 mm |
| Weight (Parent Unit) | Approximately 130 g |
| Weight (Baby Unit) | Approximately 150 g |
| Power Supply | AC adapter (DC 5V, 1A) or 2x AAA batteries (parent unit) |
| Battery Life (Parent Unit) | Up to 10 hours (alkaline batteries) |
| Operating Range | Up to 300 meters outdoors, 50 meters indoors |
| Frequency | 2.4 GHz DECT |
| Audio Monitoring | Two-way talk-back, sound-activated LED indicator |
| Temperature Display | Yes, on parent unit |
| Night Light | Built-in lullabies and night light (baby unit) |
| Lullabies | 5 pre-installed melodies |
| Power Saving Mode | Auto shut-off when out of range |
| Cleaning Instructions | Wipe with a soft, dry cloth. Do not use liquid cleaners. |
| Safety | Overheat protection, low battery alert |
| Spare Parts | AC adapters, batteries available from Uniden |
| Warranty | 1 year limited |
| Certifications | FCC, CE, RoHS |
| Package Contents | Parent unit, baby unit, 2 AC adapters, user manual |
Frequently Asked Questions - BW 4151 UNIDEN
User questions about BW 4151 UNIDEN
0 question about this device. Answer the ones you know or ask your own.
Ask a new question about this device
Download the instructions for your Baby monitor in PDF format for free! Find your manual BW 4151 - UNIDEN and take your electronic device back in hand. On this page are published all the documents necessary for the use of your device. BW 4151 by UNIDEN.
USER MANUAL BW 4151 UNIDEN
For more exciting new products please visit our website: Australia: www.uniden.com.au
OWNER'S MANUAL
IMPORTANT SAFETY INSTRUCTIONS
This manual contains important information about this product's operation. If you are installing this product for others, you must leave this manual or a copy with the end user.
When using your equipment, always follow basic safety precautions to reduce the risk of fire, electric shock and injury to persons, including the following:
- This unit is NOT WATERPROOF. Never submerge the devices in water or rinse them in running water.
- Always position the device and power cord out of the reach of children. The power cord could result in strangulation or cause injury to children.
- Keep small parts out of the reach of children (risk of swallowing).
- Keep packaging material away from children (risk of suffocation).
- Never place the Baby Unit in the cot or within the reach of your child.
- Make sure that cables are out of the reach of your child (risk of electric shock).
• Always make sure that the devices are fully functioning before use. - Only use the AC adaptors included with the unit.
- Do not use the cable to pull the AC adaptor plug out of the socket.
- Disconnect the AC adaptor plug from the mains when the device is not in use.
- The device and the AC adaptor should not come into contact with hot surfaces or sharp objects.
- Do not use any additional parts that are not recommended by the manufacturer or offered as equipment.
- After use, before cleaning and changing any accessory parts, the AC adaptor should always be disconnected.
Warning to Parents and Other Users
Failure to follow these warnings and the assembly instructions could result in serious injury or death. This product is not designed or intended for use as a medical monitor, nor should this product be used as a substitution for medical or parental supervision. Always be sure that both the transmitter and monitor are working properly, and are within range of each other.
STRANGULATION HAZARD. Keep the adaptor cords out of the reach of children.
WARNING: KEEP OUT OF THE REACH OF CHILDREN.
Allow for proper ventilation when units are in use. Do not cover the camera or monitor with any object such as a blanket. Do not place it in a drawer or in any location which would muffle the sound or interfere with the normal flow of air.
SAVE THESE INSTRUCTIONS!
For best results
To avoid damage to your equipment, follow these simple precautions:
- Do not drop, puncture or disassemble any part of the equipment. There are no user-serviceable parts inside.
- Do not expose the equipment to high temperatures, and avoid leaving the equipment in direct sunlight for more than a few minutes. Heat can damage the case or electrical parts.
- Do not place heavy items on top of the equipment or expose the equipment to heavy pressure.
- Remove the power adaptor during long periods between usages.
- Clean only with a dry cloth.
Failure to follow the instructions in this operating manual will void the warranty. Uniden assumes no liability for damages to property or injury to persons caused by improper handling or failure to comply with these safety instructions.
CONTENTS
IMPORTANT SAFETY PRECAUTIONS ......2
CONTENTS 4
WHAT'S IN THE BOX? 5
GETTING STARTED 6
INSTALLATION 10
General Placement Considerations 10
Mounting the Camera on the Wall 10
Powering the Camera 11
Powering the Camera 12
SYSTEM MENUS ....13
Monitor Function Settings 13
Camera Settings 14
Alert Settings 16
System Settings 17
TROUBLESHOOTING 20
SPECIFICATIONS 21
TWO-YEAR LIMITED WARRANTY....22
natural_image
Line drawing of a stylized 3D object resembling a camera or device, with no text or symbols present.Camera
natural_image
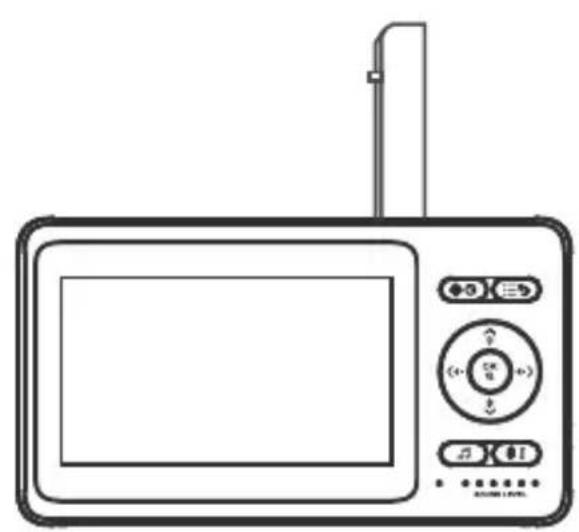
Line drawing of a digital camera with control panel and display screen (no text or symbols)Monitor
natural_image
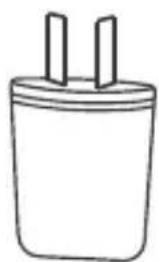
Simple line drawing of a two-pin electrical plug (no text or symbols)USB Power Adaptor x 2
natural_image
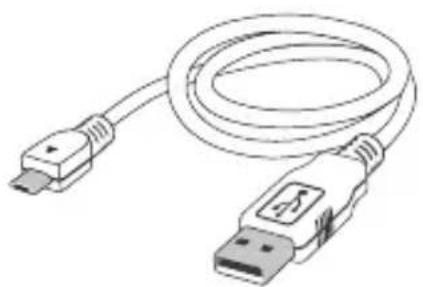
Line drawing of a USB cable with two connectors (no text or symbols)Micro USB Cable x 2
• Image may vary slightly from the actual product.
- If any item is missing or damaged, contact your place of purchase immediately. Never use damaged products!
- Need help? Get answers at our website: www.uniden.com.au for Australian model.
All trademarks are registered trademarks of their respective owners.
GETTING STARTED
CAMERA
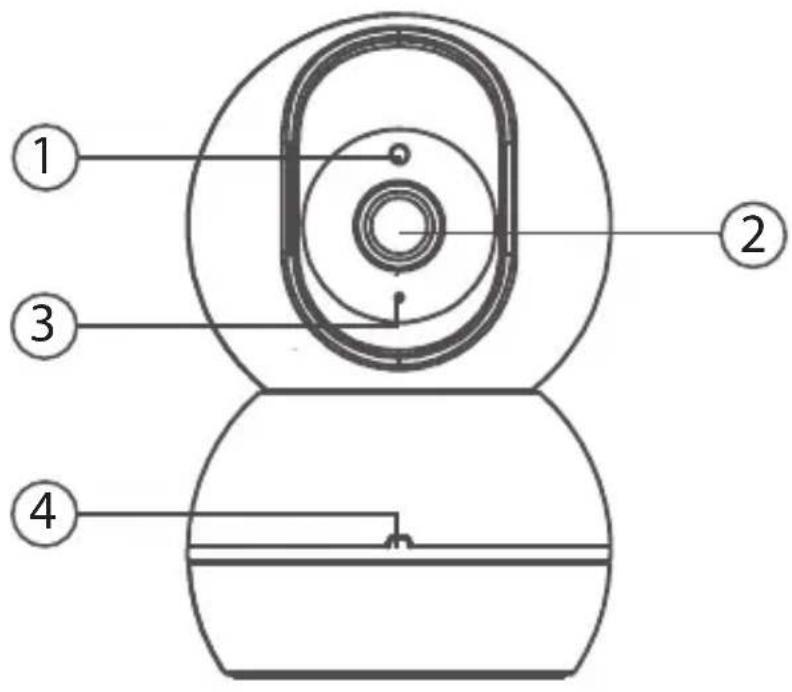
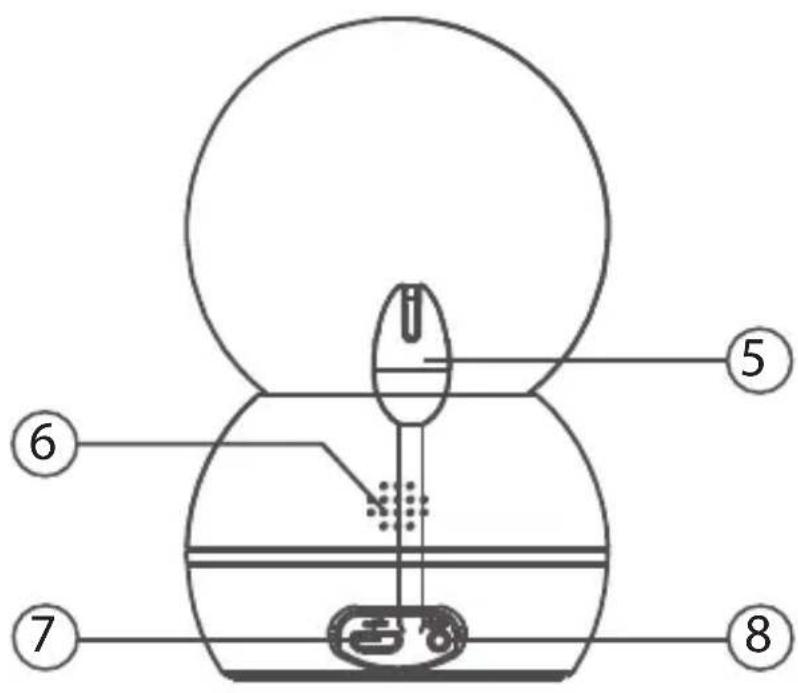
| Item What it does | |
| 1 Light sensor: Measures light intensity on the camera side. | |
| 2 Camera lens. | |
| 3 Microphone: Receives sounds for the area near the camera, and transmits sound from the camera to the monitor. | |
| 4 Pairing Indicator: Flashing when in pairing mode. At any other time is disabled, the LED indicator is disabled. | |
| 5 Temperature sensor: Detects temperature at camera side and displays it on the monitor LCD. | |
| 6 Speaker | |
| 7 DC 5V Power: Plug in the USB cable. | |
| 8 PAIR: Pairs the camera to the monitor. |
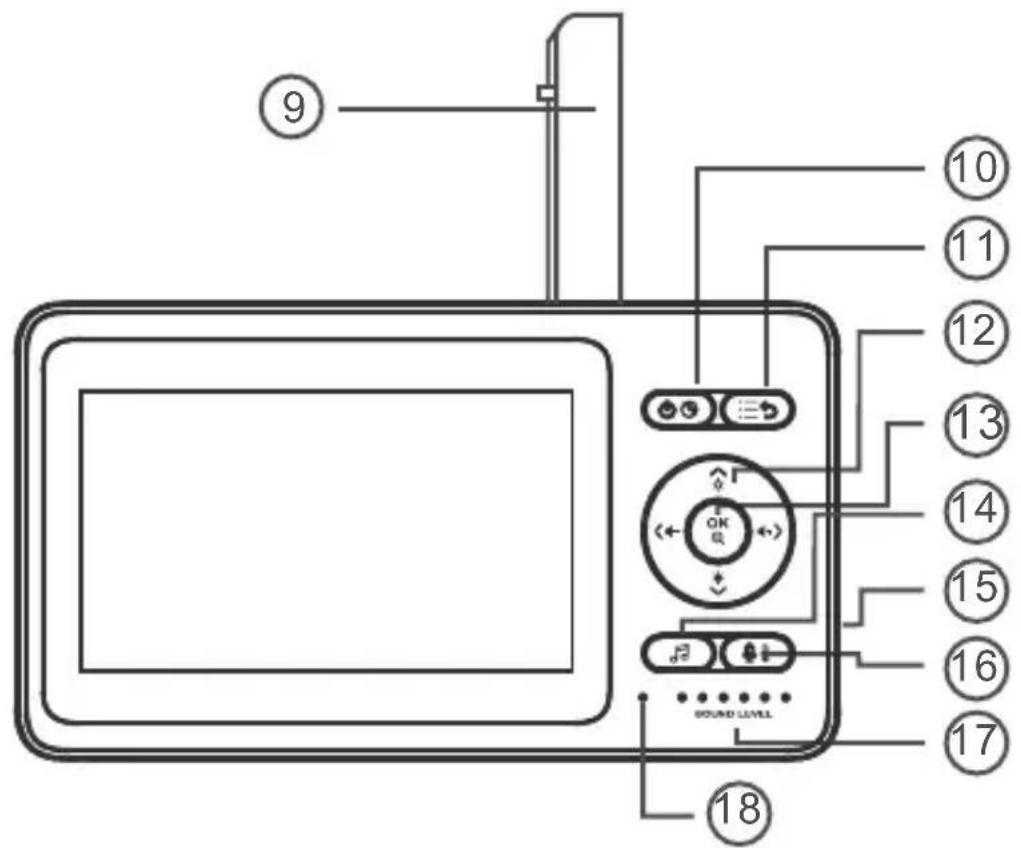
MONITOR
natural_image
Technical diagram of a mechanical component with labeled parts (no readable text or symbols)| Item What is it does | |
| 9 Antenna: Receives video and audio signals from the camera. | |
| 10 | POWER: Press and hold to switch on/off the monitor. Press once to wake up/ turn off the screen. |
| 11 MENU/BACK: Press to display the menu options. In menu, press to return to previous page. If two cameras are paired, press to return from single channel view to two channel view. | |
| 12 Press the button #16 first to adjust the screen brightness or the monitor volume.In two channel view, press the ◀ or ► button to select the camera and press OK to view the camera in single view.▲: • In Live View: Tilt up.• Increase screen brightness.◄: • In Live View: Pan left.• Decrease speaker volume.• In Menus: Scroll left.▼: • In Live View: Tilt down.• Decrease screen brightness.►: • In Live view: Pan right.• Increase speaker volume.• In Menus: Scroll right. | |
| 13 OK:• In Menus: Press down to select a menu or accept a setting.• In Live view: Press to zoom in/out. | |
| 14 | LULLABY: Press this button to enter lullabies selection. |
| 15 DC | 5V Power: Plug in the USB cable. |
| 16 TALK: Press and hold to activate Intercom function.BRIGHTNESS & VOLUME: Press once to activate screen brightness and volume button. | |
| 17 LED light bar. The LEDs indicate sound level. The most right LED indicate the battery is charging or the device is powered by an external source. | |
| 18 Microphone: Receives sounds for the area near the monitor, and transmits sound from the monitor to the camera. | |
| 19 Reset | |
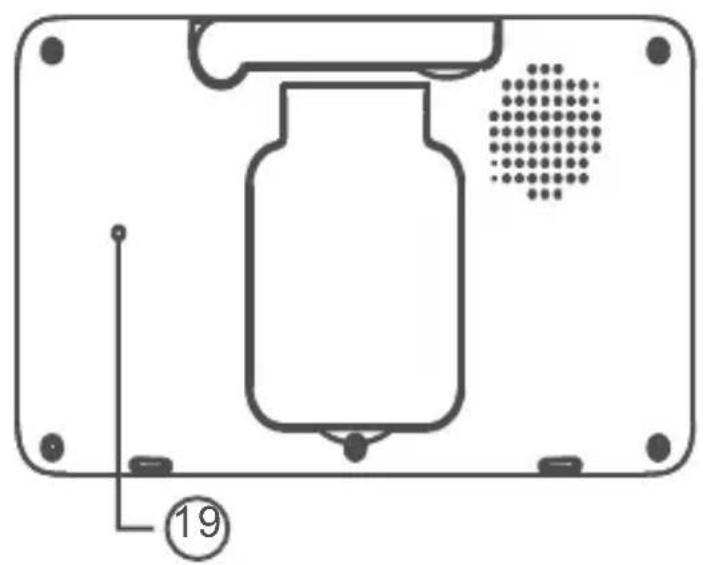
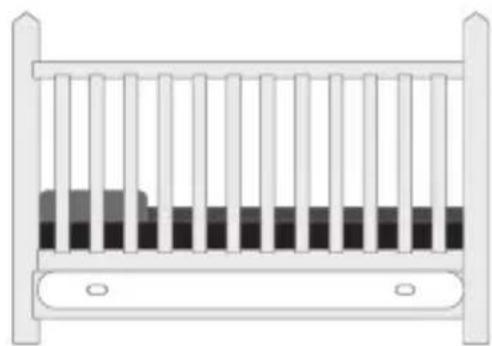
INSTALLATION
General Placement Considerations
The camera can be placed on a shelf or other flat surface.
natural_image
Simple line drawing of a ladder with vertical bars and two feet at the base (no text or symbols)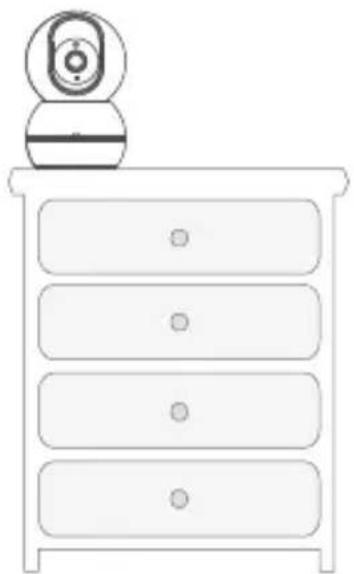
natural_image
Line drawing of a four-tiered drawer with a circular top and a button, no text or symbols present.- The camera included is NOT weatherproof; it is an indoor camera.
- The clearest line-of-sight between the camera and the monitor is best. Walls, especially brick and concrete, can affect connection quality.
- Avoid having a direct light source in view of the camera (ceiling or floor lamps).
- Carefully plan where and how the camera will be positioned, and where you will route the cable that connects the camera to the power adaptor.
- Do not cover or obstruct the inlet holes for the temperature sensors and leave the sensor horizontal for more accurate reading. The temperature reading is for reference only and there may be some variance between the actual temperature and the temperature reading.
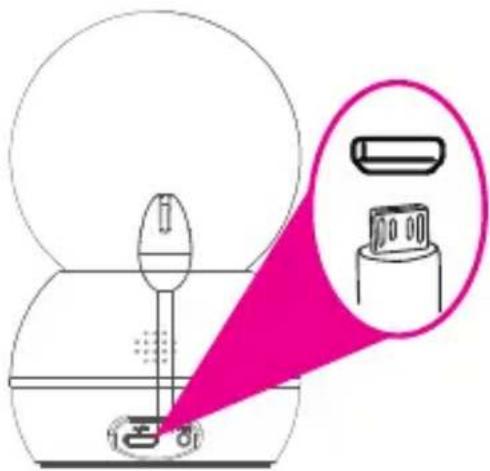
Powering the Camera
- Insert one end of the micro USB cable to the micro USB port on the camera (at the back of the camera).
- Connect the other end of the USB cable into the USB power adaptor.
- Connect the USB power adaptor into a 240 volt AC (standard indoor) power outlet.
natural_image
Diagram of a device with a magnified inset showing internal components (no text or symbols)- Switch on the plug and allow the camera to power up. The pairing indicator will flash momentarily.
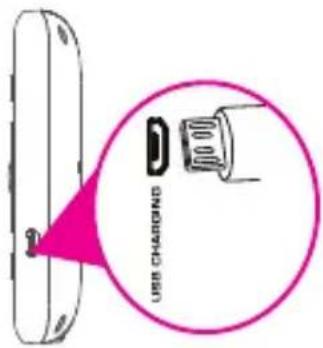
Powering the Monitor
-
Place the monitor in a location with clear reception from your camera(s).
-
If you are using the monitor as a stand-alone unit, flip out the stand on the back of the monitor and extend the antenna.
-
Insert one end of the micro USB cable to the micro USB port on the side of the monitor.
-
Connect the other end of the USB cable into the USB power adaptor.
-
Connect the USB power adaptor into a 240 volt AC (standard indoor) power outlet.
-
Press and hold the POWER button to turn the unit on or off. Let the monitor charge for 6 hours prior to first time use so the built-in rechargeable monitor battery is fully charged. DO NOT remove the charging cable from the monitor during the initial charge process. After the initial charge, recharge the monitor as needed.
-
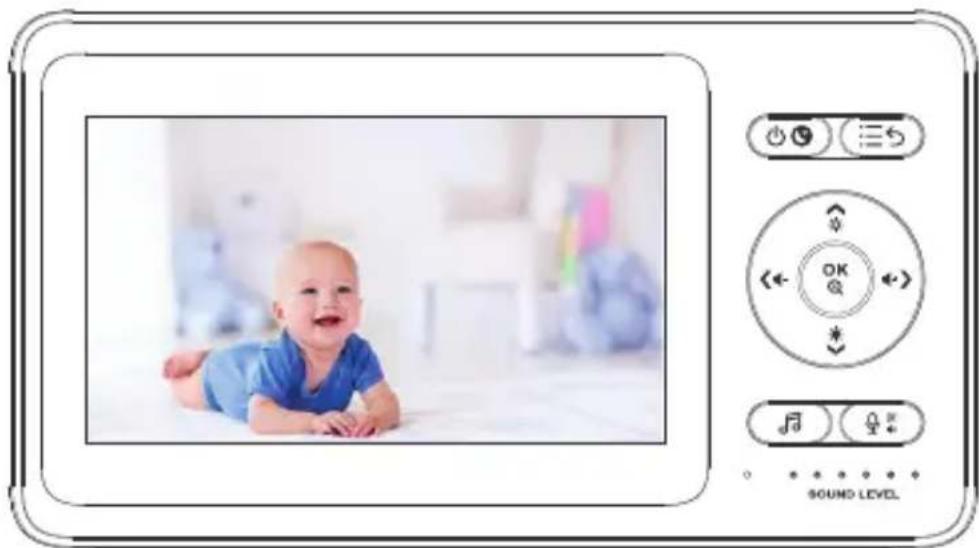
Out of range displays until you turn on the camera.
natural_image
Digital camera interface displaying a baby photo with sound level control buttons (no readable text or symbols on the image itself)You can install additional cameras (maximum of 2 cameras). When adding cameras that were not included in the original box, you will need to pair the cameras with the monitor.
SYSTEM MENUS
Monitor Function Settings
Functions of the Babysitter is user definable, to best satisfy your demands. Temperature alerts may offer automatic notification to you. This chapter will introduce the user-definable settings item by item.
Access Monitor Menu
In states of live view, press MENU button on the monitor can enter into MENU list; In states of non-live view, press MENU button on the monitor can return to previous interface level.
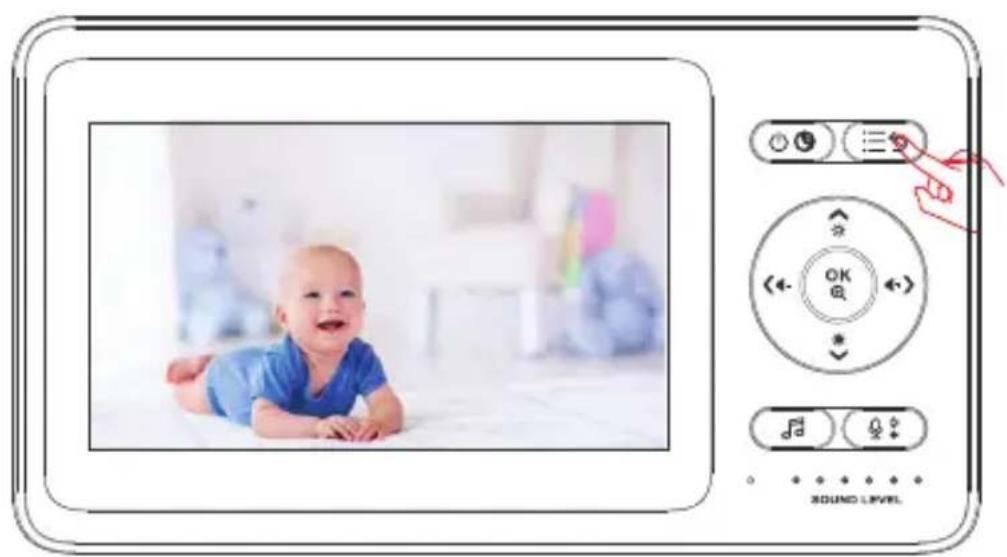
natural_image
Digital camera interface displaying a baby on a bed with a circular control panel and sound level indicator (no readable text or symbols)

OK:Select


MENU:Return
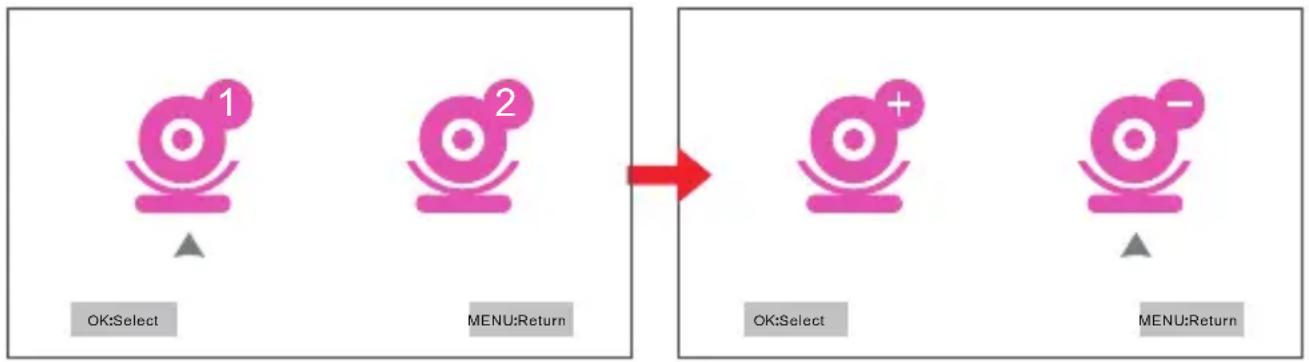
Camera Settings (camera pairing and deletion)
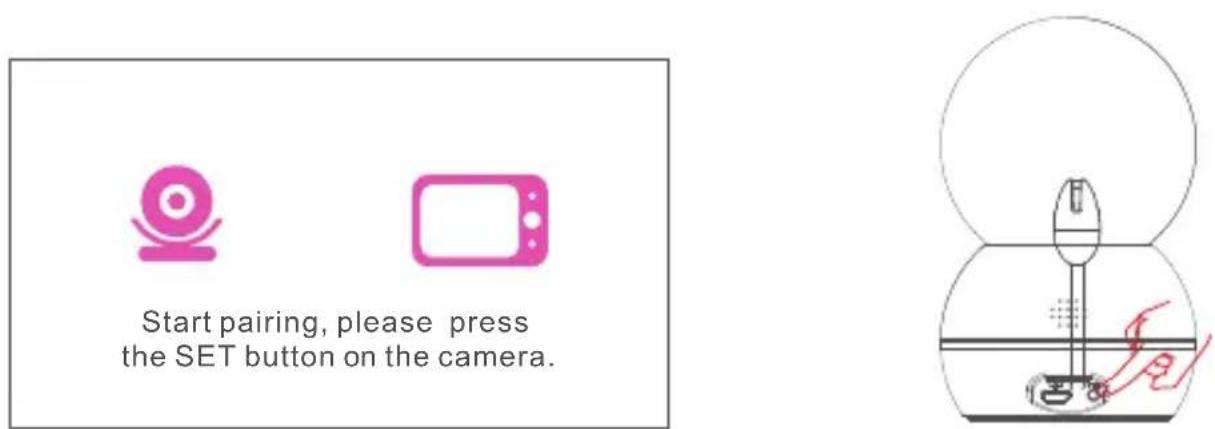
Add camera
- Select Camera, and press OK to enter the function.
- Select the channel to be paired, and press OK to confirm. Then select "Add Camera" and press OK to confirm.

flowchart
graph LR
    A["OK:Select"] --> B["MENU:Return"]
    B --> C["OK:Select"]
    C --> D["MENU:Return"]
- When the device prompts "Start pairing, please press the SET button on the camera.", press the SET button on the camera, and at this point, the device enters pairing mode. After pairing succeeds, the screen will jump to a real-time monitoring screen.
Delete camera
To replace any camera, the old camera must be deleted first before adding a new camera.
-
Select Camera, and press OK to enter the function.
-
Select the channel to be deleted, and press OK to confirm. Then select "Delete Camera" and press OK to confirm.
flowchart
graph LR
    A["OK:Select"] --> B["MENU:Return"]
    B --> C["OK:Select"]
    C --> D["MENU:Return"]
Lullabies
The digital wireless baby monitor has 5 lullabies including White Noise. They can help you lull your baby to sleep.
-
Select Music Play, and press OK to enter the function. If two cameras are paired to the monitor, select the camera that you wish to play music.
-
Select the music you want to play, press OK to confirm, and the camera will play the lullaby of your choice. Press OK again, and the lullaby pauses. Select "All" to play all the lullabies in a loop. After settings are completed, press MENU to return.
-
You can also play music quickly through the music play button on the panel.

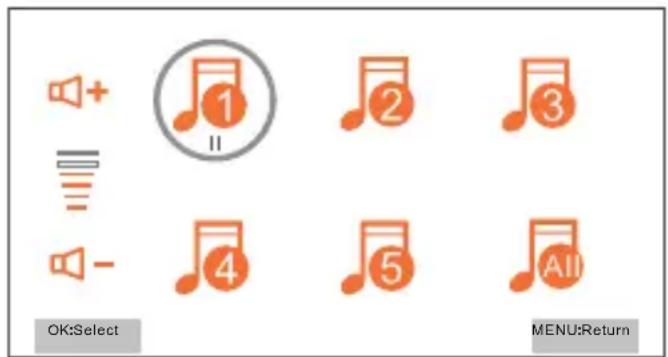
- Notice: In the current interface, press keys to switch lullabies; press keys to adjust the volume.
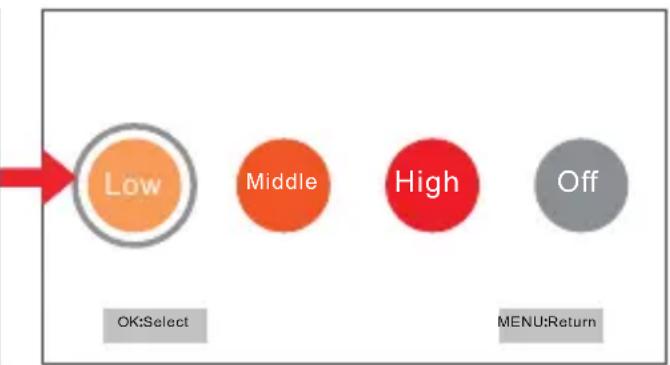
VOX Sensitivity settings
VOX (Voice Activation) allows you to set the sound sensitivity for the camera. This function identifies the volume of the baby's sound or crying. When it is above the set threshold, the monitor screen will lit up when it is in Eco mode or the screen is in standby mode.
- Select Alert Settings, press OK to enter the settings page, and select "Vox Sensitivity" settings.
- Select "Low, Middle, High, Off" as needed and press OK to confirm.
- Press BACK button to exit.
flowchart
graph LR
    A["Low"] --> B["OK:Select"]
    C["Middle"] --> D["MENU:Return"]
    E["High"] --> F["Off"]
Note: There is no audible alert for VOX.
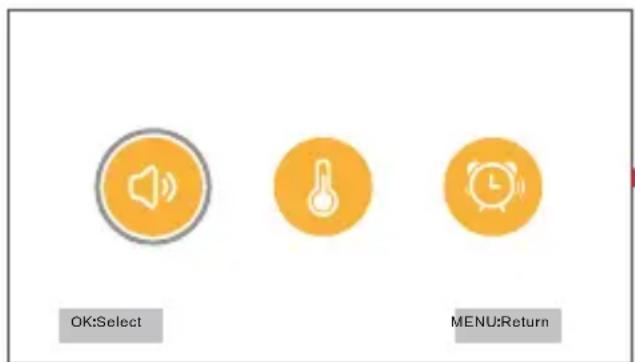
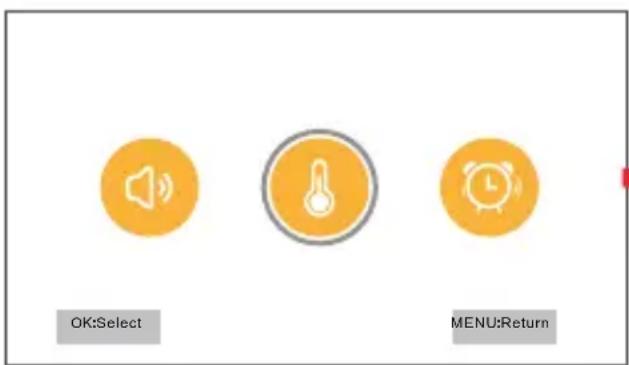
Alert Settings
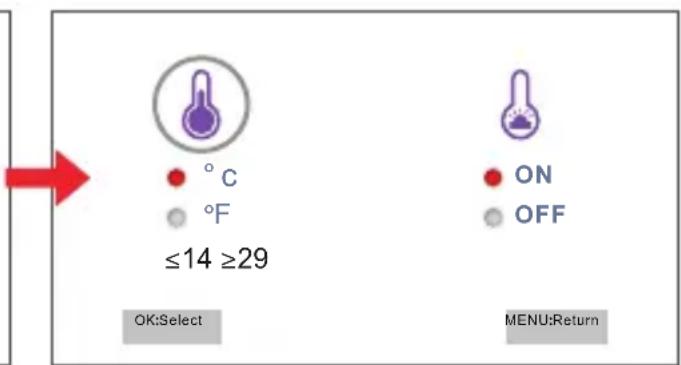
Temperature alert settings
When it is too hot or too cold in your baby's room, the temperature alert will push a notification to your monitor.
- Select Alert Settings, press OK to enter the settings page, and select "Temperature Alert" settings.
- Select "Celsius, Fahrenheit" as needed and press OK to confirm.
- Select "Alert" "ON, OFF" as needed.
- Press BACK button to exit.
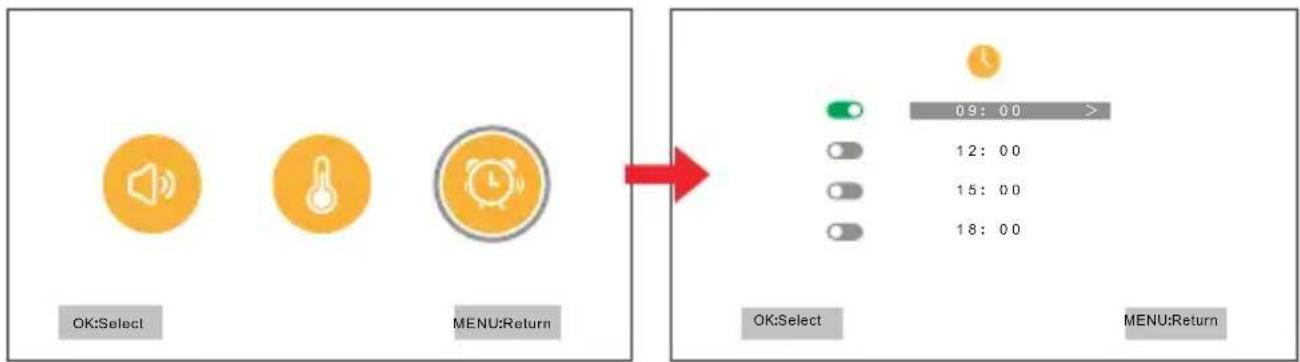
Timer Alerts Settings
You can set the a timer to prevent you from forgetting to feed your baby as busy or for other reasons, which may remind you.
- Select Alert Settings, press OK to enter the settings page and select "Alerts" Settings.
- Select the time periods and quantity of "Alerts" as needed, and press OK to enter the settings page. After the settings are completed, press OK to confirm.
- Press BACK button to exit.
flowchart
graph LR
    A["OK:Select"] --> B["MENU:Return"]
    C["OK:Select"] --> D["MENU:Return"]
    style A fill:#FFD700,stroke:#333
    style B fill:#FFD700,stroke:#333
    style C fill:#FFD700,stroke:#333
    style D fill:#FFD700,stroke:#333
System settings Time settings
Calibrate time on the monitor.
- Select Settings, and press OK to enter the settings page.
-
Select Time Settings, and press OK to enter the settings page. After settings are completed, press OK to confirm.
-
Press BACK button to exit.

flowchart
graph LR
    A["OK:Select"] --> B["MENU:Return"]
    C["OK:Select"] --> D["MENU:Return"]
    E["O SD: YYYYY-MM-DD: HH-MM-SS:"] --> F["→"]
Language selection
Switch language displayed on the monitor.
- Select Settings, and press OK to enter the settings page.
-
Select Language Settings, and press OK to enter the settings page. Select a language you need and press OK to confirm.
-
Press BACK button to exit.
Alert sound On/Off
Switch the alert sound "ON/OFF" on the monitor.
- Select Settings, and press OK to enter the settings page.
- Select Alert Sound Settings, and press OK to enter the settings page.
- Select "ON/OFF" and press OK to confirm.
- Press BACK button to exit.
Power saving mode
You can set the monitor to automatically enter Power saving mode. The monitor will automatically enter energy saving state according to the length of time you set.
- Select Settings, and press OK to enter the settings page.
-
Select Eco Mode, and press OK to enter the settings page. Select a time that suits your need and press OK to confirm.
-
Note: There are three options for sleep time: 20 seconds, 40 seconds, and 60 seconds. You can choose according to your needs. Selecting "OFF" and pressing OK will turn off the Power saving mode.
-
Press BACK button to exit.

flowchart
graph LR
    A["OK:Select"] --> B["MENU:Return"]
    C["OK:Select"] --> D["MENU:Return"]
    E["20s"] --> F["40s"] --> G["60s"] --> H["OFF"]
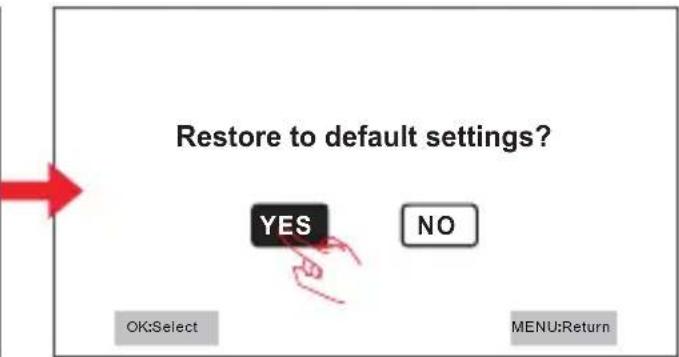
Restore to default settings
Restore the monitor to default settings.
- Select Settings, and press OK to enter the settings page.
- Select 📊 Restore to Default Settings, and press OK to enter the settings page.
- The device will prompt "Restore to default settings?". Select YES and press OK to confirm. The device begins to execute a factory reset.
- Press BACK button to exit.
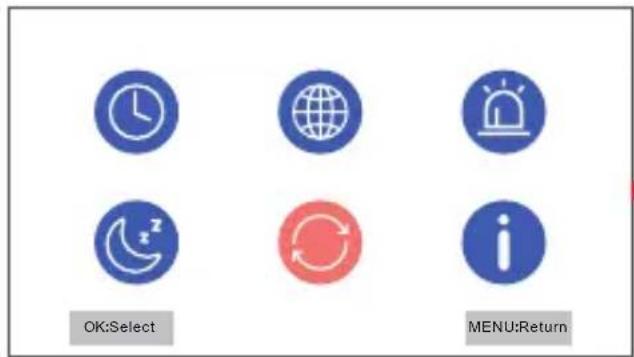
View version information
View version information of the monitor and camera.
- Select Settings, and press OK to enter the settings page.
- Select Version Information, and press OK to enter the version information view page.
- Press BACK button to exit.


TROUBLESHOOTING
If you have problems with the system, there is often a quick and simple solution. Please try the following:
| If Try | |
| There is no picture from the camera | ·checking all connections to the camera. Make sure the adaptor is plugged in.·making sure that the cameras and monitor are both ON.·making sure that the camera is in range of the monitor. |
| The picture keeps dropping | ·moving the camera closer to the monitor.·repositioning the camera, monitor or both to improve the reception.·adjusting the monitor antenna to vertical position. |
| There are audio problems | ·making sure that there is sound within range of the camera microphone.·moving the camera or monitor farther apart if the unit emits a loud screeching noise. |
| There is an irregular beeping coming from the monitor | That is the Alert tone. Go to the Alert screen to turn the alert volume down or off. |
| The picture has become choppy | The picture may become choppy when experiencing a lower frame rate. Try:·moving the camera closer to the monitor.·removing obstructions between the monitor and camera.·adjusting the monitor and camera antennas to vertical position. |
| The monitor picture has frozen | Use a blunt object like a paper clip to press RESET and reset the monitor. The monitor turns off. Press POWER to turn it back on again. |
SPECIFICATIONS
GENERAL
| Camera Monitor | ||
| Operating Frequency Range | 2.400 ~ 2.4835GHz | |
| TX Power 15dBm NA | ||
| RX Sensitivity NA -81dBm | ||
| Type of Spread Spectrum Used | FHSS | |
| Type of Modulation Used GFSK | ||
| Communication Range up to 150m Line of Sight | ||
CAMERA
| Image Sensor 1/6.5” Color CMOS | |
| Video Resolution | 640 x 480 |
| Viewing Angle 45°(H) | |
| Rotation Angle Pan: 350° Tilt:55° | |
| Night Vision up to 3m | |
| Power Consumption | up to 2.5W |
| Operating Temperature Range | 0°C ~ 40°C |
MONITOR
| Display | 4.3” LCD |
| Resolution | 480 x 272 |
| Power Consumption | up to 1W |
| Operating Temperature Range | 0°C ~ 40°C |
| Battery Life | up to 6 hours |
TWO-YEAR LIMITED WARRANTY
BW4151
Important:
Satisfactory evidence of the original purchase is required for warranty service. Please refer to our Uniden website for any details or warranty durations offered in addition to those contained below.
Warrantor:
The warrantor is Uniden Australia Pty Limited ABN 58 001 865 498 ("Uniden Aust").
Terms of Warranty: Uniden Aust warrants to the original retail purchaser only that the BW4151 (“the Product”), will be free from defects in materials and craftsmanship for the duration of the warranty period, subject to the limitations and exclusions set out below.
Warranty Period: This warranty to the original retail purchaser is only valid in the original country of purchase for a Product first purchased either in Australia or New Zealand and will expire two (2) year from the date of the original retail sale. If a warranty claim is made, this warranty will not apply if the Product is found by Uniden to be:
A. Damaged or not maintained in a reasonable manner or as recommended in the relevant Uniden Owner's Manual;
B. Modified, altered or used as part of any conversion kits, subassemblies or any configurations not sold by Uniden Aust;
C. Improperly installed contrary to instructions contained in the relevant Owner's Manual
D. Repaired by someone other than an authorized Uniden Repair Agent in relation to a defect or malfunction covered by this warranty; or
E. Used in conjunction with any equipment, parts or a system not manufactured by Uniden.
Parts Covered: This warranty covers the Product and included accessories.
User-generated Data: This warranty does not cover any claimed loss of or damage to user-generated data (including but without limitation phone numbers, addresses and images) that may be stored on your Product.
Statement of Remedy: If the Product is found not to conform to this warranty as stated above, the Warrantor, at its discretion, will either repair the defect or replace the Product without any charge for parts or service. This warranty does not include any reimbursement or payment of any consequential damages claimed to arise from a Product's failure to comply with the warranty. Our goods come with guarantees that cannot be excluded under the Australian Consumer Law. You are entitled to a replacement or refund for a major failure and for compensation for any other reasonably foreseeable loss or damage. You are also entitled to have the goods repaired or replaced if the goods fail to be of acceptable quality and the failure does not amount to a major failure. This warranty is in addition to and sits alongside your rights under either the COMPETITION AND CONSUMER ACT 2010 (Australia) or the CONSUMER GUARANTEES ACT (New Zealand) as the case may be, none of which can be excluded.
Procedure for Obtaining Warranty Service: Depending on the country in which the Product was first purchased, if you believe that your Product does not conform with this warranty, you should deliver the Product, together with satisfactory evidence of your original purchase (such as a legible copy of the sales docket) to Uniden at the address shown below. You should contact Uniden regarding any compensation that may be payable for your expenses incurred in making a warranty claim. Prior to delivery, we recommend that you make a backup copy of any phone numbers, images or other data stored on your Product, in case it is lost or damaged during warranty service.
UNIDEN AUSTRALIA PTY LTD
Phone number: 1300 366 895
Email: custservice@uniden.com.au
Uniden®
©2020 Uniden Australia Pty Ltd
Printed in PRC v1.0