
Dual Camera HD Dash Cam BPDV142 - Camera BLAUPUNKT - Free user manual and instructions
Find the device manual for free Dual Camera HD Dash Cam BPDV142 BLAUPUNKT in PDF.


| Product Type | Dash Camera |
| Brand | Blaupunkt |
| Model | BPDV142 |
| Camera Type | Dual Camera (Front and Rear/Interior) |
| Video Resolution | HD (1920x1080p) Front and Rear |
| Field of View | 170° Front, 120° Rear |
| Display | 2.4-inch LCD |
| Recording Mode | Continuous Loop Recording with G-Sensor |
| Night Vision | Yes, with IR LEDs |
| Storage | Supports microSD up to 32GB (Class 10) |
| Power Supply | 12V DC with car cigarette lighter adapter |
| Battery | Built-in Li-ion 200mAh |
| Dimensions (Front Camera) | Approx. 70 x 55 x 30 mm |
| Weight (Front Camera) | Approx. 80 g |
| Mounting | Suction cup mount for windshield |
| Key Features | G-Sensor, Loop Recording, Motion Detection, Parking Monitor |
| Maintenance | Clean lens with soft cloth; avoid solvents |
| Safety | Do not obstruct airbags; install according to manual |
| Spare Parts / Repairability | Spare suction mounts and cables available; not user-serviceable internally |
| General Information | For use in vehicles; includes 12V adapter, USB cable, and user manual |
Frequently Asked Questions - Dual Camera HD Dash Cam BPDV142 BLAUPUNKT
User questions about Dual Camera HD Dash Cam BPDV142 BLAUPUNKT
0 question about this device. Answer the ones you know or ask your own.
Ask a new question about this device
Download the instructions for your Camera in PDF format for free! Find your manual Dual Camera HD Dash Cam BPDV142 - BLAUPUNKT and take your electronic device back in hand. On this page are published all the documents necessary for the use of your device. Dual Camera HD Dash Cam BPDV142 by BLAUPUNKT.
USER MANUAL Dual Camera HD Dash Cam BPDV142 BLAUPUNKT
natural_image
Close-up of a black cylindrical device with a circular top and central button, no visible text or symbols.Enjoy it.
Table of Contents
Product Overview 3
Using the Dual Camera
Changing the battery 4
Inserting a memory card....4 Adjusting the position of the lens....4
Turning the DashCam on/off....5
Basic Operations
Switching between operating modes 5
Navigating the menu ....
How to shoot 5
Start / Stop shooting 5
Open / Close audio 5
Video playback and file management ....6 Video playback ....6
Computer access to the DashCam file....6
Reset the DashCam 8
Technical Specifications 8
Product Overview Using the Dual Camera


Charging the battery:
There are two methods for battery charging.
-
Use the USB cable to connect the DashCam to a computer for charging
-
Use the included vehicle adapter power source for charging.
When the DashCam is charging, the red indicator light turn on. When
it is finished charging, the indicator light will automatically turn off.
The Simple Charging Practice Guide Supplementation Form 1.
NOTE: In the event that your vehicle loses power, the reserve battery will save files and record data.
Inserting a memory card
Insert a Micro5D card into the card slot. The Micro5D card will be secured into
(1) The side when you feel at once,
The Desiccant supports -due to \$25B MICROCS card.
Formatting a memory card
The first time you a memory card, the DashCam will ask you to format the MicroSD card. Select "Yes" to allow the DashCam to format the memory card and install the required software needed for viewing DashCam videos on your computer. The software only works with PC computers.
Note: Before you format the memory card, make sure you have backed up any
Important files. Formating the memory card will erase any saved files
To remove, push the MicroSD card inside and the card will pop up.
Adjusting the pilsitions of the lens
You can adjust the front lens of the DashCam by 25° upwards or downwards for better viewing and recording angle.
Turning the DashCam on/off
Turn On: Press and hold the power button until red on indicator lights up. Turn Off: Press and hold the power button until red off indicating drive off
Sum Oil. Press and hold the power button which led oil indicator shots on
Notice: When the DashCam has low battery, it will prompt automatic shutdown.
Basic Operations
Switching between operating modes This device has two operating modes: Video Mode and Playback Mode press the mode Key to change between them.
System Settings: The following settings can be found in the Menu Screen.
Video Made: Select which lens to allow video recording.
Time Setup: Press the left/right key to adjust the date and time. Press the OK
key to confirm and exit.
Format: Press the OK key to enter and Select Yes? No.
Selecting "Yes" will erase the memory card and format it for the DashCam.
IV Out: Select NISOPAL setting.
beep: Turn-Off/Off beep noise when pressing DashCam Buttons. Audio Record, On/Off
Language: English / Ge
Language, English, Germany, Russia, Traditional Chinese Simplified Chinese / Japanese.
LCD Default: On/Off.
G-SENSOR Sensitivity: Adjust G-Sensor detection settings. (This function
automatically starts during video recording).
Frequency: 50HZ / 60HZ
Vibration detection: On/Off
Default Setting: Reset the default setting to your current setting.
In the shooting mode, press OK key to start shooting, then press OK key again
to stop shooting.
When the DashCam is on or a MicroSD card is inserted, it will
automatically start shooting.
Open: Close audio:
During video recording process, pressing left key can fast open / close audio in
the missed.
How to shoot
Start / Stop shooting
In the shooting mode, press OK key to start shooting, then press OK key again
to stop shooting.
When the DashCam is on or a MicroSD card is inserted, it will automatically
start shooting.
During video recording process, pressing left key can fast open / close audio in the videos.
Video playback and file management
Press the MODE key to enter playback mode and the screen will show the
playback picture
Video playback. Press the left and right keys to select audio and video files need playpark.
Press the left and right keys to select audio and press OK key for play and pause of the video film
Computer access to the DashCam file
This DashCam does not support USB protocol. Accessing the files required a SD card reader or adapter.
When you first insert a MicroSD card and complete formatting for the first time,
the DashCain will automatically generate specialized software tool (ADR Player) on the memory card. According to the DashCam file, only an app is available.
on the memory card. Accessing the Bashcair Files Can Only be accessed via this tool.
Notice:
(1) For ease of use we recommend installing the software on your PC.
(2) The software is only compatible with Windows.
Using ADR Player: X2Player software.
- Use a card reader to read video information on the MicroSD card.
In the SD card disk the user can see three files: ap.bin, Default_Folder.ini
and ADR Player (X2Player)
-
Run ADR Player (X2Player).
-
Open the player to play video documents.
Click to open the player.

Select MicroSD Card disk path, then click the "apply" to load and automatically
play the document in the card.
Clicking the ActiveX can control playback slow motion / stop /
play (pause) / fast forward.
- Select double lens channel
Clicking the 10 20 Select dual camera playback: dual camera / front
5678camera/back camera.
- Video on file:
Select a video file to save ☑ and click 📄 to pop up the saving options. After
selecting, click "sure" to save the selected file.
- Photo on file. Select a photo to save and click 📄 in any opening options, after opening
Select a photo to save and click 📄 to pop up saving options. After selecting, click "save".
-
Delete a file:
-
Delete a file. Select the video file not needed □ and click ■ The options "turn" cancel"
Select the video file not needed and check. The options 'sarden cancer will display select "Sure" to delete the selected video file.
- Toolbox
ToolBox Functions: SD card formatting / upload software to the SD card / SD
card speed test / mag selection and user password setting.
Click to enter.

- Gravity sensor:
Click 📄, to view gravity sensor data while the video plays to trace accident
and abnormal circumstance occurring during the driving process.
- Other operations
Click 20 for the following functions: repair film / unlock protection / choose
to display size
Reset the DashCam
When abnormal circumstance occur due to improper operation, you can press
reset button to restart the DsschCsh
Technical Specifications
| LCD screen size | 2.7" (16.9) |
| Lens | Front lens with ultra wide angle of 140° back lens with ultra wide-angle of 100°. |
| Optional language | English / German / Russian / Traditional Chinese / Simplified Chinese / Japanese. |
| Video format | AVI |
| Memory card slot | MicroSD |
| Microphone/ Speaker | Built-in |
| Television Output | NTSC/PAL |
| DC access DC | GV |
| Battery built in lithium polymer battery | |
| System requirement | Windows 2000XP/Vista' Windows 7/8/10 |
Note: we reserve the modification right of the machine design and
specifications without notice.
©2017 Baupunkt Windows is a trademark of Microsoft. Google Maps is a trademark
of Google. Baupunkt, is not affiliated with Microsoft or Google.




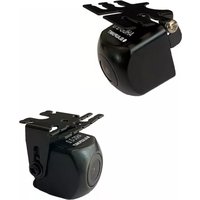
Brand : BLAUPUNKT
Model : Dual Camera HD Dash Cam BPDV142
Category : Camera