
R-216LS - Microwaves SHARP - Free user manual and instructions
Find the device manual for free R-216LS SHARP in PDF.


| Product Type | Microwave |
| Brand | Sharp |
| Model | R-216LS |
| Category | Microwaves |
| Capacity | 21 L |
| Dimensions (H x W x D) | 280 x 460 x 360 mm |
| Weight | 11 kg |
| Power Supply | 230 V / 50 Hz |
| Power Consumption | 1200 W |
| Microwave Output Power | 800 W |
| Frequency | 2450 MHz |
| Turntable Diameter | 270 mm |
| Control Type | Digital with LED display |
| Door Type | Side opening |
| Interior Light | Yes |
| Defrost Function | Yes, by weight or time |
| Auto Cook Menus | 8 pre-set programs |
| Child Lock | Yes |
| Clock/Timer | Yes |
| Material | Stainless steel |
| Color | Silver |
| Cleaning | Wipe interior and exterior with damp cloth |
| Safety Features | Child lock, door interlock |
| Spare Parts Availability | Available through authorized service |
Frequently Asked Questions - R-216LS SHARP
User questions about R-216LS SHARP
0 question about this device. Answer the ones you know or ask your own.
Ask a new question about this device
Download the instructions for your Microwaves in PDF format for free! Find your manual R-216LS - SHARP and take your electronic device back in hand. On this page are published all the documents necessary for the use of your device. R-216LS by SHARP.
USER MANUAL R-216LS SHARP
followed by letter Indicating color S=Stainless steel

natural_image
Black-and-white photo of a bowl containing various food items including vegetables, meatballs, and sauce (no visible text or symbols)CONTENTS
- Precautions to Avoid Possible Exposure to Excessive Microwave Energy ....... Inside Front Cover
- For Customer Assistance .... Inside Front Cover
- Consumer Limited Warranty ....1
- Product Information Card ....1
- Important Safety Instructions ......2
- Unpacking and Installation Instructions...... 3
• Grounding Instructions ....3
• Information You Need to Know 4-6
• Part Names 7-8
• Before Operating 9 - Manual Operation....9
• Special Features 10-14
Defrost 10
Manual Defrost 11
Popcorn 11
Reheat / Cook 12-13
Short Cuts 14
• Other Convenient Features 14-15
- Cleaning and Care ....16
• Service Call Check 17
- Specifications 17
• Cooking Reference 18-19
• Cookbook Information 18
• Cookbook Order Form 19
• Auto-Touch Guide .....20
FOR CUSTOMER ASSISTANCE
To aid in reporting this microwave oven in case of loss or theft, please record below the model number and serial number located on the unit. We also suggest you record all the information listed and retain for future reference.
Please provide the following information when you write or call: model number, serial number, date of purchase, your complete mailing address (including zip code), your daytime telephone number (including area code) and description of the problem.
| MODEL NUMBER | SERIAL NUMBER |
| DATE OF PURCHASE | |
| DEALER | TELEPHONE |
| SERVICER | TELEPHONE |
TO PHONE:
DIAL 1-800-BE-SHARP (237-4277) for :
SERVICE (for your nearest Sharp Authorized Servicer)
PARTS (for your authorized parts distributor)
ADDITIONAL CUSTOMER INFORMATION
ACCESSORIES and SHARP CAROUSEL COOKBOOK
TO WRITE:
Sharp Electronics Corporation
Customer Assistance Center
1300 Naperville Drive
Romeoville, IL 60446-1091
TO ACCESS INTERNET: www.sharpusa.com
PRECAUTIONS TO AVOID POSSIBLE EXPOSURE TO EXCESSIVE MICROWAVE ENERGY
(a) Do not attempt to operate this oven with the door open since open-door operation can result in harmful exposure to microwave energy. It is important not to defeat or tamper with the safety interlocks.
(b) Do not place any object between the oven front face and the door or allow soil or cleaner residue to accumulate on sealing surfaces.
(c) Do not operate the oven if it is damaged. It is particularly important that the oven door close properly and that there is no damage to the: (1) door (bent), (2) hinges and latches (broken or loosened), (3) door seals and sealing surfaces.
(d) The oven should not be adjusted or repaired by anyone except properly qualified service personnel.
CONSUMER LIMITED WARRANTY
SHARP ELECTRONICS CORPORATION warrants to the first consumer purchaser that this Sharp brand product (the "Product"), when shipped in its original container, will be free from defective workmanship and materials, and agrees that it will, at its option, either repair the defect or replace the defective Product or part thereof with a new or remanufactured equivalent at no charge to the purchaser for parts or labor for the period(s) set forth below.
This warranty does not apply to any appearance items of the Product nor to the additional excluded item(s) set forth below nor to any Product the exterior of which has been damaged or defaced, which has been subjected to improper voltage or other misuse, abnormal service or handling, or which has been altered or modified in design or construction.
In order to enforce the rights under this limited warranty, the purchaser should follow the steps set forth below and provide proof of purchase to the servicer.
The limited warranty described herein is in addition to whatever implied warranties may be granted to purchasers by law. ALL IMPLIED WARRANTIES INCLUDING THE WARRANTIES OF MERCHANTABILITY AND FITNESS FOR USE ARE LIMITED TO THE PERIOD(S) FROM THE DATE OF PURCHASE SET FORTH BELOW. Some states do not allow limitations on how long an implied warranty lasts, so the above limitation may not apply to you.
Neither the sales personnel of the seller nor any other person is authorized to make any warranties other than those described herein, or to extend the duration of any warranties beyond the time period described herein on behalf of Sharp.
The warranties described herein shall be the sole and exclusive warranties granted by Sharp and shall be the sole and exclusive remedy available to the purchaser. Correction of defects, in the manner and for the period of time described herein, shall constitute complete fulfillment of all liabilities and responsibilities of Sharp to the purchaser with respect to the Product, and shall constitute full satisfaction of all claims, whether based on contract, negligence, strict liability or otherwise. In no event shall Sharp be liable, or in any way responsible, for any damages or defects in the Product which were caused by repairs or attempted repairs performed by anyone other than an authorized servicer. Nor shall Sharp be liable or in any way responsible for any incidental or consequential economic or property damage. Some states do not allow the exclusion of incidental or consequential damages, so the above exclusion may not apply to you.
THIS WARRANTY GIVES YOU SPECIFIC LEGAL RIGHTS. YOU MAY ALSO HAVE OTHER RIGHTS WHICH VARY FROM STATE TO STATE.
Your Product Model Number & Description:
R-216L Home Use Carousel Microwave Oven. (Be sure to have this information available when you need service for your Product.)
Warranty Period for this Product:
One (1) year parts and labor. The warranty period continues for an additional four (4) years, for a total of five (5) years, with respect to the magnetron tube in the Product for parts only; labor and service are not provided free of charge for this additional period.
Additional Item(s) Excluded from Warranty Coverage (if any):
Non-functional accessories, turntable and light bulb.
Where to Obtain Service:
From a Sharp Authorized Servicer located In the United States. Tofind the location of the nearest Sharp Authorized Servicer, call Sharp toll free at 1-800-BE-SHARP (1-800-237-4277).
What to do to Obtain Service:
Ship prepaid or carry in your Product to a Sharp Authorized Servicer. Be sure to have Proof of Purchase available. If you ship the Product, be sure it is insured and packaged securely.
TO OBTAIN SUPPLY, ACCESSORY OR PRODUCT INFORMATION, CALL
1-800-BE-SHARP OR VISIT www.sharpusa.com.
Save the proof of purchase as it is needed should your oven ever require warranty service.
PRODUCT INFORMATION CARD
The product information card, which is on the inside of the microwave oven carton, should be completed within ten days of purchase and returned. We will keep it on file and help you access the information in case of loss, damage or theft. This will also enable us to contact you in the unlikely event that any adjustments or modifications are ever required for your oven.
IMPORTANT SAFETY INSTRUCTIONS
When using electrical appliances basic safety precautions should be followed, including the following:
WARNING - To reduce the risk of burns, electric shock, fire, injury to persons or exposure to excessive microwave energy:
- Read all instructions before using the appliance.
- Read and follow the specific "PRECAUTIONS TO AVOID POSSIBLE EXPOSURE TO EXCESSIVE MICROWAVE ENERGY" on inside front cover.
- This appliance must be grounded. Connect only to properly grounded outlet. See "GROUNDING INSTRUCTIONS" on page 3.
- Install or locate this appliance only in accordance with the provided installation instructions.
- Some products such as whole eggs and sealed containers — for example, closed glass jars — are able to explode and should not be heated in this oven.
- Use this appliance only for its intended use as described in this manual. Do not use corrosive chemicals or vapors in this appliance. This type of oven is specifically designed to heat, cook or dry food. It is not designed for industrial or laboratory use.
- As with any appliance, close supervision is necessary when used by children.
- Do not operate this appliance if it has a damaged cord or plug, if it is not working properly or if it has been damaged or dropped.
- This appliance should be serviced only by qualified service personnel. Contact nearest Sharp Authorized Servicer for examination, repair or adjustment.
- Do not cover or block any openings on the appliance.
- Do not store or use this appliance outdoors. Do not use this product near water— for example, near a kitchen sink, in a wet basement, near a swimming pool or similar locations.
- Do not immerse cord or plug in water.
- Keep cord away from heated surfaces.
-
Do not let cord hang over edge of table or counter.
-
See door surface cleaning instructions on page 16.
- To reduce the risk of fire in the oven cavity:
a. Do not overcook food. Carefully attend appliance when paper, plastic or other combustible materials are placed inside the oven to facilitate cooking.
b. Remove wire twist-ties from paper or plastic bags before placing bag in oven.
c. If materials inside the oven ignite, keep oven door closed, turn oven off and disconnect the power cord or shut off power at the fuse or circuit breaker panel.
d. Do not use the cavity for storage purposes. Do not leave paper products, cooking utensils or food in the cavity when not in use. - Liquids, such as water, coffee or tea are able to be overheated beyond the boiling point without appearing to be boiling Visible bubbling or boiling when the container is removed from the microwave oven is not always present. THIS COULD RESULT IN VERY HOT LIQUIDS SUDDENLY BOILING OVER WHEN A SPOON OR OTHER UTENSIL IS INSERTED INTO THE LIQUID. To reduce the risk of injury to persons:
a. Do not overheat the liquid.
b. Stir the liquid both before and halfway through heating it.
c. Do not use straight-sided containers with narrow necks. Use a wide-mouthed container.
d. After heating, allow the container to stand in the microwave oven at least for 20 seconds before removing the container.
e. Use extreme care when inserting a spoon or other utensil into the container. - If the oven light fails, consult a SHARP AUTHORIZED SERVICER.
SAVE THESE INSTRUCTIONS
UNPACKING AND INSTALLATION INSTRUCTIONS
Unpacking and Examining Your Oven
Remove:
- all packing materials from inside the oven cavity; however, DO NOT REMOVE THE WAVEGUIDE COVER, which is located on the right cavity wall. Read enclosures and SAVE the Operation Manual.

- the feature sticker, if there is one, from the outside of the door.
Check the oven for any damage, such as mis-aligned or bent door, damaged door seals and sealing surfaces, broken or loose door hinges and latches and dents inside the cavity or on the door. If there is any damage, do not operate the oven and contact your dealer or SHARP AUTHORIZED SERVICER.
Choosing a Location for Your Oven
You will use the oven frequently so plan its location for ease of use. It's wise, if possible, to have counter space on at least one side of the oven. Allow at least 2 inches (50mm) on the sides, top and at the rear of the oven for air circulation. Do not place or install the oven in any area where heat and steam are generated; for example, next to or above a conventional gas or electric range or above a conventional wall oven. Heat and steam may damage the electronics or the mechanical parts of the oven.
GROUNDING INSTRUCTIONS
This appliance must be grounded. This oven is equipped with a cord having a grounding wire with a grounding plug. It must be plugged into a wall receptacle that is properly installed and grounded in accordance with the National Electrical Code and local codes and ordinances. In the event of an electrical short circuit, grounding reduces risk of electric shock by providing an escape wire for the electric current.
WARNING - Improper use of the grounding plug can result in a risk of electric shock.
Electrical Requirements
The electrical requirements are a 120 volt 60 Hz, AC only, 15 amp. or more protected electrical supply. It is recommended that a separate circuit serving only this appliance be provided. The oven is equipped with a 3-prong grounding plug. It must be plugged into a wall receptacle that is properly installed and grounded. Should you only have a 2-prong outlet, have a qualified electrician install a correct wall receptacle.
A 3-prong adapter may be purchased and used temporarily if local codes allow. Follow package directions.
A short power-supply cord is provided to reduce risk of becoming entangled in or tripping over a longer cord.
Permanent and Correct Installation

Extension Cord
If it is necessary to use an extension cord, use only a 3-wire extension cord that has a 3-blade grounding plug and a 3-slot receptacle that will accept the plug on the microwave oven. The marked rating of the extension cord should be AC 115-120 volt, 15 amp. or more.
Be careful not to drape the cord over the countertop or table where it can be pulled on by children or tripped over accidentally.
Notes: 1. If you have any questions about the grounding or electrical instructions, consult a qualified electrician or service person.
- Neither Sharp nor the dealer can accept any liability for damage to the oven or personal injury resulting from failure to observe the correct electrical connection procedures.
Radio or TV Interference
Should there be any interference caused by the microwave oven to your radio or TV, check that the microwave oven is on a different electrical circuit, relocate the radio or TV as far away from the oven as feasible or check position and signal of receiving antenna.
Temporary Use

INFORMATION YOU NEED TO KNOW
ABOUT YOUR OVEN
This Operation Manual is valuable: read it carefully and always save it for reference.
A good microwave cookbook is a valuable asset. Check it for microwave cooking principles, techniques, hints and recipes. See pages 18 and 19 for ordering the Sharp Carousel Microwave Cookbook.
NEVER use the oven without the turntable and support nor turn the turntable over so that a large dish could be placed in the oven. The turntable will turn both clockwise and counterclockwise.
ALWAYS have food in the oven when it is on to absorb the microwave energy.
When using the oven at power levels below 100%,
you may hear the magnetron cycling on and off. It is normal for the exterior of the oven to be warm to the touch when cooking or reheating.
Condensation is a normal part of microwave cooking. Room humidity and the moisture in food will influence the amount of moisture that condenses in the oven. Generally, covered foods will not cause as much condensation as uncovered ones. Vents on the oven back must not be blocked.
The oven is for food preparation only. It should not be used to dry clothes or newspapers.
Your oven is rated 800 watts by using the IEC Test Procedure.
ABOUT FOOD
| FOOD | DO | DON'T |
| Eggs, sausages, nuts, seeds fruits & vegetables | · Puncture egg yolks before cooking to prevent “explosion”. · Pierce skins of potatoes, apples, squash, hot dogs and sausages so that steam escapes. | · Cook eggs in shells. · Reheat whole eggs. · Dry nuts or seeds in shells. |
| Popcorn | · U se specially bagged popcorn for the microwave oven. · Listen while popping corn for the popping to slow to 1 or 2 seconds or use special POPCORN pad. · Place carefully so bag does not touch oven walls. The corners of the bag may be folded down. | · Pop popcorn in regular brown bags or glass bowls. · Exceed maximum time on popcorn package. |
| Baby food | · T transfer baby food to small dish and heat carefully, stirring often. Check temperature before serving. · Put nipples on bottles after heating and shake thoroughly. “Wrist” test before feeding. | · Heat baby food in original jars. · Heat disposable bottles. · Heat bottles with nipples on. |
| General | · Cut baked goods with filling after heating to release steam and avoid burns. · Stir liquids briskly before heating and allow to stand at least for 20 seconds after heating before stirring or drinking to avoid eruption. · Use deep bowl, when cooking liquids or cereals, to prevent boilovers. | · Heat or cook in closed glass jars or air tight containers. · Can in the microwave as harmful bacteria may not be destroyed. · Deep fat fry. · Dry wood, gourds, herbs or wet papers. |
ABOUT UTENSILS AND COVERINGS
It is not necessary to buy all new cookware. Many pieces already in your kitchen can be used successfully in your new microwave oven. Make sure the utensil does not touch the interior walls during cooking.
Use these utensils for safe microwave cooking and reheating:
- glass ceramic (Pyroceram®), such as Corningware®.
- heat-resistant glass (Pyrex®)
- microwave-safe plastics
- paper plates
- microwave-safe pottery, stoneware and porcelain
- browning dish (Do not exceed recommended preheating time. Follow manufacturer's directions.)
These items can be used for short time reheating of foods that have little fat or sugar in them:
- wood, straw, wicker
DO NOT USE
• metal pans and bakeware
• dishes with metallic trim
• non-heat-resistant glass
• non-microwave-safe plastics (margarine tubs)
• recycled paper products
- brown paper bags
- food storage bags
- metal twist-ties
Should you wish to check if a dish is safe for microwaving, place the empty dish in the oven and microwave on HIGH for 30 seconds. A dish which becomes very hot should not be used.
The following coverings are ideal:
- Paper towels are good for covering foods for reheating and absorbing fat while cooking bacon.
- Wax paper can be used for cooking and reheating.
- Plastic wrap that is specially marked for microwave use can be used for cooking and reheating. DO NOT allow plastic wrap to touch food. Vent so steam can escape.
- L ids that are microwave-safe are a good choice because heat is kept near the food to hasten cooking.
- Oven cooking bags are good for large meats or foods that need tenderizing. DO NOT use metal twist ties. Remember to slit bag so steam can escape.
How to use aluminum foil in your microwave oven:
- Small flat pieces of aluminum foil placed smoothly on the food can be used to shield areas that are either defrosting or cooking too quickly.
- Foil should not come closer than one inch to any surface of the oven.
Should you have questions about utensils or coverings, check a good microwave cookbook or follow recipe suggestions.
ACCESSORIES There are many microwave accessories available for purchase. Evaluate carefully before you purchase so that they meet your needs. A microwave-safe thermometer will assist you in determining correct doneness and assure you that foods have been cooked to safe temperatures. Sharp is not responsible for any damage to the oven when accessories are used.
ABOUT CHILDREN AND THE MICROWAVE
Children below the age of 7 should use the microwave oven with a supervising person very near to them. Between the ages of 7 and 12, the supervising person should be in the same room.
The child must be able to reach the oven comfortably; if not, he/she should stand on a sturdy stool.
At no time should anyone be allowed to lean or swing on the oven door.
Children should be taught all safety precautions: use potholders, remove coverings carefully, pay special attention to packages that crisp food because they may be extra hot.
Don't assume that because a child has mastered one cooking skill he/she can cook everything.
Children need to learn that the microwave oven is not a toy. See page 15 for Child Lock feature.
ABOUT MICROWAVE COOKING
- Arrange food carefully. Place thickest areas towards outside of dish.
- Watch cooking time. Cook for the shortest amount of time indicated and add more as needed. Food severely overcooked can smoke or ignite.
- Cover foods while cooking. Check recipe or cookbook for suggestions: paper towels, wax paper, microwave plastic wrap or a lid. Covers prevent spattering and help foods to cook evenly.
- Shield with small flat pieces of aluminum foil any thin areas of meat or poultry to prevent overcooking before dense, thick areas are cooked thoroughly.
- Stir foods from outside to center of dish once or twice during cooking, if possible.
-
Turn foods over once during microwaving to speed cooking of such foods as chicken and hamburgers. Large items like roasts must be turned over at least once.
-
Rearrange foods such as meatballs halfway through cooking both from top to bottom and from the center of the dish to the outside.
- Add standing time. Remove food from oven and stir, if possible. Cover for standing time which allows the food to finish cooking without overcooking.
- Check for doneness. Look for signs indicating that cooking temperatures have been reached.
Doneness signs include:
- Food steams throughout, not just at edge.
- Center bottom of dish is very hot to the touch.
- Poultry thigh joints move easily.
- Meat and poultry show no pinkness.
- Fish is opaque and flakes easily with a fork.
ABOUT SAFETY
- Check foods to see that they are cooked to the United States Department of Agriculture's recommended temperatures.
| TEMP | FOOD |
| 160°F(71°C) | ... for fresh pork, ground meat, bone-less white poultry, fish, seafood, egg dishes and frozen prepared food. |
| 165°F(74°C) | ... for leftover, ready-to-reheat refrigerated, and deli and carry-out “fresh” food. |
| 170°F(77°C) | ... white meat of poultry. |
| 180°F(82°C) | ... dark meat of poultry. |
To test for doneness, insert a meat thermometer in a thick or dense area away from fat or bone. NEVER leave the thermometer in the food during cooking, unless it is approved for microwave oven use.
- A LWAYS use potholders to prevent burns when handling utensils that are in contact with hot food. Enough heat from the food can transfer through utensils to cause skin burns.
- A void steam burns by directing steam away from the face and hands. Slowly lift the farthest edge of a dish's covering and carefully open popcorn and oven cooking bags away from the face.
- Stay near the oven while it's in use and check cooking progress frequently so that there is no chance of overcooking food.
- NEVER use the cavity for storing cookbooks or other items.
- Select, store and handle food carefully to preserve its high quality and minimize the spread of foodborne bacteria.
- Keep waveguide cover clean. Food residue can cause arcing and/or fires.
- Use care when removing items from the oven so that the utensil, your clothes or accessories do not touch the safety door latches.
PART NAMES
natural_image
Technical diagram showing a circular component with internal lines and a three-pointed star-like structure, labeled 7 and 8 (no text or symbols on the diagram itself)1 Door opening button
Push to open door.
2 Oven door with see-through window
3 Safety door latches
The oven will not operate unless the
door is securely closed.
4 Door hinges
5 Door seals and sealing surfaces
6 Turntable motor shaft
7 Removable turntable support Carefully place the turntable support in the center of the oven floor.
8 Removable turntable Place the turntable on the turntable support securely. The turntable will rotate clockwise or counterclockwise. Only remove for cleaning.
9 Ventilation openings (Rear)
10 Oven light It will light when oven is operating.
11 Waveguide cover: DO NOT REMOVE.
12 Auto-Touch control panel
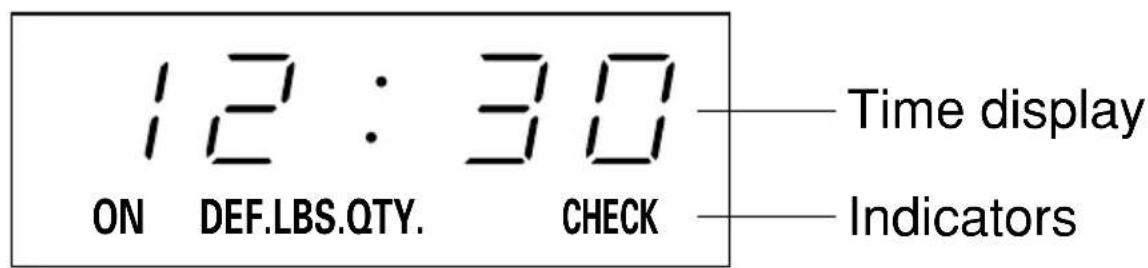
13 Time display: 99 minutes, 99 seconds
DISPLAY
R-216LS

Number next to the control panel illustration indicates page on which there are a feature description and usage information.
BEFORE OPERATING
- Before operating your new microwave oven make sure you read and understand this operation manual completely.
-
Before the oven can be used, follow these procedures:
-
Plug in the oven. Close the door. The oven display will then begin flashing 88:88
- Touch STOP/CLEAR pad. : will appear.
- Touch CLOCK pad to set clock.
TO SET THE CLOCK
- Suppose you want to enter the correct time of day 12:30 (A.M. or P.M.).
PROCEDURE DISPLAY
1


Touch CLOCK pad.
The colon (:) will flash.
2 1 2 3 0
Enter the correct time of day by touching the numbers in sequence.

3


Touch CLOCK pad again.
This is a 12 hour clock. If you attempt to enter an incorrect clock time, will appear in the display. Touch STOP/CLEAR pad and re-enter the time.
- If the electrical power supply to your microwave oven should be interrupted, the display will intermittently show 88:88 after the power is reinstated. If this occurs during cooking, the program will be erased. The time of day will also be erased. Simply touch STOP/CLEAR pad and reset the clock for the correct time of day.
STOP/CLEAR
Touch STOP/CLEAR pad to:
- Erase if you make a mistake during programming.
- Cancel timer.
- Stop the oven temporarily during cooking.
- Return the time of day to the display.
- Cancel a program during cooking, touch twice.
MANUAL OPERATION
TIME COOKING
Your oven can be programmed for 99 minutes 99 seconds (99.99). Always enter the seconds after the minutes, even if they are both zeros.
- Suppose you want to cook for 5 minutes at 100% .
PROCEDURE DISPLAY
1 5 0 0
Enter cooking time.

2


Touch START pad.
TO SET POWER LEVEL
There are eleven preset power levels.
Using lower power levels increases the cooking time which is recommended for foods such as cheese, milk and long slow cooking of meats. Consult cookbook or recipes for specific recommendations.
To lower the power, touch POWER LEVEL pad once. Note the display will indicate "P-HI" (HIGH, 100%). To lower to "90%" touch POWER LEVEL pad again. Repeat as necessary to select 80% - 0%.
- Suppose you want to defrost for 5 minutes at 30% .
PROCEDURE DISPLAY
1 5 0 0
Enter defrost time.

2


Touch POWER LEVEL pad 8 times or hold down until the desired power level appears.
3


Touch START pad.
If you wish to know power level, simply touch the POWER LEVEL pad. As long as your finger is touching the POWER LEVEL pad, the power level will be displayed.
SPECIAL FEATURES
DEFROST
Defrost automatically defrosts ground meat, steaks, chops and poultry. Round the weight to the nearest half pound. (Ex. if the steak's actual weight is 2.2 lb, round to 2.0 lb. If the steak's weight is 2.4 lb, round to 2.5 lb.)
- Suppose you want to defrost a 2.0 lb steak.
PROCEDURE
1 You do not need to select food. To enter weight, touch the DEFROST pad for a .5 lb increase per touch.

Quickly touch DEFROST pad 4 times for 2.0 lb because the oven starts automatically.
x 4
The oven will stop so that the food can be checked.
2 After the 1st stage, open the door. Turn steak over and shield any warm portions. Close the door. Touch START pad.
3 After the 2nd stage, open the door. Shield any warm portions. Close the door. Touch START pad.
4 After defrost cycle ends, cover and let stand as indicated in chart below.
NOTE:
- Defrost can only be used within 3 minutes after cooking, opening and closing the door or touching the STOP/CLEAR pad.
- Defrost can be programmed with More or Less Time Adjustment. See page 15.
- You may choose to enter the weight in tenths of pounds. This procedure may be easier with larger weights such as 3.0 lb because it requires fewer touches. To program, touch DEFROST and enter weight by touching the number pads. Example: touch DEFROST then 3 and 0 for a weight of three pounds. If you attempt to enter more or less than the allowed amount, EE will appear in the display.
- To defrost other foods or foods above or below the weights allowed on DEFROST CHART below, use time and 30% power. See Manual Defrost on page 11.
DEFROST CHART
| FOOD PRO & MDOURNET | ||
| Ground Meat | .5-3.0 lb(.3-1.3 kg) | Remove any thawed pieces after each stage.Let stand, covered, 5 to 10 minutes. |
| Steaks/Chops | .5-3.0 lb(.3-1.3 kg) | After each stage of defrost cycle, rearrange and if there are warm or thawed portions, shield with small flat pieces of aluminum foil. Remove any meat that is nearly defrosted.Let stand, covered, 10 to 20 minutes. |
| Boneless Poultry | .5-2.0 lb(.3-.9 kg) | Use boneless breast of chicken or turkey. After each stage, if there are warm or thawed portions, rearrange or remove. Let stand, covered, for 10 to 20 minutes. |
| Bone-in Poultry | .5-3.0 lb(.3-1.3 kg) | Arrange pieces with meatiest portions toward outside of glass dish or microwave safe rack. After each stage, if there are warm or thawed portions, rearrange or remove. Let stand, covered, for 10 to 20 minutes. |
NOTE: Check foods when oven signals. Do not over defrost. After final stage, small sections may still be icy. Let stand to continue thawing.
Shielding prevents cooking from occurring before the center of the food is defrosted. Use small smooth strips of aluminum foil to cover edges and thinner sections of the food.
MANUAL DEFROST
If the food that you wish to defrost is not listed on the DEFROST CHART or is above or below the limits in the AMOUNT column on the DEFROST CHART, you need to defrost manually.
You can defrost any frozen food, either raw or previously cooked, by using 30% power level. See page 9. Estimate defrosting time and press POWER LEVEL pad 8 times when you select the power level.
For either raw or previously cooked frozen food the rule of thumb is approximately 5 minutes per pound. For example, defrost 5 minutes for 2-3 cups of casserole or 1 pound/450 g of frozen spaghetti sauce.
Always stop the oven periodically to remove or separate the portions that are defrosted. If food is not defrosted at the end of the estimated defrosting time, program the oven in 1 minute increments at 30% until totally defrosted.
When using plastic containers from the freezer, defrost only long enough to remove from the plastic in order to place in a microwave-safe dish.
POPCORN
The popcorn setting automatically provides the correct cooking time for most brands of microwave popcorn. See the chart below.
- Suppose you want to pop a regular size (3.5 oz/100g) bag.
PROCEDURE
1
POPCORN
Touch POPCORN pad once.
The oven starts automatically.
NOTE:
- Popcorn pad can only be used within 3 minutes after cooking, opening and closing the door or touching the STOP/CLEAR pad.
- Popcorn can be programmed with More or Less Time adjustment. See page 15.
POPCORN CHART
FOOD PROCEDUREAMOUNT
| POPCORN | 1 bag | Try several brands to decide which is most acceptable for your taste. Place bag with only one fold slightly off center and place bag with two folds in the center of the turntable.You should fold down the corners of the bag so it turns freely. |
| 3.5 oz bag (100 g)(Regular) | Touch POPCORN pad once for regular..? | |
| 2.85 - 3.5 oz bag (80 - 100 g)(Regular Light) | Touch POPCORN pad twice within 2 seconds for regular light..2 | |
| 1.2 - 1.75 oz bag (35 - 50 g)(Mini) | Touch POPCORN pad three times within 3 seconds for mini..3 |
REHEAT / COOK
Reheat and Cook automatically compute the correct warming or cooking time and microwave power level for foods shown in the charts.
- Suppose you want to heat 2 cups of soup.
PROCEDURE
| 1 | Touch REHEAT once. |  |
| 2 | Select desired food by touching number pad.(Ex: Touch 2 for soup.) |  |
| 3 | Repeat touching same number pad to select quantity. (Ex: Touch 2 two more times for 2 cups.) | [183K] |
| 4 | Touch START pad. |  |
NOTE:
- To heat or cook other food or foods above or below the quantity allowed on the REHEAT CHART or COOK CHART, cook manually.
- Reheat and Cook can be programmed with More or Less Time Adjustment. Touch POWER LEVEL once or twice before touching START. See page 15.
COOK CHART
| FOOD | AMOUNT | PROCEDURE |
| 1. Baked Potatoes 1 - 2 med. | Pierce with fork in several places. Place on paper towel on turntable. After cooking, remove from oven and let stand wrapped in foil for 5 to 10 minutes. | |
| 2. Fresh Vegetables 1 - 2 cups | For beans, carrots, corn and peas, add 1 tablespoon of water per cup. For broccoli, Brussel sprouts, cabbage and cauliflower, cook immediately after washing with no additional water.If you like tender crisp vegetables, double measured quantity per setting. For example, use 2 cups cauliflower and program for 1 cup. After cooking, remove from oven, stir, cover and let stand 3 to 5 minutes before serving. | |
| 3. Frozen Vegetables | 1 - 2 cups | Add no water. Cover with lid or plastic wrap. After cooking, stir and let stand, covered, for 3 minutes. |
| 4. Frozen Entrees 6 - 10 oz(170 - 280 g) | Use for frozen, convenience foods. It will give satisfactory results for most brands. You may wish to try several and choose your favorite. Remove package from outer wrapping and follow package directions for covering. After cooking, let stand, covered, for 1 to 3 minutes. | |
| 6 - 8 oz(170 - 230 g)9 - 10 oz(231 - 280 g) | TouchCOOK pad and number pad 4 twice for packages weighing 6-8 oz. will appear in the display.TouchCOOK pad and number pad 4 three times for packages weighing 9-10 oz. will appear in the display. | |
REHEAT CHART
| FOOD | AMOUNT | PROCEDURE |
| 1. Casserole 1 - 2 cups Use to reheat refrigerated canned or homemade pasta with sauce or other cooked casserole. For room temperature pasta or casserole, use Less option. For pasta without sauce double the quantity per setting. For example, measure 2 cups of cooked noodles and program for 1 cup. Cover with lid or plastic wrap.After cooking, stir and let stand, covered, 2 to 3 minutes. | ||
| 2. Soup | 1 - 2 cups | Place in bowl or casserole. Cover with lid or plastic wrap. At end, stir, re-cover and let stand 1 to 3 minutes. |
| 3. Pizza 1 - 2 slices | Use to reheat refrigerated leftover pizza. 1 slice is approximately 1/8th of a 12 inch (30cm) pizza or 1/12th of a 16 inch (40cm) pizza. Place on paper towel. | |
| 4. Beverage .5 - 1 cup | This setting is good for restoring cooled beverage to a better drinking temperature. Stir after heating. Use More Time Adjustment (See page 15) for heating COLD TAP WATER to a temperature somewhat below the boiling point to make instant coffee or tea. Stir liquid briskly before heating to avoid "eruption". | |
| 5. Dinner Plate 1 plate | Use to reheat precooked foods from the refrigerator. Place meaty portions and bulky vegetables to outside of plate. Cut large items like baked potatoes in smaller pieces. Flatten foods such as mashed potatoes and other dense foods. Cover with wax paper or plastic wrap. ONE PLATE ONLY. After cooking, check that food is very hot throughout and that the bottom center of the plate is very hot. If not, continue heating using time and power level. Allow to stand, covered, 1 to 2 minutes. | |
| 1 Regular | Touch REHEAT pad and number pad 5 twice for a regular amount of food: approximately 4 oz (110 g) sliced meat or poultry, 1/2 cup potato or rice and 1/2 cup of vegetables or equivalent. will appear in the display. | |
| 1 Large | Touch REHEAT pad and number pad 5 three times for a larger amount of food on a dinner plate. will ap-pear in the display. | |
| 1 Small | Touch REHEAT pad and number pad 5 four times for a smaller amount of food on a dinner plate. will appear in the display. | |
| 6. Rolls/Muffins 1 - 2 pcs. | Use to warm rolls, muffins, biscuits, bagels etc. Large item should be considered as 2 regular size. Cover each roll/muffin with paper towel.For refrigerated rolls or muffins, it may be necessary to double the entered amount to ensure the proper serving temperature. For example, enter quantity of 2 for 1 refrigerated muffin.For Frozen Rolls or Muffins, use More Time Adjustment. (Touch POWER LEVEL pad once before touching START pad. See page 15.) | |
SHORT CUTS
Short Cuts automatically compute the correct heating time and microwave power level for softening ice cream and warming syrup.
- Suppose you want to warm 1/4 cup of syrup.
PROCEDURE
1
WARM
Touch WARM pad once. The oven starts automatically.
NOTE:
- Short Cut pads can only be used within 3 minutes after cooking, opening and closing the door or touching the STOP/CLEAR pad.
- To soften or warm other food or foods except the quantity listed in the SHORT CUTS CHART, cook manually.
- Short Cuts can be programmed with More or Less Time Adjustment. See page 15.
SHORT CUTS CHART
| FOOD | AMOUNT | PROCEDURE |
| SOFTENIce cream | 1 pint (470 ml)1/2 gallon (1.9 l) | DO NOT COVER.TouchSOFTENpad once for 1 pint.1TouchSOFTENpad twice within 2 seconds for 1/2 gallon.2. |
| WARM Syrup | 1/4 cup1/2 cup | Use a Pyrex measuring cup. DO NOT COVER.TouchWARMpad once for 1/4 cup.1TouchWARMpad twice within 2 seconds for 1/2 cup.2. |
OTHER CONVENIENT FEATURES
MULTIPLE SEQUENCE COOKING
The oven can be programmed for up to 3 automatic cooking sequences, switching from one power level setting to another automatically.
Sometimes cooking directions tell you to start on one power level and then change to a different power level. Your oven can do this automatically.
- Suppose you want to cook for 5 minutes at 100% and then continue to cook for 30 minutes at 50%
PROCEDURE
1 First, enter cooking time. Then, touch POWER LEVEL pad once for 100% power.
500
POWER LEVEL x 1
2 Then, enter second cooking time and touch POWER LEVEL pad 6 times for 50% power.
3000
POWER LEVEL x 6
3 Touch START pad.
START MINUTE PLUS
NOTE:
-
If 100% is selected as the final sequence, it is not necessary to touch the POWER LEVEL pad.
-
If you wish to know power level, simply touch the POWER LEVEL pad. As long as your finger is touching the POWER LEVEL pad, the power level will be displayed.
MINUTE PLUS
Minute Plus allows you to cook for a minute at 100% by simply touching the MINUTE PLUS pad. You can also extend cooking time in multiples of 1 minute by repeatedly touching the MINUTE PLUS pad during manual cooking.
- Suppose you want to heat a cup of soup for one minute.
PROCEDURE
1 Touch MINUTE PLUS pad.

NOTE:
- To use Minute Plus, touch pad within 3 minutes after cooking, closing the door, touching STOP/CLEAR pad or during cooking.
- Minute Plus cannot be used with SPECIAL FEATURES.
MORE OR LESS TIME ADJUSTMENT
More
Should you discover that you like any of the DEFROST, POPCORN, REHEAT, COOK or SHORT CUT settings slightly more done, touch the POWER LEVEL pad once after touching your choice of pads. The display will show PL US.
Less
Should you discover that you like any of the DEFROST, POPCORN, REHEAT, COOK or SHORT CUT settings slightly less done, touch the POWER LEVEL pad twice after touching your choice of pads. The display will show LE 55.
NOTE:
For DEFROST, POPCORN and SHORT CUTS, the POWER LEVEL pad must be touched within 2 seconds of touching your choice of pads.
TIMER
- Suppose you want to time a 3-minute long distance phone call.
| PROCEDURE | |
| 1 Enter time. | 3 0 0 |
| 2 Touch TIMER pad. | TIMER/CLOCK |
CHILD LOCK
The Child Lock prevents unwanted oven operation such as by small children.
The oven can be set so that the control panel is deactivated or locked. To set, touch CLOCK, the number 1 pad and then touch the START pad and hold for 3 seconds. Should a pad be touched, SA FE will appear in the display.
To cancel, touch CLOCK, the number 1 and STOP/CLEAR pads.
AUDIBLE SIGNAL ELIMINATION
If you wish to have the oven operate with no audible signals, touch CLOCK, the number 5 and then touch the START pad and hold for 3 seconds.
To cancel and restore the audible signal, touch CLOCK, the number 5 and STOP/CLEAR pads.
DEMONSTRATION MODE
To demonstrate, touch CLOCK, 0 pad and then touch START pad and hold for 3 seconds. 5 HD will appear in the display. Cooking operations and specific special features can now be demonstrated with no power in the oven. For example, touch MINUTE PLUS pad and the display will show 1.00 and count down quickly to 0 and the End.
To cancel, touch CLOCK, then the 0 and STOP/CLEAR pads. If easier, unplug the oven from the electrical outlet and replug.
CLEANING AND CARE
Disconnect the power cord before cleaning or leave the door open to inactivate the oven during cleaning.
Exterior
The outside surface is painted. Clean the outside with mild soap and water. Then wipe with a clean dampened cloth and polish dry with a soft cloth. Do not use any type of household or abrasive cleaner.
Door
Wipe the window on both sides with a soft damp cloth to remove any spills or spatters. Metal parts will be easier to maintain if wiped frequently with a soft damp cloth. Avoid the use of spray and other harsh cleaners as they may stain, streak or dull the door surface.
Touch Control Panel
Wipe the panel with a soft cloth dampened slightly with water only. Dry with a soft cloth. Do not scrub or use any sort of chemical cleaners. Close door and touch STOP/CLEAR pad.
Interior
Cleaning is easy because little heat is generated to the interior surfaces; therefore, there is no baking and setting of spills or spattering. To clean the interior surfaces, wipe with a soft damp cloth. DO NOT USE ABRASIVE OR HARSH CLEANERS OR SCOURING PADS. For heavier soil, use baking soda or a mild soap; wipe clean with a soft damp cloth. NEVER SPRAY OVEN CLEANERS DIRECTLY ONTO ANY PART OF THE OVEN.
Waveguide Cover
The waveguide cover is made from mica so requires special care. Keep the waveguide cover clean to assure good oven performance. Carefully wipe with a soft damp cloth any food spatters from the surface of the cover immediately after they occur. Built-up splashes may overheat and cause smoke or possibly catch fire. Do not remove the waveguide cover.
Odor Removal
Occasionally, a cooking odor may remain in the oven. Toremove, combine 1 cup/250 ml water, peel and juice of 1 lemon and several whole cloves in a 2-cup/500 ml glass measuring cup. Boil for several minutes using 100% power. Allow to set in oven until cool. Wipe interior with a soft cloth.
Turntable/Turntable Support
The turntable and turntable support can be removed for easy cleaning. Wash them in mild, sudsy water; for stubborn stains use a mild cleanser and a non-abrasive scouring sponge. They are also dishwasher-proof. The turntable motor shaft is not sealed, so excess water or spills should be wiped up immediately.

natural_image
Line drawing of a hand cleaning a door with a cloth (no text or symbols)Exterior

natural_image
Line drawing of a microwave oven with open door and side door (no text or symbols)Interior

Turntable

Turntable Support
SERVICE CALL CHECK
Please check the following before calling for service:
Place one cup of water in a glass measuring cup in the oven and close the door securely. Operate the oven for one minute at HIGH 100%.
A Does the oven light come on? YES ____ NO ____
B Does the cooling fan work? YES ____ NO ____ (Put your hand over the rear ventilating openings.)
C Does the turntable rotate? YES ____ NO ____(It is normal for the turntable to turn in either direction.)
D Is the water in the oven warm? YES ____ NO ____
If “NO” is the answer to any of the above questions, please check electrical outlet, fuse and/or circuit breaker. If they are functioning properly, CONTACT YOUR NEAREST SHARP AUTHORIZED SERVICER. A microwave oven should never be serviced by a “do-it-yourself” repair person.
NOTE: 1. If time appearing in the display is counting down very rapidly, check Demonstration Mode on page 15 and cancel.
- If the oven is set for more than 20 minutes at 80, 90 or 100 percent power level, after the first 20 minutes, the power level will automatically adjust to 70 percent power to avoid overcooking.
SPECIFICATIONS
| AC Line Voltage: | Single phase 120V, 60Hz, AC only |
| AC Power Required: | 1170W 10A |
| Output Power: | |
| Microwave | 800W* (IEC Test Procedure) |
| Frequency: | 2450 MHz |
| Outside Dimensions: | 18^1/8 "(W) x 10^7/8 "(H) x 14^5/8 "(D)460mm(W) x 275mm(H) x 370mm(D) |
| Cavity Dimensions**: | 12^1/2 "(W) x 8"(H) x 13^1/4 "(D)319mm(W) x 204mm(H) x 336mm(D) |
| Oven Capacity**: | 0.8 Cu.Ft. / 22 L |
| Cooking Uniformity: | Turntable system, 10^3/4 "/ 272mm diameter |
| Weight: | Approx. 24 lb / 11 kg |
★ The International Electrotechnical Commission's standardized method for measuring output wattage. This test method is widely recognized.
★★ Internal capacity is calculated by measuring maximum width, depth and height. Actual capacity for holding food is less.
In compliance with standards set by:
FCC – Federal Communications Commission Authorized.
DHHS

– Complies with Department of Health and Human Services (DHHS) rule, CFR, Title 21, Chapter I, Subchapter J.
- This symbol on the nameplate means the product is listed by Underwriters Laboratories, Inc.
COOKING REFERENCE
MEATS, POULTRY, FISH, SEAFOOD
Allow standing time after cooking.
Ground Beef High 4 - 6 minutes
for Casseroles
(1 lb / 450 g)
Hamburger High 1st side 2 minutes
Patties(2) 2nd side 1 12 to
2^1/2 minutes
Ham slice 50% 5 - 8 minutes
(1 lb / 450 g)
Meatloaf High 10 - 16 minutes
(1 ^1/2 lb / 675 g)
Boneless High 1st side 2 minutes
Chicken 2nd side 2 - 4
Breasts minutes
Chicken High 4 - 8 minutes/lb
Pieces 9 - 17 ^1/2 minutes/kg
Fish High 5 - 6 minutes
Fillets (1lb / 450 g)
Fish Steaks 70% 6 - 8 minutes
Scallops and High 3 - 5 minutes
Shrimp (1lb / 450 g)
Check internal temperature after standing.
See chart on page 6.
COOKBOOK INFORMATION
Great recipes
\~ Reliable microwave reference guide
\~ Many color photos
\~ Step-by-step instructions
\~Nutritional information for each recipe
\~ Durable wipe-clean soft cover with 128
8 1/2 x 11 pages
\~ Helpful tips andspecial techniques
SHARP®
Simply call this toll-free number : 1-800-237-4277. Please have your credit card ready. If you prefer to order by mail, complete and return the order form on page 19. Please include check or money order (payable to Sharp Accessories & Supplies Center) for \6.00 plus \4.25 shipping & handling and tax, if applicable, per book.
SATISFACTION GUARANTEED
You must be completely satisfied with the Sharp Carousel Microwave Cookbook. If, within 14 days, you are dissatisfied for any reason, simply return the book and we'll gladly refund your \$6.00 plus tax.
(SOLAMENTE ESCRITO EN INGLES!)
COOKING REFERENCE
REHEATING
Food should be very hot (165°F/74°C). Stir before serving, if possible.
(1 serving) 3 - 5 minutes
(2 servings) 6 - 10 minutes
Pie (1 slice) High 10 - 30 seconds
Baked Potatoes High
| (1) 1 | ^1/_2 - 2^1/_2 minutes |
| (2) 2 | ^1/_2 - 3 minutes |
Vegetables High
(1 serving) ^3/4 - 1^1/2 minutes
(2 servings) 1 12 - 212 minutes
OTHER
Applesauce (4) High 5 - 8 minutes
Baked Apples (4) High 4 - 6 minutes
Chocolate 50% 1 - 2 minutes
(melt 1 square)
Eggs, High 1 - 1 12 minutes scrambled (2)
Hot Cereal (1 serving) High 1 - 3 minutes
Nachos 50% 1 - 2 minutes (large plate)
Cut along this line.
COOKBOOK ORDER FORM
Please send me ____ cookbooks at \10.25 each \ ____
Illinois sales tax, (if applicable) per book \.44 no. of books ____ \ ____
TOTAL ORDER AMOUNT \$ \_\_\_\_
☐ I have enclosed a check made payable to Sharp Accessories & Supplies Center.
☐ Please bill my ☐ VISA MASTERCARD
□ AMERICAN EXPRESS
Acct. No. ____ Expiration date ____ / ____
Signature
(All credit card orders must be signed.)
Name
Address
City ____ State ____ Zip ____
Daytime Phone No. ( ) ____
Mail to: SHARP Accessories & Supplies Center 2130 Townline Road Price is subject to change without notice. Peoria, Illinois 61615–1560
AUTO-TOUCH GUIDE
For more complete information and safety precautions, refer to your Operation Manual.
SET CLOCK
If 88:88 is in display, first touch STOP/CLEAR pad.
1 Touch CLOCK pad.

2 Enter correct time of the day by touching numbers in sequence. (Ex. 12:30)
1 2 3 0
3 Touch CLOCK pad again.

MANUAL OPERATION
High Power Cooking
1 Enter cooking time by touching number pads. (Ex: 1 min. 30 sec.)
1 3 0
2 Touch START pad.

Variable Power Cooking
1 After Step 1 above, touch POWER LEVEL pad 6 times. (Ex: 50%)

2 Touch START pad.

DEFROST
1 Touch DEFROST pad for a .5 lb increase per touch. (Ex: 2.5 lb steak)

DEFROST CHART
FOOD AMOUNT
Ground Meat .5 to 3.0 lb (.3 - 1.3 kg)
Steaks/Chops .5 to 3.0 lb (.3 - 1.3 kg)
Boneless Poultry .5 to 2.0 lb (.3 - .9 kg)
Bone - in Poultry .5 to 3.0 lb (.3 - 1.3 kg)
SHORT CUTS
1 Touch desired SHORT CUT pad.
SOFTEN (Ice cream)
SOFTEN
Once - 1 pint (470 ml)
Twice - 1/2 gallon (1.9l)
WARM (Syrup)
Once - 1/4 cup
Twice - 1/2 cup
WARM
POPCORN
1 Touch POPCORN pad: once for a regular size twice - regular size light 3 times - mini size
POPCORN
POPCORN CHART
FOOD AMOUNT
Popcorn 3.5 oz (100 g) - Regular 2.85 - 3.5 oz (80 - 100 g) - Regular light 1.2 - 1.75 oz (35 - 50 g) - Mini
REHEAT / COOK
1 Touch REHEAT or COOK pad. (Ex: For reheating soup, touch REHEAT.)
REHEAT
2 Select desired Reheat or Cook setting. (Ex: Touch ^2 to reheat soup.)
2
3 Touch number2 pad twice for 2 cups. 2 x 2
4 Touch START pad.
START MINUTE PLUS
REHEAT CHART
FOOD AMOUNT
- Casserole 1 - 2 cups
- Soup 1 - 2 cups
- Pizza 1 - 2 slices
- Beverage .5 - 1 cup
- Dinner Plate 1 plate; reg., lg. or sm.
- Fresh Rolls/Muffins 1 - 2 pcs.
COOK CHART
FOOD AMOUNT
- Baked Potatoes 1 - 2 med.
- Fresh Vegetables 1 - 2 cups
- Frozen Vegetables 1 - 2 cups
- Frozen Entrees 6 - 8 oz (170 - 230 g), 9 - 10 oz (231 - 280 g)
MINUTE PLUS
Touch MINUTE PLUS pad for one minute at 100% power or to add a minute during manual cooking. Continue to touch for additional minutes.
START MINUTE PLUS
SHARP®
HORNO MICROONDAS
natural_image
Black and white photo of a bowl containing various food items including carrots, peppers, eggs, and a cup (no visible text or symbols)CONTENIDO
Sharp Electronics Corporation
Customer Assistance Center
1300 Naperville Drive
Romeoville, IL 60446-1091
POR INTERNET: www.sharpusa.com
natural_image
Technical line drawing of a mechanical component with two views labeled 7 and 8 (no text or symbols on the diagram itself)natural_image
Line drawing of a hand cleaning a wall-mounted door (no text or symbols)Parte exterior

natural_image
Line drawing of a microwave oven with open door and side door (no text or symbols)Parte interior

Plato giratorio

Soporte del
plato giratorio
FCC – Federal Communications Commission Authorized.
DHHS

(SÓLO ESTÁ DISPONIBLE EN INGLÉS)
- CONTENTS
- FOR CUSTOMER ASSISTANCE
- TO PHONE:
- TO WRITE:
- PRECAUTIONS TO AVOID POSSIBLE EXPOSURE TO EXCESSIVE MICROWAVE ENERGY
- CONSUMER LIMITED WARRANTY
- Your Product Model Number & Description:
- Warranty Period for this Product:
- Additional Item(s) Excluded from Warranty Coverage (if any):
- Where to Obtain Service:
- What to do to Obtain Service:
- PRODUCT INFORMATION CARD
- IMPORTANT SAFETY INSTRUCTIONS
- SAVE THESE INSTRUCTIONS
- UNPACKING AND INSTALLATION INSTRUCTIONS
- Unpacking and Examining Your Oven
- Choosing a Location for Your Oven
- GROUNDING INSTRUCTIONS
- Electrical Requirements
- Extension Cord
- Radio or TV Interference
- INFORMATION YOU NEED TO KNOW
- ABOUT YOUR OVEN
- ABOUT UTENSILS AND COVERINGS
- Use these utensils for safe microwave cooking and reheating:
- These items can be used for short time reheating of foods that have little fat or sugar in them:
- DO NOT USE
- The following coverings are ideal:
- How to use aluminum foil in your microwave oven:
- ABOUT CHILDREN AND THE MICROWAVE
- ABOUT MICROWAVE COOKING
- Doneness signs include:
- ABOUT SAFETY
- PART NAMES
- DISPLAY
- BEFORE OPERATING
- TO SET THE CLOCK
- PROCEDURE DISPLAY
- STOP/CLEAR
- MANUAL OPERATION
- TIME COOKING
- TO SET POWER LEVEL
- SPECIAL FEATURES
- DEFROST
- PROCEDURE
- NOTE:
- MANUAL DEFROST
- POPCORN
- POPCORN CHART
- REHEAT / COOK
- SHORT CUTS
- OTHER CONVENIENT FEATURES
- MULTIPLE SEQUENCE COOKING
- MINUTE PLUS
- MORE OR LESS TIME ADJUSTMENT
- TIMER
- CHILD LOCK
- AUDIBLE SIGNAL ELIMINATION
- DEMONSTRATION MODE
- CLEANING AND CARE
- Exterior
- Door
- Touch Control Panel
- Interior
- Waveguide Cover
- Odor Removal
- Turntable/Turntable Support
- SERVICE CALL CHECK
- COOKING REFERENCE
- MEATS, POULTRY, FISH, SEAFOOD
- COOKBOOK INFORMATION
- Great recipes
- SHARP®
- SATISFACTION GUARANTEED
- REHEATING
- OTHER
- COOKBOOK ORDER FORM
- TOTAL ORDER AMOUNT \$ \_\_\_\_
- AUTO-TOUCH GUIDE
- SET CLOCK
- High Power Cooking
- Variable Power Cooking
- DEFROST CHART
- FOOD AMOUNT
- REHEAT CHART
- COOK CHART
- HORNO MICROONDAS
- CONTENIDO
Brand : SHARP
Model : R-216LS
Category : Microwaves