Chief Vintage (2012) - Motorcycle Indian - Free user manual and instructions
Find the device manual for free Chief Vintage (2012) Indian in PDF.

| Product Type | Cruiser Motorcycle |
| Model | Chief Vintage (2012) |
| Engine Type | Air-cooled, 4-stroke V-Twin |
| Displacement | 1811 cc (110.5 cu in) |
| Horsepower | 73 hp (54.4 kW) @ 4600 rpm |
| Torque | 112 ft-lb (152 Nm) @ 2600 rpm |
| Transmission | 6-speed overdrive |
| Final Drive | Belt drive |
| Fuel Capacity | 5.5 gallons (20.8 liters) |
| Dry Weight | 747 lbs (339 kg) |
| Seat Height | 26.0 inches (660 mm) |
| Wheelbase | 68.0 inches (1727 mm) |
| Ground Clearance | 5.5 inches (140 mm) |
| Front Suspension | Telescopic fork, 46 mm, 4.7 inches travel |
| Rear Suspension | Single shock, air adjustable, 3.5 inches travel |
| Front Brakes | Dual 300 mm disc, 4-piston calipers |
| Rear Brakes | Single 300 mm disc, 2-piston caliper |
| Tires (Front) | 130/90-16 (tubeless) |
| Tires (Rear) | 150/80-16 (tubeless) |
| Instrumentation | Speedometer, tachometer, fuel gauge, odometer, trip meter |
| Lighting | Halogen headlight, LED tail light |
| Maintenance | Oil change every 5,000 miles; valve adjustment every 10,000 miles; belt inspection at each service |
| Cleaning | Use mild soap and water; avoid high pressure washers |
| Safety | ABS (optional), standard fenders and mirrors |
| Parts and Repairability | Dealer service recommended; genuine Indian parts available |
Frequently Asked Questions - Chief Vintage (2012) Indian
User questions about Chief Vintage (2012) Indian
0 question about this device. Answer the ones you know or ask your own.
Ask a new question about this device
Download the instructions for your Motorcycle in PDF format for free! Find your manual Chief Vintage (2012) - Indian and take your electronic device back in hand. On this page are published all the documents necessary for the use of your device. Chief Vintage (2012) by Indian.
USER MANUAL Chief Vintage (2012) Indian
California Proposition 65 Warning
This product contains or emits chemicals known to the state of California to cause cancer and birth defects or other reproductive harm.
Congratulations on your purchase of a new Indian Chief ^ Motorcycle. You have joined a select group of discriminating motorcycle owners who have acquired a celebrated piece of American history: an Indian Motorcycle. Your new Chief ^ is the end result of true dedication and craftsmanship by the engineering, design, and assembly teams here at Indian Motorcycle. We hope you will take as much pride in riding your new Indian motorcycle as our team did in building it.
Your motorcycle is designed and manufactured to meet our goal of providing you with a high quality motorcycle that you can ride trouble-free for many years to come. This owner's manual contains important information about the safe operation and important maintenance of your motorcycle.
We urge you to read the manual thoroughly. Become familiar with the controls it describes and follow its recommendations closely, as this will make your riding as easy and enjoyable as possible.
To help maintain the value of your motorcycle and to keep from voiding your factory warranty, please remember that skilled technicians using equipment and methods recommended by IM are best qualified to perform all major repairs and service. Your authorized Indian Motorcycle Dealer knows your motorcycle best and should be consulted for service and assistance.
Again, thank you for your purchase. Enjoy the ride...
Information

text_image
Motorcycle Information Model Year You are the proud owner of an Indian™ Motorcycle, V.I.N. Color Engine Serial No. Ignition Key No. Fuel Cap Key No.
text_image
Owner Information Name City Zip Code/Postal Code Home Tel. Address State/Province Country Business Tel. Fax E-mail
text_image
Dealer Information Name Address City Zip Code/Postal Code State/Province Country Tel. Fax Purchase Date e-mail Owner's Signature Dealer's SignatureThis manual should be considered a permanent part of the motorcycle and must remain with the motorcycle at the time of resale.
Table of Contents
Indian Motorcycle ^TM
Introduction......4
Motorcycle Components Identification 6
Specifications - Dimensions, weights, and capacities 7
Features and Safety – What you must know before riding your Indian Motorcycle..... 11
Starting and Riding – How to start and operate your Indian Motorcycle....26
Maintenance and Lubrication – Required maintenance and service 31
Warranty Information – Warranty coverage, responsibilities, claim procedure......42
Maintenance Schedule & Records....50
Index 59
Introduction
For your own safety, and for longer service life of your motorcycle, follow the instructions and warnings contained in this manual. Ignoring them could result in damage to the motorcycle, personal injury, or death.
Read about operator training available to you through the Motorcycle Safety Foundation in the Features and Controls section of this manual.
Damage to your motorcycle caused by failing to follow these instructions is not covered by the Indian Motorcycle Limited Warranty.
At Indian Motorcycle, we continuously strive for improvements in product design, quality and performance. Please understand that as a result of our ongoing improvement efforts, we reserve the right to make changes in the design and manufacture of the motorcycle. Therefore, the information, illustrations and descriptions in this manual might differ from your motorcycle.
If you have any questions about the operation of your motorcycle that are not answered in this manual, contact your authorized Indian Motorcycle dealer. Your dealer will be glad to demonstrate the proper procedures.
Owner's Service and Warranty Information
This owner's manual contains detailed information about the warranties covering your Indian ^® motorcycle, including:
• Indian Motorcycle Limited Warranty
- Indian Motorcycle Emission Control System Warranty
• Indian Motorcycle Noise Control System Warranty
When talking about all three warranties we refer to these throughout this manual as the IM Warranties.
Operating Your Motorcycle Outside the U.S.A.
If you plan to operate your motorcycle in foreign countries, please be aware that:
• Service facilities or replacement parts may not be available
- Unleaded gasoline may not be available and the use of leaded fuels will cause engine damage, damage to your emissions systems and will void your warranty
- Gasoline may have a considerably lower octane rating. Improper fuel can cause engine damage.
California Proposition 65 Warning
WARNING!
This product contains or emits chemicals known to the state of California to cause cancer and birth defects or other reproductive harm.
WARNINGS, CAUTIONS, NOTICES AND NOTES
The following signal words and symbols appear throughout this manual and on your vehicle. Your safety is involved when these words and symbols are used. Become familiar with their meanings before reading the manual.
The safety alert symbol indicates a potential personal injury hazard.
WARNING indicates a hazardous situation which, if not avoided, may result in death or serious injury.
CAUTION indicates a hazardous situation which, if not avoided, may result in minor or moderate injury.
NOTICE indicates a situation that may result in property damage.
NOTE indicates information to help clarify procedures.
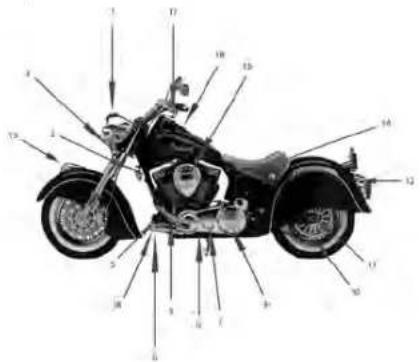
Indian Chief Component Identification
- Head Light
- Left Front Turn Signal
- Horn
- Gear Shifter
- Voltage Regulator
- Footrest
- Chain Inspection Cover
- Primary Chain Cover
- Clutch Inspection Cover
- Rear Sprocket and Drive Pulley
- Rear Axle Adjuster
- Left Rear Turn Signal
- Indian Head Dress
- Power port- Rear
- Air Cleaner
- Ignition Switch
- Speedometer
-
Evap Emissions Control
-
Front Brake Master Cylinder
- Right Front Turn Signal
- Coil Cover
- Rear Brake Pedal
- Rear Master Cylinder
- Footrest
- Oil Filter
- Transmission Fill Plug
- Transmission Drain Plug
- Engine Oil Fill Plug
- Engine Oil Drain Plug
- Rear Axle Adjuster
- Right Rear Turn Signal
- Tail light
- Battery (Under Seat)
- Fuel Filler Cap
- Throttle Control Grip
- Power Port - Front
text_image
Labeled diagram of a motorcycle with numbered parts for identification and assembly reference.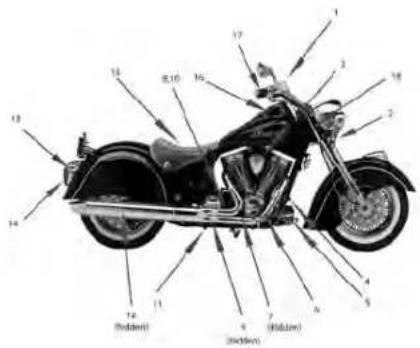
text_image
Labeled diagram of a motorcycle with numbered parts and directional arrows indicating componentsIndian Chief Specifications
| EngineType....Powerplus 105, 45, V-TwinDisplacement....105 cubic inches / 1720 ccBore x Stroke....3.966" x 4.25" | Fuel System......Closed Loop Fuel InjectionExhaust System....2 into 1 with Catalytic ConverterRev Limit....5250 RPM |
| Dimensions and Weight | |
| Weight (without fuel):Classic....728 lbs. / 330.2 kgDark Horse....746 lbs. / 338.4 kgBlackhawk....766 lbs. / 347 kgRoadmaster....747 lbs. / 339 kgVintage....753 lbs. / 341.6 kgGVWR....1220 lbs. / 553 kgGAWR....671 lbs. / 304 kgGAWF....549 lbs / 249 kgSeat Height....27.75 in. / 708 mmSeat Height - Blackhawk....26.75" / 667mmWheelbase....68.4 in / 1737 mm | Overall Length:All....100.5 in. / 2553 mmOverall Width....40.5 in. / 1029 mm(all models)Overall Height....50.5 in. / 1283 mmwith Windshield....59.5 in. / 1511.3 mmRake (frame)....34 DegreesTrail....5.92 in.Ground Clearance....6.0 in / 162 mmFuel Capacity....5.6 U.S. Gallons / 21.0 liters(fuel light on)....0.75 U.S. Gallon / 2.8 liters |
| DrivetrainPrimary Drive....Chain Drive - Wet ClutchEngine Sprocket....28 TeethClutch Sprocket....37 TeethPrimary Reduction Ratio 1.32:1....Transmission....Constant Mesh, Foot Shift, 6-Speed1st Gear Ratio....3.77:12nd Gear Ratio....2.56:13rd Gear Ratio....1.87:14th Gear Ratio....1.44:15th Gear Ratio....1:15:16th Gear Ratio....1:1 | Final Drive....Belt Drive, 136 ToothTransmission....31 ToothRear Wheel....65 ToothRatio....2.10:1Overall Gear Ratio1stGear....10.44:12ndGear....7.09:13rdGear....5.17:14thGear....3.98:15thGear....3.19:16thGear....2.77:1 |
Primary Chain Slack....3/8-1/2"/9.25-12.7 mm
Rear Drive Belt Deflection 47 hz + 5 hz *
*Preferred method for setting tension is with sonic tension meter
Indian Chief Specifications
Brakes - Tires - Wheels
Brakes ......Front: Brembo Dual (4 piston)
Rear: Brembo (2 piston)
Brake Pad New: Backing Plate + Pad
Thickness Front..240-.334 in. / 5.20-8.50mm
Rear .346-.362 in. / 8.80-9.20mm
Minimum .157 in. / 4.00mm
Wheels....3.5 in. x 16 in. 60 Spoke
3.5 in. x 16 in. Billet Aluminum
Inner Tube – None Required
Tires/Front
Black – Michelin Commander II 130/90-B16 73H
Pressure – Single Rider....36 psi
Pressure @ GVWR....38 psi
White Wall – Metzler Marathon ME880 130/90-16
Pressure — Single Rider .... 36 psi
Pressure @ GVWR....38 psi
Tires/Rear
Black – Michelin Commander II 150/80-B16 77H
Pressure — Single Rider .... 39 psi
Pressure @ GVWR....42 psi
White Wall - Metzler Marathon ME880 150/80B-16
Pressure — Single Rider .... 39 psi
Pressure @ GVWR....41 psi
Fluid Requirements
Indian Motorcycle recommends Indian Branded Oils and Fluids for trouble free operation
Engine Oil....SAE 20W-50 weight SG
3 Quarts With filter at oil change
Transmission .... SAE 80W/90 weight GL55
Hypoid C GL5 transmission oil
20-24 U.S. ounces / 591-710 cc
Fork Oil....5 weight fork oil 165 SUS
Wet: 10.5 us ounces/310 cc
Primary Drive Oil ...... SAE 80W/90 Weight GL55
Wet 20-22 US ounces/ 591- 650 cc
Dry: (cover removed) 29 US ounces/ 857cc
Fuel......Unleaded Gasoline
91 Octane Minimum (R+M/2)
Brake Fluid ....DOT 4
(Do Not use DOT 5 silicone fluid)
Clutch Fluid....DOT 4
(Do Not use DOT 5 silicone fluid)
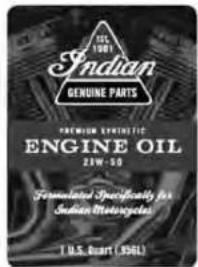
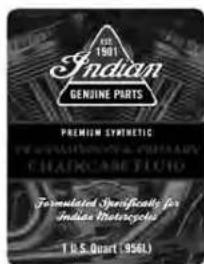
Indian Motorcycle Synthetic 20W50 Engine Oil
Synthetic 20W50 Engine Oil is formulated with synthetic base oil and premium engine additive which have physical properties that meet API SM and ILSAC GF-4 specification.
text_image
1901 Indian Genuine PARTS PREMIUM SYNTHETIC ENGINE OIL 25W-50 Formulated Specifically for Indian Motorcycles T U.S. Ruart (1968)
text_image
PREMIUM DISCHEDIC ENGINE OIL 20W-10 Pulping designed and not growth, biodegradable 200 gm. compliance of the above- performance and protection for all operating problems but before the first time the standard The product is designed to be demonstrate with products used in protection and repair in combination with product or equipment and the product is used in the product and maintenance of the product the standard The product is designed to be demonstrate with products used in correlation with correlation of the product the standard The product is designed to be demonstrate with correlation with correlation of the product the standard The product is designed to be demonstrate with correlation with correlation of the product the standard The product is designed to be demonstrate with correlation with correlation of the product the standard The product is designed to be demonstrate with correlation with correlation of the product the standard The product is designed to beIndian Motorcycle Synthetic Gear Oil
Indian Motorcycle Synthetic Gear lubricant is formulated with premium gear additive and synthetic base oil which have physical properties that meets API MT-1 and API GL-5 specification.
text_image
1981 Indian GENEINE PARTS PREMIUM SYMETHIC PRODUCTION & CHEMISTRY CHAOCARE TUDIO Formulated Specificable for Indian Watercolors T U.S. Quart (956L)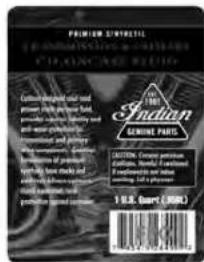
text_image
PREMIUM SYMBOLS INDIAN GARLIC POURTLE CLOTHING DESCRIBED WITH MEAT POMEER IN AVEY AND FINE AND COMPLEXING ITEMS IN THE EQUITY OF INDIAN GARLIC POURTLE GARLIC POURTLE 100 GARLIC POURTLE INDIAN GARLIC POURTLE GARLIC POURTLE 1 U.S. Market (200K)Indian Chief Specifications
Electrical
Spark Plugs ...... BOSCH 7955/ FR7DC+ P/N 61100001
Gap....036"/.90 mm
Battery 12 Volt, 20 amp/ Hr, 330 CCA (Cold Cranking Amps) Sealed Glass Mat Battery
Power Points
Front....3 Amp maximum
Rear.... 10 Amp maximum
Voltage Regulator....14 Volt / 42 Amp
Bulbs All bulbs are 12 volts
Headlamp....H4 12V 60/55W LL
Spot Lamps ...... H335W (35W)
Tail/Brake Light......1157LL
Front Fender Light......LED- Must be replaced as assembly
Turn Signal 1156LL
License Plate.....C5W
Speedometer......LED- Must be replaced as assembly
Indicator lights ....LED- Must be replaced as assembly
A Few Words about Safety
Indian Motorcycle is a strong supporter of motorcycle rider training programs. The purpose of this manual is not to provide instruction in the techniques and skills needed to ride your Indian Motorcycle. We highly recommend that all riders complete a recognized training program prior to operating any motorcycle. For the location of a Motorcycle Safety Foundation Course near you, call 1-800-446-9227 or visit www.msf-usa.org
This motorcycle is designed to be used only on the road by a licensed rider. Off-road operation in some areas may be illegal. Obey all local laws and regulations and ride safely at all times. Always ride with your headlamp on and never ride in someone else's blind spot.
Always wear a helmet, protective clothing, eye protection, and never ride under the influence of alcohol or drugs. Following these recommendations will help you experience countless hours of riding enjoyment at the controls of your Indian Motorcycle.
Pre-Ride Checklist
WARNING!
Read the entire FEATURES & SAFETY section of this manual before riding your motorcycle. A complete understanding of the features and capabilities of your motorcycle is essential to its safe operation. Anything less may result in serious injury or death.
Before each time you ride your motorcycle, ensure it is in safe operating condition. Walk around the motorcycle, checking for any visible problems, then:
- Check fuel level. Add fuel if required
- Check oil level (See Maintenance & Lubrication section)
- Check transmission fluid level (See Maintenance & Lubrication section)
- Check motorcycle and the ground beneath the bike for any fuel, oil or hydraulic fluid leaks
- Check steering for smoothness by turning the handlebars through the full operating range
- Check controls to ensure they are operating properly, including the front and rear brakes, throttle, clutch and shifter
- Check tires for wear, damage and correct pressure. Incorrect pressure will result in poor riding characteristics and can affect handling and stability. (See TIRE INFORMATION) for correct inflation pressures to use
- Check all electrical equipment and switches including the brake light, turn signals and horn for proper operation
- Check rear belt adjustment. Service as necessary
- Make sure that all nuts, bolts and screws are properly secured
Break-In: The First 1000 Miles (1600 km)
The more cautiously you treat your motorcycle during the break-in period, the more satisfied you will be with its performance later on. Overloading the engine at low RPM and/or running the engine prematurely at high RPM may result in damage to the pistons and/or other engine components.
Therefore, we urge you to ride your motorcycle during this period with the following considerations:
- Upon initial start-up (see COOL ENGINE STARTING PROCEDURE in the STARTING & RIDING section), do not let the engine idle for long periods as heat build up can be excessive
- Avoid fast starts with the throttle wide open. Instead, ride slowly until the engine warms up
- Avoid running the engine at extremely low RPM in higher gears (lugging the engine)
- For the first 50 miles (80 km), keep the engine speed below 2500 RPM in any gear, but do not lug the engine. DO NOT EXCEED 50 MPH (80 KM/H) See speed in gear chart at the bottom of this page
- From the first 50 miles (80 km) up to the first 500 miles (800 km), vary the engine speed, avoiding any steady pace for long distances. Keep the engine speed below 3500 RPM in any gear. DO NOT EXCEED 55 MPH (90 KM/H). See downshifting and up-shifting charts.
- For the balance of the first 1000 miles (1600 km), vary the engine speed through all the gears. Avoid overheating and
overloading the engine. DO NOT EXCEED 70 MPH (115 KM/H)
After the break-in period is complete, have fun and ride safely!
Speed in Gears
@ 2500 RPM @3500 RPM
Gear MPH Gear MPH Gear MPH Gear MPH
| 1st......18 | 1st......25 |
| 2nd......26 | 2nd......37 |
| 3rd......36 | 3rd......51 |
| 4th......47 | 4th......66 |
| 5th......59 | 5th......83 |
| 6th......68 | 6th......95 |
Ignition/Light Key Switch
The ignition/light key switch controls the electrical functions of the motorcycle. It is located on the center of the dash below the speedometer on the Chief.
The key locks and unlocks the ignition/light switch and should not remain in the switch while operating the motorcycle. The center position is the off position. Turn the switch clockwise to turn on the ignition (See figure 1). Note: the headlights do not
turn on until the engine is running.
WARNING!
Motorcycle riders must remain as visible as possible at all times. To aid in this, the headlight must be on at all times. Do not modify the ignition/light switch wiring to circumvent the automatic headlight feature.
Electric Starter Switch
The electric starter switch is located on the right handlebar controls.
• To start the motorcycle, pivot the engine stop switch to the RUN position and shift the transmission into neutral.
• DO NOT OPEN THE THROTTLE
- Turn the ignition switch ON, pull in the clutch and push the START switch.
NOTE: Two keys are provided with the motorcycle. Store one in a safe place.
NOTE: The headlights only illuminate once the engine is running. To override this function, toggle the spotlight switch (if equipped) to "OFF- ON-OFF" with the ignition switch in the on position
Engine Run/Stop Switch
The engine Run/Stop switch is located on the right handlebar switch cube.
The engine Run/Off switch must be in the Run position for the engine to start
Toggling the switch to the Off position interrupts electrical current stopping the engine or prevents the engine from starting.
The headlights and any accessories plugged into power ports will remain on until the ignition key is turned off.
NOTE: The engine stop switch must be in the RUN position to operate the engine
Throttle Control Grip
The throttle control grip is located on the right handlebar
(See figure 4). To open the throttle, roll the top of the control grip towards you. To close the throttle, roll the control grip away from you. The control grip is spring loaded so that when you remove your hand, the throttle returns to the idle position.
The clutch lever is located on the left handlebar (See figure 3). With your left hand, pull the lever towards the handlebar grip to disengage the clutch. To engage the clutch, release the lever slowly until it reaches its full resting position.
The left hand control is equipped with adjustable clutch
natural_image
Close-up of a motorcycle's gauge dial and rear bumper (no visible text or symbols)Figure 1: Ignition switch flips open to access key lock.
Features and Safety
lever. This will allow the rider to adjust the lever to his/her preference by changing the dial settings. Setting #1= largest reach. Setting #4= smallest reach.
natural_image
Close-up of a mechanical lever handle and lever arm (no visible text or symbols)Figure 2: Lever Adjustment
To change settings, gently push lever away from hand grip and use thumb to rotate. Rotate dial to desired setting and release lever. The # will align with the arrow on the lever. (See figure 2).
natural_image
Close-up of a mechanical device with black handle and wiring (no visible text or symbols)Figure 3: Left Hand Control
WARNING!
Positioning your fingers between the clutch hand lever and handlebar grip could hamper the operation of the clutch. This may cause loss of control of the motorcycle, resulting in severe injury or death.
Horn Switch
The horn switch is located on the left handlebar controls. The horn is operated by pressing the switch (See figure 3).
High-Low Beam Switch
The high-low beam switch is located on the left handlebar controls. By pressing the switch, you select either high or low beam strength for the headlamp (See figure 3).
NOTE: When the high beam is on, the high beam (blue) indicator light remains lighted (See the INDICATOR LIGHTS section of this manual).
Passing/Fog (Spot) Lamp Switch
The spot lamp switch is located high on the rear, left-hand side of the headlight cover. (See figure 5)
NOTE: The passing/fog lamps do not work when the headlamp is on high beam.
natural_image
Close-up of a mechanical device with lever and cable (no visible text or symbols)Figure 4: Right Hand Control
Turn Signal Switch ( )
The turn signal switch is located on the left
switch cube. Pushing the switch right turns the right front and rear signals on. Pulling the switch left turns the left front and rear signals on. The turn signals will cancel automatically, or can be canceled manually by repeating
natural_image
Close-up of a metallic circular component with a central hole, mounted on a plain surface (no text or symbols visible)Figure 5: Spot Lamp Switch
the activation of the button. NOTE: If you signal to turn in one direction, then press the switch for the opposite turn signal, the first signal is automatically cancelled and the opposite signal lamps will start to flash.
Hazard Warning 4-way Flasher ( △ )
The hazard 4-way flasher is located on the right switch cube. The hazard 4-way flasher operates all four signal lamps at the same time. Pressing the switch to the left activates the warning flashers. The hazard flasher must be activated when the ignition switch is the ON position. Once activated, the hazard flashers will continue to flash in OFF position. The hazard flashers can be deactivated with the ignition switch in either the ON or OFF position.
Mirrors
Your vehicle is equipped with convex mirrors. Objects seen in mirror may be closer than they appear. Be sure to adjust your mirrors prior to starting your ride.
NOTE: To adjust the mirrors, first sit on the motorcycle and assume a comfortable riding position. Then, position the mirrors so that you can see a small portion of your shoulders in each mirror.
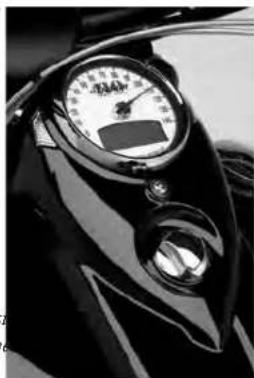
Indicator Lights
The 4 indicator lights are located in the speedometer/ odometer on the fuel tank. The lights represent: high beam indicator, neutral, engine oil pressure and low fuel. (See figure 6).
The blue high beam indicator lights when the high beam headlamp is in operation.
The green neutral indicator lights to indicate when the transmission is in neutral.
The green turn signal indicators flash when the turn signals are in operation. When the 4-way hazard flashers are in operation the turn signal indicators will flash.
The red engine oil indicator lights when the ignition is
turned on before starting the engine. If, however, the red light continues to glow when the motorcycle engine speed is above idle, this indicates that oil is not circulating through the engine properly. See dealer for service.
text_image
Schindler SCHINER 000-0012 YOURFigure 6: Speedometer
Features and Safety
Speedometer/Odometer
The speedometer registers forward speed in miles per hour (or kilometers per hour). The odometer registers the number of miles (or kilometers) traveled (See LCD figure 6).
NOTE: Do not tamper with or alter the odometer. This is illegal and could damage the speedometer. In addition, this violates a condition of your IM Warranty.
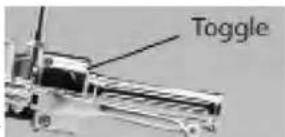
LCD Display
The toggle mode button is located on the backside of the left hand control.(See Figure 7) With the ignition on, press and toggle mode switch to change display modes.
text_image
ToggleFigure 7: Toggle mode button
The LCD display modes:
- Trip 1
- Trip 2
- RPM
- Speed
- Hour Meter
- Battery Voltage
- Clock
Trip Meter Reset
To reset the trip meter, hold mode button for approximately 3 seconds. This will reset the trip to zero.
MPH or Km/h Setting
To change setting between MPH or Km/h, toggle mode button to odometer display. Hold mode button for 30 seconds to change setting.
Low Fuel Display
When fuel becomes low, the low fuel sensor will illuminate a low fuel symbol on the speedometer LCD display (See figure 6). The LCD will automatically go to Low Fuel display and start to count number of miles (or kilometers) ridden since low fuel indicator was activated.
Clock Set Operation
Toggle mode button to display Clock display. To set clock, hold mode button for approximately 3 seconds. The clock display will flash. To change hour, press mode switch until desired time is achieved. To change minutes, hold mode switch until minutes flash. Press mode switch until desired time is achieved. Hold mode switch until time stops flashing.
Fault Display
If one of the following is no longer functioning properly,
the LCD display will alert you.
| Description: | Display if Fault: |
| Fuel Pump | |
| O2 Heat | 2HTR |
| Starter Solenoid | |
| Turns Flasher | |
| Head Light | |
| Brake Light | |
| Spot Light |
To remove warning, fix the issue and/or press and hold toggle button for more than 2 seconds. This will disable the lamps display until the next ignition cycle.
CAUTION
If the oil pressure indicator light does not go off at speeds above idle, it often indicates an empty oil tank or diluted oil. Check the oil supply first. If the oil supply is normal and the oil indicator light remains on, stop the engine immediately. Do not operate the motorcycle until the problem is identified and the necessary repairs are made.
Gear Shifter
The gear shifter is located on the left side of the
motorcycle and is operated with the left foot (See figure 8). Pushing the lever all the way down shifts the transmission into the next lower gear. Lifting the lever all the way up shifts the transmission into the next higher gear. The shift lever must be released after each gear shift before another gear shift can be made. Neutral position is between first and second gears. First gear is the last gear position that can be found by pushing
the lever all the way down as many times as possible. To shift from first gear to neutral, gently lift the lever half a stroke.
Neutral will be easier to find if the motorcycle is rolling slowly or almost completely stopped.
Finding neutral when not rolling is typically more difficult. Two techniques of neutral when stopped.
natural_image
Close-up of a motorcycle's front wheel and side arm mechanism (no visible text or symbols)Figure 8: Gear Shifter
- With the clutch pulled inward, rock the motorcycle forward and backward a few inches. Shift the transmission into neutral while rocking.
- With the transmission in first gear gently release the clutch until it just begins to engage. Apply upward
Features and Safety
pressure on the shift lever and quickly pull the clutch inward.
Both techniques load and unload the transmission shift dogs allowing them to disengage.
CAUTION
With the motorcycle standing still, you may experience difficulty shifting gears. When this difficulty is experienced, do not attempt to force the shift. This will result in a damaged or broken shifter.
With the engine stopped: to shift gears, roll the motorcycle backward and forward with the clutch fully disengaged while maintaining a slight pressure on the shift lever.
With the engine running and the motorcycle standing still: roll the motorcycle as indicated above, or engage the clutch very slightly while applying light pressure to the shifter lever to shift gears.
See SHIFTING GEARS in the STARTING & RIDING section for more information.
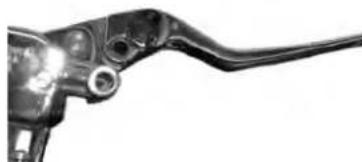
Front and Rear Brakes
The brake hand lever is located on the right handlebar and is operated by the right hand. The brake hand lever controls the front wheel brake (See figure 10).
The rear brake pedal is located on the right side of the motorcycle and operated by the right foot. The brake pedal controls the rear wheel brake (See figures 9).
When operating the brakes, use both front and rear brakes in conjunction.
natural_image
Close-up of a mechanical device with attached components, possibly a vehicle or robotic arm (no visible text or symbols)Figure 9: Rear Brake Control
The front brake
control is equipped with adjustable levers. This will allow the rider to adjust the lever to his/her preference by changing the dial settings.
Setting #1= largest reach. Setting #5= smallest reach.
To change settings, gently push lever away from hand grip and use thumb to rotate. Rotate dial to desired setting and release lever. The number will align with the arrow on the
lever (See figure 2).
WARNING!
Never lock either the front or rear brake. This could cause loss of control, resulting in severe injury or death.
natural_image
Industrial machine setup with articulated arm and control panel (no visible text or symbols)Figure 10: Front Master Cylinder
After riding in heavy rain without applying the brakes or through water deep enough to wet the brake components, the initial braking action may be somewhat reduced. In such circumstances, increased brake pressure may be necessary. Be sure to maintain a safe distance from the vehicles in front.
WARNING!
Resting your foot on the rear brake pedal will cause excessive and premature wear of the brake pads. This can also overheat the brakes resulting in reduced braking efficiency. When the brakes are overheated, stopping distances may increase, and could result in severe injury or death.
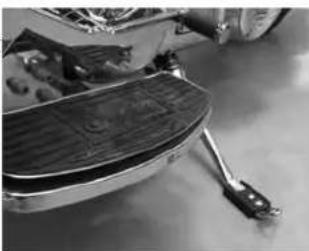
Sidestand
Your motorcycle is equipped with a sidestand located on the left side of the motorcycle. When using the sidestand, always turn the handlebars to the left for maximum stability. (See figure 11).
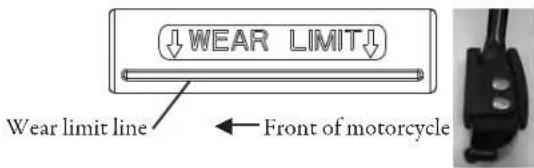
Your sidestand is equipped with a pad that is subject to wear over time. Periodically
natural_image
Close-up of a mechanical brake lever assembly (no visible text or symbols)Figure 11: Sidestand
inspect your sidestand for wear. See your Indian dealer when the wear limit indicator is reached.
text_image
WEAR LIMIT Wear limit line ← Front of motorcycleWARNING!
If the motorcycle weight is not resting on the sidestand, it will not lock. In this situation, any movement of the motorcycle could cause the sidestand to retract slightly. If the sidestand is not in the full forward position when the motorcycle weight is rested on it, the motorcycle could fall over, possibly causing injury and damage to the motorcycle.
CAUTION
Always park the motorcycle on a level, firm surface prior to engaging the sidestand. If parked on an uneven surface, the motorcycle weight could cause the motorcycle to tip over. As a result, possible injury and damage to the motorcycle could occur.
WARNING!
Be sure the sidestand is fully retracted before riding the motorcycle. If the sidestand is not fully retracted during vehicle operation, it could contact the road surface. This could distract the rider, causing possible loss of control resulting in potential injury and damage to the motorcycle.
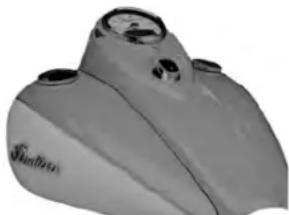
Fuel Filler Caps
Your motorcycle is equipped with two fuel filler caps, located on top of the fuel tank (See figure 12). Only the right cap is functional, the left cap is removable but non-functional.
NOTE: The left cap is non-operable and no attempt should be made to remove it for fueling or any other purpose.
To open the fuel filler cap; twist the right cap counterclockwise until it is removed.
To tighten the cap; turn the right cap clockwise until the seal just touches the tank and then continue to tighten until the cap clicks.
Add fuel to the tank until it touches the bottom of the filler neck. The tank is full at this level When refueling, place gasoline in right tank fill only.
WARNING!
Always remove the fuel filler cap slowly and fill the fuel tank slowly to prevent spillage. The tank is full when the fuel touches the bottom of the filler neck. Do not overfill the fuel tank. Leave space in the fuel tank to allow for the fuel to expand. Expansion can cause gasoline to overflow through the fuel tank vent tube. After refueling, be sure the fuel filler cap is securely tightened. Fuel is both flammable and explosive. Failure to follow these warnings could result in an explosive severe injury or death.
natural_image
3D rendered model of a mechanical component with no visible text or symbolsFigure 12: Fuel Tank

natural_image
Simple line drawing of a boat hull with water level and a small rectangular object on the side (no text or symbols)Figure 13: Fuel Tank and Filler Neck
Fuel Blends
To maintain engine durability and performance, we only recommend using a premium unleaded fuel with an octane rating of at least 91 (R+M) / 2. If premium unleaded fuel is not available and low octane fuel is used, follow these precautions:
• Have the fuel tank filled only partially with
unleaded regular and fill up with premium unleaded as soon as possible.
CAUTION
Using gasoline containing an alcohol additive such as Methanol may cause the failure of the fuel system rubber components and/or engine damage. Do not use gasoline that contains Methanol.
CAUTION
The paint on your motorcycle can be stained by fuel spills. Do not overfill the fuel tank.
Exhaust - Your Indian Chief motorcycle is equipped with a catalytic converter installed in the exhaust system.
CAUTION
Engines run with a misfire or non-firing cylinder can overheat the catalytic converter. Damage to the catalytic converter and emission control loss may occur with overheating – DO NOT OPERATE the motorcycle if a misfire or non-firing cylinder exists.
Accessories and Cargo
Adding accessories and cargo to your motorcycle can affect its ride and handling. Only use Indian Motorcycle-approved accessories.
WARNING!
Never exceed the weights and capacities of your motorcycle and accessories. Doing so may adversely affect the handling of your vehicle resulting in severe injury or death.
- The Gross Vehicle Weight Rating (GVWR) is the maximum weight that the motorcycle may safely carry. The GVWR comprises the weight of the motorcycle, the rider, the passenger, any accessories and/or cargo. To find the GVWR for your motorcycle, look for the information sticker located on the down frame tube near the steering head or see Page 7, Indian Chief Specs.
- Adjust the rear shock absorber to compensate for the increased load the motorcycle is carrying (See your dealer for adjustment information).
- When adding cargo, distribute the weight evenly on both sides of the motorcycle. Try to keep the cargo weight concentrated close to the motorcycle and as low as possible. Do not place heavy items too far behind the rider or on the handlebars or front forks.
- Ensure the cargo is secured properly and will not shift while the motorcycle is in operation. Check the cargo regularly to ensure it has not shifted.
- Do not exceed 80 mph (130 km/h) when carrying a passenger or cargo. Be sure to always obey posted speed limits.
Features and Safety
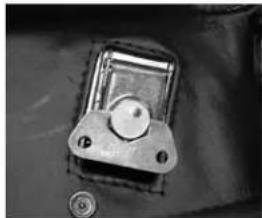
Saddlebags
Motorcycles equipped with Indian branded saddle bags
should not exceed 15 pounds of cargo per side. Cargo weight should be distributed evenly between the two saddlebags. Your saddlebags are attached with a rotary latch that allows easy removal and installation of your saddlebags. (See Figure 17).
natural_image
Close-up of a metallic mechanical component with mounting holes and a circular knob (no visible text or symbols)Figure 17: Saddle Bag Latch
To remove your saddlebag, unbuckle the outside clasps and lift saddlebag lid. Turn each rotary latch counterclockwise and remove the 1/4 turn fastener. Lift and remove saddle bag from motorcycle. To install, reverse procedure.
Passenger Backrest
Your motorcycle is equipped with a “quick attach” feature that is integrated as part of the saddlebag mounts. This feature comes standard on Roadmaster models or can be added to any other models. The “quick attach” feature can be used to mount the passenger backrest and other Indian “quick attach” accessories.
To remove the passenger backrest you will need to remove the 1/4 turn fastener located inside the saddlebag (if your bike is equipped with saddlebags) or visibly on the saddlebag mounts. Once the 1/4 fastener is removed, pull up to release the backrest from rear mounts. After the backrest is cleared of rear mounts, pull back to remove the backrest from the motorcycle. To install, reverse directions.
Windshield
Your motorcycle is equipped with a "quick attach" feature for the windshield that is integrated as part of the headlight bezel mounts. This feature comes standard on Roadmaster and Vintage models and is offered as an accessory for some other models (see your dealer for accessory information). Your windshield uses a key lock to ensure it is properly locked into place and to prevent theft.
To remove the windshield, unlock the windshield lock located on the right side of the motorcycle at approximately handlebar height. Push firmly on upper windshield to remove windshield from upper mounts. Pull up and out on windshield to remove from motorcycle. To install reverse directions.
WARNING!
Placing excessive weight, or uneven distribution of weight in the saddlebags will adversely affect the handling of your motorcycle. This may cause loss of control of the motorcycle, resulting in severe injury or death.
This motorcycle has been carefully designed and engineered to be ridden in its original configuration. The addition of accessories can adversely affect the handling of the motorcycle. Use only Indian Motorcycle-approved accessories.
WARNING!
Never exceed the Gross Vehicle Weight Rating for this motorcycle. Overloading the motorcycle may cause unstable handling which could result in severe injury or death.
Tire Information
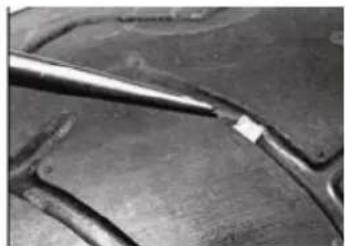
Tread wear indicators (TWI) are required by law. These indicators are located in at least six places on the tread circumference and become visible at a tread depth of approximately 1/16 in. (1.5 mm), at which point the tire is considered to be worn and should be replaced. The tread wear indicators appear as a solid band across the tread. (See figure 19).
natural_image
Close-up of two metal tools with a small white object on one end, placed on a textured surface (no text or symbols visible)Figure 19: Tire Tread Wear
WARNING!
Do not allow your tires to wear excessively. Replace tires as tread wear approaches the tread wear indicators. Failure to do so could result in severe injury or death.
WARNING!
For your safety, tires, rims and air valves must be correctly matched to wheel rims. Mismatched tires, rims and air valves may result in damage to the tire bead during mounting or may allow the tire to slip off the rim, possibly resulting in tire failure.
Use only the proper size tires specified with the same or higher load ratings. The tires Indian has selected give proper clearance between fenders, swingarm, drive belts, etc. Use of larger diameter or wider tires may cause interference between the tire, fender, swingarm, drivebelt, etc. Tire sizes are molded on the tire sidewall.
For model, tires, and sizes and recommended riding pressures, see the Specifications pages.
Operating Recommendations
Prior to operating your motorcycle, conduct a pre-riding check to ensure the motorcycle is in proper running condition. See the PRE-RIDING CHECKLIST on page 11.
WARNING!
Never operate after consuming alcohol or drugs. Doing so could result in severe injury or death.
CAUTION
Do not run the engine at high RPM with the clutch disengaged or the transmission in neutral. Never exceed the maximum safe RPM (5250) as this may cause serious engine damage.
CAUTION
The engine supplied in your motorcycle is air-cooled and requires unrestricted air flow to ensure proper operating temperature. Long periods of idling or traveling at very low speeds (such as during a parade) may overheat the engine, resulting in serious engine damage.
WARNING!
When riding on wet or icy roads, braking efficiency is greatly reduced. Exercise caution when riding immediately after the start of a rainfall as oil from the road surface combines with the water.
When descending a long, steep grade, downshift to a lower gear to use the engine compression to help slow the motorcycle. Avoid using the brakes exclusively and continuously when descending a long, steep grade as this may overheat the brakes, resulting in reduced braking efficiency.
Starting the Engine
Cool Engine Starting
After a cold start, the engine should be warmed up for 30 seconds minimum at low RPM. Do not run the engine above 2500 RPM immediately after a cold start. Do not open throttle when starting engine. Idle speed is computer controlled and idle speed will adjust automatically depending on engine temperature and air temperature.
- Place the engine stop switch in the RUN position.
- Ensure that the throttle is fully closed.
- Turn the ignition switch to the ON position.
- Disengage clutch.
- Press the starter switch to activate the electric starter.
After an initial 30 second to 1 minute warm-up period, begin riding
Warm Engine Starting
- Place the engine stop switch in the RUN position.
- Turn the ignition switch to the ON position.
- Disengage clutch.
- Ensure that throttle is fully closed
- Press the starter switch to activate the electric starter.
DO NOT OPEN THE THROTTLE WHILE STARTING THE ENGINE.
If the engine still does not start, remove the spark plugs a
second time. A nominal waiting period of 20 minutes may be required to allow the excess gas to evaporate from the cylinders. Replace the spark plugs and perform the normal starting procedure.
Stopping the Engine
To stop the engine, turn the ignition/light key to the OFF position.
If the engine stalls or stops suddenly, turn the ignition switch to the OFF position to prevent battery discharge.
Shifting Gears
Starting the Motorcycle in Motion
To engage first gear from a start, pull the clutch lever towards you to fully disengage the clutch. With your left foot, push the forward shifter lever down firmly but gently to engage first gear. With the motorcycle upright and the engine idling, release the clutch lever slowly to engage the clutch and at the same time, open the throttle gradually.
NOTE: Always use first gear when starting the motorcycle in motion.
Upshifting
To engage second gear after the motorcycle is underway, shift lever down once and release
Release the clutch lever slowly and open the throttle gradually. To engage third, fourth, fifth, and sixth gears, repeat this same procedure.
Upshifting (Acceleration) Chart
| Speed Mph Km/h | |
| 1st to 2nd gear 16 25 | |
| 2nd to 3rd gear 26 42 | |
| 3rd to 4th gear 38 61 | |
| 4th to 5th gear 45 72 | |
| 5th to 6th gear 62 100 |
Downshifting
To shift to lower gears, close the throttle partially, disengage the clutch and press down on the gear shift lever once and release (See figure 20). When engine speed decreases, such as while climbing a hill or slowing for a corner, partially closing the throttle will ensure the engine accelerates slightly as soon as the clutch is disengaged helping the transmission gears mesh.
text_image
Technical diagram of a mechanical component with numbered parts for identificationFigure 20: Upshift
Downshifting (Deceleration) Chart
| Speed Mph Km/h | |
| 6th to 5th gear 62 50 | |
| 5th to 4th gear 35 56 | |
| 4th to 3rd gear 24 39 | |
| 3rd to 2nd gear 15 24 | |
| 2nd to 1st gear 12 19 |
(All figures are approximate)
NOTE: Your Indian motorcycle is equipped with an RPM Rev limiter that cuts power to the engine at 5250 RPM.
CAUTION
The clutch must be fully disengaged before attempting a gearshift or transmission and primary chain damage may occur.
WARNING!
When downshifting, do not select a lower gear at speeds higher than those listed in the above table. Down shifting when your speed is too high may damage the transmission or cause the rear wheel to lose traction. This may cause loss of control resulting in severe injury or death.
CAUTION
Always shift to neutral before stopping the engine. Neutral is between first and second gears. When the transmission is in neutral, the green indicator light in the instrument cluster will glow.
Neutral position is a half stroke upward from 1st gear. Neutral will be easier to find if the motorcycle is rolling slowly or almost completely stopped. Finding neutral when not rolling is typically more difficult. See GEAR SHIFTER in the FEATURES AND SAFETY section for more information.
Safe Operating Maintenance
To keep your motorcycle in safe operating condition, regular and thorough maintenance is essential.
CAUTION
Prior to operating your motorcycle, conduct a pre-riding check to ensure the motorcycle is in proper running condition. See the PRE-RIDING CHECKLIST on page 11.
Break-In Maintenance
Regular maintenance is always important, but never more so than in your motorcycle's first 500 miles (800 km). As your motorcycle reaches this mark, take it to your authorized Indian Motorcycle dealer for initial service operations.
NOTE: In order to keep your INDIAN WARRANTIES valid, and to ensure proper emissions system operation, new motorcycle service is required.
WARNING!
Always follow service and maintenance recommendations because they all have a bearing on the safe operation of your motorcycle. Failure to follow the service and maintenance recommendations in this manual may result in severe injury or death.
At First 500 Miles (800 km)
- Change oil and replace filter
- Change transmission fluid and clean magnetic drain plug.
- Check brake fluid level and condition.
- Inspect brake lines and system for leaks.
- Inspect oil lines and system for leaks.
- Inspect clutch fluid level, lines and system for leaks.
- Adjust clutch
- Lubricate the front brake hand lever, side stand bushing, throttle control grip, and clutch control hand lever.
- Inspect throttle control cables and adjust as needed.
- Check rear brake pedal adjustment.
- Inspect brake pads and discs for wear.
- Check and adjust inner primary chain.
- Change primary drive oil.
- Check and adjust rear drive belt.
- Inspect air filter.
-
Inspect fuel lines and fittings for leaks.
-
Clean battery connections.
- Check operation of all electrical equipment and switches.
- Clean throttle body
- Check spark plug condition and replace as required.
- Check for stored Diagnostic Trouble Codes (DTCs).
- Check tires for pressure and signs of wear.
- Check wheel spoke tightness.
- Check rear shock absorber mounting and inspect for leaks.
- Check swingarm pivot bolts for proper tightness.
- Check engine mount fasteners (first 500 mile service only).
- Check alignment.
- Check tightness of all fasteners, except engine head bolts.
- Evaporative Emission Control System (CA only) - inspect hose condition & routing.
- Conduct road test.
Regular Service Intervals
Regular service will help keep your new Indian ^e motorcycle operating at its optimum condition. Your authorized Indian Motorcycle dealer is best equipped to service your motorcycle with factory-approved methods and replacement parts.
NOTE
Regular maintenance is required to keep your new motorcycle warranty valid. The use of other than Indian Motorcycle approved parts and service methods may void the INDIAN WARRANTIES. Furthermore, any
alterations to the emission system components, such as the exhaust system, will void your INDIAN WARRANTIES and/or may be in violation of Federal and State laws.
CAUTION
The regular maintenance schedule provided in this manual is intended only as a guideline. If you operate your motorcycle under severe or adverse conditions – in extreme cold or heat, over very bad roads, through standing water or thick dust, at high altitude, etc. – you should perform the regular maintenance on your motorcycle more frequently to ensure continued safe operation.
Engine Lubrication
Indian ^® brand 20w-50SG engine oils are specifically approved for their suitability in our engines. Therefore, use only engine oils recommended by Indian Motorcycle. If you need to add oil in an emergency and recommended oil is not readily available, use only a high-quality, 20w-50SG motorcycle oil. At the first opportunity, see your authorized Indian Motorcycle dealer to change back to the recommended oil.
CAUTION
Use of non-Indian brands or non-detergent oils can cause engine damage. (Oil filters must be 30 micron only.)
Failure to follow recommendations for engine oils could result in engine damage not covered by the Indian Motorcycle Limited Warranty.
Engine Oil Additives
CAUTION
Do not blend oil additives with engine oil as they may be harmful to the engine. Damage or malfunctions resulting from blending oil additives are not covered by the Indian Motorcycle Limited Warranty.
Checking Oil Level
As proper engine lubrication is essential to engine efficiency and durability, we recommend that you check the oil level frequently between regular service intervals. Checking the engine oil at every refueling stop is a habit that will help ensure long engine life.
The oil should be checked and topped off only when the engine is at normal operating temperature. If the engine is not at normal operating temperature, the motorcycle should be ridden until the engine reaches that stage. When the engine is sufficiently warmed up, turn the engine off to check the oil level
Starting and Riding
WARNING!
To avoid possible serious burns or injury, use extreme caution in conducting checks when the engine is warm or hot.
The Chief engine oil tank and filler plug are located on the right side of the motorcycle, below the starter.
To check the engine oil level:
- Place the motorcycle in an upright and level position.
- Remove the filler plug from the oil tank filler spout.
- Wipe the dipstick with a clean cloth.
- Insert the dipstick fully into the oil tank.
- Remove the dipstick and observe the oil level.
- The oil level should show on the dipstick but below the mark on the dipstick (See Figure 22).
- If the oil level is low, carefully add Indian® 20w-50SG oil to the oil tank
oil and filter
service.
Winter
Lubrication
Operating your
motorcycle in
cold conditions
requires special
attention,
especially with
regard to engine
lubrication. In winter, the oil change intervals must be
Figure 21: Chief Engine Oil Fill Plug and Dipstick
CAUTION
Do not allow the hot oil level to fall below the low level mark on the dipstick. Do not overfill the oil tank as this may cause oil to overflow into the air filter. The engine oil should be changed aer the rst 500 miles (800 km) and at 2500 mile (4025 km) intervals therea er when riding under normal conditions. In severe or adverse conditions, change the engine oil more frequently. See your dealer
Figure 22: Engine Oil Dip Stick
more frequent than for motorcycles operated in warm conditions. The further below freezing the temperature drops, the more frequent the oil change intervals should become. Due to the fact that water vapor condenses into water on the cold metal surface of an engine, water can appear in the oil tank when starting and warming up the
Starting And Riding
engine. If the engine does not reach normal operating temperature in cold conditions, this water will not vaporize again and will accumulate in the oil tank. In freezing weather, water in the oil tank will become slush or ice and may block the oil lines causing damage to the engine.
CAUTION
Water mixed with oil over a period of time can form sludge that is harmful to the engine and causes added stress to various working parts. Failure to follow recommendations for winter lubrication could result in engine damage not covered by the Indian Motorcycle Limited Warranty.
Transmission Lubrication
Checking and changing transmission lubricant regularly enhances the performance and service life of transmission components. The transmission fluid should be changed after the first 500 miles (800 km) and at 5000 mile (8000 km) intervals thereafter when riding under normal conditions. Indian ^ transmission fluids are specifically approved for their suitability in our transmissions. Therefore, use only Indian ^ 80-90w transmission fluid.
The transmission fill plug dipstick is located on the right side of the motorcycle and at the right side of the transmission housing (See figure 25). To check the transmission fluid level, make sure the engine is at its normal operating temperature, then:
- Place the motorcycle in an upright and level position.
- Remove the threaded fill plug dipstick.
- Clean the dipstick, install it (thread in completely) in the housing and remove it again.
- Check to see that the fluid level is between the notch and the end of the dipstick
- If the fluid level is too low, carefully add 80-90 weight transmission fluid.
- Once the proper fluid level is reached, replace the threaded fill plug and tighten by hand.
Transmission Oil Change
See your local dealer for service.
natural_image
Close-up of a hand adjusting a transparent plastic object with a small white object (no visible text or symbols)Figure 25: Transmission oil dipstick
Primary Chain
This motorcycle has a primary chain and wet clutch. The chain and wet clutch are designed to run in an oil bath to reduce wear and decrease noise. The primary chain should be checked and the oil changed after the first 500 miles and every 5000 miles thereafter.
The primary chain is located inside the primary housing on the left side of the motorcycle (See figure 26). If the chain is loose, worn or damaged in any way, it will cause the motorcycle to run improperly and the chain and sprockets to wear excessively.

natural_image
Close-up of a mechanical assembly showing gears and shafts (no visible text or symbols)Figure 26: Primary chain and housing
Primary Chain Tension
See your dealer for inspection and service.
Primary Oil Change
See your dealer for service.
Rear Drive Belt
The rear drive (secondary) belt should be checked after the first 500 miles (800 km) and every 2500 miles (4000
km) thereafter.
The rear drive belt should be checked before operating the motorcycle. If the belt tension is not correct, or the belt is worn or damaged in any way, it will cause the motorcycle to run improperly and the belt and sprockets to wear excessively.
See your dealer for proper drive belt adjustment.
Clutch
The clutch release mechanism on your Indian Motorcycle is hydraulically operated and requires no external adjustment. The clutch fluid level should be checked every 2500 miles. Use only D.O.T. 4 brake fluid in your clutch master cylinder. If the clutch is slipping when the clutch is lever pulled in or dragging when the clutch lever is being released, this indicates the need for service.
For proper service see your authorized Indian Motorcycle dealer.
CAUTION
D.O.T. 4 brake fluid will damage painted surfaces. Protect all painted surfaces from fluid contact when inspecting or servicing brake and clutch systems. Failure to conform can result in cosmetic damage.
Greasing
The following is an overview of the parts of the
motorcycle that should be greased or lubricated at regular intervals. Use only recommended special purpose grease for steering head bearings. For all other applications, use recommended multi-purpose grease or lubricant.
- Repack the steering head bearings every 20,000 miles (32,000 km) or 2 years, whichever comes first.
- Every 5000 miles (8000 km), lubricate the front brake hand lever and the clutch control hand lever.
- Lubricate side stand bushing every 5000 miles (8000 km).
CAUTION
As some greases interact chemically when mixed, avoid switching brands of greases.
Your motorcycle should be greased regularly, especially after washing or being ridden under severe or adverse conditions. For recommended service intervals, please see the MAINTENANCE SCHEDULE & RECORDS section at the back of this manual.
Front Fork Oil
The front fork oil should be drained and refilled every 10,000 miles (16,000 km) or every second year, whichever comes first. Consult the SPECIFICATIONS section of this owner's manual for proper fork oil weight and volume. If the front fork does not appear to be working properly, or if there is significant oil leakage, see your authorized Indian Motorcycle dealer as soon as
possible.
Fuel Filter
The fuel filter is located in the fuel tank attached to the high pressure fuel pump. Refer to the Service Manual or your authorized Indian Motorcycle dealer for additional information. The fuel lines and fittings should also be checked for leakage regularly. The fuel system is under pressure and caution must be used when inspecting and servicing the fuel system. For safe and proper service see your authorized Indian Motorcycle dealer.
Fuel Injection
The fuel injection on your motorcycle has been specifically designed for peak performance and efficient emissions control operation. All fuel injection settings – including the throttle and idle speed – have been set at the factory. No attempt to alter or re-program the fuel injection should be attempted. We strongly recommend that any service to the fuel injection system be performed by your authorized Indian Motorcycle dealer.
NOTE
Failure to follow recommendations for engine control programming could result in engine damage not covered by the Indian Motorcycle Limited Warranty and is a violation of Federal Law.
Air Filter
The engine air filter is located on the left side of motorcycle, and behind the air filter cover (See figure 28). The engine air filter should be inspected every 2500 miles (4000 km) and more often when riding in dusty conditions.
natural_image
Close-up of a vintage electric locomotive head dial with visible speedometer (no text or symbols beyond the dial)Figure 28: Air Filter Cover
Air Filter Removal
To remove the air cleaner loosen and remove the 2 socket head cap screws holding the outer cover of the air box. Remove the air filter and replace with a new unit.
CAUTION
Do not run the engine without the air filter element and the air filter in place. Dust and debris could be drawn into the engine, thereby causing significant damage.
Cleaning Procedure
- Clean:
Spray K&N Air Filter Cleaner onto both sides of the air filter until it completely saturates the pleated material. Allow cleaner to soak into both sides of air filter for 10 minutes to loosen the dirt. Do not let cleaner dry on air filter.
- Rinse:
Rinse off air filter with cool low-pressure water. Allow gravity to flush dirt out of air filter by applying water to the clean side of the filter; up and down the length of the pleats.
Continue to rinse the filter until all traces of cleaner are gone. If the filter is extremely dirty it may be necessary to repeat steps 1 and 2. If there are spots of dirt remaining on the filter, spray each spot directly with cleaner, allow a few minutes for it to soak and repeat rinsing step.
- Dry:
After rinsing, gently shake off excess water and allow filter to dry naturally. Do not proceed to the oiling step until the filter is completely dry.
Spark Plugs
See your authorized Indian Motorcycle dealer for service.
Emissions Control
Certain systems of the engine serve to keep the toxic component of exhaust gases within permissible limits required by law. These systems will function properly only when maintained strictly according to factory specifications. Therefore, any adjustments to the engine should be carried out only by your authorized Indian Motorcycle dealer.
WARNING!
Inhalation of exhaust gases is hazardous to your health. All exhaust gas contains carbon monoxide and inhaling it can cause unconsciousness and lead to death. Only operate vehicle in well-ventilated areas.
Headlamp
The headlamp is a replaceable quartz halogen bulb type. When replacing the headlamp, use only the specified bulb, available from your authorized Indian Motorcycle dealer. Using the incorrect bulb may cause charging system problems (See bulb chart in specifications page).
CAUTION
Never touch the quartz halogen bulb with your bare fingers as fingerprints will damage the glass and cause the bulb to fail. While handling the bulb, always wrap it in paper or a clean dry cloth.
Voltage Regulator
The output of the alternator is controlled and changed from alternating current (AC) to direct current (DC) by the voltage regulator. Located on the frame in front of the engine, the voltage regulator increases the charging rate when the battery is low and decreases the charging rate when the battery is well charged.
If you experience any electrical system difficulties that
may be linked to the alternator or voltage regulator, do not attempt to perform repairs yourself. Instead, we recommend taking the motorcycle to your authorized Indian Motorcycle dealer as they have the necessary electrical testing equipment to solve the problem quickly and efficiently.
Body Control Module
The wiring of your motorcycle is protected by the Body Control Module (BCM): headlights, engine stop/run switch, ignition coil, brake light, horn and turn signals. When an electrical fault is recognized by the BCM, the BCM removes power from the circuit to protect the wiring and electronic components on the vehicle.
The BCM continually monitors the output to check if the fault is still there. To monitor this, the BCM returns power to the circuit to measure the current in the circuit. If the fault is still there, the BCM removes power again. When this happens, the motorcycle will operate erratically and the battery will eventually lose its charge.
For electrical problems, we recommend taking the motorcycle to your authorized Indian Motorcycle dealer for service.
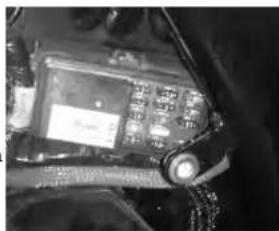
Fuses
Your motorcycle is protected by multiple fuses located under the left side of the center fairing and a main "J" fuse (See Figure 29) located under the right side of the center fairing. A spare "J" fuse is located near the "J" fuse holder, attached to the harness.
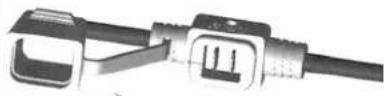
Figure 29: "J" Fuse & holder
Fuse Removal Procedure
- Remove left center fairing under the seat using a 5/32"
allen wrench (See Figure 30)
- Disconnect the auxiliary power connector
NOTE: Red locking tabs must be moved back before using the clips on the top and bottom of the fuse box cover.
- Remove fuse and replace with spare fuse
natural_image
Close-up of a motorcycle's front wheel and side gear (no visible text or symbols)Figure 30: Left Center Fairing
- Install center fairing fasteners and tighten.
Battery
Keeping your battery fully charged increases its lifespan and reduces the likelihood of failure while riding.
When the motorcycle is not being ridden, we suggest a battery tender be hooked to the battery to maintain 100% charge. Your Indian Motorcycle is equipped with the feature of charging your battery directly through the rear auxiliary port. See your Indian Motorcycle dealer for proper connectors and battery maintenance.
natural_image
Close-up of a handheld electronic device with a display screen and cable (no visible text or symbols)Fuse Box
CAUTION
Connecting the battery cables to the wrong battery terminals can cause serious damage to the electrical system of the motorcycle.
WARNING!
Battery fluid contains sulfuric acid. Do not allow this fluid to come in contact with eyes, skin or clothing. In case of contact, immediately flush the area with water and seek medical attention.
WARNING!
Batteries produce hydrogen gas, which is both flammable and explosive. Keep flames or sparks away from batteries. Ventilate the area when charging a battery.
Always protect your hands and eyes when working with batteries or battery acid. Failure to follow these warnings could result in severe injury or death.
Seat Removal
In order to gain access to the battery, the seat must be
removed. To remove the seat:
-
Remove the two side bolts that mount the seat to the frame. (See figure 34).
-
If motorcycle is equipped with passenger 35).
-
Slide the seat to rear of the motorcycle.
-
Lift the seat from its place.
natural_image
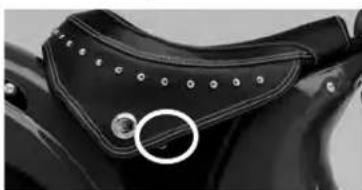
Close-up of a black motorcycle's saddle with a white circular highlight on the side (no text or symbols visible)Figure 34: Solo Seat
Seat Replacement
- Place the seat tongue under the frame mount.
- For models with a passenger seat, align the passenger
seat mount to the fender hole. Place the 1/4"20 button head bolt with lock washer
natural_image
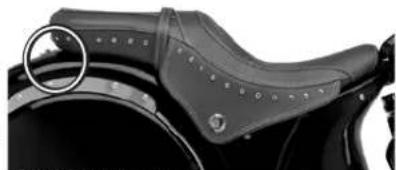
Close-up of a black leather saddle with a circular inset highlighting a specific area (no text or symbols visible)Figure 35: Dual Seat
and flat washer through the seat bracket. Slip the nylon washer between the fender and bracket. Align the bolt to the fender hole and thread inward. Do not tighten.
-
Align the seat side brackets to the frame holes. Slip the 1/4"-20 button head bolts through the brackets and into the frame. Torque to 74-88 inch pounds/ 8-10 Nm.
-
If applicable, install rear seat fastener and rubber washer between the seat and the fender. Torque rear seat fastener to fender to 10-15 inch pounds / 1-2 Nm
CAUTION
Over-tightening the rear seat fastener may cause paint damage. Always follow instructions and specifications.
Brake System
During motorcycle operation, the boiling point of the brake fluid is continuously reduced through the
absorption of moisture from the atmosphere. Under extremely hard operating conditions, this moisture can lead to the formation of bubbles in the system, thus reducing the system's efficiency.
The brake fluid must therefore be replaced every year, preferably in the spring or after removing the motorcycle from storage
Furthermore, every 2500 miles (4000 km), the brake fluid level in the front and rear master cylinder reservoirs should be checked. Use only D.O.T. 4 brake fluid. Brake pads and brake discs should be checked for wear every 2500 miles (4000 km) when riding under normal conditions. When riding under severe or adverse conditions, the pads and discs should be checked more frequently.
NOTE
Indication of the MIN level on the master cylinder sight glass cannot be related to pad wear. Pad wear inspection has to be performed directly by measuring the pad thickness.
See your authorized
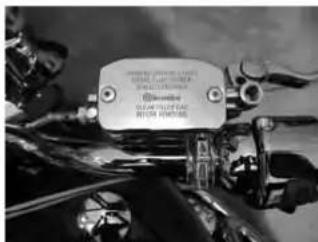
natural_image
Close-up of a mechanical component with metallic parts and no visible text or symbolsFront Brake Reservoir
Indian Motorcycle dealer for brake inspection and brake pad replacement
CAUTION
After replacing pads attention should be paid to the seating of the brake components. Brake pads need up to 250 (500 km) miles regular urban use where brakes are used frequently (not highway cruising) to allow pads to mate with new rotors. During this time brake performance will be less effective. As with many new parts on your motorcycle they will benefit from gentle use until seating is accomplished. During this time avoid using brakes harshly unless in an emergency. Riders will observe a gradual increase in brake efficiency as the motorcycle is used during the seating period.
natural_image
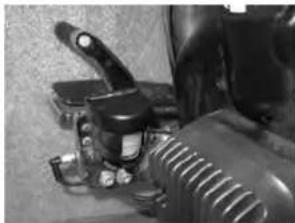
Close-up of mechanical components including a black tool, spray bottle, and fan (no visible text or symbols)Rear Brake Reservoir
Tires
Never underestimate the importance of riding on correctly inflated tires that are in proper working order.
Always check the tires for tread wear, punctures, cuts and any other abnormalities, especially when the tires are cold. See TIRE INFORMATION in the SPECIFICATION and FEATURES & SAFETY section for the correct cold tire inflation pressures. Never over-inflate the tires.
If your tires need to be replaced, see your authorized Indian Motorcycle dealer for advice on recommended D.O.T. tire brands and compounds. Tires, tubes and wheels are critical safety items and should be serviced by a skilled technician using specialized tools and equipment.
WARNING!
Improper tire inflation will cause abnormal tread wear and could adversely affect handling. Under-inflation could result in the tire slipping on the rim, or sudden tire failure. Over-inflation could result in sudden deflation (blowout) because tires are more likely to become punctured by road debris, potholes, etc. Improper tire inflation may, therefore, lead to severe injury or death.
WARNING!
Riding on tires that are not in proper working condition — excessively worn, unbalanced or improperly inflated tires — will impair traction, steering and handling, resulting in severe injury or death.
A wet road can lead to reduced traction even at low speeds riding on new tires. Depending on the depth of the water layer on the road, aquaplaning may occur. Reduce vehicle speed, avoid track grooves and painted lines on the road and apply brakes cautiously in the rain.
Shock Absorbers
The front suspension shock absorber(s) and rubber bushings on your motorcycle should be inspected after the first 500 miles (800 km) and every 5000 miles (8000 km) thereafter for leaks and deterioration.
The rear shock absorber is a non-serviceable item. If you detect leakage or malfunction of any kind, you should take the motorcycle to your authorized Indian Motorcycle dealer for inspection. See the FEATURES & SAFETY section for rear shock absorber adjustment procedures.
Vehicle Alignment
Vehicle alignment should be checked after the first 500 miles (800 km) and at 5000 mile (8000 km) intervals thereafter. Alignment should also be checked whenever the rear wheel is removed or when the rear drive belt is adjusted. See your authorized Indian Motorcycle dealer for this service.
Steering Head Bearings
The steering head bearings should be lubricated every 20,000 miles (32,000 km).
See your authorized Indian Motorcycle dealer for this service.
WARNING!
Improperly adjusted steering head bearings will impair the handling and stability of the motorcycle, possibly leading to severe injury or death. For steering head bearing adjustments see your authorized Indian Motorcycle dealer.
Care and Cleaning
Your motorcycle is subjected to many external influences which – if gone unchecked – can harm the paint as well as the external parts causing lasting damage. Such damage is caused not only by extreme weather conditions, but also by air pollution, tar, road salt, gravel and stone chipping. Other harmful influences – such as grease, oil, fuel, brake fluid, bird droppings, insects and tree resins – should be removed immediately to avoid paint damage. Frequent washing and waxing eliminates and/or reduces the ability of these influences to cause permanent damage. You should check your motorcycle regularly for stone chipping and other damage. Any damage should be repaired as soon as possible to prevent the onset of corrosion.
Cleaning Your Motorcycle
To keep your motorcycle looking like new, you should clean and wax it as often as possible. Periodic wax application with a carnauba based wax is required to maintain the factory luster. Recommended application interval is every 30 days. For information on other motorcycle care products and cleaning recommendations, see your authorized Indian Motorcycle dealer. Scratches, corrosion or damage due to neglect or improper care may not always be remedied or repaired with the care products recommended. In such cases, it is best to seek advice and assistance from your authorized Indian Motorcycle dealer.
CAUTION
When washing your motorcycle, do not use power washers. Power washers allow water to prematurely corrode bearings and bearing surface areas. If you choose to use power washers, you will have to check, clean, repack or replace bearings on your motorcycle more often then scheduled maintenance intervals.
When washing your motorcycle, be careful not to allow too much water to come into contact with the brakes, engine, mufflers or air filter. Wet brake pads or a wet brake disc will adversely affect braking ability. Never use a pressure washer to clean your motorcycle. Ensure the engine and the brakes are in proper operating condition prior to riding your motorcycle.
When cleaning or washing your Matte or Flat painted motorcycle, only use a solution consisting of soap and water to preserve the paint quality and finish. Use of other cleaners, polish or chemicals can harm paint finish.
Leather Care
Leather must be cleaned and treated to properly maintain its quality appearance and extended life. Clean and treat leather more often under adverse conditions.
CAUTION
Only use proper leather cleaners and conditioners to treat your Indian Motorcycle leather.
- Do not clean with ordinary soap or cleaners.
- Use high quality saddle soap or leather cleaner.
- Use Indian Leather Care to treat your leather.
Use of various commercial leather treatment oils will darken distressed leather. Try small amount on low visibility area first to determine color acceptably
Storage
WARNING!
Fuel is extremely flammable. Do not store a motorcycle with gasoline in the tank within the home or in a garage near open flame, pilot lights, sparks or electric motors. Failure to follow this recommendation may lead to an explosion or fire resulting in severe injury or death.
In order to keep your motorcycle in proper operating condition, careful long-term storage is essential. If you are unable to complete the following tasks yourself, contact your authorized Indian Motorcycle dealer for assistance.
Before placing your motorcycle in storage – especially over several months, such as during the winter – careful planning will help ensure the long life and durability of your vehicle.
Follow these steps to prepare your motorcycle for storage:
- Warm the motorcycle to normal operating temperature. Then, change the oil and the oil filter, and start the engine to circulate the new oil.
- Fill the fuel tank and add a gasoline stabilizer. (For recommended gasoline stabilizers, consult your Indian Motorcycle dealer). Run the engine until the gasoline stabilizer has had the chance to reach the fuel injectors. Turn the engine off.
- Check the tire pressure. Ensure the tires are inflated to the proper operating pressure. (See TIRE INFORMATION in the FEATURES & SAFETY section). If your motorcycle is not stored in an elevated position, move it regularly to ensure the tires do not develop flat spots.
- Wash and wax the motorcycle (See CARE AND CLEANING).
- Remove battery from motorcycle, if necessary, and charge it (See Battery). Store battery above freezing temperatures, trickle charge once a month.
NOTE: The battery will begin to discharge after 7 days of
non-use if it is not disconnected or charged with battery charger.
WARNING!
Batteries produce hydrogen gas, which is both flammable and explosive. Keep flames or sparks away from batteries at all times. A spark could cause an explosion resulting in severe injury or death.
Removal from Storage
- Replace the charged battery.
- Check engine, transmission and primary oil level.
- Start the engine and run it until it reaches normal operating temperature. Turn off the engine.
- Check the engine oil level again.
- Check the controls to ensure they are operating properly. Check the front and rear brakes, throttle, clutch and gear shifter.
- Check the steering by turning the handlebars through the full operating range.
- Check the tire pressure. Ensure the tires are inflated to the proper operating pressure.
- Check all electrical equipment and switches for proper operation.
- Check the ground below for any fuel, oil, clutch or brake fluid leaks.
To keep your motorcycle in proper operating condition at all times, it is important to consult your authorized Indian
Motorcycle dealer regularly as recommended in this manual.
Motorcycle Noise Regulation
Tampering with noise control systems is prohibited. Federal law prohibits the following acts or causing thereof:
The removal or rendering inoperative by any person other than for the purposes of maintenance, repair, or replacement, of any device or element of design incorporated into any new vehicle for the purpose of noise control prior to its sale or delivery to the ultimate purchaser or while it is in use, or
The use of the vehicle after such device or element of design has been removed or rendered inoperative by any person.
Among those acts presumed to constitute tampering are:
- Removal or puncturing of the muffler, baffles, header pipes, or any other component which conducts exhaust gasses.
- Removal or puncturing of any part of the intake system.
- Lack of proper maintenance.
- Replacing any moving part of the vehicle, or parts of the exhaust system or intake system, with parts other than those specified by the manufacturer.
This product should be checked for repair or replacement if the motorcycle noise has increased significantly through use. Otherwise, the owner may become subject to penalties under state and local ordinances.
Noise Emission Warranty
Indian Motorcycle warrants that this exhaust system, at the time of sale, meets all applicable U.S. EPA Federal noise standards. This warranty extends to the first person who buys this exhaust system for purposes other than resale, and to all subsequent buyers.
Warranty claims should be directed to:
An authorized Indian Motorcycle dealer, or
Indian Motorcycle, P.O. Box 47700, Hamel, MN 55340-9960
Emissions Control System Warranty
Indian Motorcycles - Emission Control System Warranty Statement
Your Warranty Rights and Obligations
The California Air Resources Board and Indian Motorcycle (hereinafter IM) are pleased to explain the emission control system warranty on your 2007 or later IM motorcycle. In California, new motor vehicles must be designed, built and equipped to meet the state's stringent anti-smog standards. IM must warrant the emission control system on your motorcycle for the periods of time listed below provided there has been no abuse, neglect or improper maintenance of your motorcycle. Your emission control system may include
parts such as the fuel-injection system, the ignition system, catalytic converter and engine computer. Also included may be hoses, belts, connectors and other emission-related assemblies. Where a warrantable condition exists, IM will repair your motorcycle at no cost to you, including diagnosis, parts and labor.
Manufacturer's Warranty Coverage
Class III motorcycles (280 cc and larger): for a period of use of five (5) years or 30,000 kilometers (18,641 miles), whichever first occurs.
If an emission-related part on your motorcycle is defective, the part will be repaired or replaced by IM. This is your emission control system DEFECTS WARRANTY.
Owner's Warranty Responsibilities
As the motorcycle owner, you are responsible for the performance of the required maintenance listed in your Rider's manual. IM recommends that you retain all receipts covering maintenance on your motorcycle, but IM cannot deny warranty solely for the lack of receipts or for your failure to ensure the performance of all scheduled maintenance.
You are responsible for presenting your motorcycle to an IM dealer as soon as a problem exists. The warranty repairs should be completed in a reasonable amount of time, not to exceed 30 days.
As the motorcycle owner, you should be aware that IM may deny your warranty coverage if your motorcycle or part has failed due to abuse, neglect, improper maintenance or unapproved modifications.
If you have any questions regarding your warranty rights and responsibilities, you should contact Indian Motorcycle, P.O. Box 47700, Hamel, Minnesota 55340-9960, or the California Air Resources Board, P.O. Box 8001, 9528 Telstar Avenue, El Monte, CA 91734-8001.
Indian Motorcycle, (hereinafter IM) warrants that each new 2009 and later Indian Motorcycle that includes as standard equipment a headlight, taillight and stoplight, and is street legal:
A. is designed, built and equipped so as to conform at the time of initial retail purchases with all applicable regulations of the United States Environmental Protection Agency, and the California Air Resources Board; and
B. is free from defects in material and workmanship which cause such motorcycle to fail to conform with applicable regulations of the United States Environmental Protection Agency or the California Air Resources Board for a period of use, depending on the engine displacement, of 12,000 kilometers (7,456 miles), if the motorcycle's engine displacement is less than 170 cubic centimeters; of 18,000 kilometers (11,185 miles), if the motorcycle's engine displacement is equal or greater than 170 cubic centimeters
Indian Motorcycle Limited Warranty
but less than 280 cubic centimeters; or of 30,000 kilometers (18,641 miles), if the motorcycle's engine displacement is 280 cubic centimeters or greater; or 5 (five) years from the date of initial retail delivery, whichever occurs first.
1. Coverage
Warranty defects shall be remedied during customary business hours at any authorized IM dealer located within the United States of America in compliance with the Clean Air Act and applicable regulations of the United States Environmental Protection Agency and the California Air Resources Board. Any part or parts replaced under this warranty shall become the property of IM.
In the State of California only, emission related warranted parts are specifically defined by the state's Emission Warranty Parts List. These warranted parts are: carburetor and internal parts; intake manifold; fuel tank; fuel injection system; spark advance mechanism; crankcase breather; air cutoff valves; fuel tank cap for evaporative emission controlled vehicles; oil filler cap; pressure control valve; fuel/vapor separator; canister; igniters; breaker governors; ignition coils; ignition wires; ignition points; condensers, and spark plugs if failure occurs prior to the first scheduled replacement; and hoses, clamps, fittings and tubing used directly in these parts. Since emission related parts may vary from model to model, certain models may not contain all of these parts and certain models may contain functionally equivalent parts.
In the State of California only, Emission Control System emergency repairs, as provided for in the California Administrative Code, may be performed by other than an authorized IM dealer. An emergency situation occurs when an authorized IM dealer is not reasonably available, a part is not available within 30 days, or a repair is not complete within 30 days. Any replacement part can be used in an emergency repair. IM will reimburse the owner for expenses, including diagnosis, not to exceed IM's suggested retail price for all warranted parts replaced and labor charges based on IM's recommended time allowance for the warranty repair and the geographically appropriate hourly labor rate. The owner may be required to keep receipts and failed parts in order to receive compensation.
II. Limitations
The Emission Control System Warranty shall not cover any of the following:
A. Repair or replacement required as a result of:
- Accident
- Misuse
- Repairs improperly performed or replacements improperly installed
- Use of replacement parts or accessories not conforming to
IM specifications which adversely affect performance and/or - Use in competitive racing or related events.
B. Inspections, replacement of parts, and other services and adjustments necessary for required maintenance.
C. Any motorcycle on which the odometer mileage has been changed so that actual mileage cannot be readily determined.
Ill. Limited Liability
A. The liability of IM under this Emission Control System Warranty is limited solely to the remedying of defects in material or workmanship by an authorized IM dealer at its place of business during customary business hours. This warranty does not cover inconvenience or loss of use of the motorcycle or transportation of the motorcycle to or from the IM dealer.
IM SHALL NOT BE LIABLE FOR ANY OTHER EXPENSES, LOSS OR DAMAGE, WHETHER DIRECT, INCIDENTAL, CONSEQUENTIAL OR EXEMPLARY ARISING IN CONNECTION WITH THE SALE OR USE OF OR INABILITY TO USE THE INDIAN MOTORCYCLE FOR ANY PURPOSE. SOME STATES DO NOT ALLOW THE EXCLUSION OR LIMITATION OF ANY INCIDENTAL OR CONSEQUENTIAL DAMAGES, SO THE ABOVE LIMITATIONS MAY NOT APPLY TO YOU.
B. NO EXPRESS EMISSION CONTROL SYSTEM WARRANTY IS GIVEN BY IM EXCEPT AS SPECIFICALLY SET FORTH HEREIN. ANY EMISSION CONTROL SYSTEM WARRANTY IMPLIED BY LAW, INCLUDING ANY WARRANTY OF MERCHANTABILITY OR FITNESS FOR A PARTICULAR PURPOSE, IS LIMITED TO THE EXPRESS EMISSION CONTROL SYSTEM WARRANTY TERMS STATED IN THIS WARRANTY. THE FOREGOING STATEMENTS OF WARRANTY ARE EXCLUSIVE AND IN LIEU OF ALL OTHER REMEDIES. SOME STATES DO NOT ALLOW LIMITATIONS ON HOW LONG AN IMPLIED WARRANTY LASTS SO THE ABOVE LIMITATIONS MAY NOT APPLY TO YOU.
C. No dealer is authorized to modify this IM Limited Emission Control System Warranty.
IV. Legal Rights
THIS WARRANTY GIVES YOU SPECIFIC LEGAL RIGHTS, AND YOU MAY ALSO HAVE OTHER RIGHTS WHICH VARY FROM STATE TO STATE.
V. This warranty is in addition to the IM Limited Motorcycle Warranty
Vl. Additional Information
Any replacement part that is equivalent in performance
Indian Motorcycle Limited Warranty
and durability may be used in the performance of any maintenance or repairs. However, IM is not liable for these parts. The owner is responsible for the performance of all required maintenance. Such maintenance may be performed at a service establishment or by any individual. The warranty period begins on the date the motorcycle is delivered to an ultimate purchaser.
Indian Motorcycle
P.O. Box 47700
Hamel, MN 55340-9960
ATTN: Warranty Department
Indian Motorcycle Warranty Policy
Limited Warranty
Indian Motorcycle Company, P.O. Box 47700, Hamel, Minnesota 55340-9960, gives a TWO YEAR LIMITED WARRANTY against defects in material or workmanship on those components of the Indian Motorcycle listed below under “Covered Components”. This warranty covers the parts and labor charges for repair or replacement of defective parts which are covered by this warranty. This warranty begins on the date of purchase. This warranty is transferable to another consumer during the warranty period through an Indian Motorcycle dealer. The total of all amounts paid or payable under the terms of this Limited Warranty shall not exceed the retail purchase price paid for the Indian Motorcycle.
Registration
At the time of sale, the Warranty Registration Form must be completed by your dealer and submitted to Indian Motorcycle Company ("IM") within ten days. Upon receipt of this registration, IM will record the registration for warranty. No verification of registration will be sent to the purchaser as the copy of the Warranty Registration Form will be the warranty entitlement. If you have not signed the original registration and received the "customer copy", please contact your dealer immediately. NO WARRANTY COVERAGE WILL BE ALLOWED UNLESS YOUR INDIAN MOTORCYCLE IS REGISTERED WITH IM. Initial dealer preparation and set-up of your Indian Motorcycle is very important in ensuring trouble-free operation. Purchasing a motorcycle in the crate or without proper dealer set-up will void your warranty coverage.
Covered Components
This Limited Warranty covers ONLY the components/parts listed below and the labor to repair or replace these parts:
- ENGINE – The following internal, lubricated parts: camshafts and bearings; connecting rods and bearings; crankshaft and main bearings; oil pump; pushrods and lifters; pistons, piston rings and pins; rocker arms, shafts and bushings; timing gears; valves, valve springs; guides and seats, top engine mount. The cylinder heads, engine block and cylinder barrels are covered if damaged by the
failure of an internal, lubricated part.
- TRANSMISSION – The following internal, lubricated parts contained within the transmission case: all gears; bearings; shifter drum, springs, main shaft, counter shaft, drive gears, selector switch and transmission mounts. The transmission case is covered if damaged by the failure of an internal, lubricated part.
- PRIMARY DRIVE - The following internal, lubricated parts contained within the primary case: all gears and bearings. The primary case is covered if damaged by the failure of an internal part.
- SUSPENSION – All internal, lubricated parts contained within the front fork tubes, front and rear wheel bearings, swing arm shafts, bearings; front and rear wheel hubs. The front fork tubes and frame are covered only if damaged by the failure of a covered part.
- STEERING – Upper and lower steering stem bearings, bushings, steering stem, handlebars, dust covers and seals. The steering stem shaft is covered if damaged by the failure of a covered part.
- BRAKES - Hydraulic brake calipers, master cylinders and hydraulic lines.
- ELECTRICAL – Coils, manually operated switches, rectifiers, rotors, starters, solenoids, stators, voltage regulator, relays, wiring harness, power control module and electronic ignition module.
-
FUEL DELIVERY – Fuel tank, fuel lines and fittings.
-
GAUGES - Speedometer.
Warranty Coverage and Exclusions
Limitations of Warranties and Remedies
The warranty excludes any failures that are not caused by a defect in material or workmanship. This warranty does not cover accidental damage, normal wear and tear, abuse or improper handling. This warranty also does not cover any Indian motorcycle that has been altered structurally, modified, neglected, improperly maintained, used for racing, or used for purposes other than for which it was manufactured, or for any damages which occur during trailer transit or as a result of unauthorized service or the use of unauthorized parts. In addition, this warranty does not cover physical damage to paint or finish, stress cracks, tearing or puncturing of upholstery material, corrosion, or defects in parts or components, of an Indian Motorcycle due to fire, explosions or any other cause beyond the control of IM.
This warranty does not cover the use of unauthorized lubricants, chemicals, or fuels that are not compatible with the Indian Motorcycle.
The exclusive remedy for breach of this warranty shall be, at the exclusive option of IM, repair or replacement of any defective materials, or components or products. THE REMEDIES SET FORTH IN THIS WARRANTY
Indian Motorcycle Limited Warranty
ARE THE ONLY REMEDIES AVAILABLE TO ANY PERSON FOR BREACH OF THIS WARRANTY. INDIAN MOTORCYCLE COMPANY SHALL HAVE NO LIABILITY TO ANY PERSON FOR INCIDENTAL, CONSEQUENTIAL OR SPECIAL DAMAGES OF ANY DESCRIPTION, WHETHER ARISING OUT OF EXPRESS OR IMPLIED WARRANTY OR ANY OTHER CONTRACT, NEGLIGENCE, OR OTHER TORT OR OTHERWISE. THIS EXCLUSION OF CONSEQUENTIAL, INCIDENTAL, AND SPECIAL DAMAGES IS INDEPENDENT FROM AND SHALL SURVIVE ANY FINDING THAT THE EXCLUSIVE REMEDY FAILED OF ITS ESSENTIAL PURPOSE. Some states do not permit the exclusion or limitation of incidental or consequential damages or implied warranties, so the above limitations or exclusions may not apply to you if inconsistent with controlling state law.
ALL IMPLIED WARRANTIES (INCLUDING BUT NOT LIMITED TO THE IMPLIED WARRANTIES OF MERCHANTABILITY AND FITNESS FOR A PARTICULAR PURPOSE) ARE LIMITED IN DURATION TO THE ABOVE TWO YEAR WARRANTY PERIOD. INDIAN MOTORCYCLE COMPANY FURTHER DISCLAIMS ALL EXPRESS WARRANTIES NOT STATED IN THIS WARRANTY OTHER THAN EMISSIONS AND EXCISE WARRANTIES. Some states do not allow limitations on how long an implied warranty lasts, so the above limitation may not apply to you if inconsistent with controlling state law.
How to Obtain Warranty Service
If your Indian Motorcycle requires warranty service, you must take it to an Indian Motorcycle Servicing Dealer. When requesting warranty service you must present your copy of the Warranty Registration form to the dealer. (THE COST OF TRANSPORTATION TO AND FROM THE DEALER IS YOUR RESPONSIBILITY). IM suggests that you use your original selling dealer; however, you may use any Indian Motorcycle Servicing Dealer to perform warranty service.
Please work with your dealer to resolve any warranty issues. Should your dealer require any additional assistance they will contact the appropriate person at IM.
This warranty also gives you specific legal rights, and you may also have other rights which vary from state to state. If any of the above terms are void because of state or federal law, all other warranty terms will remain in effect.
Reporting Safety Defects
If you believe your motorcycle has a defect that could cause an accident or injury or death, you should immediately inform the National Highway Traffic Safety Administration (NHTSA) and notify Indian Motorcycle Company.
If NHTSA receives similar complaints, it may open an investigation and if it finds that a safety defect exists in a group of vehicles, it may order a recall and remedy campaign. However, NHTSA cannot become involved as intermediaries between you, your dealer or Indian Motorcycle Company.
To contact NHTSA, you may either call the Auto Safety Hotline toll-free at 1-800-424-9393 or write to: Administrator, NHTSA, U.S. Department of Transportation, 400 7th Street, SW, Washington, D.C. 20590. Alternatively, you may file a complaint online at:
Attention: Customer Service
2100 Highway 55
Medina, MN 55340
or call:
1-800-765-2747
Maintenance Schedule and Records
| Maintenance Schedule | 52,500 miles (84,000km) |
| 500 miles (800km) | 55,000 miles (88,000km) |
| 2500 miles (4000 km) | 57,500 miles (92,000km) |
| 5000 miles (8000km) | 60,000 miles (96,000km) |
| 7500 miles (12,000km) | 62,500 miles (100,000km) |
| 10,000 miles (16,000km) | 65,000 miles (104,000km) |
| 12,500 miles (20,000km) | 67,500 miles (108,000km) |
| 15,000 miles (24,000km) | 70,000 miles (112,000km) |
| 17,500 miles (28,000km) | 72,500 miles (116,000km) |
| 20,000 miles (32,000km) | 75,000 miles (120,000km) |
| 22,500 miles (36,000km) | 77,500 miles (124,000km) |
| 25,000 miles (40,000 km) | 80,000 miles (128,000km) |
| 27,500 miles (44,000km) | 82,500 miles (132,000km) |
| 30,000 miles (48,000km) | 85,000 miles (136,000km) |
| 32,500 miles (52,000km) | 87,500 miles (140,000km) |
| 35,000 miles (56,000km) | 90,000 miles (144,000km) |
| 37,500 miles (60,000km) | 92,500 miles (148,000km) |
| 40,000 miles (64,000km) | 95,000 miles (152,000km) |
| 42,500 miles (68.000km) | 97,500 miles (156,000km) |
| 45,000 miles (72,000km) | 100,000 miles (16,000km) |
| 47,500 miles (76,000km) | |
| 50,000 miles (80,000km) |
Service at 500 miles, at 5,000 miles and every 10,000 miles thereafter.
NOTE: Make sure all service bulletin items are performed by your dealer at scheduled service intervals.
- Change engine oil and replace filter
- Change transmission fluid and clean magnetic drain plug.
- Check brake fluid level and condition.
- Inspect brake lines and system for leaks.
- Inspect oil lines and system for leaks.
- Inspect clutch fluid level, lines and system for leaks
- Adjust clutch
- Lubricate the front brake hand lever, side stand bushing, throttle control grip, and clutch control hand lever.
-
Inspect throttle control cables and adjust as needed.
-
Check rear brake pedal adjustment.
-
Inspect brake pads and discs for wear.
-
Check and adjust inner primary chain.
-
Change primary drive oil.
-
Check and adjust rear drive belt.
-
Inspect air filter.
-
Inspect fuel lines and fittings for leaks.
-
Clean battery connections.
-
Check operation of all electrical equipment and switches.
-
Clean throttle body
-
Check spark plug condition and replace as required.
-
Check for stored Diagnostic Trouble Codes (DTCs).
-
Check tires for pressure and signs of wear.
-
Check wheel spoke tightness.
-
Check rear shock absorber mounting and inspect for leaks.
- Check swingarm pivot bolts for proper tightness.
- Check engine mount fasteners (first 500 mile service only).
- Check alignment.
- Check tightness of all fasteners, except engine head bolts.
- Inspect hose condition and routing on evap emissions control system (CA only)
- Conduct road test.
Service at 2500 miles and every 5000 miles thereafter
- Change engine oil and replace filter
- Check engine, transmission and primary for leaks.
- Check and inspect transmission fluid.
- Check and inspect primary drive oil.
- Inspect oil lines and system for leaks
- Check battery and clean battery connections.
- Inspect fuel lines and fittings for leaks.
- Inspect clutch lines and system for leaks
- Inspect brake lines and system for leaks.
- Inspect air filter and replace as required
- Check spark plug condition and replace as required.
- Check throttle operation.
- Check and adjust inner primary chain.
- Check operation of all electrical equipment and switches.
- Check rear drive belt.
- Check and inspect brake fluid level.
- Check and inspect clutch fluid. Adjust clutch
- Inspect brake pads and discs for wear.
- Check tires for pressure and signs of wear.
Maintenance Schedule and Records
- Conduct road test
- Clean throttle body
- Check for stored Diagnostic Trouble Codes (DTCs).
- Inspect hose condition and routing on evap emissions control system (CA only)
- Check wheel spoke tightness.
Service at 10,000 miles and every 10,000 miles thereafter
- Change engine oil and replace oil filter.
- Check transmission for leaks.
- Change transmission fluid and clean magnetic drain plug.
- Inspect brake lines and system for leaks.
- Replace brake fluid.
- Inspect clutch fluid level, lines and system for leaks
- Adjust clutch
- Inspect oil lines and system for leaks.
- Lubricate the front brake hand lever, side stand bushing, throttle control grip, clutch control hand lever.
- Inspect throttle control cables and adjust as needed.
- Check rear brake pedal adjustment.
- Inspect brake pads and discs for wear.
- Check and adjust rear drive belt.
- Check primary chain housing for leaks.
- Check and adjust primary chain
- Change primary drive oil.
- Inspect air filter and clean/replace as required.
- Inspect fuel and fittings for leaks.
- Clean throttle body
-
Check battery and clean battery connections.
-
Check operation of all electrical equipment and switches.
- Replace spark plugs.
- Check for stored Diagnostic Trouble Codes (DTCs).
- Check tires for pressure and signs of wear.
- Check wheel spoke tightness.
- Check rear shock absorber mounting bolts and inspect for leaks
- Check swingarm pivot bolts for proper tightness.
- Replace front fork oil.
- Repack steering head bearings and re-torque steering head bearings. (20,000 mile service intervals only).
- Check alignment.
- Check tightness of all fasteners, except engine head bolts.
- Inspect fuel tank mount grommets.
- Inspect hose condition and routing on evap emissions control system (CA only)
- Conduct road test.
Maintenance Schedule and Records

text_image
500 Miles/800km Service Mileage Date/Stamp/Signature
text_image
2500 Miles/4000km Service Mileage Date/Stamp/Signature
text_image
5000 Miles/8000km Service Mileage Date/Stamp/Signature
text_image
7500 Miles/12000km Service Mileage Date/Stamp/Signature
text_image
10000 Miles/16000km Service Mileage Date/Stamp/Signature
text_image
12500 Miles/20000km Service Mileage Date/Stamp/SignatureMaintenance Schedule and Records
text_image
15000 Miles/24000km Service Mileage Date/Stamp/Signature
text_image
17500 Miles/28000km Service Mileage Date/Stamp/Signature
text_image
20000 Miles/32000km Service Mileage Date/Stamp/Signature
text_image
22500 Miles/36000km Service Mileage Date/Stamp/Signature
text_image
25000 Miles/40000km Service Mileage Date/Stamp/Signature
text_image
27500 Miles/44000km Service Mileage Date/Stamp/SignatureMaintenance Schedule and Records
| 30000 Miles/48000kmServiceMileageDate/Stamp/Signature | 32500 Miles/52000kmServiceMileageDate/Stamp/Signature | 35000 Miles/56000kmServiceMileageDate/Stamp/Signature |
| 37500 Miles/60000kmServiceMileageDate/Stamp/Signature | 40000 Miles/64000kmServiceMileageDate/Stamp/Signature | 42500 Miles/68000kmServiceMileageDate/Stamp/Signature |
Maintenance Schedule and Records

Maintenance Schedule and Records
text_image
60000 Miles/96000km Service Mileage Date/Stamp/Signature
text_image
62500 Miles/100000km Service Mileage Date/Stamp/Signature Date/Stan
text_image
65000 Miles/104000km Service Mileage o/Signature
text_image
67500 Miles/108000km Service Mileage Date/Stamp/Signature
text_image
70000 Miles/112000km Service Mileage Date/Stamp/Signature
text_image
72500 Miles/116000km Service Mileage Date/Stamp/SignatureMaintenance Schedule and Records
text_image
75000 Miles/120000km Service Mileage Date/Stamp/Signature
text_image
77500 Miles/124000km Service Mileage Date/Stamp/Signature Date/Stand
text_image
80000 Miles/126000km Service Mileage Signature
text_image
82500 Miles/132000km Service Mileage Date/Stamp/Signature
text_image
85000 Miles/136000km Service Mileage Date/Stamp/Signature
text_image
87500 Miles/140000km Service Mileage Date/Stamp/SignatureA
Accessories 21
Air Filter 33
Air Filter Removal 33
Cleaning Procedure 33
B
Battery 35
Body Control Module 34
Brakes 18
Front 18
Brake System 36
Break-In 12
Break-In Maintenance 26
C
Care and Cleaning 39
Cargo 21
Cleaning 39
Clock Set Operation 16
Clutch 31
Component Identification 6
E
Emissions Control 33
Emissions Control System Warranty 42
Engine Lubrication 28
Engine Oil
Checking Oil Level 28
Engine Oil Additives 28
Winter Lubrication 29
Engine Oil Additives 28
F
Fault Display 16
First 1000 Miles (1600 km) 12
Fluid Requirements
Brake Fluid 8
Clutch Fluid 8
Engine Oil 8
Fork Oil 8
Fuel 8
Primary Drive Oil 8
Transmission Fluid 8
Front Fork Oil 32
Fuel 20
Blends 20
Filler Caps 20
Fuel Filter 32
Fuel Injection 32
Fuses 35
Fuse Removal Procedure 35
Index
G
Gear Shifter 17
Greasing 31
H
Headlamp 34
I
Indicator Lights 15
L
LCD Display 16
Leather Care 40
Low Fuel Display 16
M
Mirrors 15
Motorcycle Noise Regulation 42
MPH or Km/h Setting 16
N
Noise Emission Warranty 42
0
Odometer 16
Operating Recommendations 23
P
Passenger Backrest 22
Pre-Ride Checklist 11
Primary Chain 30
R
Rear Drive Belt 31
Regular Service Intervals 27
S
Saddlebags 22
Seat Removal 36
Seat Replacement 36
Service Record 54
Shifting Gears 25
Downshifting 25
Downshifting (Deceleration) Chart 26
Upshifting 25
Upshifting (Acceleration) Chart 25
Shock Absorbers 38
Sidestand 19
Wear Limit 19
Signal Words 5
Specifications 7
Brakes 8
Dimensions 7
Drivetrain 7
Electrical 10
Engine 7
Engine Oil 9
Fluid Requirements 8
Gear Oil 9
Tires 8
Weight 7
Wheels 8
Speed in Gears 12
Speedometer 16
Starting the Engine 24
Cool Engine Starting 24
Warm Engine Starting 24
Starting the Motorcycle in Motion 25
Steering Head Bearings 38
Stopping the Engine 25
Storage 40
Removal from Storage 41
Switches
Engine Run/Stop Switch 13
Hazard Warning 4-way Flasher 15
High-Low Beam Switch 14
Horn Switch 14
Ignition 12
Key 12
Light 12
Passing/Fog (Spot) Lamp Switch 14
Starter Switch 13
Turn Signal Switch 14
T
Throttle Control Grip 13
Tire Information 23
Tread wear indicators 23
Tires 37
Transmission Lubrication 30
Trip Meter Reset 16
V
Vehicle Alignment 38
Voltage Regulator 34
W
Warranty
Limited Warranty 46
Windshield 22

text_image
STRYLLIGERALLY SPECIFIED 100% RECYCLEDThe text is printed on 100% recycled with 40% post-consumer waste (PCW).
PMS 201
Indian MOTORCYCLE
For your nearest INDIAN dealer,
call 1-800-765-2747
or visit www.indianmotorcycles.com
2100 Hwy. 55, Medina, MN 55340
Phone 1-888-704-5290
Part No. 9923690 Rev 01
Printed in USA
[Barcode]