LabelWorks LW-K400VP - Label printer EPSON - Free user manual and instructions
Find the device manual for free LabelWorks LW-K400VP EPSON in PDF.

| Product Type | Desktop label printer with manual keyboard |
| Dimensions (W x D x H) | Approx. 115 x 105 x 60 mm |
| Weight | Approx. 400 g (without batteries and tape) |
| Power Supply | 6 x AA alkaline batteries (not included) or optional AC adapter |
| Display | LCD panel with 12 characters x 1 line |
| Label Tape Width | Supports 6mm, 9mm, 12mm, 18mm (Epson compatible tape cassettes) |
| Maximum Print Length | Up to 2000 mm per label |
| Print Speed | Approx. 8 mm/s |
| Print Resolution | 180 dpi |
| Font Styles | Multiple built-in fonts, including bold, italic, outline |
| Barcode Support | EAN-13, Code 39, Code 128, etc. |
| Text Functions | Mirror printing, auto-numbering, text alignment, frame/underline |
| Tape Cassette Compatibility | Epson LabelWorks LC series (e.g., LC-4, LC-5) |
| Keypad | QWERTY layout with numeric keys and function keys |
| Cut Type | Manual cutter (push-button) |
| Operating Temperature | 10°C to 40°C |
| Storage Temperature | -20°C to 60°C |
| Maintenance | Clean cutter with a dry cloth; avoid dust; replace tape cassette when empty |
| Safety Precautions | Do not use damaged tapes; keep away from small children; follow battery polarity |
| Repair and Spare Parts | Contact Epson authorized service center; no user-serviceable parts inside |
| General Information | Designed for home, office, and light industrial use |
Frequently Asked Questions - LabelWorks LW-K400VP EPSON
User questions about LabelWorks LW-K400VP EPSON
0 question about this device. Answer the ones you know or ask your own.
Ask a new question about this device
Download the instructions for your Label printer in PDF format for free! Find your manual LabelWorks LW-K400VP - EPSON and take your electronic device back in hand. On this page are published all the documents necessary for the use of your device. LabelWorks LW-K400VP by EPSON.
USER MANUAL LabelWorks LW-K400VP EPSON
natural_image
Line drawing of a digital telephone receiver with keypad and control panel (no text or symbols)English
Read this document carefully to use this product safely and correctly.
If your product is faulty, please read the included warranty card and consult the store you purchased it from. If you require further assistance contact your local EPSON customer support centre.
Please also find below the URL for the support centre:
http://www.epson.co.uk/support
Part Names and Functions
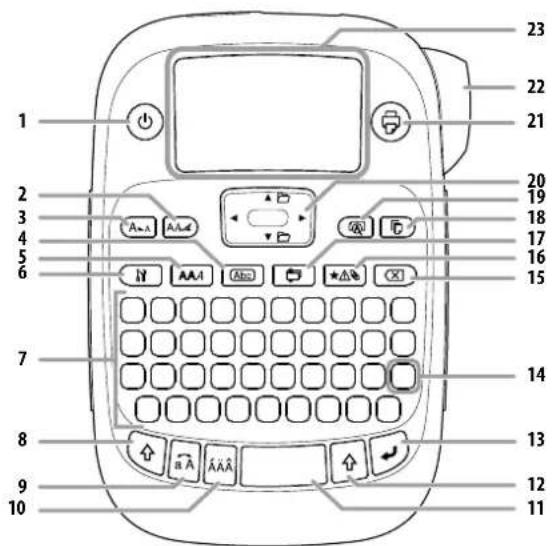
- Power, + : To "Print density" menu.
- Font
- Font size
- Frame
- Style
- Setting
- Character keys
- Shift
- Caps Lock
+ Capitalises the entered characters.
- Accent
- Space
- Shift
- Select/Enter
- Punctuation: A choice of marks.
The other choice of marks.
Adding a punctuation mark to the label
- Delete, + : deletes text.
- Symbol, + : "Sequence number" menu.
- Special label, + : to "Bar code" menu.
- Print copies
- Preview, + : the "Display" menu.
- Cursor keys
+ [▲] To [▼e] previous or next text.
- Print, + 6Feeds the tape.
- Cut Button
- Display
■ Display
You can check settings on the display. Indicators show whether or not settings are enabled.
- Font size
- Font width
- Frame
- Font style
- Vertical
- Battery level (as a guide)
- Accent mark options
- Upper case/lower case
- Cursor: Indicates the position where the operation is performed. This is the place where you enter text or delete symbols, etc.
- Head mark: Indicates what line it is in. Appears when multiple lines exist.
MEMO
X: If this appears, you cannot print anything.
- Text number mark: Indicates the number of the current text counted from the beginning.
Before use
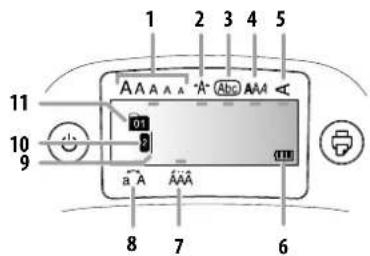
1. Preparing the power supply
This product operates on batteries or with the dedicated AC adapter.
Using on batteries
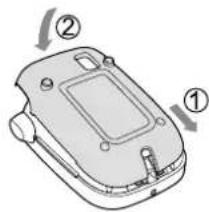
① Prepare six AA alkaline batteries.
- Remove the cover on the rear.
- Insert the batteries.
MEMO
When continuing to install a tape cartridge, leave the cover off and go to Step 2.
- Close the cover. Close it until it snaps into place.
natural_image
Diagram of a vehicle chassis with labeled parts (① and ②), showing internal components without any text or symbols.Using with the AC adapter (APT0615Z)
① Make sure to use the dedicated AC adapter (APT0615Z).
- Connect the AC adapter firmly into the power socket of the product.
- Plug the AC adapter into the outlet.

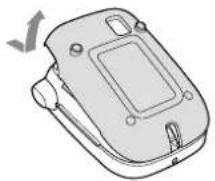
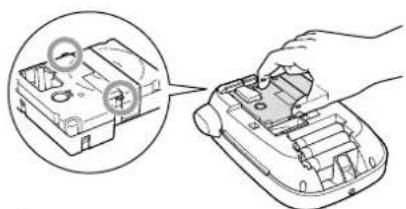
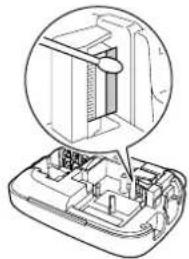
2. Installing a tape cartridge
- Remove the slack of the ink ribbon.
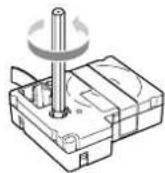
- Remove the cover on the rear.
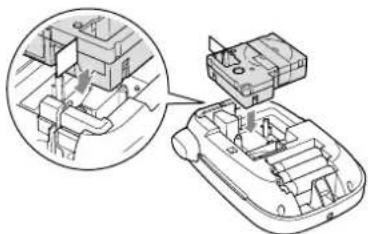
- Set the tape cartridge.
Press it firmly until it snaps into place.
When installing a new tape or the tip of the tape is longer than usual, put the tape through the "Tape Guide" slot.
natural_image
Technical diagram of a vehicle chassis with internal components and a magnified inset showing internal structure (no text or labels)- Do not press the "Cut Button" before the tape stops. - Do not pull the tape out with your fingers.
- Close the cover on the rear. Close it until it snaps into place.
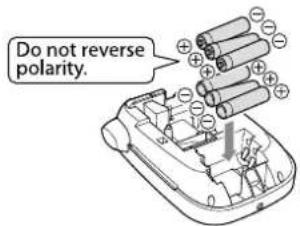
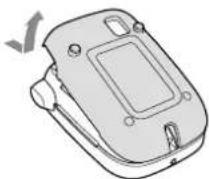
How to remove the tape cartridge
Hold the cartridge by the tabs, and lift it straight up.
natural_image
Illustration of a hand using a tool to adjust or install electronic components, with no visible text or symbols.3. Turning the power on
- Press Ⓗ When changing the language of messages on the display ◀ Display Settings ("Display" menu)
4. Feeding the tape
Do not press the "Cut Button" before the tape stops.
After setting a tape cartridge, make sure to feed tape.
- Press ◇ + ◎
- Press
- Cut the tape. Cut it by pressing the "Cut Button".
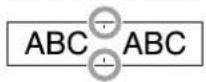
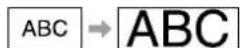
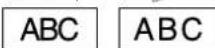
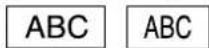
5. Creating a label
Example: ABC
- Press ☐ while holding down ☐ to enter text in capital letters.
- Press the following keys: A, B, C "ABC" appears on the display.
Refer below for other operations and the labels you can create with this product.
Editing characters, Useful functions, Creating a label with a special form
6. Printing labels
- Press
The length of the label to print and the number of prints appear, and printing starts.
- When the tape stops, press the "Cut Button" to cut the tape.
Do not press the "Cut Button" before printing is complete.
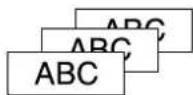
Printing multiple copies (end cut)
-
Press
-
Highlight "Copies" using the cursor keys, then press
-
Enter the number of copies using the cursor keys or numeric keys.
-
Press ↙ to start printing.
-
When printing stops, press ✗ to cut the tape. A cut mark will be printed between each copy.
Using scissors, cut along the marks to separate each label.
Printing multiple copies (each cut)
-
Press .
-
Highlight "Set cut mode" using the cursor keys, then press 🔒.
-
Select "Each label" using the cursor keys, then press ↗.
-
Highlight "Copies" using the cursor keys, then press 🔒.
-
Enter the number of copies using the cursor keys or numeric keys, then press 🔒.
-
When you are prompted to cut the tape, press the ✗ button. After each cut using the ✗ button, printing of the next copy starts.
Adjusting print density
-
When the power is off, press ⏻ . ⏻
-
Adjust print density with [◀][▶] and press .
MEMO
In general, please set the value to the default; "0".
7. Attaching labels
-
Peel off the backing paper.
-
Attach the label and rub it firmly.
■ Turn the power off after use
- Press
Batteries:
Take them out if not in use for a long time.
AC adapter:
Disconnect from the outlet and the product.
Editing characters
Press character keys and enter text.
Part Names and Functions
Text is entered from the cursor position. 📄 Display
To keep the already entered text, first move the cursor to a number to which no text is entered yet with o[▲], [▼] then enter text.
■ Switching upper case or lower case
- Press 4.
The setting is indicated on the display. Characters are set to upper case or lower case.
To capitalise partially: Enter with 📄pressed.
■ Deleting characters
- Press .
Deletes one character backward.
■ Breaking lines
- Press
Breaks the line from the character next to the cursor.
■ Deleting text
-
Press 4 .
-
When a confirmation message appears, press 🔒. Text will be deleted.
■ Confirming text
- Press .
Text appears on the display.
You can check the text and the length of the label.
But the print image cannot be confirmed.
■ Adding characters with an accent mark to the label
If there is a choice of characters with an accent mark, they are indicated on the display.
Example: École
-
Press 4 + .E
-
Press
A choice of characters with an accent mark appears.
- Select an item with [◀][▶] and press . Go on and enter the next character.

Characters with an accent mark 📋 Symbol List
■ Adding a punctuation mark to the label
Select from the following two methods.
- Press
Each press shows the next mark.
Available marks
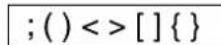
- Press
Each press shows the next mark.
Available marks

■ Adding a symbol to the label
-
Press ★△
-
When the category appears, select an item with [▲][▼] and press ☑.
-
When symbols appear, select a symbol with [◀][▶] and press .
Available symbols 📋 Symbol List
■ Creating labels with serial numbers (Sequence number)
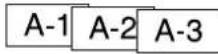
-
Press 4 . ★△
-
Enter a number/alphabet for the first label, and press 📋. The number/alphabet increases by one whenever printing is done.
■ Creating pieces of text
You can create multiple pieces of text continuously. Up to 50 pieces can be created at a time.
You can check which piece of text you are creating with the text number mark displayed at the beginning.
Creating another piece of text
- Select the next text number mark with + o[▲]. [▼] You can create another piece of text. Do the same for the next pieces.
Printing a selected piece of text
-
Select a piece of text you want to print with ⚠ of[▲]. ⚠ [▼]
-
Press
Useful functions
This section explains various functions that will help you create labels.
■ Changing the font size
-
Press
-
Select a line layout with [▲][▼] and press. "Equal": Applies the same font size. No need to proceed to Step 3.
-
Select a font size with [▲][▼] and press .

■ Changing the font
-
Press
-
Select a font with [▲][▼] and press . The font used for the entire text will change.

■ Applying a font style
-
Press .AAA
-
Select a style with [▲][▼] and press .
① Styles applied to small or elaborate characters may not be able to print clearly.

■ Using extra large font
- Make sure that your label satisfies the extra large font requirements.
Requirements for Extra Large Font
The number of lines: "1 Line"
Font size: "Auto"
Font: "SansS.", "SansS.HG", "CL Roman", "BR"
Contents: Uppercase letters, numbers, marks
except comma, space, pictograms
Font style: "Normal"
"Frame": "Off"
- If the label can use the extra large font, the + indicator appears.
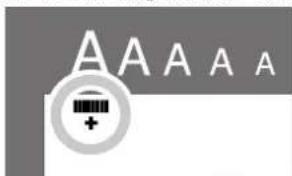
- Enter uppercase "ABCD" for example. The extra large font indicator appears.
■ Adding a frame
-
Press .Abc
-
Select an item with [▲][▼] and press. Entering the frame No. to select does the same.

Available frames 📋 Symbol List
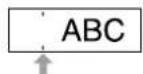
■ Specifying the length of labels
- Press .
- Highlight "Label length" using the cursor keys, then press ☐.
- Select a value (up to 40 cm) using the cursor keys or enter the value using the numeric keys, then press ☑.
- Select a text alignment setting using the cursor keys, then press
- Press A to confirm the font size setting.
- Select "Auto" using the cursor keys, then press
- Enter text.
If the length of entered text exceeds the label length you specified, the font becomes small so that the entire text fits in the specified length.
■ Changing the margins of labels
- Press .
- Highlight "Margins" using the cursor keys, then press ↗.
- Select one of the options using the cursor keys, then press ↗.
- Press
If you select the "None" option, a cut mark is printed. Cut the tape along the cut mark.
■ Adjusting the space between characters
- Press
- Select "Char. spacing" with [▲][▼] and press .
- Select an item with [▲][▼] and press .
■ Making the width of font narrower
- Press
- Select "Narrow" with [▲][▼] and press.
- Select "Narrow" with [▲][▼] and press .
■ Lining up characters vertically
- Press
- Select "Vertical" with [▲][,▼] and press .
- Select "On" with [▲][▼] and press .
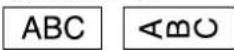
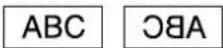
■ Using mirror writing for the label
- Press
- Select "Mirror print" with [▲][,▼] and press .
- Select "On" with [▲][▼] and press .
Creating a label with a special form
To create labels with a special form, a message confirming that the text will be deleted may appear when is pressed. Press to delete the current text and to show the special form.
MEMO
To exit the following special form mode, press 📄, then select the "Exit" and press 🌐
■ Creating an folder tab label
natural_image
Diagram of an open file folder with a magnified inset showing a separate clip (no text or symbols)- Press .
- Select from "Tab:Medium", "Tab:Small" or "Tab:Large" with [◀][▶] and press 📋
- Select a value with [▲][▼]enter label length, and press. Maximum length: 12.5cm (5.0 inch)
- Enter text.

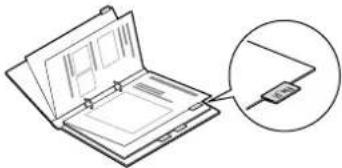
■ Creating a label for cables
Flag labels wrapping a cable
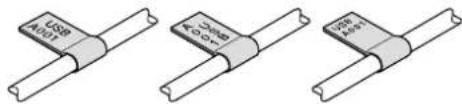
natural_image
Three identical cylindrical electronic components with no visible text or symbols- Press .
- Select from "Flag:Hori.", "Flag:Vert." or "Flag:Edge" with [▲][▼] and press 🔒
- Select a value with [▲][▼]enter label length, and press. Maximum length: 12.5cm (5.0 inch)
- Enter text.

Labels wrapping a cable
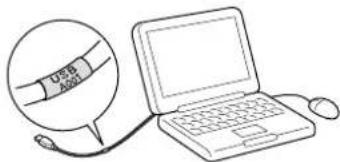
- Press .
- Select "Wrap" with [▲][▼] and press .
- Select a value with [▲][▼]enter label length, and press. Maximum length: 12.5cm (5.0 inch)
- Enter text.
■ Creating a ribbon
- Press .
- Select "8.Ribbon" using the cursor keys, then press ↻.
- Select a value using the cursor keys or enter the value using the numeric keys, then press ☑.
Range of ribbon length: 20-40 cm - Enter text for printing on both ends of the ribbon.
- Press

■ Creating a label including a barcode
- Enter barcodes according to their standards.
-
Check the printed labels with your barcode reader to ensure they can be correctly read.
• Supported barcode: CODE39, CODE128, ITF, CODABAR, UPC-A, UPC-E, EAN-8, EAN-13 -
Press
- Select an item with [▲][▼] and press .
- After setting the barcode, enter the code.

Display Settings ("Display" menu)
The following are the settings to make operation easier.
Backlight
Turns the backlight of the display on or off.
Backlight: On/Off
Contrast
Adjusts the density of the fonts on the display.
Value: -5 to +5
Language
Selects the language of the settings and messages on the display. Language: English/Spanish/French/Portuguese-Br/Portuguese-EU/Italian/Dutch/German
inch:cm
Selects the unit to indicate the length.
Value: inch/cm
Procedure
- Press + .
- Select a setting item with [▲][▼] and press .
- When the options of the selected item appear, select your choice with [▲][,▼] and press .
Cleaning
When the exterior is dirty
Wipe the dirt off with a soft cloth. If it is very dirty, use a cloth wrung out of water.
Never use chemicals or solvents such as benzine, thinner, or alcohol, or use a chemical duster.
When the printhead is dirty
If the print becomes faint or some parts are missing, there may be some dirt on the printhead.
Clean the print head with a cotton swab moistened with medical alcohol (commercially available ethanol).
natural_image
Technical line drawing of a mechanical assembly with an inset circular detail showing internal components (no text or symbols)Initialising this product
The product may stop functioning due to static electricity or other causes. Initialise the product if it does not operate normally such as the display is interrupted.
① Initialise the product. Take extreme care before initialising it. All the created text will be deleted. The settings you made for character input will return to the default.
- Press ⏻
- Press and hold ▶ + , and press .
- When a message appears, press ↗.
The product will be initialised.
To abort: Press any button other than ↗.
Troubleshooting
■ Messages
| Insert Tape No tape | cartridge is installed. Turn the power off and install a tape cartridge correctly. |
| Check tape! A tape cartridge which cannot be used in this product has been set. Check the tape cartridge. | |
| Check tape cartridge | A tape cartridge which cannot be used in this product has been set. Check the tape cartridge. |
| Check battery Possible causes for this message are:• No power remaining or inserted in the wrong way• Mixed with other types or old onesIf so, set the batteries correctly or replace them with new ones. | |
| Too many lines Text entered is too long.Pressto delete the lines indicated by the cursor. | |
| Text too long Entered text is too long for the specified tape length. Pressand adjust the tape length or make text shorter. | |
| Seq. num. only 1 | Sequence numbers have already been set. Sequence numbers can be used for one part only. |
| Text will be deleted. OK? | When creating a label with a special form,current text will be deleted. Pressdelete the text and show the special form. |
| Fill every digit Entered values for barcodes are wrong. Check the entries about values, digits, etc. | |
| Load wider tape Unable to print on the current tape. Use a wider tape. | |
| Txt is too long Continue? | Entered text is too long for the specified tape length. Press to print in the correct length. |
| Overheated! The printhead is too hot. Turn the power off and take out the tape cartridge. Wait for a while before start printing again. | |
| Cover open! Powering off. | If you open the cover on the rear without turning the power off, a message is displayed and then the power is turned off automatically. |
| Motor error! An error occurred in the motor operation. Turn the power off once, then turn it back on. If the same message appears, turn the power off and contact the EPSON customer support centre. | |
Problems
Does not operate normally.
| Initialise this product if it does not operate normally such as the power cannot be turned on or off, or the display is interrupted. |
No image comes out even though Ⓞ has been pressed.
| Are the batteries correctly set?Check if all the batteries are correctly set. |
| Did the batteries run out?Replace the batteries with new ones, or use the dedicated AC adapter (APT0615Z). |
| Is the AC adapter securely connected?Connect the AC adapter and the power cable firmly to the power socket of the product, the AC adapter connector and the outlet. |
| Are you using an AC adapter other than the dedicated one?Using an AC adapter other than the dedicated one (APT0615Z) is very dangerous, and may cause overheating or damage to the electric circuits. |
| Is the display level appropriate?Adjust the display level. |
Display has turned off.
| Did you enable the auto power-off function?The power turns off automatically if no operation is made for more than 5 minutes. |
| Did you try to carry out a function incorrectly?If buttons are operated incorrectly, the display turns off for a moment. |
Nothing is printed even though Ⓢ has been pressed.
| Is text entered?Nothing is printed if no text is entered. |
| Any message on the display?Read the message and take the appropriate action. |
| Did the tape run out?Install a new tape cartridge. |
| Did the batteries run out?Replace the batteries with new ones, or use the dedicated AC adapter (APT0615Z). |
| Is the cover on the rear open?Set the tape cartridge correctly and close the cover completely. |
Characters are not printed properly.
| Is the tape cartridge correctly set?Set the tape cartridge correctly. |
| Is the printhead dirty?Clean the printhead. |
| Did the batteries run out?Replace them with new ones, or use the dedicated AC adapter (APT0615Z). |
Printing ends in the middle of text.
| Did the tape run out?Install a new tape cartridge. |
| Did the batteries run out?Replace them with new ones, or use the dedicated AC adapter (APT0615Z). |
Created text has gone.
| Did you delete the text?If 4 X are pressed, the text on the display will be deleted. |
| Did you initialise the product?If the product is initialised, all the created text will be deleted. |
| Did you remove the batteries or the AC adapter when the product was in operation?If the AC adapter or the batteries are removed during operation, the text may be deleted. |
Cannot attach the label.
| Did you peel the backing paper?Attach the label after peeling the backing paper. |
| Are you attaching it on a dirty place or on a place with a rough surface?The label may not adhere due to the material of the attachment location or the environmental conditions. |
MEMO
If none of the above has solved the problem or the symptom is other than the above, contact the EPSON customer support centre.
Specifications
Body
| Dimensions Approx. 110 (W) x 170 (D) x 56 (H) (mm) |
| Weight Approx. 400g (excluding batteries, tape cartridge) |
Usage conditions
| Operating temperature 10 to 35 degrees C |
| Storage temperature -10 to $5 degrees C |
Power supply
| AC adapter | type APT0615 | Z2-1 |
| Manufacturer | Seiko Epson Corp. | |
| Input AC100 | 240V, 0.3A, 50-60Hz (dedicated adapter, power cable only) | |
| Output DC6.$V, 1.5A | ||
| Total output power | 10W | |
| Battery AA alkaline battery x 6 | ||
Supported tape width
4 mm, 6 mm, 9 mm, 12 mm, 18 mm