
BN315 - Video projector LG - Free user manual and instructions
Find the device manual for free BN315 LG in PDF.


| Product Type | Video Projector |
| Brand | LG |
| Model | BN315 |
| Display Technology | DLP |
| Native Resolution | 1920 x 1080 (Full HD) |
| Brightness | 1000 ANSI Lumens |
| Contrast Ratio | 150,000:1 |
| Light Source | LED |
| Light Source Life | 30,000 hours |
| Throw Ratio | 1.2:1 |
| Screen Size | 30 - 300 inches |
| Keystone Correction | Automatic Vertical ±40° |
| Connectivity | HDMI x2, USB-A, 3.5mm Audio Out |
| Built-in Speaker | 5W Mono |
| Wireless | Wi-Fi, Bluetooth |
| Noise Level | 30 dB (Eco Mode) |
| Dimensions (W x D x H) | 225 x 200 x 80 mm |
| Weight | 1.2 kg |
| Power Consumption | 65W (Max) |
| Power Supply | AC 100-240V, 50/60Hz |
| Operating Temperature | 0°C - 40°C |
| Package Contents | Projector, Power Cord, Remote Control, Quick Setup Guide |
| Maintenance | Clean air vents with soft brush; avoid liquid cleaners |
| Safety Features | Auto-off after no signal, overheat protection |
Frequently Asked Questions - BN315 LG
User questions about BN315 LG
0 question about this device. Answer the ones you know or ask your own.
Ask a new question about this device
Download the instructions for your Video projector in PDF format for free! Find your manual BN315 - LG and take your electronic device back in hand. On this page are published all the documents necessary for the use of your device. BN315 by LG.
USER MANUAL BN315 LG
Please read this manual carefully before operating your set.
Retain it for future reference.
Record model number and serial number of the set.
See the label attached on the bottom of the set and quote this information to your dealer when you require service.
Model number :
Serial number :
BN315-JD
OWNER'S MANUAL
natural_image
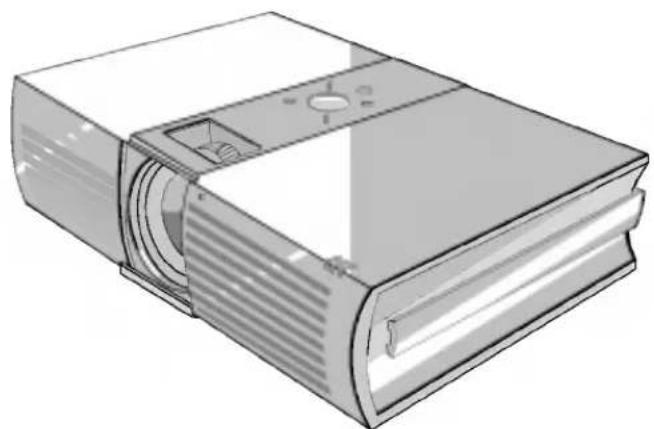
Illustration of a rectangular electronic device with a curved internal structure and ventilation slots (no text or symbols)DLP PROJECTOR
FCC NOTICE
• A Class B digital device
This equipment has been tested and found to comply with the limits for a Class B digital device, pursuant to Part 15 of the FCC Rules. These limits are designed to provide reasonable protection against harmful interference in a residential installation. This equipment generates, uses and can radiate radio frequency energy and, if not installed and used in accordance with the instructions, may cause harmful interference to radio communications. However, there is no guarantee that interference will not occur in a particular installation. If this equipment does cause harmful interference to radio or television reception, which can be determined by turning the equipment off and on, the user is encouraged to try to correct the interference by one or more of the following measures:
- Reorient or relocate the receiving antenna.
- Increase the separation between the equipment and receiver.
- Connect the equipment into an outlet on a circuit different from that to which the receiver is connected.
- Consult the dealer or an experienced radio/TV technician for help.
- Any changes or modifications not expressly approved by the party responsible for compliance could void the user's authority to operate the equipment.
Warning
This is a class B product. In a domestic environment this product may cause radio interference, in which case the user may be required to take adequate measures.
natural_image
3D illustration of a closed book with visible spine and cover (no text or symbols)Contents
Safety Instructions....4
Names of parts
Main Body 7
Connecting Part 7
Control Panel 8
Remote Control....9
Installing Batteries....9
Projector Status Indicators....10
Accessories....11
Optional Extras 11
Installing and Composition
Installation Instructions 12
Basic Operation of the Projector....13
Using Kensington Security System......14
Turning on the Projector 15
Turning off the Projector 15
Focus and Position of the Screen Image.....16
Selecting source mode 16
Connection
Connecting to a Desktop PC 17
Connecting to a Notebook PC 17
Connecting to a Video Source....17
Connecting to a DVD 18
Connecting to a D-TV Set-Top Box .....18
Function
Video Menu Options
Adjusting Video 19
APC (Auto Picture Control)....19
Auto Color Temperature Control 20
Gamma Function 20
White peaking Function 21
Color temperature Control 21
Color enhancement Control....21
Reset (Reset to original factory value).....21
Special Menu Options
Selecting Language 22
Using ARC Function....22
Flip horizontal Function....23
Flip vertical Function 23
Auto sleep Function 23
Using Keystone Function 24
Using Blank Function 24
Selecting Blank image color 24
Lamp mode Function 25
Checking lamp time 25
Using Still Function 25
Screen Menu Options
Auto Configure Function 26
Manual configure 26
Using ZOOM Function 27
Screen Position 27
Reset (Reset to original factory value).....27
Information
Supported Monitor Display....28
Maintenance....28
Replacing the Lamp 29
Specifications 31


Disposal of your old appliance
- When this crossed-out wheeled bin symbol is attached to a product it means the product is covered by the European Directive 2002/96/EC.
- All electrical and electronic products should be disposed of separately from the municipal waste stream via designated collection facilities appointed by the government or the local authorities.
- The correct disposal of your old appliance will help prevent potential negative consequences for the environment and human health.
- For more detailed information about disposal of your old appliance, please contact your city office, waste disposal service or the shop where you purchased the product.
Safety Instructions
Please take note of the safety instructions to prevent any potential accident or misuse of the projector.
→ Safety Instructions are given in two forms as detailed below.
⚠ WARNING : The violation of this instruction may cause serious injuries and even death.
NOTES: The violation of this instruction may cause light injuries or damage to the projector.
→ After reading this manual, keep it in the place that the user always can contact easily.
Indoor Installation
Do not place the Projector in direct sunlight or near heat sources such as radiators, fires and stove etc.
This may cause a fire hazard!

WARNING
Do not place inflammable materials beside the projector
This may cause a fire hazard!
Do not allow children to hang on the installed projector.
It may cause the projector to fall, causing injury or death.
Indoor Installation
Disconnect from the mains and remove all connections before moving.
When installing the projector on a table, be careful not to place it near the edge.
This may cause the projector to fall causing serious injury to a child or adult and serious damage to the projector.
Only use a suitable stand.

NOTES
Do not place the projector close to sources of steam or oil such as a humidifier.
This may create a fire hazard or an electric shock hazard!
Do not place the projector where it might be exposed to dust.
This may cause a fire hazard or damage to the unit!
Only use the projector on a level and stable surface.
It may fall and cause injury and/or damage to the unit.
Ensure good ventilation around the projector. The distance between the projector and the wall should be more than 20cm/8 inches.
An excessive increase in its internal temperature may cause a fire hazard or damage to the unit!
Do not block the vents of the projector or restrict air-flow in any way.
This would cause the internal temperature to increase and could cause a fire hazard or damage to the unit!
Do not place the projector directly on a carpet, rug or place where ventilation is restricted.
This would cause its internal temperature to increase and might create a fire hazard or damage the unit.
Outdoor Installation

WARNING
Do not use the projector in a damp place such as a bathroom where it is likely to get wet.
This may cause a fire or an electric shock hazard!
Power
Earth wire should be connected.
If the earth wire is not connected, there is a possible danger of electric shock caused by the current leakage.
If grounding methods are not possible, a separate circuit breaker should be installed by a qualified electrician.
Do not connect ground to telephone wires, lightning rods or gas pipe.

WARNING
The mains plug should be inserted fully into the power outlet to avoid a fire hazard!
This may cause a fire hazard or damage the unit.
Do not place heavy objects on the power cord.
This may cause a fire or an electric shock hazard!
Power

WARNING
Do not use too many plugs on the Mains multi-outlet.
It may result in overheating of the outlet and causes a fire hazard!
Power

NOTES
Never touch the power plug with a wet hand
This may cause an electric shock hazard!
Hold the plug firmly when unplugging. If you pull the cord, it may be damaged.
This may cause a fire hazard!
Prevent dust collecting on the power plug pins or outlet.
This may cause a fire hazard!
Do not plug when the power cord or the plug is damaged or any part of the power outlet is loose.
This may cause a fire or an electric shock hazard or damage to the unit!
Ensure the power cord does not come into contact with sharp or hot objects such as a heater.
This may cause a fire or an electric shock hazard or damage to the unit!
Place the projector where people will not trip or tread on the power lead.
This may cause a fire or an electric shock hazard or damage to the unit!
Do not turn the projector On/Off by plugging-in or unplugging the power plug to the wall outlet. (Do not use the power plug for switch.)
It may cause mechanical failure or could cause an electric shock.
Using

WARNING
Do not place anything containing liquid on top of the projector such as flowerpot, cup, cosmetics or candle.
This may cause a fire hazard or damage to the unit!
In case of impact shock or damage to the projector switch it off and unplug it from the mains outlet and contact your service center.
This may cause a fire or an electric shock hazard or damage to the unit!
Do not allow any objects to fall into the projector.
This may cause an electric shock hazard or damage to the unit!
If water is spilt into the projector unplug it from the mains supply outlet immediately and consult your Service Agent.
This may cause an electric shock hazard or damage to the unit!
Dispose of used batteries carefully and safely.
In the case of a battery being swallowed by a child please consult a doctor immediately.
In the event that an image does not appear on the screen please switch it off and unplug it from the mains supply and contact your Service Agent.
This may cause a fire or an electric shock hazard or damage to the unit!
Do not remove any covers (except lens cover). High risk of Electric Shock!
Don't look directly onto the lens when the projector is in use. Eye damage may occur!
Do not touch metal parts during or soon after operation since the vents and lamp cover will remain very hot!
CAUTION concerning the Power Cord
Most appliances recommend they be placed upon a dedicated circuit; that is, a single outlet circuit which powers only that appliance and has no additional outlets or branch circuits. Check the specification page of this owner's manual to be certain.
Do not overload wall outlets. Overloaded wall outlets, loose or damaged wall outlets, extension cords, frayed power cords, or damaged or cracked wire insulation are dangerous. Any of these conditions could result in electric shock or fire. Periodically examine the cord of your appliance, and if its appearance indicates damage or deterioration, unplug it, discontinue use of the appliance, and have the cord replaced with an exact replacement part by an authorized service personnel.
Protect the power cord from physical or mechanical abuse, such as being twisted, kinked, pinched, closed in a door, or walked upon. Pay particular attention to plugs, wall outlets, and the point where the cord exits the appliance.
Using

WARNING
Never touch the wall outlet when there is leakage of gas, open the windows and ventilate.
It can cause a fire or a burn by a spark.
Do not drop the projector or allow impact shock.
This may cause mechanical failure or personal injury!
Don't look at laser beam directly as it can cause eye damage!
Using

NOTES
Do not place heavy objects on top of projector.
This may cause mechanical failure or personal injury!
Take care not to impact the lens particularly when moving the projector.
Do not touch the lens of the projector. It is delicate and easily damaged.
Do not use any sharp tools on the projector as this will damage the casing.
Cleaning

WARNING
Do not use water while cleaning the projector
This may cause damage to the projector or an electric shock hazard.
In the unlikely event of smoke or a strange smell from the projector, switch it off, unplug it from the wall outlet and contact your dealer or service centre.
This may cause a fire or an electric shock hazard or damage to the unit!
Use an air spray or soft cloth that is moist with a neutral detergent and water for removing dust or stains on the projection lens.
Cleaning

NOTES
Contact the Service Center once a year to clean the internal parts of the projector.
Accumulated dust can cause mechanical failure.
When cleaning the plastic parts such as projector case, unplug the power and wipe it with a soft cloth. Do not use cleanser, spray water or wipe with a wet cloth. Especially, never use cleanser (glass cleaner), automobile or industrial shiner, abrasive or wax, benzene, alcohol etc., which can damage the product. Use an air spray or soft cloth that is moist with a neutral detergent and water for removing dust or stains on the projection lens.
It can cause fire, electric shock or product damage (deformation, corrosion and damage).
Others

WARNING
Do not attempt to service the projector yourself. Contact your dealer or service centre.
This may cause damage to the projector and could give an electric Shock as well as invalidating the warranty!
Others

NOTES
Be sure to unplug if the projector is not to be used for a long period.
Accumulated dust may cause a fire hazard or damage to the unit!
Refer lamp servicing to qualified service personnel.
Do not mix new batteries with old batteries.
This may cause the batteries to over-heat and leak.
Only use the specified type of battery.
This could cause damage to the remote control.
Names of parts
Main Body
* The projector is manufactured using high-precision technology. You may, however, see on the Projector screen tiny black points and/or bright points (red, blue, or green). This can be a normal result of the manufacturing process and does not always indicate a malfunction.
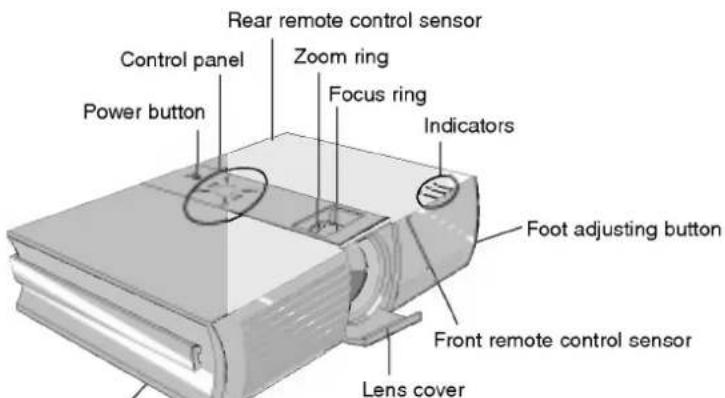
* Push the lens cover into the inside after pulling it open into the front. (If you mount on the ceiling, after pushing the cover, the lens cover is installed. If not, the cover may overlap projecting lens.)
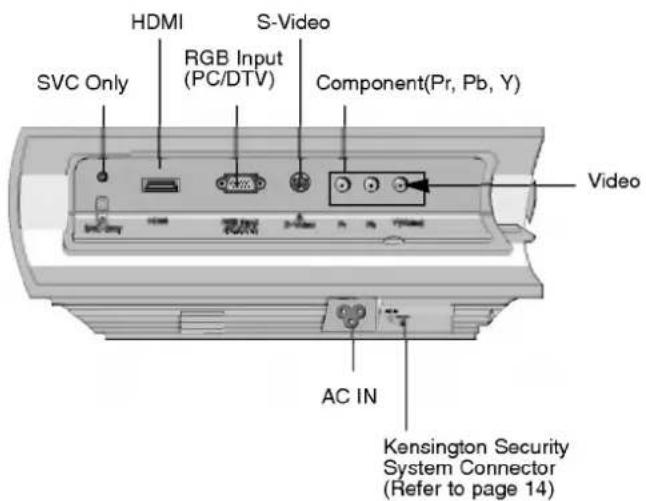
Connecting Part
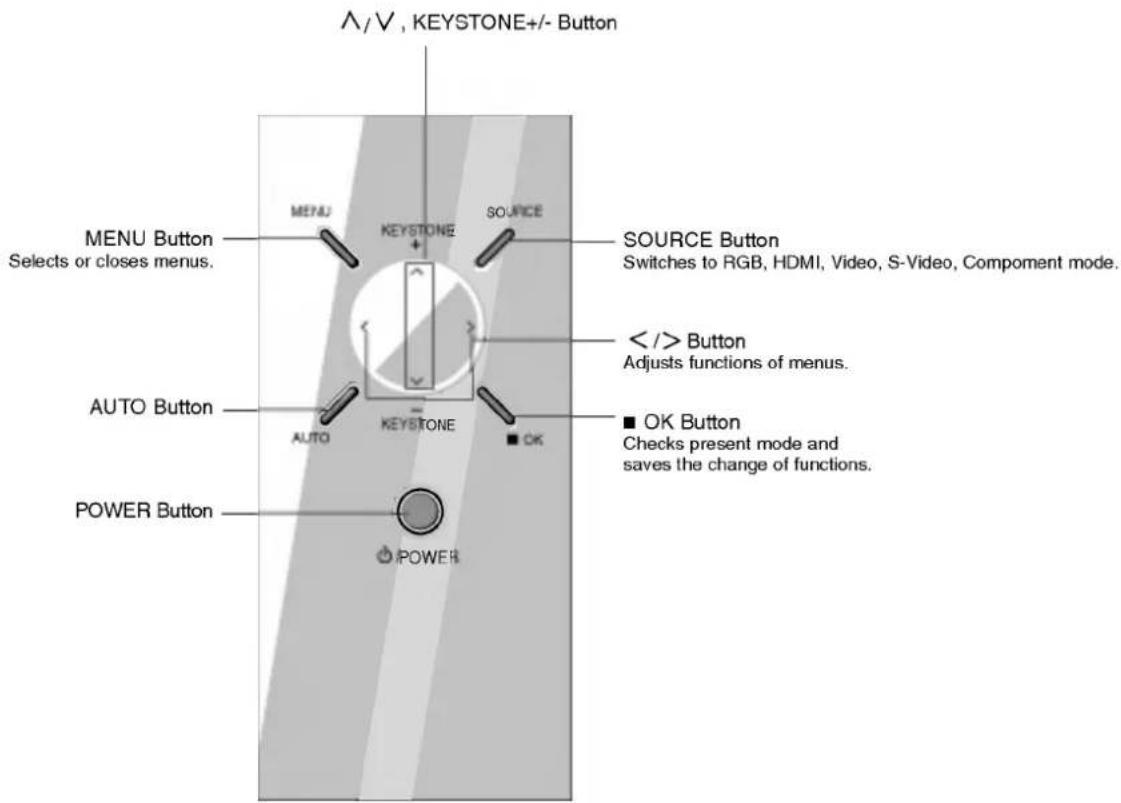
Control Panel
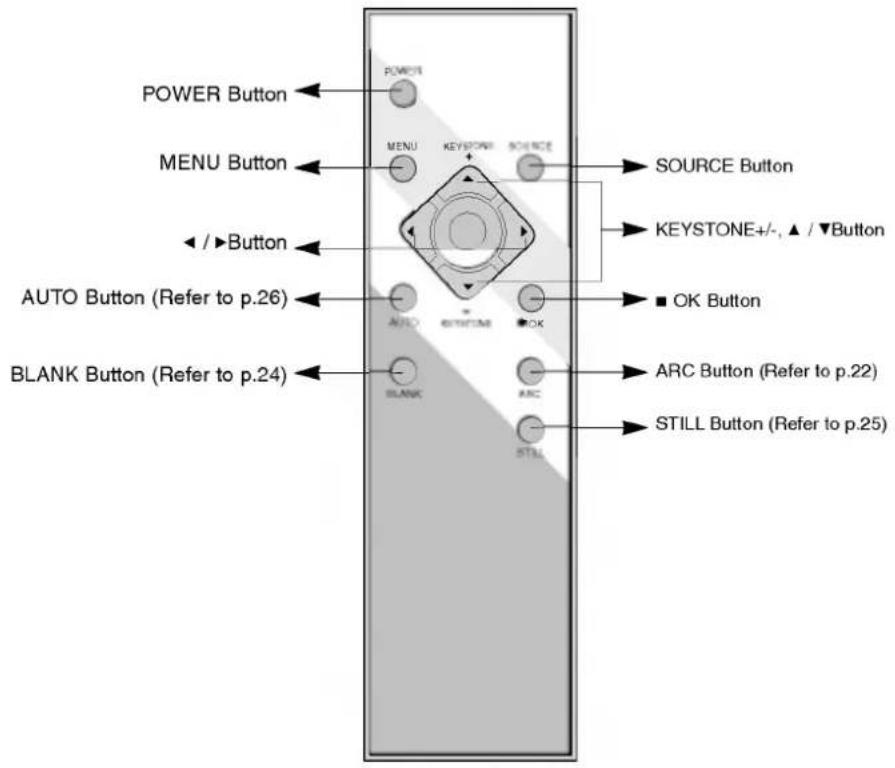
Remote Control
Installing Batteries
CAUTION
RISK OF EXPLOSION IF BATTERY IS REPLACED WITH AN INCORRECT TYPE. DISPOSE OF USED BATTERIES ACCORDING TO THE INSTRUCTIONS.
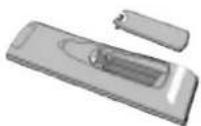
- Open the battery compartment cover on the back of the remote control.
- Insert the specified type of batteries with correct polarity, match "+" with "+" and match "-" with "-"
- Don't mix used batteries with new batteries.
Projector Status Indicators
* Lamp indicator, operation indicator and temperature indicator at the top of the projector show the user the operating status of the projector.
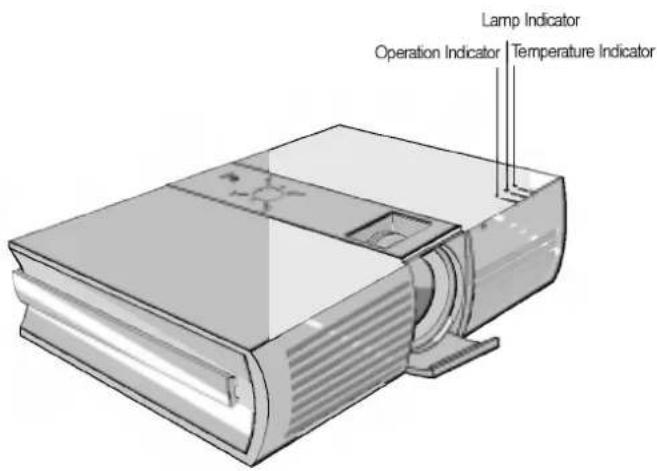
| Operation Indicator | Orange | Standby. |
| Green(flashing) | Lamp is starting up. | |
| Green | Unit is in operation (Lamp is turned on) | |
| Orange(flashing) | Projector lamp is cooling (1 min. 30 sec.) | |
| Off | Power off. | |
| Lamp Indicator | Red | Projector lamp is reaching the end of its life and needs to be replaced with a new lamp. (over 2000 hours) |
| Red(flashing) | The projector is experiencing an error. Retry Power On again later. If lamp indicator is red (flashing) again, contact the service center. | |
| Green(flashing) | The lamp cover is open. | |
| Temperature Indicator | Orange | A high temperature state has been detected. Turn the Projector off. |
| Red | The Projector has turned off due to excessive heat. | |
| Red (flashing) | Power has turned off due to problem with the internal cooling fan. Contact your service center. |
Accessories
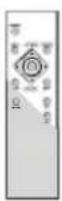
Remote Control
2 Batteries
Owner's Manual
Power Cord
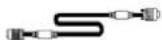
Computer Cable
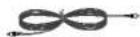
Video Cable
Optional Extras
* Contact your dealer to purchase these items.
* When applying a ceiling installer, use only the ceiling installer for projector.
* Contact your service personnel for replacing of lamp.
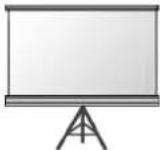
Projection Screen

Lamp
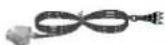
SCART to RCA jack (option)
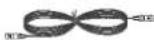
S-Video Cable
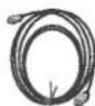
HDMI Cable
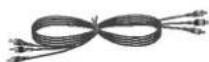
Component Cable
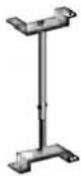
Ceiling installer for projector
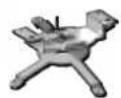
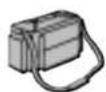
Portable Bag
Installing and Composition
Installation Instructions
* Don't place the projector in the following conditions. It may cause malfunction or product damage.

Provide proper ventilation for this projector.
●The projector is equipped with ventilation holes(intake) on the bottom and ventilation holes(exhaust) on the front. Do not block or place anything near these holes, or internal heat build-up may occur, causing picture degradation or damage to the projector.
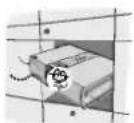
●Never push projector or spill any kind of liquid into the projector.
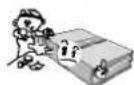
- Do not place the projector on a carpet, rug or other similar surface. It may prevent a adequate ventilation of the projector bottom. This product should be mounted to a wall or ceiling only.
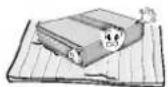
●Leave an adequate distance(30cm/12 inches or more) around the projector.
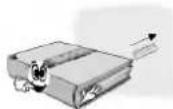

Place this projector in adequate temperature and humidity conditions.
● Install this projector only in a location where adequate temperature and humidity is available. (refer p.31)

Don't place the projector where it can be covered with dust.
● This may cause overheating of the projector.

Do not obstruct the slots and openings of the projector. This may cause overheating and create a fire hazard.

The projector is manufactured using high-precision technology. You may, however, see tiny black points and/or bright points (red, blue, or green) that continuously appear on the projector Screen. This is a normal result of the manufacturing process and does not indicate a malfunction.

To display DTV programs, it is necessary to purchase a DTV receiver (Set-top Box) and connect it to the projector.

If there is no input signal, the Menu will not be displayed on screen.
Basic Operation of the Projector
- Place the projector on a sturdy and horizontal surface with the PC or AV source.
- Place the projector with the desired distance from the screen. The distance between the projector and the screen determines the actual size of the image.
- Position the projector so that the lens is set at a right angle to the screen. If the projector is not set at a right angle, the screen image will be crooked. If this is so then the keystone adjustment may correct this (Refer to page 24.).
- Connect the cables of the projector to a wall power socket and other connected sources.
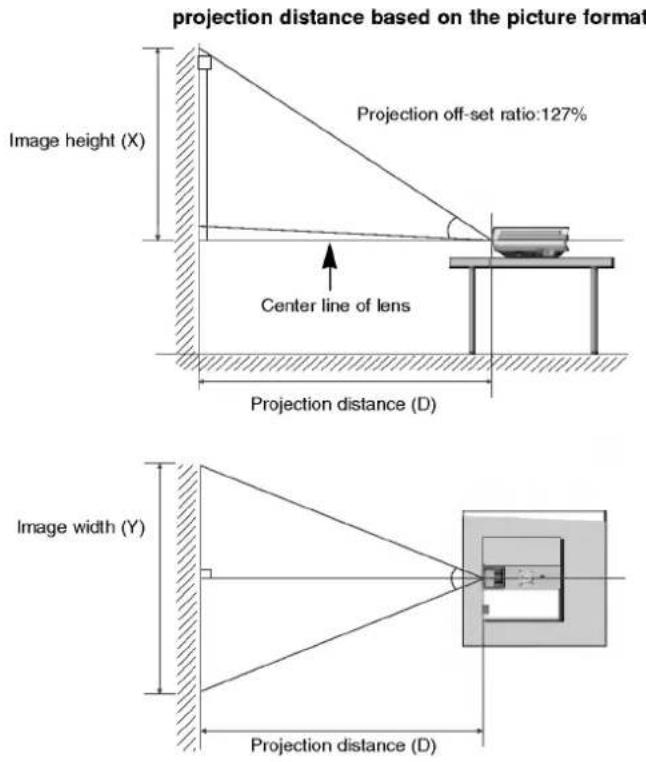
| 15:9 picture format mm/ inches | |||||||||
| Image size | 40" | 60" | 80" | 100" | 120" | 140" | 160" | 180" | 200" |
| Image height (X) | 523/21 | 784/31 | 1045/41 | 1307/51 | 1568/62 | 1830/72 | 2091/82 | 2352/93 | 2614/103 |
| Image width (Y) | 871/34 | 1307/51 | 1742/69 | 2178/86 | 2614/103 | 3049/120 | 3485/137 | 3920/154 | 4356/171 |
| The shortest distance (D) | 1376/54 | 2075/82 | 2773/109 | 3472/137 | 4171/164 | 4870/192 | 5569/219 | 6268/247 | 6967/274 |
| The longest distance (D) | 1638/64 | 2470/97 | 3303/130 | 4135/163 | 4967/196 | 5800/228 | 6632/261 | 7464/294 | 8297/327 |
* The longest/shortest distance show status when adjusted by the zoom function.
Using Kensington Security System
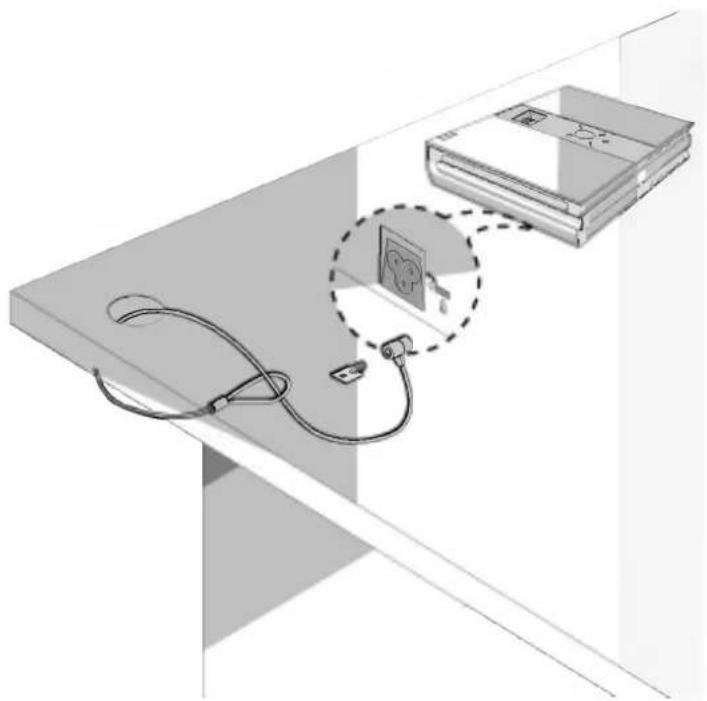
● The projector has a 'Kensington' Security System Connector on the back panel. Connect the 'Kensington' Security System cable as below.
- For the detailed installation and use of the Kensington Security System, refer to the user's guide attached to the Kensington Security System set.
And for further information, contact http://www.kensington.com, the internet homepage of the Kensington company that deals with expensive electronic equipment such as notebook PCs or projectors.
● Kensington Security System is an optional item.
natural_image
Diagram showing cable routing between a computer and a monitor on a shelf, with no visible text or symbols.Turning on the Projector
- Connect power cord correctly.
- Remove the lens cover of the projector.
- Press the POWER button on the remote control or top cover.
(Green operation indicator flashes if lamp is in start-up cycle.)
● An image will appear after the operation indicator light turns (Green).
- Select the source mode with the SOURCE button.
- Leave the projector plugged in for at least 1 minute 30 seconds after switching off the projector, as this will allow the lamp cooling to continue which will help to preserve the lamp life.
Note!
* Don't unplug the power cord while the ventilation fan (inlet/outlet) is working. If so, this may increase risk of damage to the lamp.
Turning off the Projector
- Press the POWER button on the top cover or remote control.
- Press the POWER button on the top cover or remote control again to turn off the power.
- If the operation indicator LED is orange and blinking, do not disconnect the supply until the operation indicator LED is lit constantly (orange).
- If the operation indicator LED is orange and blinking, the power button on the top cover or on the remote control will not operate.
Power Off? Please press Power key again.
Focus and Position of the Screen Image
When an image appears on the screen, check if it is in focus and fits well to the screen.
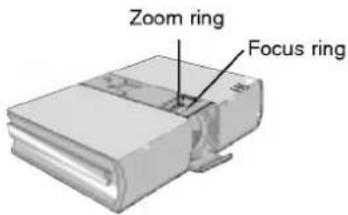
● To adjust the focus of the image, rotate the focus ring which is the outer ring on the lens.
● To adjust the size of the image, rotate the zoom ring which is the inner ring on the lens.
To raise or lower the image on the screen, extend or retract the foot at the bottom of the projector by pushing foot adjusting button as below.
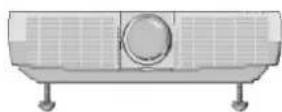
- While pressing the foot adjusting button, raise or lower the projector to place the screen image in the proper position.
- Release the button to lock the foot in its new position.
- To fine-tune the height of the projector, rotate the front foot to raise or lower it. After raising the front foot, do not press down on the projector.
Selecting source mode
- Press the SOURCE button.
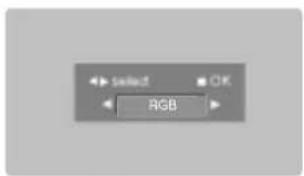
- Each press of the ◀, ▶ button changes the display as below.
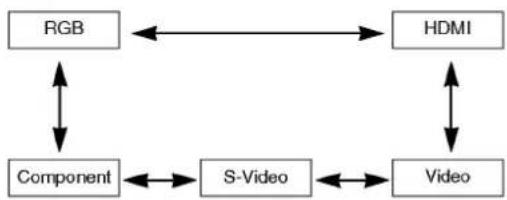
flowchart
graph TD
    A["RGB"] <--> B["HDMI"]
    C["Component"] <--> D["S-Video"]
    D <--> E["Video"]
    B <--> E
Connection
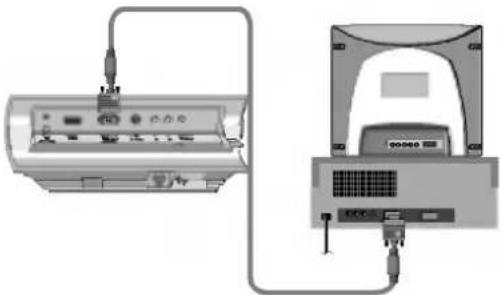
Connecting to a Desktop PC
* You can connect the projector to a computer of VGA, SVGA, XGA and SXGA output.
* You can use ARC function for the RGB signals of the Aspect Ratio 4:3. (For HD wide input signals, you cannot use ARC function.)
* Fundamentally, HD wide input signal is not included in the Spec., so the set may not support HD signal perfectly.
* Refer to page 28 for the supported monitor displays of the projector.
< How to connect >
Connect computer cable to RGB Input (PC/DTV) of the projector.
Connecting to a Notebook PC
< How to connect >
Connect computer cable to RGB Input (PC/DTV) of the projector.
If you set your computer to output the signal to both the display of your computer and the external projector, the picture of the external projector may not appear properly. In such cases, set the output mode of your computer to output the signal only to the external projector. For details, refer to the operating instructions supplied with your computer.
natural_image
Two electronic devices connected by a cable, one showing ports and the other a mounted device (no visible text or symbols)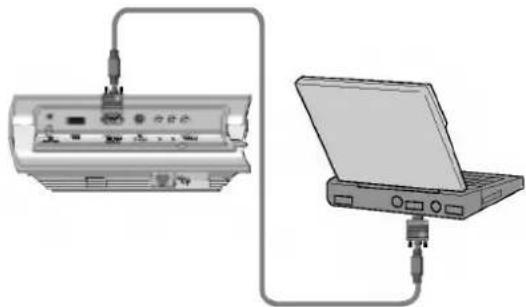
natural_image
Diagram showing two connected devices: a computer with ports and cables, and a laptop with an open port (no text or symbols visible)Connecting to a Video Source
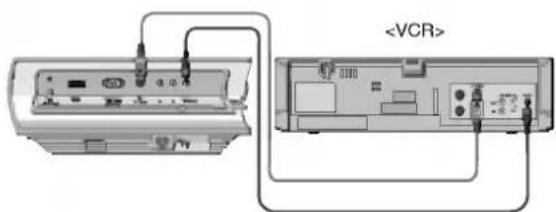
* You can connect a VTR, a camcorder or any other compatible video image source to the projector.
< How to connect 1 >
a. Connect the Video input jacks of the projector to the output jacks of the A/V source with Video cable.
< How to connect 2 >
b. Connect the S-Video input jack of the projector to the S-Video output jack of an A/V source with an S-Video cable. * You can get better picture quality when connecting S-Video source to the projector.
Connecting to a DVD
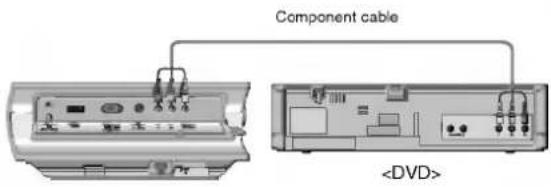
* The output jacks (Y, Pb, Pr) of the DVD might be labelled as Y, Pb, Pr / Y, B-Y, R-Y / Y, Cb, Cr according to the equipment.
< How to connect >
a. Connect the DVD Component cable to Component Pr, Pb, Y of the projector.
- When connecting the component cable, match the jack colors with the component cable.(Y=green, Pb=blue, PR=red)
b. Use a DVD with Component 480i(576i)/480p(576p), 720p, 1080i mode.
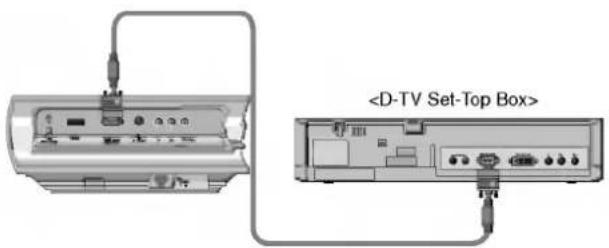
Connecting to a D-TV Set-Top Box
* To receive D-TV programmes, it is necessary to purchase a D-TV receiver (Set-Top Box) and connect it to the projector.
* Please refer to the owner's manual of the D-TV Set-Top Box for the connection between projector and D-TV Set-Top Box.
< How to connect an RGB source >
a. Connect RGB cable to RGB Input (PC/DTV) of the projector.
b. Use a DTV receiver with DTV 480p(576p)/720p/1080i mode.
* HDMI supports HDCP.
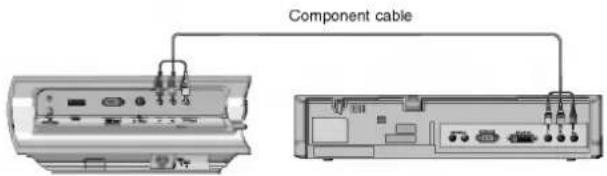
< How to connect a Component source >
a. Connect the D-TV Set-Top Box Component cable to Component Pr, Pb, Y of the projector.
* When connecting the component cable, match the jack colors with the component cable.(Y=green, PB=blue, PR=red)
b. Use a DTV receiver with DTV 480p(576p)/720p/1080i mode.
Function
* In this manual, the OSD(On Screen Display) may be different from your Projector's because it is just an example to help with the Projector operation.
* If there is no input signal present, the Menu will not be displayed.
* This operating guide explains operation of RGB(PC) mode mainly.
Video Menu Options
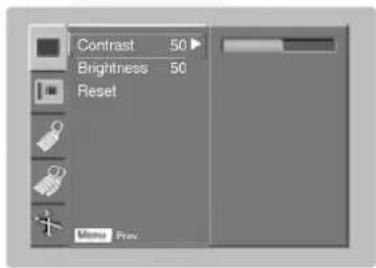
Adjusting Video
- Press the MENU button and then use ▲, ▼ button to select the ■ menu.
- Press the ▶ button and then use ▲, ▼ button to select a video item you want to adjust.
- Press the ◀, ▶ button to adjust the screen condition as you want.
-
Press the ■OK button to save the new settings.
-
Each adjustment of ■ menu options will not affect other inputs. As required, re-adjust ■ menu options for the following input source: Video/S-Video/Component (480i(576i)), Component (480p(576p), 720p, 1080i)
- To restore the original image condition after changing it, press ■OK button after selecting [Reset] item.
- When receiving an NTSC signal, the picture item Tint is displayed and can be adjusted.(60Hz only)
- To exit the menu display, repeatedly, press the MENU button.
- DLP PROJECTOR
- FCC NOTICE
- • A Class B digital device
- Warning
- Contents
- Names of parts
- Installing and Composition
- Connection
- Function
- Video Menu Options
- Special Menu Options
- Screen Menu Options
- Information
- Disposal of your old appliance
- Safety Instructions
- Indoor Installation
- NOTES
- Outdoor Installation
- Power
- Using
- CAUTION concerning the Power Cord
- Cleaning
- Others
- Main Body
- Connecting Part
- Control Panel
- Remote Control
- Installing Batteries
- CAUTION
- Projector Status Indicators
- Accessories
- Optional Extras
- Installation Instructions
- Provide proper ventilation for this projector.
- Place this projector in adequate temperature and humidity conditions.
- Don't place the projector where it can be covered with dust.
- Basic Operation of the Projector
- Using Kensington Security System
- Turning on the Projector
- Note!
- Turning off the Projector
- Focus and Position of the Screen Image
- Selecting source mode
- Connecting to a Desktop PC
- < How to connect >
- Connecting to a Notebook PC
- Connecting to a Video Source
- < How to connect 1 >
- < How to connect 2 >
- Connecting to a DVD
- Connecting to a D-TV Set-Top Box
- < How to connect an RGB source >
- < How to connect a Component source >
- Adjusting Video
- APC (Auto Picture Control)
- Auto Color Temperature Control
- Gamma Function
- White peaking Function
- Color temperature Control
- Color enhancement Control
- Reset (Reset to original factory value)
- Selecting Language
- Using ARC Function
- Flip horizontal Function
- Flip Vertical Function
- Auto sleep Function
- Using Keystone Function
- Using Blank Function
- Selecting Blank image color
- Lamp mode Function
- Checking Lamp time
- Using Still Function
- Auto Configure Function
- Manual configure
- Using ZOOM Function
- Screen Position
- Supported Monitor Display
- Maintenance
- Cleaning the lens
- Cleaning the Projector Case
- Replacing the Lamp
- Lamp Replacement
- Be careful when replacing lamp
- To obtain a replacement Lamp unit
- Lamp unit disposal
- Operating Condition
- temperature
- humidity
- Projector Lamp
- lamp model
- lamp power consumption
Brand : LG
Model : BN315
Category : Video projector