
PA75U - Video projector LG - Free user manual and instructions
Find the device manual for free PA75U LG in PDF.


| Product Type | Portable LED Video Projector |
| Model | PA75U |
| Brand | LG |
| Display Technology | DLP |
| Resolution | 1920 x 1080 (Full HD) |
| Brightness | 700 ANSI Lumens |
| Contrast Ratio | 100,000:1 |
| Light Source | LED (up to 30,000 hours) |
| Keystone Correction | Auto Vertical ±40° |
| Projection Size | 30 – 300 inches |
| Connectivity | HDMI 1.4, USB 2.0, Audio Out (3.5mm), Bluetooth |
| Built-in Speaker | 5W Mono |
| Wireless | Screen Mirroring (Wi-Fi Direct, Miracast) |
| Power Consumption | 100W (Max) |
| Power Input | AC 100-240V, 50/60Hz (Adapter included) |
| Dimensions (W x D x H) | 200 x 200 x 60 mm |
| Weight | 1.5 kg |
| Cooling System | Fan (low noise mode available) |
| Cleaning Instructions | Wipe exterior with soft dry cloth; clean air vents with brush |
| Safety Certifications | FCC, CE, RoHS |
| Spare Parts | Power adapter, remote control (order from LG service) |
| Repairability | LED light source not user-replaceable; contact LG authorized service |
Frequently Asked Questions - PA75U LG
User questions about PA75U LG
0 question about this device. Answer the ones you know or ask your own.
Ask a new question about this device
Download the instructions for your Video projector in PDF format for free! Find your manual PA75U - LG and take your electronic device back in hand. On this page are published all the documents necessary for the use of your device. PA75U by LG.
USER MANUAL PA75U LG
Please read the SAFETY INSTRUCTIONS section carefully before using the product.
PA75U
LICENSE

Manufactured under license from Dolby Laboratories. "Dolby" and the double-D symbol are trademarks of Dolby Laboratories.
ABOUT DIVX VIDEO: DivX® is a digital video format created by DivX, LLC, a subsidiary of Rovi Corporation. This is an official DivX Certified® device that plays DivX video. Visit divx.com for more information and software tools to convert your files into DivX videos.
ABOUT DIVX VIDEO-ON-DEMAND: This DivX Certified® device must be registered in order to play purchased DivX Video-on-Demand (VOD) movies. To obtain your registration code, locate the DivX VOD section in your device setup menu. Go to vod.divx.com for more information on how to complete your registration.
DivX Certified® to play DivX® video up to HD 1080p, including premium content.
DivX®, DivX Certified® and associated logos are trademarks of Rovi Corporation or its subsidiaries and are used under license. Covered by one or more of the following U.S. patents: 7,295,673; 7,460,668; 7,515,710; 7,519,274

The terms HDMI and HDMI High-Definition Multimedia Interface, and the HDMI logo are trademarks or registered trademarks of HDMI Licensing LLC in the United States and other countries.

Manufactured under license under U.S. Patent Nos: 5,956,674; 5,974,380; 6,487,535 & other U.S. and worldwide patents issued & pending. DTS, the Symbol, & DTS and the Symbol together are registered trademarks & DTS 2.0 Channel is a trademark of DTS, Inc. Product includes software. © DTS, Inc. All Rights Reserved.
This device meets the EMC requirements for home appliances (Class B) and is intended for home usage. This device can be used in all regions.
NOTE
- The product images and On-Screen Display (OSD) in this manual are examples to help you understand how to operate the product, so they may be different from the actual projector.
SAFETY INSTRUCTIONS
Please take note of the safety instructions to prevent any potential accident or misuse of the projector.
- Safety precautions are given in two forms, i.e. Warning and Caution as detailed below.

WARNING: Failure to follow the instructions may cause serious injury and even death.

CAUTION: Failure to follow the instructions may cause injury to persons or damage to the product.
- Read the owner's manual carefully and keep it to hand.
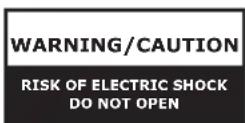

TO REDUCE THE RISK OF ELECTRIC SHOCK DO NOT REMOVE COVER (OR BACK). NO USER SERVICEABLE PARTS INSIDE. REFER TO QUALIFIED SERVICE PERSONNEL.
The lightning flash with arrowhead symbol, within an equilateral triangle, is
intended to alert the user to the presence of uninsulated “dangerous voltage” within the product’s enclosure that may be of sufficient magnitude to constitute a risk of electric shock to persons.

The exclamation point within an equilateral triangle is intended to alert the user to
the presence of important operating and maintenance (servicing) instructions in the literature accompanying the appliance.
WARNING/CAUTION
- TO REDUCE THE RISK OF FIRE AND ELECTRIC SHOCK, DO NOT EXPOSE THIS PRODUCT TO RAIN OR MOISTURE.
Read these instructions.
Keep these instructions.
Heed all warnings.
Follow all instructions.
Indoor Installation

WARNING
- Do not place the projector in direct sunlight or near heat sources such as radiators, fires, stoves, etc.
- This may cause fire.
- Do not place inflammables such as flammable spray near the projector.
- This may cause fire.
- Do not allow children to cling to or climb up to the projector.
- This may cause the projector to fall, causing injury or death.
- Do not place the projector directly on a carpet, rug or place where ventilation is restricted such as a book shelf or closet.
- This may cause the projector's internal temperature to rise and cause fire.
- Do not place the projector close to sources of steam or oil such as a humidifier or kitchen counter.
- This may cause fire or electric shock.
- Do not place the projector where it might be exposed to dust.
- This may cause fire.
- Do not use the projector in a damp place, such as a bathroom or a place exposed to the wind and rain, where it is likely to get wet.
- This may cause fire or electric shock.
- Do not allow a tablecloth or curtain to block the vents.
- This may cause the internal tem- This may ca perature of the projector to rise and cause fire.
- The distance between the projector and the wall should be more than 30 cm for ventilation purposes.
- Otherwise, this may cause the inter- Otherwis nal temperature of the projector to rise and cause fire.
CAUTION
- When installing the projector on a table, be careful not to place it near the edge.
- The projector may fall causing injury to persons or product malfunction. Make sure that you use the cabinet or stand that fits the projector.
- Disconnect the projector from the power supply and all connected apparatus before moving the projector.
- Otherwise, the power cord may be damaged causing fire or electric shock.
- Do not place the projector on an unstable or vibrating surface such as a wobbly shelf or a slope.
- It may fall or flip and cause injury.
- Be careful not to tip or drop the projector over when connecting external devices to the projector.
- This may cause injury to persons or damage to the projector.
Power
WARNING
- The grounding wire should be connected.
- Be sure to connect the grounding wire to avoid damage to the projector or electric shock when there is a short circuit.
If it is not possible to ground the unit, purchase a circuit breaker and connect the projector to its wall outlet.
Do not try to ground the projector to the gas pipe, water pipe, lightning rod, or telephone line, etc.
- The power plug should be inserted fully into the power outlet.
- An unstable connection may cause fire.
- Do not place heavy objects on the power cord.
- This may cause fire or electric shock.
- Never touch the power plug with a wet hand.
- This may cause electric shock.
- Do not plug too many devices into one multi-power outlet.
- This may cause fire due to the power outlet overheating.
- Remove dust or contaminants around power plug pins or wall outlets.
- Failure to do so may cause fire.
- To turn off the main power, remove the power plug, which should be positioned so it is easy to access for operation.
CAUTION
- Hold the plug firmly when unplugging.
- A broken wire in the cord may cause fire.
- Ensure the power cord and plug are not damaged, modified, severely bent, twisted, pulled, sandwiched or hot. Do not use the product if the power outlet is loose.
- This may cause fire or electric shock.
- Keep the power cord away from any heating devices.
- The cord coating may melt and cause fire or electric shock.
- Place the projector where people will not trip over or tread on the power cord to protect the power cord and plug from any damage.
- This may cause fire or electric shock.
- Do not turn the projector on or off by plugging in the power plug or unplugging it from the wall outlet.
(Do not use the power plug as a switch.)
- This may cause electric shock or product malfunction.
- Do not insert a conductor into the other side of the wall outlet while the power plug is inserted into the wall outlet.
In addition, do not touch the power plug immediately after it is disconnected from the wall outlet.
- This may cause electric shock.
- Only use the official power cord provided by LG Electronics. Do not use other power cords.
- This may cause fire or electric shock.
When in Use
WARNING
- Do not place anything containing liquid on top of the projector, such as a vase, flower pot, cup, cosmetics, or medicine; or ornaments, candles, etc.
- This may cause fire or electric shock, or injury due to falling.
- In the event that there is a heavy impact on the projector or the cabinet is damaged, switch it off, unplug it from the power outlet and contact an authorized service center.
- Failure to do so may cause fire or electric shock.
- Do not insert pieces of metal, such as coins, hairpins or metal debris, or flammable materials, such as paper or matches, into the projector.
- This may cause fire or electric shock.
- In the event that liquid or a foreign object falls into the projector, switch it off and unplug it from the power outlet and contact our service center.
- Failure to do so may cause fire or electric shock.
- Make sure that a child does not swallow the batteries when you replace the old remote control batteries with new ones. Keep batteries out of reach of children.
- If a child swallows a battery, consult a doctor immediately.
- Do not remove any covers except for the lens cap. There is a high risk of electric shock.
- Do not look directly into the lens when the projector is in use. The strong light may damage your eyes.
- When the lamp is on or has just been turned off, avoid touching the air vent or lamp, because these will be very hot.
- If there is a gas leak, do not touch the wall outlet. Open the window for ventilation.
- A spark may cause a fire or burn.
- Be sure to open the lens cap before using the projector.
- Never touch the projector or power cord during thunder or lightning.
- This may cause electric shock.
- Do not use the projector near electronic devices that generate a strong magnetic field.
- Do not wear the plastic package used to pack the projector around your head.
- This may cause suffocation.
- Do not use 3D glasses if you are not watching 3D.
- Do not keep your hand on the projector for a long time when it is running.
- When you play a game by connecting a game console to a projector, it is recommended that you maintain a distance of more than four times the diagonal length of the screen.
- Make sure that the length of connecting cable is long enough.
- Otherwise, the product may fall caus- Otherwise, the product may fall caus-Otherwise, the product ing personal injury or damage to the product.
CAUTION
- Do not place a heavy object on the projector. - It may fall down and cause physical injury.
- Be careful to protect the lens from heavy impact during transportation.
- Do not touch the lens of the projector. The lens may be damaged.
- Do not use any sharp tools on the projector such as a knife or hammer, because this may damage the casing.
- In the event that no image appears on the screen or no sound is heard, stop using the projector. Switch off the projector, unplug it from the power outlet and contact our service center.
- Failure to do so may cause fire or electric shock.
- Do not drop an object onto the projector or apply heavy pressure to it.
- This may cause injury to persons or product malfunction.
- It is recommended that you maintain a distance of more than 5-7 times the diagonal length of the screen between your eyes and the screen.
- If you watch the screen at a close distance for a long time, your eyesight may become worse.
Otherwise, the product may fall caus-Otherwise, the product
Cleaning
WARNING
- Do not spray the projector with water when cleaning. Do not allow water to get into the projector or do not allow it to get wet.
- This may cause fire or electric shock.
- In the event that smoke or a strange smell comes out from the projector or a foreign object falls into the projector, stop using it. Switch off the projector, unplug it from the power outlet and contact our service center.
- Otherwise, this may cause fire or electric shock.
- Use an air spray or soft cloth or cotton swab moistened with a lens cleaning chemical or alcohol to remove dust or stains on the front projection lens.
CAUTION
- Contact your seller or the Service Center once a year to clean the internal parts of the projector.
- If you do not clean the contaminated interior of the projector for a long time, there may be a fire or product malfunction.
- When cleaning plastic parts, such as the projector case, unplug the power first and wipe with a soft cloth. Do not spray with water or wipe with a wet cloth. When cleaning the plastic parts, such as the projector case, do not use cleanser, automobile or industrial shiner, abrasive or wax, benzene, alcohol, etc., which can damage the product.
- This can cause fire, electric shock or product damage (deformation, corrosion and damage).
Others
WARNING
- Only a qualified technician can disassemble or modify the projector. For inspection, adjustment, or repair, contact your seller or our service center. - Otherwise, this may cause fire or electric shock.
CAUTION
- Do not mix new batteries with old batteries.
- This may cause fire or electric shock caused by overheating and leakage.
- Unplug the power cord if the projector is not used for a long period.
- Accumulated dust may cause electric shock due to overheating, ignition, or poor insulation, or fire due to a short circuit.
- Only use the specified type of battery.
- Burst or leaking batteries may cause fire or electric shock.
- Do not charge the battery using any devices other than the one provided with the product.
- This may cause damage to the bat- This may cause damage to the bat- This may cause damage or fire.
- Dispose of the used battery properly.
- Failure to do so may cause explosion or fire. The correct method of disposal may vary depending on your country or region. Dispose of the battery pack according to the appropriate instructions.
- Do not throw or disassemble the battery.
- This may cause fire or explosion due to damage to the battery.
- Always use batteries approved and certified by LG Electronics.- Failure to do so may cause fire or explosion.
- Do not store the battery near metallic objects, such as keys and paper clips.
-Excess current may cause a rapid increase in temperature, resulting in fire or burns.
- Do not store the battery near any heat source, such as a heater.
- This may cause fire or product malfunction.
- Do not store it at temperatures higher than 60^ or in high humidity.
- This may cause explosion or fire.
- Keep the battery out of reach of children.
- Failure to do so may cause personal injury or product malfunction.
- Make sure that the battery is installed correctly.
- Failure to do so may cause explosion or fire.
- The battery contains lithium-ion, so it must be handled with care.
Failure, to do so may cause, explomay cause damage to the bat-This may cause damage sion or fire.
- Make sure you use the same type of battery for replacement. To do so may cause explo-Failure to do s
- Incorrect battery replacement may cause fire.
Antenna
- If you are using an outdoor antenna, please install it away from electrical wires to make sure it does not touch any nearby wires even when it falls down due to heavy wind.
- Failure to do so may cause electric shock or physical injury.
- To prevent any raindrops flow into the projector, bend the outdoor antenna wire where it comes indoors.
- Raindrops flowing into the projector may cause fire or electric shock.
- Do not use a portable antenna outside.
- If you use a portable antenna outside, lightning or raindrops may cause fire or electric shock. Therefore, be sure to use it inside only.
- It is dangerous to wind a portable antenna wire around a person, animal, or object or to use the antenna wire as a strap. Pay particularly special attention to ensure an infant, child, elderly person or a person with a mental disorder or mental retardation does not use the antenna wire.
-
It is dangerous to throw a portable antenna or use it as a toy. Be sure to use it as a TV signal receiver only.
• Install a portable antenna away from a person, metal, or an animal so that it does not touch them. In particular, it is extremely dangerous to insert your head, hand, or foot into the antenna or bend the antenna. -
Because the receiver sensitivity of the portable antenna may be very high depending on the location of or distance from a TV transmitter, area, house structure, surrounding environments (mountain, structure, building, wall, or window material, etc.), or nearby transportations (train, airplane, or vehicle, etc.), it is advisable to subscribe to cable television at the home or office.
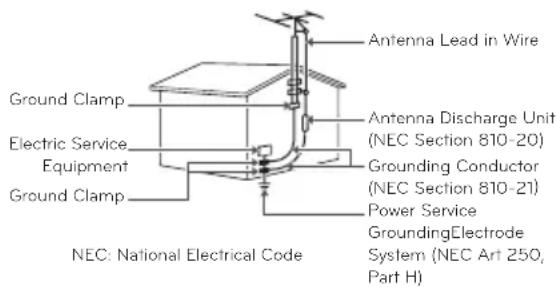
- Antenna grounding according to the National Electrical Code, ANSI/NFPA 70
FCC NOTICE
Federal Communications Commission (FCC) Statement
You are cautioned that changes or modifications not expressly approved by the part responsible for compliance could void the user's authority to operate the equipment.
This equipment has been tested and found to comply with the limits for a Class B digital device, pursuant to part 15 of the FCC rules. These limits are designed to provide reasonable protection against harmful interference in a residential installation. This equipment generates, uses and can radiate radio frequency energy and, if not installed and used in accordance with the instructions, may cause harmful interference to radio communications. However, there is no guarantee that interference will not occur in a particular installation. If this equipment does cause harmful interference to radio or television reception, which can be determined by turning the equipment off and on, the user is encouraged to try to correct the interference by one or more of the following measures:
- Reorient or relocate the receiving antenna.
- Increase the separation between the equipment and receiver.
- Connect the equipment into an outlet on a circuit different from that to which the receiver is connected.
- Consult the dealer or an experienced radio/TV technician for help.
1) this device may not cause harmful interference, and 2) this device must accept any interference received, including interference that may cause undesired operation of the device of the device.
FCC Caution
Any changes or modifications not expressly approved by the party responsible for compliance could void the user's authority to operate this equipment and For indoor use only, use outdoors or in other modes not covered by this manual may violate the FCC regulation and violate the user authority to use the product. Specially, within the 5.15-5.25 GHz band, U-NII device is restricted to indoor operations to reduce any potential for harmful interference to co-channel MSS operations.
FCC RF Radiation Exposure Statement:
This equipment complies with FCC radiation exposure limits set forth for an uncontrolled environment. End users must follow the specific operating instructions for satisfying RF exposure compliance.
IC (CANADA)
Industry Canada Statement:
This device complies with RSS-210 of the Industry Canada Rules. Operation is subject to the following two conditions:
1) this device may not cause interference and
2) this device must accept any interference, including interference that may cause undesired operation of the device.
IC Radiation Exposure Statement:
This equipment complies with IC radiation exposure limits set forth for an uncontrolled environment.
NOTE: THE MANUFACTURER IS NOT RESPONSIBLE FOR ANY RADIO OR TV INTERFERENCE CAUSED BY UNAUTHORIZED MODIFICATIONS TO THIS EQUIPMENT. SUCH MODIFICATIONS COULD VOID THE USER'S AUTHORITY TO OPERATE THE EQUIPMENT.
Disposal of your old appliance

- When this crossed-out wheeled bin symbol is attached to a product it means the product is covered by the European Directive 2002/96/EC.
- All electrical and electronic products should be disposed of separately from the municipal waste stream through designated collection facilities appointed by your government or your local authorities.
- The correct disposal of your old appliance will help prevent potential negative consequences for the environment and human health.
- For more detailed information about disposal of your old appliance, please contact your city office, waste disposal service or the shop where you purchased the product.
Disposal of waste batteries/accumulators

- When this crossed-out wheeled bin symbol is attached to batteries/ac-cumulators of Your product it means they are covered by European Directive 2006/66/EC.
- This symbol may be combined with chemical symbols for mercury(Hg), cadmium(Cd) or lead(Pb) if the battery Contains more that 0.0005 % of mercury, 0.002 % of cadmium or 0.004 % of lead.
- All batteries/accumulators should be disposed separately from the municipal waste stream via designated collection facilities appointed by the government or the local authorities.
- The correct disposal of Your old batteries/accumulators will help to prevent potential negative consequences for the environment, animal and human health.
- For more detailed information about disposal of Your old batteries/accumulators, please contact Your city office, waste disposal service or the shop where You purchased the product.
For USA
NOTE TO CABLE/TV INSTALLER
This reminder is provided to call the CATV system installer's attention to Article 820 - 40 of the National Electric Code (U.S.A.). The code provides guidelines for proper grounding and, in particular, specifies that the cable ground shall be connected to the grounding system of the building, as close to the point of the cable entry as practical.
Table of contents
LICENSE 2
SAFETY INSTRUCTIONS 3
PREPARATION 17
Accessories 17
Optional Accessories 18
Parts and Components 19
Installation 20
- Installation Precautions 20
- Projection Distance per Screen Size 21
- How to Install the Projector Using a Tripod 22
- Kensington Security System 22
REMOTE CONTROL 23
MAGIC REMOTE CONTROL 25
Pairing the Magic Remote Control 26
Re-pairing the Magic Remote Control 26
Using the Magic Remote Control 26
WATCHING WITH THE PROJECTOR 27
Connecting the
Antenna or Cable 27
Connecting the Portable Antenna 28
- Antenna connection 28
- HDTV reception 29
- Antenna Installation 29
Using the Projector 30
- Turning on the Projector 30
- Focus and Position of the Screen Image 30
- Using the Projector 30
Using the Projector Functions 31
- Home Menu 31
Additional Options 32
- Adjusting the Aspect Ratio 32
- Using the Keystone Function 33
- Using the Input List 33
Using the Quick Menu 34
ENTERTAINMENT 35
Network Setup 35
- One-Click Network
Connection 35 - Expert Settings for
Network Connection 35 - Wireless Network Connection 36
- Wireless Screen Sharing 36
Using the Wi-Fi Screen Share
Function 37 - Connecting the Wi-Fi Direct 37
Using WiDi 37
- WiDi Setup (Wireless Display) 37
- Tips for Network Setup 38
Using Media Link 39
- Connecting Media Link 39
- Using Media Link 39
- System Requirements for PLEX installation 40
- Cautions when Using Media Link 40
Using the Premium Service 41
- Using the Premium Service 41
SMARTSHARE™ 42
Before Using 42
- Connecting a USB Storage Device 42
- Removing a USB Storage Device 42
- Connecting DLNA 44
Using SmartShare™ 46
- Watching Videos 47
- Viewing the Photos 50
- Listening to Music 52
- Viewing the Files 53
Using the Magical Mirroring Function 54
- Running Magical Mirroring 54
- MirrorOp Sender 57
3D FUNCTION 61
Before Watching 3D 61
- While Watching 3D 61
Requirements for Watching 3D
Images 63
- Using the DLP-LINK (DLP-Ready)
Type Glasses 64 - Supported 3D Input Formats 64
Watching 3D Images 65
CUSTOMIZING SETTINGS 66
Settings Menu 66
PICTURE Settings 67
SOUND Settings 71
CHANNEL Settings 72
TIME Settings 73
LOCK Settings 74
OPTION Settings 76
NETWORK Settings 78
CONNECTING EXTERNAL DEVICES 79
Connecting HD
Receiver, DVD Player, or VCR 80
- HDMI Connection 80
Connecting PC 80
- RGB Connection 80
Connecting AV 81
- Component Connection 82
Connecting Headphones 82
Connecting a Laptop 83
MAINTENANCE 84
Cleaning 84
- Cleaning the Lens 84
- Cleaning the Projector Case 84
How to Fix the Lens Cap 84
Updating the Software 85
Smart Projector FAQ 86
WIRELESS SPECIFICATIONS
87
Wireless LAN Module
(TWFM-B003D) Specifications 87
Bluetooth Module
(BM-LDS302) Specifications 88
SPECIFICATIONS 89
PREPARATION
Accessories
Check the accessories provided with the product.
The picture may be different from the actual product.
natural_image
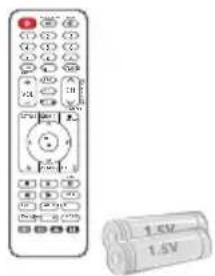
Rear view of a remote control with a battery pack (no visible text or symbols)Remote Control Two AAA Batteries
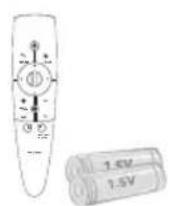
Magic Remote Control
Two AA Batteries
Owner's Manual Manual CD
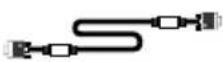
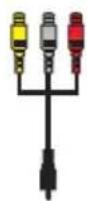
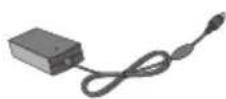
Computer Cable Composite Gender AC-DC Adaptor
natural_image
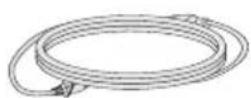
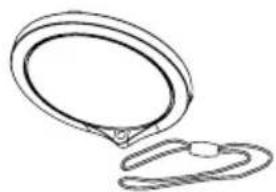
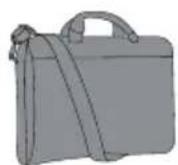
Simple line drawing of a magnifying glass with a coiled cord (no text or symbols)Power Cord Lens Cap, Strap Bag
Portable Antenna
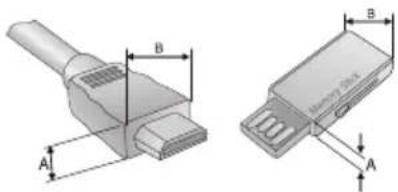
- When connecting a cable to the HDMI or USB port, be sure to use the jack that fits into the USB/HDMI port. Use a standard sized jack
natural_image
Technical illustration of two electronic component packages with labeled dimensions (A, B, A1, B), no text or symbols present.A≤10mm, B≤24mm
Optional Accessories
To purchase optional accessories, visit an electronics store or online shopping site or contact the retail store where you purchased the product.
Without prior notice, optional extras are subject to change in order to improve the performance of the product, and new optional accessories may be added.
natural_image
Simple line drawing of a blank projector on a stand (no text or symbols)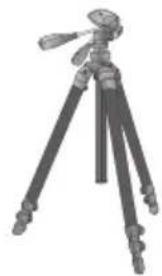
natural_image
Illustration of a tripod-mounted camera with adjustable arm and tripod base (no text or symbols)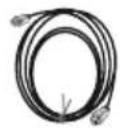
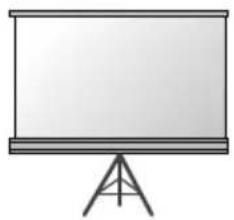
Projection Screen Tripod HDMI Cable
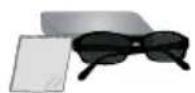
Video Cable Audio Cable
3D Glasses
(DLP-LINK or DLP-Ready Type)
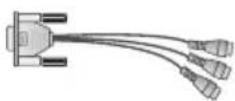
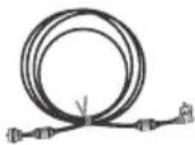
RGB to Component Cable
Coaxial Cable
Parts and Components
* The projector is manufactured using high-precision technology. You may, however, see tiny black dots and/or bright colored dots (red, blue or green) that continuously appear on the projector screen. This is a normal result of the manufacturing process and does not indicate a malfunction.
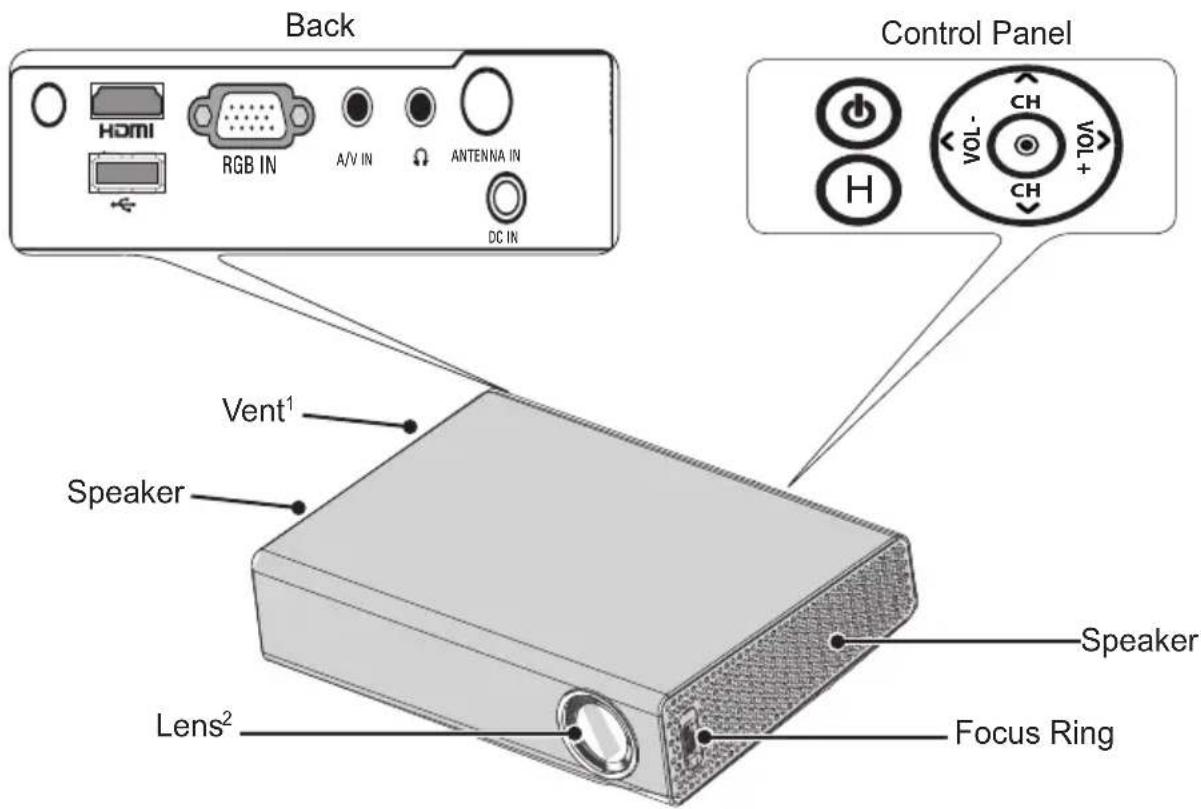
| Button Description | |
| ◎(Power) | Turns the projector on or off. |
| ◎(HOME) | Enters the Home menu. |
| CH (Channel) ∧, ∨ | Changes the TV channel. |
| VOL (Volume) -, + | Adjusts the volume level. |
| ∧, ∨, <, > | Switches between menu functions. |
| ◎(OK) Shows the current mode and saves changes to the settings. | |
1 Due to the high temperature of the vent area, do not get close to the vent area.
2 Do not remove the lens cap while storing the projector or touch the lens when using the projector. The lens may be damaged.
Installation
Installation Precautions
- Place the projector in a well-ventilated environment.
- To prevent internal heat from building up, install the projector in a well-ventilated place.
Do not place anything near the projector as this may block its air vents. If the air vents are blocked, the internal temperature will increase.
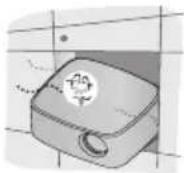
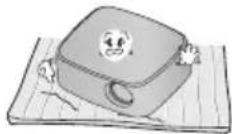
- Do not place the projector on a carpet or rug. If a projector model has its inlet vent on its bottom, do not block the vent and use the projector on a solid level surface.
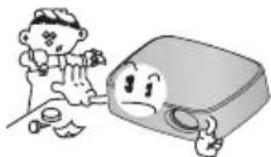
- Be sure to prevent foreign objects such as paper debris from entering the projector.
natural_image
Cartoon illustration of a child and a smiling face next to a computer monitor (no text or symbols)- Leave an adequate distance (30 cm or more) around the projector.
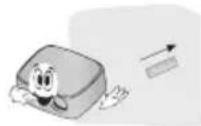
- Do not place the projector in a hot or humid environment. - Do not place the projector in a hot, cold, or humid environment.
- Do not place the projector in a place where it will easily attract dust. - This may cause fire.
- Do not remove any covers except for the lens cap. There is a high risk of electric shock.
- The projector is manufactured using high-precision technology. You may, however, see tiny black dots and/or bright colored dots (red, blue or green) that continuously appear on the projector screen. This is a normal result of the manufacturing process and does not indicate a malfunction.
- The remote control may not work in an environment where a lamp equipped with electronic ballasts or a three-wavelength fluorescent lamp is installed. Replace the lamp with an international standard lamp for the remote control to work normally.
Projection Distance per Screen Size
1 Place the projector on a sturdy, level surface, together with the computer or audio/video source.
2 Place the projector at an appropriate distance from the screen. The distance between the projector and the screen determines the actual size of the image.
3 Position the projector so that the lens is perpendicular to the screen. If the lens is not perpendicular to the screen, the projected image will look distorted. At this time, run the Keystone function.
4 Connect the power cords of the projector and the connected devices to the wall outlet.
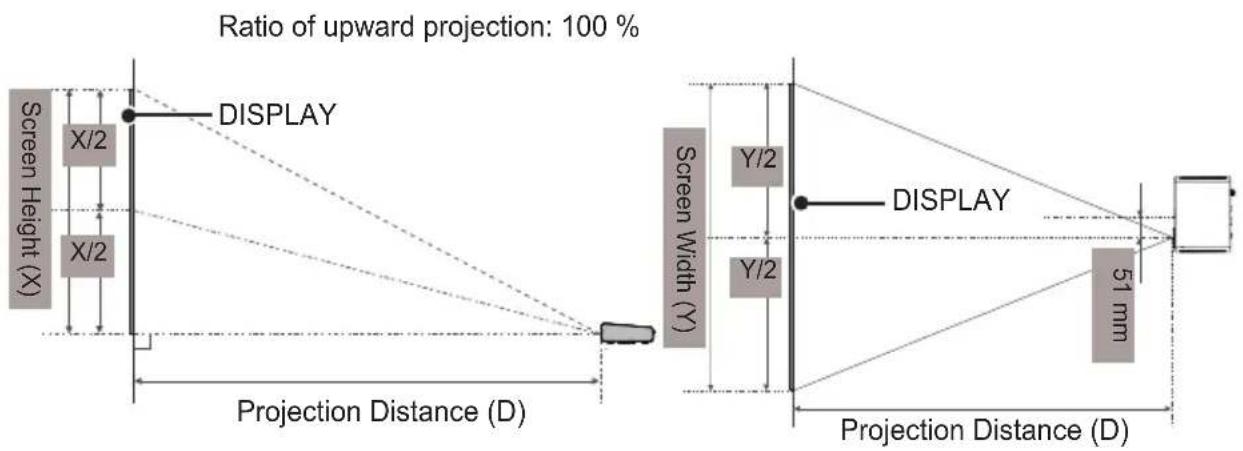
| 16:10 Ratio | |||||
| Screen Size (mm) Screen Width (Y) (mm) Screen Height (X) (mm) | Projection Distance (D) (mm) | ||||
| 762 | 646 | 404 | 902 | ||
| 889 | 754 | 471 | 1056 | ||
| 1016 | 861 | 539 | 1210 | ||
| 1143 | 969 | 606 | 1365 | ||
| 1270 | 1077 | 673 | 1520 | ||
| 1397 | 1185 | 741 | 1674 | ||
| 1524 | 1292 | 808 | 1828 | ||
| 1651 | 1400 | 875 | 1983 | ||
| 1778 | 1508 | 943 | 2137 | ||
| 1905 | 1615 | 1010 | 2291 | ||
| 2032 | 1723 | 1077 | 2445 | ||
| 2159 | 1831 | 1145 | 2600 | ||
| 2286 | 1938 | 1212 | 2755 | ||
| 2413 | 2046 | 1279 | 2909 | ||
| 2540 | 2154 | 1347 | 3063 | ||
How to Install the Projector Using a Tripod
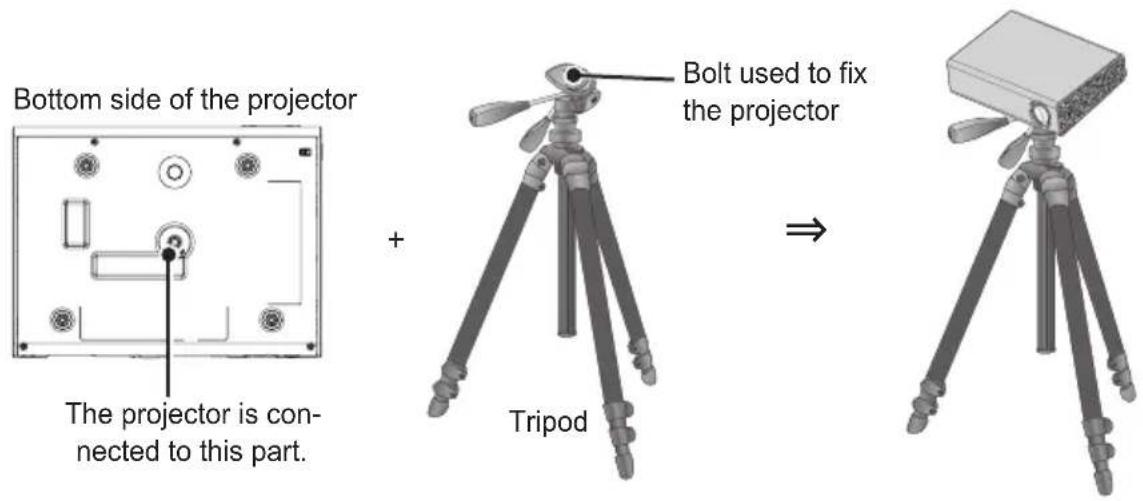
- You can install this projector using a camera tripod. As shown below, you can mount the projector instead of a camera on the tripod.
- When stabilizing the tripod, we recommend using the locking bolt of standard size 4.5 mm or less. The maximum size allowed for the locking bolt is 5.5 mm. (If it is longer than the maximum allowed size, it may damage the projector.)
Kensington Security System
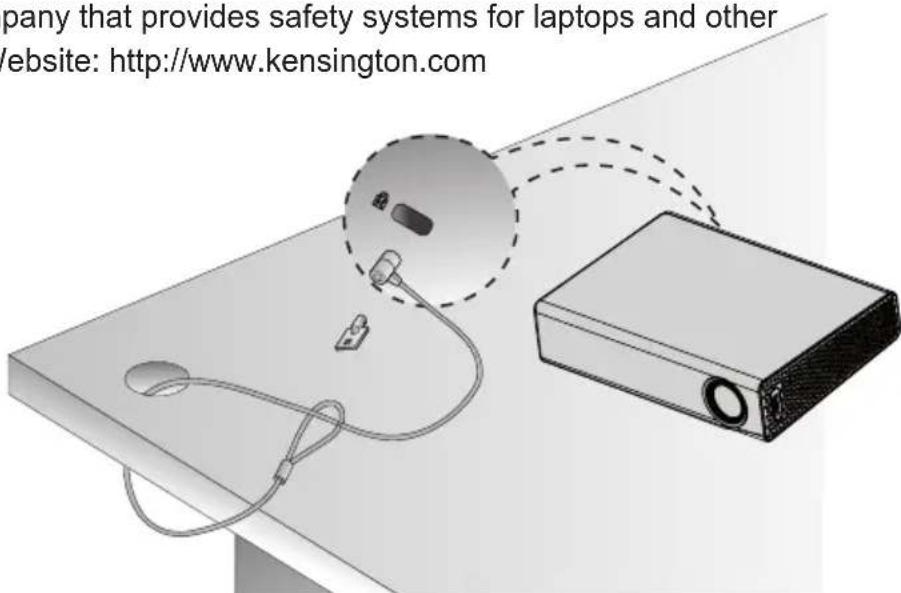
- This projector has a Kensington Security Standard connector. Connect a Kensington Security System cable as shown below.
- For more information on installation and use of the Kensington Security System, refer to the user's guide provided with the Kensington Security System.
• The Kensington Security System is an optional accessory.
• What is Kensington?
Kensington is a company that provides safety systems for laptops and other electronic devices. Website: http://www.kensington.com
REMOTE CONTROL
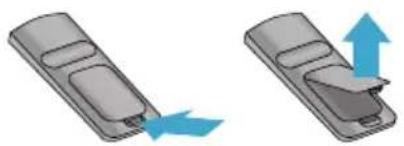
Open the battery cover on the back of the remote control and insert the specified batteries as per instructions The same type of batteries (1.5 V AAA) must be used. These must also be new batteries.
natural_image
Two 3D illustrations of a remote control device with blue directional arrows indicating movement (no text or symbols)
CAUTION
- Do not mix new batteries with old ones.
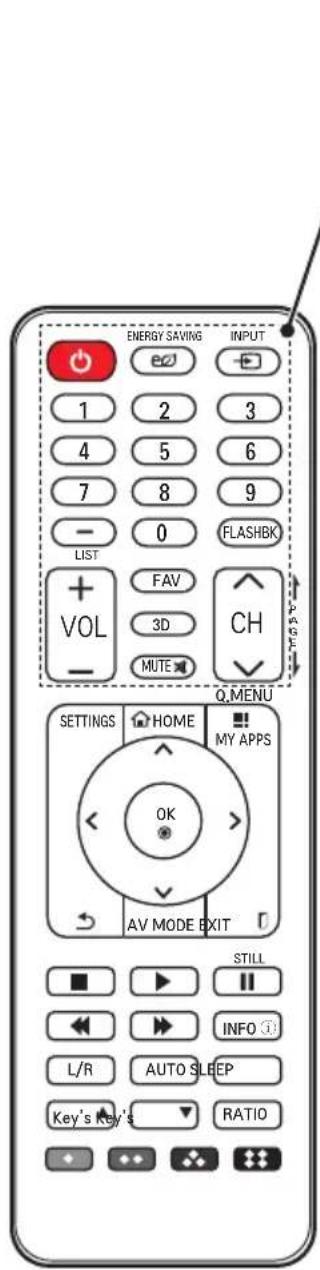
POWER
Turns the projector on or off.
ENERGY SAVING
Changes the energy saving mode.
INPUT
Changes the input source.
Number buttons
Enter a number.
- (dash)
Enters a channel number, such as 2-1 or 2-2.
LIST
Displays the channel list.
FLASHBK
Displays the channel you were watching previously.
VOL +, -
Adjusts the volume level.
FAV
Shows favorite channels.
3D
Shows 3D images.
MUTE
Mutes the sound of the projector.
CH ∧, ∨
Changes the TV channel.
PAGE
Moves to the previous/next page.
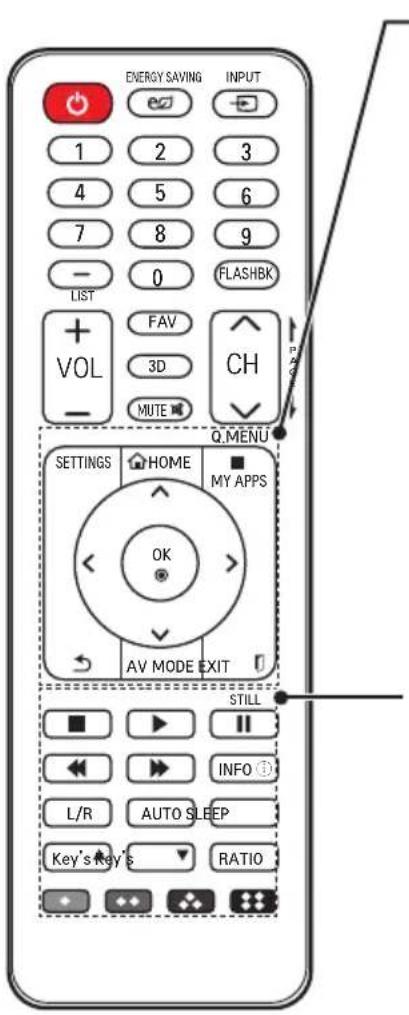
SETTINGS
Displays or closes the Settings menu.
HOME
Displays the Home menu.
MY APPS/Q.MENU
MY APPS: Displays the list of my apps.
Q.MENU: Changes the settings easily.
Up/Down/Left/Right buttons
Switches between menu functions.
OK
Shows the current mode and saves changes to the settings.
[GRAPHIC: Cyclic Arrow]
Returns to the previous screen.
AV MODE
Sets the genre.
EXIT
Closes the settings window.
Playback control buttons
Controls the playback of the projector or SmartShare™.
INFO ⓘ
Displays the information of a program or screen.
L/R
Switches the left and right sides of a 3D image.
AUTO
Automatically adjusts the PC input image.
SLEEP
Sets the sleep timer.
Key's ▲, ▼
Adjusts the Keystone settings.
RATIO
Resizes the picture.
Color buttons
Set detailed settings or gesture for each menu.

NOTE
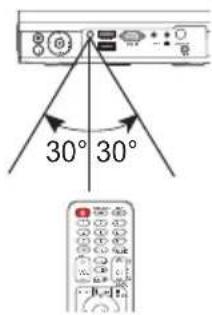
- When using the remote control, the optimal operation range is 6 meters or less (left/right) and within a 30 degree arc of the remote control IR receiver.
- If a cable is connected to the back port, the optimal operating range is 3 meters or less (left/right) and within a 30 degree arc of the remote control IR receiver.
- For seamless operation, do not block the IR receiver.
- When you carry the remote control in a bag, make sure that the buttons on the remote control are not being pressed by the projector, cables, documents or any other accessories in the bag. This may significantly reduce the battery life.
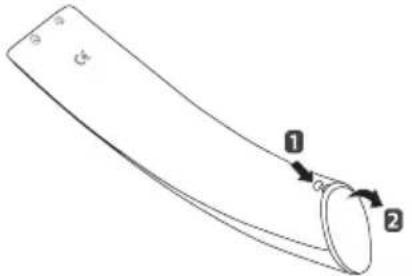
If the battery low message appears while using the projector, replace the batteries. As shown in the figure, press the top of the battery cover and slide it down the cover. Insert two new and identical alkaline batteries (1.5V, AA type) with + and - poles pointing in the correct direction in the remote control.

CAUTION
- Do not mix new batteries with old ones.
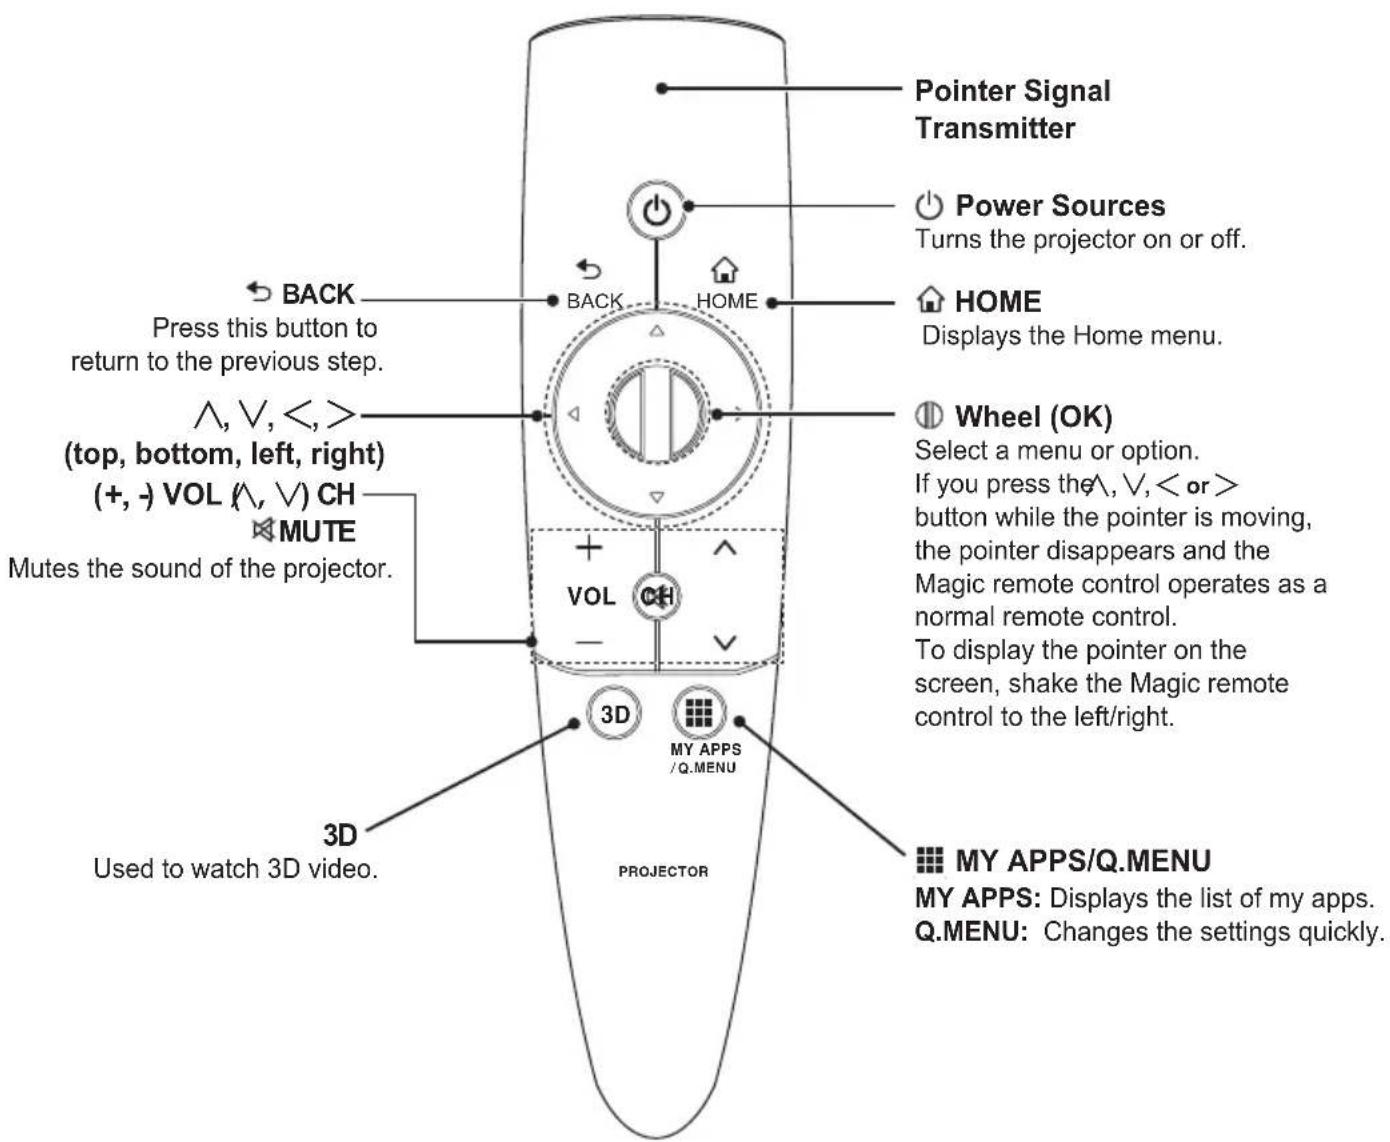
Pairing the Magic Remote Control
- You must pair the magic remote control with the projector to use it.
- Pair the magic remote control prior to use as follows:
1 Turn on the projector and press the wheel (OK) button toward the projector. When the pairing is complete, the pairing completion message is displayed on the projector screen.
2 If you failed to pair the magic remote control, turn the projector off and on and try pairing again by pressing the wheel (OK) button.
Re-pairing the Magic Remote Control
1 Press the HOME button and BACK button at the same time for about 5 seconds. The Magic remote control is paired again when you press the wheel (OK) button toward the projector.
2 You can also re-pair it by pressing the ➕ BACK button toward the projector for about 5 seconds. At this point, the Magic remote control is initialized. When the pairing is complete, the pairing completion message is displayed on the projector screen.
Using the Magic Remote Control
1 Shake the Magic remote control lightly when there is no pointer displayed on the screen. A pointer will be displayed on the screen.
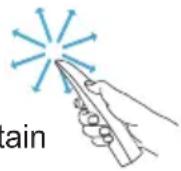
→ The pointer disappears if the remote controller is not used for a certain period of time.
2 When you move the pointer signal transmitter up/down/left/right while pointing it toward the projector, the pointer moves.
→ If the pointer is not working properly, do not move the magic remote control for about 10 seconds, and then move it again.

NOTE
- Use the remote control within the specified range (within 10 meters.) You may experience communication failures when using the device outside the coverage area or if there are obstacles within the coverage area.
- You may experience communication failures depending on the accessories. Devices such as a microwave oven and wireless LAN operate in the same frequency band (2.4 GHz) as the Magic remote control. This may cause communication failures.
- The Magic remote control may become damaged or may malfunction if it is dropped or receives a heavy impact.
- Take care not to bump into nearby furniture, electronics or other people when using the Magic remote control.
WATCHING WITH THE PROJECTOR
Connecting the Antenna or Cable
To watch TV using an indoor/outdoor antenna, connect a wall terminal to the antenna terminal of the projector using a RF cable (75 Ω).
You can watch public TV or cable (ana-log, digital) TV.
(The RF cable is sold separately.)
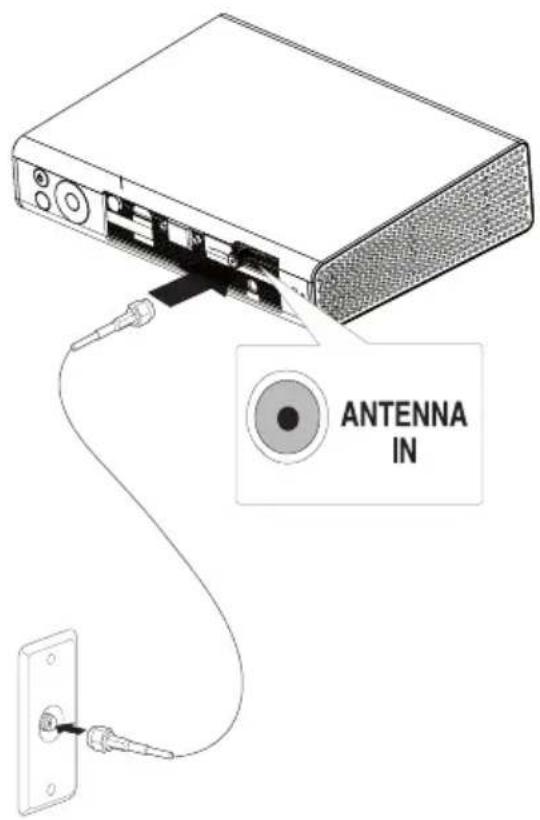

NOTE
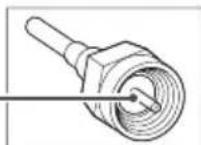
- Be careful not to bend the copper wire when connecting the coaxial cable (75Ω). Fix the cable by turning its connector clockwise.
Copper Wire
- Ensure you use a standard coaxial cable (75Ω, sold separately) when connecting to the projector input.
- To obtain better image quality in locations where signal strength is low, please purchase and install a signal amplifier (booster).
- A signal splitter is required if you want to use two or more projectors for watching with one antenna. If you have any problems with antenna installation, please consult the antenna specialized retailer or the store from which you purchased the antenna.
Connecting the Portable Antenna
Antenna connection
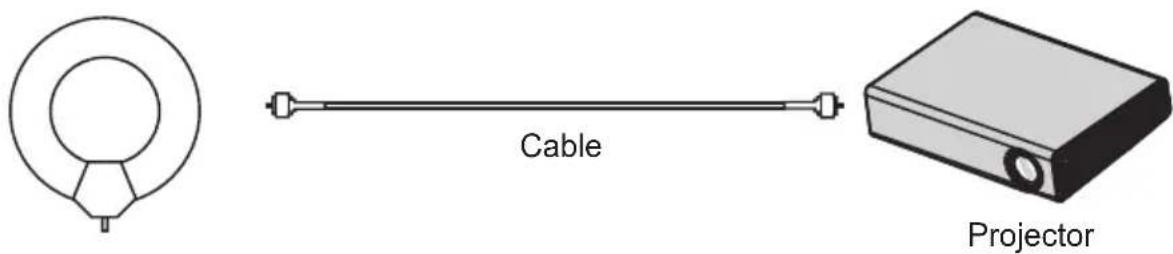

CAUTION
- It is recommended to attach the antenna to a window. This makes the reception better than when attaching it to a wall.
• Install the antenna in a place where it is out of reach of children. - The adhesive of the Velcro tape may be weakened if you attach it to an textured or uneven surface or a wall covered with wallpaper made from linen, silk, fabric, or expanded vinyl.
- Do not install the antenna close to any valuable or fragile items.
- When attaching the antenna to a surface on a cold or humid day, use a hair dryer to warm and/or dry the surface before attachment.
- If the adhesive of the Velcro tape is too weak to hold the antenna, hang the antenna using a hook or ring.
- Do not use the portable antenna outside.
- Otherwise, this may result in electric shock or fire due to lightning or rain water. Therefore, be sure to use it inside only.
- Winding a portable antenna wire around a person, animal, or object or using an antenna wire as a strap can be dangerous. Remember to keep an antenna wire from infants, children, elderly or mentally disabled people.
- It is dangerous to throw the portable antenna or use it as a toy. Be sure to use it inside only for receiving TV signals.
• Install a portable antenna away from people, animals, or metal objects so that it does not touch them or cannot fall on them. - Because the sensitivity of a portable antenna will vary depending on the location of or distance from a TV transmitter, region, house type, surrounding environment (mountain, structure, building, wall, and window material), and nearby transportations (train, airplane, and vehicle), it is recommended you to subscribe to cable television at home or office.
HDTV reception
1 Connect an RF cable to the connector port on the bottom of the antenna. If the cable is not long enough, you can use a coaxial cable.
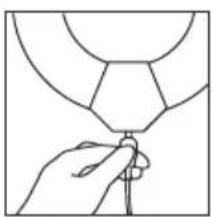
natural_image
Line drawing of a hand holding a small object, possibly a lamp or decorative item (no text or symbols)2 Connect the other end of the cable to the Antenna In port of the projector.
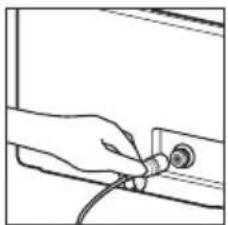
natural_image
Hand holding a cable with a connector inserted, no text or symbols visible3 Attach the antenna to a wall near a window temporarily and use the Auto Tuning function of the projector to tune channels.
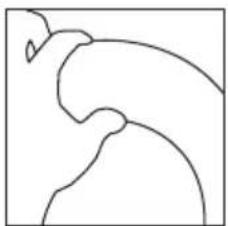
natural_image
Simple line drawing of a curved, abstract shape resembling a stylized bird or wing (no text or symbols)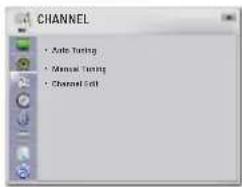
4 Install the antenna in a place with the best reception using the signal strength indicator.
Antenna Installation
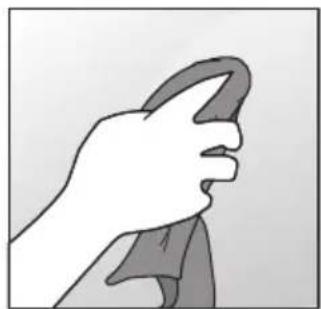
1 When attaching the antenna to a window, clean the window with a dry cloth fi rst. You may also hang the antenna on a wall with a hook or ring.
natural_image
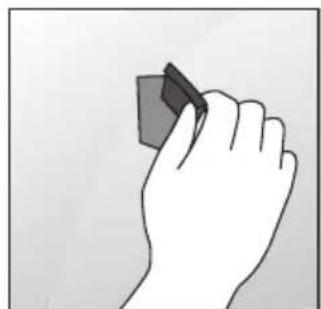
Illustration of a hand holding a cloth or towel, no text or symbols present2 Remove the tape from the backside of the Velcro tape and attach the tape while trying not to touch the sticky side with your fingers.
natural_image
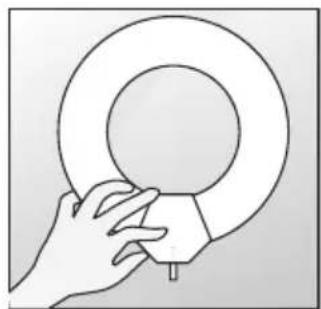
Illustration of a hand holding a small object, no text or symbols present3 Check if the tape is securely fixed after 10 minutes and attach the antenna.
natural_image
Hand holding a circular object with a small protrusion, no text or symbols visibleUsing the Projector
Turning on the Projector
1 Connect the power cord correctly.
2 After waiting for a moment, press the POWER button on the remote control or the control panel. (The light on the control panel will be turned on.)
- Check if the lens cap is open before turning on the projector.
3 In the Language Selection screen, select a language.
4 Select an input signal by using the INPUT button on the remote control.
Focus and Position of the Screen Image
When an image appears on the screen, check if it is in focus and fits the screen properly.
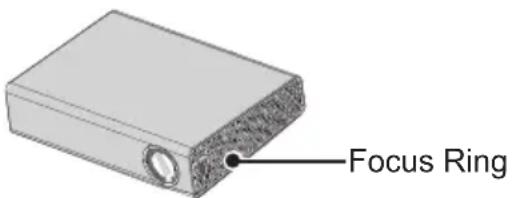
- To adjust the focus of the image, rotate the focus ring.
Using the Projector
1 In Standby mode, press the POWER button to turn the projector on.
2 Press the INPUT button and select the input signal you want.
3 Control the projector using the following buttons while watching the screen.
| Button | Description |
| CH ∧, ∨ | Changes the TV channel. |
| List Displays the channel list. | |
| 0 - 9 Enters a channel number. | |
| VOL -, + | Adjusts the volume level. |
| MUTE Mutes the sound of the projector. | |
| FLASH-BK | Displays the channel you were watching previously. |
| Key's ▲, ▼ | Adjusts the Keystone settings. |
4 To turn the projector off, press the POWER button.
Using the Projector Functions
The menu screen display in this owner's manual is an example to help users understand how to operate the product and may look different from the actual screen.
Home Menu
1 Press the HOME button of the remote control.
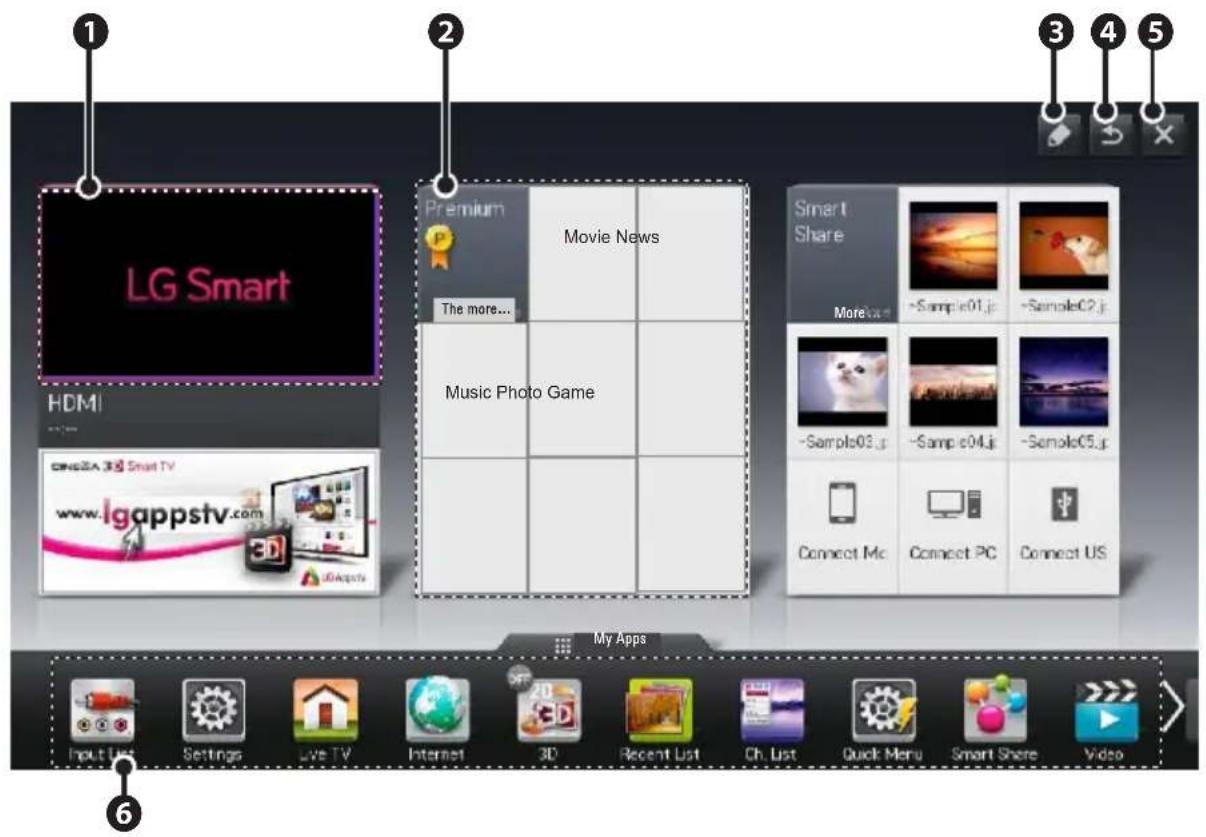
| Description | |
| 1 | Displays the screen you are currently watching. |
| 2 | Displays the premium menu. |
| 3 | You can edit the card list. |
| 4 | Returns to the previous screen. |
| 5 | Exits from the HOME menu. |
| 6 | Displays the list of my apps. |
Additional Options
Adjusting the Aspect Ratio
Resize an image to view at its optimal size by pressing RATIO while you are using the projector.

NOTE
• Available options may vary depending on the input signal.
- You can also change the image size by pressing Q.MENU or SETTINGS.
- FULL: Changes to the full screen regardless of the aspect ratio.
■ 16:9: Resizes images to fit the screen width.
- Just Scan: Displays high definition images in the original size without cutting off the edges.

NOTE
- When using Just Scan, some channels will have noise at the edge of the screen.
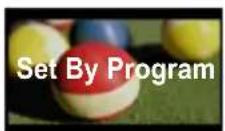
- Set By Program: Displays images in the same aspect ratio as the original image.
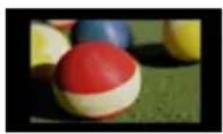
■ 4:3: Resizes images to the aspect ratio.
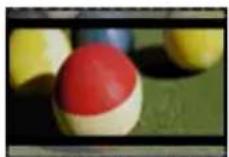
- Zoom: Enlarges an image to fit the screen width. The top and bottom of the image may be truncated.
- Press the
button to zoom in or out of the image. - Press the ∧ or ∨ button to move the image.
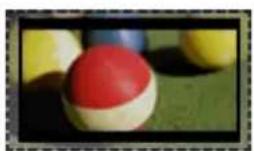
- Cinema Zoom: Formats an image to the cinemascope ratio, 2.35:1. It ranges from 1 to 16.
- Press the
button to zoom in or out of the image. - Press the ∧ or ∨ button to move the image.

NOTE
- If you enlarge or reduce the picture, it may be distorted.
Using the Keystone Function
If the projector is not at a right angle to the screen, you can use the trapezoidal setting to adjust the screen.
Because the Keystone function may cause inferior screen image quality, use this function only when it is not possible to set up the projector at an optimal angle.
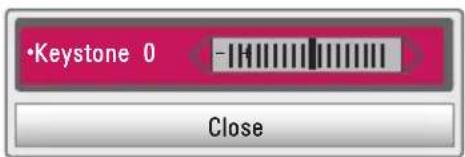
1 Press the Key's▲ or Key's▼ button to adjust the screen.
- Keystone can be adjusted from -40 to 40.
2 Press the OK button after adjustment.
Using the Input List
Using the Input List
1 Press the INPUT button to access the input sources.
- The connected input mode appears first. Please note that the external input and component are always enabled.
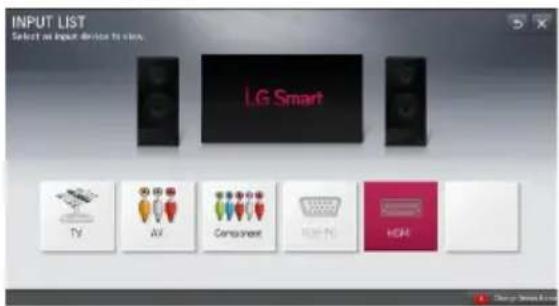
2 Select an input signal using the INPUT button. The projector is switched only to the connected input mode. You can use the < or > button to switch between all the input modes.
Adding an Input Label
Displays which devices are connected to which input ports.
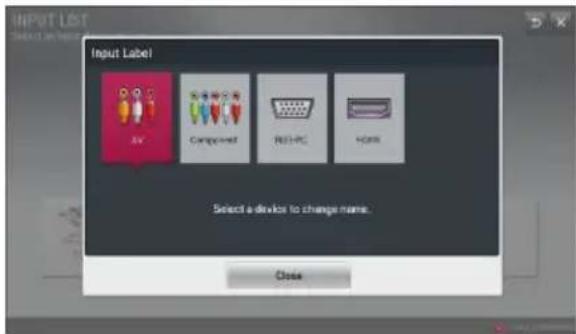
1 Press the INPUT button to access the input sources.
2 Press the RED button.
3 Use the < or > button to scroll to one of the input sources.
4 Use the ∧, ∨, < or > button to select a device name.
Using the Quick Menu
You can customize frequently used menus.
1 Press the MY APPS button and select the Q.MENU.
2 Press the < or > button to scroll through the following menus and press OK.
| Menu | Description |
| Aspect Ratio | Resizes the picture. |
| Picture Mode | Changes the picture mode. |
| Sound Mode | Sets the sound mode. |
| Sleep Timer | Sets the projector to be turned off at the specified time. |
| Caption | Sets whether to display captions and customizes your option in each mode. |
| Multi Audio | Sets MONO or STEREO, or a language for a bilingual broadcast. |
| Energy Saving | Adjusts the brightness. |
| AV Mode | Sets the genre. |
| Del/Add | Edits channels. |
| USB Device | Allows you to remove a connected USB device in a safe manner.(Displayed only when a USB device is connected.) |
3 Press the ∧, ∨, <, or > button to scroll through the following menus.
ENTERTAINMENT
Network Setup
To use the network media sharing features like DLNA, the projector must first be connected to wireless network. To use any Internet related Smart functions, your network must be connected to the Internet.
One-Click Network Connection
If your wireless router supported one button setup (WPS), you can use it to easily connect the projector to your network
1 Press the SETTINGS button.
2 Press the ∧ or ∨ button to select NETWORK and press the OK button.
3 Use the ∧, ∨, < or > button to set Network Connection and press the OK button.
4 The projector should automatically connect to the wireless network when using one button setup. If it does not, use the AP List option in the expert settings.
Expert Settings for Network Connection
It is used in a specific environment such as office (where fixed IP, etc. is used).
1 Press the SETTINGS button.
2 Press the ∧ or ∨ button to select NETWORK and press the OK button.
3 Use the ∧, ∨, < or > button to set Network Connection and press the OK button.
4 Select Set Expert in the network connection list.
5 Select one of the following network connection methods.
| Item | Description |
| AP List | Select a network from a list of available wireless routers. |
| Enter the SSID | Directly enter the name of the wireless router to connect. |
| WPS-PBC | Press the WPS button on the wireless router that supports this function. Not all makes and models will have a WPS button. |
| WPS-PIN | Enter the PIN number in the web page of the PIN-supporting wireless router to connect to the router in a simple manner. |
| Ad-hoc | This is used for a direct connection with a PC or phone when a wireless router is not available. |
Wireless Network Connection
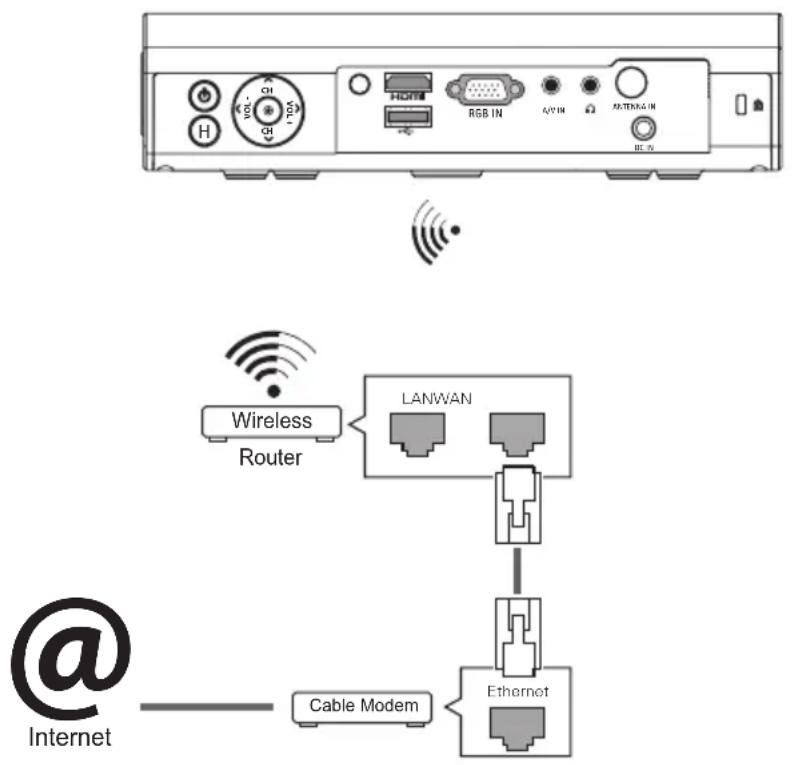
You can use a wireless network by using the built-in wireless network module as shown below.
A wireless router must be installed and operating at this time. Refer to the wireless router's user manual to see how to install it.
The network settings and connection may be different depending on the network environment. Set up the router as instructed in its user manual.
flowchart
graph TD
    A["External Network Interface"] --> B["Wireless Router"]
    B --> C["LANWAN"]
    C --> D["Ethernet"]
    D --> E["Cable Modem"]
    E --> F["Internet"]
    style A fill:#f9f,stroke:#333
    style B fill:#ccf,stroke:#333
    style C fill:#cfc,stroke:#333
    style D fill:#fcc,stroke:#333
    style E fill:#cff,stroke:#333
Wireless Screen Sharing
This function allows the user to use the wireless connection, such as Wi-Fi direct or WiDi. On the SmartShare ^™ , you can share the screen of a device connected through Wi-Fi Screen Share.
Turn Wi-Fi Screen Share on. A list of devices available for connection is displayed. Select a device to connect. A connection request message is displayed. Select Yes. The Wi-Fi Screen Share device is then connected.
1 Press the SETTINGS button.
2 Press the ∧ or ∨ button to select NETWORK and press the OK button.
3 Press the ∧, ∨, < or > button to select Wi-Fi Screen Share and then press the OK button.
Using the Wi-Fi Screen Share Function
With this function, you can use a wireless connection such as Wi-Fi Direct or WiDi, etc.
Using SmartShare ^™ , you can share a device's screen through Wi-Fi Screen Share.
Connecting the Wi-Fi Direct
1 Press the SETTINGS button.
2 Press the /or button to select NETWORK and press the OK button.
3 Press the ∧, ∨or < button to select Wi-Fi Screen Share and then press the OK button.
4 Set Wi-Fi Screen Share to On. (If you don't want to use this function, set to Off.)
5 Enable Wi-Fi Direct on the device that you want to connect to.
6 The list of devices that can connect to the Smart Projector is displayed.
7 Select a device to connect.
8 Select Yes when the connection request message appears.
9 If the device that you want to connect to accepts the request, Wi-Fi Screen Share will be connected.
Using WiDi
WiDi represents Wireless Display. It is a system that sends video and sound files a notebook PC that supports Intel WiDi.
WiDi Setup (Wireless Display)
1 Press the SETTINGS button.
2 Use the ∧, \or<button to select NETWORK and press the OK button.
3 Press the ∧, √or<button to select Wi-Fi Screen Share and then press the OK button.
4 Set Wi-Fi Screen Share to On. (If you don't want to use this function, set to Off.)
5 Your laptop runs the Intel WiDi program (☐).
6 The nearby LG Smart Projectors supporting WiDi are searched. In the list, select the Smart Projector you want and click Connect.
7 Enter the 4-digit MY PIN number displayed on the Smart Projector in the Intel WiDi program input field on a laptop and press Continue.
8 In a moment, the laptop screen is displayed on the Smart Projector screen. The wireless environment may affect the screen display. If the connection is poor, the Intel WiDi connection may be lost.
* For more information on how to use the Intel WiDi, visit http://intel.com/go/widi.
Tips for Network Setup
- Modem reconfiguration may cause network connection problems. If it does, turn off the modem and disconnect it from the projector; then turn on the modem again. It will be working normally.
- LG Electronics is not responsible for any Internet connection problems, or any failure, error or malfunction due to your Internet connection.
- The network connection may not be working properly because of the Internet Service Provider (ISP).
- DSL service requires a DSL modem, and cable service requires a cable modem. Internet connections may be limited due to an agreement with an Internet service provider (ISP), and the projector might not connect to a network. (When only one device is allowed per line and a PC is already connected, other devices are not available for use.)
- The wireless network may be affected by interference from a device that uses 2.4 GHz frequency, such as a wireless telephone, Bluetooth device or microwave. Interference may also be caused by a device that uses 5 GHz frequency such as Wi-Fi devices.
- The wireless network service may run slowly depending on the surrounding wireless environment.
-
Some devices may have a network traffic jam if any local home networks are turned on.
-
To connect to a wireless router, a router that supports wireless connection is necessary; the wireless connection function of the corresponding router must also be activated. Ask the router manufacturer whether the router supports wireless connection.
- To connect to a wireless router, verify the SSID and security settings of the wireless router. Please refer to the user guide of the corresponding router regarding SSID and security settings of the wireless router.
- The projector may not work properly if network devices (wire/wireless router or hub, etc.) are incorrectly set up. Be sure to install the devices correctly by referring to their user guides before configuring the network connection.
- When Ad-hoc is used, it may not be able to connect depending on the device (for example, laptop) that is connected.
- The connection method may vary according to the manufacturer of the wireless router.
Using Media Link
If you install the Plex server on a computer that is connected on the same network as the smart projector, you can directly and easily use various multimedia, such as photos, videos, or music stored on the computer.
Connecting Media Link
1 Install the Plex Media Server program on a computer.
You can download the Plex program suitable for your PC or notebook from www.lg.com.
2 After installing the program, select the Plex icon in the system tray on the computer and click the right button of the mouse. Set the shared folders in Plex Media Manager.
3 Select Media Link from the Home menu of the projector.
4 The Media Link section for a connected a computer is displayed. Select a section.
Using Media Link
1 Press the MY APPS button.
2 Go to Media Link.
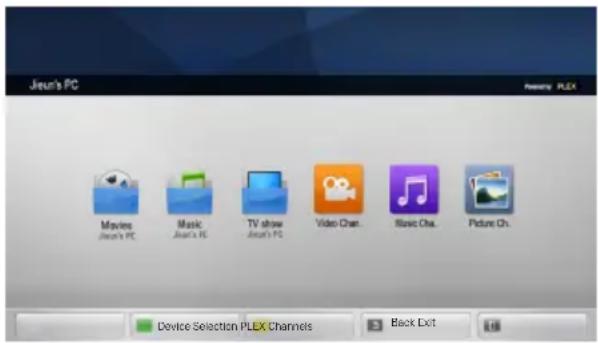
The folders appear as set up in the PLEX Media Manager.
System Requirements for PLEX installation
- Minimum requirements PC with 1.6 GHz Intel Core Duo Processor and Windows XP SP3 or higher, 512 MB RAM or more Recommendations for HD contents transcoding (720p and 1080p) PC with 2.4 Ghz Intel Core Duo Processor and Windows XP SP3 or higher, 2 GB RAM or more Windows XP, Vista and Windows 7, and Windows 8 support
• Network requirements ADSL/Cable/Wi-Fi Internet connection for calculation and update of media meta data. Wired network: 100 BaseT or 1000 BaseT Ethernet network Wireless network: Uncongested 802.11 n recommended, Media play supported by wireless mobile devices
Cautions when Using Media Link
- Only the 0.9.1.14 or higher version of PLEX media server can be installed on a Mac or PC.
- For the following languages, the GUI language is displayed in English and the transferred data is not shown.
: Thai, Arabic, Persian, Hebrew, Kurd- Thai, Arish - When playing a media file which is not supported by the projector using the video plug-in, initial buffering may take longer because of conversion on the computer.
The conversion performance in the computer may be different depending on the computer performance or network speed. - The supported formats for playing the files on the computer (Movie, projector Show, Music) are the same with DLNA.
- Playing a specific clip is not supported during music playback. (Same as DLNA)
- If you play high definition video over Wi-Fi, it may not play properly because of low network speed.
- The projector may not detect a computer when a router is used because of the router settings.
(For example, if the "Tcast Forward" function is enabled in some routers, the projector cannot detect a computer if it is connected through Wi-Fi.) - For some plug-ins, the media play may be restricted depending on its media format.
- A plug-in is subject to change without notice by its provider, or it may not be working.
Using the Premium Service
This service gives you easy access to a wide variety of content, such as news and UCC at any time, as long as you are connected to the Internet.
In addition to global contents, the premium contents are specialized based on the country you are in.
Using the Premium Service
1 Press the HOME button.
2 Go to Premium.
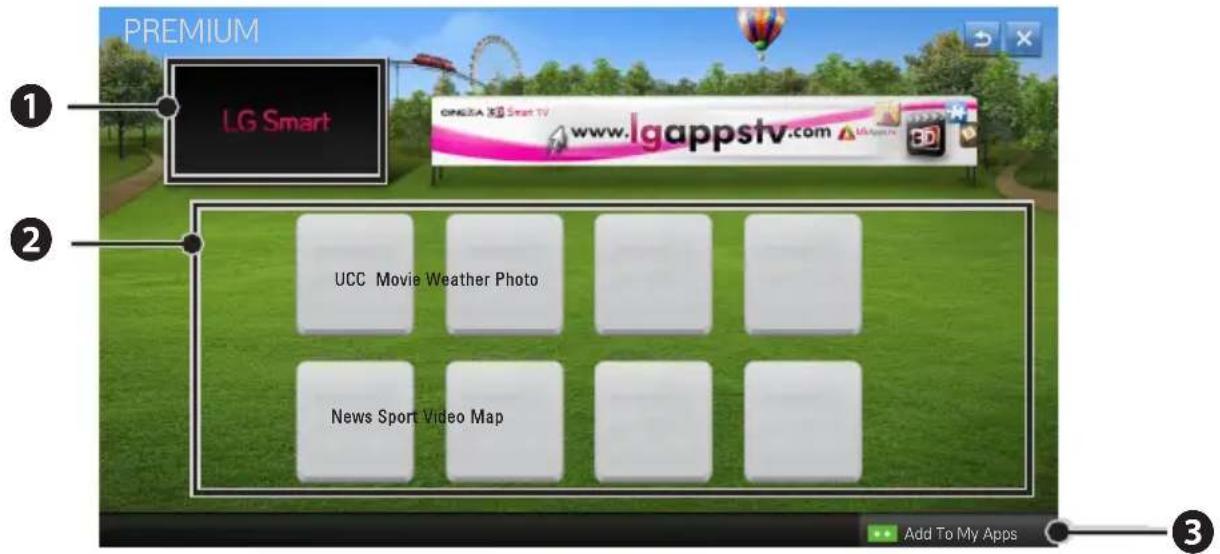
| Description | |
| 1 | Displays the screen you are currently watching. |
| 2 | Selects the content. |
| 3 | Adds a content to My Apps. |
SmartShare™
Before Using
Connecting a USB Storage Device
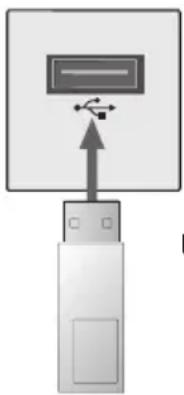
Connect a USB storage device (external HDD or USB memory stick) to the USB port of the projector to view the content files stored on the USB device.
You cannot write or delete data in the USB storage device.
Connect a USB memory stick as shown below.
natural_image
Diagram showing a USB port connected to a device with an icon and pointer (no text or symbols)USB Memory Stick
Removing a USB Storage Device
1 Press the MY APPS button.
2 Select Q.MENU.
3 Use the < or > button to move to USB Device and press the OK button.
4 Remove the USB device.

NOTE
• After the USB storage device is disconnected, it cannot be read. Remove the USB storage device and connect it again.
Tips for Using a USB Device
- A USB storage device installed using an automatic recognition program or its own driver might not be recognizable.
- Some USB devices may not be supported or will not work properly.
- Please use only a USB storage device formatted as a FAT32 or NTFS file system provided by Windows.
- It is recommended to use an external USB hard disk with rated voltage of 5V or less and rated current of 500mA or less.
- It is recommended to use a USB hub or hard disk drive with power supplied. (If the power supplied is not enough, the USB storage device may not be detected properly.)
- It is recommended to use a USB memory stick which is 32 GB or less and a USB hard drive which is 2 TB or less.
- If a USB external hard drive with the power saving function does not work, turn the hard drive off and on again to make it work properly. See the owner's manual of the USB hard drive for more information.
- The data of a USB device may be damaged, so it is recommended to backup any important files. Users are responsible for data management. The manufacturer bears no responsibility.
Supported Files for SmartShare™
• Maximum data transmission rate: 20 Mbps (Megabit per second)
- Supported external subtitle formats: *.smi, *.srt, *.sub (MicroDVD, SubViewer 1.0/2.0), *.ass, *.ssa, *.txt (TMPlayer), *.psb (PowerDivX)
• Supported internal subtitle formats: XSUB (subtitles from DivX6 are supported)
Connecting DLNA
Digital Living Network Alliance (DLNA) allows you to enjoy videos, music and photos saved on your PC or server using the Smart Projector through a home network.
Connecting the DLNA-Certified
Mobile Device
- Smart Projector and smartphone should be connected to the same network.
1 Enable Wi-Fi on the smartphone.
2 Install/run the app to share content on the smartphone.
3 Run "Share my mobile phone Content".
4 Select the kind of Content (video/music/photo) to play.
5 Select the video, music, or photo file to play on Smart Projector.
6 Select Add to Playlist.
7 On the device that you want to play the file, select the Smart Projector model. (You can find the Smart Projector model name on the product label.)
8 Play ▶ Enjoy the selected file on Smart Projector.
Connecting DLNA DMR (Digital
Media Renderer)
- With the Windows 7 or Window 8 PC operating system or DLNA-certified device (e.g. mobile phone), music/videos/photos may be played on the Smart Projector without installing a separate program.
1 Configure the Smart Projector and PC on the same network. Configure Windows 7 or Window 8-installed PC on the network.
2 To replay a music/video/photo file, right-click on the file and use the "Remote Playback" Windows 7 or Window 8 feature. To play on your mobile device, refer to its user manual.
3 Content will be played in only one device even though more than one Smart Projector or device is connected. Play speed can vary depending on network speed.
Connecting DLNA DMP (Digital
Media Player)
- With a PC having SmartShare™ PC Software, music/video/photo files may be replayed on the Smart Projector by linking them via home networking.
1 Configure the Smart Projector and the PC on the same network. Smart Projector and each device should be connected through a single access point to enable DLNA service.
2 Install SmartShare™ PC Software on PC from the web site. Before installation, close all running programs including firewall and Anti-Virus programs.
3 The sever should be running in order to watch shared files on your Smart Projector.

NOTE
- For how to use the SmartShare PC software, refer to the software help.
- For the website information, go to HOME → SETTINGS → SUPPORT → Product/Service Info.
When DLNA is Malfunctioning
- Check your network settings when the DLNA option does not work properly.
- To watch the 1080p video through DLNA, a router that uses 5 GHz frequency is required. If a 2.4 GHz router is used, the video does not play properly.
- When playing a video in DLNA mode, the Multi Audio and Closed Caption features are not supported.
- If multiple TVs are connected to one server in the DLNA mode, the content may not be played properly depending on server performance.
- Subtitles are only supported on some DMC devices.
- The DLNA function may not work properly depending on the network environment.
- The DLNA function may not be supported for a router that does not support multi-cast. For more information, refer to the user guide that came with your router or contact to the manufacturer.
- Even for the file format supported by the projector, the supported file format may differ depending on the DLNA server environment.
- If there are too many folders or files in a folder, it may not work properly.
- The information on the file imported from the DLNA server may not be displayed correctly.
• To watch the video subtitles on the DLNA server, Nero MediaHome 4 Essentials is recommended. - When a subtitle file is added later, disable the shared folder and then enable it again.
- The DRM file and document file in the DLNA server are not played.
Using SmartShare™
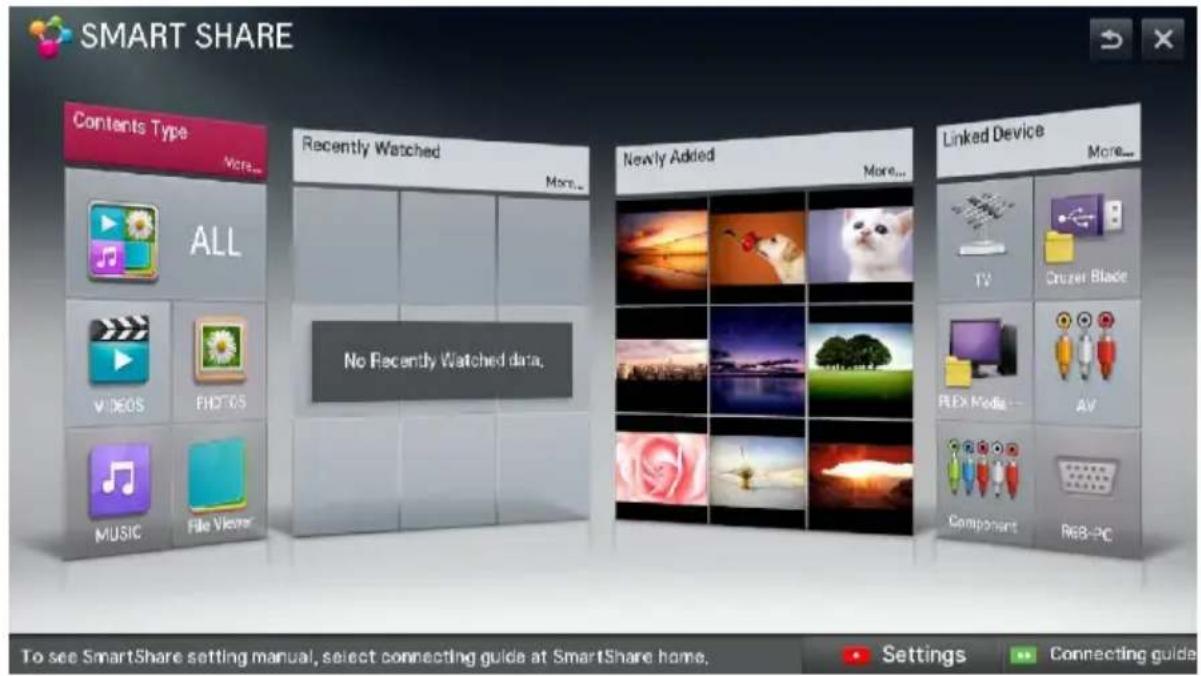
1 Press the HOME button of the remote control.
2 Select SmartShare™.
You can open photos, music, videos, and documents form a USB file. You can open open photos, music, and videos from computers on your local network using DLNA and Media Link. The photo, music, video and document files of all devices connected to the projector are displayed. (For the document files, only those in the devices connected via USB are displayed.)
Watching Videos
In the Movie List, you can watch movies from a connected USB device.
Tips for Playing Videos
- Some subtitles created by a user may not work.
- A video file and its subtitle file must be located in the same folder. A video file name and its subtitle file name must be identical in order to display the subtitle properly.
- Streaming files which include Global Motion Compensation (GMC) or Quarterpel Motion Estimation (Qpel) is not supported.
• H.264/AVC profile level 4.1 or below is supported.
- The file sizes that can be played may be different depending on the encoding environment.
• Video files created by some encoders may not be played back.
• Video files in formats other than the ones specified here may not be played back.
- Videos stored on a USB device that does not support high-speed play-back may not play properly.
- DTS audio is supported only for play-back of USB video files.
Video Codec
Maximum supported resolution: 1920 x 1080 @30p
| Extension | Codec | |
| .asf.wmv | Video VC-1 Advanced Profile, VC-1 Simple and Main Profile | |
| Audio WMA Standard, WMA 9 Professional | ||
| .divx.avi | Video | DivX3.11, DivX4, DivX5, DivX6, XViD, H.264/AVC, Motion Jpeg |
| Audio | MPEG-1 Layer I, II, MPEG-1 Layer III (MP3), Dolby Digital, Dolby Digital Plus, LPCM, ADPCM, DTS | |
| .mp4.m4v.mov | Video H.264/AVC, MPEG-4 Part 2 | |
| Audio AAC | ||
| .mkv | Video H.264/AVC | |
| Audio HE-AAC, Dolby Digital | ||
| .ts.trp.tp | Video H.264/AVC, MPEG-2, VC-1 | |
| Audio | MPEG-1 Layer I, II, MPEG-1 Layer III (MP3) Dolby Digital, Dolby Digital Plus, AAC | |
| .vob | Video MPEG-1, MPEG-2 | |
| Audio Dolby Digital, MPEG-1 Layer I, II, DVD-LPCM | ||
| .mpg.mpeg | Video MPEG-1 | |
| Audio MPEG-1 Layer I, II | ||
Controlling the Video Playback
You can control playback using the following buttons.
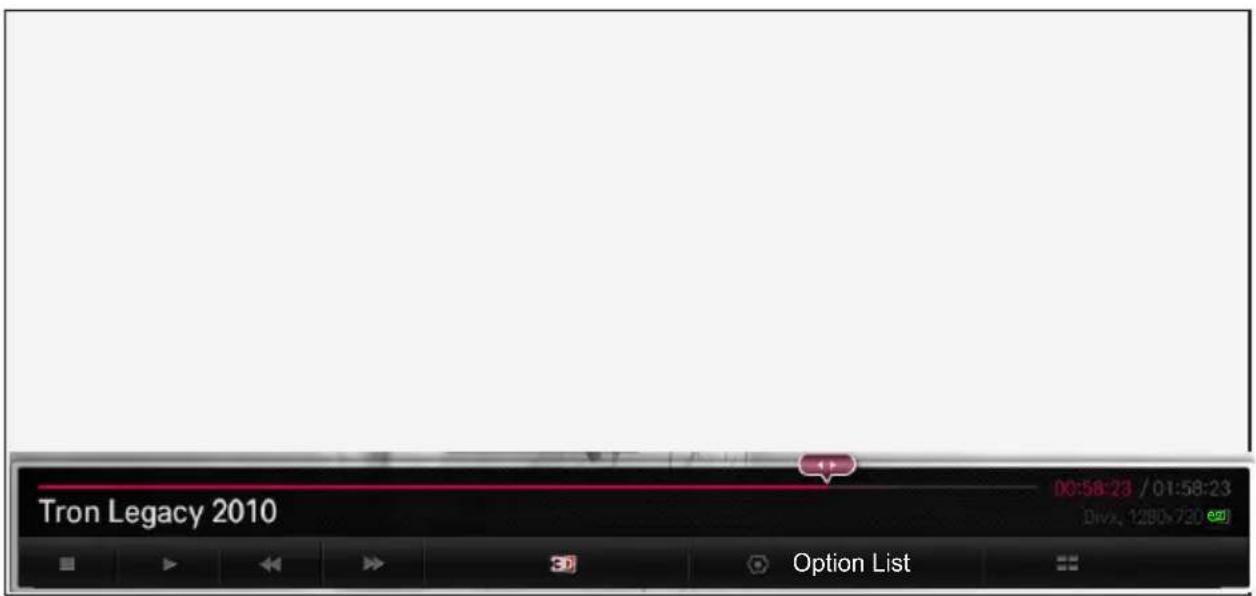
| Item | Description |
| ◀▶ | Shows the current playing position. You can use the < or > button to move forward or backward. |
| ■ | Stops playing and returns to Movie List. |
| ▶ | Resumes normal playback. |
| || | Pauses the media player. If no button is pressed on the remote control for 10 minutes after pausing, playback is restarted. |
| ||▶ Displays in slow motion. | |
| ◀▶ | Whenever this button is pressed, the playback speed is changed. |
 | Switches to the 3D screen. |
| Option | Sets the option. |
| List | Stops the playback and returns to the list. |
Viewing the Photos
You can view photos stored on a connected device.
Photo File
| File Format | Item Profile | ||
| 2D (jpeg, jpg, jpe)3D (jps) | Supported format | SOF0: baselineSOF1: Extend SequentialSOF2: Progressive | |
| Size | Min. 64 x 64 | ||
| Max. Normal | Type: 15360 (W) x 8640 (H)Progressive Type: 1920 (W) x 1440 (H) | ||
| 3D (mpo) | Supported format | mpo | |
| Size | 4:3 3,648 x 2,7362,592 x 1,9442,048 x 1,536 | ||
| 3:2 3,648 x 2,432 | |||
Controlling the Photo Playback
You can control playback using the following buttons.
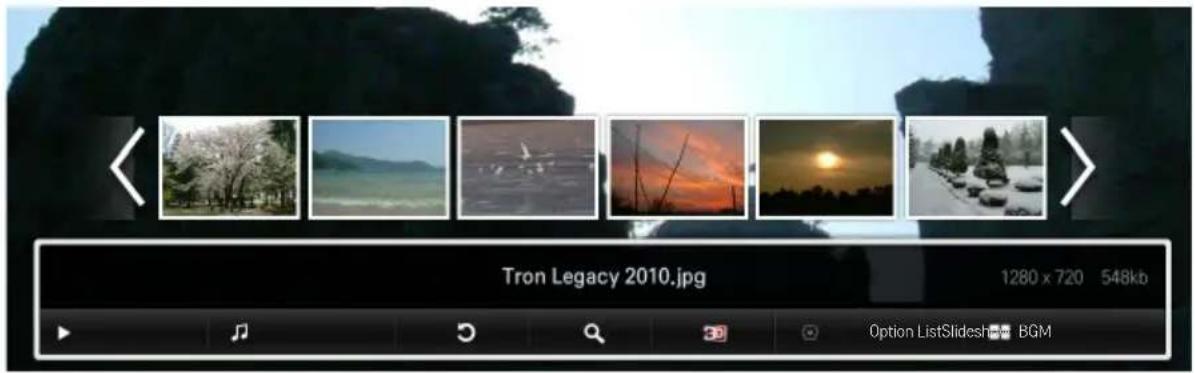
| Item | Description |
| <, > | Selects the previous or next photo. |
| Slide show | If no picture is selected, all photos in the current folder are displayed in a slide show. If some photos are selected, those photos are displayed in a slide show. Set Slide Speed in the Option → Set Photo View menu. |
| BGM | You can listen to music while viewing full-size photos. Set BGM in the Option → Set Photo View menu. |
| ∪ | Rotates photos. Rotates a photo 90°, 180°, 270°, 360° clockwise. Photos cannot be rotated if their width is greater than the height of the maximum supported resolution. |
| Q | Enlarges or reduces the photo. Use the Up/Down/Left/Right buttons to select a page and press the OK button. |
 | Switches to the 3D screen. |
| Option | A setting popup window will appear. |
| List | Stops the playback and returns to the list. |
Listening to Music
You can play audio files stored on the connected device.
Audio File
| No | Audio Codec | Bit rate | Sampling rate | Remark |
| 1 M | P3 32 Kbps - | 320 Kbps 16 kHz, 48 | kHz MPEG1, MPEG2, | Layer2, Layer3 |
Controlling Music Playback
You can control playback using the following buttons.

| Item | Description |
| ◀ ▶ | Changes the playing position. |
| ■ | Stops playing. |
| ▶ | Resumes normal playback. |
| ◀ ▶ | Plays the previous/next file. |
| ⊂ | Sets the repeat playback. |
| ✕ | Sets the random playback. |
| Option | Sets Option for the music list. |
| List | Returns to a list. |
Viewing the Files
You can see document files stored on a connected device.
Supported File Formats
XLS, DOC, PPT, TXT, XLSX, PPTX, DOCX, PDF
Microsoft Office 97/2000/2002/2003/2007 versions
Adobe PDF 1.0/1.1/1.2/1.3/1.4 versions
- File Viewer realigns a document, so it may look different from what is displayed on a PC.
- For documents that include images, the resolution may look lower during the realigning process.
- If the document is large or has many pages, it may take longer to load the document.
• Unsupported fonts may be replaced by other fonts.
Browsing File Viewer
You can control playback using the following buttons.
- Press the Go Page button to move to the previous or next page.
-
Press the VOL button to zoom in or zoom out.
-
Press the OK button.
-
Press the Up/Down/Left/Right buttons to move to Go Page or Zoom.
![[125 %] PA75U is Good Projector.ppt 1 / 1 489 KB Go Page Zoom Option List](/content/2026/05/1042499/images/989706352266d63827dde76e9db967817709b53506fae7edd0dcee4d04c66d68.jpg)
| Item Description |
| Go Page Moves to the page you want. |
| Zoom Enlarges or reduces the photo. |
| Option Sets Option for File Viewer. |
| List Returns to a list. |
Using the Magical Mirroring Function
The magical mirroring feature is used to wirelessly transmit and project the screen of a network-connected laptop (PC) to a projector. To use this feature, the MirrorOp Sender, an application for PC, should be installed in the user's laptop (PC).
You can download this PC program from www.MirrorOp.com.
(To obtain a full-featured MirrorOp Sender program, a user should purchase one.)
Running Magical Mirroring
1 From the HOME screen, select Magical Mirroring.
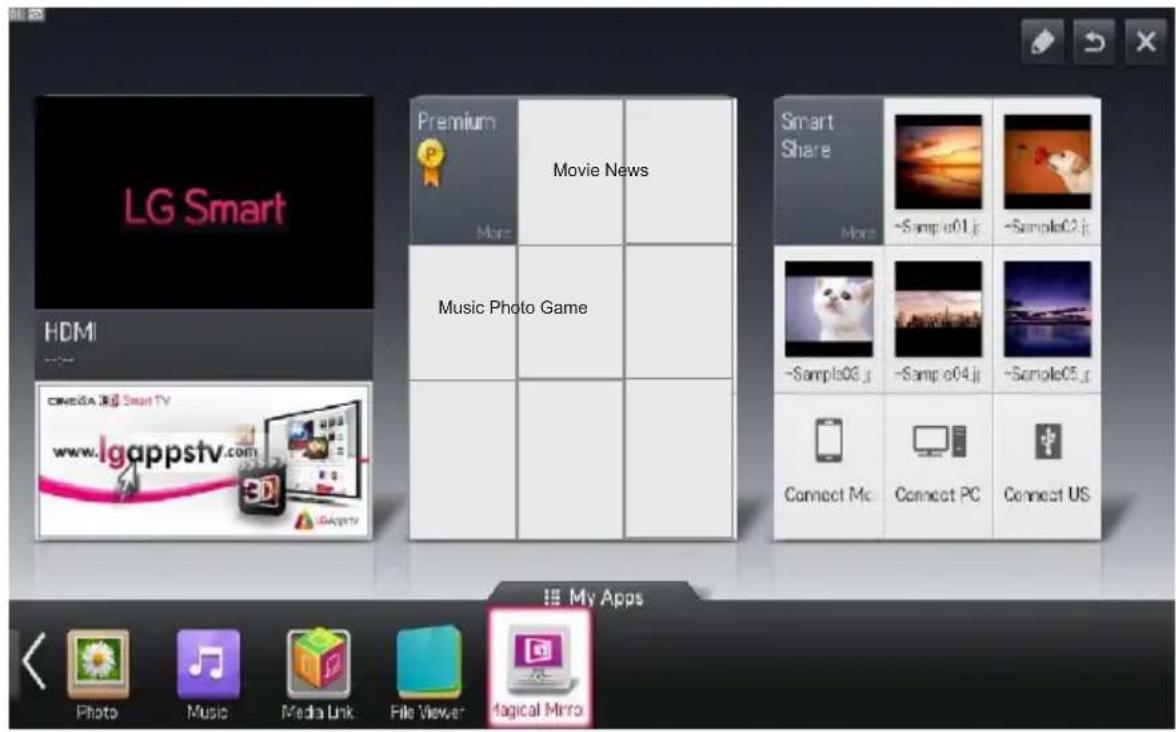

CAUTION
- Magical Mirroring is available only when a network is connected.
- When Magical Mirroring is running, only the following buttons are available on the remote control and control panel: Power, Volume, Previous and Exit.
2 After running Magical Mirroring, execute the MirrorOp Sender program on the computer.
3 In the Remote Box IP field of the MirrorOp Sender, enter the IP which is the same as the host IP of the Magical Mirroring and press Connect.
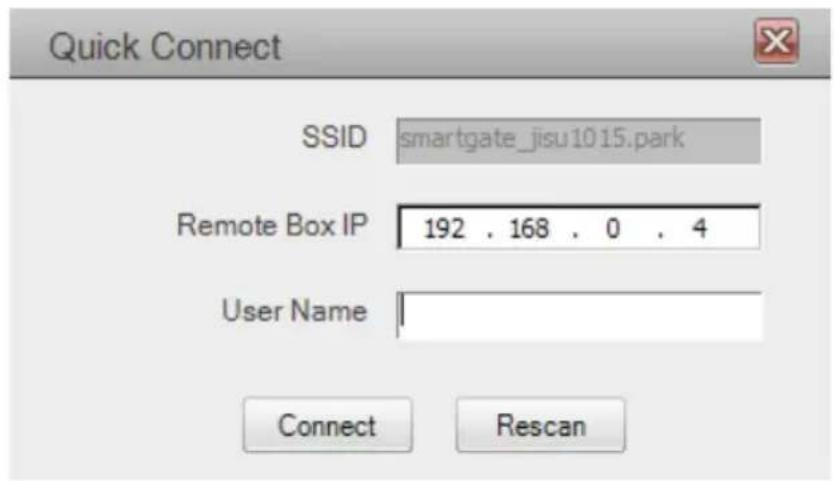
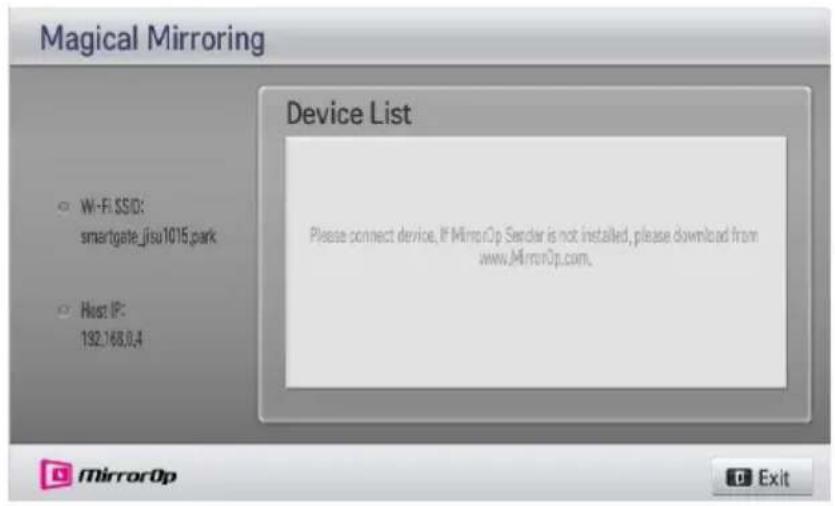
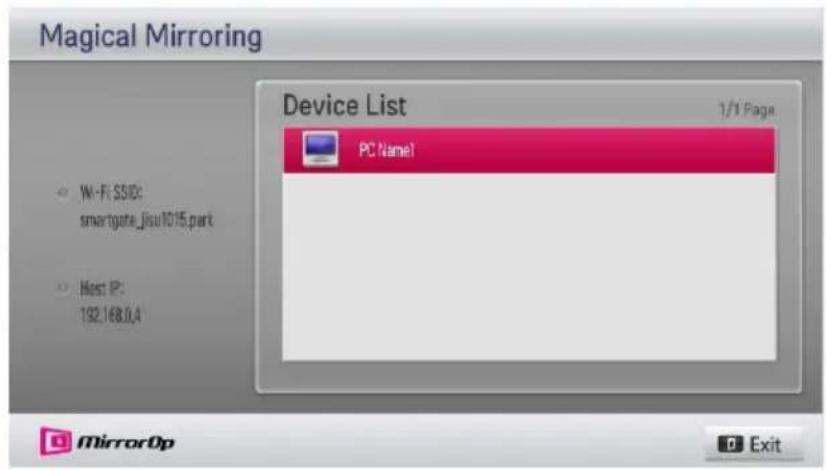
4 If MirrorOp Sender runs normally, the connected PCs are displayed in the Device List of Magical Mirroring as shown below. (All connected PCs are displayed.)
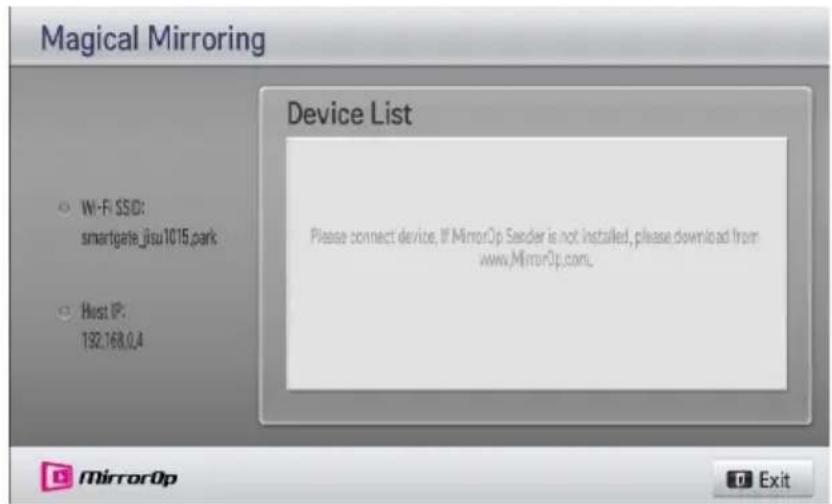
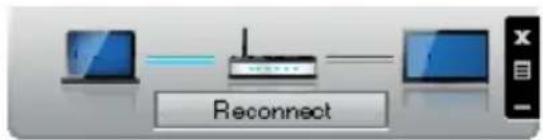
If MirrorOp Sender does not run, the Device List of Magical Mirroring is shown as follows. Check the network connection.
5 In the Device List, select a desired PC by pressing the Up/Down key and press the OK button.

CAUTION
- While running Magical Mirroring, the video or audio transmitted from the PC may be interrupted due to PC performance or wireless network status.
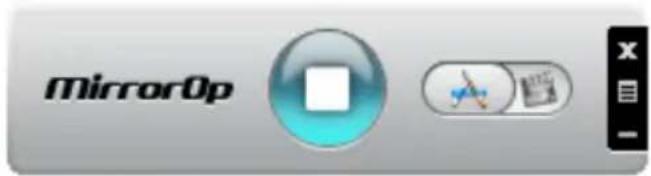
MirrorOp Sender
Changing MirrorOp Mode
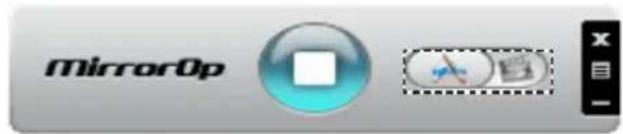
- Move the button to this position to change the transfer mode to application mode.
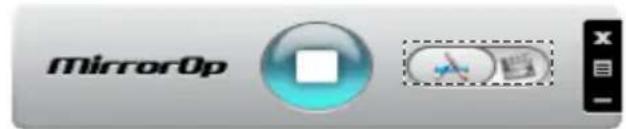
- Move the button to this position to change the transfer mode to movie mode.
| Mode Description | |
| Application Mode | When MirrorOp is set to this mode, the software will transfer images with greater quality. When you run applications such as games, you can set to this mode. This mode requires broadband, so we suggest you use the wired network when using this mode. |
| Movie Mode This mode is only for movies. When you play a movie on your PC, you can change to this mode. In this mode, the mouse and other applications do not work in real time. | |
Configuring MirrorOp
- Search Host
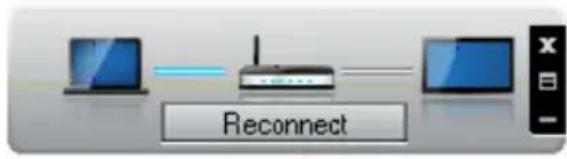
flowchart
graph LR
    A["Device 1"] --> B["Router"]
    C["Device 2"] --> B
    B --> D["Reconnect"]
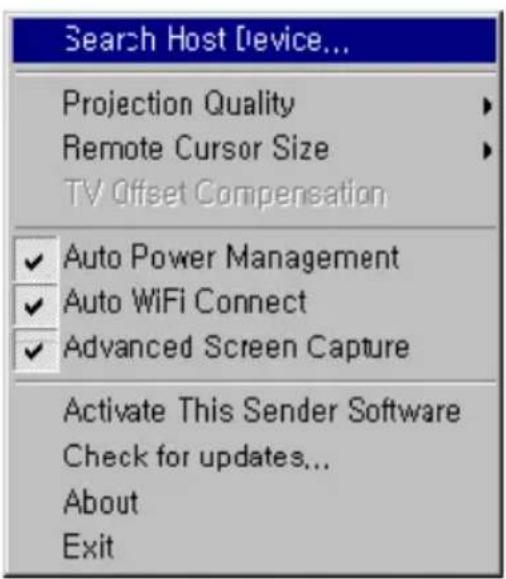
- Projection Quality

NOTE
- Using this option, you can select "Normal" or "Best" for the projection quality. If the network connection is good, select "Best"; if not, "Normal".
- TV Offset Compensation
- Auto Power Management
- When you use the Notebook to run the MirrorOp application, please choose this option. This option helps the notebook switch to the enabled mode. Your Wi-Fi network card will always work at an optimum level.
- Auto Wi-Fi Connect
- When you choose this option, your MirrorOp will automatically connect to the server and log in.
- Advanced Screen Capture
- Different PCs have different video output designs. When this option is not selected, some layers might not be captured, for example if you play a movie using a special media player. When you play a movie on your pc, and cannot see the picture on the projector, make sure to choose this option. With this option, the mouse pointer on the screen may appear as a double image; check to see if it does.

NOTE
- This option is used to adjust the vertical and horizontal display position. Please read the notice on the panel.
- Activate This Sender Software
Buy a license or import the license if you already have one.
- Check for Updates
Check the newest version on the network
System Requirements
| CPU Dual core 1.8 GHz or higher (excluding Atom processor) | |
| Display Adaptor nVIDIA or ATI graphic card with 64MB VRAM or above | |
| Operating System Windows Vista, Windows 7 | |
| Wi-Fi 802.11 n | |
3D FUNCTION
3D technology uses different video frames for each eye to add depth to the video.
Before Watching 3D
While Watching 3D

WARNING
- If you view 3D video or images too closely for a long period of time, your eyesight may become worse.
- If you watch the projector or game screen for a long time with 3D glasses on, you may experience dizziness or eye fatigue.
- If you are pregnant, a senior citizen, drunk, have heart problems, or easily feel motion sickness, we recommend that you do not watch 3D.
- Because 3D can be recognized as real, some viewers may get surprised or overexcited.
- Do not watch 3D images near fragile objects or any objects that can be knocked over easily.
• Take care not to injure yourself as you may subconsciously try to move away from the life-like 3D images. -
Prevent children of 5 years or younger from watching a 3D video. It may impair the development of their eyes.
-
Warning about photosensitivity seizures
- Some users may experience a seizure or other abnormal symptoms when they are exposed to a flashing light or particular patterns from a video game. If anyone in your family has a history of epilepsy or has ever experienced any kind of seizure, please consult your doctor before viewing 3D images.
If you experience one of the following symptoms while watching a 3D video, stop watching the 3D video immediately and take a rest. - Dizziness, switched eyesight, twitch- Dizziness, swing of the eye or facial muscles, involuntary movements, cramp, loss of consciousness, confusion, loss of sense of direction, or nausea. If the symptom does not disappear, please consult your doctor.
- You can reduce the risk of photosensitive seizures by taking the following preventive measures.
- Take a rest of 5 - 15 mins. for every 1 hour of viewing.
- If vision varies between each eye, correct the variation before beginning to watch a 3D video.
- Ensure that the 3D video is directly in front of you, at eye level.
- You should stop watching if you experience a headache, fatigue or dizziness.
- Do not view 3D images for a long period of time when you are tired or ill.

CAUTION
- Extra special care is required for children watching a 3D video.
When Watching 3D Video
- Watch 3D images within the optimum viewing angle and distance.
- If you are outside the viewing angle or distance, you may not be able to see 3D images. You cannot view 3D images when you are lying down.
- You may see left and right images overlapped during projector initialization after it is powered on. It may take some time for optimization.
- It may take some time for the 3D image to look normal after you turn your eyes away from the screen and look back at the 3D image.
- It may flicker slightly while watching 3D images under a 3 wavelength lamp fluorescent light (50 Hz - 60 Hz) or near windows. If so, it is recommended to block the sun light with a curtain and to dim the lights.
- The 3D glasses must be DLP-LINK (DLP Ready) type.
- You may not be able to watch 3D properly if there is an obstacle between the projector and 3D glasses.
• Install the 3D projector as far as possible from other devices.
Please check the following when using 3D glasses.
- Do not use 3D glasses as ordinary glasses, sunglasses or protective goggles.
- If you do so, this may cause injury.
- Do not store 3D glasses in very hot or very cold conditions. If you do, this may cause them to become distorted. Do not use distorted glasses.
- Do not drop 3D glasses or allow them to come into contact with other objects.
- This may cause product malfunction.
- The lenses of 3D glasses are easily scratched. Use a soft clean cloth when cleaning them.
- Foreign particles on the cloth may take some time for the 3D im-cause scratches.
- Do not scratch the surface of the 3D glasses' lenses with sharp objects or wipe them with chemicals. If the lenses get scratched, images may not look normal when viewing 3D.
Requirements for Watching 3D Images
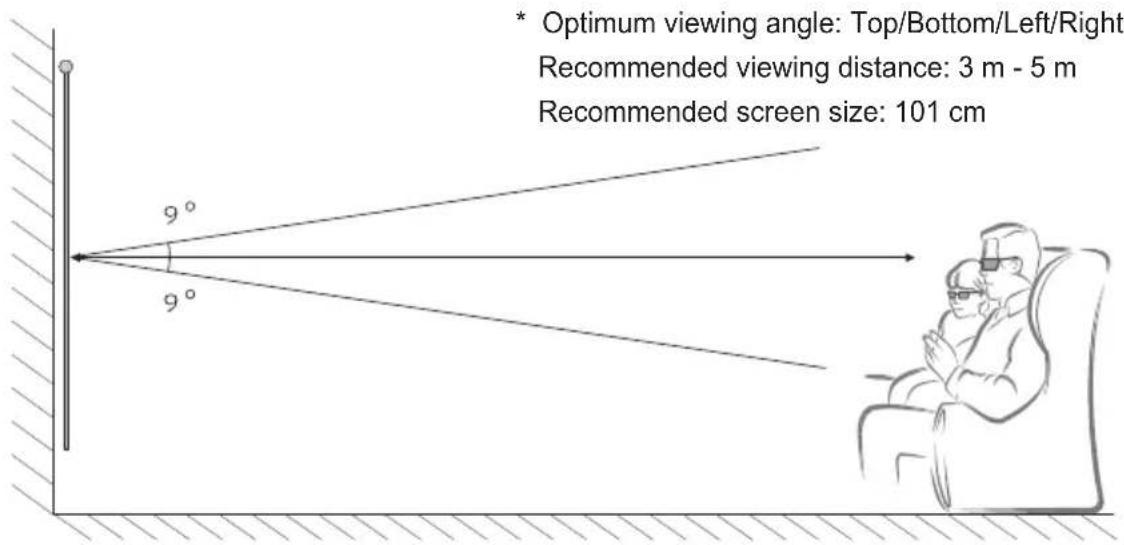
* Watching 3D videos should be done in dark room environments only.
* For 3D watching, set the energy saving mode to Minimum.

NOTE
- The pairing with the DLP-LINK glasses is affected by the intensity of light reflected from the screen.
Therefore, the pairing with DLP-LINK glasses may not work properly if the light reflected from the screen is not bright enough, such as when the surrounding area is bright, the screen is big, or the maximum energy saving mode is enabled.
• Some menus may not work while playing a 3D video.
- You can only watch a 3D video properly when the 3D video format option has been selected on the projector.
Using the DLP-LINK (DLP-Ready) Type Glasses
1 While watching 3D images from the projector, press buttons on the glasses.
2 When you press the button, the glasses flicker while synchronizing with the 3D images. (The flickering is a unique operation method of DLP-LINK type glasses. It may be different depending on the glasses type.)
3 If the glasses flicker or problems occur while watching 3D, first turn the lights off to make the room darker. Contact your projector seller for queries about the glasses.
Supported 3D Input Formats
3D Auto Conversion Formats
| Signal | Horizontal Frequency (KHz) | Vertical Frequency (Hz) | Supported 3D Formats | |
| HDMI | 1080p | 54.00 24 | F/P, L/A | |
| 67.50 30 | ||||
| 27.00 24 | S/S, T&B, S/S Full | |||
| 33.75 30 | ||||
| 67.50 60 S/S, T&B | ||||
| 1080i | 67.50 | 60 S/S Full | F/P, F/A | |
| 33.75 S/S, T&B, S/S Full | ||||
| 720P | 90.00 F/P, L/A | |||
| 45.00 S/S, T&B, S/S Full | ||||
| 480p | 63.00 F/P,L/A | |||
| 31.50 T/B,S/S,S/S Full | ||||
| USB | 1080p 33.7 | 5 30 S/S, T&B, C/B, MPO (Photo) | ||
| DLNA | ||||
| Supported 3D Formats | |
| DTV Dual Stream | |
S/S : Side by Side, T&B : Top & Bottom, F/P : Frame Packing, F/A : Field Alternative
L/A : Line Alternative, S/S Full : Side by Side Full, C/B : Checker Board
R/I : Row Interleaving, C/I : Column Interleaving, F/S : Single Frame Sequential
3D Manual Conversion Formats
| Signal | Horizontal Frequency (KHz) | Vertical Frequency (Hz) | Supported 3D Formats | |
| HDMI-DTV | 1080p | 27.00 24 | 2D to 3D, S/S, T&B, C/B | |
| 33.75 30 | ||||
| 67.50 | 60 | 2D to 3D, S/S, T&B, C/B, F/S, R/I, C/I | ||
| 1080i 33.75 2D to 3D, S/S, T&B | ||||
| 720P 45.00 2D to 3D, S/S, T&B, F/S | ||||
| Others - - 2D to 3D | ||||
| HDMI-PC | 1024 x 768 48.36 | 60 | 2D to 3D, S/S, T&B | |
| 1920 x 1080 | 67.50 | 2D to 3D, S/S, T&B, C/B, F/S, R/I, C/I | ||
| Others - - 2D to 3D | ||||
| RGB-PC | 1024 x 768 48.36 60 2D to 3D, S/S, T&B | |||
| Others - - 2D to 3D | ||||
| Component | 1080p | 27.00 24 | 2D to 3D, S/S, T&B | |
| 33.75 30 | ||||
| 67.50 | 601080i 33.75 | |||
| 720P 45.00 | ||||
| Others - - 2D to 3D | ||||
| USB | 1080p 33.75 30 | 2D to 3D, S/S, T&B, C/B, F/S, R/I, C/I(S/S, T&B for photos) | ||
| DLNA | ||||
| Resolution Supported 3D Formats | ||
| DTV | HD 2D to 3D, S/S, T&B | |
| SD | 2D to 3D | |
S/S : Side by Side, T&B : Top & Bottom, F/P : Frame Packing, F/A : Field Alternative
L/A : Line Alternative, S/S Full : Side by Side Full, C/B : Checker Board
R/I : Row Interleaving, C/I : Column Interleaving, F/S : Single Frame Sequential
Watching 3D Images
1 Play supported 3D video titles.
2 For RGB-PC, you must press AUTO on the remote control before watching 3D video.
3 Press the 3D button.
4 While watching 3D images from the projector, press the button on the glasses.
5 Select a screen with better 3D display quality.
• If you press the 3D button during viewing, it returns to 2D.
CUSTOMIZING SETTINGS
Settings Menu
1 Press the SETTINGS button.
2 Use the ∧, ∨, < or > button to select a desired item and press the OK button.
3 Use the ∧, ∨, < or > button to set up a desired item and press the OK button.
4 Press the EXIT button when completed.
| Menu Description | ||
 | PICTURE Adjusts the image quality for optimal viewing. | |
 | AUDIO Adjusts the sound quality and volume level. | |
 | Channel Sets up or edits a channel. | |
 | TIME Sets the time and time-related features. | |
 | LOCK Locks or unlocks a channel or a program. | |
 | OPTION Customizes the general settings. | |
 | NETWORK Sets the network. | |
 | SUPPORT Shows the projector information. | |
PICTURE Settings
1 Press the SETTINGS button.
2 Press the ∧ or ∨ button to select PICTURE and press the OK button.
3 Use the ∧, ∨, < or > button to set up a desired item and press the OK button.
- To return to the previous menu, press the ↩ button.
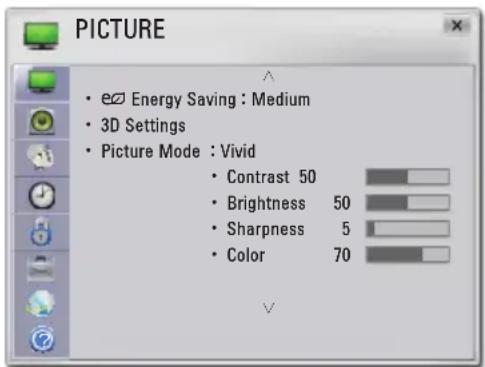
The available picture settings are described as follows.
| Item | Description |
| Energy Saving | Adjusts the brightness. |
| 3D Settings | Selects 3D mode. |
| Picture Mode | Selects one of the preset images or customizes options in each mode for the best screen performance. You can also customize advanced options for each mode. |
| Mode | |
| Vivid Maximizes the visual effect of video.Displays a crystal clear picture by enhancing contrast, brightness, and sharpness. | |
| Standard Displays the picture with normal contrast, brightness and sharpness. | |
| Cinema Optimizes the image for a movie. | |
| Game Optimizes the image for playing games on fast-moving screens. | |
| Expert1/2 Adjusts the detailed image settings. | |
| Contrast | Increases or decreases the gradient of the video signal. |
| Brightness | Adjusts the base level of the video signal to make the image brighter or darker. |
| Sharpness | Adjusts the level of edge sharpness between the light and dark areas of the picture. The lower the level is, the softer the image looks. Horizontal and Vertical Sharpness are available only in Expert1/2. |
| Color Adjusts the intensity of all colors. | |
| Tint Adjusts the balance between red and green levels. | |
| Item Description | |
| Advanced Control | Customizes the advanced settings. |
| Picture Option | Sets optional settings. |
| Picture Reset | Restores each mode's options to the factory default. |
| Aspect Ratio | Changed the image size to view images at its optimal size. |
| Picture Wizard II | By following the instructions, using the remote control, you can easily adjust the picture quality to technical standards without needing an expensive pattern device or a picture quality expert. |
| Screen (RGB-PC) | Adjusts the picture quality in RGB-PC input. |
| Item | |
| Resolution Available resolutions are 768 resolution (1024 x 768/1280x768/1360x768, 60Hz) and 1050 resolution (1400x1050/1680x1050, 60Hz). | |
| Auto Config. Provides optimized picture quality by automatically calibrating mismatched horizontal width and a shaky picture caused by conflicts between the internal settin gs of the projector and various PC graphic signals.You can also use the AUTO button on the remote control. | |
| Position Moves the image up/down/left/right. | |
| Size Changes the screen size. | |
| Phase Makes the picture look clear by removing horizontal noise. | |
| Reset Restores all the settings to the factory default. | |
Advanced Control
| Item Description | |
| Dynamic Contrast | Adjusts the contrast to keep it at the best level for the brightness of the screen. |
| Dynamic Color | Adjusts screen colors so that they look natural. |
| Clear White | Makes the white area of the screen look brighter and whiter. |
| Preferred Color | Skin Color Adjusts the skin color in the picture to your preference. |
| Grass Color Adjusts only the natural color area of e.g., field and mountain. | |
| Sky Color Adjusts only the color of the sky. | |
| Super Resolution | Improves blurry and unclear parts in the picture to make the picture more vivid. |
| Color Temperature | Adjusts the overall color of the screen as you want.You can selectWarm, Cool, Medium, Purity or Natural. |
| Gamma Sets | a gradation curve between video input and output signal. |
| Color Gamut | Selects the range of colors to display.Standard: Displays the original colors of an input signal regardless of the display features.Wide: Sets to use the rich colors of the display. |
| Edge Enhancer | Provides much sharper and clearer edges to the picture. |
| xvYCC Displays much richer colors. | |
| Color Filter Accurately adjusts color and tint by filtering a specific color area of RGB space. | |
| Expert Pattern | Displays the patterns necessary for expert adjustment. |
| WHITE BALANCE | Adjusts white balance. Detailed adjustment is possible as shown below.Color Temperature: You can select Warm, Cool, Medium, Purity or Natural. |
| a. Method: 2 points- Pattern: Inner, Outer- Contrast Red/Green/Blue, Brightness Red/Green/Blue: Adjustable range -50 - +50.b. Method: 20 point IRE- Pattern: Inner, Outer- Institute of Radio Engineers (IRE) is the unit indicating the size of a video signal and can be set to 5, 10, 15, ... 100. You can fine-tune for each setting as shown below.- Luminance: If you set up luminance for 100 IRE, a luminance value satisfying each gamma is automatically calculated for each step from 10 IRE to 90 IRE.- Red/Green/Blue: The adjustment range is -50 - +50. | |
| Color Management system | Adjusts Red/Green/Blue/Yellow/Cyan/Magenta colors. Allows an expert to adjust the tint using a test pattern. Six colors (Red/Green/Blue/Cyan/Magenta/Yellow) can be selectively adjusted without affecting other colors.You may not see colors change on a normal picture even after adjustment.- Chroma Red/Green/Blue/Yellow/Cyan/Magenta,Tone Red/Green/Blue/Yellow/Cyan, Magenta:The adjustment range is -30 - +30 each. |
* Available options may differ depending on the input signal or video mode, etc.
Picture Option
| Item Description | |
| Noise Reduction | Removes noises in the picture. |
| MPEG Noise Reduction | Reduces the noise produced while creating digital video signals. |
| Black Level | Compensates the brightness and contrast of a screen to balance with the black level of the video input. |
| Real Cinema | Provides optimal picture quality for watching a movie. |
| TruMotion Makes the picture look smooth by compensating it. | |
* If the video signal is 60 Hz, TruMotion may not work.
SOUND Settings
1 Press the SETTINGS button.
2 Press the ∧ or ∨ button to select SOUND and press the OK button.
3 Use the ∧, ∨, < or > button to set up a desired item and press the OK button.
- To return to the previous menu, press the ↩ button.
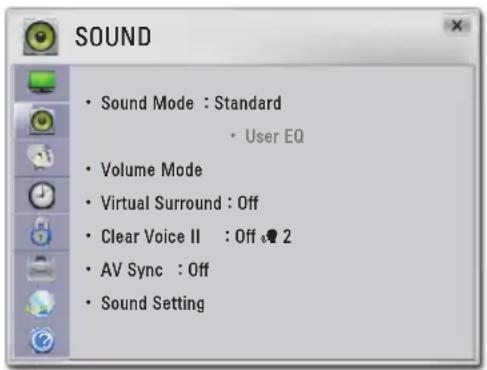
The available audio settings are described as follows.
| Item Description | |
| Sound Mode | Sets the sound mode. |
| User EQ Allows you to adjust the treble and bass sound. | |
| Volume Mode | Sets the projector volume. |
| Virtual Surround | Provides realistic stereo sound. |
| Clear Voice II | Makes the voice from the projector crisp and clear. |
| AV Sync | Allows you to manually adjust picture and audio when they are not synced. |
| Sound Setting | Balances the sound. |
CHANNEL Settings
1 Press the SETTINGS button.
2 Press the ∧ or ∨ button to select CHANNEL and press the OK button.
3 Use the ∧, ∨, < or > button to set up a desired item and press the OK button.
- To return to the previous menu, press the ↗ button.
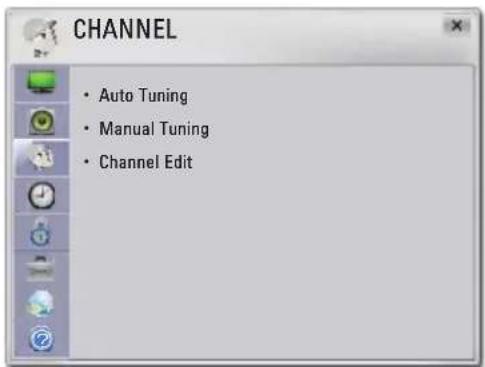
The available channel settings are described below.
| Item Description | |
| Auto Tuning Remembers a channel which is currently broadcasting. Be sure to use this function when you move to another house or move the projector to other place. It must be used while the antenna is connected and there are channel broadcasting signals. | |
| Manual Tuning | Checks a channel signal, deletes or remembers a channel. |
| Channel Edit Deletes or remembers a channel. | |
TIME Settings
1 Press the SETTINGS button.
2 Press the ∧ or ∨ button to select TIME and press the OK button.
3 Use the ∧, ∨, < or > button to set up a desired item and press the OK button.
- To return to the previous menu, press the ↩ button.
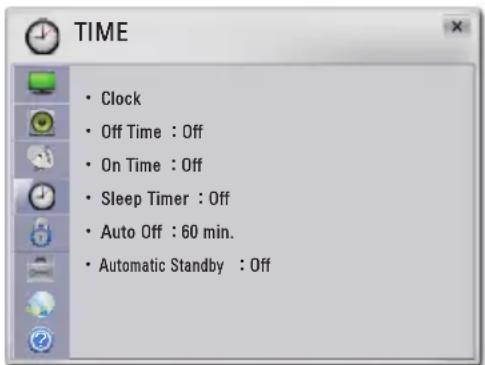
The available time settings are described as follows.
| Item Description | |
| Clock You | can check or change the time while using the projector. |
| Off Time /On Time | You can set the On/Off Time for the projector.[KDBA]NOTEThis works normally only when the current time is confi gured.If Off Time and On Time are the same, Sleep takes priority when the projector is on and Power On takes priority when the projector is off.Although the projector can be turned on by the On Time function, it is automatically turned off if no button is pressed within 120 minutes. This is a convenient function if you are away from your home for a long period of time. |
| Sleep Timer | The projector is turned off at the preset time. |
| Auto Off If | there is no signal, the projector automatically turns off after the preset time has elapsed. |
| Automatic Standby | Turns off the projector automatically if there is no input for the given time. |
LOCK Settings
1 Press the SETTINGS button.
2 Press the ∧ or ∨ button to select LOCK and press the OK button.
3 Use the ∧, ∨, < or > button to set up a desired item and press the OK button.
- To return to the previous menu, press the ↕ button.
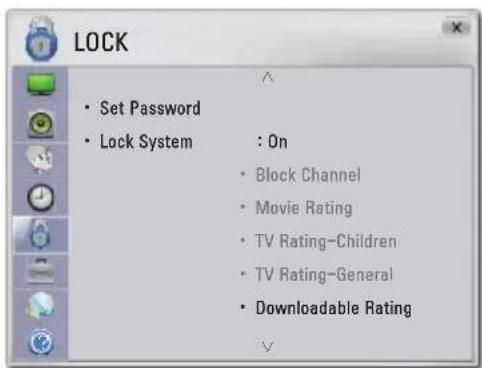
The available lock settings are described below.
| Setting Description | ||
| Set Password Changes the 4-digit password. The default PIN is “0 0 0 0”.If you forget your password, press “0-3-2-5” on the remote control. | ||
| Lock System Activates or deactivates the lock system. | ||
| Block Channel Blocks the channels that contain inappropriate contents for children. The channels can be selected but the screen is blank and the audio is muted.To watch a locked channel, enter the password. | ||
| Movie rating Blocks the movies that are only broadcasted on the projector and contain inappropriate contents, based on the Motion Picture Association of America (MPAA) rating. | ||
| TV Rating-Children Blocks the children's TV programs that parents do not want their children to watch. To block other TV programs, you should set the TV Rating-General feature. | ||
| TV Rating-General | Blocks the TV programs that you want based on the ratings by using the Parental Control Function (V-Chip).[3x25]NOTEThe V-Chip electronically reads TV program ratings and allows parents to block program that are unsuitable for children. | |
| Rating | ||
| Age Applies to TV-G, TV-PG, TV-14, TV-MA. | ||
| Dialogue (Sexual dialogue) applies to TV-PG, TV-14. | ||
| Language (Adult language) applies to TV-PG, TV-14, TV-MA. | ||
| Sex (Sexual situations) applies to TV-PG, TV-14, TV-MA. | ||
| Violence Applies to TV-PG, TV-14, TV-MA. | ||
| Downloadable Rating | This function operates only when the projector has received Region5 Rating data. The name of the rating option may differ. NOTEThis feature is available only for digital channels. NOTEThis feature is available only for digital channels. | |
| Input Block Block the input sources. | ||
NOTE
OPTION Settings
1 Press the SETTINGS button.
2 Press the ∧ or ∨ button to select OPTION and press the OK button.
3 Use the ∧, ∨, < or > button to set up a desired item and press the OK button.
- To return to the previous menu, press the ↗ button.
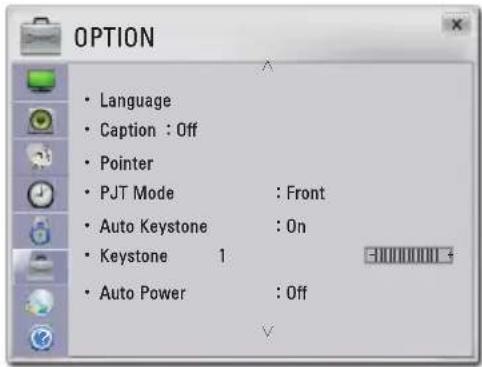
The available option settings are described below.
| Item Description | |
| Language Selects the desired language. | |
| Caption If a broadcasting station transmits a digital bilingual signal, you can select a desired language. This will be the default language used when the power is on or a channel is changed. If there is no information for a selected foreign language, it is displayed in English | |
| Digital Subtitle Settings (For digital broadcasting) | |
| Size Selects the size of a subtitle. | |
| Font Selects the font of a subtitle. | |
| Text Color Selects the color of a subtitle. | |
| Text Opacity Selects the transparency of a subtitle. | |
| Bg Color Selects the background color of a subtitle. | |
| Bg Opacity Selects the transparency of a subtitle background. | |
| Edge Type Selects the frame type of a subtitle. | |
| Edge Color Selects the frame color of a subtitle. | |
| Pointer Selects a desired pointer. | |
| Speed Sets the move speed of a pointer. | |
| Shape Selects the pointer shape. | |
| Size Selects the pointer size. | |
| Alignment Enable this option. While using the magic remote control, if the pointing position of the remote control and the actual pointer position do not match, shake the magic remote control to the left and right.The pointer automatically moves to the center of screen to match the movement. | |
| PJT Mode | Turns the projected image upside down or flips it horizontally. |
| Auto Keystone | Auto Keystone provides a rectangular screen image by automatically adjusting the Keystone number when there is a trapezoidal screen image caused by tilting of the projector. |
| Item | |
| On Automatically adjusts the Keystone number. | |
| Off Manually adjusts the Keystone number. | |
| Keystone | Compensates for the trapezoidal image shape created when projecting an image from an angle not perpendicular to the screen. |
| Auto Power | Makes the projector turn on automatically when the power cord is connected. |
| Item | |
| On When the power cord is connected to the projector, it turns on automatically. | |
| Off When the power cord is connected to the projector, it goes into standby mode. | |
| High Altitude | If the projector is used at an altitude higher than 1200 meters, turn this option on.When High Altitude is not enabled, the projector may overheat or its protection function may be activated. If this happens, turn the projector off and then on again after waiting for several minutes. |
| Auto Input Search | Automatically searches for and displays the input signal type when it is received. It is available only with external inputs (RGB, HDMI, AV and Component). |
| Balloon Help | Enables/disables the balloon help. |
| Smart Projector Setting | Manages the smart projector settings or IDs. |
| Initial Setting | Resets all projector settings to the factory default. |
NETWORK Settings
1 Press the SETTINGS button.
2 Press the ∧ or ∨ button to select NETWORK and press the OK button.
3 Use the ∧, ∨, < or > button to set up a desired item and press the OK button.
- To return to the previous menu, press the ↩ button.
4 Press the EXIT button when completed.
The available network settings are described below.
| Item Description | |
| Network Connection | Connects a wireless network. |
| Network status | Checks the status of wireless network. |
| Wi-Fi Screen Share | Wi-Fi Screen Share supports wireless connection technology, such as Wi-Fi Direct and WiDi. You can share the fi le and screen of the devices connected by the Wi-Fi Screen Share on the SmartShareTM. |
| Smart Share Setting | Changes the settings for SmartShareTM. |
CONNECTING EXTERNAL DEVICES
You can connect various external devices to the projector.
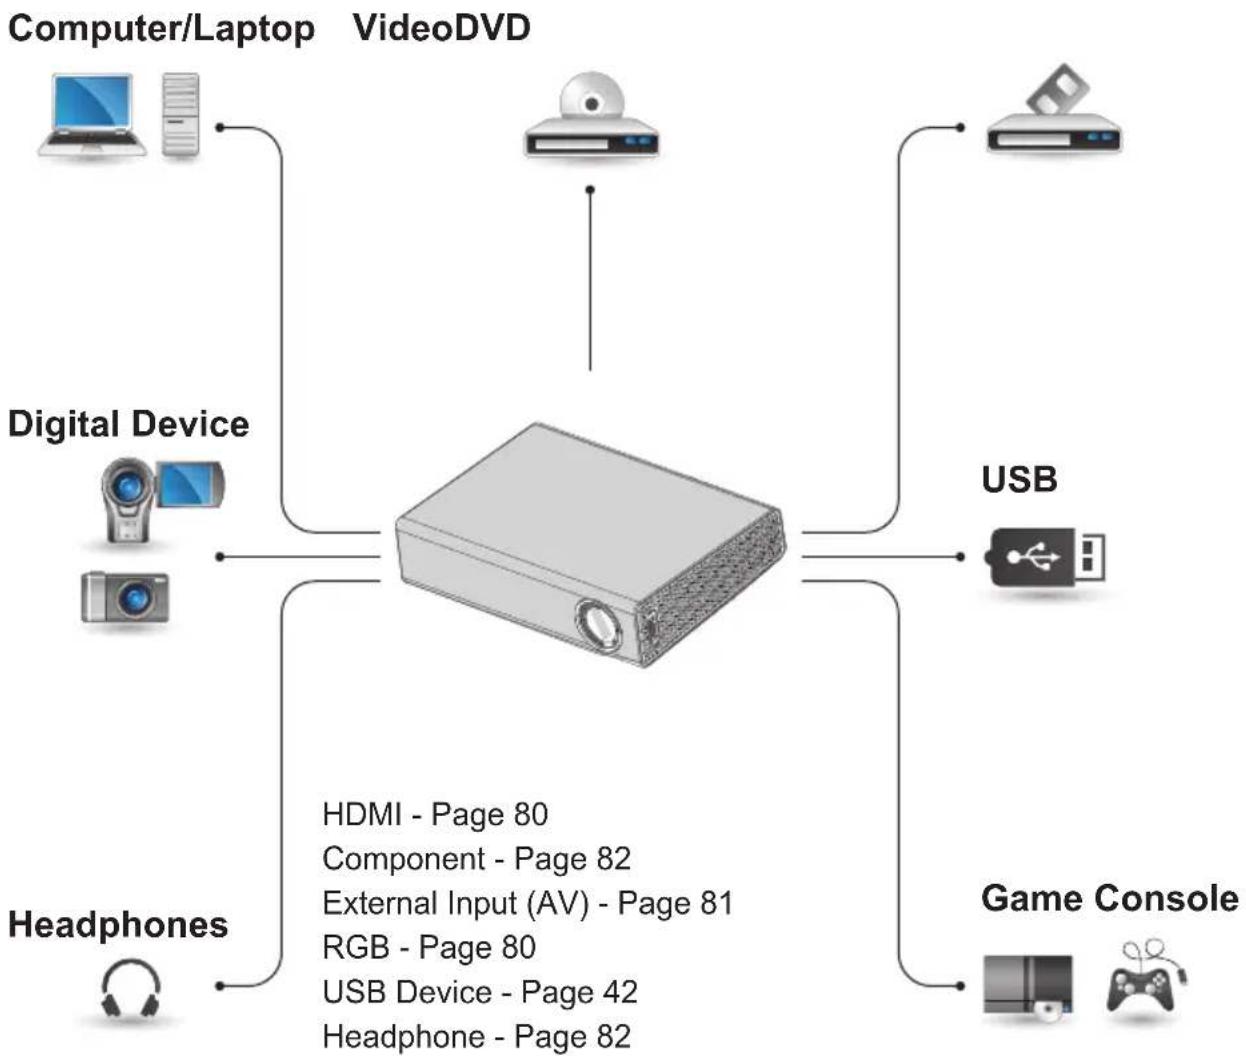
flowchart
graph TD
    A["Computer/Laptop"] --> B["VideoDVD"]
    C["Digital Device"] --> B
    D["Headphones"] --> B
    E["USB"] --> B
    F["Game Console"] --> B
    B --> G["HDMI - Page 80"]
    B --> H["Component - Page 82"]
    B --> I["External Input (AV) - Page 81"]
    B --> J["RGB - Page 80"]
    B --> K["USB Device - Page 42"]
    B --> L["Headphone - Page 82"]
Connecting HD Receiver, DVD Player, or VCR
Connect a HD receiver, DVD Player, or VCR to the projector and select an appropriate input mode.
HDMI Connection
With an HDMI cable, you can enjoy high quality picture and sound. Press the INPUT button on the remote control to select HDMI.
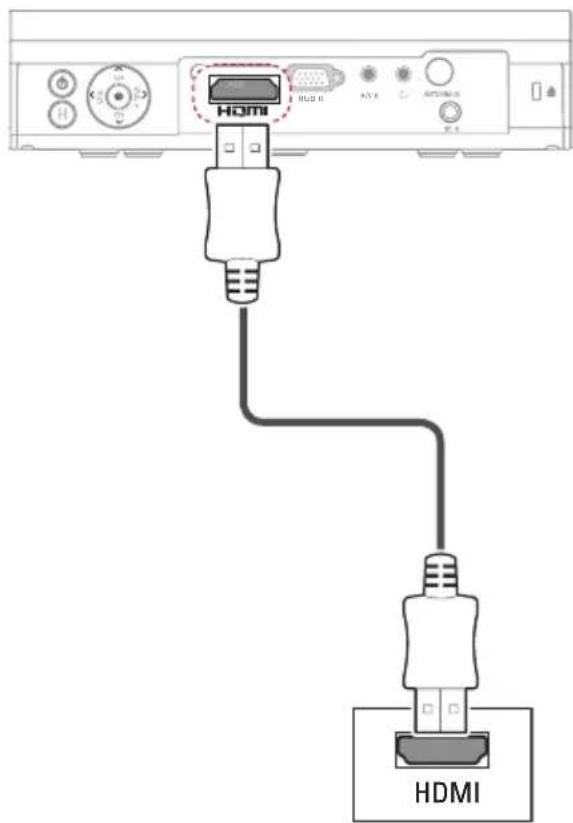
Connecting PC
The projector supports Plug & Play. Your PC will automatically detect the projector and requires no driver installation.
RGB Connection
Connect the PC output and the RGB IN input port of the projector with the RGB cable. For audio signal, connect the PC and the projector with an optional audio cable.
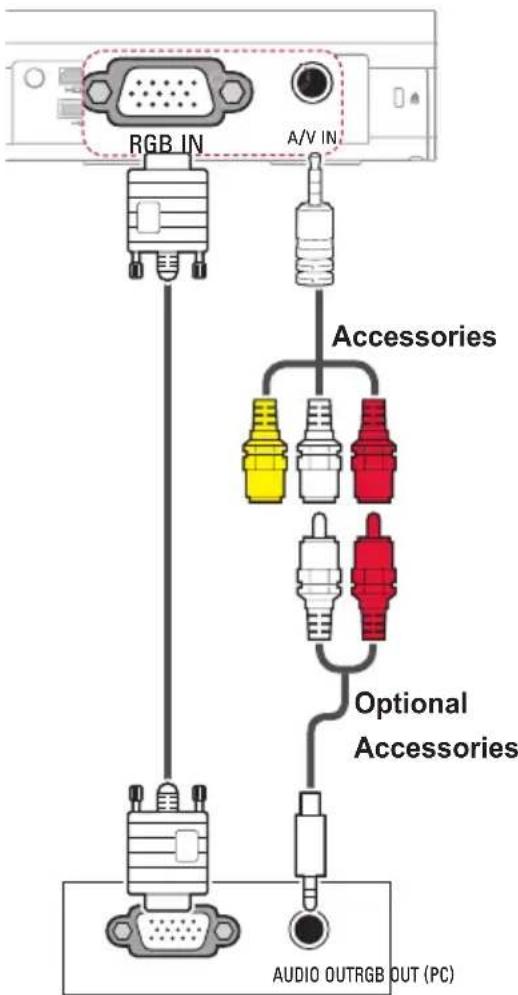
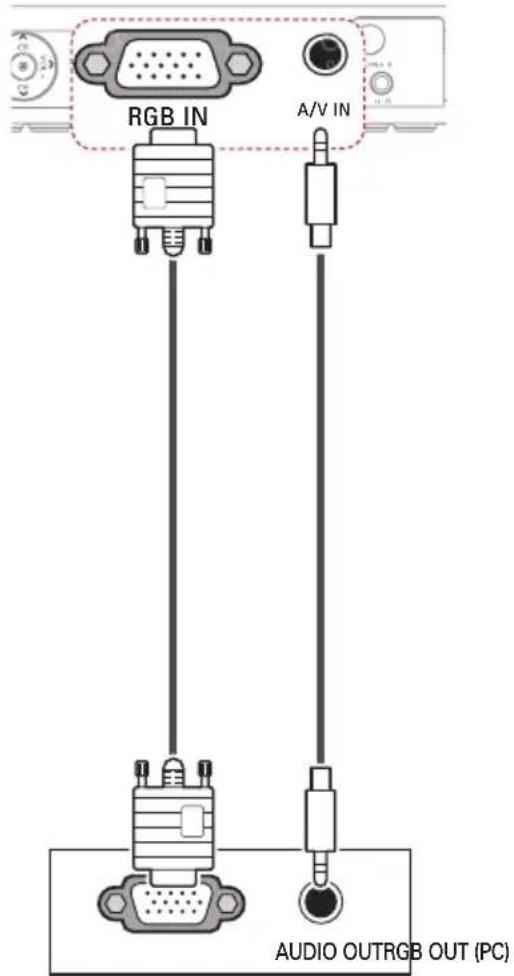
You can connect the audio cable without using a gender as shown in the illustration above.
Connecting AV
Connect the output ports of an external device and the A/V IN port of the projector. Press the INPUT button to select AV.
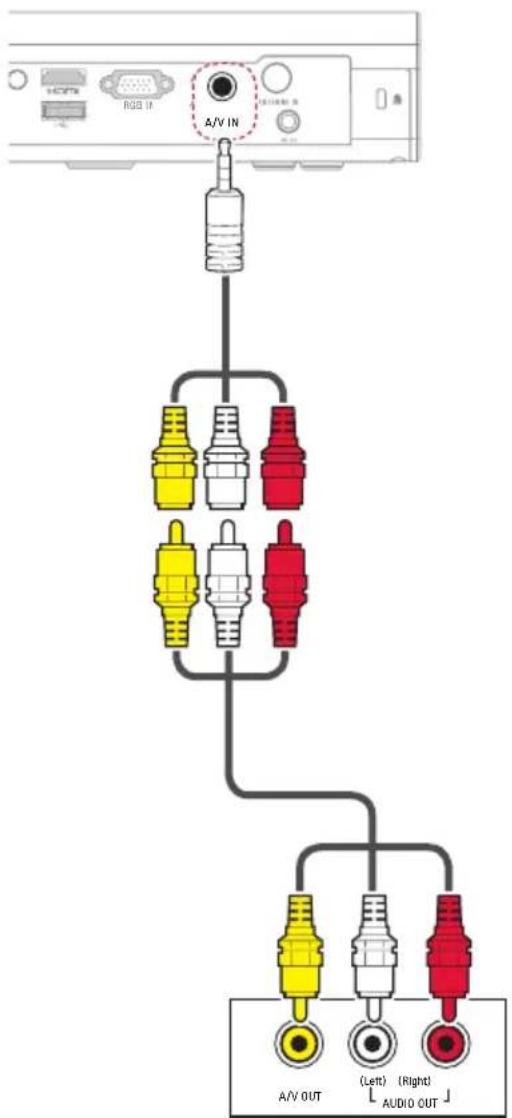
Component Connection
You can enjoy vivid images when you connect an external device with a component port to the RGB IN port of the projector. Press the INPUT button on the remote control to select Component. Purchase an RGB to component cable and use it.
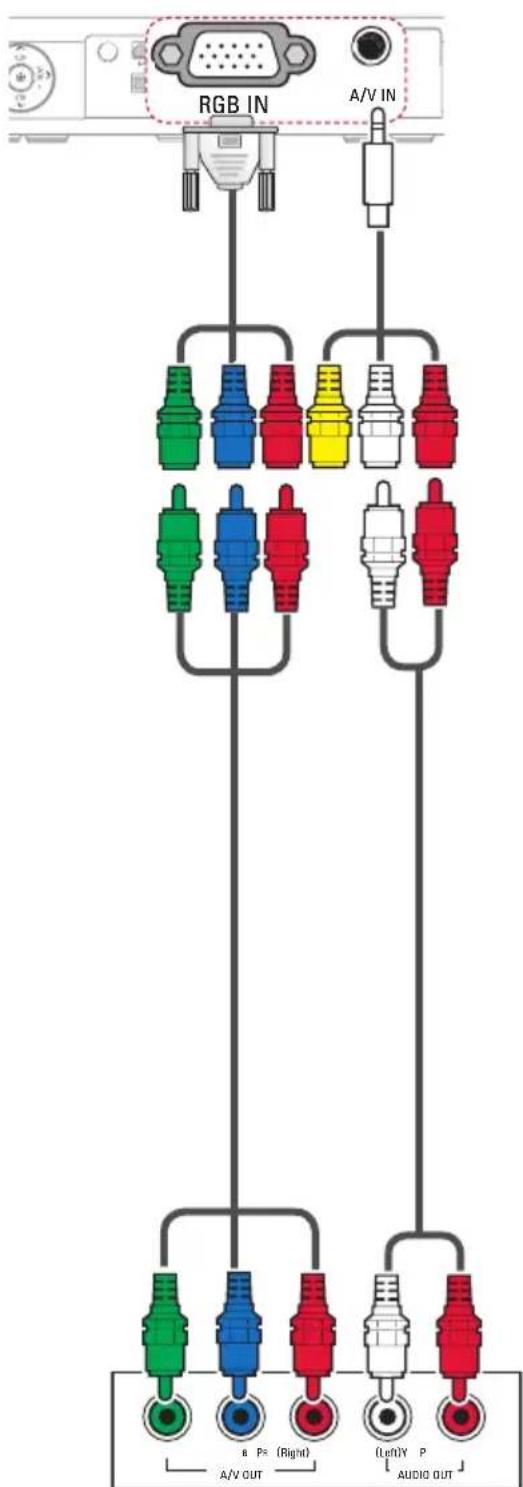
Connecting Headphones
You can listen to the audio through headphones.
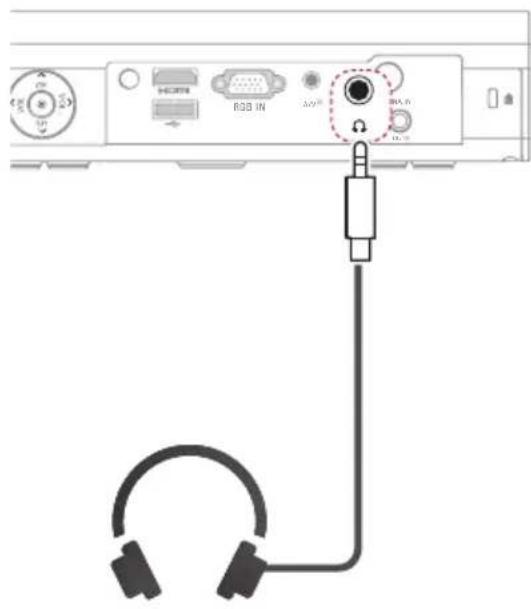
Connecting a Laptop
You can connect the projector to a lap-top to use various functions.
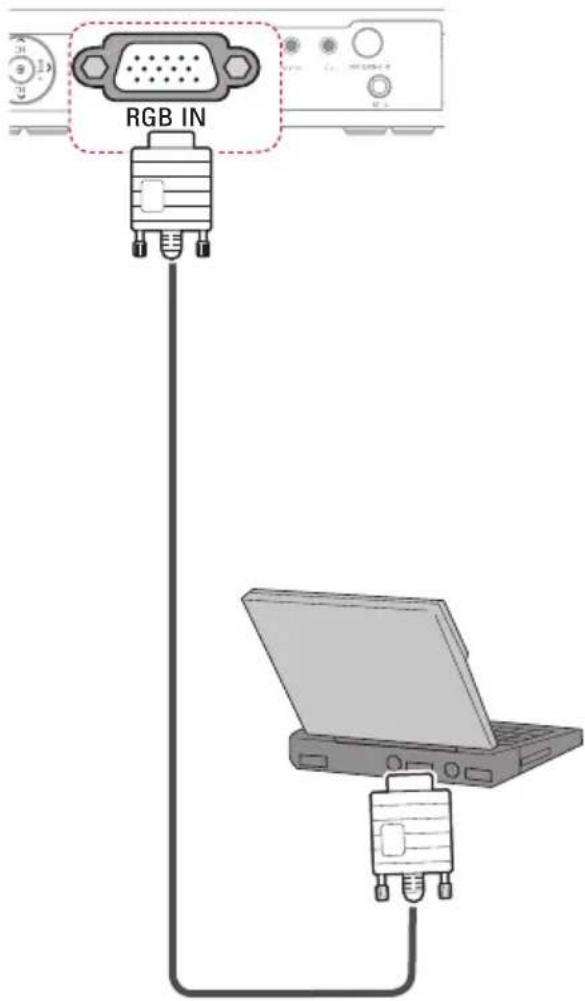
The table below shows examples of switching the output. For more information, refer to the "External Output", "Connecting to an External Monitor", or similar sections of the owner's manual of your computer.
| Brand | Switching Output |
| NEC [Fn]+[F3] | |
| Panasonic [Fn]+[F3] | |
| Toshiba [Fn]+[F5] | |
| IBM [Fn]+[F7] | |
| Sony [Fn]+[F7] | |
| Fujitsu [Fn]+[F10] | |
| LG [Fn]+[F7] | |
| Samsung [Fn]+[F4] | |
| Macintosh | Adjust the control panel to enable mirroring after start-up. |
MAINTENANCE
Clean your projector to keep it in optimal condition.
Cleaning
Cleaning the Lens
If there is any dust or staining on the lens surface, you must clean the lens. Use an air spray or a cleaning cloth to clean the lens.
To remove dust or stains, use an air spray or apply a small amount of cleaning agent onto a swab or soft cloth to lightly rub the lens.
Please be aware that liquid may flow into the lens if the product is sprayed directly onto the lens.
Cleaning the Projector Case
To clean the projector case, first unplug the power cord.
To remove dust or stains, use only a dry, lint-free, nonabrasive cloth to polish the lens.
Do not use alcohol, benzene, thinners or other chemicals, which may damage the case.
How to Fix the Lens Cap
1 Prepare the lens cap and the strap supplied as accessories.
2 Insert the end of the strap into the hole at the bottom of the lens section of the projector. Attach the strap to the projector by inserting and pulling the other end of the strap into the other end.
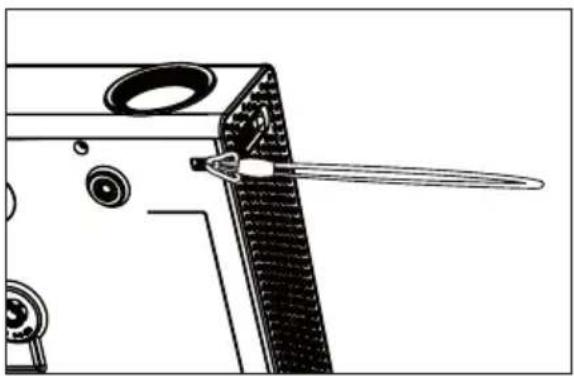
natural_image
Technical line drawing of a mechanical component with a tool inserted, showing no text or symbols3 Insert the other end of the strap into the hole of the lens cap, and then pass the lens cap through the strap.
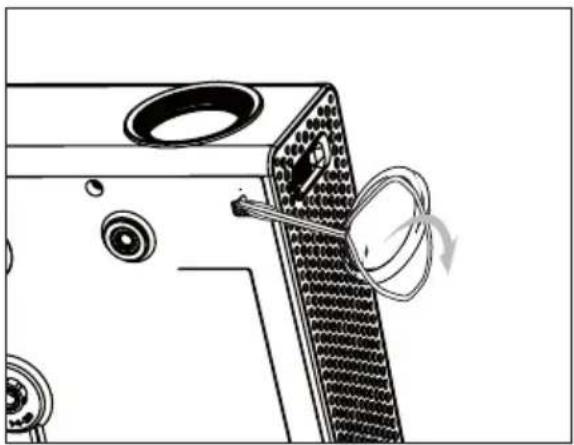
natural_image
Diagram of a mechanical device with a handle and rotating cable, showing no text or symbolsUpdating the Software
When a software update is required, run the software update to obtain the latest software version.
You can manually check for and download any software updates.
1 On the HOME screen, press the SETTINGS button.
2 Select SUPPORT and go to Software Update.
| Item Description | |
| Software Update | Enable this option.When an update file is found, it is downloaded automatically. When the update file has finished downloading, a software update window appears. |
| Check Update Version | If an update file of a higher version exists after checking the latest update version, you can proceed with the update manually. |
- The update service to get the latest version is provided through an Internet connection.
- If the software is not updated, some functions may not work well.
Smart Projector FAQ
| Problem Troubleshooting | |
| Whenever I enter a menu, the 'Initializing' message is always displayed. | The 'Initializing' message indicates the CPU and hardware booting time, network communication setup, or communication time with SDP (device authorization and basic information download). It normally takes about 20 seconds. |
| No contents are shown in the premium card. | If the country setting is changed in the Smart Projector Setting menu, the contents may not be displayed.Go to HOME → SETTINGS → OPTION → Smart Projector Setting → Smart Projector Country and then change the country as you want. |
| Some spaces are not visible for a specific website when using the Internet. | In this projector, the Internet supports up to Flash 10. Some formats other than the following formats may be restricted to play: JPEG, PNG, GIF, WMV (ASF), WMA, MP3, MP4. |
| The Internet is automatically shut down when I visit a website. | The Internet may be forced to shut down if the memory size is insufficient to accommodate the image information of a website. |
WIRELESS SPECIFICATIONS
Wireless LAN Module (TWFM-B003D) Specifications
| Standard IEEE802.11a/b/g/n | |
| Frequency Range | 2400 MHz to 2483.5 MHz5150 MHz to 5250 MHz5725 MHz to 5850 MHz |
| Modulation CCK / OFDM / MIMO | |
| Output Power(Typical) | 802.11a: 15 dBm802.11b: 14 dBm802.11g: 17 dBm802.11n - 2.4 GHz: 17 dBm802.11n - 5 GHz: 15 dBm |
| Data Rate | 802.11a/g: 54 Mbps802.11b: 11 Mbps802.11n: 300 Mbps |
| Antenna Gain(Typical) | 2400 MHz to 2483.5 MHz: -2.5 dBi5150 MHz to 5250 MHz: -2.2 dBi5725 MHz to 5850 MHz: -2.9 dBi |
| Occupied Bandwidth | 802.11a/b/g: HT20802.11n: HT20/40 |
Because the band channel used by the country could be different, the user cannot change or adjust the operating frequency and this product is set for the regional frequency table.
- FCC ID of Wi-Fi module inside Projector FCC ID: BEJTWFMB003D

Bluetooth Module (BM-LDS302) Specifications
| Standard Bluetooth Version 3.0 | |
| Frequency Range | 2400 MHz - 2483.5 MHz |
| Output Power (Max.) | 10 dBm or lower |
| Data rate (Max.) | 3 Mbps |
| Communication Distance | Line of Open Sight approx. 10 m |
• FCC ID of Bluetooth module inside Projector
FCC ID: BEJLDS302
CE
SPECIFICATIONS
| MODELS PA75U (PA75U-JE) | ||
| Resolution (Pixel) 1280 (Horizontal) × 800 (Vertical) | ||
| Aspect ratio 16:10 (Horizontal:Vertical) | ||
| Panel size (mm) 11.623 | ||
| Projection distance (Video size) | 0.90 m-3.06 m (76.2 cm - 254.0 cm) | |
| Ratio of upward projection | 100 % | |
| Working range of the remote control | 6 m | |
| AC-DC Adaptor 19.5 V, 7.18 A | ||
| Audio output 3 W + 3 W | ||
| Reception type NT$C, ATSC | ||
| Reception channels | Cable | VHF 2 - 13, UHF 14 - 69, CATV 1 - 135, DTV 2 - 69, CADTV 1 - 135 |
| Antenna U | HF 14 - 69 | |
| External Antenna Impedance | 75 Ω | |
| Height (mm) | Front Side 56.5 (without foot), 60.0 (with foot) | |
| Rear Side 44.0 (without foot), 47.5 (with foot) | ||
| Width (mm) 230.0 | ||
| Depth (mm) 170.0 | ||
| Weight (g) 1350 | ||
| USB Device 5 V, 0.5 A (Max.) | ||
| Operation environment | Temperature | |
| Operation | 0 °C to 40 °C | |
| Storage | -20 °C to 60 °C | |
| Relative humidity | ||
| Operation | 0 % - 80 % | |
| Storage | 0 % - 85 % | |
Supported Monitor Display
| Resolution | Horizontal Frequency (kHz) | Vertical Frequency (Hz) |
| 720 x 400 31 | 469 70.08 | |
| 640 x 480 31 | 469 59.94 | |
| 800 x 600 37 | 879 60.31 | |
| 1024 x 768 48 | 363 60.00 | |
| 1152 x 864 54 | 348 60.053 | |
| 1280 x 800 49 | 68 60 | |
| 1280 x 1024 63 | 981 60.020 | |
| 1400 x 1050 65 | 317 59.979 | |
| 1680 x 1050 65 | 3 60 |
- If an invalid signal is input into the projector, it will not be displayed properly on the screen or a message such as “No Signal” or “Invalid Mode” will be displayed.
- The projector supports the DDC1/2B type as the Plug & Play function (Auto-recognition of PC monitor).
• PC synchronization signal types supported: Separate type synchronization. - In PC mode, 1280x800 is recommended for the best picture quality.
HDMI/DVI-DTV mode supported
| Resolution | Horizontal Frequency (kHz) | Vertical Frequency (Hz) |
| 720 x 480 31.47 | 31.47 | 60 |
| 59.94 | ||
| 31.5 | 60 | |
| 1280 x 720 44.96 | 45 | 59.94 |
| 60 | ||
| 1920 x 1080 33.75 | 33.72 | 60 |
| 59.94 | ||
| 67.5 | 60 | |
| 67.432 | 59.939 | |
| 27 | 24 | |
| 26.97 | 23.976 | |
| 33.75 | 30 | |
| 33.71 | 29.97 |
Component Port Connection
| Signal | Component |
| 480i / 576i | o |
| 480p / 576p | o |
| 720p / 1080i | o |
| 1080p | o(50 Hz / 60 Hz only) |
Open Source software Information
To obtain the source code under the GPL, LGPL, MPL and other open source licenses, which are contained in this product, please visit
http://opensource.lge.com.
In addition to the source code, all referenced license terms, warranty disclaimers and copyright notices are available for download.
If you send an email to opensource@lge.com to request the open source code of the software installed on the projector within three years of purchase, we will send you a CD-ROM containing the open source code. You will only be charged a minimum for packaging and delivery.

The model and serial number of the projector are located on the back or on the side of the projector. Record them below should you ever need service.
MODEL
SERIAL
- LICENSE
- NOTE
- SAFETY INSTRUCTIONS
- WARNING/CAUTION
- Indoor Installation
- WARNING
- CAUTION
- Power
- When in Use
- Cleaning
- Others
- Antenna
- FCC NOTICE
- Federal Communications Commission (FCC) Statement
- FCC Caution
- FCC RF Radiation Exposure Statement:
- IC (CANADA)
- Industry Canada Statement:
- IC Radiation Exposure Statement:
- Disposal of your old appliance
- Disposal of waste batteries/accumulators
- For USA
- NOTE TO CABLE/TV INSTALLER
- Table of contents
- LICENSE 2
- SAFETY INSTRUCTIONS 3
- PREPARATION 17
- REMOTE CONTROL 23
- MAGIC REMOTE CONTROL 25
- WATCHING WITH THE PROJECTOR 27
- Using the Projector Functions 31
- ENTERTAINMENT 35
- SMARTSHARE™ 42
- Using SmartShare™ 46
- Using the Magical Mirroring Function 54
- 3D FUNCTION 61
- Before Watching 3D 61
- Requirements for Watching 3D
- Images 63
- Watching 3D Images 65
- CUSTOMIZING SETTINGS 66
- CONNECTING EXTERNAL DEVICES 79
- Connecting HD
- Connecting Headphones 82
- Connecting a Laptop 83
- MAINTENANCE 84
- Cleaning 84
- How to Fix the Lens Cap 84
- Updating the Software 85
- Smart Projector FAQ 86
- WIRELESS SPECIFICATIONS
- Wireless LAN Module
- SPECIFICATIONS 89
- PREPARATION
- Accessories
- Optional Accessories
- Parts and Components
- Installation
- Installation Precautions
- Projection Distance per Screen Size
- How to Install the Projector Using a Tripod
- Kensington Security System
- REMOTE CONTROL
- ENERGY SAVING
- INPUT
- Number buttons
- LIST
- FLASHBK
- FAV
- 3D
- MUTE
- PAGE
- SETTINGS
- HOME
- MY APPS/Q.MENU
- Up/Down/Left/Right buttons
- OK
- [GRAPHIC: Cyclic Arrow]
- AV MODE
- EXIT
- Playback control buttons
- INFO ⓘ
- L/R
- AUTO
- SLEEP
- Key's ▲, ▼
- RATIO
- Color buttons
- Pairing the Magic Remote Control
- Re-pairing the Magic Remote Control
- Using the Magic Remote Control
- WATCHING WITH THE PROJECTOR
- Connecting the Antenna or Cable
- Copper Wire
- Connecting the Portable Antenna
- Antenna connection
- HDTV reception
- Antenna Installation
- Using the Projector
- Turning on the Projector
- Focus and Position of the Screen Image
- Using the Projector Functions
- Home Menu
- Additional Options
- Adjusting the Aspect Ratio
- Using the Keystone Function
- Using the Input List
- Adding an Input Label
- Using the Quick Menu
- ENTERTAINMENT
- Network Setup
- One-Click Network Connection
- Expert Settings for Network Connection
- Wireless Network Connection
- Wireless Screen Sharing
- Using the Wi-Fi Screen Share Function
- Connecting the Wi-Fi Direct
- Using WiDi
- WiDi Setup (Wireless Display)
- Tips for Network Setup
- Using Media Link
- Connecting Media Link
- System Requirements for PLEX installation
- Cautions when Using Media Link
- Using the Premium Service
- SmartShare™
- Before Using
- Connecting a USB Storage Device
- Removing a USB Storage Device
- Tips for Using a USB Device
- Supported Files for SmartShare™
- Connecting DLNA
- Connecting the DLNA-Certified
- Mobile Device
- Connecting DLNA DMR (Digital
- Media Renderer)
- Connecting DLNA DMP (Digital
- Media Player)
- When DLNA is Malfunctioning
- Using SmartShare™
- Watching Videos
- Tips for Playing Videos
- Video Codec
- Controlling the Video Playback
- Viewing the Photos
- Controlling the Photo Playback
- Listening to Music
- Audio File
- Controlling Music Playback
- Viewing the Files
- Supported File Formats
- Browsing File Viewer
- Using the Magical Mirroring Function
- Running Magical Mirroring
- From the HOME screen, select Magical Mirroring.
- MirrorOp Sender
- Changing MirrorOp Mode
- Configuring MirrorOp
- - Search Host
- - Projection Quality
- - TV Offset Compensation
- - Auto Power Management
- - Auto Wi-Fi Connect
- - Advanced Screen Capture
- - Activate This Sender Software
- - Check for Updates
- 3D FUNCTION
- Before Watching 3D
- While Watching 3D
- When Watching 3D Video
- Please check the following when using 3D glasses.
- Requirements for Watching 3D Images
- Using the DLP-LINK (DLP-Ready) Type Glasses
- Supported 3D Input Formats
- Watching 3D Images
- CUSTOMIZING SETTINGS
- Settings Menu
- PICTURE Settings
- SOUND Settings
- CHANNEL Settings
- TIME Settings
- LOCK Settings
- OPTION Settings
- NETWORK Settings
- CONNECTING EXTERNAL DEVICES
- Connecting HD Receiver, DVD Player, or VCR
- HDMI Connection
- Connecting PC
- RGB Connection
- Connecting AV
- Component Connection
- Connecting Headphones
- Connecting a Laptop
- MAINTENANCE
- Cleaning the Lens
- Cleaning the Projector Case
- How to Fix the Lens Cap
- Updating the Software
- Wireless LAN Module (TWFM-B003D) Specifications
- Bluetooth Module (BM-LDS302) Specifications
- Open Source software Information
- http://opensource.lge.com.
Brand : LG
Model : PA75U
Category : Video projector