
U8150 - Smartphone LG - Free user manual and instructions
Find the device manual for free U8150 LG in PDF.


| Product Type | 3G Video Mobile Phone |
| Brand | LG |
| Model | U8150 |
| Network | UMTS / GSM (3G and 2G) |
| Camera Resolution | VGA (640x480 pixels) |
| Video Recording | Up to 1 minute at 176x144 or 352x288 |
| Display | Color LCD (estimated 2.2-inch, 176x220) |
| Battery | Removable Li-Ion (estimated 1000 mAh) |
| Memory | Internal flash memory (shared for apps, photos, messages) |
| Messaging | SMS, MMS, Email (POP3/SMTP) |
| Connectivity | USB, IrDA, WAP 2.0 |
| Multimedia | MP3 player, video player, voice recorder |
| Organiser | Calendar, To-do list, Memo, World clock, Calculator, Unit converter, Timer, Stopwatch |
| Java Support | Yes (MIDP 2.0) |
| Profiles | General, Silent, Vibrate only, Outdoor, Headset, Car, User defined (2) |
| Security | PIN, PIN2, Phone lock (Power on, SIM change, Immediate), Call barring, Fixed dialing |
| Call Features | Call divert, Call waiting, Auto redial, Minute reminder, Answer mode (flip open, send key, any key) |
| Care Instructions | Use dry cloth; avoid solvents; keep away from heat, moisture, dust; use only LG-approved accessories |
| Disposal | Do not dispose with household waste; follow local regulations for electronic waste |
Frequently Asked Questions - U8150 LG
User questions about U8150 LG
0 question about this device. Answer the ones you know or ask your own.
Ask a new question about this device
Download the instructions for your Smartphone in PDF format for free! Find your manual U8150 - LG and take your electronic device back in hand. On this page are published all the documents necessary for the use of your device. U8150 by LG.
USER MANUAL U8150 LG
natural_image
Abstract pixelated pattern with no discernible text, symbols, or structured elementsU8150 Guida utente
Italiano

natural_image
Abstract pixelated pattern with no discernible text, symbols, or structured contentU8150 User Guide
English

Disposal of your old appliance
- When this crossed-out wheeled bin symbol is attached to a product it means the product is covered by the European Directive 2002/96/EC.
- All electrical and electronic products should be disposed of separately from the municipal waste stream via designated collection facilities appointed by the government or the local authorities.
- The correct disposal of your old appliance will help prevent potential negative consequences for the environment and human health.
- For more detailed information about disposal of your old appliance, please contact your city office, waste disposal service or the shop where you purchased the product.

Table of Contents
Guidelines 6
Installing the USIM card 10
Introduction 12
Main Module 13
No Sim Idle Screen 13
Idle Screen 13
Numbering Screen 17
Phone Lock Screen 18
Main Menu 19
- Apps & Games ...... 21
1.1 Applications ...... 21
1.2 Download 22
1.3 Settings 22
- Organiser 24
2.1 Calendar 24
2.2 Todo 27
2.3 Memo 28
2.4 Secret Memo 29
- Extras 30
3.1 Shortcuts 30
3.2 Alarm clock 30
3.3 Calculator 31
3.4 World time 32
3.5 Unit converter 32
3.6 Timer 35
3.7 Connectivity 36
- Internet 37
4.1 Internet 40
4.2 Bookmarks 40
4.3 Go to URL 41
4.4 Saved pages 41
4.5 Clear cache 41
4.6 Servizi TIM 41
4.7 Settings 41
- Messaging 42
5.1 Write message 42
5.2 Inbox 66
5.3 Email inbox (Mailbox) 68
5.4 Outbox 72
5.5 Draftbox 74
5.6 Templates 75
5.7 Emoticon 75
5.8 Service commander 76
5.9 Settings 76
- Multimedia 87
6.1 Camera 87
6.2 Picture album 89
6.3 Camcorder 91
6.4 Video player 92
6.5 Audio player 93
U8150
7. Profile 95
Alert by 95
Voice ring tone Line 1/2 95
VT ringtone 95
Ring tone volume 95
Message alert 95
Message tone 96
Warning alert 96
Key tone effect 96
Key tone volume 96
Flip tone effect 96
Switch on effect 96
Switch off effect 96
8. Address Book 97
8.1 Add new 97
8.2 Search 97
8.3 Caller groups 99
8.4 Speed dials 99
8.5 Clear address book 99
8.6 Copy all 100
8.7 Move all 100
8.8 Own number 100
8.9 Settings 101
9. Settings ...... 102
9.1 Time & Date 102
9.2 Display 103
9.3 Call 106
9.4 Network 120
9.5 Connection 122
9.6 Security 123
9.7 Memory status 126
9.8 Language 127
9.9 Phone info. 127
9.10 Reset Settings 127
Product care and maintenance
Warning: Use only batteries, charger and accessories approved for use with this particular phone model. The use of any other types may invalidate any approval or warranty applying to the phone, and may be dangerous.
- Do not disassemble this unit. Take it to a qualified service technician when repair work is required.
- Keep away from electrical appliance such as a TV, radio or personal computer.
- The unit should be kept away from heat sources such as radiators or cookers.
- Do not drop.
- Do not subject this unit to mechanical vibration or shock.
- The coating of the phone may be damaged if covered with wrap or vinyl wrapper.
- Use dry cloth to clean the exterior of the unit. (Do not use solvent such as benzene, thinner or alcohol.)
- Do not subject this unit to excessive smoke or dust.
- Do not keep the phone next to credit cards or transport tickets; it can affect the information on the magnetic strips.
- Do not tap the screen with a sharp object; otherwise, it may damage the phone.
- Do not expose the phone to liquid or moisture.
- Use the accessories like an earphone cautiously. Do not touch the antenna unnecessarily.
Efficient phone operation
To enjoy optimum performance with minimum power consumption please:
- Hold the phone as you speak to any other telephone. While speaking directly into the microphone, angle the antenna in a direction up and over your shoulder. If the antenna is extendable/retractable, it should be extended during a call.
- Do not hold the antenna when the phone is in use. If you hold it, it can affect call quality. It also may cause the phone to operate as a higher power level that needed and shorten talk and standby times.
- If your mobile phone supports infrared, never direct the infrared ray at anyone's eye.
Electronics devices
All mobile phones may get interference, which could affect performance.
- Do not use your mobile phone near medical equipment without requesting permission. Avoid placing the phone over the pacemaker, i.e. in your breast pocket.
- Some hearing aids might be disturbed by mobile phones.
- Minor interference may affect TVs, radios, PCs, etc.
Road safety
Check the laws and regulations on the use of mobile phones in the areas when you drive.
- Do not use a hand-held phone while driving.
- Give full attention to driving.
- Use a hands-free kit, if available.
- Pull off the road and park before making or answering a call if driving conditions so require.
- RF energy may affect some electronic systems in your motor vehicle such as car stereo, safety equipment.
- When your vehicle is equipped with an air bag, do not obstruct with installed or portable wireless equipment. It can cause serious injury due to improper performance.
Blasting area
Do not use the phone where blasting is in progress.
Observe restrictions, and follow any regulations or rules.
Potentially explosive atmospheres
- Do not use the phone at a refueling point. Don't use near fuel or chemicals.
- Do not transport or store flammable gas, liquid, or explosives in the compartment of your vehicle, which contains your mobile phone and accessories.
In aircraft
Wireless devices can cause interference in aircraft.
- Turn off your mobile phone before boarding any aircraft.
- Do not use it on the ground without crew permission.
Children
Keep the phone in a safe place out of small children's reach. It includes small parts which if detached may cause a choking hazard.
Emergency calls
Emergency calls may not be available under all cellular networks. Therefore, you should never depend solely on the phone for emergency calls. Check with your local service provider.
Battery information and care
- You do not need to completely discharge the battery before recharging. Unlike other battery systems, there is no memory effect that could compromise the battery's performance.
- Use only LG batteries and chargers. LG chargers are designed to maximize the battery life.
- Do not disassemble or short-circuit the battery pack.
- Keep the metal contacts of the battery pack clean.
- Replace the battery when it no longer provides acceptable performance. The battery pack may be recharged hundreds of times until it needs replacing.
- Recharge the battery if it has not been used for a long time to maximize usability.
- Do not expose the battery charger to direct sunlight or use it in high humidity, such as the bathroom.
- Do not leave the battery in hot or cold places, this may deteriorate the battery performance.
- Dispose of used batteries in accordance with local legislation.
Installing the USIM card
Your USIM card contains your phone number, service details and contacts and must be inserted into your handset.
If your USIM card is removed then your handset becomes unusable until a valid one is inserted. Always disconnect the charger and other accessories from your handset before inserting and removing your USIM card.
Your USIM card may only be used in handsets which are enabled for 3 services. Any attempt to use the USIM card in other handsets may result in serious damage to the handset and may prevent you from being able to use it, including the making of emergency calls.
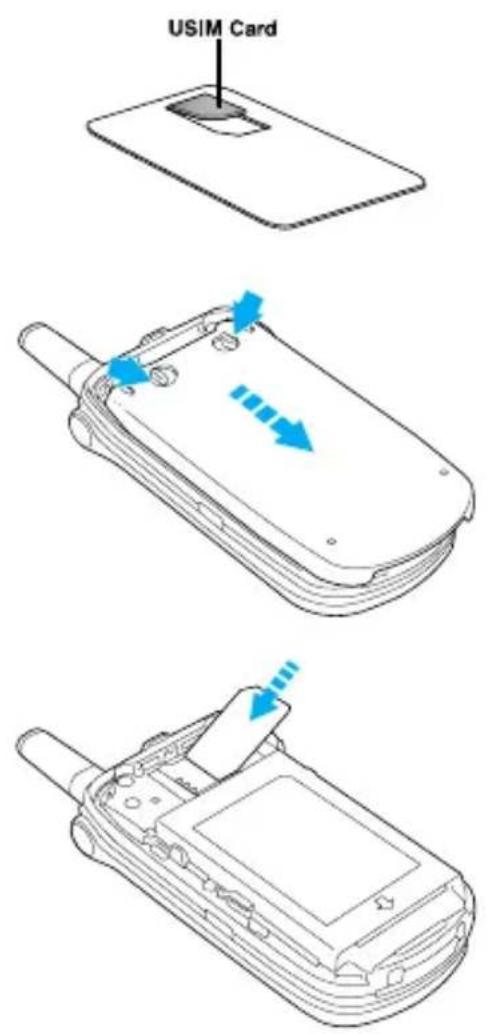
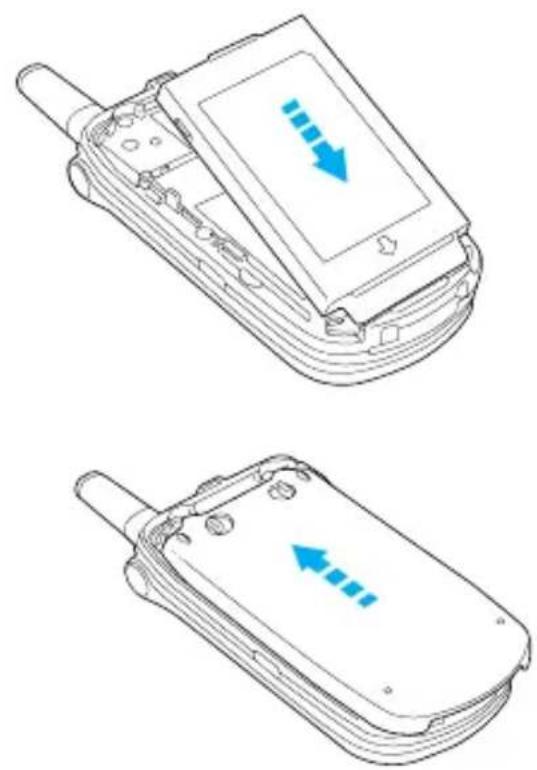
[Notice]
Before installing always make sure that the phone is switched off and remove the battery.
The metal contact of the USIM card can be easily damaged by scratches. Pay special attention to the USIM card while handling and installing. Follow the instructions supplied with the USIM card.
Introduction
This document is the User's Guide for the LG-U8150 3G Video Mobile Phone. All rights for this document are reserved by LG Electronics. Copying, modifying and distributing this document without the consent of LG Electronics are prohibited.
No Sim Idle Screen
This is the initial screen of the phone that appears when there is no Sim card installed in the phone, or the installed Sim card is invalid. In this screen, users can only make emergency calls, and turn the phone off. To turn off the phone, press and hold the End key for a while.
Screen Structure
If there is no Sim card installed, an animation telling you to insert a Sim card appears.
Emergency Call Function
The right soft key is represented by "SOS" on the screen. Key in your desired emergency call number using the number keys, and then press the OK key to make an emergency call.
Idle Screen
The idle screen appears when you have installed a proper Sim card and turned the phone on.
Screen Structure
Idle screen consists of the operator's name, indicators, date, and time on a background image. You can configure the background image by selecting Settings → Select Display → Select Screen Theme for Idle mode.
Time is displayed in the style and color of the selected image.
You can select the style and color of the clock by selecting Display Settings → Idle Clock font.
Indicators display the following information.
Icon Description

Battery level - indicates the amount of power in your battery.
The greater the amount of solid colour the greater the power.
Call diverting - indicates call divert option has been selected.
Text - indicates when you have a new new text message.
Multimedia - indicates when you have a new Multimedia message.
3G network - indicates whether you are in the 3 video service area.
No-service area - indicates you are in the no-service area.
Roaming service - indicates that you are using a roaming service.
Alarm - indicates an Alarm.
Normal - indicates the General profile is activated
Silent - indicates the silent menu in Profile.
Vibrate only - indicates whether the vibrate function is on or off.
Headset - indicates the headset menu in Profile.
Outdoor - Indicates the loud profile is activated.
Key Functions
The functions of the keys in the idle screen status are described below.
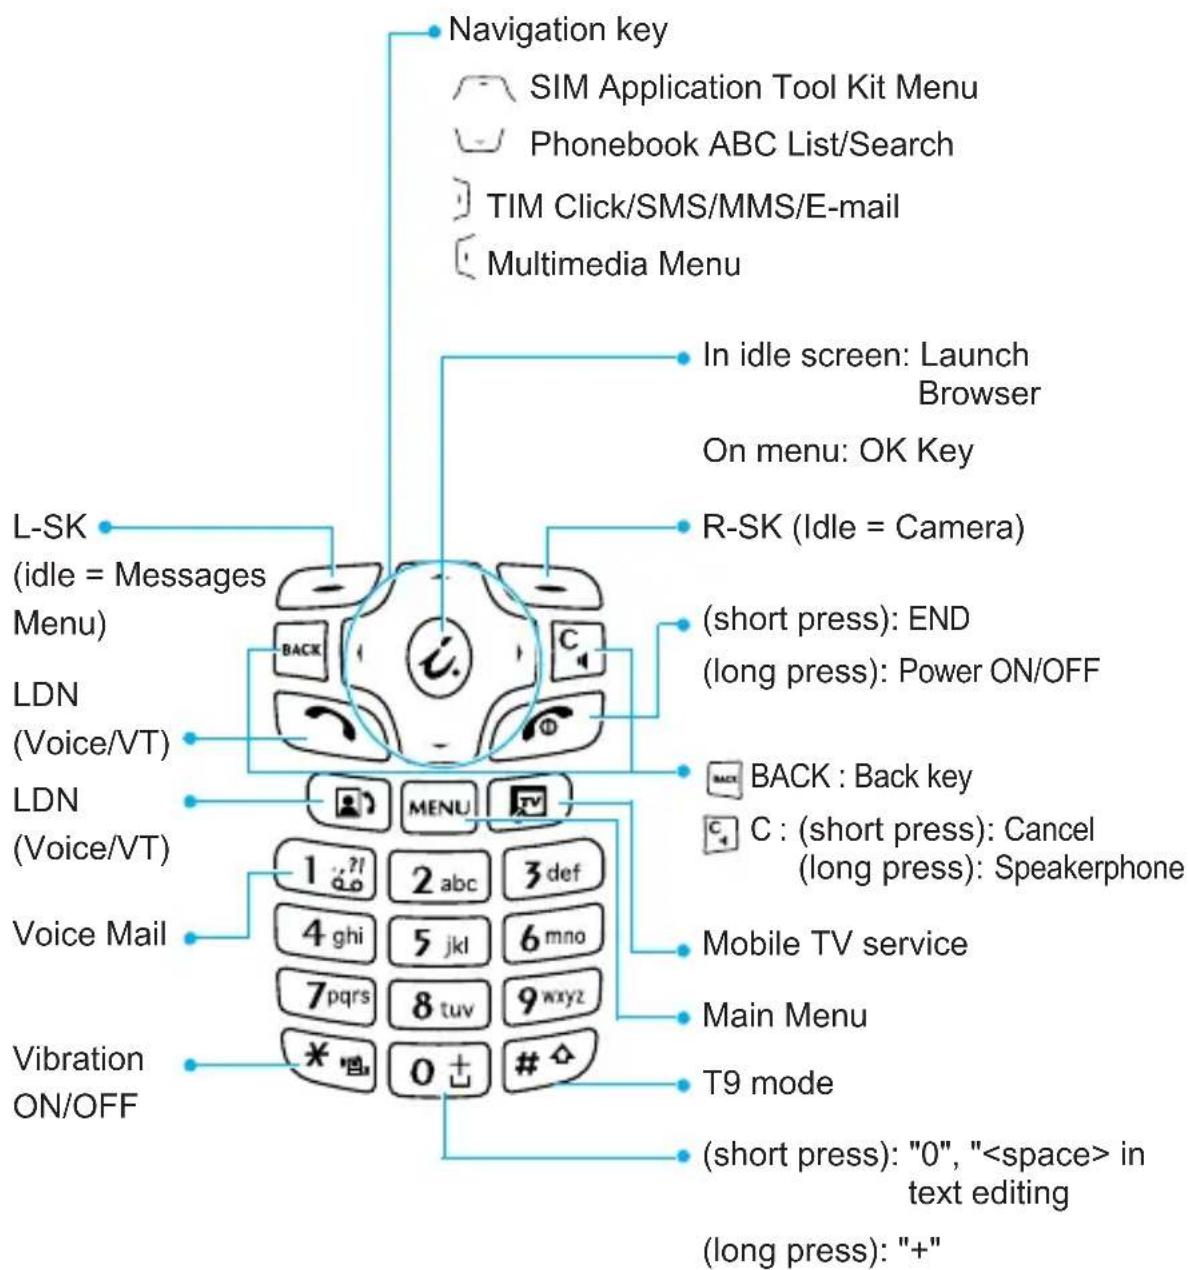
While the folder is closed, long press the 3rd side key to turn on the backlight of the Sub LCD. By pressing the key again briefly in this mode, you can open the Entertainment menu.
| Key | Characters in the Order Display | |
| Lower case Upper case | ||
| 1 . , ? ! ’ ” 1 . , ? ! ’ ” 12 a b c 2 à á á ä ã ä ̇ a æ ç A B C 23 d e f 3 è é ê ë D E F 3 È É Ê Ė4 g h i 4 i í í í G H I 4 i í í í5 j k l 5 £ J K L 5 £6 m n o 6 ò ó ñ õ õ õ ø æ M N O7 p q r s 7 β P Q R S 7 β8 t u v 8 ù ú û ü90 | À Á Â Ä Ä Ä Å Æ ÇÄ Ö Ó Ñ Ñ Ñ Ñ Ñ Ñ ÑÜ T U V 8 Ù Ú Û Üw x y z 9Space 0 | W X Y Z 9Space 0 |
Numbering Screen
The numbering screen appears when a number key is pressed in the idle screen.
Screen Structure
The numbering screen consists of status indicators, dialled number, and soft menu. Status indicators are the same as that of the idle screen. The dialled number is displayed in the size and colour configured in Settings → Display → Dialling font. You can make a call while dialling a phone number by pressing the Send or Video Call key.
Soft Key
You can use the soft keys for several functions while dialling a number. Using the left most soft key, you can send a message to the current dialled number, you can search for numbers in addressbook, and using the key, you can input hyphen, manual hold, or time hold characters within the number. Using the middle soft key, you can save the current dialled number to the electronic organiser. Using the right most soft key, you can search the current dialled number in the electronic organiser.
Phone Lock Screen
When the phone lock function is selected, you can only make an emergency call, release the lock, and turn off the phone in this screen. As always, you can turn the phone off by pressing and holding the End key for a while.
Screen Structure
The screen structure of the Phone Lock screen is the same as that of the idle screen, except that the lock message appears instead of the idle screen banner.
Emergency Call Function
You can make an emergency call using the right soft key. Like the No Sim Idle screen, the emergency numbers are displayed.
Unlock Function
If you press the OK key, a popup screen appears asking you to input the PIN code to unlock the phone. The PIN code is configured by selecting Settings → Security → Change codes. If you key in an incorrect PIN code, the phone will remain in phone lock status. If you key in the correct PIN code, the phone will be unlocked, and the idle screen will be displayed. If you have turned the phone off in the phone lock status, you will find the phone remains in phone lock status when you turn it on.
You can launch a menu by pressing the Menu key over numeric key 2 in the idle screen. Move to a desired item and press the OK key to go into the sub menu.
You can also go into a submenu by directly pressing the corresponding numeric key as follows.
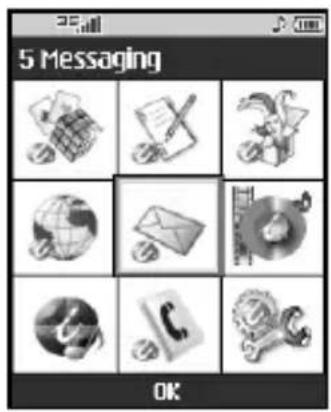
The main menu consists of the following high-level and sub menus.
1 Apps & Games
1 Applications
2 Download
3 Settings
2 Organiser
1 Calendar
2 Todo
3 Memo
4 Secret Memo
3 Extras
1 Shortcuts
2 Alarm clock
3 Calculator
4 World time
5 Unit converter
6 Timer
7 Connectivity
4 Internet
1 Internet
2 Bookmarks
3 Go to URL
4 Saved pages
5 Clear cache
6 Servizi TIM
7 Settings
Main Menu
5 Messaging
1 Write message
2 Inbox
3 Email inbox (Mailbox)
4 Outbox
5 Draftbox
6 Templates
7 Emoticon
8 Service commander
9 Settings
8 Address Book
1 Add new
2 Search
3 Caller groups
4 Speed dials
5 Clear address book
6 Copy all
7 Move all
8 Own number
9 Settings
6 Multimedia
1 Camera
2 Picture album
3 Camcorder
4 Video player
5 Audio player
9 Settings
1 Time & Date
2 Display
3 Call
4 Network
5 Connection
6 Security
7 Memory status
8 Language
9 Phone info.
10 Reset settings
7 Profile
1 Vibrate only
2 Silent
3 General
4 Outdoor
5 Headset
6 Car
7 User define 1
8 User define 2
1. Apps & Games
This handset searches the executable Java Application and downloads from Internet that supports it.
1.1 Applications
- This menu is for viewing and executing the downloaded application.
- To execute an application, select an application using the Up and Down keys and press the OK (Center) key.
- To exit an application, press the End key or select Option > 6. Back.
1.1.1 Delete
Deletes a downloaded application.
1.1.2 File information
Displays information about the application such as the name, vendor, version and size.
1.1.3 Set authorisation
Configures the permissions for each application.
1.1.4 APN setting
- Configures the APN to be used by the downloaded application.
- The reverse colored item in the list is the current Midlet APN setting.
- Select a desired APN value reverse color, and press OK or Select to configure.
- The above APN value list can be modified, edited and deleted in the following APN settings.
1.1.5 Memory info.
- Displays the amount of memory the downloaded applications use.
1.2 Download
- Using this menu you can download applications.
- If you select Download, the phone is connected to the Internet site where you can download applications.
- The download environment setting is determined according to the SetOn value of the Internet settings, and the download site is determined according to the values of in the Java settings.
- Search through a connected site and select the desired application to download it to your mobile phone.
1.3 Settings
Configure the priority settings, download site and APN settings required to run a Java.
1.3.1 Priority settings
Configure whether to execute call, alarm and message functions while running a Java.
Select Enable to receive a call, alarm and message. If you select Disabled, you cannot receive a call, alarm and message while a Java is running.
1.3.2 Download site settings
You can save a site to download applications. When you select 1.2 Download, your phone is connected to the activated URL.
The first value of the list is used as a default value. The value cannot be deleted or modified.
- Add new : Adds a new item.
- Edit : Edits the selected item.
- Delete : Deletes the selected item.
- View : Shows the contents of the selected item.
1.3.3 Access point setting
You can add, edit and delete an Access point. You can manage the list described in 1.1.4 APN settings.
The first value of the list is used as a default value. The value cannot be deleted or modified.
- Add new : Adds a new item.
- Edit : Edits the selected item.
- Delete : Deletes the selected item.
- View : Shows the contents of the selected item.
When an Access point value is deleted, the default value is used.
2.1 Calendar
2.1.1 Schedule Inquiry and Search
2.1.1.1 Reference by Months
You can refer to your schedule by months. The cursor is on the current date, and the scheduleregistered date is underlined.
The schedule saved for the date where the cursor is located is represented by an icon, and the date by the lunar calendar is displayed on the right side. Pressing the shortcut key 1 moves to the previous day and pressing key 3 moves to the next day.
Pressing shortcut key 4 moves to the previous month and pressing key 5 moves to today. Pressing key 6 moves to the next month.
Pressing key 7 moves to the previous year, and key 9 moves to the next year. You can move the date using the up, down, left, and right direction keys.
2.1.1.2 Reference by Days
Pressing the ‘OK’ key in the reference by month moves to reference by day where you can refer to your schedule by days. You can refer to the moving date tab using the left and right key. As a search result, brief schedule contents, repetition set up configuration, and alarm set up configuration are displayed. You can send the schedule to another phone or an Internet site through SMS or e-mail.
2.1.1.3 Detailed Reference
You can refer to a detailed schedule, that is the whole contents of the schedule configured by user. You can send the schedule to another phone or an Internet site through SMS or e-mail.
2.1.2 Search Schedule
You can add a schedule. You can configure the date, start time, end time, contents, type of schedule, repetition, alarm, and melody of the schedule. You can select one of 21 melodies for a schedule.
| Schedule types | |
| Appointment |  |
| Personal |  |
| Configurable repetition options | |
| No repeat Icon does not exist. | |
| Daily |  |
| Weekly | |
| Monthly | |
| Yearly | |
| Configurable alarm options | |
| No alarm. Icon does not exist. | |
| On time |  |
| Before 15 mins. | |
| Before 30 mins. | |
| Before 1 hour | |
| Before 1 day | |
| Before 3 days | |
| Before 1 week | |
2.1.3 Delete Schedule
2.1.3.1 Delete elapsed schedules
You can delete all schedules whose date has passed using this function.
2.1.3.2 Multiple
You can specify duration, and delete some schedules in the duration using this function.
2.1.3.3 Delete all
You can delete all saved schedule contents using this function.
2.1.4 Set Up and Release Holiday
You can set up or release user holidays using this function.
| Configurable holiday options | |
| On the day | When a date is configured as an holiday, the date is displayed in red. User configuration is used to configure and cancel holidays of 2 to 10 days. |
| Weekly | |
| Monthly | |
| Yearly | |
| Multiple setting | |
2.1.5 Schedule Notification
If the user has configured the alarm setting, the specified alarm sound will ring. If the notification time is before the schedule start time, you can set up the alarm again so that it sounds repeatedly.
2.2 Todo
You can view, edit and add jobs to do. Jobs to do are displayed in time order. The jobs already finished and unfinished are displayed in different ways.
2.2.1 Add
To add a job, press the 'Add' key in the To Do List Management screen. Then input a title, date, and description for the job.
When input has been completed, press the 'Save' key to save the new job.
2.2.2 Detailed View and Edit
To view detailed job contents, locate the cursor on the desired item in the To Do List, and then press the 'Select' key.
You can edit and delete a job using 'Menu'.
2.2.3 Set Job Status
To set up the status of a job, Done or Not complete, press the 'OK' key in the To Do list.
The jobs set as finished are displayed with tick mark on the image below the unfinished jobs in the To Do list.
You can set Done jobs to Not complete by selecting 'Menu'.
2.3 Memo
Using the memo management function, you can view and manage saved memo contents, and add new memo.
Add Memo
To add a new memo, press the 'Add'. You can select, number, lower case English, or upper case English using the .You can input useful phrases or emoticons. You can save and add the contents of the current memo to the list by pressing the 'Save' key.
2.3.1 Send memo to
Select ‘Send memo to’ from the ‘Option’ to send the memo through SMS or e-mail.
2.3.2 Move to secret memo
Hide the memo in your secret memo box.
2.3.3 Edit and delete Memo
Locate the cursor on your desired memo, and press the key to view all the contents of the memo. This function shows all the memo contents. You can edit or delete the contents of a memo using the 'Option' key. You can return to the memo management screen by pressing the 'Back' key. You can delete a memo by pressing the 'Delete' key.
2.3.4 View information
View details of the memo including its title, size and date.
2.3.5 Memory info.
Check the memory status of your phone.
2.4 Secret memo
In the secret memo management box, users can view and manage the contents of saved secret memos, as well as add a new secret memo. To access the secret memo management box, the user should input the Security code.
2.4.1 Send Memo
Select 'Send memo to' from the 'Option' to send the memo through SMS or e-mail.
2.4.2 Adding a Memo
Press 'Add' button to add a new memo.
By using the key, users can select, Number, lower case English, or upper case English.
By using 'Option' button, users can input template and emoticon. Press 'Save' button to save the contents of the memo and add the memo to the list.
2.4.3 Detailed View of Memo
Locate the cursor on the desired memo, and press 'View' button to view the entire contents of the memo.
By using 'Option' button, you can add, delete and move the memo to normal memo box.
Press the 'Back' key to return to memo management screen.
Press the 'Delete' button to delete the memo.
2.4.4 Editing a Memo
Select 'Edit' in memo detailed view screen. Then the edit screen appears, and you can edit the contents of the memo.
2.4.5 Deleting a Memo
Select 'Option' in the memo management screen, or select 'Option' while reading the contents of memo to delete the memo.
3. Extras
3.1 Shortcuts
You can register frequently-used menus, and create your own menus. To move to your desired menu directly, select your desired menu from the Shortcuts menu, and press [OK] key.
- Add: In the [Empty] list, press the right [Add] key. And register desired menu.
- Edit : In the added menu item list, press the right [Edit] key to edit a registered menu.
- Delete One : To delete a registered menu, press the left [Option] key in the added menu item list. Then [Delete] appears. Press the Select key to display the sub menu. Then select [One] to delete the menu.
Delete All : To delete all registered menus, press the left [Option] key in the added menu item list. Then [Delete] appears. Press the Select key to display the sub menu. Then select [All] to delete all the menus. - View Information: In the added menu item list, press the left [Option] key. Select [View information] from the menu to view the information on the real location of the added menu.
3.2 Alarm clock
If you set up alarm, [Alarm icon] appears on the idle screen.
The specified alarm sounds at the scheduled time. Press the [OK] key to stop the alarm, and the alarm is released. If you press the [Right key] or [Snooze], the alarm sound is paused and resumed in 5 minutes. You can configure up to 3 alarms.
-
Select your desired alarm to configure in the alarm list. If there is no alarm, press the right soft key [Add] to add a new alarm.
-
Set/Cancel alarm : Set or cancel the alarm using the left and right direction keys.
-
Input alarm time : Input your desired alarm time by specifying hour and minute. If the time format is 12 hours-based format, you have to select either 'AM' or 'PM' using the right soft key.
- Select repeat mode: Select desired repeat mode using the left and right direction keys.
- Select bell : Select the bell to use for the alarm using the left and right direction keys.
- Input memo : Input alarm name.
When you have completed configuration, press the []key [Save] to save the changed alarm configuration.
3.3 Calculator
You have a calculator function that provides 4 calculations of addition, subtraction, multiplication and division.
- Press [Func].
- Select Useful functions.
- Select Calculator.
You can input numbers using the number keys, and operators using the up, down, left, and right direction key. You can input a decimal point by pressing the left soft key. Whenever you press the Delete key, characters are sequentially deleted in reverse direction.
When calculation is completed and the result is displayed on the screen, pressing a number or decimal point (.) clears the previous result and the calculator waits for new input, even though you did not press AC key. When calculation is completed and the result is displayed on the screen, pressing a symbol saves the result into the symbol, and continues calculation.
3.4 World Time
The World time function provides time information on major cities worldwide.
- Press [Menu].
- Select Useful functions.
- Select world time.
- You can view the time of desired country or city using the left and right key.
- You can select a desired city as a base using [Home].
3.5 Unit Converter
Using this menu, users can convert the unit of 7 weights and measures of currency, length, width, weight, and volume velocity & temperature.
- Press [Menu].
- Select Useful functions.
- Select Unit converter.
3.5.1 Currency
- Select the Currency menu.
- Users can set a currency exchange rate using [Rate].
- Input standard unit in 'Domestic' and then press [Save]. Then you can view converted value in 'Foreign'.
- You can view the value in home country currency unit in 'Domestic' by inputting standard unit in 'Foreign'.
- Press [Reset] to clear the current input filed.
- To exit currency conversion function, press the [Back] key.
3.5.2 Length
- Select length menu.
- Select the desired unit to convert using [Unit].
- Input the standard unit and view your converted value.
- Press [Input again] to clear the current input filed.
- To exit length conversion function, press [Back] key.
3.5.3 Surface ("Area" would be a appropriate word here)
- Select Surface menu.
- Select desired unit to convert using [Unit].
- Input standard unit and view converted value.
- Press [Reset] to clear the current input filed, and locate the cursor in the input field.
- To exit Surface conversion function, press [Back] key.
3.5.4 Mass
- Select Mass menu.
- Select desired unit to convert using [Unit].
- Input standard unit and view converted value.
- Press [Reset] to clear the current input filed, and locate the cursor in the input field.
- To exit Mass conversion function, press [Back] key.
3.5.5 Volume
- Select Volume menu.
- Select desired unit to convert using [Unit].
- Input standard unit and view converted value.
- Press [Reset] to clear the current input filed.
- To exit volume conversion function, press [Back] key.
3.5.6 Velocity
- Select Velocity menu.
- Select desired unit to convert using [Unit]
- Input standard unit and view converted value.
- Press [Reset] to clear the current input field
- To exit Velocity conversion function, press [Back] key.
3.5.7 Temperature
- Select Temperature menu.
- Position the cursor in desired unit by using up or down arrow key.
- Input standard unit and view converted value.
- Press [Reset] to clear the current input field.
To exit Temperature conversion function, press [Back] key.
3.6 Timer
- Press [Menu].
- Select Useful functions.
- Select Timer.
3.6.1 Stopwatch
A Stopwatch function is provided.
- Select Stopwatch menu.
- Press [Go] to start the stopwatch.
- Press [Stop] to stop the stopwatch and view the measured duration of time.
- Press [Go] to resume the stopwatch.
- Press [Lap] during operation to record the duration of time at the moment, and continue the stopwatch.
- Users can save up to 6 time records by pressing [Lap]. If the number of recorded time exceeds 6, the oldest one is deleted.
Press [Reset] to initialise the stopwatch.
3.6.2 Date finder
- Select Date finder menu.
- Input desired date in [From] field
- Input desired number of days in [After] field
- Press [OK] and view the [Deadline] date displayed [DD/MM/YYYY] displays the existing date format
3.6.3 Date counter
- Select Date counter menu.
- Press [Add] and input text in [Title] field
- Input desired date in the [Deadline] date field and press [Save]
- To view detailed job contents, locate the cursor on the desired item in the Date counter List and press [View].
Details of the selected item with days remain is displayed in View detail page.
You can edit and delete a Date counter item using 'Menu'.
3.7 Connectivity
You can configure PC Sync communication by selecting the Tools menu and item number 7. You can select either [USB] or [IrDA]. To use IrDA, select [IrDA] and press [OK] or [Select].
How to Connect to internet (Settings)
1. Setup (Default)
- User can connect to internet or Internet using one of the settings values configured in internet Settings.
- The list of setting values can be seen by pressing POUND Key "60F" by selecting the settings option in internet menu. The settings are listed by its "Service Title".
- The default item used to connect to internet is displayed with "ON" icon on the right side of the list.
- Users can add or edit settings other than "WAP TIM".
To change the default connection settings, select one of the items listed in the settings menu and press "OK". The selected item will be displayed with "ON" icon on right hand side of the selected list.
2. Additional Setup
- Select Settings from "internet" menu. Open "Option" menu by pressing Left Soft Key and select "Add New" option.
The following items need to be configured
| Service Title Settings | profile name (e.g. internet) |
| Connection Mode | Choose from given list of connection modes (default is TCP with Proxy) |
| IP address WAP G | ateway IP address provided by the operator. (213.26.205.1) |
| Proxy Server Port | Port details are provided by operator, depending upon “Connection Mode”. |
| Security Choose “s | secure” connection if needed, Default value is “Non-Secure”. |
| Timeout Linger time | setting (300 seconds as a default) |
| Access point setting | for the corresponding service. (More details for adding or editing new Access Point refer step 3) |
- Press "Save" key to save any configuration changes.
3. Access Point Setup
- User can list the available Access Points by selecting "List" appears on Right soft menu of "Access point" parameter from internet setting value.
- The default Access Point is displayed with "ON" icon on the right side of the list.
- TIM Corporation provides pre-configured Access Point entries, in which primary configuration is for View only and other configuration can be Editable.
- User can add a new Access Points by selecting "Add New" from "Option" menu.
The details for Access Point parameters are as follows:
| Connection title Access Point profile name (e.g. WAP TIM) | |
| Bearer Choose the bearer from the list. (Default is “Automatic) | |
| Authentication Choose the authentication from the list. (Default is “No auth”) | |
| Username Information provided by Service Provider. | |
| Password Information provided by Service Provider. | |
| APN APN name to access network. Information provided by service provider. | |
| QOS Choose the QOS from the list. (Default is “Interactive”) | |
| Dial-Up Number Required for connecting to CSD network. Information provided by Service Provider | |
| Baud rate Choose the value from select list. (Default is “9600”) | |
| Call type Choose Call type from the list. (Default is “ISDN”) |
Press "Save" key to save any configuration changes.
Browser Menu
Browser Menu is seen once the page is displayed. On selecting "Option" from Left Soft Menu of browser, various options are provided and these are as follows:
| Homepage To access the homepage URL configured in current default setting. | |
| Reload Reloads the current page. | |
| Bookmark Adding page displayed as Bookmark and other operations of bookmark. | |
| Settings Provides a menu for “Clear Cache”, “Session Info”, “Certificates” and “Clear Cookies” | |
| Back Returns to the previous page. | |
| Forward To go to next page, If user navigated to previous pages. | |
| Go to URL A desired URL can be entered here to visit. |
4.1 Internet
Upon selecting internet, connection is made to internet using configured setting information.
4.2 Bookmarks
To store the frequently access or favorites URLs/Pages. Add, Edit or delete operations can be performed on bookmark.
Few pre-configured URLs are stored as Bookmark.
- To add new bookmarks select "Add" from Right Soft Menu.
Enter "Title" and associated "URL" information and press "Save" key to save. - To connect to desired bookmark select "Connect" from "Option" menu.
- To edit the existing bookmark select "Edit" from "Option" menu.
- To delete bookmark(s) select "Delete" from "Option" menu then select "One" or "All".
4.3 Go to URL
User can enter a URL to directly Connect to the page. To enter a symbol, press the Asterisk “ ”key to display symbol table and to
switch input mode, press the POUND “ #key.
4.4 Saved pages
Shows the list of pages saved by users while browsing the Internet. (For information about saving a page, refer to the third item of Browser Option Menu)
4.5 Clear cache
Clears the cache memory.
4.6 Servizi TIM
Using this menu, you can access USIM services. When an inserted USIM card is not providing USIM service, the menu will not appear. With this menu, users can use various USIM services. The menu may be different depending on the services provided by the USIM card.
4.6 Settings
Settings information is explained before.
5.1 Write message
5.1.1 TIM Click
Using the TIM Click service, you can print photographs saved in your Photo Album or taken using the camera function of your phone, or you can create a Postcard using a photograph and send it to a desired address.
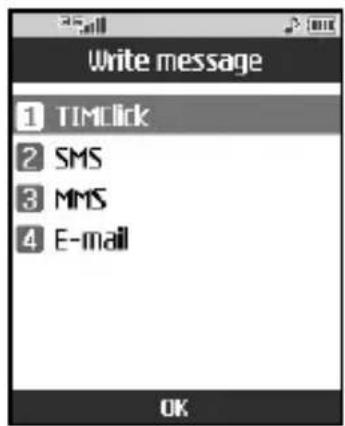
You can access the TIM Click menu by one of the three following procedures.
First, Select 5 Messaging from the top menu or press the Message Hot Key in the idle screen to enter the Messaging menu. Then, select 1 Write Message and select TIM Click to use the TIM Click service.
![5 Messaging 1 Write message 2 Inbox [0/0] 3 Email inbox 4 Outbox [0/0] 5 Draftbox [0] 6 Templates 7 Emoticon OK](/content/2026/05/1050210/images/2ab158a905f81ebeee08dcc67fb087c0d746216ba7338141de6469062ddc6000.jpg)
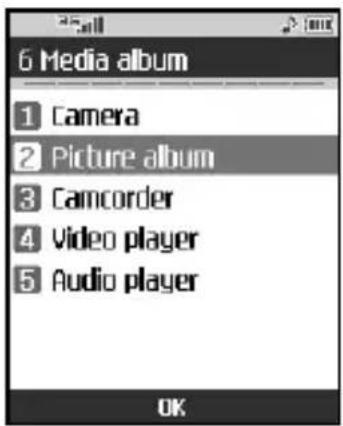
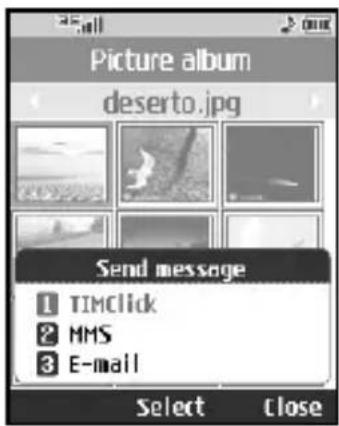
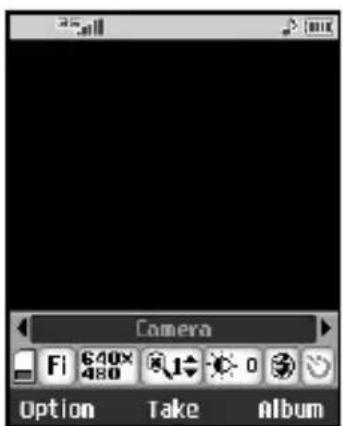
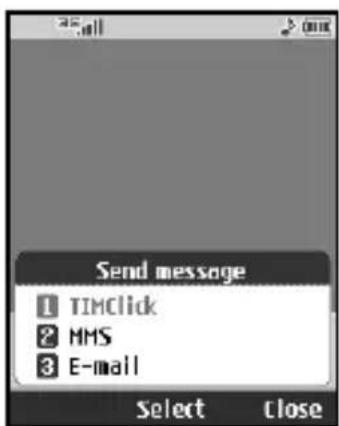
Alternately, Select 6 Multimedia Album from the top menu, select 2 Picture Album, select an image and press the Send (R-SK) key. The Option menu appears, allowing you to select a desired Send type. Select TIM Click here to use the TIM Click service. At this time, the TIM Click menu will appear only when you have selected an image whose resolution is equal to or higher than 640x480 pixels. If the resolution of the selected image is lower than 640x480 pixels, only the MMS and E-mail menus will appear.
You can also send a photograph taken in the Camera mode as a TIM Click message if the resolution of the photograph is equal to or higher than 640x480 pixels. To send a photograph via TIM Click message, press the Send (R-SK) key and select TIM Click. The TIM Click menu will not be displayed in the Send menu if the resolution of the photograph is lower than 640x480 pixels.
5.1.1.1 Print (Stampa)
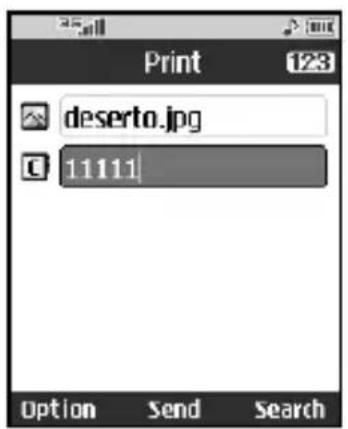
Using this menu, you can use the photograph printing service. It sends a user-selected photograph to the Tim Service Centre. The Tim Service Centre forwards the photograph to the store (called Negozio Photos) at the user-specified location, and the photograph is printed in the shop. You can get the printed photograph at a reasonable price from the store. You will have to specify the Postal Code (CAP) of your location when you send the photograph to be printed. After you send a Print message, SMS will send you the address of the shop where you can get the printed photograph and the time it will be available.
However, the Print service is provided only for the photographs whose resolution is equal to or higher than 640x480 pixels.
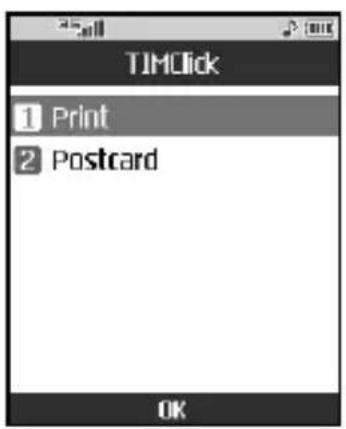
- Select 'Print' from the TIM Click menu.
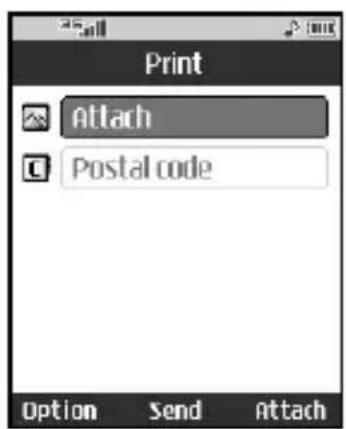
- Attach an image file and enter the Postal code of the desired store.
- You can send the created Print message by pressing the Send (L-SK) key.
5.1.1.2 Postcard (Cartolina)
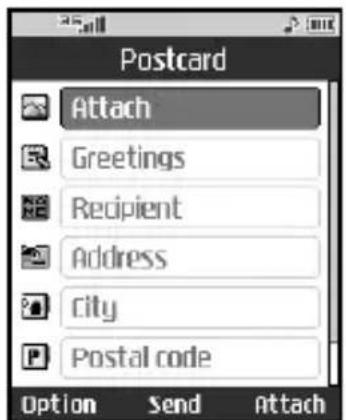
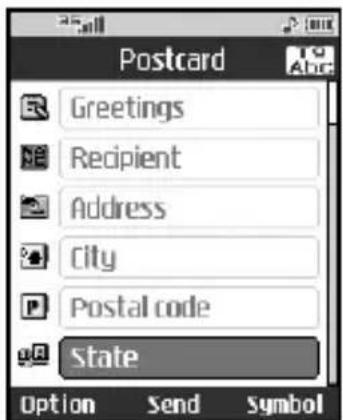
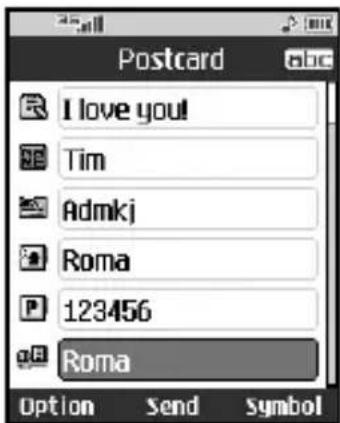
You can request a postcard be sent by sending an image, greetings and the address of the recipient to the TIM Click Centre. The TIM Click Centre then creates a postcard using the image and greetings and then sends it to the specified address. After you send a Postcard message, you will receive a SMS message telling you that the message has been properly received by the centre or that the specified address is invalid. You can attach an image whose resolution is equal to or higher than 640x480 pixels.
- Select 'Postcard' from the TIM Click menu.
- Attach an image file by selecting Attach key in the Image field and enter a brief greeting message in the Message field.
- Enter the name and address of the recipient.
- You can send the created Print message by pressing the Send (L-SK) key.
5.1.2 SMS
The normal message service is a short message service that allows up to 140 bytes of message.
- You can specify up to 20 recipients. Press [Option] or [Search] at the bottom to save the message in the draft box, to load a send message list, and to select a recipient from the phone book.
- Entering contents displays a new window where you can easily write a message. Using the [Option] menu, you can temporarily save the message, load an emoticon and a phrase, and select a phone number from the phone book. You can input various symbols using the key at the bottom. You can change the input method using T9 by pressing the key while writing a message.
- When you have finished writing a message, press the [OK] key. Then select one from the Send & Save, Send, and Save to the draft box menus. The Send & Save option saves the message after transmission, the Send option just sends the message without saving the message, and the Save to the draft box option saves the message in the draft box for future use without sending the message. Group broadcasting sends a message to multiple recipients, and the transmission progress status is represented by the recipient's phone number. When the message has been sent successfully, the message in the Outbox or not based on sending option. If the transmission has been failed, the message saved in Outbox as a fail message.
5.1.3 MMS
5.1.3.1 Sending an MMS
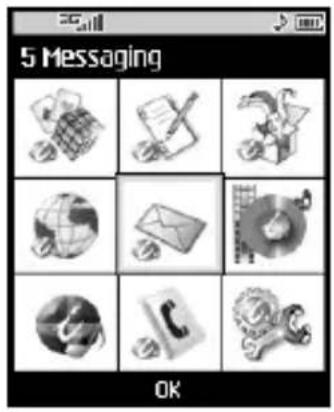
Selecting (5). Messaging from the top menu or pressing the Messaging shortcut key displays the message menu.
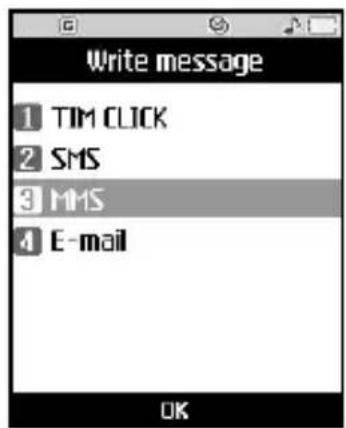
In the menu, select (1). Write message, and then select MMS to create an MMS message.
You can create various types of messages.
5.1.3.1.1 MMS
-
You can create an MMS (Multimedia Messaging Service) message.
-
Select 'MMS' from the Write Message menu and then press [OK].
- You can edit an MMS message field using the cursor.
![OKB MMS 1230 To(1) Cc(1) Title Empty slide[1/1] Option OK Search](/content/2026/05/1050210/images/e484c5ee92dad0143cacb667a5db2c5a3c6e2ebf4b0452cd2b5606c84e25dddd.jpg)
- Move the cursor to the To field, and enter the message recipient. You can specify the recipient by either the phone number or the e-mail address. You can search the phone book by pressing the right soft key. When a recipient has been specified, another field where you can specify another recipient appears. You can specify up to 20 recipients.
![OKB MMS 1230 To(1) Cc(1) Title Empty slide[1/1] Option OK Search](/content/2026/05/1050210/images/d22d3061aa7f776d6b92f8b5ace8613af260f68a67f19f57da8617c9789ade88.jpg)
![OKB MMS 123 To(1) Cc(1) Title Empty slide[1/1] 1 Save to drafts 2 Recent messages 3 Send settings Close Select](/content/2026/05/1050210/images/79b4612064769d2beafe3bda0b88e65fa0591d5197cb37ad5edd6b07cca8bc20.jpg)
![OKB MMS To(1) Cc(1) Title Empty slide[1/1] Option OK](/content/2026/05/1050210/images/b6d0e50b27785e62aa1082104d5acaaa04738c64a203df7a995c7ced95266f90.jpg)
- Move the cursor to a slide item to add, delete or edit the slide.
![OKB MMS To(1) Cr(1) Title Empty slide[1/1] Option OK Edit](/content/2026/05/1050210/images/de2bd3ec7d11c117d5053f4063d4e2a8dedadde938739faceecd87800871441a.jpg)
![OKB MMS To(1) Cc(1) Title Empty slide[1/1] 1 Save to drafts 2 Add new slide Close Select](/content/2026/05/1050210/images/e9c1d223fcbf26c006e358b68c827e1fcfd0e92762fea74ad396ca0ca56bc6d6.jpg)
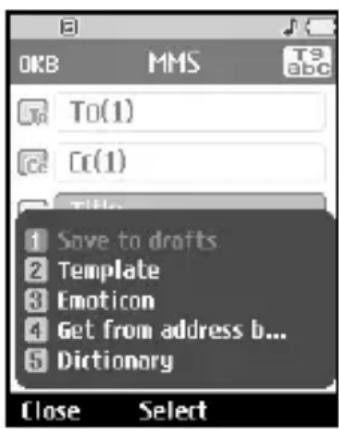
- You can save a message in the draft box by using the Option menu while you are writing the message.
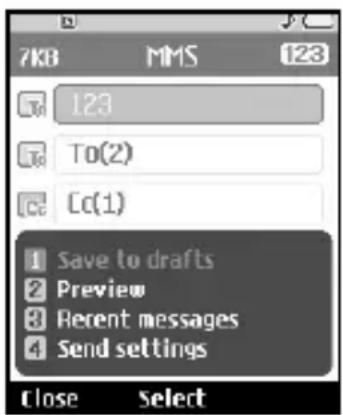
- You can preview the message while writing a message by using the Option menu.
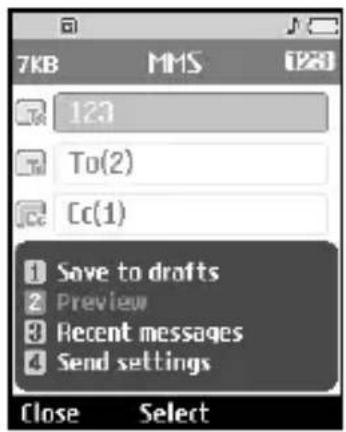
- You can search and load information from the phone book by the [Search] key while writing a message.
![OKB MMS 123 To(1) Cc(1) Title Empty slide[1/1] Option OK Search](/content/2026/05/1050210/images/effeacf2a9430422d18311a4580330733d7a2d6f41574e1c99ccbf76fd58c48c.jpg)
- You can load the last message while writing a message.
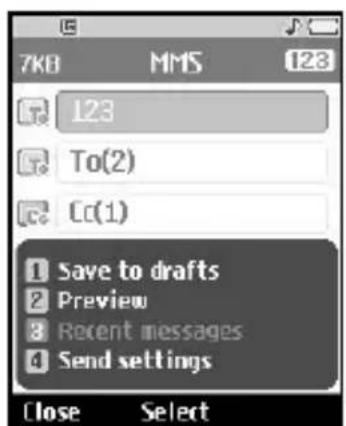
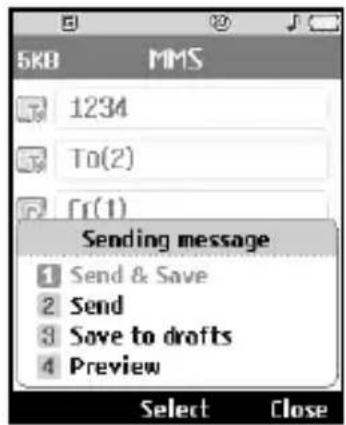
- When you have completed creating a message, press [OK]. You can send the message by selecting Send Message from the popup list, and you can save the message by selecting Save to draft box. You can preview the message by selecting Preview from the popup list.
5.1.3.1.2 Creating an MMS slide
- Press Edit in the slide item while creating an MMS message.
![OKB Slide[1/1] 5 seconds Image Audio Video Message 0% Option Save Attach](/content/2026/05/1050210/images/1b911e035e71c39f5c3700d59107e26ce92d7e5fb0dc98092b361b88064fbaae.jpg)
- You can change the slide duration in the Slide Duration field. If you do not change it, the default value is used.
![OKB Slide[1/1] 5 seconds Image Audio Video Message 0% Option Save List](/content/2026/05/1050210/images/923fbde462a61a2dbf668adf4e54da16636e22495832307ee4667c1a2ce04185.jpg)
- You can attach your desired image, audio, or video file by moving the cursor to the desired file to attach, and selecting Attach. If there is an attached image or audio file, you cannot attach a video file. If there is an attached video file, you cannot attach an image or audio file. You can cancel the attached file by using [Option].
![7KB Slide[1/1] 5 seconds image01.jpg Audio Video Message 0% Option Save Attach](/content/2026/05/1050210/images/cdfc0ec28f6ed2cc738fecc04dee5e9791bb4cd993815997ba8d472f99113301.jpg)
![7KB Slide[1/1] 5 secs. image01.jpg Audio Video Remove attachment Add new slide Close Select](/content/2026/05/1050210/images/838b8eb336d9aa8ecb1c83212632f762ad8907c2d08c4dbcb4d7e4b5f4a49116.jpg)
- You can insert desired contents into a slide by moving the cursor to the desired message. When the page is full, users can not enter any more characters. You can insert templates, or emoticons into the contents input window by using the Option menu. You can insert a name, or a phone number saved in the phone book into the contents input window by using [Option].
![7KB Slide[1/1] 5 seconds image01.jpg Audio Video Message 2% Please Call me back! Option Save](/content/2026/05/1050210/images/6ef90c1b70ceabb9156b6551249f676755c4e1359afe4a8beb13c4bcf58dde1d.jpg)
![7KB Slide[1/1] 5 secs. image01.jpg add new slide Template Emuticon Get from address b... Dictionary Close Select](/content/2026/05/1050210/images/eb737862dd5ee59c98f56f774279712bb231d9832c573cb0996a6598fa13383d.jpg)
- You can use the following functions by using [Option] while creating a MMS slide.
5.1 Slide / No attach / No message / Cursor position: Attach field
- Add new slide : Select this menu to add a slide.
- Delete Slide : Select this menu to delete the slide.
- Next slide : Select this menu to move to the next slide.
- Previous slide : Select this menu to move to the previous slide.
![OKB Slide[2/3] 5 seconds Image Audio 1 Add new slide 2 Delete slide 3 Next slide 4 Previous slide Close Select](/content/2026/05/1050210/images/9f7326782d6991102d1da09f785c056cab79fbc35bc0b70b1d6070f6db4610b5.jpg)
5.2 Slide / No attach / No message / Cursor position: Message field
- Add new slide : Select this menu to add a new slide.
- Templates : Select this menu to use a template.
- Emoticon : Select this menu to use an emoticon.
- Get from Address book : Select this menu to use the address book.
- Dictionary : Select this menu to use the dictionary.
- Next slide : Select this menu to move to the next slide.
- Previous slide : Select this menu to move to the previous slide.
![OKB Slide[3/3] 5 seconds Image Audio 1 Add new slide 2 Delete slide 3 Next slide 4 Previous slide Close Select](/content/2026/05/1050210/images/fc445c19b9ae2eb4104efecaba819ff858827098912985b866631d5c0014f047.jpg)
5.3 Before attaching or while writing a message / cursor position: Attach field
- Add new slide : Select this menu to add a new slide.
- Delete Slide : Select this menu to delete the slide.
- Next slide : Select this menu to move to the next slide.
- Previous slide : Select this menu to move to the previous slide.
![OKB Slide[2/3] 5 seconds Image Audio 1 Add new slide 2 Delete slide 3 Next slide 4 Previous slide Close Select](/content/2026/05/1050210/images/97eafd4e45e3ebb1f160b9ceb7008f26096366c5bce6ac27e33d39f2fbcbdbee.jpg)
5.4 After attaching or while writing a message / cursor position: Attach field
- Remove attachment : Select this menu to cancel an attachment.
- Add new slide : Select this menu to add a new slide.
- Delete slide : Select this menu to delete the slide.
- Next slide : Select this menu to move to the next slide.
- Previous slide : Select this menu to move to the previous slide.
![7KB Slide[2/3] 5 seconds image01.jpg Remove attachment Add new slide Delete slide Next slide Previous slide Close Select](/content/2026/05/1050210/images/266536326552fcd6f9180df944692d23fe3d34025c5524b8229dfc7eac9ee58b.jpg)
5.5 No attachment or while writing a message / cursor position: Message field
- Add new slide : Select this menu to add a new slide.
- Delete Slide : Select this menu to delete the slide.
-
Templates : Select this menu to use a template.
-
Emoticon : Select this menu to use an emoticon.
- Get from address book : Select this menu to use the address book.
- Dictionary : Select this menu to use the dictionary.
- Next slide : Select this menu to move to the next slide.
- Previous slide : Select this menu to move to the previous slide.
![OKO Slide[3/3] 5 seconds 1 Add new slide 2 Delete slide 3 Template 4 Emotion 5 Get from address b... 6 Dictionary 7 Previous slide Close Select](/content/2026/05/1050210/images/a5a4ae37aa3a30e65b091f51bacaf36eb48924dc27239b6fe4f5eb33b1f78aff.jpg)
5.6 Slide / No attachment / No message / cursor position: Slide duration field
- Add new slide : Select this menu to add a new slide.
- Delete slide : Select this menu to delete the slide.
- Next slide : Select this menu to move to the next slide.
- Previous slide : Select this menu to move to the previous slide.
![OKB Slide[2/3] 5 seconds Image Audio 1 Add new slide 2 Delete slide 3 Next slide 4 Previous slide Close Select](/content/2026/05/1050210/images/26715f9e501c2187e27f72486b5106452a8d922e51e0169ef72e7a9477d994ad.jpg)
5.1.3.2 MMS send menu
Sends created MMS message and then saves the message.
![7KD MMS 123 12345 To(2) [ r(1) ] Sending message 1 Send & Save 2 Send 3 Save to drafts 4 Preview Select Close](/content/2026/05/1050210/images/50b69498429135ba882a005e9740a2850465bd174e847e0fddef203a8a7417c2.jpg)
5.1.3.2.2 Send
Sends created MMS message.
5.1.3.2.3 Save to drafts
Saves the created MMS message to the Draftbox.
5.1.3.2.4 Preview
Shows the created MMS message before sending it.
![7KB MMS 12345 To(2) [0(1)] Sending message 1 Send & Save 2 Send 3 Save to drafts 4 Preview Select Close](/content/2026/05/1050210/images/4b1aaace9a22493346db671169901c2d1d6af8c860914ee16f03259b4dc73f9d.jpg)
5.1.3.3 Viewing MMS messages
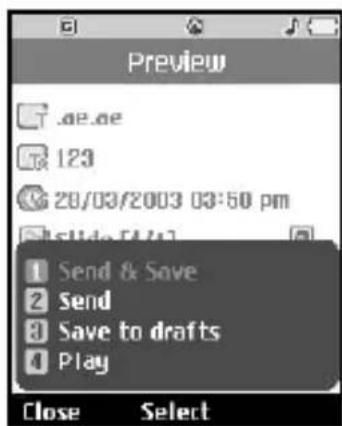
5.1.3.3.1 To preview MMS message
- You can preview a created MMS.
- If the message is too long to be displayed on screen, the contents of the message are automatically scrolled.
- Press the Pause key to pause playback of the message, and press the Play key to resume playing the message.
- If an audio or video file is attached to an MMS message, press the Mute key to activate the mute function. Press the Sound key to cancel the mute function.
- Press the Info key to stop playback, and move to the Detailed View screen to view detailed information about the MMS message.
- When message playback is complete, the screen display changes to the Detailed View screen.
- Press the Play key to play the message.
- Press the Edit key to move to the Create Message screen.
- You can use the following functions using the Option key.
- Send & Save : Sends and saves the message.
- Send : Sends the message without saving it.
- Save to drafts : Saves the message in the draft box.
- Edit: Moves to message edit screen.
- Play : Plays the message.
![Preview Please Call me back! 123456 28/03/2003 03:50 pm Slide [1/2] Slide [2/2] Option Play Edit](/content/2026/05/1050210/images/fa35db0b05035800f4ac644c51bce3f1028262da788d5f688085939732a33d1f.jpg)
5.1.3.3.2 Viewing MMS messages in the Inbox and Outbox
- Select an MMS message to view its contents.
- If the message is too long to be displayed on a screen, the contents of the message are automatically scrolled.
- Press the Pause key to pause playback of the message, and press the Play key to resume playing the message.
- If an audio or video file is attached to an MMS message, press the Mute key to activate the mute function. Press the Sound key to cancel the mute function.
- Move to a desired message by using the left and right direction keys.
- Press the Info key to stop playback, and move to the Detailed View screen so that you can view detailed information about the MMS message.
-
When message playback is complete, the screen display changes to the Detailed View screen.
-
Press the Play key to play the message.
- Press the Edit key to move to the message edit screen.
- You can use the following functions using the Option key.
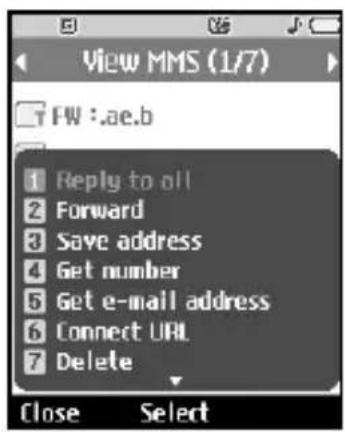
[Inbox / view detailed screen menus]
- Reply to all : Creates reply to all (copy of originator and cc addresses) selected message.
- Reply : Creates reply to the selected message by [R-SK] key.
- Forward : Forwards the selected message.
- Save address : Saves the telephone numeric in the addressbook.
- Get number : Extracts the phone numeric included in the text of the message.
-
Get e-mail address : Extracts the e-mail address from the message text.
-
Connect URL : Connects to the URL included in the message text.
- Delete : Deletes selected message.
- Mute (or Sound) : Enables or disables mute function.
- View attachment : Plays attached files.
- Play : Plays the message.
- Message info : Displays information on the selected message.
* For a file with just an image, Menu 8. The Mute (or Sound) menu would not appear.
![MMS (2/7) Please Call me back! 123456 28/03/2003 03:50 pm Slide [1/2] Slide [2/2] Option Play Edit](/content/2026/05/1050210/images/63ee4bd870258b984c2e2b77ef4d2f0003de30dc6695e39d7c6334c5386defa5.jpg)
[Outbox / view detailed screen menus]
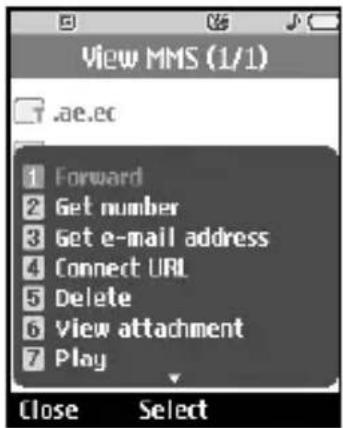
- Forward : Forwards selected message.
- Get number : Extracts phone number from the message text.
- Get e-mail address : Extracts the e-mail address from the message text.
- Connect URL : Connects to the URL included in the message text.
- Edit : Edits the selected message by [Soft2] key.
- Delete : Deletes selected message.
- View attachment : Plays attached files.
- Play : Plays the message.
- Message info.: Displays information on the selected message.
![MMS (2/2) Please Call me back! 123456 28/03/2003 03:50 pm Slide [1/2] Slide [2/2] Option Play Edit](/content/2026/05/1050210/images/a1069b4efb6fb9192fc9ee05749ff65f93a406e891738b3f45425f6081fb8070.jpg)
5.1.4 E-mail
5.1.4.1 Create e-mail
- You can create a new e-mail (Electronic mail).
- Select e-mail from Write message, and press the OK key.
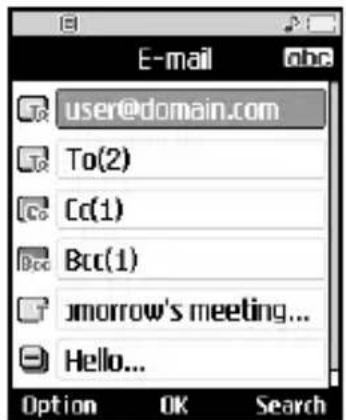
- You can edit the items necessary to create an e-mail message by using the cursor.
- Move the cursor to To field, and enter the e-mail address of the recipient of the e-mail.
- Move the cursor to CC (Carbon Copy) field, and enter the reference e-mail address to forward the e-mail.
- Move the cursor to BCC (Blind Carbon Copy), and enter a hidden reference e-mail address to forward the e-mail without forwarding information.
-
For the recipient (To), reference address (CC) and hidden reference address (BCC) fields only valid e-mail addresses are allowed. When an e-mail address has been specified, another field where you can specify another address appears. You can specify up to 4 recipients for each of the fields.
-
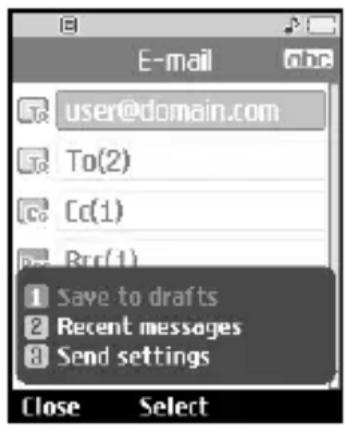
To enter data in the recipient (To), reference address (CC) and hidden reference address (BCC) fields, you can search the address book by using the Search key and use the following functions by using the [Option] key.
-
Save to drafts : Select this menu to save the message in the draft box.
- Recent messages : Select this menu to load the e-mail address from the latest created message.
- Send settings : Select this menu to configure the settings of the e-mail that you wish to send.
-
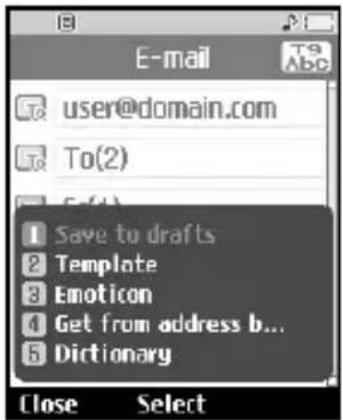
Move the cursor to the Subject field and create the subject. You can search the address book by using the Search key while entering the Subject field, and use the following functions by using the [Option] key.
-
Save to drafts : Select this menu to save the message in the draft box.
- Template : Select this menu to use a template.
- Emoticon : Select this menu to use an emoticon.
- Get from address book : Select this number to insert a name or phone number from the address book.
- Dictionary : Select this menu to use the dictionary.
-
You can enter the message contents by moving the cursor to the Message field. Entering contents displays a new window where you can easily write message.
-
Save to drafts : Select this menu to save the message in the draft box.
- Template : Select this menu to use a template.
- Emoticon : Select this menu to use an emoticon.
- Get from address book : Select this menu to insert a name or phone number from the address book.
- Signature text : Select this menu to insert the signature text.
- Dictionary : Select this menu to use the dictionary.
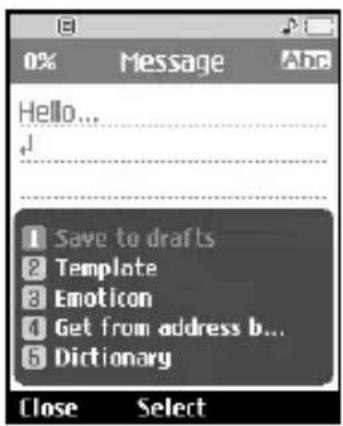
Messaging
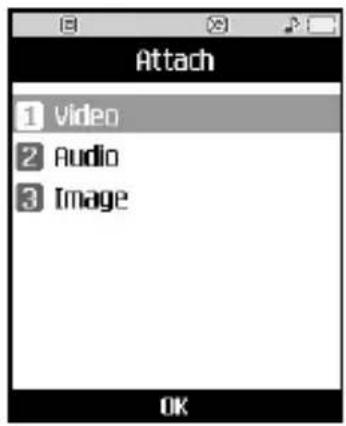
- You can attach a file by moving the cursor to the Attach field. Press the Attach key or select Attach from the Option menu. In the Attach menu, move the cursor to the Video, Audio or Image item, and press the OK key to attach a file. You can attach up to 2 files, and the size of attached files should be 1MB or less. You can change the attached file for another by selecting the attached file name. You can cancel the attached file by using the [Option] key.
- When you have finished writing an e-mail, press the OK key to send or save the e-mail.
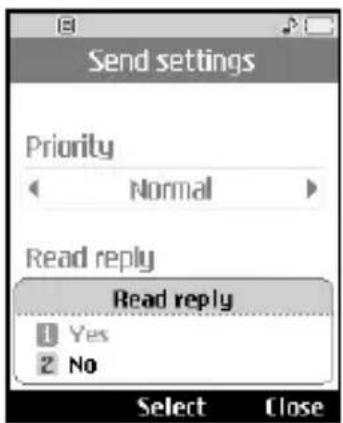
5.1.4.2 Send settings
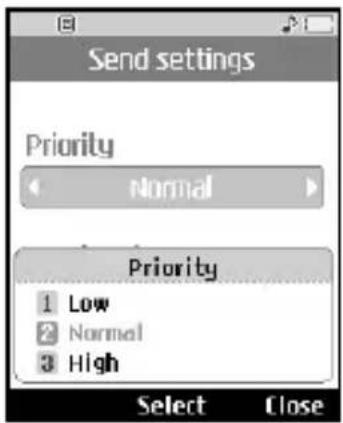
5.1.4.2.1 Priority
You can configure the priority of the e-mail you wish to send. You can select either Low, Normal or High.
5.1.4.2.2 Read reply
You can set whether you want to request a read receipt for a sent e-mail.
5.1.4.3 Send e-mail menu
5.1.4.3.1 Send & Save
Sends the created e-mail and then saves it in the Outbox. Sending will be processed in the background, and you can do another job.
5.1.4.3.2 Send
Sends the created e-mail.
5.1.4.3 Save to drafts
Saves the created e-mail in the draft box.
5.1.4.3.4 Preview
You can preview the created e-mail before sending it.
![E-mail user@domain.com To(2) [cf1] Message 1 Send & Save 2 Send 3 Save to drafts 4 Preview Select Close](/content/2026/05/1050210/images/2a02413fd91c6f787f04fd101c56e54b971db3e51febba13d8e5de4ff17fc1d4.jpg)
![E-mail user@domail.com To(2) [cf1] Sending will be processed in the background.](/content/2026/05/1050210/images/9f7882000e950bea3e340caf8613aa992e1dd8329e4f584f42ea4fe18c0b419c.jpg)
5.2 Inbox
- You can view saved messages. Select a message and then press the Select key to view the message.
- You can view the previous or next message by using the left and right keys.
- To view an MMS Noti message, select Retrieve in the message view screen. Then the file is transmitted, and you can view the file when the transmission is complete.
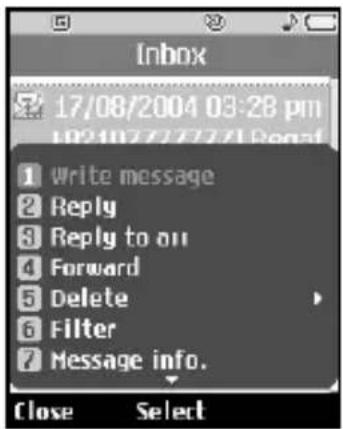
- You can use the following functions by using [Option] key.
[For a normal message]
- Write message: You can write a new message.
-
Reply to all : Creates reply to all (copy of originator and cc addresses) the selected message. (only MMS message)
-
Reply: You can create a reply to the selected message.
-
Forward : Forwards the selected message. (Not supported for MMSNoti message.)
-
Delete
- One : Deletes a selected message.
- Multiple delete : Deletes more than one selected message.
- All : Deletes all messages.
-
Filter : Displays messages by desired message types.
-
Message info : Shows information on the selected message.
-
Memory info : Shows the amount memory the phone has left.
[For WAP push message]
- Write message : Creates a new message
-
Delete
-
One: Deletes a selected message.
- Multiple delete : Deletes more than one selected messages.
-
All : Deletes all messages.
-
Filter : Displays messages by desired message types.
- Message info : Displays information on the selected message.
- Memory info : Shows how much memory the phone has left.
5.3 Email inbox (Mail box)
5.3.1 Viewing e-mail Message List
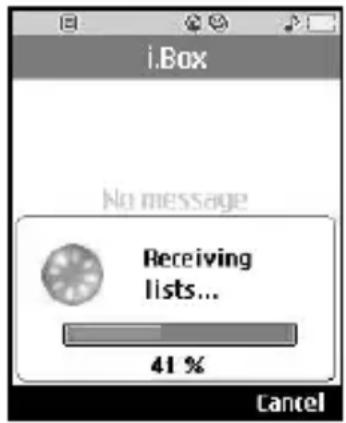
- Select an e-mail account and then press the OK key to view the received e-mail list.
- Using the Retrieve key, you can retrieve a new e-mail list from the e-mail server of the selected account.
-
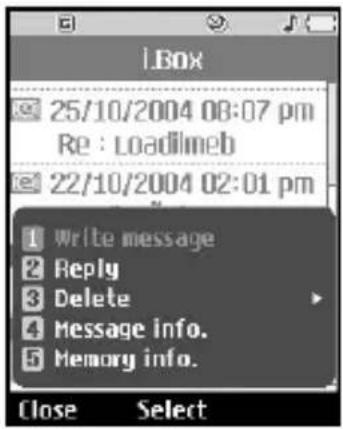
In e-mail list, you can use the following functions by using the [Option] key.
-
Write message : Creates a new e-mail message.
- Reply : Creates a reply to the selected e-mail. You can write a reply using SMS, MMS or e-mail.
-
Delete : Deletes an e-mail. Deleted e-mails are temporarily saved in Trash. The following Delete options are provided.
-
One : Deletes the selected message.
- Multiple delete : Deletes more than one selected message.
- All : Deletes all messages.
- Message info. : Displays information on the selected message.
- Memory info. : Shows how much memory the phone has left.
5.3.2 Viewing an e-mail message
- Select one of the received e-mails and press the OK key to receive the contents of the e-mail.
- The contents of the received e-mail are automatically displayed in the View screen.
- You can view the contents of the previous or next e-mail by using the left/right key.
-
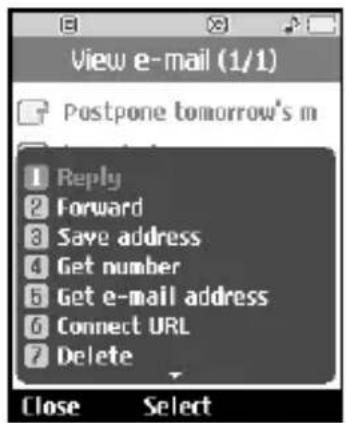
In the e-mail View screen, you can select the following functions by using the [Option] key.
-
Reply : Creates a reply to the selected e-mail message.
- Forward : Forwards the selected e-mail message to another e-mail address.
- Save address : Saves the address of the sender of the selected e-mail message in the phone book.
- Get number : Extracts the number from the selected email message.
- Get e-mail address : Extracts the e-mail address from the selected e-mail message.
- Connect URL : Extracts the URL address from the selected e-mail message.
- Delete : Deletes the selected e-mail message.
- View attachment : Shows the files attached files to the selected e-mail.
- Message Info. : Displays information on the selected e-mail message.
5.3.2.1 Trash
- You can restore or permanently delete deleted e-mails in Trash.
- Select Trash in the mailbox and press the OK key to view the deleted e-mail list.
- Press the Delete key to delete a deleted e-mail permanently.
- Press the Restore key to restore a deleted e-mail.
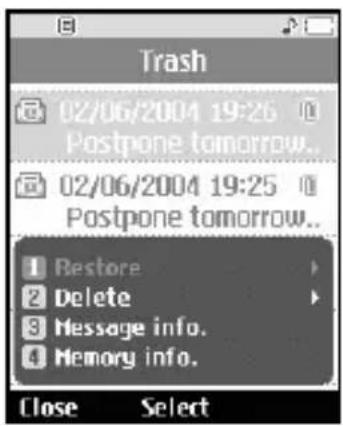
- Using the Option key, you can select the following functions.
- Restore : Restores a deleted e-mail.
• One : Restores a selected e-mail.
• All : Restores all the e-mails in Trash.
- Delete : Deletes an e-mail permanently.
• One : Deletes the selected e-mail permanently.
- All : Deletes all the e-mails in Trash permanently.
- Message info.: Displays information about the selected e-mail.
- Memory info. : Displays information about the amount of phone memory used by the e-mail.
☐ The e-mails in Trash would not be received again.
5.4 Outbox
- You can view saved messages. Select a message and then press the Select key to view the message.
- You can view the previous or next message by using the left and right keys.
- You can use the following functions by using [Option] key.
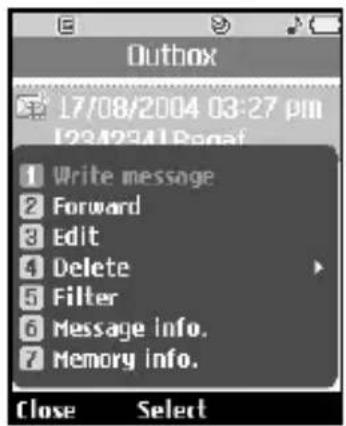
[For Normal Message]
- Write message : You can write a new message.
- Forward : You can forward a selected message.
- Edit : You can edit a selected message.
- Delete
• One : Deletes a selected message.
- Multiple delete : Deletes more than one selected messages.
• All : Deletes all messages.
- Filter : Displays messages by desired message types.
- Message info : Displays information on the selected message.
- Memory info : Shows how much memory the phone has left.
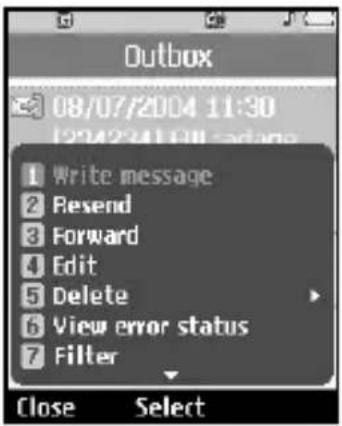
[For sending a failed message]
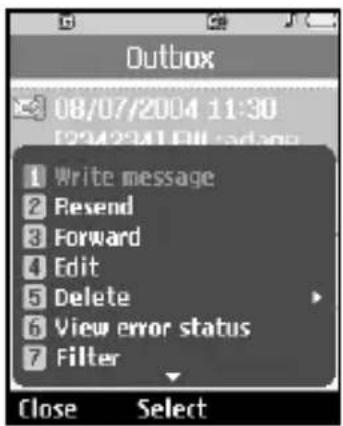
- Write message : Creates a new message.
- Resend : Resends the selected message.
- Forward : Forwards the selected message.
- Edit : Edits the selected message.
- Delete
• One : Deletes a selected message.
- Multiple delete : Deletes more than one selected messages.
• All : Deletes all messages.
- View error status : Shows the reason for transmission failure.
- Filter : Displays messages by desired message types.
- Message info : Displays information on the selected message.
- Memory info : Shows how much memory the phone has left.
- A message transmission can be canceled while sending the message by selecting Send & Save or Send menu (Only MMS).
![Outbox 17/08/2004 04:23 pm [12:345] hi 17/08/2004 03:27 pm [22:42:24] Proof Sending is cancelled OK](/content/2026/05/1050210/images/47bb08ecfa92b151f8940507b9a00f93cc4400eb8a8f08c812c85c6f4fe1ffca.jpg)
5.5 Draftbox
- You can view saved messages. Select a message and then press the Select key to view the message.
- You can view the previous or next message by using the left and right keys.
-
You can use the following functions by using the [Option] key.
-
Write message : You can write a new message.
- Delete.
• One : Deletes the selected message.
- Multiple delete : Deletes more than one selected messages.
• All : Deletes all messages.
- Filter: Displays messages by desired message types.
- Message info : Displays information on the selected message.
- Memory info : Shows how much memory the phone has left.
![Draftbox 17/08/2004 04:23 pm [12345] FW :hi 1 Write message 2 Delete 3 Filter 4 Message info. 5 Memory info. Close Select](/content/2026/05/1050210/images/1981a08d66c3e891bf5ca93ca77c1c80cc7e83dff1e3c8e1fa8b66e4ae292063.jpg)
5.6 Templates
You can add, edit, and delete frequently-used useful phrases.
You can save frequently-used phrases in the input window in advance. You can save these useful phrases using the Options menu.
- Depending on your service provider, the useful phrases such as the following examples are saved as a default.
- Please Call me back!
- Meeting at
• I'm late. I will be there at
- Phone to
• Where are you now?
- Don't forget to
• I love you! • Write to
5.7 Emoticon
You can add, edit, and delete frequently used emoticons.
You can save emoticons that are frequently used in the input window in advance. You can save the emoticons through Options menu.
- According to the request of service provider, the emoticons such as the following examples are saved as a default.
$$ \bullet : -) $$
$$ \bullet =: P $$
$$ \cdot (- _ -) $$
$$ \bullet ; -) $$
$$ \cdot ]: - | [ \cdot : - $$
$$ \ast $$
$$ \bullet = |: -) = $$
5.8 Service commander
This is an editor to enable the user to enter text, which cannot be entered in the Idle Screen, to use the USSD service specified by the service commands provider. Enter the USSD service provided by the service provider and press Send to use the service. The user can enter up to 182 characters.
5.9 Settings
5.9.1 SMS
5.9.1.1 Message Type
• Text / Voice / Fax / X.400 / E-mail / ERMES
5.9.1.2 Validity period
• 1 hour / 12 hours / 1 day / 1 week / Maximum
5.9.1.3 Reply using same service centre
- Yes / No
5.9.1.4 Delivery report
- Yes / No
5.9.1.5 SMS centre
- Input the address of SMSC.
5.9.2 MMS Option Setting
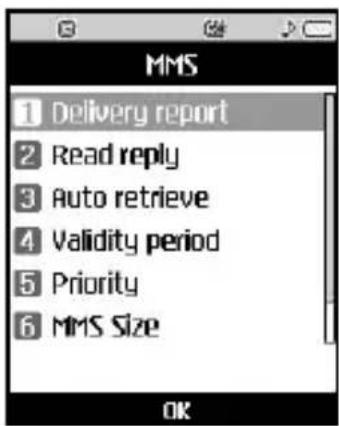
Select (5). Messages from the top menu. Select MMS from the menu to configure MMS message related options. MMS setting Menu
![5 Messaging 3 Email inbox 4 Outbox [1/2] 5 Draftbox [1] 6 Templates 7 Emoticon 8 Service commander 9 Settings OK](/content/2026/05/1050210/images/085ecf1844172de09b75b4d51b75f0ee6f364db615089e38f0bfeee4c32b2d2e.jpg)
5.9.2.1 Delivery report
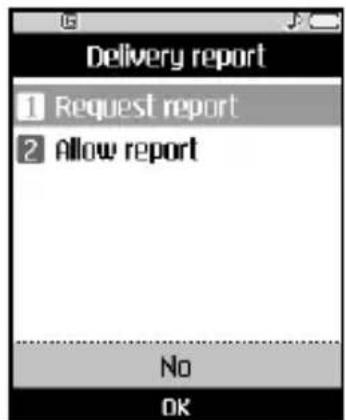
This menu allows you to determine whether to request a delivery confirmation mail to a recipient, and whether to allow sending delivery confirmation mail to a sender.
- Request report : Determines whether to request a delivery confirmation mail for an MMS message.
- Allow report: Determines whether to allow sending a delivery confirmation mail for a delivery confirmation mail request.
5.9.2.2 Read reply
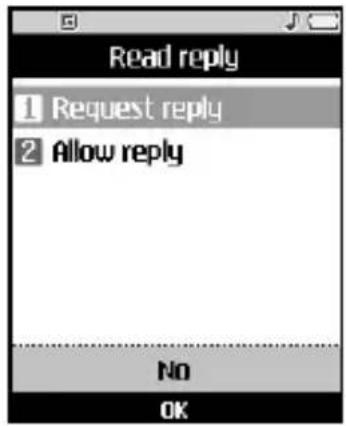
This menu allows you to determine whether to request a read confirmation mail to a recipient, and whether to allow sending read confirmation mail to a sender.
-
Request reply : Determines whether to request a read confirmation mail for an MMS message.
-
Allow reply : Determines whether to allow sending a read confirmation mail for a read confirmation mail request.
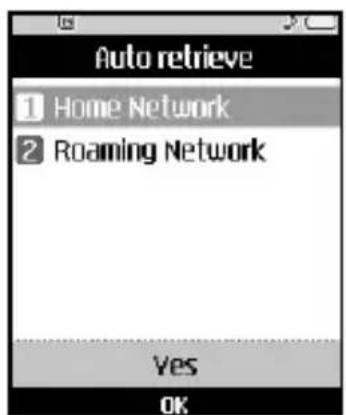
5.9.2.3 Auto retrieve
This menu allows you to determine whether to automatically download an MMS message when an MMS notification message arrives.
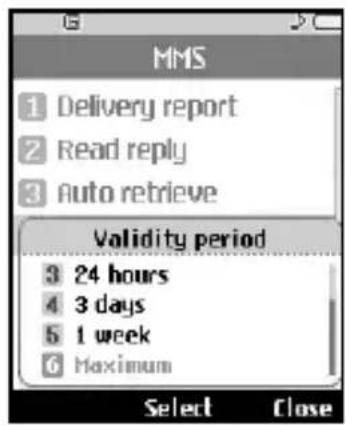
5.9.2.4 Validity period
This menu allows you to configure the term of validity for a message when transmitting an MMS message.
The message would be saved in the MMS server only for the configured term.
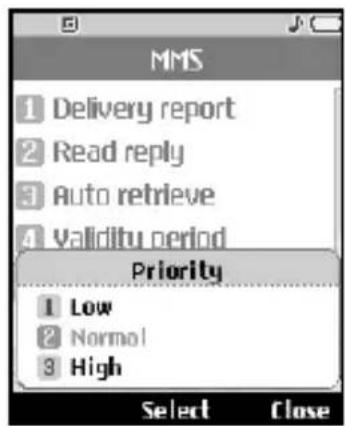
5.9.2.5 Priority
You can configure the priority of a message for MMS message transmission.
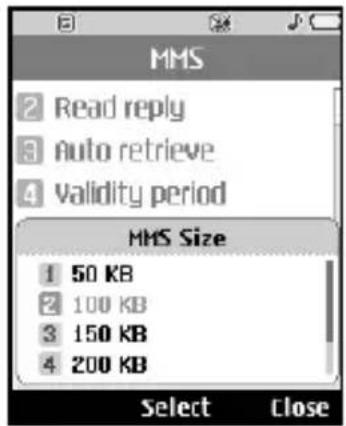
5.9.2.6 MMS Size
You can configure the size of a message for MMS message transmission.
5.9.2.7 MMS centre
This menu allows you to configure network information such as MMSC, and WAP gateway, to send an MMS message.
In the Option menu, you can create or delete a new profile by using the left soft key. You can finish the configuration by pressing OK. As for the default profiles, you can edit or delete MoviStar MMS only.
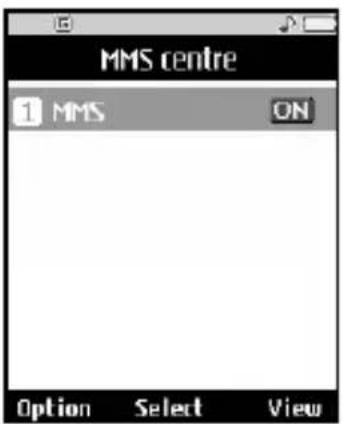
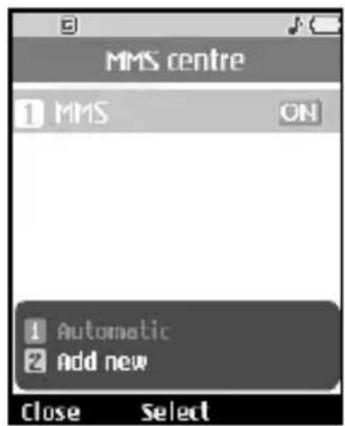
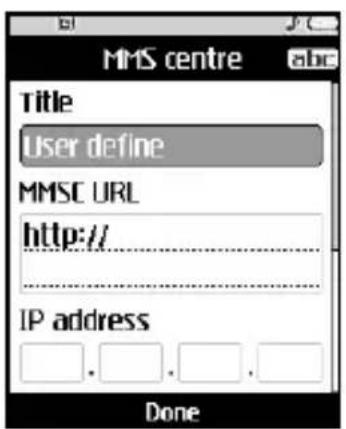
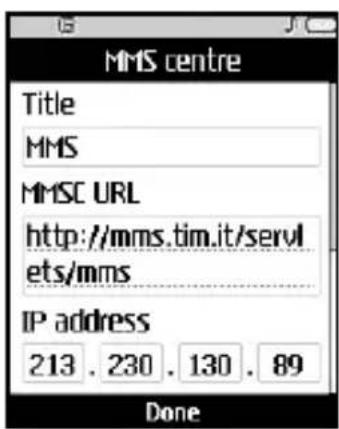
A profile name selected in a Checkbox is the current configured value. You can view and edit the contents of the profile in the edit mode by pressing the Edit key. The edit screen also appears when creating a new profile under Options. The meanings of the items are given below.
- Title : Profile name
- MMSC URL : Enter the MMS center URL
- IP address : Enter the WAP gateway IP address
- Port number : Enter the WAP gateway port number
- Connection mode : Specify the UDP(CO/CL), the TCP with proxy, the TCP without proxy
- Access point : Specify the access point name (see WAP connection settings.)
Press the Done key to save the changes and complete MMS setting.
If you have made changes, press the OK key to save the changes and exit.
5.9.3 E-mail Option Settings
You can configure settings for receiving and transmitting e-mails such as Allow reply, Auto retrieve, Signature text, E-mail account and Auto retrieve.
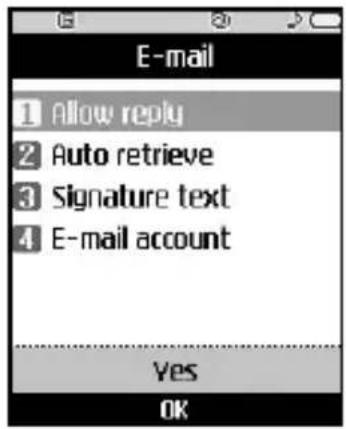
5.9.3.1 Allow reply settings
You can configure settings for Allow reply.
5.9.3.2 Auto retrieve setting
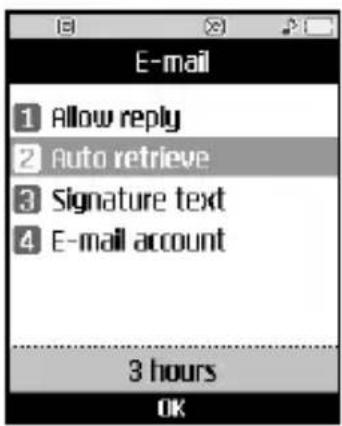
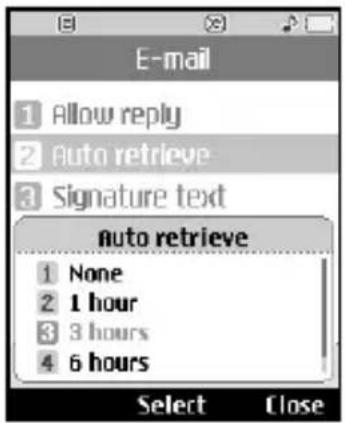
You can configure Auto retrieve to retrieve e-mails automatically from the incoming mail server. When a new mail arrives, an icon appears at the top of the idle screen. You can select that auto receiving time slot have None, 1, 3, 6 and 12 hours.
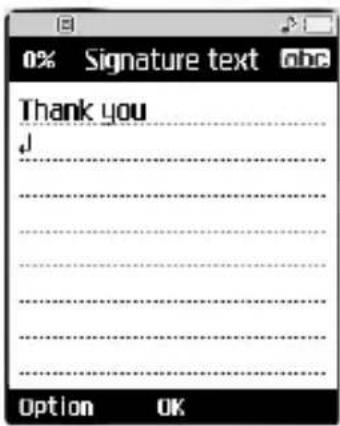
5.9.3.3 Signature text
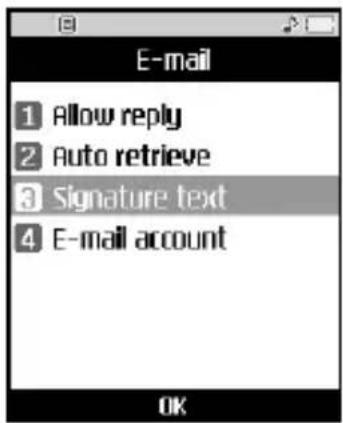
You can configure a signature text to be attached to the end of an e-mail. The configured signature text is automatically attached to the end the e-mail when it is sent.
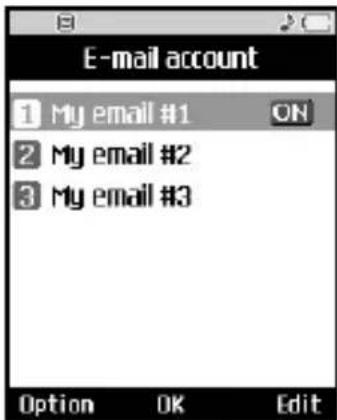
5.9.3.4 E-mail account
- You can create or configure an e-mail account including the e-mail server and user ID.
- You can edit a selected e-mail account by pressing the Edit key.
- You can select an e-mail account to be used to send an e-mail using the OK key.
-
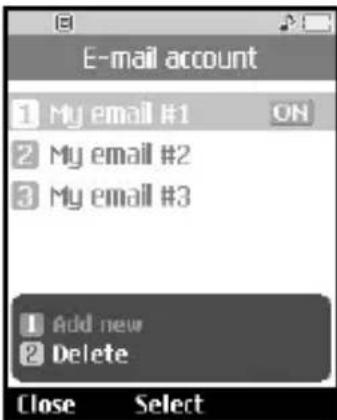
You can select the following functions using the Option key.
-
Add new : Create a new e-mail account.
- Delete : Deletes a selected e-mail account.
Creating a new e-mail account
- Select Add new from the E-mail account menu options.
- By moving the cursor to a desired item, you can edit the item to create an e-mail account.
- Move the cursor to the Title field and enter a title.
- Move the cursor to the User name field and enter the user name of the e-mail account.
- Move the cursor to the Password field and configure e-mail account password.
-
Move the cursor to the e-mail address field and configure the e-mail address for outgoing mail.
-
Move the cursor to the Reply e-mail address field and configure the e-mail address to reply to your e-mail.
-
Move the cursor to Maximum receive size and configure the maximum e-mail size. The permissible maximum receive size is no more than 500KB.
-
Move the cursor to Save to server and determine whether to leave a copy of messages on the incoming server or not. You can select Yes or No using the List key.
-
Move the cursor to the Outgoing mail server field and configure the outgoing e-mail server.
-
Move the cursor to the Outgoing server port field and configure the mail server port number. In general, the outgoing mail server port number (SMTP) is 25.
-
Move the cursor to the Incoming mail server field and configure the incoming e-mail server.
-
Move the cursor to the Incoming server port field and configure the mail server port number. In general, the incoming mail server port number (POP3) is 110.
-
Move the cursor to the Access point field to select an access point to connect to the Internet. You can select a configured access point using the List key.
-
Move the cursor to the SMTP authentication field and decide whether the outgoing mail server requires authentication. You can select Yes or No using the List key.
-
Move the cursor to the auto retrieve item and decide a auto receiving E-mail message as a fixed time slot, You can select on/off using the List key. If you want to utilize this function, there is selected auto retrieve in E-mail setting. But auto retrieve is not selected, you can select auto retrieve in Option.
-
When the e-mail account has been configured, press the Save key to create the e-mail account.
Editing an e-mail account
- Select a desired e-mail account from the e-mail account list and press the Edit key.
- You can edit desired fields by moving the cursor up and down.
- When configuration is complete, press the Save key to complete the e-mail account configuration.
5.9.4 VMS centre
Users can activate or deactivate VMSC.
6.1 Camera
6.1.1 Taking a Picture (Still picture)
- Select Camera from the Multimedia menu and press the numeric key (#1).
-
Environment Setting.
-
Select the [Option] key.
- Size : Select Size (resolution), and choose one from 640x480, 352x288, 176x144, wallpaper size and address book size. 352x288 means the width of picture is 352 pixels and the height is 288 pixels.
- Quality : You can select the desired quality of picture by selecting either super fine, fine or standard.
- Flash : Select either Always on (always use flash), When taking (only when taking a picture) or Always off (do not use flash).
- Zoom : You can select either 1:1 or 1:2. For pictures with 640x480 resolution only 1:1 zoom function is supported.
- Brightness : You can select a level from -50 to 50. The higher the level, the more brighter the screen.
- White balance : Using this function you can adjust the tone of the background picture according to the weather by selecting either Auto, Daylight, Cloudy, Shade or Fluorescent.
- Delay timer : Using this function you can delay the camera shutter time by selecting either Off, 3 seconds, 5 seconds or 10 seconds.
- Camera Effect : Using this menu you can select special camera effect by selecting either Normal, Mono or Sepia.
- Shutter sound : You can select the camera shutter sound by selecting either No sound, Sound1 or Sound2.
3. Taking a Picture
- Adjust the camera position so that object is in the center of the screen, and then press the Take key to take a picture of the object. A taken picture saved in the flash memory. To view existing taken pictures, select album soft menu. Then the Picture album is launched, and displays existing pictures as thumbnails. Move to a desired picture to view, and select [View: View] to view the picture. You can also send a selected picture to the other party through the MMS or E-mail service by pressing the Send key in the thumbnail list screen.
Summary)
[Take a Picture] → Press the Take key.
[Option] → Size → Select 352*288, 176*144 or Wallpaper size → Zoom → Select either 1x or 2x Zoom
[Album] → View pictures taken
6.1.2 Taking a picture when the folder is closed
- Press the Side 3 key, and select Camera.
- Press the Side 3 key quickly and the picture is saved immediately.
- Press and hold the Side 3 key to exit the camera function.
6.2 Picture album
You can view JPEG or GIF images with the Image Viewer. Basically images are displayed in thumbnail, and pictures taken are displayed by default image (camera). 9 thumbnail images are displayed on a screen at a time. You can use various functions by using the [Option] key.
Select [Go to camera] to move to camera mode and take a picture.
Select [Go to camera] to move to camera mode.
Select [Rename] to rename the selected image.
Select [Delete] to delete the selected image.
Select [Multiple delete] to delete all selected images at once.
Select [Delete all] to delete all images.
Select [Screen theme] to configure the selected image as an Idle mode, an incoming call, an outgoing call, a switch on, a switch off or a sub LCD.
Select [Slide show] to display the saved images automatically one by one.
Select [File information] to view information about the selected image such as size and date created.
Select [Memory info] to view information about the memory status.
Select a thumbnail in the Thumbnail list screen, and select [View] to view the image enlarged.
In the large image screen, you can use the [Go to camera], [Rename], [Delete], [Screen theme], [Zoom], [Edit image], [Slide show] and [File infomation] functions by using the [Option] key. These functions have been described above. Zoom function supports 1:2, 1:4 and 1:8 zoom-in functions. Using the Edit image function, you can rotate an image by 90°, 180° and 270°, and can change the tone of image to black & white or sepia or blue. In the large image screen, you can see the previous or next image by using the left or right keys. Select [Send] to attach the selected image to an MMS message or E-mail service.
Summary)
Move → Using Up and Down keys.
[Option] → You can select the Go to camera, Rename, Delete, Screen theme, Slide show, File Information and Memory info. functions
[View] → Displays the selected image enlarged. You can view the previous or next image by using the left or right keys.
[Send] → Attaches the selected image to an MMS message or E-mail service.
6.3 Camcorder
-
This function is selected when you select 2. Camcorder from the Multimedia album or when you press the left or right navigation keys in 1 Camera mode.
-
Environment Settings
- Press the [Option] key.
- Quality : You can select the desired quality of video by selecting either Super fine, Fine or Standard (just as you can in Camera)
- Flash : Select either Always on (always use flash), When recording (only when recording a picture) and Always off (do not use flash).
- Zoom : You can select either 1:1 or 1:2.
- Brightness : You can select a level from -50 to 50 (that the same as with Camera)
- Effect : Using this menu you can select a special camcorder effect by selecting either Normal, Mono or Sepia.
- Recording time : You can select recording times of 10 seconds, 30 seconds, or 1 minute.
- Recording a video
Put the camcorder where you want it and press the "Rec." key to start recording. Press the "Stop" key again to stop recording. The recorded video is saved in the gallery. To view the recorded video, select [List], select a desired video thumbnail from the video list and press "Play".
Summary)
[Record] → "Rec." button.
[List] → Play recorded video
6.4 Video player
You can view a video using the video player. Video files are displayed in the list as thumbnails. You can select a desired video by using the Up, Down, Left, and Right keys. Select a desired video and select Play to view the recorded video.
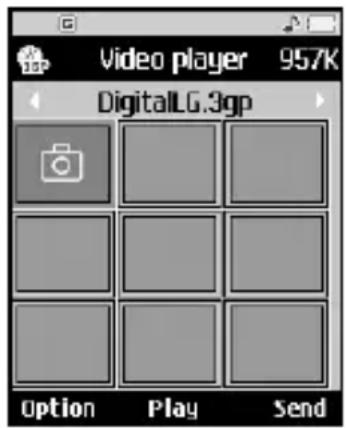
Select [Send] to attach the selected video to an MMS message and an E-mail service.
You can use various functions by using the [Option] key.
Select [Rename] to rename the selected video.
Select [Delete] to delete the selected video.
Select [Multiple delete] to delete all selected video files at once.
Select [Delete all] to delete all video files.
Select [Screen theme] to configure the selected video as an idle mode, a switch on, a switch off or a sub LCD.
Select [File information] to view information about the selected vedio file such as size and date created.
Select [Memory info] to view information about the memory status.
You can play the previous or next video file by using the [Option] key while playing a video file.
You can select Pause and Play at any time while playing a video.
Selecting [Video list] while playing a video moves to the Thumbnail list screen.
You can adjust the volume using the Up and Down keys while playing a video.
Summary)
Move → Using Up, Down, Left and Right keys.
[Option] → You can select either Rename, Delete, Multiple delete, Delete all, Screen theme, all or File Information, Memory info. functions.
[Play] → Plays the video.
[Send] → Attaches the selected video file to an MMS message or E-mail service.
6.5 Audio player
You can listen to recorded audio files as well as MP3 files using Audio player.
You can play existing default audio files by selecting [Default sounds]. Select [My sounds] to view and play all saved audio files. Select [Voice recorder] to record voice. Selecting [Play lists] enables you to play desired audio files one after the other.
Selecting [Play lists] displays audio files in a list. If you select a desired file, the file is played immediately.
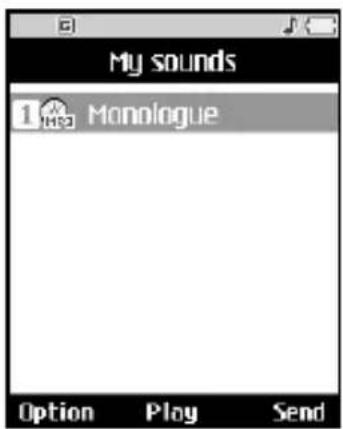
Multimedia
You can use various functions by using the [Option] key while playing a file.
Select [Mute] to turn off the sound. The selected audio file is played but no sound will be heard.
The [Repeat] function provides 3 options: None, Current file and All files so that you can repeat the current file or all files.
Select [Delete] to delete the selected file.
Select [Next file] to play the next file.
Select [Previous file] to play the previous file.
Select [View list] to display the file list screen.
Select [File information] to view information about the selected image.
Select [Mute] or [Sound] to turn the sound on and off.
You can adjust the volume by using the Up and Down keys.
You can use various functions by selecting [Option] in the list screen.
Select [Sound theme] to configure the audio file as a ring tone, switch on, or switch off sound.
Select [Rename] to rename the selected audio file.
Select [Delete] to delete the selected file.
Select [Sort] to sort the selected audio file by name, by data or by extension.
Select [File information] to view information about the selected audio file such as size and date created.
Summary)
Move → Using Up and Down keys.
[Option] → You can select Delete, Sound theme, Sort, Rename and File Info functions.
7. Profile
You can select ring tone or vibration for an incoming call and configure the sound and volume of the ring tone, button sound, folder sound, sound effect, and power on and off sound according to a profile. The profiles provided include [Vibrate only], [Silent], [General], [Outdoor], [Headset], [Car], [User define1], and [User define2]. Select a profile, and press the OK button to activate the profile. The [General], [Silent], [Vibrate only], [Headset], and [Car] profiles do not have an Option menu. Move the cursor to the corresponding profile. Then menus available are displayed on the softbar below the screen. Select the View or Edit menu for each profile to view the configuration of the item or to change the configuration.
Alert by
This option determines the incoming call notification mode. You can select from [Ring], [Vibration], [Ring & Vibrate], [Ring after vibration], [Ring once], and [Beep once] mode.
Voice ring tone Line 1/2
This option determines the Voice ring tone for incoming call notification.
VT ringtone
This option determines the Video ringtone for incoming call notification.
Ring tone volume
This option determines the ring tone volume for incoming call notification.
Message alert
This option determines the message alert that is sounded when a message has been arrived. You can select one of [No sound], [Once], [Every 1 min], [Every 2 min], [Every 5 min], and [Every 10 min] mode.
Message tone
This option determines the message tone that is sounded when a new message has been arrived.
Warning alert
This option determines the warning alert sound that is sounded for: [Feedback popup], [No network], [No battery], [When Delete all execute], [Factory default press], [Memory full], [Warning popup alert]. The volume of warning alert is determined by the volume of the ring tone.
Key tone effect
This option determines the key tone that is sounded when a key is pressed.
Key tone volume
This option determines the key tone volume for key pressing.
Flip tone effect
This option determines the flip tone effect that is sounded when the flip is opened.
Switch on effect
This option determines the switch on effect that is sounded when the mobile phone is turned on.
Switch off effect
This option determines the switch off effect that is sounded when the mobile phone is turned off.
8. Address Book
This is a addressbook function to record and manage contact addresses. Using the Addressbook Management menu, you can register new contact addresses, or can search for desired addresses by name, phone number, or groups.
8.1 Add new
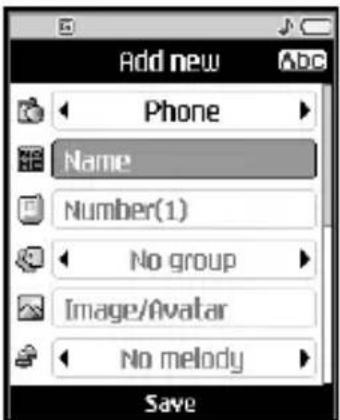
You can register a new contact address. You can input the name, up to 5 phone numbers, up to 2 e-mail addresses, assign it to up to 3 groups, include memo, company / party, position / occupation, home address, office address, home page URL, ring tone, and avatar or image (photograph) in the contact address information. You can input and manage up to 500 or 1000 contact addresses depending on the memory usage.
8.2 Search
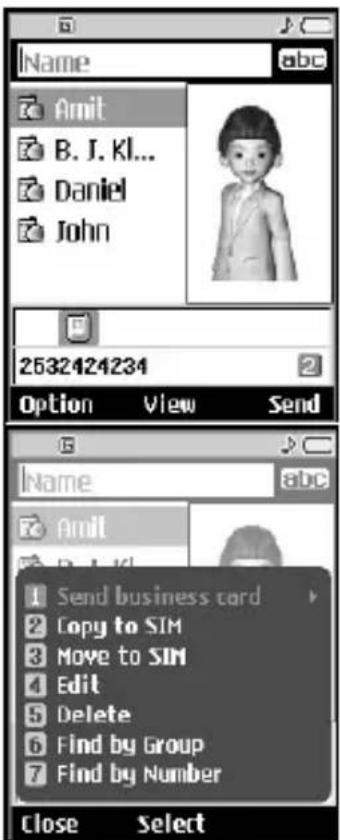
Performs the contact address search function. The search operation is performed based on a name as a default. The current search method and results found are displayed in the Search window. On the right side of the screen, an image or avatar registered to the selected contact address appears. You can make a phone call or send a message to the selected phone number. An address search can be performed based on the phone number, the e-mail address or group information.
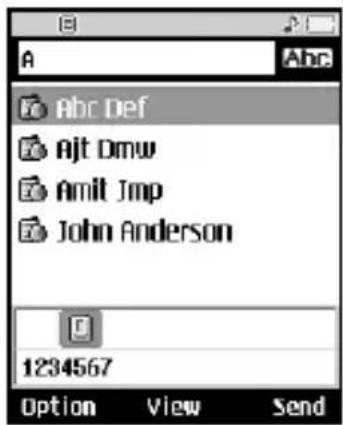
When you use the phonebook name search, enter a letter. Then the items starting with your specified letter are displayed.
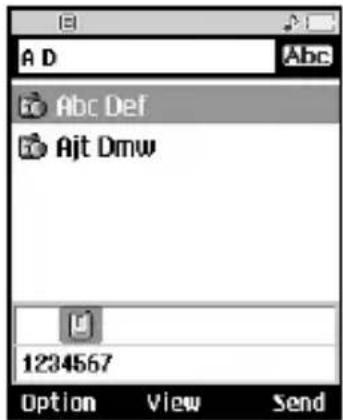
If you enter the second letter by separating it from the first one with a space, the items whose the first name word starts with the first one and the second name word starts with the second one are displayed.
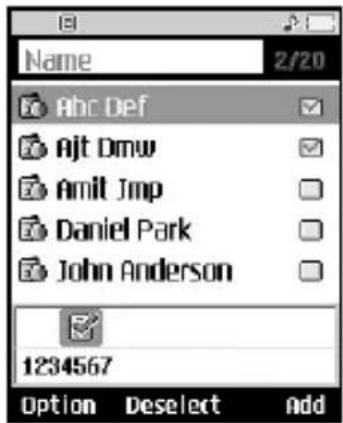
If you select multiple items in the phonebook search for the SMS, MMS, or Email, the selected check box remains even after you change the search method.
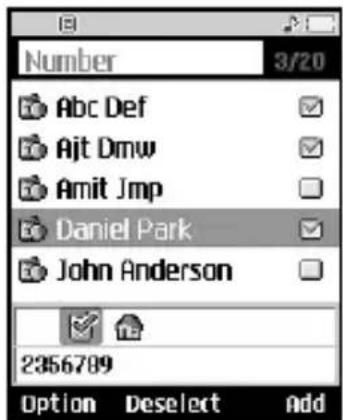
For example, if you have selected 2 items in the name search, and you enter the number search or group search, you can select additional items as well as the 2 already selected items.
8.3 Caller groups
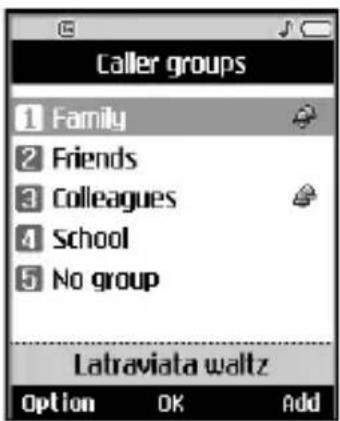
Using this menu you can manage group information. There are 4 default groups:
Friend, Family, Company and School.
You can add up to 30 groups. You can also edit and delete groups. You can assign an image and a ring tone for each group.
When a bell for a number is not specified, a call from the number sounds the group ring tone assigned to the number for the group.
8.4 Speed dials
![Speed dials 1 Voice message 2 Amit 3 [Empty] 4 [Empty] 5 [Empty] 6 Daniel 2532424234 Option Change](/content/2026/05/1050210/images/fa3660afbf5173f3c84b50e7b0a42f456816467d2a28e9c8251ab7b0923ef43f.jpg)
Using this menu you can manage speed dials. Speed dials are configured between 2\~9. You can register speed dials for any number of 5 numbers for a specific contact address, and a contact address may have multiple speed dials.
8.5 Clear address book
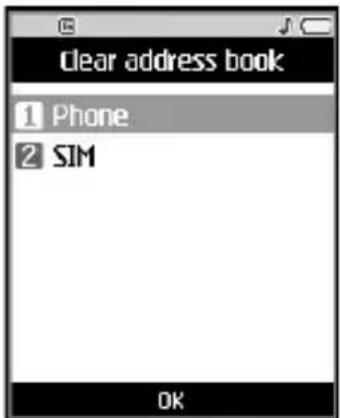
Clears contact address information. You can delete a contact address saved in the mobile phone memory as well as in the USIM (SIM) card.
8.6 Copy all
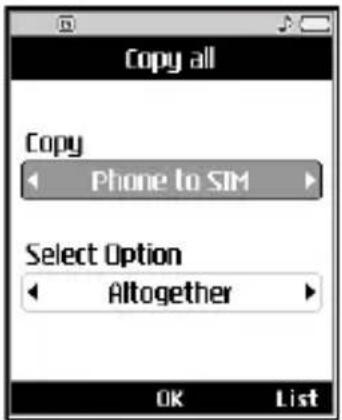
You can copy contact address information from the phone memory to the USIM (SIM) or from USIM (SIM) to the phone memory. You can copy just selected items or all of them.
8.7 Move all
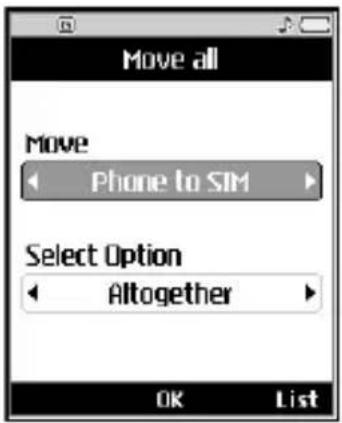
You can move contact address information from the phone memory to the USIM (SIM) or from the USIM (SIM) to the phone memory. You can move just selected items or all of them.
8.8 Own number
![Own number 1 [Empty] 2 Test Name 3 [Empty] Edit](/content/2026/05/1050210/images/e4ded769e28e0c0905f8138b0403452c384cd1e5af8e1f71272ce893dd9eae3f.jpg)
You can save up to 2 own numbers being used in the USIM card, and send the number to another person through Card.
8.9 Settings
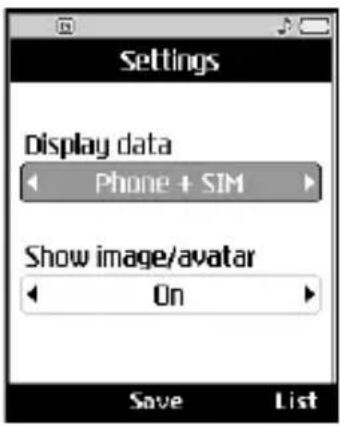
Determines where phone book data is stored. You can select mobile phone memory, USIM (SIM) card, or both of them. Phone + SIM is the default setting. You can change the setting by using the left and right keys. In addition, you can decide whether to show the image and the avatar on the Search screen.
9.1 Time & Date
Although the current time is automatically configured when the phone is registered to the network, users can configure time and date directly using 'Time & Date' menu. The time configured by user is valid only while the phone is turned on.
9.1.1 Time
- Select the 'Time' item from the Time & Date list, and then press [OK] [Select].
- Move to your desired field, 'Time', 'Minute', or 'AM'/'PM' field using [Left key] and [Right key].
- Input 'Time', and 'Minutes' using the number keys.
- Press the [OK] or [Confirm] key to set the time with the specified value.
9.1.2 Date
- Select 'Date' item from the Time & Date list, and then press [OK] [Select].
- Select date format using Left and Right keys or by pressing the [Setup] key.
- Input 'Year', 'Month', and 'Day' using the number keys.
- Press [OK] [Confirm] to set the date with the specified value.
9.1.3 Auto Update Data/Time
When Auto Update is configured to "On", the time and date are automatically updated according to the current time zone. If Confirm first is selected, time and date update are confirmed before the automatic update.
9.1.4 Daylight Saving
This function enables Summer time. Configuring “Daylight saving” to “On” immediately applies summer time. If Define summer is selected, summer time is applied only to the configured term.
9.2 Display
In this menu, you can configure screen display options including LCD settings and theme.
9.2.1 Backlight
Users can configure backlight setting to save battery charges. Basically [Standard], [Saving], [User define] are provided. In addition, a custom function is provided that allows the user to specify the backlight setting.
9.2.1.1 Standard
Standard configures backlight settings with the following values.
| Item Default Value | |
| Main LCD duration 10 seconds | |
| Main LCD level Bright | |
| Sub LCD duration 5 seconds | |
| Sub LCD level Bright | |
| Keypad duration 10 seconds |
9.2.1.2 Saving
Saving configures backlight settings with the following values.
| Item Default Value | |
| Main LCD duration 5 seconds | |
| Main LCD level Medium | |
| Sub LCD duration 5 seconds | |
| Sub LCD level Medium | |
| Keypad duration 5 seconds |
9.2.1.3 User define
User settings value as one chooses time and brightness.
9.2.2 Contrast
9.2.2.1 Main LCD
To adjust the brightness of the internal LCD, use the Left and Right keys (direction key). -50 is the dimmest and 50 is the brightest.
9.2.2.2 Sub LCD
To adjust the brightness of the external LCD, use the Navigation key. -50 is the dimmest and 50 is the brightest.
9.2.3 Dialing Font
When number keys are pressed for call connection in idle state, the size and color of displayed number can be configured.
9.2.4 Idle Clock Font
You can configure the font size and color of the clock displayed on the internal LCD idle screen. To select [Size] and [Color], use the Up and Down keys. For the [Size] options, you can select either [Small] or [Large]. To select one of the displayed colors for the [Color] option, use the Left and Right keys.
9.2.5 Screen Theme
You can configure the background by themes.
9.2.5.1 Idle mode
You can select an internal LCD background to display in idle mode.
9.2.5.2 Sub LCD
You can select an external LCD background to display in idle mode.
9.2.5.3 Incoming Call
You can select an external LCD background to display when an incoming call arrives. The configuration is applied to both voice and video calls.
9.2.5.4 Outgoing Call
You can select an external LCD background to display when dialling a call. The configuration is applied to both voice and video calls.
9.2.5.5 Switch on
You can select an internal LCD background to display while.
9.2.5.6 Switch Off
You can select an internal LCD background to display when turning the phone off.
9.3 Call
9.3.1 Video telephony
9.3.1.1 Block my picture
Substitute image refers to a configured video that is transmitted to the other party instead of your live self-video during a video call when you do not wish to be revealed. Setting this to On will block the transmission of your self-video and send the image that has already been converted for the substitute image. Setting this to Off will transmit your self-video on live.
9.3.1.2 Change substitute image
Using this menu, you can select a substitute image or a video to be transmitted instead of your live self-video. Pressing Change substitute image will display available images and video clips in thumbnail view. Select a desired image or video and press the OK key to convert the file into the proper substitute image format. The file size for conversion is limited to 200k. If an incoming voice or video call interrupts at this time, you will be prompted with a popup menu whether to accept or reject the call. If you select No, which rejects the incoming call, the conversion process is continued. If you select Yes to call, which cancels the conversion process, then you will be directly connected to the call.
9.3.2 Call history
You can view missed, received, dialled and entire call records. Up to 100 call records can be saved. Each call record menu provides the following functions.
- You can make a voice or video call to the number in the call record.
- You can save the number in the call record in the addressbook.
- You can send a message to the number in the call record.
- You can view detailed information of the call records such as the date, time and call time.
- You can clear call records.
9.3.2.1 Missed calls
Allows you to view missed call records, make a call, send a message, and save the number in the addressbook.
9.3.2.2 Received calls
Allows you to view received call records, make a call, send a message, and save the number in the addressbook.
9.3.2.3 Dialed calls
Allows you to view dialled call records, make a call, send a message, and save the number in the addressbook.
9.3.2.4 All calls
Allows you to view all of the missed, received, and dialled call records. You can make a call, or send a message to the number you have selected from the records. You can also save the number in the addressbook.
9.3.3 Call divert
Call divert menus for video, voice, data and fax calls are provided. However, available menus are determined by the SIM supporting CPHS.
The menu consists of Video, Voice, All fax calls and All data calls. The Video menu provides menus to divert video calls and the Voice menu provides menus to divert voice calls. The Video and Voice menus have the following submenus.
If you select Video, the All video calls, If busy, If no reply and If out of reach (If unavailable) menu list appears.
If you select Voice, the All voice calls, If busy, If no reply and If out of reach (If unavailable) menu list appears.
9.3.3.1 Video
9.3.3.1.1 All video calls
- When the off menu is selected – Deletes Call Divert Number registered to the network. While waiting for the result from the network, Requesting message and animation appears. When the network answers, the result of the operation is displayed.
- When the To voicemail centre is selected, it activates or deactivates a Voicemail centre number. To register the VMS number, select Messages → Settings → Voice mail centre from the menu. If you select this menu when there is no registered number, the “VMS not activated” message appears. Selecting this menu when there is a registered number displays Requesting message and animation. When the network answers, the result of the operation is displayed.
- When To other number is selected – A dialogue window appears allowing you to enter a phone number to divert to. Input a phone number to divert calls to, and press OK button. While waiting the result from the network, Requesting message and animation appears. When the network answers, the result of the operation is displayed.
-
When Input dial number (DN) is selected – A menu appears, a user selects To other number, and inputs a number. Divert registration is performed with the selected number. Select the number, and press the OK button. While waiting for the result from the network, a Requesting message and animation appears. When the network answers, the result of the operation is displayed.
-
Options menu – After activating the All video calls menu, selecting the Options menu at the bottom of the menus displays the Cancel all and View status menus. The View status menu shows the settings on the network. If you select this menu, Requesting.. message and animation appear. Then the network settings are displayed when the information is received from the network. Selecting Status in the right soft menu gives the same result. If you select the Cancel all menu, the call divert numbers registered in the network are deleted after user confirmation. Selecting the Cancel all menu will display the operation result after showing the Requesting message and animation.
9.3.3.1.2 If busy
- When the off menu is selected – It operates the same to All voice calls menu.
- When To voice mail centre is selected – It operates the same to All voice calls menu.
- To other number is selected – It operates the same to All voice calls menu.
- When input dial number (DN) is selected – It operates the same to All voice calls menu.
- When Options menu is selected – It activates and operates If busy menu. It operates the same to All voice calls menu.
9.3.3.1.3 If no reply
- When the off menu is selected – It operates the same as All voice calls menu.
- When To voice mail centre is selected – It operates the same as to All voice calls menu.
- When To other number is selected – It operates the same as to All voice calls menu.
- When input dial number (DN) is selected – It operates the same to All voice calls menu.
- When Options menu is selected – Activates and operates If no reply menu. It operates the same to All voice calls menu except that users can configure delay time in the Set delay menu in the menu list.
9.3.3.1.4 If out of reach
- When off menu is selected – It operates the same to All voice calls menu.
- When To voice mail centre is selected – It operates the same to All voice calls menu.
- When To other number is selected – It operates the same to All voice calls menu.
- When input dial number (DN) is selected – It operates the same to All voice calls menu.
- When Options menu is selected – Activates and operates If out of reach menu. It operates the same to All voice calls menu.
9.3.3.2 Voice
9.3.3.2.1 All voice calls
- When the off menu is selected – Deletes Call Divert Number registered to the network. While waiting for the result from the network, Requesting message and animation appears. When the network answers, the result of the operation is displayed.
- When the To voicemail centre is selected, it activates or deactivates a Voicemail centre number. To register the VMS number, select Messages → Settings → Voice mail centre from the menu. If you select this menu when there is no registerednumber, the “VMS not activated” message appears. Selecting this menu when there is a registered number displays Requesting message and animation. When the network answers, the result of the operation is displayed.
- When To other number is selected – A dialogue window appears allowing you to enter a phone number to divert to. Input a phone number to divert calls to, and press OK button. While waiting the result from the network, Requesting message and animation appears. When the network answers, the result of the operation is displayed.
- When Input dial number (DN) is selected – A menu appears, a user selects To other number, and inputs a number. Divert registration is performed with the selected number. Select the number, and press the OK button. While waiting for the result from the network, a Requesting message and animation appears. When the network answers, the result of the operation is displayed.
Settings
- After activating All video calls menu, selecting Options menu on the bottom of the menus displays Cancel all and View status menus. View status menu shows the settings on the network. If you select this menu, Requesting.. message and animation appears. Then the network settings are displayed when the information is received from the network. Selecting the Status of the right soft menu shows the same result. If you select Cancel all menu, the call divert numbers registered in the network are deleted after user confirmation. Selecting Cancel all menu will display the operation result after showing Requesting message and animation.
9.3.3.2.2 If busy
- When the off menu is selected – It operates the same to All voice calls menu.
- When To voice mail centre is selected – It operates the same to All voice calls menu.
- To other number is selected – It operates the same to All voice calls menu.
- When input dial number (DN) is selected – It operates the same to All voice calls menu.
- When Options menu is selected – It activates and operates If busy menu. It operates the same to All voice calls menu.
9.3.3.2.3 If no reply
- When the off menu is selected – It operates the same as All voice calls menu.
- When To voice mail centre is selected – It operates the same as to All voice calls menu.
- When To other number is selected – It operates the same as to All voice calls menu.
- When input dial number (DN) is selected – It operates the same to All voice calls menu.
- When Options menu is selected – Activates and operates If no reply menu. It operates the same to All voice calls menu except that users can configure delay time in the Set delay menu in the menu list.
9.3.3.2.4 If out of reach
- When off menu is selected – It operates the same to All voice calls menu.
- When To voice mail centre is selected – It operates the same to All voice calls menu.
- When To other number is selected – It operates the same to All voice calls menu.
- When input dial number (DN) is selected – It operates the same to All voice calls menu.
- When Options menu is selected – Activates and operates If out of reach menu. It operates the same to All voice calls menu.
9.3.3.3 All fax calls
- When off menu is selected – It operates the same to All voice calls menu.
- When To other number is selected – It operates the same to All voice calls menu.
- When input dial number (DN) is selected – It operates the same to All voice calls menu.
- When Options menu is selected – It activates and operates All fax calls menu. It operates the same to All voice calls menu.
9.3.3.4 All data calls
- When off menu is selected – It operates the same to All voice calls menu.
- When To other number is selected – It operates the same to All voice calls menu.
- When input dial number (DN) is selected – It operates the same to All voice calls menu.
- When Options menu is selected – It activates and operates All data calls menu. It operates the same to All voice calls menu.
9.3.4 Call duration
You can view call time by types. Press R-SK Key for initialisation. Initialisation will require your PIN number.
9.3.4.1 Last Call
Shows the latest call time in units of hour/minute/second.
9.3.4.2 Received calls Shows incoming call time.
9.3.4.2 Received calls
Shows incoming call time.
9.3.4.3 Dialed calls
Shows outgoing call time.
9.3.4.4 All calls
Shows total call time.
9.3.5 Call costs
- This function displays your call cost of the last and entire calls.
- To initialise, press 'Clear' button, and input PIN code.
- Select Cost Setting to configure call cost settings and call cost limit.
- You can select either Unit or Currency in call cost settings. According to your setting, call cost is displayed when a call is terminated.
- In the call cost limit configuration, select On to configure the cost limit. When cost limit is configured, and call cost reaches the limit, making a call will not be allowed.
9.3.6 Fixed dial number
- To enter the menu allowing FDN configuration, PIN authentication is required.
- The first menu displays the current configured number. Enter configuration menu through Option menu.
- For configuration, input name and phone number. The configuration information is saved in SIM.
- The information saved in SIM is used when FDN restricts outgoing calls.
9.3.7 Call barring
The Call barring menu consists of Outgoing calls, International calls, International except home country, Incoming calls, and Incoming calls when abroad submenus. However, the menus available depend on whether the SIM supports CPHS. The Outgoing calls menu bars dialing outgoing calls, the International calls menu bars dialing outgoing international calls, the International except home country menu bars dialing outgoing international calls except for the Home PLMN country, Incoming calls rejects incoming calls, and the Incoming calls when abroad menu rejects incoming calls in roaming.
Outgoing calls
- When OK button is selected – Receives Barring password from user, and activates barring service on the network. Requesting message and animation appears. When the network answers, the result of the operation is displayed.
- When Options menu is selected – It activates Outgoing calls menu. Select options menu from the soft menus on the lowest menu. Then, Activate, Deactivate, Deactivate all, View status, and Exit menus appear. Select Activate menu to receive Barring Password from user and activates the barring service on the network. Deactivate menu deactivates barring service after Barring Password input of user. Deactivate all menu deactivates all barring service configured in the network after Barring Password input of user. View status menu enables users to view the current network configuration. Selecting View status menu displays Requesting message with animation and the result of the operation when the network answers.
International calls
- When OK button is selected – It operates the same to Outgoing calls menu.
- When Options menu is selected – It activates and operates International calls menu. It operates the same to Outgoing calls menu.
International except home country
- When OK button is selected – It operates the same to Outgoing calls menu.
- When Options menu is selected – It activates and operates International except home country menu. It operates the same to Outgoing calls menu.
Incoming calls
- OK button select – It operates the same to Outgoing calls menu.
- When Options menu is selected – It activates and operates Incoming calls menu. It operates the same to Outgoing calls menu.
Incoming calls when abroad
- OK button select – It operates the same to Outgoing calls menu.
- When Options menu is selected – It activates and operates Incoming calls when abroad menu. It operates the same to Outgoing calls menu.
9.3.8 Settings
9.3.8.1 Call waiting
- Activate : Selecting this item, displays requesting message and animation. When the network answers, the result of the operation is displayed.
- Deactivate select : Selecting this item displays requesting message and animation. When the network answers, the result of the operation is displayed.
- View status select : Selecting this item displays requesting message and animation. When the network answers, the result of the operation is displayed.
9.3.8.2 Send my number
- Set by network : Configures with the default settings determined by the service provider.
- On : Configures to send my phone number when making an outgoing call.
- Off : Configures not to send my phone number when making an outgoing call.
9.3.8.3 Call reject
Automatic menu : Users can configure to reject all or a specific number calls by selecting Deactivate, Reject on list, or Reject all calls menu. Selecting Deactivate disables Automatic call reject. Selecting Reject on list rejects only reject target numbers saved in Phone book. Selecting Reject all calls rejects all arriving calls unconditionally by silent or disconnecting. When you configuring Reject on list mode, you can add numberto reject by using 'List' menu. When you adding a number to the list, you can select either 'Silent', or 'Disconnect'. You can input number directly or by searching Addressbook using 'Search' key.
Manual menu : When On is selected, press and hold the side key for a while to reject a call by silence, and press and hold the side key for a while once again to reject a call by disconnecting. When Off is selected, side key does not work for call reject operation.
9.3.8.4 Auto answer
-
When On is selected: an incoming call is automatically answered when the ring tone sounds three times in handset status.
-
When Off is selected: an incoming call would not be answered in handset status.
9.3.8.5 Auto redial
Allows you to set the auto redial function when a call attempt has failed.
9.3.8.6 Answer mode
Allows you to set the answering method. You can choose between opening the folder, pressing the Send key, and pressing any key.
9.3.8.7 Minute reminder
Determines whether to sound a 1 minute tone every 1 minute when you are on the phone.
9.4 Network
9.4.1 Network selection
- If you select Network selection you can select either Automatic or Manual.
- If you select Automatic, connection continues according to the Automatic network selection procedures.
- If you configure the Network mode to GSM-preferred, UMTS-preferred or Automatic, all the currently available PLMN lists are found, and you can select one item from the list for registration. If you configure the Network mode to GSM only, the currently available UMTS PLMN list is found, and you can select one item from the list for registration.
If you configure the Network mode to UMTS only, the currently available GSM PLMN list is found, and you can select one item from the list for registration.
9.4.2 Network mode
- If you configure the Network mode to GSM-preferred, the phone searches for available GSM PLMN first and then searches for UMTS PLMN when it is turned on. That is, the phone is registered to the GSM network first and then registered to UMTS when it is turned on.
- If you configure the Network mode to UMTS-preferred, the phone searches for available UMTS PLMN first and then searches for GSM PLMN. That is, the phone is registered to the UMTS network first and then registered to GSM when it is turned on.
-
If you configure the Network mode to GSM only, the phone only searches for available GSM PLMN when it is turned on. If the phone is outside of the GSM service area, the phone enters the No service status.
-
If you configure the Network mode to UMTS only, the phone only searches for available UMTS PLMN when it is turned on. If the phone is outside of the UMTS service area, the phone enters No service status.
-
If you configure the Network mode to Automatic, the phone searches for available UMTS and GSM PLMN when it is turned on.
9.4.3 Preferred lists
- Select Preferred lists to display the preferred list saved in the current SIM card.
-
You can edit and save a preferred list in the SIM card by selecting the menu when the preferred list is displayed.
-
New : Adds an item selected from the popup list to the preferred list.
- Delete : Deletes the value of the preferred list item.
- Move up : Moves the preferred list item up.
- Move down : Moves the preferred list item down.
9.4.3.1
Select Save to save the preferred list values in SIM.
9.5 Connection
Access points
This menu shows the access point list. You can register, delete and edit by using the Option Menu. However, you cannot delete or edit default configurations provided by TIM (see section 4).
You can edit new items you added except default items -WAP TIM /MMS TIM/i.Box - by selecting Option > Edit.
| Connection title Access Point profile name | |
| Bearer Choose the | bearer from the list.(Default is “Automatic”) |
| Authentication Choose the authentication from the list.(Default is “No auth”) | |
| Username Information provided by Service Provider. | |
| Password Information provided by Service Provider. | |
| APN APN name to access network.Information provided by service provider. | |
| QOS Choose the QOS from the list.(Default is “Interactive”) | |
| Dial-Up Number Required for connecting to CSD network.Information provided by Service Provider | |
| Baud rate Choose the value from select list.(Default is “9600”) | |
| Call type Choose Call type from the list.(Default is “ISDN”) | |
- Press "Save" key to save any configuration changes.
- To configure the new configuration as the access point for the current Internet configuration, follow the procedures in Section 4.
9.6 Security
You can activate a PIN code. When it is activated, a window asking you to enter the PIN code appears when you turn on the phone so as to prevent unauthorized use of the phone.
9.6.1 PIN code request
You can activate a PIN (Personal Identification Numeric). You can check the current status of configuration from the status bar.
| Item | Description |
| Enable PIN Request You have to input the PIN code each time the mobile phone is turned on. | |
| Disable PIN Request You do not have to input the PIN code when the mobile phone is turned on. | |
PIN request and release procedures
- Select 'PIN request' item from the list, and press [Select]. Then a window allowing you to select 'Enable' or 'Disable' appears.
- Select 'Enable'/'Disable' from the list, press [Select], and input the current PIN code to set the PIN request. If 'PIN request' is already enabled/disabled, an "Already enabled"/ "Already disabled" message will be displayed.
- 3 incorrect PIN code entries in the PIN code input window would invalidate the PIN code. In this case, you have to input the PUK (PIN Unblock Key) code to configure the PIN code again.
- The maximum allowed numeric of attempts of PUK input is 10 times. 10 occasions of incorrect PUK entries would limit the mobile phone use.
Press the Back key in the PIN code input window to return to the previous step.
9.6.2 Change codes
You can change PIN, PIN2, the mobile phone password and the call barring password.
9.6.2.1 PIN
PIN is the abbreviation of Personal Identification Numeric, and is used to restrict the use of an unauthenticated user.
PIN Password Change Procedure
- Select 'PIN' from the 'Password settings' list and then press [Select].
- Input the current PIN, and press [Select].
- Input the new PIN, and press [Select].
- Input the new PIN once again, and press [Select].
- If the PIN is different from that of step 3, the procedure is restarted from step 3.
-
When the PIN is properly changed, a “Successfully Changed” message as well as new PIN code appears. With an incorrect PIN input in step 2, the procedure is restarted from step 2, and the remaining allowed numeric of input attempts is decreased by 1.
-
Press the Back key in the PIN code input window to return to the previous step.
* 3 incorrect PIN code entries in the PIN code input window would invalidate the PIN code. In this case, you have to input the PUK (PIN Unblock Key) code to configure the PIN code again. The maximum allowed numeric of attempts of PUK input is 10 times. 10 occasions of incorrect PUK entries would limit the mobile phone use.
9.6.2.2 PIN 2
PIN2 is the abbreviation of Personal Identification Numeric 2, and is used to restrict the use of unauthenticated users like PIN. PIN2 numeric change procedure is the same to that of PIN. 3 incorrect PIN2 code entries would invalidate the PIN2 code. In this case, you have to input PUK2 to use the PIN2 code again. The maximum allowed numeric of attempts of PUK2 input is 10 times, like PUK1. 10 incorrect PUK2 entries would invalidate the PUK2.
9.6.2.3 Security code
The security code is used to change the mobile phone password. The maximum allowed numeric of attempts of security code input is not limited like PIN and PIN2.
9.6.2.4 Barring password
See Incoming call of Call Barring section.
9.6.3 Phone Lock
You can lock your mobile phone to prevent it being used by other people. The following 4 lock functions are provided.
- Power On : Whenever the mobile phone is turned on.
- If SIM Changed : When the mobile phone's SIM card has been changed.
- Immediate : Locks the phone immediately.
- None : Cancels lock function.
9.6.4 Certificates
If stored, a list of root/ca certificates required for WTLS/TLS can be found here. Certificates can be viewed or deleted from the list.
9.6.5 Session clear
Secure (WTLS/ TLS) session data can be cleared using this option. Session data should be cleared to establish a new secure session.
9.7 Memory Status
This function shows the usage of the memory of the mobile phone that can be used to save user data. User data is saved in a FLASH memory, a type of non-volatile memory, keeping saved data permanently unless the data are deleted by user.
9.7.1 Common memory
This function shows the status of the user memory of the mobile phone. Since this function scans the overall file system for statistics, a few seconds are required.
9.7.2 Reserved memory
Displays the amount of memory the phone multimedia is using. Since the entire file system is searched for statistics, this will take a few seconds.
9.7.3 SIM memory
This function shows the status of the SIM card user memory. This function requires a few seconds to display the memory usage statistics.
9.8 Language
This function changes the language used in the phone.
Automatic
Italiano
English
Français
Deutsch
Nederlands
Español
Português
9.9 Phone info.
This function shows the version of the mobile phone software.
9.10 Reset Settings
This function initialises user-configured values. Reset sets all settings to factory defaults
Additional text in the manual for using the Internet kit in Windows 98.
-
To disconnect the Internet kit after use in Windows 98, use the Internet Kit program. Never disconnect on the terminal.
-
The Internet kit connection message may appear up to 10 seconds after the connection is established through the mobile terminal (MT) depending on the programs running on Windows 98.
(For example)
When the connection message appears on a laptop the connection has been established. The connection message may be delayed on a desktop PC depending on the number of programs running and the number of drivers installed.
Declaration of Conformity
LG Electronics
This model complies with the essential requirements of Article 3 of the R&TTE 1999/5/EC Directive, if used for its intended use.
- Health (Article 3.1.a of the R&TTE Directive)
-
Safety (Article 3.1.a of the R&TTE Directive)
-
Electromagnetic compatibility (Article 3.1.b of the R&TTE Directive)
- Efficient use of the radio frequency spectrum (Article 3.2 of the R&T
I hereby declare under our sole responsibility that the product mentioned above to which this declaration relates complies with the above
mentioned articles of the directive.
If available, write the contact person(s)
CE 0889
Mr. Ji Jong, Jeon
LG Electronics Inc. GSM Division
Emerald BD, 1042 Hogye-Dong, Dongan-Gu
Anyang-city, Kyuongki-Do
431-080, Korea
Mr. Jin Seog, Kim
LG Amsterdam Branch Office
Capronilaan 6, 1119 NR Schiphol-rijk, The Netherlands (Tel.) +31-20-655 7774
Mr. Jin Seog, Kim LG Amsterdam Br Capronilaan 6, 111 The Netherlands (Tel.) +31-20-655 7
Memo
Memo
- U8150 Guida utente
- Italiano
- U8150 User Guide
- English
- Disposal of your old appliance
- Table of Contents
- U8150
- Profile 95
- Address Book 97
- Settings ...... 102
- Product care and maintenance
- Efficient phone operation
- Electronics devices
- Road safety
- Blasting area
- Potentially explosive atmospheres
- In aircraft
- Children
- Emergency calls
- Battery information and care
- Installing the USIM card
- [Notice]
- Introduction
- No Sim Idle Screen
- Screen Structure
- Emergency Call Function
- Idle Screen
- Icon Description
- Key Functions
- ^
- Numbering Screen
- Soft Key
- Phone Lock Screen
- Unlock Function
- Apps & Games
- Organiser
- Extras
- Internet
- Main Menu
- Messaging
- Address Book
- Multimedia
- Settings
- Profile
- Apps & Games
- Applications
- Delete
- File information
- Set authorisation
- APN setting
- Memory info.
- Download
- Settings
- Priority settings
- Download site settings
- Access point setting
- Calendar
- Schedule Inquiry and Search
- Reference by Months
- Reference by Days
- Detailed Reference
- Search Schedule
- Delete Schedule
- Delete elapsed schedules
- Multiple
- Delete all
- Set Up and Release Holiday
- Schedule Notification
- Todo
- Add
- Detailed View and Edit
- Set Job Status
- Memo
- Add Memo
- Send memo to
- Move to secret memo
- Edit and delete Memo
- View information
- Memory info.
- Secret memo
- Send Memo
- Adding a Memo
- Detailed View of Memo
- Editing a Memo
- Deleting a Memo
- Extras
- Shortcuts
- Alarm clock
- Calculator
- World Time
- Unit Converter
- Currency
- Length
- Surface ("Area" would be a appropriate word here)
- Mass
- Volume
- Velocity
- Temperature
- Timer
- Stopwatch
- Date finder
- Date counter
- Connectivity
- How to Connect to internet (Settings)
- Setup (Default)
- Additional Setup
- Access Point Setup
- Browser Menu
- Internet
- Bookmarks
- Go to URL
- Saved pages
- Clear cache
- Servizi TIM
- Settings
- Write message
- TIM Click
- Print (Stampa)
- Postcard (Cartolina)
- SMS
- MMS
- Sending an MMS
- MMS
- Creating an MMS slide
- MMS send menu
- Send
- Save to drafts
- Preview
- Viewing MMS messages
- To preview MMS message
- Viewing MMS messages in the Inbox and Outbox
- [Inbox / view detailed screen menus]
- [Outbox / view detailed screen menus]
- Create e-mail
- Messaging
- Send settings
- Priority
- Read reply
- Send e-mail menu
- Send & Save
- Send
- Save to drafts
- Preview
- Inbox
- [For a normal message]
- [For WAP push message]
- Email inbox (Mail box)
- Viewing e-mail Message List
- Viewing an e-mail message
- Trash
- Outbox
- [For Normal Message]
- [For sending a failed message]
- Draftbox
- Templates
- Emoticon
- Service commander
- Settings
- SMS
- Message Type
- Validity period
- Reply using same service centre
- Delivery report
- SMS centre
- MMS Option Setting
- Delivery report
- Read reply
- Auto retrieve
- Validity period
- Priority
- MMS Size
- MMS centre
- E-mail Option Settings
- Allow reply settings
- Auto retrieve setting
- Signature text
- E-mail account
- Creating a new e-mail account
- Editing an e-mail account
- VMS centre
- Camera
- Taking a Picture (Still picture)
- Taking a Picture
- Summary)
- Taking a picture when the folder is closed
- Picture album
- Camcorder
- Video player
- Audio player
- Multimedia
- Profile
- Alert by
- Voice ring tone Line 1/2
- VT ringtone
- Ring tone volume
- Message alert
- Message tone
- Warning alert
- Key tone effect
- Key tone volume
- Flip tone effect
- Switch on effect
- Switch off effect
- Address Book
- Add new
- Search
- Caller groups
- Speed dials
- Clear address book
- Copy all
- Move all
- Own number
- Settings
- Time & Date
- Time
- Date
- Auto Update Data/Time
- Daylight Saving
- Display
- Backlight
- Standard
- Saving
- User define
- Contrast
- Main LCD
- Sub LCD
- Dialing Font
- Idle Clock Font
- Screen Theme
- Idle mode
- Sub LCD
- Incoming Call
- Outgoing Call
- Switch on
- Switch Off
- Call
- Video telephony
- Block my picture
- Change substitute image
- Call history
- Missed calls
- Received calls
- Dialed calls
- All calls
- Call divert
- Video
- All video calls
- If busy
- If no reply
- If out of reach
- Voice
- All voice calls
- Settings
- If busy
- If no reply
- If out of reach
- All fax calls
- All data calls
- Call duration
- Last Call
- Received calls
- Dialed calls
- All calls
- Call costs
- Fixed dial number
- Call barring
- Outgoing calls
- International calls
- International except home country
- Incoming calls
- Incoming calls when abroad
- Settings
- Call waiting
- Send my number
- Call reject
- Auto answer
- Auto redial
- Answer mode
- Minute reminder
- Network
- Network selection
- Network mode
- Preferred lists
- 9.4.3.1
- Connection
- Access points
- Security
- PIN code request
- Change codes
- PIN
- PIN 2
- Security code
- Barring password
- Phone Lock
- Certificates
- Session clear
- Memory Status
- Common memory
- Reserved memory
- SIM memory
- Language
- Automatic
- Phone info.
- Reset Settings
- Additional text in the manual for using the Internet kit in Windows 98.
- (For example)
- Declaration of Conformity
- LG Electronics
- CE 0889
- Memo
Brand : LG
Model : U8150
Category : Smartphone