
PTL 7125 D - Washing machine Philco - Free user manual and instructions
Find the device manual for free PTL 7125 D Philco in PDF.


| Product Type | Free-standing washing machine |
| Loading Type | Front-load |
| Capacity (kg) | 7.5 kg |
| Maximum Spin Speed (rpm) | 1200 rpm |
| Energy Class | A+++ |
| Annual Energy Consumption (kWh) | 152 kWh |
| Annual Water Consumption (L) | 8900 L |
| Noise Level Washing (dB) | 52 dB |
| Noise Level Spinning (dB) | 76 dB |
| Dimensions (H x W x D) (cm) | 85 x 60 x 55 |
| Weight (kg) | 67 kg |
| Power Supply | 220-240 V, 50 Hz |
| Type of Electric Connection | Plug (Schuko) |
| Number of Programs | 15 |
| Key Programs | Cotton, Synthetics, Delicates, Wool, Quick 15', Rinse & Spin, Drum Clean |
| Features | Child Lock, Delay Start, Unbalanced Load Detection, Overflow Protection |
| Display Type | LED |
| Drum Volume (L) | 58 L |
| Maintenance Indications | Clean filter regularly, drain pump filter, detergent drawer |
| Spare Parts Availability | Yes, through authorized service |
Frequently Asked Questions - PTL 7125 D Philco
User questions about PTL 7125 D Philco
0 question about this device. Answer the ones you know or ask your own.
Ask a new question about this device
Download the instructions for your Washing machine in PDF format for free! Find your manual PTL 7125 D - Philco and take your electronic device back in hand. On this page are published all the documents necessary for the use of your device. PTL 7125 D by Philco.
USER MANUAL PTL 7125 D Philco
Instruction and installation manual
使用說明書
型號:
P T L 7 1 2 5 D

natural_image
Line drawing of a washing machine with open lid and front panel (no text or symbols)Please read and save these instruction
請仔細閱讀並妥善保存此說明書

Read this manual carefully as it offers practical advice to help you get the most from your washing machine.
This «Instruction and Installation Manual» contains everything you need to know about the everyday running of your machine.
Please refer to this manual for installation and maintenance instructions. The manual also contains information about possible working problems, advice about sorting clothes for washing, an explanation of label symbols and hints about how to remove stubborn stains.
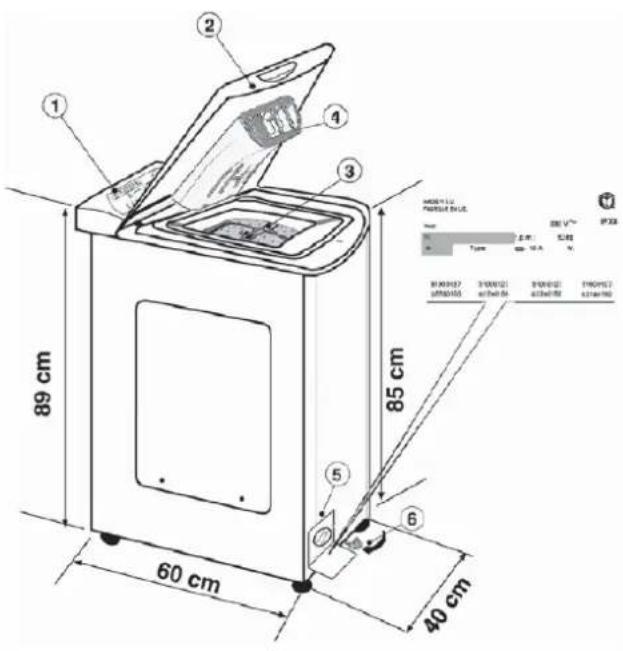
1.-CONTROL PANEL 2.-LID 3.-DRUM
4.- DETERGENT DISPENSER 5.- PLINTH PANEL
6.- FILTER
Table of contents
| page | |
| Safety measures | 3 |
| Setting up - Installation | 5 |
| Preparing the wash. Opening/ closing the drum 7 | |
| Detergent load | 8 |
| Electronically-controlled variable load- Fuzzy Logic 8 | |
| Description of controls 9 | |
| Programmes selection | 17 |
| General recommendations | 18 |
| Troubleshooting | 20 |
| Washing hints | 21 |
Safety measures
natural_image
Hand inserting a plug into an open electrical socket (no text or symbols visible)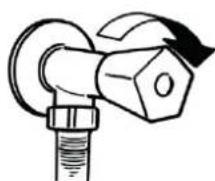
natural_image
Simple line drawing of a mechanical valve or fitting with no text or symbolsCE This appliance meets the European Directives 2004/108/EC, 2006/95/EC which have been substituted respectively by 89/336/EEC, 73/23/EEC and subsequent modifications thereof.
This appliance is not intended for use by persons (including children) with reduced physical, sensory or mental capabilities, or lack of experience and knowledge, unless they have been given supervision or instruction concerning use of the appliance by a person responsible for their safety.
Children should be supervised to ensure that they do not play with the appliance.
ATTENTION: FOR ALL CLEANING AND MAINTENANCE WORK
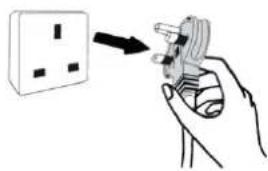
- Remove the plug.
- Turn off the water inlet tap after each wash.

- The manufacturer fits all the machines with an earth connection.
Ensure that the electrical installation has an earth connection and that it is connected; if not, call a qualified Service Center.
The earth connection is essential for user safety as it eliminates the risk of electrical discharge.
- Power sockets should be in easily accessible places so that the washing machine can be unplugged in case of any problems.
- If the electric cable is damaged replace with an original set (cable and plug) supplied by the manufacturer or official after-sales service.
note:
In the event that it is necessary to replace the power cable, make sure that you comply with the following colour-code chart during the wiring:
blue neutral
brown phase
Yellow-green earth
The manufacturer accepts no responsibility for any damage to people or things resulting from the failure to comply with the appliance's installation and safety regulations.
- Do not touch the appliance with wet hands or feet.
- Do not use the appliance when bare-footed.
- Use extension cords only with extreme care.
- Do not use adapters or multiple plugs.
- Do not allow the appliance to be used by children or the infirm without due supervision.
- Do not pull on the power cord or the appliance itself to remove the plug from the socket.
- Do not leave the appliance outdoors or exposed to the atmospheric elements (rain, sun, etc.).
- Do not cover the appliance with cloth or plastic while it is working.
- Do not install the appliance in damp places or anywhere where it could be sprayed by the shower.
- Do not install the appliance on a surface which obstructs the space between the floor and the base of the machine.
- Keep all packaging out of the reach of children as it could constitute a health hazard.

ATTENTION:
DURING A WASH CYCLE THE WATER CAN REACH TEMPERATURES OF 90°C.

- Unpack the appliance.
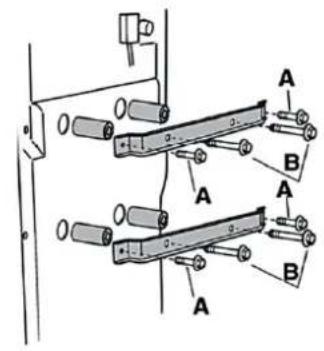
- Remove the 4 screws (A) from both clamps and the 4 screws (B).
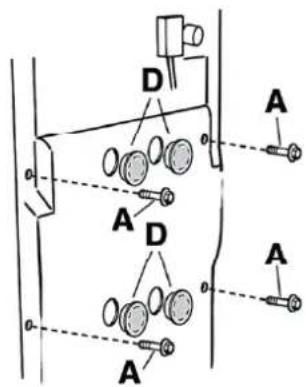
- Replace the 4 screws (A) and fit the trims provided (D).
If your model offers this function:
Position the protection sheet as shown in the diagram.
1.- Washing machine with wheel trolley.
2.- Washing machine without wheel trolley.

natural_image
Technical line drawing of a mechanical assembly with no visible text or symbols
natural_image
Technical line drawing of a mechanical assembly with no visible text or symbols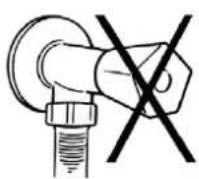


natural_image
Illustration of a hand holding a small mechanical component with wires, no text or symbols present
natural_image
Illustration showing a person using a box to interact with another person, and another person bending over a rope on a floor (no text or symbols)
ATTENTION: DO NOT TURN THE TAP ON
- The washing machine should be connected to the water mains via the new tube supplied with the appliance (inside the drum). Do not use the old tube for this purpose.
- Connect one end of the water inlet pipe with the elbow bend to the electrovalve (top rear part of the machine) and the other end to a tap or a plumbed-in 3/4" gas threaded connection.
- Place the washing machine close to the wall, ensuring that there are no bends or kinks anywhere in the tube. Hook the outlet pipe to the edge of the sink or preferably to a fixed drainage outlet of a diameter greater than that of the outlet pipe and at a height of min. 50 cm. and a maximum of 75 cm. from the floor.
If necessary, use the curved accessory to attach and support the outlet pipe more securely.

If your model offers this function:
- To move the washing machine easily, turn the trolley lever to the right. Once you have finished moving the machine, return the lever to its original position.
- Level the machine by adjusting the front feet.
a) Turn the nut clockwise to release the screw on the foot.
b) Raise or lower the foot by rotating it until it stands firmly on the floor.
c) Lock the foot in position by turning the nut anticlockwise until it comes up against the bottom of the washing machine.
Check that the appliance is properly levelled.
Check that the washing machine does not rock by trying to move two diagonally opposite top corners at the same time.
- If you move the washing machine from one place to another, you must level the feet again afterwards.
- Connect the machine.
natural_image
Close-up of a hand pressing down on a white plastic door (no text or symbols visible)
natural_image
Close-up of hands placing a small object into a rectangular basin (no visible text or symbols)
natural_image
Close-up of hands installing or adjusting a mechanical component in a drawer (no visible text or symbols)
natural_image
Close-up of a mechanical component with a circular opening and mesh structure (no visible text or symbols)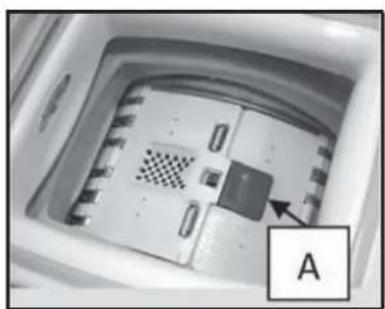
natural_image
Interior view of a microwave oven with a labeled component 'A' (no text or symbols on the device itself)ATTENTION:
IT IS IMPORTANT TO MAKE SURE THAT THE DRUM IS CAREFULLY OPENED AND CLOSED, OTHERWISE THE MACHINE OR LAUNDRY COULD GET DAMAGED.
ENSURE THAT THE DOORS FIT TOGETHER PERFECTLY AND ARE PROPERLY CLOSED.
Loading
1.
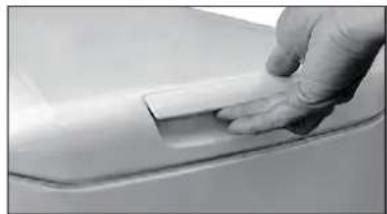
Open the washing machine lid.
2.
Open the drum by pressing the (A) button with one hand while pressing down on the opposite door with the other.
3.
Place clothes in the drum one item at a time, and without squashing. Do not exceed the load limits recommended in the "programme table". An overloaded washing machine will not wash properly, and will leave clothing wrinkled.
4.
To close the drum, place the doors so that the one with the (A) button is below the other and they fit together perfectly.
Detergent load

The detergent dispenser is divided into 3 compartments:
.- Compartment I is for the pre-wash detergent.
.- Compartment II is for the main wash detergent.
- The compartment ✿ is for fabric conditioners, scenting agents and special additives such as starch, blueing, etc.
The detergent dispenser has two reference marks:
.- Recommended (lower reference mark). This indicates the recommended level for the pre-wash and main wash compartments.
.- Max. This indicates the maximum level, which should never be exceeded.
Important:
- Do not use liquid detergent for programs with a prewash cycle and/or timed start.
- When the clothes present stains that need treatment with bleaches liquids products, you can proceed to their preliminary cleaning in the washing machine. For that: Introduce the bleach product in the "compartment II", and set the rinse program. Once finished set the programmer to the OFF position, add the rest of the laundry, and proceed with a normal was program.
Electronically-controlled Variable Load – Fuzzy Logic
This machine has electronics that automatically process all stages of the wash to ensure exceptional results and at the same time save you time and money.
Once a programme has been selected, the machine optimises the following elements depending on the wash load and type of fabric:
- quantity of water and power consumption
- wash time
- rinse efficiency
The washing machine also:
- detects suds and increases the amount of rinse water if necessary
- adjusts spin speed according to load distribution, thus forestalling any imbalance in the mechanism.
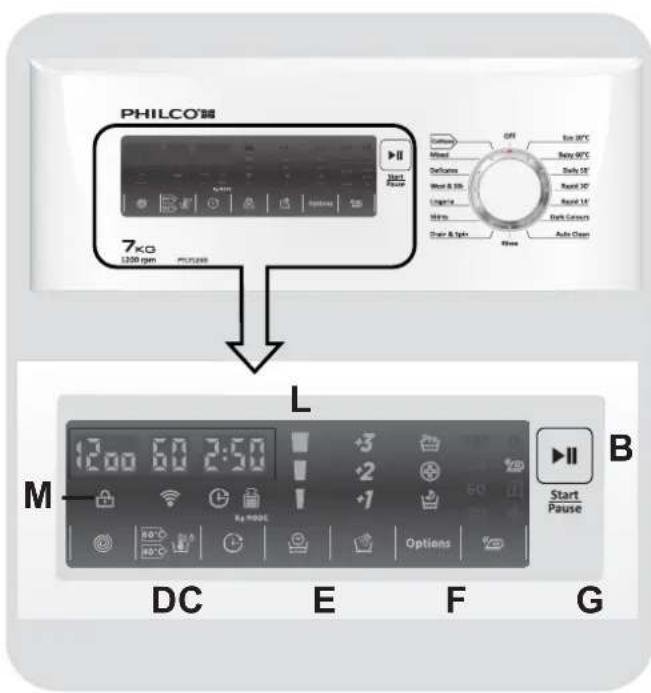
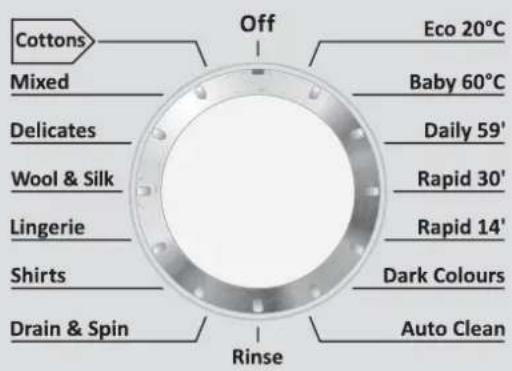
A Programme selector with OFF position
B START/PAUSE button
C SPIN SPEED button
D TEMPERATURE SELECTION button
E DELAY START button
F WASH TIME button
G EXTRA RINSE button
H OPTIONS button
I EASY IRON button
L Digital display
M DOOR LOCKED indicator light

WARNING:
Don't touch the display while inserting the plug because the machines calibrates the systems during the first seconds: touching the display, the machine couldn't work property. In this case, remove the plug and repeat the operation.
The programme selector must be returned to the OFF position at the end of each cycle or when starting a subsequent wash cycle prior to the next programme being selected and started.
Opening the door
A special safety device prevents the door from being opened immediately after the end of the cycle.
Wait for 2 minutes after the wash cycle has finished and the "Door Security" light has gone out before opening the door.
PROGRAMME selector with OFF position
When the programme selector is turned the display lights up to show the settings for the programme selected.
For energy saving, at the end of the cycle or with an inactivity period, the display level contrast will decrease.
N.B.: To switch the machine off, turn the programme selector to the OFF position.
- Press the START/PAUSE button to start the selected cycle.
- Once a programme is selected the programme selector remains stationary on the selected programme till cycle ends.
- Switch off the washing machine by turning the selector to OFF.
START/PAUSE button
Close the door BEFORE selecting the button START/PAUSE.
- Press to start the selected cycle.
When the START/PAUSE button has been pressed, the appliance can take few seconds before it starts working.
ADD OR REMOVE ITEMS AFTER THE PROGRAMMES HAS STARTED (PAUSE)
- Press and hold the START/PAUSE button for about 2 seconds (some indicator light and the time remaining indicator will flash, showing that the machine has been paused).
● Wait 2 minutes until the safety device unlocks the door.
● After you have added or removed items, close the door and press the START/PAUSE button (the programme will start from where it left off).
CANCELLING THE PROGRAMME
● To cancel the programme, set the selector to the OFF position.
The option buttons should be selected before pressing the START/PAUSE button.
If an option is selected that is not compatible with the selected programme then the option indicator first flashes and then goes off.
SPIN SPEED button
- By pressing this button, it is possible to reduce the maximum speed, and if you wish, the spin cycle can be cancelled.
● To reactivate the spin cycle press the button until you reach the spin speed you would like to set.
To prevent damage to the fabrics, it is not possible to increase the speed over that which is automatically suitable during the selection of the program.
- It is possible to modify the spin speed without pausing the machine.
The machine is fitted with a special electronic device, which prevents the spin cycle should the load be unbalanced.
This reduces the noise and vibration in the machine and so prolongs the life of your machine.
TEMPERATURE SELECTION button
● This button allows you to change the temperature of the wash cycles.
- It is not possible to raise the temperature over the maximum allowed for every programme, in order to save the fabrics.
DELAY START button
- This button allows you to pre-programme the wash cycle to delay the start of the cycle for up to 24 hours.
● To delay the start use the following procedure:
- Set the required programme.
- Press the button once to activate it (h00 appears on the display) and then press it again to set a 1 hour delay (h01 appears on the display). The pre-set delay increases by 1 hour each time the button is pressed, until h24 appears on the display, at which point pressing the button again will reset the delay start to zero.
- Confirm by pressing the START/PAUSE button (the light on the display starts to flash). The countdown will begin and when it has finished the programme will start automatically.
- It is possible to cancel the delay start by turning the programme selector to OFF.
If there is any break in the power supply while the machine is operating, a special memory stores the selected programme and, when the power is restored, it continues where it left OFF
WASH TIME button
- By selecting this button there is a choice of 3 levels of wash intensity, depending on how much the fabrics are soiled (can be used only on some programmes as shown in the table of programmes).
- Once the programme has been selected the indicator light will automatically show the wash time set for that programme.
- Selecting a different wash time the relevant indicator will light up.
EXTRA RINSE button
● This button allows you to add rinses at the end of the washing cycle. The maximum number of extra rinses is related to the programme selected.
● This function has been studied for the people with delicate and sensitive skin, for which also a least residue of detergent can cause irritations or allergies.
- It advises to also use this function for the children items and in case of washings of very dirty items, for which it is due to use a lot of detergent, or in the washing of toweling items whose fibres mostly have the tendency to hold the detergent.
OPTIONS button
You can choose between three different options:
- PREWASH
● This option allows you to make a prewash and it is particularly useful for heavily soiled loads (can be used only on some programmes as shown in the table of programmes).
- We recommend you use only 20% of the recommended quantities shown on the detergent pack.
- HYGIENE PLUS
- With this option it is possible to hygienize the clothes, the washing programme reach a temperature of 60^ .
- NIGHT & DAY
● This option reduces the intermediate spin speed to 400 rpm, where applicable, increase the water level during rinsing and keep the laundry immersed in water after the final rinse, in order to spread the fibre sevenly.
● During the phase in which the water is held in the tub, the relevant indicator light blink to show that the machine is at a standstill.
- Deselect the option to end the cycle with a spin dry (which may be reduced or cancelled using the appropriate button) and emptying phase.
● Thanks to electronic control, the water in the intermediate phases is emptied silently, making this option very useful for washing at night.
EASY IRON button
This function allows you to minimize creases as much as possible, eliminating the intermediate spins or reducing the intensity of the last one.
Digital Display
The display's indicator system allows you to be constantly informed about the status of the machine.

1) DOOR LOCKED INDICATOR LIGHT
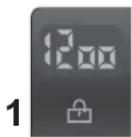
● The indicator light is illuminated when the door is fully closed.
Close the door BEFORE selecting the START/PAUSE button.
- When START/PAUSE is pressed on the machine with the door closed, the indicator will flash momentarily and then illuminate.
If the door is not properly closed, the light will continue to flash for about 7 seconds, after which the start command will be automatically delete. In this case, close the door in the proper way and press the START/PAUSE button.
● A special safety device prevents the door from being opened immediately after the end of the cycle. Wait for 2 minutes after
the wash cycle has finished and the DOOR LOCKED light has gone out before opening the door. At the end of the cycle turn the programme selector to OFF.
2) SPIN SPEED
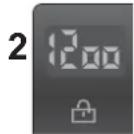
This show the spin speed of the selected programme that can be changed or omitted by the relevant button.
3) WASH TEMPERATURE

This show the washing selected programme that can be changed (where allowed) by the relevant button.
4) CYCLE DURATION

- When a programme is selected the display automatically shows the cycle duration, which can vary, depending on the options selected.
- Once the programme has started you will be kept informed constantly of the time remaining to the end of the wash.
● The appliance calculates the time to the end of the selected programme based upon a standard loading, during the cycle, the appliance corrects the time to that applicable to the size and composition of the load.
5) WASH TIME

- Once the programme has been selected the indicator light will automatically show the wash time set for that programme.
- Selecting a different wash time the relevant indicator will light up.
6) EXTRA RINSES

The indicator lights show the extra rinses selected by the relevant button.
7) OPTIONS
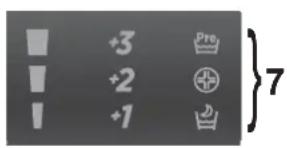
The indicator lights show the option that can be selected by the relevant button (PREWASH, HYGIENE PLUS and NIGHT & DAY).
8) WI-FI (some models only)

- In the models with the Wi-Fi option, the icon indicates that the Wi-Fi system is working.
- For all other information in the Wi-Fi system, there is a specific manual inside the machine.
9) DELAY START

This flashes when delay start has been set.
10) Kg MODE (function active only on Cotton and Synthetics programmes)

- During the first minutes of the cycle, the "Kg MODE" indicator remain on while the intelligent sensor will weigh the laundry and adjust the cycle time, water and electricity consumption accordingly.
-
Through every wash phase "Kg MODE" allows to monitor information on the wash load in the drum and in the first minutes of the wash it:
-
adjusts the amount of water required;
- determines the length of the wash cycle;
- controls rinsing according to the type of fabric selected to be washed it;
- adjusts the rhythm of drum rotation for the type of fabric being washed;
- recognizes the presence of lather, increasing, if necessary, the amount of water during rinsing;
- adjusts the spin speed according to the load, thus avoiding any imbalance.
Table of programmes


| PROGRAM | kg* (MAX.) | TEMP.°C | DETERGENT | |||
| Recommended | Max. | 2 | TCBA | 1 | ||
| Eco 20°C | 7 | 20° | 20° | ● | ● | |
| Baby 60°C | 4,5 | 60° | 60° | ● | ● | |
| Daily 59' | 2,5 | 40° | 40° | ● | ● | |
| Rapid 30' | 2,5 | 30° | 30° | ● | ● | |
| Rapid 14' | 1 | 30° | 30° | ● | ● | |
| Dark Colours | 3,5 | 40° | 40° | ● | ● | (●) |
| Auto Clean | ● | |||||
| Rinse | - | - | - | ● | ||
| Drain & Spin | - | - | - | |||
| Shirts 1) | 3,5 | 30° | 30° | ● | ● | (●) |
| Lingerie 1) | 2 | 40° | 60° | ● | ● | |
| Wool & Silk | 1 | 30° | 30° | ● | ● | |
| Delicates | 2,5 | 40° | 40° | ● | ● | |
| Mixed 1) | 3,5 | 40° | 60° | ● | ● | (●) |
| Cottons 1) | 7 | 40° | 90° | ● | ● | (●) |

(● Only with PREWASH option selected (programmes with PREWASH option available).
1) For the programmes shown you can adjust the duration and intensity of the wash using the WASH TIME button.
Technical data mod. PTL 7125D
| Mains voltage | Wash power rating | Spin Power rating | Pump Motor Power rating | Heating element power rating | Max. Power input | Mains Fuse Amp. rating | Water pressure | Water consumption *prog. EN60456 | Energy consumption *prog. EN60456 |
| 220-230V. 50Hz. | 175 W. | 340 W. 30 | W. 1300 | W. 1500 W. | 10 A. | 0,05-0,8 Mpa | 51 L. | 0,79 Kw. |
IMPORTANT: Do not use liquid detergent for programs with a prewash cycle and/or time delay.
PREPARING THE WASH CYCLE
1.- Once the washing is loaded, ensure that the drum doors are properly closed..
2.- Add detergent and additives, not exceeding the maximum level indicator.
.- detergent for pre-wash I
.- detergent for wash programme II
.- fabric conditioner
Programmes selection
To clean different types of fabrics and various levels of dirt, the washing machine has specific programs to meet every need of washing (see table of programmes).
Eco 20°C
This innovative programme, allows you to wash different fabrics and colours together, such as cottons, synthetics and mixed fabrics at only 20^ C and provides an excellent cleaning performance. Consumption on this program is about 40% of a conventional 40^ C. cottons wash.
Baby 60°C
This program allows you to wash all baby clothes getting a perfect clean and sanitizing effect, setting the temperature at 60^ C minimum. To optimize the result of the sanitizing effect we recommend the use of powder detergent.
Daily 59 Min.
This specially designed programme maintains the high quality wash performance whilst greatly reducing the wash time. The programme is designed for a reduced load (see table of programmes).
Rapid 30 Min.
A complete washing cycle (wash, rinse and spin). This programme is particularly suited to slightly dirty cottons and mixed fabrics. With this programme it is recommended to use only 20% of the detergent normally used to avoid waste.
Rapid 14 Min.
A complete washing cycle (wash, rinse and spin). This programme is suited to slightly dirty cottons and mixed fabrics. With this programme it is recommended to use only 20% of the detergent normally used to avoid waste.
Dark Colours
Program designed to mix all dark garments and to avoid the loss of colour and the formation of creases. We recommend the use of liquid detergent.
Auto Clean
This program is suited to clean the drum of your appliance. It is recommended to use this program every 50 washing cycles, to ensure a long service life and avoid bad odors. Make sure to start the program exclusively without laundry in the machine, using only powder detergent for washing machine. When the washing cycle finishes, open the door of the washing machine to dry the drum.
Rinse
This program performs 3 rinses with an intermediate spin (which can be reduced or excluded by using the appropriate button). It is used for rinsing any type of fabric, for example after a wash carried out by hand.
Drain & Spin
The program completes the drain and a maximum spin. It is possible to delete or reduce the spin with the SPIN SPEED button.
Shirts
The washing cycle is optimized to reduce the creation of creases, keeping an excellent washing performance. It is also possible to further reduce the spin speed, to ensure an easier ironing.
Lingerie
This program has been designed to perfectly clean the everyday underwear: it is particularly indicated for cottons and resistant synthetics, with also the possibility to mix colours (colourfast clothes only).
Wool & Silk
This programme allows a delicate washing cycle, particularly suited to garments specified as "Machine-Washable" Wool fabrics and laundry items made from Silk or specified as "Wash as Silk" on the fabric label.
Delicates
This program alternates among moments of work during breaks and is particularly suitable for washing delicate fabrics. The wash cycle and rinses are carried out with a high level of water to ensure the best performance.
Mixed
The washing and rinsing are optimized in the rhythms of rotation of the drum and to the water levels. The gentle spin, ensures a reduced formation of creases in the fabric.
Cottons
This program is suitable to clean normally soiled cotton laundry and it is the most efficient program in terms of combined energy and water consumptions for washing cotton laundry.
CLEANING AND MAINTENANCE OF THE MACHINE
Do not use abrasives, spirits or solvents when cleaning the exterior of the washing machine. It is sufficient to use a damp cloth.
The washing machine requires very little maintenance.
• Drying the rubber seal of the drum.
- Cleaning the dispenser and its compartments.
- Cleaning the filter.
- Cleaning prior to removals or when the machine is to stand idle for long periods.
To help conserve the washing machine, dry the rubber seal and leave the door open when the cycle ends.
CLEANING THE FILTER
The washing machine comes with a special filter, located behind the machine's front plinth panel, that collects larger objects (coins, buttons, etc.) which could even block the pump.
It is advisable to clean the filter whenever the machine fails to rinse the clothes as well as it should or when it fails to drain properly.
When it is necessary to clean the filter, proceed as follows:

natural_image
Line drawing of a washing machine with a downward arrow indicating a drop or direction (no text or symbols)
flowchart
graph TD
    A["Opening"] --> B["Receiving $ currency"]
    B --> C["Car Washing"]
    C --> D["Cut down with arrow"]
    D --> E["Reinjection with switch"]
    E --> F["Reinjection with no stop"]
    F --> G["Car Washing with hand press"]
    G --> H["Cut down with arrow"]
- Use a basin to collect the water coming out.
- Remove the filter and clean it.
- Once the filter is clean, replace it by following the above-mentioned pro in reverse.
CLEANING THE DETERGENT DISPENSER AND ITS COMPARTMENTS

natural_image
Close-up of a white electrical outlet cover with ventilation slots and indicator lights (no text or symbols visible)A

natural_image
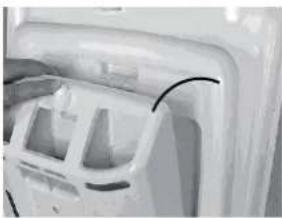
Close-up of a hand inserting a small object into a white plastic container (no text or symbols visible)- It is advisable to clean the three compartments of the detergent dispenser (pre-wash, wash, and fabric conditioner) from time to time. To do this, remove the detergent dispenser and after cleaning it, fit it back in place.
To remove and fit the detergent dispenser, follow the steps indicated in the images.
removing
.- Press button A
natural_image
Close-up of a white plastic container with internal compartments and a curved line indicating a seam or edge (no text or symbols visible).-Hold down the button and pull the detergent dispenser outwards

natural_image
Front view of a refrigerator with front panel, side panels, and decorative icons (no text or symbols).- Remove the dispenser and clean it
.- In the case of the pre-wash (I) and wash (II) compartments, it is advisable to remove any dried-in remains of detergent which obstruct the flow of the detergent to the drum.

natural_image
Hand holding a pen tip on a white plastic tray, with an arrow pointing to a black hole and a label 'S' pointing to the top (no text or symbols on the object itself)- In the fabric conditioner compartment, the trap (S) located at the rear part of the dispenser should be removed by pulling them out.
Remove any solid residue which could block the holes in the compartments.

natural_image
Close-up of a mechanical component with labeled point B (no text or symbols beyond label)fitting
.- Fit in the tabs as shown

natural_image
Close-up of a white plastic container with a small inset component and an arrow pointing to it (no visible text or symbols)- Push the detergent dispenser towards the housing (C) in the door until the tab clicks into place.
| FAULT | CAUSE | SOLUTION |
| 1.- No programme works • The | appliance is not plugged in.• The general switch is disconnected.• There is no electricity.• The fuses in the electric installation are damaged.• The door is open. | • Plug it in.• Activate the general switch.• Check.• Check.• Close the door. |
| 2.- The appliance does not load water | • See causes for 1.• The tap is turned off. | • Check.• Turn on the tap. |
| 3.- The water does not drain • The | The filter is clogged.• The outlet pipe is bent. | • Check the filter.• Straighten the outlet pipe. |
| 4.- The spin function does not work | • The washing machine has not yet drained the water.• The “Spin Exclusion” option is activated. | • Wait a few minutes for the washing machine to drain.• Enable the spin option. |
| 5.- Strong vibrations during spin cycle | • The washing machine is not correctly levelled.• The anchoring device for transport has not been removed.• The wash load is not evenly distributed. | • Adjust the feet.• Remove the transport support.• Distribute it evenly. |
| 6.- The high-speed spin does not work | • The wash load is not evenly distributed within the drum. | • Distribute the wash load evenly in the drum. |
| 7.- Display will show error n° 0,1,5,6,7,8,9,12,13,15,16 | • Contact technical service. | |
| 8.- Display will show error n° 2 | • Machine does not fill with water • | Check that water inlet tap is open. |
| 9.- Display will show error n° 3 | • Water does not empty from machine | • Check that outlet is not clogged• Check for kinks in outlet tube. |
| 10.-Display will show error n° 4 | • Too much water in machine. • Shut off water tap.• Contact technical service | |
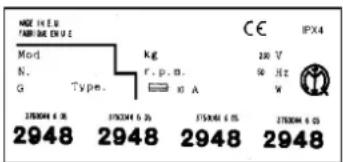
If the problem or malfunctioning persists, disconnect the machine, turn off the tap and do not try to repair.
For all repairs contact an Official Technical Assistance centre and always insist on the use of original parts. Failure to do so may compromise the safety of your machine.
When contacting a Technical Assistance Centre always refer to the model (see also control panel) and the registration and serial numbers indicated on the plate at the bottom front of the machine behind the plinth panel or on the guarantee certificate. That is to say, everything that appears in the box.
Providing this information will ensure a faster and more efficient service.
Hints on the most economical, most environmentally friendly way to use your washing machine.
HINTS ON USING YOUR WASHING MACHINE
Wait until you have a full load before using the machine: this will avoid the use of more water and power than necessary.
We recommend using the full load capacity: this could save you up to 50% in power consumption. Wash a single full load rather than two light loads.
WHEN IS PRE-WASHING NECESSARY?
Only when washing heavily soiled clothes.
With clothes that are not especially dirty, you can save between 5 and 15% by not using this option.
WHAT WASH TEMPERATURE SHOULD I USE?
Applying a stain remover before placing clothes in the machine will eliminate the need for wash temperatures of more than 60 °C .
When loading a wash into the drum, we recommend that you:
- For specially delicate garments we recommend the use of a protective net.
- Empty all pockets and ensure that they do not contain metal objects (paperclips, safety pins, pins, coins, etc.).
- Fasten pillow slips, close all zips and fastenings, and tie any loose ribbons or belts from dresses.
- Remove all runners (metal and plastic) from curtains and net curtains. We recommend that the ribbon be gathered into a ball and tied with its own cord.
- Unfold all items to be washed.
- Be careful not to exceed the recommended load for each programme.
- When washing rugs, bedspreads and other highly absorbent items, cancel the spin option.
- In order to be able to wash woollens in the washing machine they must carry the “Pure New Wool” symbol as well as the information “does not become matted” or “machine washable”.
- If possible, do not wash only towels. Mix them with your regular washing.
- Ensure that no item becomes trapped between the drum doors.
LABEL SYMBOLS
Labels are usually sown into the collar or side seams. The symbols which appear on them indicate the following:
• Maximum WASH temperature.
- Appropriate and inappropriate washing methods.
- Appropriate and inappropriate washing products.
The symbols are as follows:
WASH
Washing instructions always appear as a basin with different indications:
- Do not wash.
- Can be washed both by hand or in the washing machine. The figures in the basin indicate the maximum wash temperature. 60
- Hand wash only.
When the hand is half submerged in the water, this means that the item should be tumbled only gently during washing. If it is fully submerged in the water, this means that the garment should only be washed by hand.
• The line under the basin means that the item should be washed on a gentle cycle. - Do not spin.
BLEACH
Bleach is widely used to whiten fabrics, although in some cases it can cause irreparable damage. There are various symbols which refer to its use.
- Bleach can be used.
- Do not use bleach.
Please record the following information:
- Model
- Serial No.
Name of distributor
Date of purchase
The manufacturer reserves the right to make any technical modifications due to product improvement. No prior notice will be given. If you have any enquiry, please contact our after-sales department and forgive for any inconvenient.
All information is subjected to English version.

Gilman Home Appliances
太平家庭電器
香港仔大道232都工業大廈二樓
維修安裝:8210 8210
2/F, Shing Dao Industrial Building, 232 Aberdeen Main Road, Hong Kong
Service Hotline:8210 8210
請記錄下列資料
2/F, Shing Dao Industrial Building,
232 Aberdeen Main Road,Hong Kong
This appliance is marked according to the European directive 2002/96/EC on Waste Electrical and Electronic Equipment (WEEE).
By ensuring this product is disposed of correctly, you will help prevent potential negative consequences for the environment and human health, which could otherwise be caused by inappropriate waste handling of this product.
The symbol on the product indicates that this product may not be treated as household waste. Instead it shall be handed over to the applicable collection point for the recycling of electrical and electronic equipment
Disposal must be carried out in accordance with local environmental regulations for waste disposal.
For more detailed information about treatment, recovery and recycling of this product, please contact your local city office, your household waste disposal service or the shop where you purchased the product.
EN
The manufacturer declines all responsibility in the event of any printing mistakes in this booklet. The manufacturer also reserves the right to make appropriate modifications to its products without changing the essential characteristics.
簡介
natural_image
Hand holding a small electrical socket with an arrow pointing to it (no text or symbols visible)
natural_image
Illustration of a garment being cut with scissors, showing fabric layers and cutting process (no text or symbols)·除去包裝

natural_image
Technical line drawing of a mechanical assembly with no visible text or symbols
natural_image
Technical line drawing of a mechanical assembly with no visible text or symbols


natural_image
Illustration showing a person placing a cabinet on a floor with two hand gestures (no text or symbols)
重要:在這時不要開啟水龍頭。
natural_image
Close-up of a hand holding a white object on a surface, no visible text or symbols
natural_image
Close-up of hands placing a small object into a white basin (no visible text or symbols)
natural_image
Close-up of hands cleaning a wall-mounted device with buttons and a plastic sheet (no visible text or symbols)
natural_image
Close-up of a circular mechanical component with a perforated base and central hub (no visible text or symbols)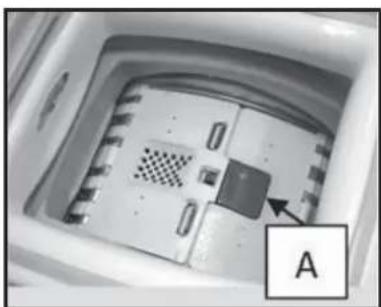
natural_image
Interior view of a microwave oven with a labeled component 'A' (no text or symbols on the device itself)注意:




10
| 程式 | 最多洗衣量千克 | 温度設定°C | 使用衣粉 | ||||
| 建議 | 最高 | 2 | ☀ | 1 | |||
| Eco 20°C | 7 | 20° | 20° | ● | ● | ||
| Baby 60°C | 4,5 | 60° | 60° | ● | ● | ||
| Daily 59' | 2,5 | 40° | 40° | ● | ● | ||
| Rapid 30' | 2,5 | 30° | 30° | ● | ● | ||
| Rapid 14' | 1 | 30° | 30° | ● | ● | ||
| Dark Colours | 3,5 | 40° | 40° | ● | ● | (●) | |
| Auto Clean | ● | ||||||
| Rinse | - | - | - | ● | |||
| Drain & Spin | - | - | - | ||||
| Shirts 1) | 3,5 | 30° | 30° | ● | ● | (●) | |
| Lingerie 1) | 2 | 40° | 60° | ● | ● | ||
| Wool & Silk | 1 | 30° | 30° | ● | ● | ||
| Delicates | 2,5 | 40° | 40° | ● | ● | ||
| Mixed 1) | 3,5 | 40° | 60° | ● | ● | (●) | |
| Cottons 1) | 7 | 40° | 90° | ● | ● | (●) | |
(•)祇有選擇了預洗的時候才需要。
natural_image
Line drawing of a washing machine with a downward arrow indicating a drop or direction (no text or symbols)
flowchart
graph TD
    A["Start"] --> B["Close-up of box with dollar coin"]
    B --> C["Switch: 100,50, 25,15, 10,5"]
    C --> D["Close-up of bag with hand, arrow indicating rotation"]
    D --> E["Close-up of washer, switch: 100, 75, 50, 25, 10, 5"]
    E --> F["Close-up of washer, switch: 75, 50, 25, 10, 5"]
a Gilman Group Company
2/F, Shing Dao Industrial Building, 232 Aberdeen Main Road, Hong Kong 香港香港仔大道 232 號城都工業大廈 2 樓
20.10.2015/M-43011258
- Instruction and installation manual
- 使用說明書
- Please read and save these instruction
- Safety measures
- ATTENTION: FOR ALL CLEANING AND MAINTENANCE WORK
- The earth connection is essential for user safety as it eliminates the risk of electrical discharge.
- note:
- ATTENTION:
- If your model offers this function:
- ATTENTION: DO NOT TURN THE TAP ON
- Loading
- 1.
- 2.
- 3.
- 4.
- Detergent load
- Important:
- Electronically-controlled Variable Load – Fuzzy Logic
- WARNING:
- Opening the door
- PROGRAMME selector with OFF position
- START/PAUSE button
- ADD OR REMOVE ITEMS AFTER THE PROGRAMMES HAS STARTED (PAUSE)
- CANCELLING THE PROGRAMME
- SPIN SPEED button
- TEMPERATURE SELECTION button
- DELAY START button
- WASH TIME button
- EXTRA RINSE button
- OPTIONS button
- - PREWASH
- - HYGIENE PLUS
- - NIGHT & DAY
- EASY IRON button
- Digital Display
- 1) DOOR LOCKED INDICATOR LIGHT
- Close the door BEFORE selecting the START/PAUSE button.
- 2) SPIN SPEED
- 3) WASH TEMPERATURE
- 4) CYCLE DURATION
- 5) WASH TIME
- 6) EXTRA RINSES
- 7) OPTIONS
- 8) WI-FI (some models only)
- 9) DELAY START
- 10) Kg MODE (function active only on Cotton and Synthetics programmes)
- PREPARING THE WASH CYCLE
- Programmes selection
- Eco 20°C
- Baby 60°C
- Daily 59 Min.
- Rapid 30 Min.
- Rapid 14 Min.
- Dark Colours
- Auto Clean
- Rinse
- Drain & Spin
- Shirts
- Lingerie
- Wool & Silk
- Delicates
- Mixed
- Cottons
- CLEANING AND MAINTENANCE OF THE MACHINE
- CLEANING THE FILTER
- CLEANING THE DETERGENT DISPENSER AND ITS COMPARTMENTS
- removing
- fitting
- HINTS ON USING YOUR WASHING MACHINE
- WHEN IS PRE-WASHING NECESSARY?
- WHAT WASH TEMPERATURE SHOULD I USE?
- LABEL SYMBOLS
- WASH
- BLEACH
- Gilman Home Appliances
- 太平家庭電器
- 請記錄下列資料
- EN
- 簡介
Brand : Philco
Model : PTL 7125 D
Category : Washing machine