
PV-DV203 - Camcorder PANASONIC - Free user manual and instructions
Find the device manual for free PV-DV203 PANASONIC in PDF.


| Product Type | Digital Camcorder |
| Recording Medium | MiniDV tape |
| Image Sensor | 1/4-inch CCD |
| Optical Zoom | 10x |
| Digital Zoom | 20x |
| LCD Screen Size | 2.5 inches |
| Viewfinder | Color electronic |
| Dimensions (WxHxD) | Approx. 66 x 92 x 168 mm |
| Weight (without battery) | Approx. 480 g |
| Power Supply | 7.2V DC (battery) or AC adapter |
| Battery Type | Lithium-ion (CGA-DU14 compatible) |
| Recording Format | MiniDV (SP/LP) |
| Audio | 12-bit/16-bit PCM stereo |
| Image Stabilization | Electronic |
| Special Features | Night mode, digital effects |
| Input/Output Ports | AV out, S-Video out, DV (IEEE1394) out |
| Card & Care | Clean lens with soft cloth; avoid moisture |
| Safety | Do not expose to rain; use specified accessories |
| Spare Parts Available | Battery, AC adapter, remote control (optional) |
| General Information | User manual included; store in original packaging |
Frequently Asked Questions - PV-DV203 PANASONIC
User questions about PV-DV203 PANASONIC
0 question about this device. Answer the ones you know or ask your own.
Ask a new question about this device
Download the instructions for your Camcorder in PDF format for free! Find your manual PV-DV203 - PANASONIC and take your electronic device back in hand. On this page are published all the documents necessary for the use of your device. PV-DV203 by PANASONIC.
USER MANUAL PV-DV203 PANASONIC
Digital Palmcorder® MultiCam™ Camcorder
Panasonic®
Digital Video Camcorder Operating Instructions Model No. PV-DV203

MultiMediaCard™

Mini DY
Before attempting to connect, operate or adjust this product, please read these instructions thoroughly.
Spanish Quick Use Guide is included.
For assistance, please call: 1-800-211-PANA(7262) or send e-mail to: consumerproducts@panasonic.com

LSQT0653A
Things You Should Know
Thank you for choosing Panasonic!
You have purchased one of the most sophisticated and reliable products on the market today. Used properly, we're sure it will bring you and your family years of enjoyment. Please take time to fill in the information below. The serial number is on the tag located on the underside of your Palmcorder. Be sure to retain this manual as your convenient Palmcorder information source.
Date of Purchase
Dealer Purchased From
Dealer Address
Dealer Phone No.
Model No.
Serial No.
Safety Precautions
WARNING: TO PREVENT FIRE OR SHOCK HAZARD, DO NOT EXPOSE THIS EQUIPMENT TO RAIN OR MOISTURE.
Your ^B^(n) D' Palmcorder is designed to record and play back in Standard Play (SP) mode and Long (LP) mode.
It is recommended that only cassette tapes that have been tested and inspected for use in VCR machines with the ^MiniD^Y mark be used.

CAUTION
RISK OF ELECTRIC SHOCK DO NOT OPEN

CAUTION: TO REDUCE THE RISK OF ELECTRIC SHOCK,
DO NOT REMOVE COVER (OR BACK)
NO USER-SERVICEABLE PARTS INSIDE
REFER SERVICING TO QUALIFIED SERVICE PERSONNEL

This symbol warns the user that uninsulated voltage within the unit may have sufficient magnitude to cause electric shock.
Therefore, it is dangerous to make any kind of contact with any inside part of this unit.

This symbol alerts the user that important literature concerning the operation and maintenance of this unit has been included. Therefore, it should be read carefully in order to avoid any problems.
The above markings are located on the appliance bottom cover.
Declaration of Conformity
Model Number : PV-DV203
Trade Name : Panasonic
Responsibility Party : Matsushita Electric Corporation of America
Address: One Panasonic Way Secaucus New Jersey 07094
Telephone Number : 1-800-211-PANA(7262)
This device complies with Part 15 of the FCC Rules. Operation is subject to the
following two conditions: (1) This device may not cause harmful interference, and
(2) this device must accept any interference received, including interference that may cause undesired operation.
Note: This equipment has been tested and found to comply with Part 15 of the FCC Rules. These limits are designed to provide reasonable protection against harmful interference when operated in a residential environment.
If this equipment does cause interference to radio or television reception, which can be determined by turning the equipment off and on, use the equipment in another location and/or utilize an electrical outlet different from that used by the receiver.
If necessary, consult the dealer or an experienced radio/TV technician for help. You may find the booklet, ‘Something About Interference’ available from FCC local regional offices helpful.
FCC Warning: To assure continued FCC compliance, use only the provided shielded interface cable when connecting digital video camcorder to computer in accordance with instruction herein. Also, any unauthorized changes or modifications to this equipment would void the user's authority to operate.
2
Forassistance, please call: 1-800-211-PANA(7262)or sende-mail to: consumerproducts@panasonic.com
Important Safeguards
- Read Instructions — All the safety and operating instructions should be read before the unit is operated.
- Retain Instructions — The safety and operating instructions should be retained for future reference.
- Heed Warnings — All warnings on the unit and in the operating instructions should be adhered to.
- Follow Instructions — All operating and maintenance instructions should be followed.
- Cleaning — Unplug this video unit from the wall outlet before cleaning. Do not use liquid or aerosol cleaners. Use a dry cloth for cleaning.
- Attachments — Do not use attachments not recommended by the video product manufacturer as they may be hazardous.
- Water and Moisture — Do not use this video unit near water — for example near a bath tub, wash bowl, kitchen sink, or laundry tub, in a wet basement, or near a swimming pool, and the like.
- Accessories — Do not place this video unit on an unstable cart, stand, tripod, bracket, or table. The video unit may fall, causing serious injury to a child or adult, and serious damage to the unit. Use only with a cart, stand, tripod, bracket, or table recommended by the manufacturer, or sold with the video unit. Any mounting of the unit should follow the manufacturer's instructions and should use a mounting accessory
recommended by the manufacturer. An appliance and cart combination should be moved with care. Quick stops, excessive force, and uneven surfaces may cause the appliance and cart combination to overturn. - Ventilation — Slots and openings in the cabinet are provided for ventilation and to ensure reliable operation of the video unit and to protect it from overheating. These openings must not be blocked or covered. Never place the video unit on a bed, sofa, rug, or other similar surface, or near or over a radiator or heat register. This video unit should not be placed in a built-in installation such as a bookcase or rack unless proper ventilation is provided or the manufacturer's instructions have been adhered to.
- Power Sources — This video unit should be operated only from the type of power source indicated on the marking label. If you are not sure of the type of power supply to your home, consult your appliance dealer or local power company. For video units intended to be operated from battery power, or other sources, refer to the operating instructions.

- Grounding or Polarization — This video unit may be equipped with either a polarized 2-wire AC (Alternating Current) line plug (a plug having one blade wider than the other) or 3-wire grounding type plug, a plug having a third (grounding) pin. The 2-wire polarized plug will fit into the power outlet only one way. This is a safety feature. If you are unable to insert the plug fully into the outlet, try reversing the plug. If the plug still fails to fit, contact your electrician to replace your obsolete outlet. Do not defeat the safety purpose of the polarized plug. The 3-wire grounding type plug will fit into a grounding type power outlet. This is a safety feature. If you are unable to insert the plug into the outlet, contact your electrician to replace your obsolete outlet. Do not defeat the safety purpose of the grounding type plug.
- Power-Cord Protection — Power-supply cords should be routed so that they are not likely to be walked on or pinched by items placed upon or against them, paying particular attention to cords of plugs, convenience receptacles, and the point where they exit from the unit.
- Outdoor Antenna Grounding — If an outside antenna or cable system is connected to the video unit, be sure the antenna or cable system is grounded so as to provide some protection against voltage surges and built-up static charges. Part 1 of the Canadian Electrical Code, in USA Section 810 of the National Electrical Code, provides information with respect to proper grounding of the mast and supporting structure, grounding of the lead-in wire to an antenna discharge unit, size of grounding conductors, location of antenna discharge unit, connection to grounding electrodes, and requirements for the grounding electrode.

- Lightning — For added protection of this video unit receiver during a lightning storm, or when it is left unattended and unused for long periods of time, unplug it from the wall outlet and disconnect the antenna or cable system. This will prevent damage to the video unit due to lightning and power-line surges.
Important Safeguards
- Power Lines — An outside antenna system should not be located in the vicinity of overhead power lines or other electric light or power circuits, or where it can fall into such power lines or circuits. When installing an outside antenna system, extreme care should be taken to keep from touching such power lines or circuits as contact with them might be fatal.
- Overloading — Do not overload wall outlets and extension cords as this can result in a risk of fire or electric shock.
- Objects and Liquids — Never push objects of any kind into this video unit through openings as they may touch dangerous voltage points or short out parts that could result in a fire or electric shock. Never spill liquid of any kind onto the video unit.
- Servicing — Do not attempt to service this video unit yourself as opening or removing covers may expose you to dangerous voltage or other hazards. Refer all servicing to qualified service personnel.
- Damage Requiring Service — Unplug this video unit from the wall outlet and refer servicing to qualified service personnel under the following conditions: a. When the power-supply cord or plug is damaged.
b. If any liquid has been spilled into, or objects have fallen onto, the video unit.
c. If the video unit has been exposed to rain or water.
d. If the video unit does not operate normally by following the operating instructions. Adjust only those controls that are covered by the operating instructions, as an improper adjustment of other controls may result in damage and will often require extensive work by a qualified technician to restore the video unit to its normal operation.
e. If the video unit has been dropped or the cabinet has been damaged.
f. When the video unit exhibits a distinct change in performance — this indicates a need for service.
-
Replacement Parts — When replacement parts are required, be sure the service technician has used replacement parts specified by the manufacturer or have the same characteristics as the original part. Unauthorized substitutions may result in fire, electric shock or other hazards.
-
Safety Check—Upon completion of any service or repairs to this video unit, ask the service technician to perform safety checks to determine that the video unit is in safe operating order.
Precautions
USE & LOCATION
- TO AVOID SHOCK HAZARD ... Your Palmcorder and power supply should not be exposed to rain or moisture. Do not connect the power supply or operate your Palmcorder if it gets wet. Your Palmcorder has been designed for outdoor use, however, it is not designed to sustain direct exposure to water, rain, sleet, snow, sand, dust, or direct splashing from a pool or even a cup of coffee. This action could permanently damage the internal parts of your Palmcorder. Do not attempt to disassemble this unit. There are no user serviceable parts inside. Unplug your Palmcorder from the power supply before cleaning.
• DO NOT AIM YOUR PALMCORDER AT THE SUN OR OTHER BRIGHT OBJECTS - DO NOT LEAVE THE PALMCORDER WITH THE EVF AIMED DIRECTLY AT THE SUN AS THIS MAY CAUSE DAMAGE TO THE INTERNAL PARTS OF THE EVF
- DO NOT EXPOSE YOUR PALMCORDER TO EXTENDED HIGH TEMPERATURE ... Such as, direct sunlight, inside a closed car, next to a heater, etc... This action could permanently damage the internal parts of your Palmcorder.
- AVOID SUDDEN CHANGES IN TEMPERATURE ... If the unit is suddenly moved from a cold place to a warm place, moisture may form on the tape and inside the unit.
• DO NOT LEAVE YOUR PALMCORDER OR THE POWER SUPPLY TURNED ON WHEN NOT IN USE. - STORAGE OF YOUR PALMCORDER ... Store and handle your Palmcorder in a manner that will not subject it to unnecessary movement (avoid shaking and striking). Your Palmcorder contains a sensitive pick-up device which could be damaged by improper handling or storage.
CARE
- TO CLEAN YOUR PALMCORDER ... Do not use strong or abrasive detergents when cleaning your Palmcorder body.
- TO PROTECT THE LENS ... Do not touch the surface of the lens with your hand. Use a commercial Palmcorder lens solution and lens paper when cleaning the lens. Improper cleaning can scratch the lens coating.
- TO PROTECT THE FINISH OF YOUR PALMCORDER ... Before handling your Palmcorder, make sure your hands and face are free from any chemical products, such as suntan lotion, as it may damage the finish.
4
For assistance, please call: 1-800-211-PANA(7262) or send e-mail to: consumerproducts@panasonic.com
Table of Contents
Things You Should Know 2
Important Safeguards 3
Precautions 4
Before Using....6
- Easy Cassette Eject/Insertion .... 7
Quick Guide 12
Supplying Power 15
Setting the Clock....17
Using the Palmcorder Menu.... 18
Camera Recording 19
- Simple Recording .... 19
- Digital PhotoShot™ Mode 21
- Zoom 22
Special Effect Features 24
Advanced Settings 28
Playback Your Recordings 32
Special Effect Features 34
Digital Features 40
Editing Features 45
Card Features 49
W PC Connection
• Transferring Your Images (Windows) 56
• PHOTOVU/MPEG4 Movie Messenger™ System 60
• Transferring Your Images (i.LINK) (Windows) 72
• PHOTOVU/MPEG4 Movie Messenger™ System (i.LINK) 73
• Palmcorder USB Device Driver/SD Drive 75
- Palmcorder File Converter 78
• Web Camera (For Windows XP users/For Windows 98SE, Me, 2000 users) ...... 80
• Warning Indications 89
M PC Connection
• Transferring Your Images (Macintosh) 90
Palmcorder Accessory System 92
Palmcorder Accessory Order Form 93
Notes On Operations 94
Specifications 97
Before Requesting Service 98
On-Screen Displays (OSD) 100
Request for Service Notice 101
Limited Warranty 102
Customer Services Directory 103
Spanish Quick Use Guide/Guía Para Uso Rápido 104
MENU OSD 108
Electronic Viewfinder/LCD Monitor Indications 113
Index of Controls 117
Index Back Cover
Before Using
Unpack your Palmcorder
1 pc. AC Adaptor (PV-DAC11) with AC Cable and DC Cable
1 pc. 8 MB Memory Card (RP-SD008BMK0)
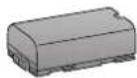
1 pc. Battery Pack (CGR-D08/CGR-D08R)


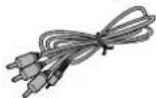
1 pc. A/V Cable (LSJA0280)
1 pc. Lens Cap (LSYF0535) with Lens Cap Strap (LSGQ0066)
1 pc. Shoulder Strap (LSFC0016)


1 pc. USB Cable (K1HA05CD0001)
1 pc. CR2025 Clock Battery (installed in Palmcorder)


1 pc. CD-ROM of Driver Software for Windows 98SE/Me/2000/XP and Macintosh; USB Device Driver for Windows 98SE/Me/2000/XP; PHOTOVU/MPEG4 Movie Messenger™ System for Windows 98SE/Me/2000/XP; Built-in SD Drive for Macintosh (LSFT0527)
Microsoft®, Windows® and Windows Media are registered trademarks of Microsoft in the United States and other countries. Macintosh, iMac, iBook, PowerBook, Power Macintosh, Power Mac, and Mac are trademarks or registered trademarks of Apple Computer, Inc. Intel® Pentium® is a registered trademark. i.LINK is a trademark. PHOTOVU/MPEG4 Movie Messenger™ System is a registered trademark. IBM is a registered trademark of IBM Company. MultiMediaCard is a registered trademark. SD is a trademark.
Record Speed/Playback Time
Use only those tapes having the logo indicating the 6.35 mm digital standard.
| Cassette type | Record Speed/Playback time | |
| SP | LP | |
| AY-DVM30EJ | 30 minutes | 45 minutes |
| AY-DVM60EJ | 60 minutes | 90 minutes |
| AY-DVM80EJ | 80 minutes 12 | 0 minutes |
Erase Protection
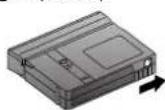
Cassettes have a sliding record tab to ensure recordings are not accidentally erased.
1 To prevent accidental erasure: Slide the tab to the left (open).

2 To record again: Slide the tab to the right (close).
6
Forassistance, please call: 1-800-211-PANA(7262)or sende-mail to: consumerproducts@panasonic.com
Before Using
Easy Cassette Eject/Insertion
- If the Palmcorder is connected to a power source, the cassette can be inserted and ejected without turning the Palmcorder on.

Note
- When inserting the cassette, make sure it is facing the right direction and then push it in completely.
- If Hand Strap is tight it may prevent Cassette Holder from fully opening for Cassette insert or eject. Loosen Hand Strap if necessary.
Attaching the Shoulder Strap
1 Undo the two strap ends from their buckles.
2 Thread the strap end through the Strap Attachment Rings.
- Tilt Viewfinder upward.
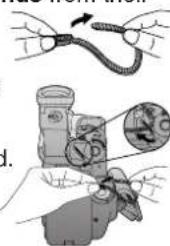
3 Reinsert the strap ends through their buckles.
• Make sure the straps are not twisted.

Adjust the Length
1 Loosen the strap from the Buckle and create a loop.
2 Pull the strap firmly through the Buckle to shorten or lengthen the strap.
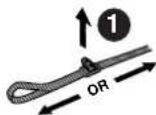
Before you begin
- Connect the Palmcorder to a power source. (pp. 15, 16)
1 Slide TAPE EJECT to open the Cassette Compartment Cover.
2 Insert a cassette record tab up, window side facing out.
3 Press PUSH CLOSE to close the Cassette Compartment Cover.
• To remove the cassette...
Slide TAPE EJECT to open the Cassette Compartment Cover and pull the cassette tape straight out.
Hand Strap
Adjust the length of the Hand Strap to the size of your hand as illustrated.

Lens Cap
Attaching the Lens Cap Strap:
Thread the Lens Cap Strap through the Strap Attachment Ring as shown.

Attaching the Lens Cap Strap to the Hand Strap:
Remove the Hand Strap from the front clasp and thread the Strap through the loop in the Lens Cap Strap. Reattach the Hand Strap.

natural_image
Illustration of a vintage digital camera with attached cable and lens (no text or symbols)Before Using
Using EfficiBright™ LED Light
To brighten the natural colors in a scene. GAIN UP works together with the LED Light to enhance the light's brightness.
Note
- Use LED Light for recording subjects 1.5 m (4.9 feet) away or closer.
- In the M-CARD mode, the GAIN UP mode cannot be set.

flowchart
graph TD
    A["GAIN UP"] --> B["Press LIGHT"]
    B --> C["Press LIGHT"]
    C --> D["Press LIGHT"]
    D --> E["Press LIGHT"]
    style A fill:#f9f,stroke:#333
    style B fill:#ccf,stroke:#333
    style C fill:#cfc,stroke:#333
    style D fill:#fcc,stroke:#333


Before you begin
- Connect the Palmcorder to a power source. (pp. 15, 16)
- Set POWER to CAMERA or M-CARD.
1 Press LIGHT. (Mode 1)
• LED Light and GAIN UP turn ON.
- GAIN UP ON will be brighter than when only LED Light is ON, however, ghost images will appear.
2 Press LIGHT. (Mode 2)
• GAIN UP turns OFF.
- To eliminate ghost images, use this mode.
3 Press LIGHT. (Mode 3)
• LED Light turns OFF.
- Pressing LIGHT again returns to 1.
Note
• Using Light reduces battery time.
- Set LIGHT to OFF when not in use.
- Do not look directly into the light.
- If the LED Light is used with a Conversion Lens attached, a slight vignetting (darkening around edges) effect occurs on the screen.
• Using MagicPix at the same time will make conditions even brighter. (p. 41)
8
Forassistance, please call: 1-800-211-PANA(7262)or sende-mail to: consumerproducts@panasonic.com
Before Using
Remote Control (Optional)
You can operate the major functions of your Palmcorder from up to approximately 5 m (16 feet) away (indoors). Aim the IR Remote Control toward the front of the Palmcorder and press the desired buttons (Remote Sensor is located under the lens).

To operate Camera functions:
Set POWER to CAMERA.
To operate VCR functions:
Set POWER to VCR.
Controlled Functions
- Rec/Pause (p. 19)
- Tele (Zoom) (p. 22)
- Wide (Zoom) (p. 22)
• Date/Time (p. 113) - Reset (p. 46)
- PhotoShot (p. 21)
• Display On TV (p. 39)
• Counter/Time Code (p. 114)
• Audio Dubbing (p. 45) - Record (p. 48)
- Menu (pp. 18, 46)
- Play (pp. 32, 48)
• FF/Search (p. 34)
- REW/Search (p. 34)
- Pause/Select (p. 36)
- Stop/Set (pp. 17, 18, 32, 48)
- Slow/Frame Advance (Forward) (pp. 35, 36)
- Slow/Frame Advance (Backward) (pp. 35, 36)
• Index Search (Forward) (p. 37)
• Index Search (Backward) (p. 37)
- Speaker Volume (p. 33)
Replace the Battery
Optional



1 Insert a slender pointed object, such as the tip of a ball-point pen into the slot so that it fits into the hole (as shown A). Then, while sliding to the right, pull the Battery Tray out with your fingernail.
2 Insert the battery into the Battery Tray with the ⊕ mark facing down. Do not reverse the polarity.
3 Insert the Battery Tray.
Replace battery with Panasonic PART NO. VSBW0004 (CR2025) only. Use of another battery may present a risk of fire or explosion.
Caution: Battery may explode if mistreated. Dispose of used battery properly. Keep away from children. Do not recharge, disassemble or dispose of in a fire.
Before Using
Remote Controlling Two Palmcorders
You can control any two Panasonic Palmcorders with one Remote Control (Optional). In order for the remote to distinguish between the two units, it is necessary to set one of the Palmcorders to VCR 2. On the remote, press VCR 1 or VCR 2 to control the desired Palmcorder.

Optional

Note
- When the Palmcorder and remote are not set to the same mode (VCR1 or VCR2), "CHECK REMOTE MODE (REMOTE)" will appear.

1 Set POWER to VCR or CAMERA.
- The POWER Lamp lights red. - Be sure POWER is fully turned to VCR or CAMERA position.
2 Press MENU to display the VCR or CAMERA mode menu screen.
3 Rotate JOG KEY to select OTHER FUNCTIONS in the CAMERA or VCR mode menu screen, then press JOG KEY to display the OTHER FUNCTIONS menu screen.
4 Rotate JOG KEY to select REMOTE, and then press JOG KEY to select VCR 2 (Menu OSD: pp. 109, 111). Leave the other Palmcorder set to VCR1.
5 Set the Remote Control to VCR 1 or VCR 2 to correspond with the Palmcorder you wish to control. (See above left.)
• After replacing the Remote Control Battery, the remote will default to VCR 1.
Before Using
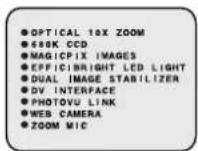
Self Demo Mode
If no operation takes place for approx. 10 minutes after the AC Adaptor was connected to the Palmcorder and the POWER Switch was turned to CAMERA without inserting a Cassette, the Palmcorder is automatically set to Self Demo mode for introducing its function. To turn it off, follow steps 1\~4 below.
[ EVF or LCD Monitor ]

Before you begin
- Connect the Palmcorder to a power source. (pp. 15, 16)
1 Set POWER to CAMERA.
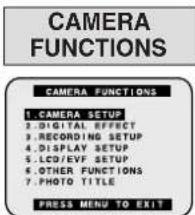
2 Press MENU to display the CAMERA FUNCTIONS menu screen.
3 Rotate JOG KEY to select OTHER FUNCTIONS, and press JOG KEY to display the OTHER FUNCTIONS menu screen.
4 Rotate JOG KEY to select DEMO MODE, and press JOG KEY to select OFF.
- Press MENU to exit.
Note
- If any button is pressed or operated (except PLAY/MULTI and ZOOM), the Self Demo mode is canceled.
- The Self Demo mode can be started by setting DEMO MODE to ON and by exiting the menu.
To turn Self Demo back on:
- Set to DEMO MODE : ON in MENU screen.
Quick Guide
Insert the Battery Pack
Before you begin
- Charge the Battery. (p. 15)

1 Insert the Battery Pack and slide it up until it locks with a click.
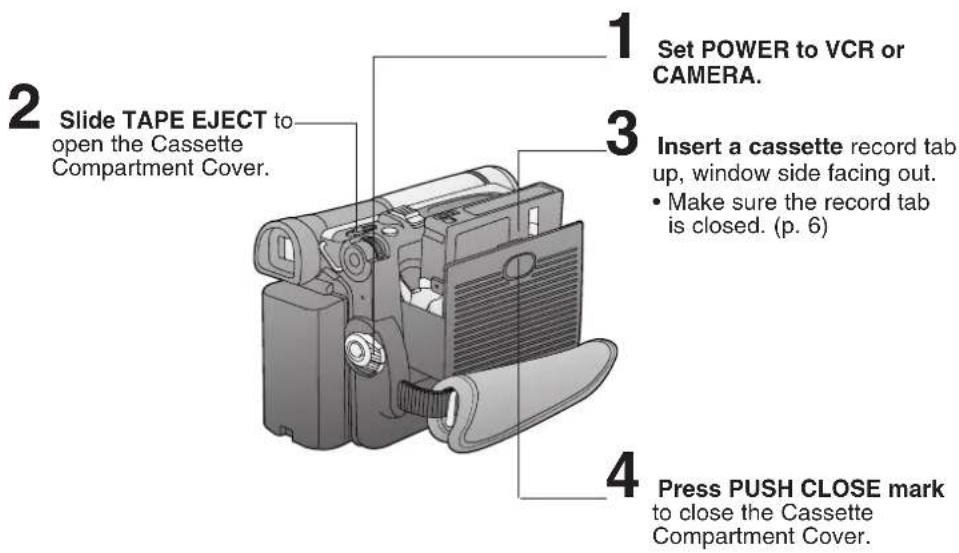
Insert Cassette
These Palmcorders are equipped with the Easy Cassette Eject System so it is easy to insert or remove tapes, even when the Palmcorder is on a tripod. (p. 7)
12
Forassistance, please call: 1-800-211-PANA(7262)or sende-mail to: consumerproducts@panasonic.com
Quick Guide
Camera Recording
When the LCD monitor is fully open, the Viewfinder automatically turns OFF.

4
Press REC/PAUSE to start recording. Press REC/PAUSE again to pause recording.
Before Use
To Watch Playback in the LCD (Liquid Crystal Display)
When the LCD monitor is fully open, the Viewfinder automatically turns OFF.
Before you begin
- Charge the Battery. (p. 15)
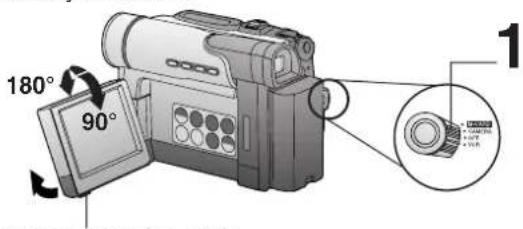
Set POWER to VCR.
2
Use OPEN tab on underside of the LCD monitor to unlock. Swing it fully open and adjust the angle.
3
Press◀(REW) to rewind the tape.

natural_image
Illustration of a digital camera with labeled buttons and an open screen (no text or symbols present)4
Press (PLAY) to start playback.
5
Press■(STOP) to stop playback.
Quick Guide
Insert Memory Card\*
Before you begin
- Charge the Battery. (p. 15)
*Memory Card: MultiMediaCard or SD Memory Card (p. 94)
- Be sure to insert the Memory Card before using Card PhotoShot. (p. 49)
Below is a list of memory cards which can be used in this Palmcorder.
| Memory Card | Capacity |
| SD Memory Card (RP-SD008BMK0) (supplied) | 8 MB |
| MultiMediaCard (SanDisk brand) | 8 MB, 16 MB |
| SD Memory Card (optional) (p. 92) | 16 MB, 32 MB, 64 MB |
SD Memory Card write protection switch

A write protection switch is located on the SD Memory Card. Sliding the switch to the "LOCK" position prevents writing on or formatting the card.
Write protection Switch
2
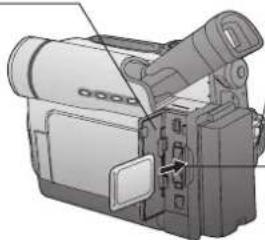
Open the Card Slot door.
natural_image
Illustration of a digital video camera with no visible text or symbols1 Set POWER to OFF.
3 Insert the Memory Card and gently push in until you hear a click.
4 Close the Card Slot door.
To remove the Memory Card...
Press here to eject the card.

When inserting the Memory Card

Note
- When inserting the Memory Card, insert with the cropped corner down as shown in the illustration above.
14
For assistance, please call: 1-800-211-PANA(7262)or send e-mail to: consumerproducts@panasonic.com
Supplying Power
Charge the Battery Pack on the AC Adaptor

Note
About the Flashing of the CHARGE Lamp
- Charge the Battery within an ambient temperature range of 10 °C (50 °F) and 30 °C (86 °F).
- If charging is done in extreme low or high temperatures, Battery charge time increases.
CHARGE Lamp flashes when...
• The Battery is being charged, but charging is taking longer than normal. - Charging is not possible. Remove the Battery once, wait a short time, then re-attach it for charging.
Insert the Battery Pack

1 Insert the Battery Pack and slide it up until it locks with a click.
1 Connect and plug in the Power Cord as shown.
• POWER Lamp will light.
- Remove the DC Cable, if attached, from the adaptor.
2 Attach the Battery as shown to charge.
- CHARGE Lamp lights up. It goes out when charging is complete (approx. 1 hour). Expect approx. 1 hour 50 minutes of operation (using EVF) when fully charged.
3 Remove the Battery. Slide the Battery out and then lift up.
Remove the Battery Pack

1 While sliding the BATTERY RELEASE, slide the Battery downward and remove.
Supplying Power
Battery Care
Caution:
- Charge only with specified charger.
- Charge the Battery within an ambient temperature range of 10 °C (50 °F) and 30 °C (86 °F).
- The Battery may be warm after charging or just after use. This is normal.
- Do not use an insufficiently charged or worn out Battery.
- If charging is done in extreme low or high temperatures, Battery charge time increases.
Safety precautions:
- Do not place the Battery near, or dispose of in fire.
- Do not directly connect (short circuit) the positive (+) and negative (−) terminals.
- Never attempt to disassemble or reassemble the Battery.
To avoid damage to the Battery:
- Do not drop or jar the Battery.
- Use the Battery with specified models only.
- If the Battery is used in extremely high temperatures, a safety device will automatically prevent operation.
- While not in use, remove Battery from the Palmcorder and AC Adaptor and store in a cool, dark, dry place. If you leave the Battery in the Palmcorder or on the AC Adaptor, the Battery will no longer be rechargeable.
- Keep the Battery terminals clean.
To ensure longer battery life:
U.S.A. CONSUMERS: ATTENTION:

A lithium ion/polymer battery that is recyclable powers the product you have purchased. Please call 1-800-8-BATTERY for information on how to recycle this battery.
Use AC Adaptor

16
Forassistance, please call: 1-800-211-PANA(7262)or sende-mail to: consumerproducts@panasonic.com
Setting the Clock
Set the Date and Time
The date and time is calculated, including leap years, up to DEC 31 2089.
EXAMPLE:
YEAR : 2003


Push
MONTH


Rotate
MONTH : FEB
Note
• To make corrections,
Press JOG KEY repeatedly to move back to an item and correct.
- If "CLOCK BATTERY" indication appears, please refer to "Replacing Clock Battery" on page 95.
Before you begin
- Connect the Palmcorder to a power source. (pp. 15, 16)
- Set POWER to CAMERA or VCR.
1
Press MENU to display the Camera or VCR mode menu screen. (p. 18)

2
Rotate JOG KEY to select OTHER FUNCTIONS, and then press JOG KEY to display the OTHER FUNCTIONS menu screen.
3
Rotate JOG KEY to select CLOCK SET, and then press JOG KEY to set to ON. (Menu OSD: pp. 109, 111.)
- The CLOCK SET menu screen is displayed.
4
Rotate JOG KEY to select YEAR, then press JOG KEY to fix and move to the next item. Likewise, set the month, day, hour, and minute.

When CLOCK SET setting is completed, press MENU twice to start the clock and exit.
Using the Palmcorder Menu
The Palmcorder features three menu displays: one for CAMERA mode (recording), one for M-CARD (Memory Card Photo Mode) and one for VCR mode (Playback). (pp. 108\~112)
- While the Menu screen is displayed, you cannot record on or play a tape.
- While recording, the Menu screen cannot be displayed.
- During playback, the Menu screen can be displayed.
Before you begin
- Connect the Palmcorder to a power source. (pp. 15, 16)
- Set POWER to CAMERA or VCR.
2, A, B, C JOG KEY
1, D MÉNU

natural_image
Illustration of a vintage digital camera with handle and control panel (no text or symbols)Displaying the MENU
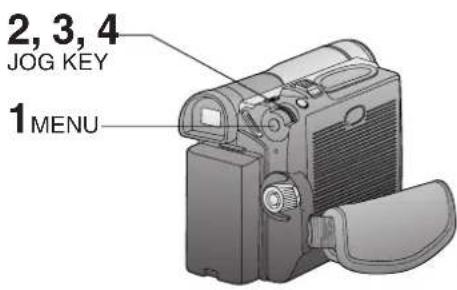
1 Press MENU to display the CAMERA or VCR menu (according to the POWER setting).
2 Rotate JOG KEY to select a menu item.
Setting the MENU Items (EX. VCR Mode menu)
A Press JOG KEY to set your selection.
B Rotate JOG KEY to select a menu item.

C
RETURN * ---- YES
PRESS MENU TO EXIT
RETURN * ---- YES
PRESS MENU TO EXIT
Press JOG KEY to set your selection.
• The “▶” mark indicates selection.
D Press MENU to exit the menu.
CAMERA Main menu
1 : CAMERA SETUP
To select PROG. AE, PROGRESSIVE, D. ZOOM, or CINEMA.
2 : DIGITAL EFFECT
To select EFFECT.
3 : RECORDING SETUP
To select REC SPEED, AUDIO REC, SCENEINDEX, WIND CUT, or ZOOM MIC.
4 : DISPLAY SETUP
To select DATE/TIME, C. DISPLAY, C. RESET, or DISPLAY.
5 : LCD/EVF SETUP
To select LCD BRIGHTNESS, LCD COLOR, or EVF BRIGHTNESS.
6 : OTHER FUNCTIONS
To select REMOTE, BEEP SOUND, SHTR EFFECT, CLOCK SET, SELF REC, or DEMO MODE.
7: PHOTO TITLE
To select TITLE or MODE.
VCR Main menu
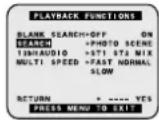
1 : PLAYBACK FUNCTIONS
To select BLANK SEARCH, SEARCH, 12 bit AUDIO, or MULTI SPEED.
2 : DIGITAL EFFECT
To select EFFECT1, EFFECT2, or D. ZOOM.
3 : RECORDING SETUP
To select REC SPEED or AUDIO DUB.
4 : DISPLAY SETUP
To select DATE/TIME, C. DISPLAY, C. RESET, or DISPLAY.
5 : LCD/EVF SETUP
To select LCD BRIGHTNESS, LCD COLOR, or EVF BRIGHTNESS.
6 : OTHER FUNCTIONS
To select REMOTE or CLOCK SET.
Camera Recording
Simple Recording
Remove the lens cap and clip it to the hand strap.



WARNING:
- Do not leave the Palmcorder with the EVF aimed directly at the sun as this may cause damage to the internal parts of the EVF.
- Do not lift, or carry, the Palmcorder by the EVF or the LCD Monitor.
- Do not pull hard on the EVF Eye Cup.
Before you begin
- Connect the Palmcorder to a power source. (pp. 15, 16)
- Insert a cassette with the record tab closed. (p. 7)
1 Set POWER to CAMERA.
• The POWER Lamp lights red.
- Be sure POWER is fully turned to the CAMERA position.
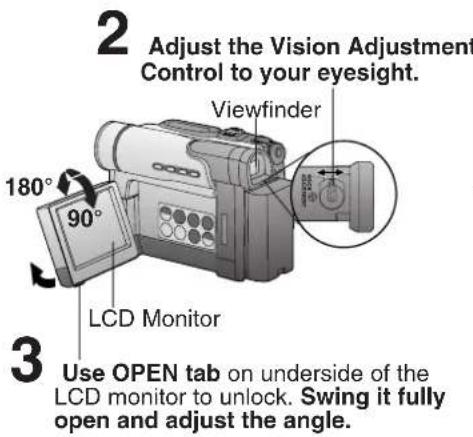
2 With the Viewfinder Eye Cup held up against your eye, adjust the Vision Adjustment Control to your eyesight.
- Adjust the EVF Brightness of the Viewfinder if necessary. Please refer to "To adjust the LCD/EVF BRIGHTNESS or COLOR" on page 20.
3 Set to REC SPEED "SP" or "LP" in the RECORDING SETUP menu screen. (Menu OSD: p. 108)
4 Press REC/PAUSE to start recording. • “REC” is displayed on the screen. Press REC/PAUSE again to pause recording.
5 Set POWER to OFF when finished. • To remove the cassette, slide TAPE EJECT.
- When the Palmcorder is aimed at excessively bright objects, or bright lights, a vertical bar may appear in the picture. This is a normal characteristic of the CCD pick-up device. Try to avoid this whenever possible.
To conserve power
After 5 minutes, the Record/Pause mode will automatically change to Standby mode.
To resume recording, set POWER to OFF and then ON again.
Camera Recording
Using the LCD Monitor
The LCD (Liquid Crystal Display) monitor can be used while recording.

1 Use OPEN tab on underside of the LCD monitor to unlock.
2 Swing the LCD monitor fully open and adjust the viewing angle.
• The LCD monitor will automatically turn on.
- When the LCD monitor is completely closed, it will shut off automatically to save power.
- Adjust the LCD Brightness and/or color of the LCD monitor if necessary. Please refer to "To adjust the LCD/EVF BRIGHTNESS or COLOR" below.
3 Start recording.
Note
• Using the LCD monitor will reduce battery operating time.
- Close the LCD monitor completely when not in use.
To adjust the LCD/EVF BRIGHTNESS or COLOR

1 Press MENU to display the main menu screen.
2 Rotate JOG KEY to select LCD/EVF SETUP from the main menu screen. (Menu OSD: pp. 109, 111)
3 Press JOG KEY to display the LCD/EVF SETUP screen.
4 Press JOG KEY to select LCD BRIGHTNESS, LCD COLOR, or EVF BRIGHTNESS, then rotate JOG KEY to adjust.
5 Press MENU twice to exit this mode.
Camera Recording
Digital PhotoShot™ Mode
Use this feature to record a seven second (approx.) still image on the tape from the current camera picture. Audio is also recorded for on-the-spot narration. Or, you can add narration later with the Audio Dubbing feature to make an interesting slide show, etc. (p. 45)

1 Set POWER to CAMERA.
2 Press PHOTOSHOT in Record/Pause mode. "PHOTO" will appear in the EVF or the LCD monitor.

Note
- If SHTR EFFECT on the OTHER FUNCTIONS menu screen is set to ON, a sound effect similar to the shutter of a film camera will be heard when PHOTOSHOT is pressed.
- When PHOTOSHOT is pressed, the playback image takes approx. 7 seconds to process. After that, the Camera mode screen will be displayed.
Camera
Progressive PhotoShot™ Mode
With the progressive PhotoShot Function, you can record still pictures with higher resolution than with the normal PhotoShot Function.

1 Set POWER to CAMERA.
2 Press MENU to display the CAMERA FUNCTIONS menu screen.
3 Rotate JOG KEY to select CAMERA SETUP, and press JOG KEY to display the CAMERA SETUP menu screen.
4 Screen. Rotate JOG KEY to select PROGRESSIVE, and press JOG KEY to select ON.
- Press MENU to exit.
- “P” will appear in the EVF or the LCD monitor.
5 LCD monitor. Press PHOTOSHOT in Record/Pause mode.
EVF/LCD

Note
- This function may not work with D.E.I.S., D. ZOOM and D.FUNCTION functions.
Camera Recording
Zoom
You can gradually zoom in for close ups or zoom out for wide angle shots.

1 Set POWER to CAMERA.
2 Zoom slowly: by lightly pressing the "T" (Telephoto) or the "W" (Wide Angle) side of the POWER ZOOM.
Zoom quickly: by applying more pressure.
3 Start recording.
Note
- The zooming speed ranges from a slow 17 seconds to a fast 1.8 seconds according to the amount of pressure applied to the POWER ZOOM.
Zoom Microphone Function
Along with the zooming operation, the microphone's directional angle and sensitivity are varied for recording sounds.

1 Set POWER to CAMERA.
2 Press MENU to display the CAMERA FUNCTIONS menu screen.
3 Rotate JOG KEY to select RECORDING SETUP, then press JOG KEY to display the RECORDING SETUP menu screen.
4 Rotate JOG KEY to select ZOOM MIC in the RECORDING SETUP menu. (Menu OSD: p. 108)
5 Press JOG KEY to select ON.
- Press MENU to exit.
- "Z.MIC" will appear on the screen.
Note
- The Zoom Microphone Function may not work effectively if the surrounding noise is too loud.
Camera Recording
Recording Check
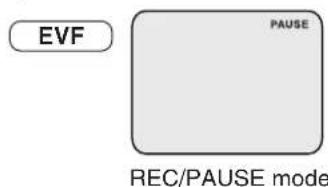
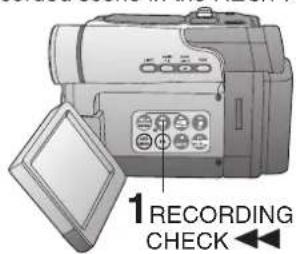
To playback the final few seconds of the last recorded scene in the REC/PAUSE mode.
Recording Still Pictures
You can record still pictures of any desired duration together with sound.
Self Recording
Rotate the LCD monitor 180 degrees so it faces the same direction as the lens to record yourself.

natural_image
Illustration of a vintage-style video camera with an 180-degree angle indicator (no text or symbols on the device itself)1 Press RECORDING CHECK briefly in the REC/PAUSE mode. The [CHK] indication appears. After checking, the Palmcorder returns to the REC/PAUSE mode.
- For Recording Check, the Palmcorder must be in the same mode (SP or LP) as was used for recording, otherwise the playback picture is distorted.
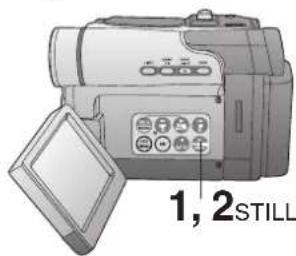
1 While in RECORD mode, press STILL to capture a still picture. The captured still picture will be recorded together with sound.
2 Press STILL once again to release the still picture. The camera will resume recording real-time pictures.
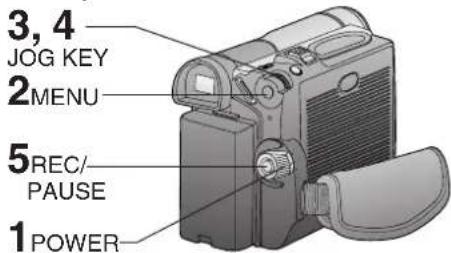
1 Set POWER to CAMERA.
2 Press MENU to display the CAMERA FUNCTIONS menu screen.
3 Rotate JOG KEY to select OTHER FUNCTIONS, then press JOG KEY to display the OTHER FUNCTIONS menu screen.
4 Rotate JOG KEY to select SELF REC, and then press JOG KEY to select MIRROR. (Menu OSD: p. 109)
- Press MENU to exit.
- The picture in the LCD monitor will appear reversed.
5 Start recording.
Special Effect Features
CINEMA Mode
You can record a picture compatible with a wide-screen TV equipped with S-Video picture terminal and Zoom/Wide features.

Backlight
Use when recording a subject that is darker than the surrounding scene, in a shadowed area, or when the light source is behind your subject.

1 Set POWER to CAMERA.
2 Press MENU to display the CAMERA FUNCTIONS menu screen.
3 Rotate JOG KEY to select CAMERA SETUP, then press JOG KEY to display the CAMERA SETUP menu screen.
4 Rotate JOG KEY to select CINEMA, and then press JOG KEY to select ON.
- A black strip will appear at the top and bottom of the picture.
- Press MENU to exit.
- “CINEMA” will appear on the screen.
5 Start recording.

1 Set POWER to CAMERA.
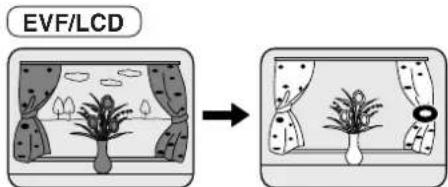
2 Press BACK LIGHT to activate the Backlight feature.
- The Indicator "○" will appear in the EVF or LCD monitor.
3 Press BACK LIGHT again to cancel the Backlight feature.
Note
- The Indicator "○" will not appear in the EVF or LCD monitor when OFF is selected in the DISPLAY menu.
Special Effect Features
Program AE
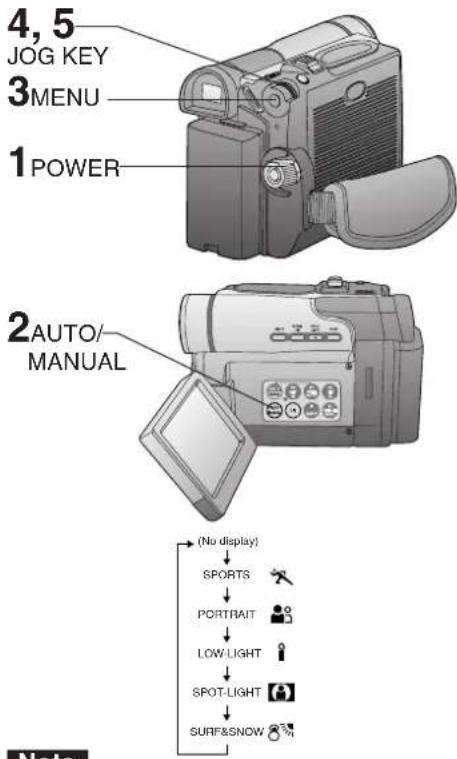
The Auto Exposure feature can be used to make quality recordings in a variety of scene situations.
Note
SPORTS mode
- The recorded images will not be so blurred when they are viewed later using slow or still picture playback.
- When playing back a sports mode recording, the movement may appear slightly jerky.
- Do not use this mode when recording under fluorescent, mercury, or sodium lighting. These types of lights will affect the color and brightness of the images.
- A vertical band of light might appear when recording objects that are brightly illuminated or highly reflective.
- If the amount of light is insufficient, the SPORTS "X" indicator will flash in the EVF or the LCD monitor.
- The image may flicker if this mode is used indoors.
1 Set POWER to CAMERA.
2 Press AUTO/MANUAL so that the "MNL" indication appears in the EVF or the LCD monitor.
3 Press MENU to display the CAMERA FUNCTIONS menu screen.
4. Rotation JOG KEY to select CAMERA SETUP, and then press JOG KEY to display the CAMERA SETUP menu screen.
5
Rotate JOG KEY to select PROG. AE, then press JOG KEY repeatedly to select one of the five modes shown below.
6 • Press MENU to exit.
Repeat steps 2\~5 to select OFF to cancel this feature.
| Mode | Indication |
| For recording fast action scenes. | |
| For recording only subjects in the foreground, while ignoring subjects in the background. | |
| For recording in extreme low light conditions. | |
| Recording in situations where subjects are under a spotlight(s). | |
| For recording in locations with a high degree of “Dazzle,” such as snow slopes and the seashore. |
PORTRAIT mode
- The image may flicker if this mode is used indoors.
LOW-LIGHT mode
- Scenes recorded in extremely low light levels may turn out dark.
SPOT-LIGHT mode
- If the recorded subject is extremely bright, the picture may appear whitish.
SURF&SNOW mode
- If the recorded subject is extremely bright, the picture may appear whitish.
- It is not possible to select the SPORTS mode or PORTRAIT mode or Low-Light mode together with the GAIN UP mode and MAGIC PIX mode.
Special Effect Features
Audio/Video Fade In/Out
You can make smoother scene transitions for a more professional look.

Fade In
Starting the first scene with "fade in" is very effective.
1 In REC/PAUSE mode, hold down FADE until the picture fades out.
2 Press REC/PAUSE to start recording.
3 Release FADE and the picture will gradually fade in.
Fade Out
Use to create a soft ending or (together with fade in) for a soft transition from one scene to the next.
A During recording, hold down FADE until the picture fades out.
B Press REC/PAUSE to pause the recording.
Special Effect Features
Photo Title
You can use PhotoShot images stored on a Memory Card to record a WIPE or MIX effect on a cassette.
Note
When Photo Title is set to ON, the selected image and Title will appear before each recording is made.
WIPE : The Photo title is replaced with the current scene in a wiping motion.

MIX : The photo title is replaced with the current scene in a gradual mixing effect.


Before you begin
- Connect the Palmcorder to a power source. (pp. 15, 16)
- Set POWER to OFF before inserting a recorded Memory Card. (pp. 49, 50)
1 Set POWER to CAMERA.
2 Press MENU to display the CAMERA FUNCTIONS menu screen. Then rotate and press JOG KEY to select PHOTO TITLE.
3 Rotate and press JOG KEY to select and set MODE and then TITLE. 1st : Select and set MODE (WIPE or MIX). 2nd : Select and set TITLE to "SET".

- "PLEASE WAIT" appears on-screen.
• The Multi image screen is displayed.
4 Rotate and press JOG KEY to select and set an image. - "PLEASE WAIT" is displayed while image is processed. Then, "PHOTO TITLE SET" is displayed for approx. 3 seconds, and the screen goes back to the Camera mode screen. - After Photo Title is performed, Digital Function turns off.
5 Press REC/PAUSE to start recording with Photo Title. • WIPE or MIX screen is displayed at the beginning of the recording. Then the Photo Title setting will be cleared automatically.
Advanced Settings
White Balance
Auto White Balance ("AWB") automatically maintains optimum color balance in most lighting conditions. However, when using Digital Functions, etc., you may get better results by using the manual adjustment.

| Mode | Description |
| AWB | Automatically maintains optimum color balance in most lighting conditions. |
| [4KW2T] | When the source illumination is a halogen lamp. |
| [4K4EZ] | When shooting outdoors on a sunny day. |
* | The White Balance setting that was previously set manually.Note• When ZOOM is set to 10X or higher, White Balance cannot be adjusted. |
1 Set POWER to CAMERA.
2 Press AUTO/MANUAL so that the "MNL" indication appears in the EVF or the LCD monitor.
3 Press JOG KEY repeatedly until "AWB" appears in the EVF or LCD monitor.
4 Rotate JOG KEY to select other modes. (See mode chart at left.)
• Press AUTO/MANUAL to cancel the setting.
* For manual White Balance adjustment:
A. Rotate JOG KEY to select "△"
B. Point the Palmcorder at a white object (full-screen) and hold JOG KEY down until “indication stops flashing.
- If "■" indication flashes when the Palmcorder is turned on, the previous manual White Balance setting is in effect.
In the following cases, the “■” indication flashes:
- The flashing indicates that the previously adjusted White Balance setting is still kept. This setting will be kept until White Balance is adjusted again.
- Correct White Balance may not be attainable manually in poor lighting conditions.
Note
- DISPLAY (Menu OSD: p. 109) must be set to ALL for MF, AE, W.BALANCE, HIGH SPEED SHUTTER, or IRIS to be displayed on the LCD or EVF.
- While "GAIN UP" or "MAGICPIX" is displayed on the LCD or EVF, Manual White Balance is inoperable.
Forassistance, please call: 1-800-211-PANA(7262)or sende-mail to: consumerproducts@panasonic.com
Advanced Settings
Auto Focus
The Palmcorder automatically adjusts the focus over the entire zoom range.
Manual Focus
Use Manual Focus (MF) when recording ...
- a subject through glass.
- a scene where the subject is far from the Palmcorder and there are objects in the foreground.
- a subject with distinct horizontal stripes.
- a subject not centered in the Viewfinder.
- subjects with shiny surfaces.
- an obliquely angled subject.
- a bright, flat subject such as a white wall.
• in low light situations. - a scene with fast motions, like a golf swing. Re-focusing may be required
- when your Palmcorder is aimed at a new scene.


1 Set POWER to CAMERA.
2 Press AUTO/MANUAL so that the "MNL" indication appears in the EVF or the LCD monitor.
3 Press FOCUS so that the "MF" (Manual Focus) indication appears in the EVF or the LCD monitor.
4 Press and hold POWER ZOOM, "T" side (Telephoto), until the lens is at maximum zoom in.
5 Turn M.FOCUS DIAL until the picture is in focus.
- It may be necessary to back away from the subject to focus the image properly.
6 Press POWER ZOOM to "W" or "T" as desired.
- The subject will remain in focus over the entire zooming range.
- It may be necessary to back away from the subject to focus the image properly.
Macro Focus (for close-ups)
Press the "W" side of POWER ZOOM to the maximum wide angle position.
Auto Focus will function with the subject as close as 25 mm (1 inch) in front of the lens.
Advanced Settings
High Speed Shutter
To record high speed motion (e.g. tennis stroke) with improved STILL or SLOW MOTION playback when watching the tape on this Palmcorder.
Manual Selection
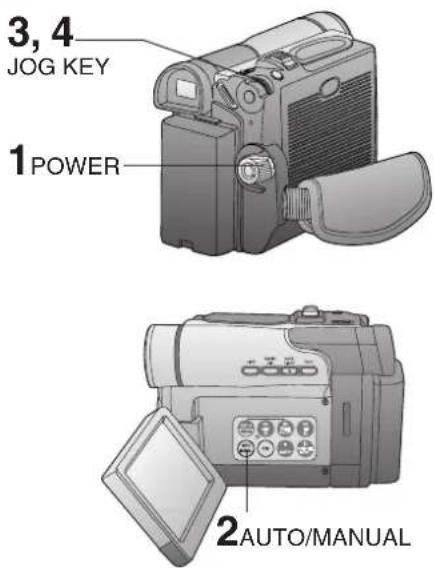
1 Set POWER to CAMERA.
2 Press AUTO/MANUAL so that the "MNL" indication appears in the EVF or the LCD monitor.
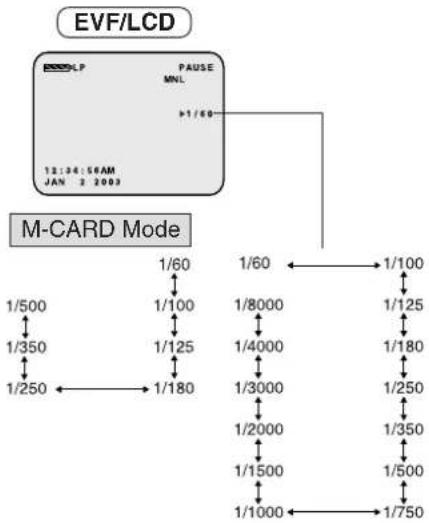
3 Press JOG KEY repeatedly to display the shutter speed.
4 Rotate JOG KEY to choose one of the following shutter speeds.
- Press AUTO/MANUAL to cancel the setting.
Note
- For proper color reproduction, it is recommended that you use this feature outdoors. For indoor High Speed Shutter recording, additional halogen or tungsten light should be provided. Fluorescent light will degrade the picture quality.
- This feature requires ample light. More light is required for the fastest shutter speeds.
- The Auto Focus system may not operate properly in insufficient light when using the High Speed Shutter.
- When PROG.AE is ON, you cannot manually select the shutter speed.
- When MagicPix or GAIN UP is ON, H.S.S. cannot manually select the shutter speed.
- When PROGRESSIVE is set to ON, the shutter speed cannot be adjusted to 1/750 s or faster.
flowchart
graph TD
    A["EVF/LCD"] --> B["M-CARD Mode"]
    B --> C["1/500"]
    B --> D["1/350"]
    B --> E["1/250"]
    B --> F["1/60"]
    B --> G["1/100"]
    B --> H["1/125"]
    B --> I["1/180"]
    B --> J["1/60"]
    B --> K["1/8000"]
    B --> L["1/4000"]
    B --> M["1/3000"]
    B --> N["1/2000"]
    B --> O["1/1500"]
    B --> P["1/1000"]
    B --> Q["1/750"]
    B --> R["1/100"]
    B --> S["1/125"]
    B --> T["1/180"]
    B --> U["1/250"]
    B --> V["1/350"]
    B --> W["1/500"]
    B --> X["1/750"]
    B --> Y["1/60"]
    Y --> Z["1/100"]
    Z --> AA["1/125"]
    AA --> AB["1/8000"]
    AB --> AC["1/4000"]
    AC --> AD["1/3000"]
    AD --> AE["1/2000"]
    AE --> AF["1/1500"]
    AF --> AG["1/1000"]
    AF --> AH["1/750"]
    AF --> AI["1/60"]
    AI --> AJ["1/8000"]
    AJ --> AK["1/4000"]
    AK --> AL["1/3000"]
    AL --> AM["1/2000"]
    AM --> AN["1/1500"]
    AN --> AO["1/1000"]
    AN --> AP["1/750"]
Advanced Settings
Adjusting the Iris Manually
Normally, the Palmcorder adjusts the exposure automatically. However, when the background is extremely bright, or when the subject is backlit, you can compensate by adjusting the iris manually.

WIND CUT
You can reduce sound distortion caused by wind hitting the microphone.

1 Set POWER to CAMERA.
2 Press AUTO/MANUAL so that the "MNL" indication appears in the EVF or the LCD monitor.
3 Press JOG KEY repeatedly so that Iris setting indication appears in the EVF or the LCD monitor.
4 EVT of the LCD monitor.
Rotate JOG KEY to adjust the iris;
- When a value closer to "CLOSE" is selected, the image becomes darker.
- When a value closer to "OP+18dB" is selected, the image becomes brighter.
- Press AUTO/MANUAL to cancel the setting.
Note
- The value to which +dB is attached indicates a gain value. If this value is too large, the quality of the image deteriorates.
- Depending on ZOOM magnification, the iris value may not be displayed correctly.
- If you are using Program AE mode, you cannot adjust the iris. If the iris is adjusted manually, the above modes will be canceled.
1 Set POWER to CAMERA.
2 Press MENU to display the CAMERA FUNCTIONS menu screen.
3 Rotate JOG KEY to select RECORDING SETUP, then press JOG KEY to display the RECORDING SETUP menu screen.
4 Rotate JOG KEY to select WIND CUT, and then press JOG KEY to select ON.
- Press MENU to exit.
- "WIND CUT" will appear in the EVF or LCD monitor.
5 Start recording.
Playback Your Recordings
Playback using the LCD Monitor
You can also use the LCD monitor to play back your recording.

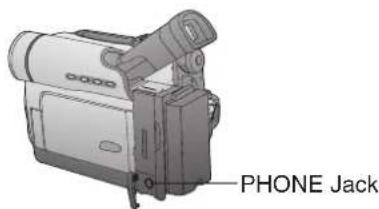
Connecting Earphone (not supplied)
Before you begin
- Connect the Palmcorder to a power source. (pp. 15, 16)
- Insert a recorded cassette.
1 Set the POWER to VCR.
• The POWER lamp lights red.
- Be sure POWER is fully turned to the VCR position.
2 Use OPEN tab on underside of the LCD monitor to unlock and swing open.
3 Press←(REWIND/SEARCH) to rewind the tape.
4 Press▶(PLAY) to start playback.
5 Press ■ (STOP) to stop playback.
- When the tape reaches its beginning during rewind or rewind search, it will stop automatically.
Note
- When a tape recorded in LP mode on another digital video camera is played back on this unit, the picture may appear mosaic.
• Using the LCD monitor reduces battery operating time. - You can place the Palmcorder on a table, etc. for viewing. Rotate the LCD Monitor 180° and swing it up against the Palmcorder body as shown.
You can connect earphones (not supplied) to the PHONE Jack.
Playback Your Recordings
Repeat Playback

Adjusting the Volume
![1, 2 VOLUME EVF/LCD VOLUME [.-] | | | | - - [-+] 12:36:56AM JAN 2 2003](/content/2026/05/1048910/images/6f976d11d545ba7de79e9766099b6f74e701d5430e10add9d08ddbf61969fa52.jpg)
Blank Search
You can go directly to a blank portion of tape and start recording exactly where you left off.

1 Press PLAY for more than 5 seconds in STOP mode.
- The Palmcorder will go into Repeat Playback mode when the tape reaches its end.
- The letter "R ▷" will appear in the EVF and LCD monitor.
2 Turn the Palmcorder OFF to exit the Repeat Playback mode.
1 Slide VOLUME to adjust the volume of the built-in speaker in PLAY mode. The volume setting screen appears.
2 Press "T" to increase the volume. Press "W" to decrease the volume.
1 Set POWER to VCR.
2 Press MENU to display the VCR FUNCTIONS menu screen.
3 Rotate JOG KEY to select PLAYBACK FUNCTIONS, then press JOG KEY to display the PLAYBACK FUNCTIONS menu screen.
4 Rotate JOG KEY to select BLANK SEARCH in the PLAYBACK FUNCTIONS menu. (Menu OSD: p. 110)
5 Press JOG KEY to select ON. • "BLANK" will appear on the screen.
Special Effect Features
Note
• Sound is muted during all special effects.
Rapid Visual Search

A During playback, hold down ▶ (FAST FORWARD/SEARCH) or ◀ (REWIND/SEARCH). The search will continue for as long as the button is held down.
B Press (FAST FORWARD/SEARCH) or (REWIND/SEARCH) once for a continuous rapid visual search. Press (PLAY) to release.
Note
- When executing a rapid visual search, the picture may become bluish for an instant or mosaic. This is normal during this mode.
STILL Picture
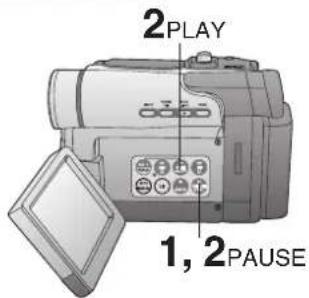
1 Press II (PAUSE) during playback. 2 Press ▶ (PLAY) or II (PAUSE) to release.
Note
• To protect the tape and video heads, your Palmcorder's operating modes will revert as follows: STILL → STOP (after 3 minutes.)
Fast Forward/Rewind Check
Monitor normal picture playback during fast forward or rewind.

A Hold down ★FAST FORWARD/SEARCH) during fast forward.
B Hold down (REWIND/SEARCH) during rewind.
- The picture will appear for as long as the button is held down.
Forassistance, please call: 1-800-211-PANA(7262)or sende-mail to: consumerproducts@panasonic.com
Special Effect Features
Note
• Sound is muted during all special effects.
Slow Motion Playback (Optional Remote Control Only)
Optional

Variable Speed Search

1 Forward Slow:
Press |GLOW/F.ADV during play.
Reverse Slow:
Press ◀ SLOW/F.ADV during play.
2 Press PLAY to release. (During reverse slow motion playback, time code indication may not change regularly.)
Note
- Palmcorder will automatically STOP when in slow motion for more than 10 minutes.
- During slow motion playback, picture may move up and down. This is normal.
- When you start or stop slow motion playback, the picture may become bluish for an instant.
1 Press→(PLAY) to start playback.
2 Press JOG KEY for about 1 second.
3 Rotate JOG KEY to adjust the playback speed.
- Rotate JOG KEY clockwise for forward playback.
- Rotate JOG KEY counterclockwise for reverse playback.
To return to normal playback:
Press ▶(PLAY). Playback will continue at normal speed.
Note
- The Variable Speed Search function offers a choice of six playback speeds (1/5X (LP mode: 1/3X), 1X, 2X, 5X, 10X, 20X) both in forward and reverse directions.
- The review playback at the 1X speed is playback in reverse direction.
- During the Variable Speed Search (except 1X speed in forward direction), mosaic-like patterns will appear in the picture.
- During the Variable Speed Search, sound is muted.
- The Variable Speed Search feature is not available when the Repeat Playback is active.
Special Effect Features
Note
• Sound is muted during all special effects.
Frame by Frame Advance
When using Optional Remote Control
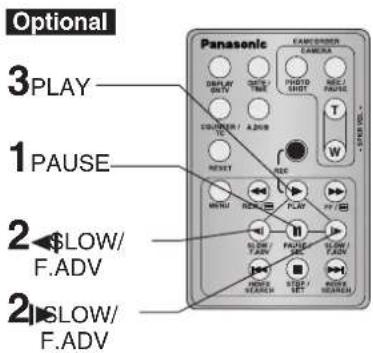
1 Press PAUSE during playback.
2 Press |▶ SLOW/F.ADV to do a frame by frame advance.
Press ◀|SLOW/F.ADV to do a frame by frame reverse.
3 Press PLAY to release.
Note
- If you hold down SLOW/F.ADV, you can see a continuous series of still images at a slower speed than normal slow mode.
- During frame by frame advance, a few frames may move automatically, and the picture may become bluish for an instant.
When using Palmcorder
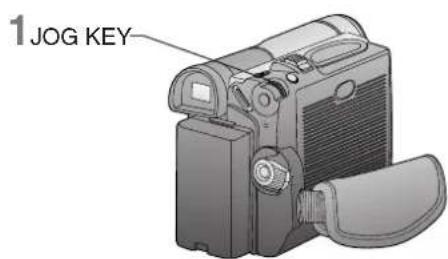
1 During Still mode, rotate JOG KEY to advance or reverse the picture one frame at a time.
Special Effect Features
Note
- Sound is muted during all special effects.
Index Search (Photo/Scene) (Optional Remote Control Only)
Search for a particular scene by using the electronic index marks placed at the beginning of each recording.

Optional

Top Scan
If you hold down INDEX SEARCH for more than 2 seconds, the Palmcorder will scan for scenes (or PhotoShots) and playback the first few seconds of each.
To cancel this function, press PLAY or STOP.
Note
- Search will not work if there is a succession of PhotoShots.
1 Press MENU to display the VCR FUNCTIONS menu screen.
2 Rotate JOG KEY to select PLAYBACK FUNCTIONS, then press JOG KEY to display the PLAYBACK FUNCTIONS menu screen.
3 Rotate JOG KEY to select SEARCH, and then press JOG KEY to select PHOTO or SCENE. (Menu OSD: p. 110) • Press MENU to exit.
A Place the Palmcorder in the VCR STOP mode.
B Press INDEX SEARCH fast forward or rewind for the number of recordings (indexes) forward or back you want to view. The Palmcorder will advance or rewind to the desired recording and automatically start playback.
- The number of times you pressed the button is displayed in the EVF and the LCD monitor if you set SEARCH on the VCR menu to SCENE. (Menu OSD: p. 110) (e.g., if you press the button three times, "S3" will appear.)
- If the interval between scenes is less than 1 minute, index search may not operate properly.
- Response time from pressing the button and the change in the scene number is quite slow. Do not press INDEX SEARCH rapidly and continuously.
- During Reverse Index Search mode, playback will not begin when a tape rewinds all the way to the beginning.
Note
• The picture quality will deteriorate slightly.
- The tape remaining indicator will not appear while the PHOTOSHOT feature is used.
- In the Photo/Scene Index Search mode, the shutter sound effect may not be able to be heard even when SHTR EFFECT is set to ON.
- Photo Index Search may fail to detect a recorded PhotoShot image if the image is 3 seconds or less.
Special Effect Features
Strobe Multi Mode
In Strobe Multi Mode, you can select the rate at which a succession of still screens are captured from the playback picture.


Note
- A Multi Image Playback screen cannot be output from the DV terminal or USB terminal.
- A Multi screen will have slightly lower image quality.
1 Set POWER to VCR.
2 Press MENU to display the VCR FUNCTIONS menu screen.
3 Rotate JOG KEY to select PLAYBACK FUNCTIONS, then press JOG KEY to display the PLAYBACK FUNCTIONS menu screen.
4 Rotate JOG KEY to select MULTI SPEED in the PLAYBACK FUNCTIONS menu screen. (Menu OSD: p. 110)
5 Press JOG KEY repeatedly to set desired speed.
Strobe Speeds
| Strobe Speeds | 9 screen capture time |
| FAST | Every 0.3 seconds |
| NORMAL | Every 0.6 seconds |
| SLOW | Every 1.0 seconds |
- Press MENU to exit.
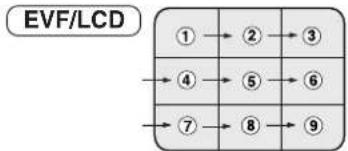
6 Press (PLAY) to start playback. Press (MULTI) at the point you want to start capturing.
- A succession of 9 screens will be captured, and playback will stop.
flowchart
graph TD
    A["①"] --> B["②"]
    B --> C["③"]
    D["④"] --> E["⑤"]
    E --> F["⑥"]
    G["⑦"] --> H["⑧"]
    H --> I["⑨"]
- Press ▶ (PLAY) to start playback. Press ■(STOP) to stop playback.
Special Effect Features
View Recording/Playback on your TV
[ TV with AUDIO/VIDEO IN Jacks ]

[ TV with S-VIDEO IN Jacks ]
For best Chrominance and Luminance, use the S-Video connection if available on your TV.

Before you begin
- When using S-VIDEO Connector, insert the DC Cable into the DC IN Terminal. (p. 16)
1 Set POWER to CAMERA or VCR.
To view what the Palmcorder is recording or to playback a tape on your TV.
2 Turn your TV ON and set it to LINE INPUT or S-VIDEO.
Check your TV operating instructions for further information.
3 Start playback or begin a recording.
• Make sure the Palmcorder and TV are turned off while connecting.
- Please connect the A/V Cable securely.
Note
(Optional Remote Control Only)
You can display the various EVF and LCD indications on your TV by pressing DISPLAY ON TV on the remote control. Press again to remove the indications.
Optional

Digital Features
Digital Zoom
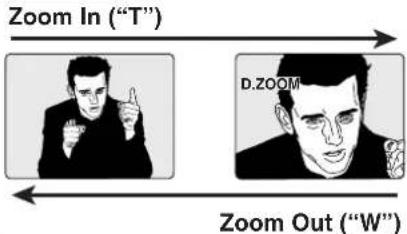
This feature is useful when you want to record close-up shots of subjects located beyond a normal zoom range of 1X to 10X magnification. With the digital zooming feature, you can select a magnification of 25X, or even up to 700X.
Note
- Other Digital Functions are turned off automatically when the EIS and Digital Zoom are selected.
EVF/LCD


CAMERA mode
1 Set POWER to CAMERA.
2 Press MENU to display the CAMERA FUNCTIONS menu screen.
3 Rotate JOG KEY to select CAMERA SETUP, then press JOG KEY to display the CAMERA SETUP menu screen.
4 Rotate JOG KEY to select D. ZOOM, then press JOG KEY to select 25X or 700X.
25X : from 10X to 25X
700X : from 10X to 700X
OFF: Turn off D.ZOOM
- Press MENU to exit.
5 Press REC/PAUSE to start recording and press POWER ZOOM to zoom in or zoom out.
- The magnification level is always displayed in the EVF or the LCD monitor when DISPLAY is set to ALL or PARTIAL. (Menu OSD: p 109)
6 Repeat steps 2\~4 to select OFF to cancel this feature.
Note
• The normal optical zoom functions from 1X to 10X.
- As magnification increases, resolution significantly decreases.
- Because the image is enlarged digitally, the picture may become distorted when higher magnification levels are used.
- When the level falls below 10X, the normal zooming function will resume.
- Focus distance becomes 1.2 m (4 feet) if the lens is in full telephoto.
Digital Features
Digital Zoom (Continued)

VCR mode
1 Set POWER to VCR.
2 Press MENU to display the VCR FUNCTIONS menu screen.
3 Rotate JOG KEY to select DIGITAL EFFECT, then press JOG KEY to display the DIGITAL EFFECT menu screen.
4 Rotate JOG KEY to select D. ZOOM, then press JOG KEY to select ON.
- Press MENU to exit.
5 Press→(PLAY) to start playback.
• The center portion of the image doubles in size.
6 Repeat steps 2\~4 to select OFF to cancel this feature.
MagicPix™ Images
Color recording of video or still images onto the Mini DV tape in low lighting.
Note
- MagicPix cannot be used with still images on the Memory Card. (See "Card PhotoShot" on page 49.)

1 Set POWER to CAMERA.
2 Press MAGIC PIX.
- “MAGICPIX” will appear on the screen.
3 To cancel the Digital Function, press MAGIC PIX again.
EVF/LCD

natural_image
Two-panel illustration showing a person changing their face from left to right (no text or symbols)Note
- The image will be brighter than with GAIN UP, however motion jitter will be much greater.
Digital Features
Dual Digital Electronic Image Stabilization System (D.E.I.S.)
This feature helps compensate for any unintentional hand or body movement. It can be used in both the Recording and Playback (VCR) modes.
Note
- Other Digital Functions are turned off automatically when the EIS and Digital Zoom are selected.


CAMERA mode
1 Set POWER to CAMERA.
2 Press EIS to stabilize the picture.
• Picture flicker may be observed when taping under fluorescent lighting conditions.
• The EIS indicator flashes when the light level is inadequate.
- Turn D.E.I.S. OFF during recording when using a tripod.
3 Press REC/PAUSE to start recording. 4 Press EIS again to cancel.
- Be sure that D.E.I.S. is turned off when not needed.
D.E.I.S. may not function when...
- Palmcorder movement is too extreme.
- Recording a subject with distinct horizontal or vertical stripes.
• Recording in low light situations. - Recording a subject under a great amount of fluorescent light.
- Recording a scene with very fast motions.
VCR mode
A Set POWER to VCR.
B Press▶(PLAY) to start playback.
C Press EIS to stabilize the picture.
D Press EIS again to cancel. - Be sure that D.E.I.S. is turned off when not needed.
Note
- When using D.E.I.S in VCR mode, the image size is slightly larger.
Digital Features
Other Digital Functions
Use the following features to add interest and professionalism to your recordings or playback. Select from twelve special effects.
Types of Digital Functions
MIRROR
Symmetrical image from the current camera picture.
STROBE
The recording appears as a sequence of still frames.
MOSAIC
The picture appears in a mosaic pattern.
SLIM
The picture is expanded vertically.
TRAIL
The subject being recorded creates a trail when in motion.
STRETCH
The picture is expanded horizontally.
GAIN UP (Not available during playback) Picture sensitivity is increased.
- The image will be brighter than normal, however motion jitter will occur.
WIPE (Not available during playback) Successive scenes are separated in a way which simulates the drawing of a curtain.
MIX (Not available during playback) The current scene is mixed in with the following scene during scene changes.
P-IN-P (Not available during playback) PinP (Still image) is displayed on the Main Picture.
SEPIA (Only available during playback) The picture is played back in sepia, a brownish color, giving it an antique look.
B/W (Black-and-white) (Only available during playback)
The picture is played back in black-and-white.
1 Set POWER to CAMERA or VCR.
2 Press MENU to display the menu screen.
3 Rotate JOG KEY to select DIGITAL EFFECT in the CAMERA or VCR mode menu screen, then press JOG KEY to display the DIGITAL EFFECT menu screen.
4 Rotate JOG KEY to select EFFECT in the CAMERA mode menu screen or EFFECT1 / EFFECT2 in the VCR mode menu screen, and then press JOG KEY repeatedly to select one of the Digital Functions listed on the left.
5 To cancel the Digital Function, press JOG KEY repeatedly to select OFF.
Note
- The EIS and Digital Zoom features are turned off automatically when one of the Digital Functions listed at left is selected.
To use the WIPE function
a. In Camera mode, set the "EFFECT" item in the main menu screen to "WIPE". (Menu OSD: p. 108)
b. Press REC/PAUSE to start recording.
c. Press REC/PAUSE to pause the recording. The last scene will be memorized.
d. Press RECORD/PAUSE to start recording again. The new scene will take the place of the memorized scene.
To use the MIX function
a. In Camera mode, set the "EFFECT" item in the main menu screen to "MIX". (Menu OSD: p. 108) Then, perform steps b-d above.
The memorized scene and the new scene will appear mixed as the scene changes from one to the other.
Note
- When Photo Title is set, WIPE/MIX mode becomes Photo Title. When Photo Title is finished, Digital Function turns OFF.
Digital Features
Picture in Picture (PinP)
You can display a PinP (still image) screen on the Main Picture.
Note
- PinP position is fixed at the bottom right of the screen.

1 Set POWER to CAMERA.
2 Press MENU to display the CAMERA FUNCTIONS menu screen.
3 Rotate JOG KEY repeatedly to select DIGITAL EFFECT, then press JOG KEY to display the DIGITAL EFFECT menu screen.
4 Press JOG KEY to select P-IN-P.
- Press MENU to exit this menu.
- "P-IN-P" will appear in the EVF or the LCD monitor.

5 Aim at the scene you wish to place as PinP, then press II(CAMERA STILL) to freeze the image.
6 Press II (CAMERA STILL) again to place the frozen image as PinP.

7 Press REC/PAUSE to record a scene with PinP image.
- Press PHOTOSHOT to record a scene with PinP image in PhotoShot mode.
- Press II (CAMERA STILL) again to remove PinP image.
Editing Features
Audio Dubbing using the Built-in Microphone
The original sound can be replaced with new sound using the built-in Palmcorder microphone.



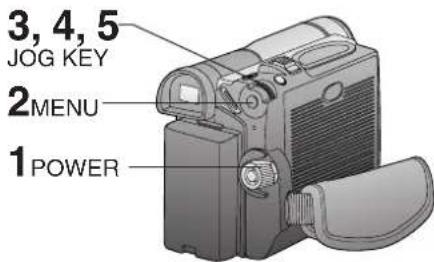
Before you begin
• Turn on the Palmcorder.
- Insert a pre-recorded tape to be dubbed.
| 12 bit | The original sound is recorded on ST (Stereo) 1, and the new sound will be recorded on ST (Stereo) 2. |
| 16 bit | The original sound is replaced with the new sound. |
- Select 12 bit if you do not want the original sound to be completely replaced during an audio dub.
- With tape containing both 12 bit and 16 bit audio, please note that if dubbing is started in a 16 bit portion, the 12 bit audio will also be completely replaced.
1 Set POWER to VCR.
- If you have the optional Remote Control, you can set the Palmcorder to stop automatically at a specific point on the tape. See "Memory-Stop Editing" on page 46.
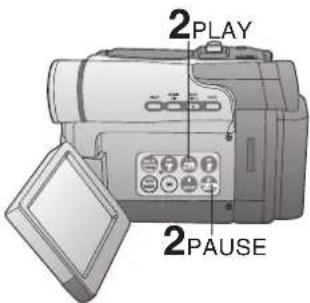
2 Press▶(PLAY). Then press II (PAUSE) where you want dubbing to begin.
When using the Palmcorder only
3 Press MENU to display the VCR FUNCTIONS menu screen.
Rotate JOG KEY to select RECORDING SETUP, then press JOG KEY to display the RECORDING SETUP menu screen.
Rotate JOG KEY to select AUDIO DUB, and then press JOG KEY to select ON.
- The Palmcorder will go to Stand By mode, and "A.DUBII" indication appears in the EVF or the LCD monitor. Go to step 4.
When using the Optional Remote Control only
3 Press A.DUB on the Remote Control.
- The Palmcorder will go to Stand By mode, and "A.DUB II" indication appears in the EVF or the LCD monitor. Go to step 4.
Editing Features
To listen to the desired audio sound, set the 12bit AUDIO setting of the VCR mode MENU (Menu OSD: p. 110) as follows:
12bit AUDIO: The following selections are available for 12 bit AUDIO dubbed recordings only (sound recorded in SP mode only).
| ST 1 | Set this position to listen to the original sound. |
| ST 2 | Set this position to listen to the audio dubbed sound. |
| MIX | Set this position to listen to both the original sound and the audio dubbed sound. |
Note
- When a 16 bit recording is dubbed over, the original audio of the recording will be erased.
- When a 12 bit recording is dubbed over and played back, and MIX is selected as the AUDIO, both the original audio and the dubbed audio are played back.
- If you recorded in LP mode, you cannot use the A.DUB feature.
Memory-Stop Editing
You can set an automatic Dubbing stop point.

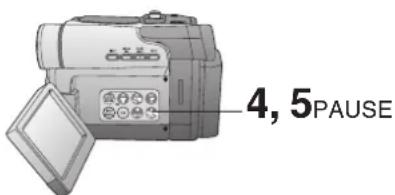
4 Press I(PAUSE) to start Audio Dubbing. "A.DUB >indication appears.
- Connect the Palmcorder to the TV in order to monitor the sound. (p. 39)

Only NTSC (National Television Standards Committee) recorded tapes can be audio dubbed. The following screen appears if the tape was not recorded in NTSC format.
5 Press I(PAUSE) to stop Audio Dubbing.
- If the microphone used for dubbing gets too near the speaker of your TV, a howling noise (feedback) may occur.
- If the tape position is in or was started in a blank section, you cannot use the A.DUB feature.
A Press MENU to display the VCR FUNCTIONS menu screen.
B Rotate JOG KEY to select DISPLAY SETUP, and then press JOG KEY to display the DISPLAY SETUP menu
C Rotate JOG KEY to select C. DISPLAY, and then press JOG KEY to set to MEMORY.
D Press MENU to exit MENU mode. Then, press RESET on the remote control to reset the Counter Memory to M 0:00.00.
Now, rewind to the editing start point, and continue with steps 2-5. The tape will now stop automatically at "M 0:00.00".
Forassistance, please call: 1-800-211-PANA(7262)orsende-mailto:consumerproducts@panasonic.com
Editing Features
Copying your Tapes to S-VHS or VHS Cassette
Source (Playing) Palmcorder

Monitor with your TV
- Turn the TV ON and select its VCR channel (either CH3 or CH4).
- Set the VCR/TV Selector on the recording VCR to VCR.
Before you begin
- Connect both Palmcorder and VCR to their power sources.
- Connect the Palmcorder to a VCR as illustrated left.
- Turn ON both units.
- Set the recording VCR's Input Signal Selector to LINE.
- Set the Palmcorder POWER to VCR.
- Before using S-VIDEO Connector, insert the DC Cable into the DC IN Terminal. (p. 16)
1 Insert a pre-recorded tape
into the source (playing) Palmcorder and a blank tape, with record tab in place, into the target VCR (Recorder).
2 Press (PLAY) on the Palmcorder. When the tape reaches the point from which you want to start dubbing, press PAUSE.
3 Place the VCR into REC/PAUSE mode. (See VCR manual.)
4 Simultaneously, press PAUSE on both units to begin copying.
5 Press STOP on both units when copying is completed.
Note
- For technical reasons, dubbing a tape may reduce its quality.
- Press DISPLAY ON TV on the Palmcorder Remote Control to eliminate EVF/LCD Monitor indications.
- If the Time Code is displayed in the EVF or LCD monitor, it cannot be reset.
- Only the DATE/TIME, when displayed, will be recorded on the tape.
CAUTION:
Unauthorized exchanging and/or copying of copyrighted recordings may be copyright infringement.
Editing Features
Copying from Digital Equipment (dubbing)
High quality digital-to-digital copying can be accomplished if both Palmcorders incorporate the DV Input/Output (i.LINK) Connector (DV Interface cable (i.LINK) is not supplied).

Before you begin
- Connect both Palmcorders to their power sources.
- Connect the two Palmcorders using the DV Interface cable (i.LINK) (4-pin to 4-pin).
• Turn both Palmcorders ON.
1 Insert a pre-recorded tape into the source (playing) Palmcorder, and set POWER to VCR.
2 Insert a blank tape with the record tab closed into the target (recording) Palmcorder and set POWER to VCR.
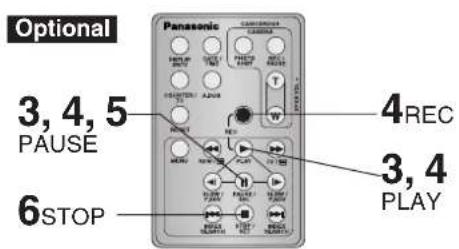
3 Press (PLAY) on the source Palmcorder. When the tape reaches the point from which you want to start dubbing, press II (PAUSE).
4 Hold down●(REC) and press ▶(PLAY) on the target (recording)
Palmcorder.
Press II (PAUSE) to pause the tape at the starting point of the dub.
5 Simultaneously, press II (PAUSE) on both units to begin dubbing.
6 Press ■ (STOP) on the recording unit, and then press ■ (STOP) on the playing unit to end dubbing.
Note
- When two Palmcorders are used for dubbing, it is recommended that the Remote Control (Optional) VCR1 or VCR2 setting be used to avoid improper-operation.
CAUTION: Unauthorized exchanging and/or copying of copyrighted recordings may be copyright infringement.
48
Forassistance, please call: 1-800-211-PANA(7262)orsende-mailto:consumerproducts@panasonic.com
Card Features
Card PhotoShot
You can record still images to a Memory Card.
Warning
- When using an M-CARD, DV Output will not function.

Image Resolution and Capacity (Supplied 8MB Memory Card)
| REC Mode | Image Resolution | Capacity |
| FINE | 1280 x 960 | Approx. 30 images |
| NORMAL | 640 x 480 | Approx. 70 images |
- The number of images given for each mode applies when all images are taken in same mode.
- You can change recording modes at any time before capturing an image.
- The number of images that can be captured may differ depending on the subject. After capturing an image, the number may not decrease, or it may decrease by two. This is normal.
Note
- 1280 x 960 PhotoShot image is interpolated from 640 x 480 image.
- Some artifacting, softened edges or picture noise may occur in Fine (1280 x 960) Mode.
- PhotoShot capture time for Fine Mode (1280 x 960) is approximately 10 seconds, and for Normal Mode (640 x 480) is approx. 5 seconds.
Before you begin
- Connect the Palmcorder to a power source. (pp. 15, 16)
- Set POWER to OFF before inserting a Memory Card. (p. 14)
1
Set POWER to M-CARD.
• The POWER lamp lights red.
- Be sure POWER is fully turned to M-CARD position.
- “PLAY: PUSH PLAY KEY” is displayed for 10 seconds. (p. 51)
2
Press MENU to display CARD SETUP menu, then press JOG KEY to select NORMAL or FINE.

- Press MENU to exit this menu.
3
Press PHOTOSHOT to record an image.


- The PhotoShot image is recorded to the Memory Card.
- When SHTR EFFECT is set to ON (Menu OSD: p. 109), still pictures are recorded with a visual shutter effect and click sound. If set to OFF, the still image will be displayed only.
Warning
- While "PROCESSING" is displayed, DO NOT turn off the Palmcorder or unplug the AC Adaptor (supplied) because this will cause irreversible damage to the memory.
- When recording DV Tape playback output to the Memory Card, only NORMAL mode is available. (p. 50)
Card Features
Cautions for the Memory Card
- While Memory Card data is being read, do not remove it, turn off the power, or subject unit to vibrations and/or shocks.
- Do not leave the Memory Card in a place with high temperature, a place exposed to direct sunlight, or a place where electromagnetic waves and static electricity can be generated.
- Electromagnetic waves, static electricity, malfunction of the Digital Video Palmcorder or of the Memory Card itself could erase the data recorded on it. To prevent the loss of picture data, we recommend that you make a backup copy on the computer.
- Do not bend or drop the Memory Card as this could damage it or the captured contents.
- Do not touch the connector on the rear edge of the Memory Card with your fingers and take care that no dirt, dust or water enters it.
- Do not affix other labels to the Memory Card face or back as Card insertion/removal may become impossible.
Recording Images From a Tape
You can record still images from a cassette tape to a Memory Card.

Note
- When using this feature, the REC Mode will always be set to NORMAL (640 x 480).
• Even if Playback Digital Effects (MIRROR, MOSAIC, SEPIA, B/W) have been used, these effects do not affect the recording. - Multi-Picture cannot be recorded. (p. 38)
Before you begin
- Connect the Palmcorder to a power source. (pp. 15, 16)
- Set POWER to OFF before inserting a Memory Card. (p. 14)
1 Repeat steps 1 and 2 on page 49.
2 Set POWER to VCR.
3 Press ▶ (PLAY) to start playback of the cassette tape. And then, press II (PAUSE) to select an image.
4 Press PHOTOSHOT to record the desired image to the Memory Card.


- When PHOTOSHOT is pressed in PLAY or SLOW mode, the screen goes to STILL mode.
• To playback the images of the Memory Card, see page 51. - When Variable Speed Search is done (p. 35), this feature cannot be used.
5 Repeat steps 3\~4 to record another image to the Memory Card.
Forassistance, please call: 1-800-211-PANA(7262)orsende-mailto:consumerproducts@panasonic.com
Card Features
Playback Still Images
You can view the images on the Memory Card.
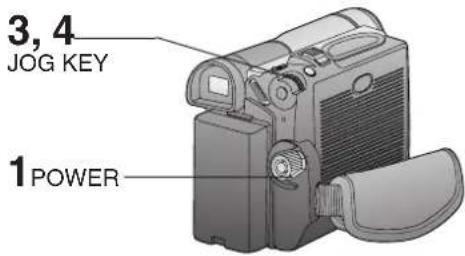
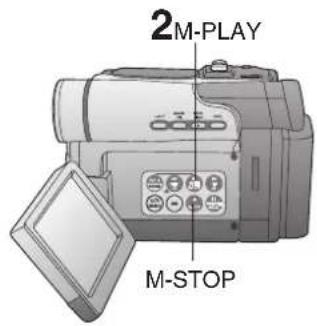

Note
- If the file number is changed, the Palmcorder cannot read the file data.
- This product is compliant with DCF (Design rule for Camera File System). Images saved on the Memory Card using other Digital Still Cameras that are compliant with DCF can be viewed on this product.
Warning
- While "PLEASE WAIT" is displayed, DO NOT turn off the Palmcorder or unplug the AC Adaptor (supplied) because this may cause irreversible damage to the Memory Card.
Before you begin
- Set POWER to OFF before inserting a recorded Memory Card. (pp. 49, 50)
1
Set POWER to M-CARD. - “PLAY: PUSH PLAY KEY” is displayed for 10 seconds.
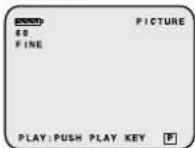
2
Press ▶ (M-PLAY) to display the Multi playback screen.
- "PLEASE WAIT" appears on-screen.
- Rotate JOG KEY to scroll through Multi image screen pages (6 images per page) and select an image.
- The selected image is underlined in green.
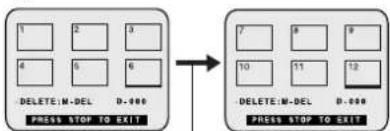
flowchart
graph LR
    A["1"] --> B["2"] --> C["3"]
    D["4"] --> E["5"] --> F["6"]
    G["DELETE: M-DEL"] --> H["D-000"]
    I["PRESS STOP TO EXIT"] --> J["7"] --> K["8"] --> L["9"]
    M["10"] --> N["11"] --> O["12"]
    P["DELETE: M-DEL"] --> Q["D-000"]
    R["PRESS STOP TO EXIT"] --> S["10"] --> T["11"] --> U["12"]
"PLEASE WAIT" is displayed.
- Press MENU to display CARD SETUP menu screen.
- Press ■ (M-STOP) to return to the Card PhotoShot REC Mode. (p. 49)
3
Press JOG KEY to display the selected image as a full-size screen.
- "PLEASE WAIT" appears on-screen.
4
Rotate JOG KEY to select BACK (previous image), MULTI (Multi Image screen), or NEXT (next image).

- Press ■ (M-STOP) to return to the Multi Playback screen.
Note
- The input to the Video Monitor and LCD Panel will not be displayed on the picture recorded of the Memory Card.
Card Features
Delete Specific Images
You can delete unwanted images and increase the remaining image memory.
Warning:
Once deleted, images cannot be restored.
DELETE PAGE
Delete specific images from a page.
DELETE ALL
Delete all images. (p. 53)
FORMAT
Delete all data. (p. 54)


Warning
- While deleting image, DO NOT turn off the Palmcorder or unplug the AC Adaptor (supplied) because this may cause irreversible damage to the Memory Card, resulting in reduced image storage capacity.
Before you begin
- Set POWER to OFF before inserting a recorded Memory Card. (pp. 49, 50)
1 Set POWER to M-CARD.
- “PLAY: PUSH PLAY KEY” is displayed for 10 seconds.
2 Press ▶ (M-PLAY) to display the Multi playback screen. • “PLEASE WAIT” appears on-screen.
3 PressII (M-DEL) to display the DELETE menu, then rotate and press JOG KEY to select PAGE.

- DELETE PAGE menu is displayed.

4 Rotate and press JOG KEY to select and set the image to be deleted. • The selected image is underlined in pink.
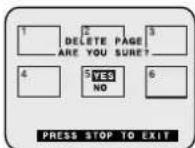
5 Rotate JOG KEY to select YES, and press JOG KEY to delete the selected image. • To cancel delete, press ■ (M-STOP) or rotate and press JOG KEY to select NO. • “PLEASE WAIT” appears on-screen during deletion. • To delete other images, repeat steps 4\~5.
Forassistance, please call: 1-800-211-PANA(7262)orsende-mailto:consumerproducts@panasonic.com
Card Features
Delete All Image Pages
You can delete all images from the Memory Card easily with this operation.
Warning:
Once deleted, images cannot be restored.


Warning
- While deleting images, DO NOT turn off the Digital Video Camcorder or unplug the AC Adaptor (supplied) because this may cause irreversible damage to the Memory Card, resulting in reduced image storage capacity.
Before you begin
- Set POWER to OFF before inserting a recorded Memory Card. (pp. 49, 50)
1 Do steps 1 and 2 on page 52.
2 PressI (M-DEL) to display the DELETE menu. Then, rotate and press JOG KEY to select ALL.

- The screen below is displayed. - To cancel delete, press ■ (M-STOP) or rotate and press JOG KEY to select NO.

3 Rotate and press JOG KEY to select YES.
- "PLEASE WAIT" is displayed on the screen, and then "NO PICTURE" is displayed.
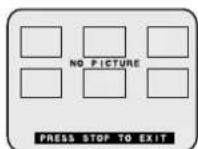
- Press ■ (M-STOP) to return to the Card PhotoShot REC Mode screen. (p. 49)
Card Features
Format the Memory Card
You can easily format your Memory Card using this operation.
Warning:
Formatting permanently removes all image data.


Warning
- While deleting image, DO NOT turn off the Palmcorder or unplug the AC Adaptor (supplied) because this may cause irreversible damage to the Memory Card, resulting in reduced image storage capacity.
Before you begin-
- Set POWER to OFF before inserting a recorded Memory Card. (pp. 49, 50)
1 Do steps 1 and 2 on page 52.
2 PressII (M-DEL) to display the DELETE menu, then rotate and press JOG KEY to select FORMAT.

- The screen below is displayed. - To cancel format, press ■ (M-STOP) or rotate and press JOG KEY to select NO.

3 Rotate and press JOG KEY to select YES.
- “PLEASE WAIT” is displayed on the screen as all image data is deleted from Memory Card. Deletion is complete when “NO PICTURE” is displayed.

- Press ■ (M-STOP) to return to the Card PhotoShot REC Mode screen. (p. 49).
Card Features
DPOF Setting
You can select the images to be printed, the number of prints, and other print-related information (DPOF setting) on a Memory Card. "DPOF" stands for Digital Print Order Format, and since printing data can be added to images on the Memory Card, the Memory Card can be used with any system that supports DPOF.
VARIABLE:
You can select images recorded on the Memory Card and set the number of prints desired.
ALL1:
The number of prints recorded on the Memory Card is collectively set to 1.
ALLO:
The currently set number of prints is set to 0.
3, 4, 5,
JOG KEY
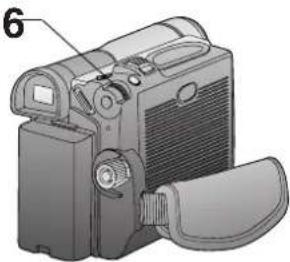
natural_image
Illustration of a digital camera with a handle and labeled part (6), no text or symbols present.
Before you begin
- Set POWER to OFF before inserting a recorded Memory Card. (pp. 49, 50)
1 Do steps 1 and 2 on page 52.
2 Press MENU to display the CARD SETUP menu screen.
3 Rotate JOG KEY to select DPOF, then press JOG KEY to select ON.

4 Rotate JOG KEY to select VARIABLE, then press JOG KEY to select ON.
- DPOF SETTING menu screen is displayed on the screen.

5 Rotate and press JOG KEY to select the picture.
- The selected image is underlined in green.
• The cursor moves to "D-000".
6 Rotate and press JOG KEY to set the number of prints.
- The “●” mark is displayed. The “●” mark indicates pictures for which 1 or more prints have been set. - When printing one each of all the pictures, select “ALL1”; if not all the pictures are printed, select “ALL0”.

7 Repeat steps 5 and 6 to set the other pictures.

Print mark is based on DPOF (Digital Print Order Format).
Transferring Your Images (Windows)
You can transfer images from your Palmcorder tape to your PC (Personal Computer).
System Requirements (for Palmcorder USB Device Driver/PHOTOVU MPEG4 Movie Messenger™ System)
• IBM PC/AT or compatible
- Pentium II Processor: 266 MHz or more
• RAM: 64 MB or more
• CD-ROM drive (for installation)
- Mouse or other pointing device
- Windows 98SE/Me/2000/XP preinstalled PC with USB port
- 2 MB minimum available hard disk space (for Palmcorder USB Device Driver)
- 15 MB minimum available hard disk space (for PHOTOVU/MPEG4 Movie Messenger™ System)
- 10 MB minimum available hard disk space (for Palmcorder File Converter)
- Minimum 120 MB of free hard disk space for Motion picture transfer from DV tape to PC (for PHOTOVU/MPEG4 Movie Messenger™ System)
- Video card that supports 16 bit color at 800 x 600 monitor resolution (for Palmcorder USB Device Driver, PHOTOVU/MPEG4 Movie Messenger™ System, and Palmcorder File Converter)
- Microsoft® Windows Media™ Player 6.4 (for Windows 2000 users: Microsoft® Windows Media™ Player 7.1) or later (for PHOTOVU/MPEG4 Movie Messenger™ System)
If Windows Media Player 6.4 (for Windows 2000 users: Windows Media Player 7.1) or later is not installed in your PC, please download and install Windows Media Player from the Microsoft Home Page: http://www.microsoft.com/
*Satisfy the conditions recommended by Microsoft for Windows XP.
Palmcorder USB Device Driver/Web Camera/SD Drive
Install Palmcorder USB Device Driver.
You can transfer motion/still picture to your PC using Movie Messenger, Web Camera or SD Drive via USB. Using this driver allows data communication between the Memory Card and PC.
PHOTOVU/MPEG4 Movie Messenger™ System
Install PHOTOVU/MPEG4 Movie Messenger™ System.
You can transfer motion/still pictures to your PC from a Mini DV Tape via USB and i.LINK.
Palmcorder File Converter
Install File Converter.
You can convert the JPEG data of your PC into the DCF (Design rule for Camera File System) data, and transfer this data to your Palmcorder via USB. Using this driver allows data communication between the Memory Card and PC.
Transferring Your Images (Windows)
Software Installation (Windows 98SE/Me/2000/XP)
Caution
- Please install Palmcorder USB Device Driver first before connecting the Palmcorder and your PC using USB Cable. Once Palmcorder USB Device Driver is installed, you must restart your computer for installation to take effect.
- Restarting the computer not only applies to Driver installation, but must be done whenever "Restarting Windows" a is displayed after software or driver install/uninstall.
- For Windows XP users, when installing Palmcorder USB Device Driver, a message, such as the one below, is displayed. The following message b is displayed. However, testing by the manufacturer has confirmed functionality of this Palmcorder with Windows XP. Click [Continued Anyway] and proceed.
a

b
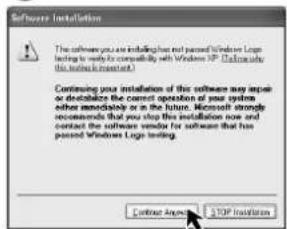
123
Turn on the PC (Personal Computer) and start up Windows.
Insert the supplied Software CD-ROM into the CD-ROM drive.
Click the icon you want to install. Please install the Palmcorder USB Device Driver first and follow the instructions listed under "Caution".

Palmcorder USB Device Driver
• For Movie Messenger
- For Web Camera
- For SD Drive : Click
PHOTOVU/MPEG4 Movie
Messenger™ System : Click
Palmcorder File Converter : Click


4
Follow the instructions as they appear on your PC screen.
Note
- If a window does not appear automatically, click the "Start" button on your desktop and then click "Run". When the Run box is open, type in "D:\InstMenu.exe" where "D:" is the drive letter of your CD; then click "OK".
- If you attempt to install the next Software before the previous Software installation is completed, "Error" may appear. In this case, click [OK] and install the next Software from the menu.
Transferring Your Images (Windows)
Notes on PHOTOVU/MPEG4 Movie Messenger™ System operation
- For PHOTOVU/MPEG4 Movie Messenger™ System, do not connect the i.LINK and USB terminals to the Palmcorder at the same time.
- Make sure Palmcorder power is not shut off during use as your PC system may become unstable. Therefore, the AC Adaptor should be used as the power source. (Be especially careful when recording in M-CARD or CAMERA mode as the power eventually shuts off automatically if a tape is inserted.)
- For PHOTOVU/MPEG4 Movie Messenger™ System, if the play, stop, fast forward, and rewind functions are operated using the Palmcorder buttons, the image may not be captured properly. Use Palmcorder Operation Buttons displayed on the PC screen.
Verifying the driver (Windows 98SE/Me/2000/XP)
Note
- Verify the driver while Palmcorder is connected to the computer.
PHOTOVU/MPEG4 Movie Messenger™ System (VCR Mode)
[ This screen is an example (Windows 2000) ]
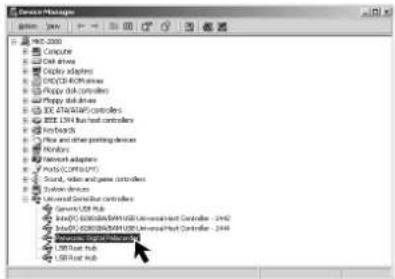
1 Click "Start," "Settings," and "Control Panel."
2 Double-click on "System", verify [Panasonic Digital Palmcorder] is displayed in [Universal Serial Bus controllers] of [Device Manager] of [Hardware].
Palmcorder USB Device Driver/Web Camera (CAMERA Mode)
[ This screen is an example (Windows 2000) ]

1 Click "Start," "Settings," and "Control Panel."
2 Double-click on "System", verify [Panasonic USB Video Camera] is displayed in [Imaging Devices] of [Device Manager] of [Hardware].
Transferring Your Images (Windows)
Palmcorder USB Device Driver/SD Drive, Palmcorder File Converter (M-CARD Mode)
[ This screen is an example (Windows 2000) ]

1 Click "Start," "Settings," and "Control Panel."
2 Double-click on "System", verify [USB Storage Device Controller]* is displayed in [Universal Serial Bus controllers] of [Device Manager] of [Hardware].
* If you are using Windows 98SE, [MATSUSHITA USB Storage Device Controller] will be displayed.
Uninstalling Application Software
[ This screen is an example (Windows 2000) ]
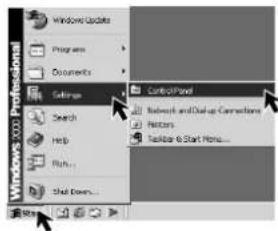

1 Click "Start," "Settings," and "Control Panel."
2 Double-click on "Add/Remove Programs" in the "Control Panel."
3 Select the application software you want to remove, and then click [Change/Remove]*.
* If you are using Windows 98SE or Me, click [Add/Remove].
PHOTOVU/MPEG4 Movie Messenger™ System
Connection (for PHOTOVU/MPEG4 Movie Messenger™ System)

1 Turn on your PC.
2 Set the Palmcorder POWER to VCR.
For Windows XP users
3 Connect the Palmcorder to your PC (Windows) using the USB Cable (supplied).
- "CAPTURE" appears in the EVF or the LCD monitor.
- The "Found New Hardware Wizard" screen of Windows is displayed. Follow the instructions as they appear on your PC screen.

Note
- For extended use, the AC Adaptor should be used as a power source.
60
Forassistance, please call: 1-800-211-PANA(7262)orsende-mailto:consumerproducts@panasonic.com
PHOTOVU/MPEG4 Movie Messenger™ System
For Windows 98SE/Me/2000 users
3
Connect the Palmcorder to your PC (Windows) using the USB Cable (supplied).
- "CAPTURE" appears in the EVF or the LCD monitor.
- The "Found New Hardware" screen of Windows is displayed.
Note
- For extended use, the AC Adaptor should be used as a power source.
To disconnect USB Cable safely (Windows 2000/XP)
If USB Cable is disconnected while computer is on, error message may appear. In such a case click [OK] and close the dialog box. By following the steps you can disconnect the cable safely.
[ This screen is an example (Windows 2000) ]

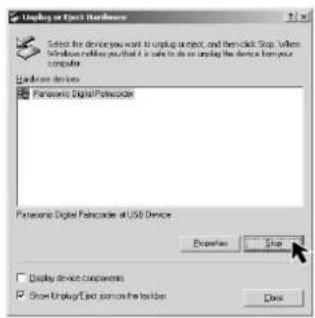

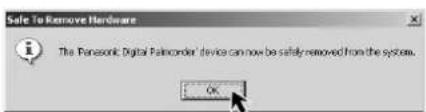
1
Double-click the icon in the task tray.
2
Select [Panasonic Digital Palmcorder] and click [Stop].
3
Verify [Panasonic Digital Palmcorder] is selected and click [OK].
4
Click [OK].
- You can safely disconnect the cable.
Note
- Some OS, such as Windows 98SE or Me, may not show the icon indication that you may safely disconnect in task tray. (OS may be set not to show) Close PHOTOVU/MPEG4 Movie Messenger™ System, then disconnect the USB Cable.
PHOTOVU/MPEG4 Movie Messenger™ System
Running the PHOTOVU/MPEG4 Movie Messenger™ System\*
* PHOTOVU: You can transfer Still images from your Palmcorder tape to a PC.
MPEG4 Movie Messenger™ System: You can transfer Motion images from your Palmcorder tape to a PC.


Before you begin
- Insert a recorded tape. (p. 12)
1 Set Palmcorder POWER to VCR.
2 Connect the Palmcorder to your PC using the USB Cable (supplied) or DV Interface Cable (i.LINK) (not supplied). (pp. 60, 61, 72)
3 Click on "Start," "(All) Programs," "Panasonic," "MPEG4 MovieMessenger System 1.01," then "MovieMessenger."
4 "PHOTOVU/MPEG4 MovieMessenger System 1.01" is opened.
Note
Refer to Help on program for information about application operations and Error messages.
While PHOTOVU/MPEG4 Movie Messenger™ System is running, do not perform the following operations...
The PC system may become unstable.
- Change the screen area or color pallet in the Display Properties window.
- Turn the Palmcorder power switch ON or OFF while connecting the Palmcorder to your PC using the USB Cable or DV Interface Cable (i.LINK).
- Change the Palmcorder power switch (VCR/CAMERA).
*You must first close the application. - Connect/disconnect the DV Interface Cable (i.LINK).
- Connect/disconnect the USB Cable.
PHOTOVU/MPEG4 Movie Messenger™ System
Using Tape Image Data (USB)
By connecting the Palmcorder and PC with the USB Cable, you can transfer Motion images and Still images saved on the DV Tape directly to your PC.
Note
• Detail mode cannot be used with a USB connection.
- Deactivate your PC ScreenSaver or this application may shutdown during image capture.


To capture Still images
3
Click on [Still Capture] at the point you wish to capture an image.
- Repeat step 3 to continue capturing images.
• Captured Still images are saved to the PC, and you can playback the saved images on the View Manager. (p. 64)
Before you begin
- Insert a recorded tape. (p. 12)
• Make Palmcorder-PC connections. (pp. 60, 61)
• Turn your PC on. (p. 60) - Set Palmcorder POWER to VCR.
1
Repeat steps 1\~4 on page 62 to run the PHOTOVU/MPEG4 Movie Messenger™ System.
Note
- When the USB Cable is connected, the input display will automatically become USB. If it is not USB, please confirm the connection. Then, close and restart the software.
2
Click▶(PLAY) on PC screen to playback the DV tape.
• The playback screen cannot be viewed on the PC. Please use the LCD monitor on the Palmcorder for confirmation.
To capture Motion images
3
Click on [Movie Capture] at the start point you wish to capture a Motion image.
4
- “Now capturing a movie” is displayed. Click STOP to end capture.
- "Now Searching..." is displayed.
- The DV Tape is rewound to the point at which the capture was started. The Motion image is then transferred to the PC.
- “Data transfer is now in progress” is displayed on the PC screen.
- The maximum capture time is approx. 30 seconds. Capture stops automatically at the end of 30 seconds.
Note
- Motion images cannot be captured if data contains the following...
- A change between 12 bit and 16 bit.
- A change between SP and LP mode
- During transfer to the PC, the Motion images will not be displayed on the PC screen.
- Transfer takes from about 30 to 50 seconds for every 1 second of the Motion image when using USB connection.
5
To capture other Motion images, repeat steps 3\~4.
PHOTOVU/MPEG4 Movie Messenger™ System
Playing back the saved Motion and Still images
You can play back the saved Motion images and Still images (p. 63) for confirmation.
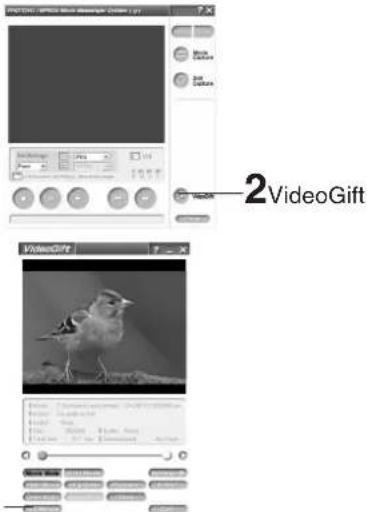
3
Manager

All:
Still image, Motion image and Sound data are displayed.
Picture:
Still image data (*.BMP, *.JPG) is displayed.
Movie:
Motion Image data (*.AVI, *.WMV) is displayed.
Sound:
Sound image data (*.WAV) is displayed.
For Internet:
The data (*.WMV, *.JPG) is displayed.
64
1
Repeat steps 1\~4 on page 62 to run the PHOTOVU/MPEG4 Movie
2
Click [VideoGift] to display the VideoGift screen.
- The image captured last is displayed in the VideoGift screen.
Caution for Windows 2000 users
- If "Unable To Locate DLL" warning indication is displayed, please see page 89.
3
Click [View Manager] to display the View Manager screen.
To view Motion images
4
Click on [Movie].
- The first frame of each Motion image will be displayed as a list.
5
Double click on the desired Motion image to display the playback screen.
- Click ▶ to start Motion image playback.

natural_image
Black-and-white photo of a small bird perched on a branch, no visible text or symbolsNote
- You can also playback a motion image by simply pointing at the thumbnail with your mouse. Duration Rec Time, and size are displayed as well. (Only size for still images.)
To view Still images
4
Click on [All] or [Picture] to display the Still image list.
5
Double Click on the desired image to open it.
natural_image
Black and white photo of a horse's head in a landscape (no text or symbols visible)Note
- If the image cannot be opened, please refer to the software Help menu.
Forassistance, please call: 1-800-211-PANA(7262)or sende-mail to: consumerproducts@panasonic.com
PHOTOVU/MPEG4 Movie Messenger™ System
VideoGift Screen
You can use these features using the VideoGift Screen.

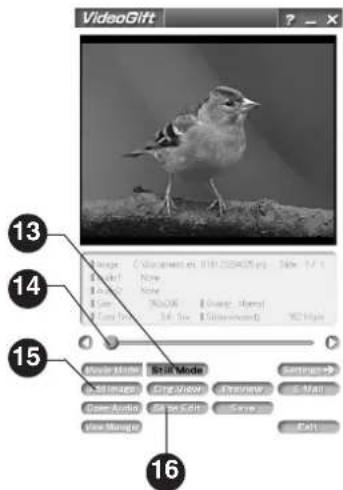
1 Slider
Drag the pointer of the playback start position.
2 Movie Mode
You can display motion images.
3 Open Movie
You can open folders containing video files (*.AVI, *.WMV).
4 Open Audio
You can open folders containing audio files (*.WAV). Valid only when the file is opened in the VideoGift screen.
5 View Manager
You can open the View Manager screen.
6 Org. View
You can play original moving image: (Uncompressed moving image.)
7 Save
You can save the compressed images (*.WMV) to your hard disk.
8 Preview
You can preview the compressed motion image.
9 Slider
Drag the pointer of the playback end position.
10 Settings
You can open the "Compression Settings" screen. (p. 70)
11 E-mail
You can attach the compressed image to your e-mail.
12 Exit
Exits VideoGift screen.
13 Still Mode
You can display still images.
14 Slider
When several still images are opened in the VideoGift screen, a slide show of the images can be done.
15 Add Image
You can open the folder containing a desired still image to add images.
16 Slide Edit
A collection of still images can be edited as a slide show.
PHOTOVU/MPEG4 Movie Messenger™ System
Using the VideoGift Screen


1 Repeat steps 1\~4 on page 62 to run the PHOTOVU/MPEG4 Movie Messenger™ System.
2 Messenger™ System. Click [VideoGift] to display the VideoGift screen.
- The image captured last is displayed in the VideoGift screen.
Caution for Windows 2000 users
- If "Unable To Locate DLL" warning indication is displayed, please see page 89.
3 page 89. Click [View Manager] to display the View Manager screen.
Using a Motion Image on the VideoGift Screen
4 Click on [Movie] to display a Motion image list on the View Manager screen.
5 Click on [Movie Mode] on the VideoGift screen.
b Select the Motion image from the View Manager screen, then drag and drop the image to the "VideoGift" screen.
- By clicking [Open Movie], you can add the saved motion images on your PC hard disk. You can also select the file by dragging and dropping from Windows Explorer.
- You can use the VideoGift features (p. 65) on the VideoGift screen.
Using a Still Image on the VideoGift Screen
4 Click on [All] or [Picture] to display a Still image list on the View Manager screen.
5 Screen. Click on [Still Mode] on the VideoGift screen.
6 Select the Still image from the View Manager screen, then drag and drop the image to the "VideoGift" screen.
- When clicking [Add Image], you can add the saved still images on your PC hard disk.
- If selecting a frame from a motion image, See "Selecting a Frame from a Motion Image" on page 71.
- You can use the VideoGift features (p. 65) on the VideoGift screen.
Forassistance, please call: 1-800-211-PANA(7262)or sende-mail to: consumerproducts@panasonic.com
PHOTOVU/MPEG4 Movie Messenger™ System
Setting the Mail Software
It is possible to set the mail software to start up automatically when [E-Mail] of VideoGift is clicked.
Note
The e-mail Software must support MAPI (Messaging Application Programming Interface).
Below are some e-mail Software programs which support MAPI:
Microsoft Outlook, Microsoft Outlook Express, Netscape Messenger:
- Outlook(R) Express 5x, Outlook97, Outlook98, Outlook2000
- Outlook Express 4x
- Other MAPI applications [Netscape(R) Messenger 4.5x, and so on]

1 Repeat steps 1\~4 on page 62 to run the PHOTOVU/MPEG4 Movie Messenger™ System.
2 Click [VideoGift] to display the VideoGift screen.
- The image captured last is displayed in the VideoGift screen.
Caution for Windows 2000 users
- If "Unable To Locate DLL" warning indication is displayed, please see page 89.
3 Click [Settings] to display the Compression Settings/Mailer Settings screen.
4 Click ① to set the mail software.
- The mail software installed in the computer will be displayed.
- You can select Outlook Express or other software.
Note
- If selecting software other than Outlook Express and Microsoft Outlook, click [Other]. From the file dialog box, select the executable file (*.exe) of the mail software application and then click [Open].
5 Click [Settings] to close the Compression Settings/Mailer Settings screen.
PHOTOVU/MPEG4 Movie Messenger™ System
Attaching captured Motion and Still images to your e-mail
You can easily transfer and compress your Motion images as attachments to your e-mail.

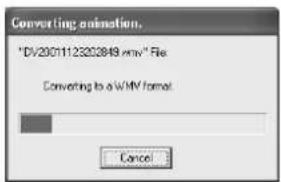

Note
• Refer to Help for information about application operations and Error messages.
- If your e-mail software is not supported by MAPI, pressing the [E-Mail] button will automatically open the folder containing the compressed file. To attach, drag and drop the file into your e-mail.
Before you begin
- Insert a recorded tape. (p. 12)
• Make Palmcorder-PC connections. (pp. 60, 61)
• Turn your PC on. (p. 60) - Set Palmcorder POWER to VCR.
1
Repeat steps 1\~4 on page 62 to run the PHOTOVU/MPEG4 Movie Messenger™ System.
2
Click [VideoGift] to display the VideoGift screen.
- The image captured last is displayed in the VideoGift screen.
Caution for Windows 2000 users
- If "Unable To Locate DLL" warning indication is displayed, please see page 89.
Attaching Motion images to e-mail
3
Repeat steps 4\~6 on page 66 to select a Motion Image.
- If sending a portion of a Motion image, see "Sending a Portion of a Motion Image" on page 69.
- To compress a Motion image, see "Setting the Size and Quality of Motion and Still Image" on page 70.
4
Clicking on [E-Mail] will convert the selected image to WMV format.
Note
- Follow the instructions as they appear on your PC screen.
Attaching Still images to e-mail
3
Repeat steps 4\~6 on page 66 to select a Still Image.
- To compress a Still image, see "Setting the Size and Quality of Motion and Still Image" on page 70.
4
Clicking on [E-Mail] will convert the selected image to WMV format.
Note
- Follow the instructions as they appear on your PC screen.
Forassistance, please call: 1-800-211-PANA(7262)or sende-mail to: consumerproducts@panasonic.com
PHOTOVU/MPEG4 Movie Messenger™ System
Sending a Portion of a Motion Image

1 Repeat steps 1\~4 on page 62 to run the PHOTOVU/MPEG4 Movie Messenger™ System.
2 Messenger™ System. Click [VideoGift] to display the VideoGift screen.
- The image captured last is displayed in the VideoGift screen.
Caution for Windows 2000 users
- If "Unable To Locate DLL" warning indication is displayed, please see page 89.
3 page 89. Select a Motion image. (Continue with steps 4\~6 on page 66 to specify the portion to be played.)
4 Drag pointer 1 to start position.
5 Drag pointer ② to end position.
6 Click [Preview]. (To set size/quality, do steps 4 and 5 on page 70.)
- To save the image to your PC, click [Save].
7 [Save]. Click [E-Mail] and then send the e-mail message. (p. 68)
Slide-Show Edit
A collection of still images can be edited as slides.

1 Repeat steps 1\~4 on page 62 to run the PHOTOVU/MPEG4 Movie Messenger™ System.
2 Click [VideoGift] to display the VideoGift screen.
- The image captured last is displayed in the VideoGift screen.
Caution for Windows 2000 users
- If "Unable To Locate DLL" warning indication is displayed, please see page 89.
3 page 89. Select the Still images.
(See steps 4\~6 on page 66.)
• The selected Still images are displayed on the VideoGift screen.
4 displayed on the VideoGift screen. Click on [Slide Edit] on the VideoGift screen.
- The "Slide-show Edit" screen is displayed.
5 displayed. Edit slides.
- Use "Help" for detailed instructions.
PHOTOVU/MPEG4 Movie Messenger™ System
Setting the Size and Quality of Motion and Still Image

Size of Compressed File
| Image Quality | Image Size | |
| 352 x 288 pixels | 176 x 144 pixels | |
| High | 3000 KB/min | 1000 KB/min |
| Normal | 2000 KB/min | 600 KB/min |
| Low | 1000 KB/min | 360 KB/min |

1 Repeat steps 1\~4 on page 62 to run the PHOTOVU/MPEG4 Movie Messenger™ System.
2 Click [VideoGift] to display the VideoGift screen.
- The image captured last is displayed in the VideoGift screen.
Caution for Windows 2000 users
- If "Unable To Locate DLL" warning indication is displayed, please see page 89.
3 Select a Motion or Still image.
(See steps 4\~6 or 4\~6 on page 66.)
- The selected Motion or Still image is displayed on the VideoGift screen.
4 Press [Settings] to display the "Compression Settings" screen.
5 Set the Image Size and Quality.
- See "Size of Compressed File" to the left.
6 Click [Save] to save the compressed image to your PC.
Click [Preview] to view the
compressed Motion Image.
Click [E-mail] to send the e-mail message.
1 Image Size You can select the image size (352 x 288 or 176 x 144).
2 Quality You can select the image quality (High, Normal, Low).
PHOTOVU/MPEG4 Movie Messenger™ System
Selecting a Frame from a Motion Image
This screen is displayed when an individual frame from a moving image file is to be added as a still image.


1 Repeat steps 1\~4 on page 62 to run the PHOTOVU/MPEG4 Movie Messenger™ System.
2 Click [VideoGift] to display the VideoGift screen.
• The image captured last is displayed in the VideoGift screen.
Caution for Windows 2000 users
- If "Unable To Locate DLL" warning indication is displayed, please see page 89.
3 Click [View Manager] to display the View Manager screen.
4 Click on [Movie] to display a Motion image list on the View Manager screen.
5 Click on [Still Mode] on the VideoGift screen.
6 Select the Motion image from the View Manager screen, then drag and drop the image to the "VideoGift" screen.
- The "Select Frame" screen is displayed.
7 Drag the pointer① to select a desired frame.
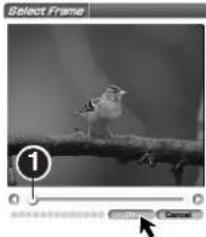
8 Click [OK].
9 Click [Save] to save the compressed image to your PC.
Click [Preview] to view the compressed Motion Image.
Click [E-mail] to send the e-mail message.
Transferring Your Images (i.LINK) (Windows)
PC Connection with DV Interface Cable (i.LINK)
A video clip can be transferred directly to your PC (Personal Computer) via a DV Interface Cable (i.LINK) (not supplied) using products and software from a number of video editing software companies.
Using products from video editing software companies allows you to capture and edit video clips using the DV Interface (i.LINK).
Our DVC being OHCI compliant should have no problem working with any OHCI compliant Firewire Card/video - Editing software package.
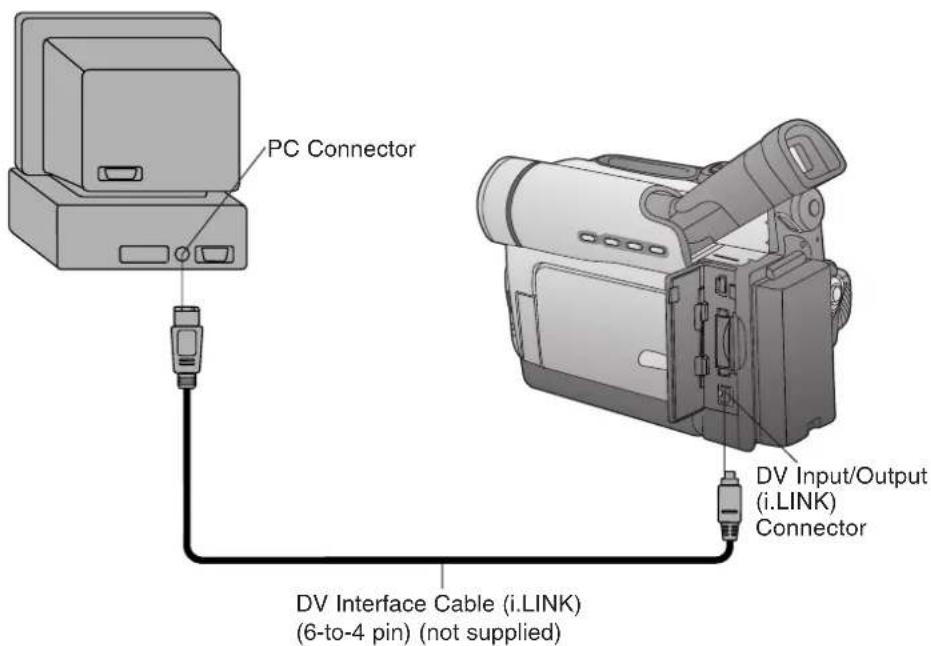
Note
• PC must be equipped with an i.LINK terminal.
- During Palmcorder playback, do not disconnect the DV Interface Cable (i.LINK) or turn the Palmcorder off as this may cause a PC hang-up error.
- For PHOTOVU/MPEG4 Movie Messenger™ System, do not use 2 i.LINK terminals on your PC at the same time.
- PHOTOVU/MPEG4 Movie Messenger™ System i.LINK (DV) operates normally with Windows 98SE or later operating system.
- PHOTOVU/MPEG4 Movie Messenger™ System i.LINK connection may not work with some DV Interface boards. In this case, use the software included with the board.
- 1394 (i.LINK) Interface must conform to OHCI (Open Host Controller Interface Specification).
72
Forassistance, please call: 1-800-211-PANA(7262)orsende-mailto:consumerproducts@panasonic.com
PHOTOVU/MPEG4 Movie Messenger™ System (i.LINK)
Using Tape Image Data
By connecting the Palmcorder and PC with the DV Interface Cable (i.LINK), you can transfer Motion images and Still images saved on the DV Tape directly to your PC.
Note
- If PHOTOVU/MPEG4 Movie Messenger™ System does not work, please refer to note on page 72.
- Deactivate your PC ScreenSaver or this application may shutdown during image capture.
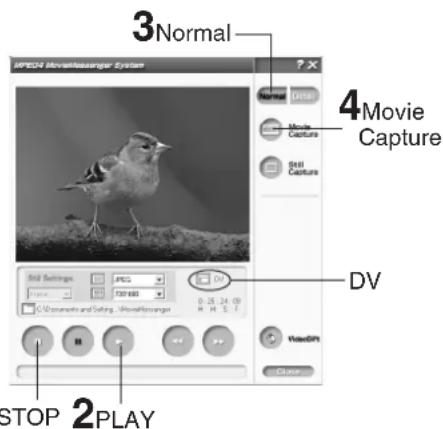
How to insert the DV Interface Cable (i.LINK)
A Set Palmcorder POWER to VCR.
B Connect the Palmcorder to your PC using the DV Interface Cable (i.LINK) (not supplied).
C Start up the PHOTOVU/MPEG4 Movie Messenger™ System.
How to remove the DV Interface Cable (i.LINK)
A Close the PHOTOVU/MPEG4 Movie Messenger™ System.
B Remove the DV Interface Cable (i.LINK) from the Palmcorder.
C Set Palmcorder POWER to OFF.
Before you begin
- Insert a recorded Tape. (p. 12)
- Make Palmcorder-PC connections. (p. 72)
- Turn your PC on.
- Set Palmcorder POWER to VCR.
- Run the Software after the DV Interface Cable (i.LINK) has been connected to the Palmcorder.
1
Repeat steps 1\~4 on page 62 to run the PHOTOVU/MPEG4 Movie Messenger™ System.
Note
- When the DV Interface Cable (i.LINK) is connected, the input display will automatically become DV. If it is not DV, please confirm the connection. Then, close and restart the software.
- When using Windows XP, “Windows Movie Maker” may open automatically. If so, close “Windows Movie Maker” and “Movie Messenger”, and open “Movie Messenger” again.
2
Click▶(PLAY) button on PC screen to playback the DV tape.
- Please use the LCD monitor on the Palmcorder or PC screen for confirmation.
To capture Motion images
[When selecting Normal]
3
Click on [Normal].
4
Click on [Movie Capture] at the point you wish to capture a Motion image. Click on [STOP] to end capture.
- The image is transferred to the PC in real time.
- The maximum capture time is approx. 3 minutes.
- When capturing data containing changes between 12 bit and 16 bit and/or between SP and LP mode, a separate file will be made for each mode.
- Please refer to pages 64\~71 for other functions.
(Continued on next page.)
PHOTOVU/MPEG4 Movie Messenger™ System (i.LINK)
![3Normal 3, 3Detail 4Movie Capture 4Still Capture DV 6STOP 5, 7, 5Select Saving a file... [ .66% ]](/content/2026/05/1048910/images/a635d093fc116db8cd475bee6f19c0284509ea836cffdcdc8d3d1bbf72fd620d.jpg)
To capture Still images
[When selecting Detail]
3
Click on [Detail].
4
Click on [Still Capture] at the point you wish to capture images.
- The screen to select frames is displayed.
5
Select the frame for the segment to be captured select frames, and click [Select].
- Repeat steps 4 and 5 to continue capturing images.
• Captured Still images are saved to the PC, and you can playback the saved images on the View Manager. (P. 64)
74
[When selecting Detail]
Note
- Detail mode lets you specify the start and end frames for the video segment you want to capture and save.
3
Click on [Detail].
4
Click on [Movie Capture] at the point where you wish to capture a Motion image.
- The screen to select the start frame is displayed.
5
Select the start frame for the segment to be captured select one frame, and click [Select].
- “Now Searching...” is displayed, and the DV tape is rewound to the point at which the capture was started.
- "Now capturing a movie." is displayed.
6
Click on [Stop] to end capture.
- The screen to select the end frame is displayed.
7
Select the end frame for the segment to be captured, select one frame, and click [Select].
- "Saving a file..." is displayed.
- The image is transferred to the PC in real time.
To capture Still images
[When selecting Normal]
3
Click on [Normal].
4
Click on [Still Capture] at the point you wish to capture an image.
- Repeat step 4 to continue capturing images.
- Captured Still images are saved to the PC, and you can playback the saved images on the View Manager. (P. 64)
Forassistance, please call: 1-800-211-PANA(7262)orsende-mailto:consumerproducts@panasonic.com
Palmcorder USB Device Driver/SD Drive
Connection (for Palmcorder USB Device Driver/SD Drive)
Note
- For Palmcorder USB Device Driver/SD Drive, do not connect the i.LINK and USB terminals to the Palmcorder at the same time.
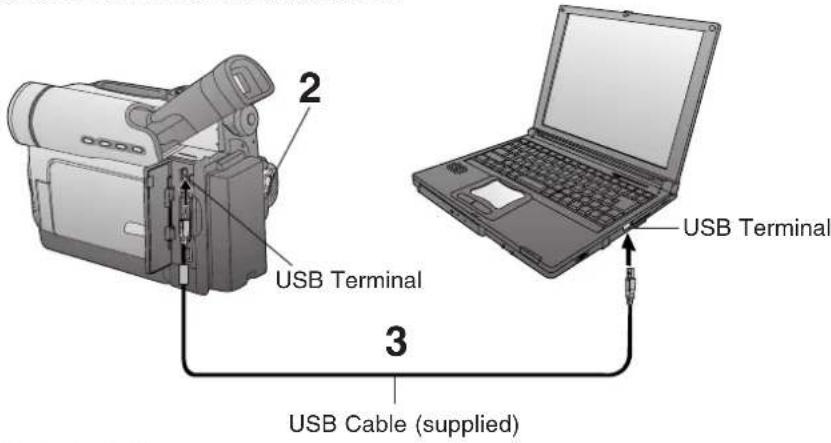
1 Turn on your PC.
2 Set the Palmcorder POWER to M-CARD.
For Windows XP users
3 Connect the Palmcorder to your PC (Windows) using the USB Cable (supplied).
- "CONNECT WITH PC" and "STORAGE" appears in the EVF or the LCD monitor.
- The "Found New Hardware Wizard" screen of Windows is displayed. Follow the instructions as they appear on your PC screen.

Note
- When connecting for the first time using Windows XP, the OS installation CD may be required.
Follow the instructions as they appear on your PC screen. - For extended use, the AC Adaptor should be used as a power source.
Palmcorder USB Device Driver/SD Drive
For Windows 98SE/Me/2000 users
3
Connect the Palmcorder to your PC (Windows) using the USB Cable (supplied).
- "CONNECT WITH PC" and "STORAGE" appears in the EVF or the LCD monitor.
- The "Found New Hardware" screen of Windows is displayed.
Note
- For extended use, the AC Adaptor should be used as a power source.
To disconnect USB Cable safely (Windows Me/2000/XP)
If USB Cable is disconnected while computer is on, error message may appear. In such a case click [OK] and close the dialog box. By following the steps you can disconnect the cable safely.
[ This screen is an example (Windows 2000) ]
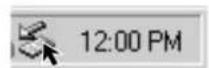


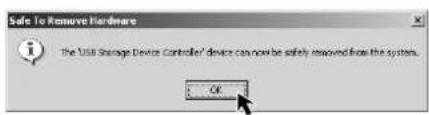
1
Double-click the icon in the task tray.
2
Select [USB Storage Device Controller]* and click [Stop].
3
Verify [USB Storage Device Controller]* is selected and click [OK].
4
Click [OK].
- You can safely disconnect the cable.
* If you are using Windows Me, [USB Disk] will be displayed.
Note
- Some OS, such as Windows 98SE, may not show the icon indication that you may safely disconnect in task tray. (OS may be set not to show) After the [ACCESS] display disappears from the EVF or LCD monitor you may disconnect the USB Cable.
Palmcorder USB Device Driver/SD Drive
Using Memory Card Image Data
By connecting the Palmcorder and PC with the USB, you can transfer Still images saved on the Memory Card directly to your PC.

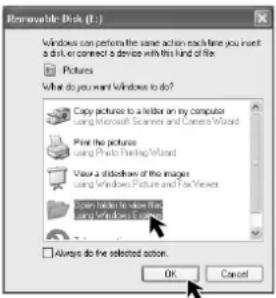
Note
- Please do not change file or folder names on the PC. The images on the Memory Card may not be able to be viewed on the Palmcorder.
- When “ACCESS” is displayed in the EVF or LCD monitor, please do not remove the Memory Card or USB Cable, or turn off the power as data may be damaged.
Before you begin
• Install the Palmcorder USB Device Driver. (p. 57)
- Set POWER to OFF before inserting a recorded Memory Card. (pp. 49, 50)
- Make Palmcorder-PC connections. (pp. 75, 76)
- Turn your PC on. (p. 75)
- Set POWER to M-CARD
For Windows 98SE/Me/2000 users
1 Connect the Palmcorder to your PC using the USB Cable (supplied). (pp. 75, 76)
- “PLEASE WAIT”, “CONNECT WITH PC”, and “STORAGE” appears in the EVF or the LCD monitor.
2 Open My Computer.
3 Click [Removable Disk].
- You can view images stored on the Memory Card and also save them to your hard disk.
For Windows XP users
1 Connect the Palmcorder to your PC using the USB Cable (supplied). (pp. 75, 76)
- The "Removable Disk" screen is displayed.
- "PLEASE WAIT", "CONNECT WITH PC", and "STORAGE" appears in the EVF or the LCD monitor.
2 Click on [Open folder to view files using Windows Explorer] and then [OK].
- You can view images stored on the Memory Card and also save them to your hard disk.
Palmcorder File Converter
Using Palmcorder File Converter
You can convert the JPEG data of your PC into DCF (Design rule for Camera File System) data, and transfer this data to your Palmcorder via USB.


1 Set Palmcorder POWER to M-CARD.
2 Connect the Palmcorder to your PC using the USB Cable (supplied). (pp. 75, 76)
3 Click on "Start," "(All) Programs," "Panasonic," "Palmcorder," then "File Converter 3.0."
4 Select and click "To resize the image" or "To convert format for Panasonic Digital Palmcorder."
• To resize the image:
The size of images captured with the Palmcorder can be increased or decreased to make them suitable for Internet and e-mail use.
• To convert format for Panasonic Digital Palmcorder:
Images can be converted to JPEG format and to file names that can be played back on the Palmcorder.
When selecting "To resize the image"
5 Select the size for the image you want to change. Then, click on "File select" and select the file to be converted.
Note
- When User Select is selected, you can specify a size within a range of 2048 x 1536 \~ 64 x 48 pixels.
(Continued on next page.)
Forassistance, please call: 1-800-211-PANA(7262)orsende-mailto:consumerproducts@panasonic.com
Palmcorder File Converter

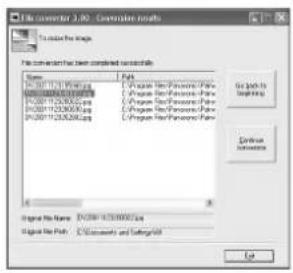

![The converter 2.00: Select the Drive to select the Dlc To convert format to Digital Pathcode Select the linkages after listing is connected Select this drive [Drive] GNC1 Back Next Cancel](/content/2026/05/1048910/images/d17f73ccc0092209a8ff157e854d46b3672e50cbe83cdd9240337da8257d8530.jpg)

6 Select the folder to which the converted file is to be saved.
• The Conversion results screen is displayed.
7 Use "Help" for detailed instructions.
When selecting "To convert format for Panasonic Digital Palmcorder"
5 Select the file to be converted.
6 Select the drive to which the converted file is to be saved. • The Conversion results screen is displayed.
7 Use "Help" for detailed instructions.
Web Camera
Before Using Web Camera\* Features
Web Camera\*
MSN Messenger and NetMeeting are software that can be linked and used together. Using the Palmcorder and the Internet, you can communicate with others by having picture and sound similar in fashion to a videophone.
Please read this first.
- To use the Web Camera feature, Microsoft's Windows Messenger, MSN Messenger Service, and Windows NetMeeting are required.
- For this feature, both parties must have Windows XP. For this feature, both parties must have Windows 98SE/Me/2000.
• MSN Messenger Service, Windows Messenger and Windows NetMeeting are registered trademarks of America Microsoft Corporation in the United States and other countries.
- Communication quality and assured connectability are dependent upon the congestion conditions of your Internet provider and MSN Messenger Service, etc. This product does not guarantee assured communication quality.
Conditions for Use
- You have direct dial-up connection access to the Internet.
You and the other person(s) are in the same Network (LAN). - Microsoft MSN Messenger Service 4.5 or later/Windows NetMeeting 3.01 or later is installed.
For Windows XP users, Windows Messenger 4.5 or later is installed. - It is convenient if the person you want to access is already a registered member of Windows Messenger or MSN Messenger Service.
For Windows XP users
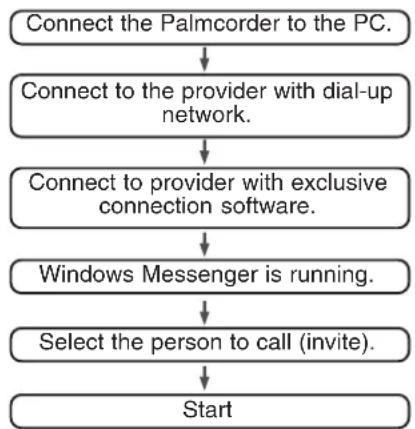
flowchart
graph TD
    A["Connect the Palmcorder to the PC."] --> B["Connect to the provider with dial-up network."]
    B --> C["Connect to provider with exclusive connection software."]
    C --> D["Windows Messenger is running."]
    D --> E["Select the person to call (invite)."]
    E --> F["Start"]
For Windows 98SE/Me/2000 users

flowchart
graph TD
    A["Connect the Palmcorder to the PC."] --> B["Connect to the provider with dial-up network."]
    B --> C["Connect to provider with exclusive connection software."]
    C --> D["MSN Messenger Service is running."]
    D --> E["Select the person to call (invite)."]
    E --> F["NetMeeting runs."]
    F --> G["Start"]
Forassistance, please call: 1-800-211-PANA(7262)orsende-mailto:consumerproducts@panasonic.com
Web Camera
Connection (for Web Camera)
Note
- For Web Camera, do not connect the i.LINK and USB terminals to the Palmcorder at the same time.

1 Turn on your PC.
2 Set the Palmcorder POWER to CAMERA.
For Windows XP users
3 Connect the Palmcorder to your PC (Windows) using the USB Cable (supplied).
- “Found New Hardware Wizard” is displayed. The following message ② is displayed. However, testing by the manufacturer has confirmed functionality of this Palmcorder with Windows XP. Click [Continue Anyway] and proceed.
Follow the instructions as they appear on your PC screen.
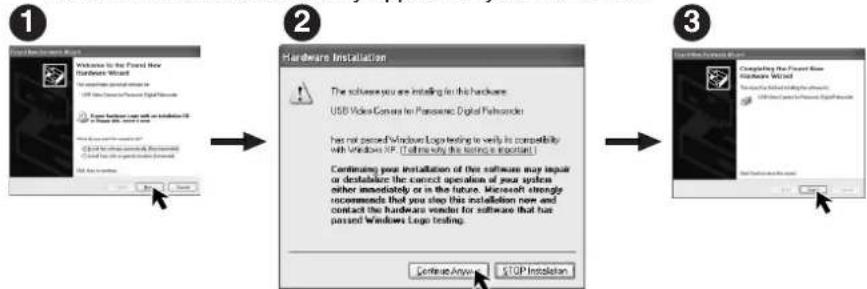
flowchart
graph LR
    A["1 Setup Software Install"] --> B["2 Hardware Installation"]
    B --> C["3 Complete Software Install"]
- "CONNECT WITH PC" and "WEBCAM" are displayed in the EVF and LCD monitor.
- Position the Palmcorder so that you are in the picture.
- To confirm if the connection between the Palmcorder and PC is correct, please refer to "Audio and Video Tuning Wizard" on page 84.
Note
- When connecting for the first time using Windows XP, the OS installation CD may be required. Follow the instructions as they appear on your PC screen.
- Do not disconnect the USB Cable while in use. This could be a source of trouble. For more details, please read the respective Help file.
- Close the application, then disconnect the USB Cable.
Web Camera
For Windows 2000 users
3
Connect the Palmcorder to your PC (Windows) using the USB Cable (supplied).
- "Found New Hardware" is displayed.
- "CONNECT WITH PC" and "WEBCAM" are displayed in the EVF and LCD monitor.
- Position the Palmcorder so that you are in the picture.
- To confirm if the connection between the Palmcorder and PC is correct, please refer to "Audio Tuning Wizard" on page 87.
- When the Palmcorder and PC (with Windows 2000) are connected via USB, a message, such as the one below, is displayed.
The following message is displayed. However, testing by the manufacturer has confirmed functionality of this Palmcorder with Windows 2000.
Click [Yes] and proceed.
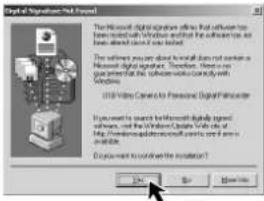
Note
- Do not disconnect the USB Cable while in use.
This could be a source of trouble. For more details, please read the respective Help file. - Close the application, then disconnect the USB Cable.
For Windows 98SE/Me users
3
Connect the Palmcorder to your PC (Windows) using the USB Cable (supplied).
- "CONNECT WITH PC" and "WEBCAM" are displayed in the EVF and LCD monitor.
- Position the Palmcorder so that you are in the picture.
- To confirm if the connection between the Palmcorder and PC is correct, please refer to "Audio Tuning Wizard" on page 87.
Note
- When connecting for the first time using Windows 98SE or Me, the OS installation CD may be required.
- Do not disconnect the USB Cable while in use. This could be a source of trouble. For more details, please read the respective Help file.
- Close the application, then disconnect the USB Cable.
Forassistance, please call: 1-800-211-PANA(7262)orsende-mailto:consumerproducts@panasonic.com
Web Camera (For Windows XP users)
For Windows Messenger (Windows XP only)
When Windows Messenger is newly installed or when running for the first time, the following settings become necessary. For more details, please read the corresponding Help file.
Note
- Once settings are performed, they are not required from the second time the software is run.
Before you begin
- Be sure you have a dial-up connection.
- Referring to pages 81\~82, connect the Palmcorder and PC. Confirm that equipment is connected correctly by running the [Audio and Video Tuning Wizard]. (p. 84)
Caution
- This feature can be used only if both parties have Windows XP. For Windows Messenger, please refer to the Microsoft Home Page: http://www.microsoft.com/ http://www.msn.com/
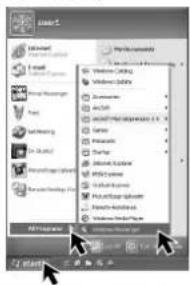


1 Turn on your PC.
2 Click on "Start," "All programs," "Windows Messenger."
- “Windows Messenger” screen is opened.
3 Click on [About Windows Messenger] in the [Help] menu.
- Confirm that your version (Windows Messenger) is 4.5 or later.
Note
- If you have a version older than 4.5, please download the latest version (4.5 or later) from the Microsoft Home Page: http://www.microsoft.com/ http://www.msn.com/
- For download and installation instructions, please refer to Help on the Home Page.
4 The first time Windows Messenger is run, etc., the Setup screen is displayed. Click [Click here to sign in].
Please carefully read the contents and then proceed.
Web Camera (For Windows XP users)
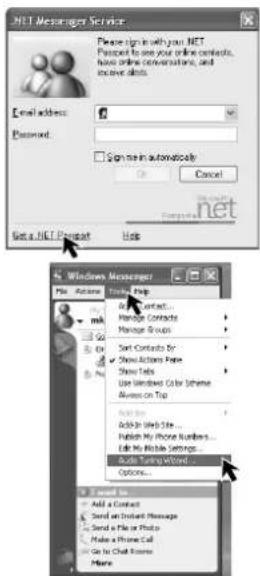
5 Type in your e-mail address and password.
- You'll need to get a hotmail address. If you do not have one, click on [Get a .NET Passport]. Please carefully read the displayed contents and then proceed.
There are times when a Version Upgrade screen will be displayed. However, if you are using Windows Messenger 4.5 or later, there is no need to upgrade.
6 Click on [Audio and Video Tuning Wizard] in the [Tools] menu.
- Select [USB Audio Device] in the [Microphone] menu.
Note
- You can set the volume for playback or mic volume, etc.
- Also, confirm that the Palmcorder and PC are connected correctly.
The person you wish to access needs to do settings 1\~6 also.

7 Select [File] -> [Add a Contact] to register the person you wish to access in Windows Messenger.
- Please enter the same e-mail address that the other person has registered with Windows Messenger.
• After registering the e-mail address of the person you wish to access, click on [Send E-Mail] and have the person register your e-mail address as well.
You cannot call a person who is not signed-on to Windows Messenger.
Web Camera (For Windows XP users)
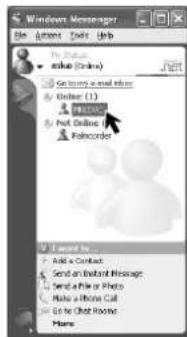


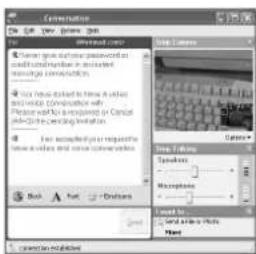
8
The person calling (inviting) side
Double-click a person to call from those currently [on-line].
- "xxxx-conversation" screen is displayed.
9
The person calling (inviting) side
Click [Start Camera] in the "xxx-conversation" screen.
- A message inviting the other person is displayed.
The invited person side
A message asking if the person accepts or declines is displayed. Click [Accept] on the screen.
• To ignore the invitation, click [Decline].
10
At this point you may proceed with a voice/video conversation.
Note
- For other information about Windows Messenger, please refer to Help.
11
When access is finished, close Windows Messenger, then set Palmcorder POWER to OFF. Finally, disconnect the USB Cable.
Web Camera (For Windows 98SE/Me/2000 users)
For MSN Messenger Service and Windows NetMeeting (Windows 98SE/Me/2000)
When MSN Messenger Service is newly installed or when running for the first time, the following settings become necessary. For more details, please read the corresponding Help file.
Note
- Once settings are performed, they are not required from the second time the software is run.
Before you begin
- Be sure you have a dial-up connection.
- Referring to pages 81\~82, connect the Palmcorder and PC. Confirm that equipment is connected correctly by running the [Audio Tuning Wizard]. (p. 87)
Caution
- For MSN Messenger Service and Windows NetMeeting, please refer to the Microsoft Home Page:
http://www.microsoft.com/ http://www.msn.com/


1 Turn on your PC.
2 Download the latest version MSN Messenger Service (4.5 or later) and Windows NetMeeting (3.01 or later) from the Microsoft Home Page: http://www.microsoft.com/ http://www.msn.com/
- For download instructions, please refer to Help on the Home Page.
3 Refer to Help on the Home Page. Install the MSN Messenger Service.
4 • Follow the instructions on the screen.
The first time MSN Messenger Service is run, etc., the Setup screen is displayed.
Click [Click here to sign in].
Please carefully read the contents and then proceed.
5 Type in your Sign-in name and password.
- You'll need to get a hotmail address. If you do not have one, click on [Get one here].
Please carefully read the displayed contents and then proceed.
There are times when a Version Upgrade screen will be displayed. However, if you are using MSN Messenger Service 4.5 or later, there is no need to upgrade.
Web Camera (For Windows 98SE/Me/2000 users)

6
Click on [Audio Tuning Wizard] in the [Tools] menu.
- Select [Panasonic USB Microphone]* in the [Recording] menu.
* If you are using Windows 2000, select [USB Audio Device] in the [Recording] menu.
Note
- You can set the volume for playback or mic volume, etc.
- Also, confirm that the Palmcorder and PC are connected correctly.
The person you wish to access needs to do settings 1\~6 also.

7
Select [Tools] -> [Add a Contact] to register the person you wish to access in MSN Messenger Service.
- Please enter the same e-mail address that the other person has registered with MSN Messenger Service.
• After registering the e-mail address of the person you wish to access, click on [Send E-Mail] and have the person register your e-mail address as well.


You cannot call a person who is not signed-on to MSN Messenger Service.
8
The person calling (inviting) side
Double-click a person to call from those currently [on-line].
- "xxxx-conversation" screen is displayed.
Web Camera (For Windows 98SE/Me/2000 users)
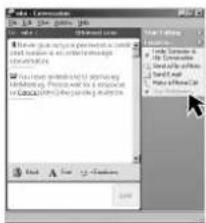


![System Properties General: [OCPM] [OCPM] [OCPM] New Object to the New Object to the OCPM DPDM DPDM Group DPDM Group Driplex adapters Driplex components Driplex components Single video Single video contains Functional Digital Networks Single video Multi video Multi video Multi video Multi video Multi video Multi video Multi video Multi video Multi video Multi video Multi video Multi video Multi video Multi video Multi video Multi video Multi video Multi video Multi video Multi video Multi video Multi video Multi video Multi video Multi video Multi video Multi video Multi video Multi video Multi video Multi video Multi video Multi video Multi audio](/content/2026/05/1048910/images/dea327fb62d24ef55aff184d8f96f7b7fcc06b4fb62e9614293cbf15382a133b.jpg)

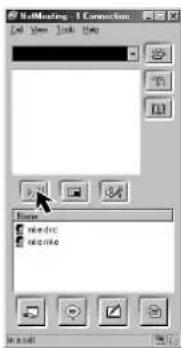

9
The person calling (inviting) side
Click [Start NetMeeting] in the "xxx-conversation" screen.
The invited person side
The Instant Message screen appears and a confirmation message is displayed. Click on [Accept].
The NetMeeting screen is automatically opened.
Note
The first time Windows NetMeeting is run, etc., the Setup screen is displayed. Please carefully read the contents and then proceed.
The user information, etc. is input. Following the directions, please complete the settings.
10
10 Click on [Options] in the [Tools] menu to confirm Video Camera Properties.
- If Video is not recognized in Video Camera Properties, select Control Panel, System, Device Manager, and finally Image Device for confirmation.
11
The invited person side
A message asking if the person accepts or declines is displayed. Click [Accept] on the screen.
• To ignore the invitation, click [Decline].
12
The person calling (inviting) side
"Incoming-Call" screen is displayed. Click on [Accept].
13
The invited person side The person calling (inviting) side
The real-time live picture displayed in the video camera is displayed on both yours and the other person's window screen.
Note
- If the picture is not displayed, click several times on the screen.
- For other information about MSN Messenger Service and Windows NetMeeting, please refer to Help.
14
When access is finished, close MSN Messenger Service and Windows NetMeeting, then set Palmcorder POWER to OFF.
Finally, disconnect the USB Cable.
Forassistance, please call: 1-800-211-PANA(7262)orsende-mailto:consumerproducts@panasonic.com
Warning Indications
Windows 2000

In Windows 2000, startup PHOTOVU/MPEG4 Movie Messenger™ System. Clicking on [VideoGift] may cause the type of error to occur to the left. If so, please perform the following instructions.

Download and install Media Player (7.1 or later), go to http://www.microsoft.com/windows/mediaplayer (current as of Oct. 9, 2002).
- "Windows Media.com: Download" is opened.
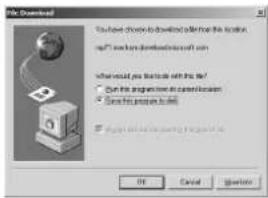
Click [Download Now!] on the screen. • The "File Download" screen is displayed. Then, follow the instructions on the screen.
Transferring Your Images (Macintosh)
You can transfer images from your Palmcorder Memory Card to your Macintosh.
System Requirements (for Built-in SD Drive)
• Mac OS 9.0\~9.1
- iMac, iBook or Power Macintosh® G3 with USB port or Power Mac™ G4
• RAM: 64 MB or more
• CD-ROM drive (for installation)
- USB Port
- Mouse or other pointing device
* Even if system requirements are met, there is no guarantee that the included software will work on all personal computers.
Connection
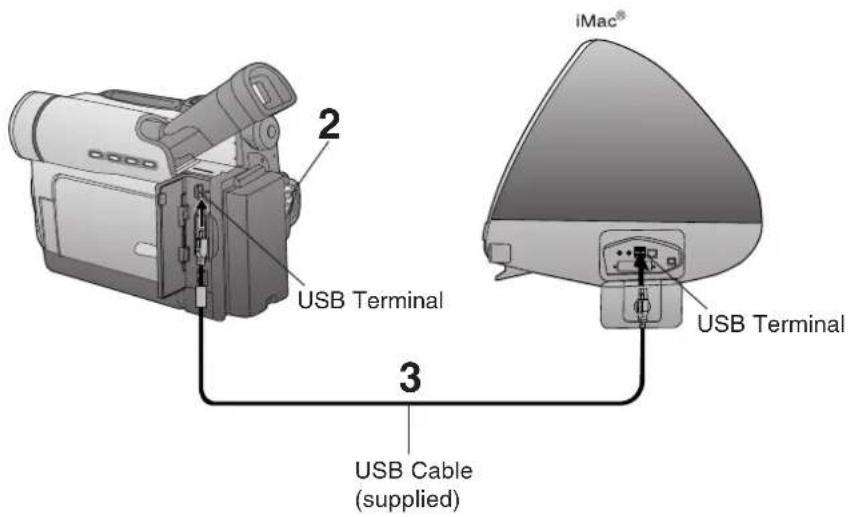
1 Turn on your PC.
2 Set the Palmcorder POWER to M-CARD.
3 Connect the Palmcorder to your Macintosh using the USB Cable (supplied).
Note
- For extended use, it is recommended that you use the AC Adaptor as a power source.
Forassistance, please call: 1-800-211-PANA(7262)orsende-mailto:consumerproducts@panasonic.com
Transferring Your Images (Macintosh)
Using Built-in SD Drive


Before you begin
- Set POWER to OFF before inserting a recorded Memory Card. (pp. 49, 50)
1 Set the Palmcorder POWER to M-CARD.
2 Connect the Palmcorder to your Macintosh using the USB Cable (supplied). (p. 90)
- "PLEASE WAIT", "CONNECT WITH PC", and "STORAGE" is displayed on the LCD monitor.
3 Double click the "Untitled" icon.
- You can view images stored on the Memory Card and also save them to your hard disk.
4 Follow the instructions as they appear on your Macintosh section screen.
Note
- Please do not change file or folder names on the computer. The images on the Memory Card may not be able to be viewed on the Palmcorder.
- When "ACCESS" is displayed in the EVF or LCD monitor, please do not remove the Memory Card or USB Cable, or turn off the power as data may be damaged.
Palmcorder Accessory System
| Accessory # | Figure | Description | Price |
| PV-DAC11A |  | AC Adaptor with AC Cable and DC Cable | 119.95 |
| CGR-D08A/1B |  | 800mAh / 1 h 30 min, Battery Pack | 69.95 |
| CGR-D16A/1B |  | 1 600mAh / 3 h, Battery Pack | 99.95 |
| CGP-D28A/1B |  | 2 800mAh/ 5 h, Battery Pack | 129.95 |
| CGR-D53A/1K |  | 5 300mAh / 9 h, Battery Pack | 229.95 |
| PV-DDC9 |  | DV Interface Cable (i.LINK) (4-pin to 4-pin) | 55.00 |
| PV-DRC9 |  | IR Remote Control | 29.95 |
| PV-H150 |  | Carrying Case | 49.95 |
| RP-SD064BPPA RP-SD032BPPA RP-SD016BPPA |  | 64 MB SD Memory Card 32 MB SD Memory Card 16 MB SD Memory Card | Call For Pricing |
| BN-SDCAPE/1B |  | SD USB Reader/Writer (compatible with MultiMediaCard) | 79.95 |
| BN-SDABPE/1B | 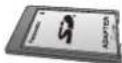 | SD PCMCIA Adaptor (compatible with MultiMediaCard) | 79.95 |
Palmcorder Accessory Order Form
Please photocopy this form when placing an order.
- Palmcorder Model # ____
- Items Ordered
| Quantity Accessory Total Price Each Description | |||
| Subtotal | |||
| Your State & Local Sales Tax | |||
| Shipping & Handling | 6.95 | ||
| Total Enclosed | |||
- Method of payment (check one)
☐ Check of Money Order enclosed (NO C.O.D.SHIPMENTS)
□ VISA Credit Card #
□ MasterCard Expiration Date ____
☐ Discover Customer Signature
Make Check or Money Order to: PANASONIC ACCESSORIES
(Please do not send cash)
- Shipping information (UPS delivery requires complete street address)
Ship To:
Mr.
Mrs.
Ms
First Last
Phone #:
Day ( )
Street Address
Night ( )
City State Zip
TO OBTAIN ANY OF OUR PALMCORDER ACCESSORIES YOU CAN DO ANY OF THE FOLLOWING:
20421 84th Avenue South Kent, WA. 98032
Notes On Operations
Notice
This product has a fluorescent lamp that contains a small amount of mercury. It also contains lead in some components. Disposal of these materials may be regulated in your community due to environmental considerations. For disposal or recycling information please contact your local authorities, or the Electronics Industries Alliance: http://www.eiae.org.
About the Memory Card (MultiMediaCard or SD Memory Card)
- Model PV-DV203 can be used with either a MultiMediaCard or a SD Memory Card.
- Both of these exterior Memory Cards (MultiMediaCard and SD Memory Card) are lightweight and removable.
- Both Memory Cards (MultiMediaCard and SD Memory Card) are offered in a variety of memory sizes, so you can purchase a higher capacity Memory Card if desired.
Notes On Operations
Replacing Clock Battery
The clock battery is pre-installed. Follow the steps below if replacement becomes necessary.
WARNING
Replace battery with Panasonic or Newsun type CR2025 only. Use of another battery may present a risk of fire or explosion. Caution: battery may explode if mistreated. Dispose of used battery properly. Keep away from children. Do not recharge, disassemble or dispose of in a fire.
Clock Battery
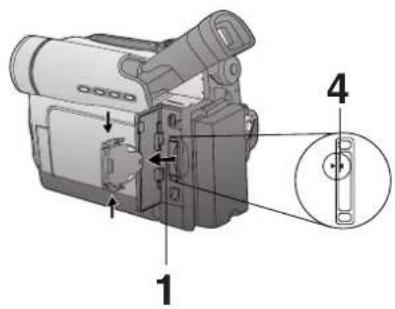


Before you begin
- Set POWER to OFF or disconnect the Palmcorder from a power source.
1 While pinching the 2 tabs, pull Battery Tray out.
2 Bend middle tab out and remove Battery.
3 Snap new Battery Ⓧ mark down) into Battery Tray.
- Do not reverse the polarity.
4 Insert Battery Tray so the triangle marks meet.
Note
- Keep Battery out of children's reach. Swallowing it may be harmful.
- Improper installation, discharge, or missing battery causes "CLOCK BATTERY" to appear.
- Battery life is approximately 5 years.
- Set POWER to OFF or disconnect the Palmcorder from a power source when replacing the clock battery.
Notes On Operations
Approximate Brightness Values
Your Palmcorder has been designed for normal scene illumination of 150 footcandles (1500 lx). However, the Palmcorder may be used at F1:1.8, if illumination is more than 0.5 footcandles (5 lx).
The table below shows the color temperature for reference.
| PALMCORDER SETTINGS | CONDITIONS | KELVIN COLOR TEMPERATURE | ARTIFICIAL LIGHT SOURCEN | COLORANT LIGHT MIXTURE |
| (Amber Filter Range) | Fair weather, blue sky | 10,000 | Color television | Bluish |
| Slightly cloudy sky | 8,000 | |||
| Cloudy or rainy sky | 7,000 | |||
| Sunlight in clear weather at midday | 6,500 | Fluorescent lamp (Daylight) | ||
| 6,000 | Camera flash bulb | |||
| 5,500 | ||||
| Average sunlight in clear weather | 5,000 | Blue lamp for photography | ||
| Sunlight 2 hours after sunrise and before sunset | 4,500 | Fluorescent lamp (White) | Whitish | |
| 4,000 | Normal flash bulb | |||
| 3,500 | Fluorescent lamp (Off-white) | |||
| Sunlight 40 min. after sunrise and before sunset | 3,200 | Tungsten lamp for photography | ||
| Sunlight 30 min. after sunrise and before sunset | 2,800 | Halogen lamp | ||
| lodine lamp | ||||
| Sunlight 20 min. after sunrise and before sunset | Tungsten lamp | Yellowish | ||
| Acetylene lamp | ||||
| Kerosene lamp | ||||
| 2,000 | Candlelight | Reddish |
Specifications
Power Source: Palmcorder: 7.2 V DC (Battery)
7.8 V DC (AC Adaptor)
AC Adaptor: 110/120/220/240 V AC, 50/60 Hz
Battery: Lithium-Ion Type DC 7.2 V
Power Consumption: Palmcorder : 7.2 V/7.8 V DC 5.5 W
AC Adaptor : 18 W
1 W (when not in use.)
Digital Interface USB/i.LINK (IEEE1394)
Video Signal: EIA Standard (525 lines, 60 fields) NTSC color signal
Video Recording System: 2 rotary heads, helical scanning system
Audio: 12 bit (32 kHz) 4 tracks
16 bit (48 kHz) 2 tracks
Pick-Up System and Device: One integral color filter Charge Coupled Device (CCD)
1/6 inch
Lens: 10:1 zoom lens, F1:1.8 with auto iris control
Focal length: 2.3 mm - 23 mm
Power zoom function
Lens filter diameter: 27 mm
Viewfinder: 8.4 mm (0.33 inch) Liquid Crystal Electronic Viewfinder
LCD Monitor: 63.5 mm (2.5 inch) Liquid Crystal Display
Minimum Illumination Required: 10 lx (F1:1.8) 1 footcandle
Memory (Still image) MultiMediaCard/SD Memory Card
640 x 480 pixels (NORMAL mode)
1280 x 960 pixels (FINE mode)
Image Storage (supplied Approx. 70 images (NORMAL mode))
8 MB Memory Card) Approx. 30 images (FINE mode)
Image Format JPEG (Design Rule for Camera File System)
Operating Temperature: 32 °F\~104 °F (0 °C\~40 °C)
Operating Humidity: 10%\~75%
Weight: Palmcorder : 0.46 kg
1.01 lbs.
AC Adaptor: 0.16 kg
0.35 lbs.
Dimensions: Palmcorder : 66 (W) x 87 (H) x 123 (D) mm
2-5/8 (W) x 3-3/8 (H) x 4-7/8 (D) inch
AC Adaptor: 70 (W) x 45 (H) x 115 (D) mm
2-3/4 (W) x 1-3/4 (H) x 4-1/2 (D) inch
Weight and dimensions shown are approximate.
Designs and specifications are subject to change without notice.
Before Requesting Service
Cleaning Care for Video Heads

natural_image
Illustration of a person standing on a bench with trees in the background (no text or symbols)Clogged Video Head
(a) Video Head Cleaning: Normally, your Palmcorder will not require head cleaning. However, it is possible that the heads may become clogged due to dust in the air, playing damaged tapes, long term use, etc. If “NEED HEAD CLEANING” appears for 5 seconds in the EVF or LCD monitor, the heads may require cleaning.
(b) Cleaning the Heads: It is recommended that head cleaning be performed by a qualified service technician. Please contact your nearest Panasonic Servicenter. An alternate solution is to obtain a head cleaning cassette. Please use Panasonic cleaning cassette (AY-DVMCLA). Be sure to follow the cleaning instructions carefully. Excessive use of the head cleaning cassette could shorten video head life.
Use this cassette only when a head clogging symptoms occur.
Refer servicing to qualified service personnel.
Tape Operations Caution
- When you go from function to function (PLAY, FF, REW etc.), please note that the unit will not accept a new function operation until the previous operation is complete.
- The POWER Button and all function buttons, (PLAY, FF, REW, etc.) are only operational after the tape has been completely loaded.
Lens Hood Area Operation Caution
When the following accessories are attached and the zoom is set to maximum wide angle, the four corners of the screen may appear darker:
- Wide or Telephoto conversion lens (optional).
- A filter (optional), etc. and then the lens hood.
- Two filters (optional).
Self Diagnostic System
If any of the following numbers appear on-screen, the camcorder may need service. Do not remove the battery (if attached) and write down the displayed number on page 101. Then, take the camcorder to a servicenter for repair.
| Error No. | Description |
| U11 | Card Error |
| U12 | Card Error |
| U14 | Card/Camcorder Dialogue Error |
| U15 | Card Access Error |
| U16 | Card Access Error |
| U30 | Error other than above |
Before Requesting Service
If you have a problem with your Palmcorder, it may be something you can correct yourself. Check the list below for symptoms and corrections.
| Symptom | Correction |
| No picture in the EVF or LCD Monitor... | Make sure the Power Source is connected. (pp. 15, 16)Make sure the POWER switch is set to VCR or CAMERA. (pp. 19, 32)Check the Dew Indicator. (p. 100)Make sure the Battery is fully charged. (p. 15)Make sure all necessary cables are connected correctly and firmly. (p. 16)Make sure the Lens Cap is removed. (p. 19) |
| Video cassette cannot be inserted... | Make sure the Power Source is connected. (pp. 15, 16)Insert the cassette record tab up, window side facing out. (p. 12) |
| Video cassette cannot be removed... | Make sure the Power source is connected. (pp. 15, 16) |
| No operation starts when operation buttons are pressed... | Check the Dew Indicator. (p. 100) |
| Recording cannot be done... | Make sure the record tab is closed. (p. 6)Check the Battery Indication. (p. 113) |
| Auto Focus does not operate... | Make sure FOCUS is set to AUTO. (p. 29)Make sure the unit is ON and set to CAMERA mode. (p. 19) |
| Sound from microphone cannot be monitored... | Make sure the unit is set to REC or REC/ PAUSE mode. (p. 19) |
| Sound cannot be heard... | Make sure the Audio on the VCR MENU is set to ST1. (pp. 46, 110) |
On-Screen Displays (OSD)
The following warning displays appear in the EVF and the LCD monitor.
| Indications | Condition |
 TAPE NOT INSERTED TAPE NOT INSERTED | If the Palmcorder is in CAMERA mode without a cassette inserted, “☐” will flash and “TAPE NOT INSERTED” will appear for 5 seconds. Recording will not start. |
 .CHECK REC TAB .CHECK REC TAB | If the Palmcorder is in CAMERA mode or Audio dub mode with the cassette sliding record tab opened, “☐” will flash and “CHECK REC TAB” will appear for 5 seconds. Recording will not start. |
 .CANNOT REC .CANNOT REC | When Audio dub is performed and the recording is other than NTSC format, “☐” will flash and “CANNOT REC” will appear for 5 seconds. |
 .T .T  END END | When the tape is about to end in REC mode, “☐” END” will flash and “TAPE END” will appear for 5 seconds. |
INCOMPATIBLE  | When an incompatible tape is detected, “INCOMPATIBLE TAPE” will appear for 5 seconds. |
NEED HEAD C  ING ING | If the video heads require cleaning, “NEED HEAD CLEANING” will appear for 5 seconds. |
R  TE TE | When the Palmcorder and remote are not set to the same mode (VCR1 or VCR2), “CHECK REMOTE MODE (REMOTE)” appears for 5 seconds. It also appears when the Palmcorder is first turned on. |
 .RECLP-MODE .RECLP-MODE | When an AUDIO DUB is attempted on a pre-recorded LP tape, “CANNOT REC LP-MODE” will appear for 5 seconds. |
 .WARNING -DEV .WARNING -DEV  ECTED ECTED | If excessive moisture condenses in the unit, “WARNING” will flash, “DEW DETECTED” will appear, and the Palmcorder will automatically turn OFF in 15 seconds.In this case, wait until the indicator no longer flashes when your Palmcorder is turned ON again. |
 .WARNING - .WARNING - LOW BATTERY LOW BATTERY | When a battery recharge is necessary, “WARNING” will flash, “LOW BATTERY” will appear, and the Palmcorder will automatically turn OFF in 15 seconds. (p. 113) |
 .CLOCK BATTERY .CLOCK BATTERY | When the Clock Battery is discharged, “CLOCK BATTERY” will appear. To replace the Clock Battery, set POWER to OFF or disconnect the Palmcorder from a power source. |
INC  TIBLE DATA TIBLE DATA | If you play a tape recorded in a format other than NTSC or you try to copy copy-protected data, “INCOMPATIBLE DATA” will appear. |
N  RD RD | Card is not inserted. |
NO S  LEFT LEFT | When a still image is transferred from a tape to an already full Memory Card, or when setting is DPOF, “NO SPACE LEFT” appears. |
On-Screen Displays (OSD)
| Indications Condition | |
| DISCONNECT DV CABLE | If the Palmcorder is in Photo Title (CAMERA mode) and the DV Interface Cable (i.LINK) is connected, “DISCONNECT DV CABLE” appears. In this case, remove the DV Interface Cable (i.LINK) from the Palmcorder. |
| DISCONNECT USB CABLE | If you are attempting to record from a Cassette by pressing PHOTO SHOT, when the USB Cable is connected, “DISCONNECT USB CABLE” appears. In this case, remove the USB Cable from the Palmcorder. |
| PICTURE | When making DV connection at the time of M-CARD mode. (Blink during 3 seconds.) |
| WEBCAM | When making DV connection at the time of Web Camera mode. (Blink during 3 seconds.) |
| STORAGE | When making DV connection at the time of USB Device Driver/SD Drive mode. (Blink during 3 seconds.) |
| WRITE PROTECTED | In M-CARD mode, this display appears if the SD Memory Card Lock Switch is in the Lock position. |
Request for Service Notice
Please photocopy this form when making a request for service notice.
Request for Service Notice:
In the unlikely event this product needs service.
- Please include your proof of purchase. (Failure to due so will delay your repair.)
- To further speed your repair, please provide an explanation of what is wrong with the unit and any symptom it is exhibiting.
Mail this completed form and your Proof of Purchase along with your unit to:
Panasonic Services Company
1705 N. Randall Road
Elgin, IL. 60123-7847
Attn: Camcorder Repair
Please write the displayed Self Diagnostic number here.
(p. 98)
Limited Warranty
PANASONIC CONSUMER ELECTRONICS COMPANY, DIVISION OF MATSUSHITA ELECTRIC
CORPORATION OF AMERICA
One Panasonic Way Secaucus, New Jersey 07094
PANASONIC SALES COMPANY, DIVISION OF MATSUSHITA ELECTRIC OF PUERTO RICO, INC.,
AVE. 65 de Infantería, Km. 9.5 San Gabriel Industrial Park, Carolina, Puerto Rico 00985
Panasonic/Quasar Video Products Limited Warranty
Limited Warranty Coverage
If your product does not work properly because of a defect in materials or workmanship, Panasonic Consumer Electronics Company or Panasonic Sales Company (collectively referred to as "the warrantor") will, for the length of the period indicated on the chart below, which starts with the date of original purchase ("warranty period"), at its option either (a) repair your product with new or refurbished parts, or (b) replace it with a new or a refurbished product. The decision to repair or replace will be made by the warrantor.
| Product | Parts | Labor | Service | Contact Number |
| Camcorder | One (1) Year (except CCD Image Sensor)CCD Image Sensor - 6 (Six) Months | Ninety (90) DaysNinety (90) Days | Carry-In or Mail-In | 1-800-211-PANA(7262) |
| DVD/VCR Deck, A/V Mixer | One (1) Year | Ninety (90) Days | Carry-In or Mail-In | 1-800-211-PANA(7262) |
| TV/VCR, TV/DVD, TV/DVD/VCR Combination | One (1) Year (except CRT)CRT - Two (2) Years | Ninety (90) DaysNinety (90) Days | Carry-In: 21" CRT and Smaller In-Home or Carry-In: 22" CRT and Larger | 1-800-211-PANA(7262) |
| TV/HDR Combination | One (1) Year (except CRT)CRT - Two (2) Years | Ninety (90) DaysNinety (90) Days | In-Home or Carry-In | 1-888-843-9788 |
| Rechargeable Batteries (in exchange for defective item) | Ten (10) Days | Not Applicable | Carry-In or Mail-In | 1-800-211-PANA(7262) |
| Tape (in exchange for defective item) | Five (5) Days | Not Applicable | Carry-In or Mail-In | 1-800-211-PANA(7262) |
| Memory Cards (in exchange for defective item) | Ninety (90) Days | Not Applicable | Carry-In or Mail-In | 1-800-211-PANA(7262) |
During the "Labor" warranty period there will be no charge for labor. During the "Parts" warranty period, there will be no charge for parts. You must carry-in or mail-in your product or arrange for in-home service, as applicable, during the warranty period. If non-rechargeable batteries are included, they are not warranted. This warranty only applies to products purchased and serviced in the United States or Puerto Rico. This warranty is extended only to the original purchaser of a new product which was not sold "as is". A purchase receipt or other proof of the original purchase date is required for warranty service.
Carry-In, Mail-in or In-Home Service
For Carry-In, Mail-In or In-Home Service (as applicable) in the United States call toll free contact number listed above or visit Panasonic Web Site: http://www.panasonic.com
For assistance in Puerto Rico call Panasonic Sales Company (787)-750-4300 or fax (787)-768-2910.
In-Home service, if applicable, requires clear, complete and easy access to the product by the authorized servicer and does not include removal or re-installation of an installed product. It is possible that certain in-home repairs will not be completed in-home, but will require that the product, or parts of the product, be removed for shop diagnosis and/or repair and then returned.
Limited Warranty Limits And Exclusions
This warranty ONLY COVERS failures due to defects in materials or workmanship, and DOES NOT COVER normal wear and tear or cosmetic damage, nor does it cover markings or retained images on the picture tube resulting from viewing fixed images (including, among other things, letterbox pictures on standard 4:3 screen TV's, or non-expanded standard 4:3 pictures on wide screen TV's, or onscreen data in a stationary and fixed location). The warranty ALSO DOES NOT COVER damages which occurred in shipment, or failures which are caused by products not supplied by the warrantor, or failures which result from accidents, misuse, abuse, neglect, mishandling, misapplication, alteration, faulty installation, set-up adjustments, misadjustment of consumer controls, improper maintenance, power line surge, lightning damage, modification, or commercial use (such as in a hotel, office, restaurant, or other business), rental use of the product, service by anyone other than a Factory Servicenter or other Authorized Servicer, or damage that is attributable to acts of God.
THERE ARE NO EXPRESS WARRANTIES EXCEPT AS LISTED UNDER "LIMITED WARRANTY COVERAGE". THE WARRANTYOR IS NOT LIABLE FOR INCIDENTAL OR CONSEQUENTIAL DAMAGES RESULTING FROM THE USE OF THIS PRODUCT, OR ARISING OUT OF ANY BREACH OF THIS WARRANTY. (As examples, this excludes damages for lost time, cost of having someone remove or re-install an installed unit if applicable, or travel to and from the servicer, loss of media or images, data or other memory or recorded content. The items listed are not exclusive, but are for illustration only.)
ALL EXPRESS AND IMPLIED WARRANTIES, INCLUDING THE WARRANTY OF MERCHANTABILITY, ARE LIMITED TO THE PERIOD OF THE LIMITED WARRANTY.
Some states do not allow the exclusion or limitation of incidental or consequential damages, or limitations on how long an implied warranty lasts, so the exclusions may not apply to you.
This warranty gives you specific legal rights and you may also have other rights which vary from state to state. If a problem with this product develops during or after the warranty period, you may contact your dealer or Servicenter. If the problem is not handled to your satisfaction, then write to the warrantor's Consumer Affairs Department at the addresses listed for the warrantor.
PARTS AND SERVICE (INCLUDING COST OF AN IN-HOME SERVICE CALL, WHERE APPLICABLE) WHICH ARE NOT COVERED BY THIS LIMITED WARRANTY ARE YOUR RESPONSIBILITY.
102
Forassistance, please call: 1-800-211-PANA(7262)orsende-mailto:consumerproducts@panasonic.com
Customer Services Directory
For Product Information, Operating Assistance, Literature Request, Dealer Locations, and all Customer Service inquiries please contact:
1-800-211-PANA (7262), Monday-Friday 9 am-9 pm; Saturday-Sunday 9 am-7 pm, EST.
or send e-mail : consumerproducts@panasonic.com
For hearing or speech impaired TTY users, TTY: 1-877-833-8855
Web Site: http://www.panasonic.com
You can purchase parts, accessories or locate your nearest servicenter by visiting our Web Site.
Accessory Purchases:
1-800-332-5368 (Customer Orders Only)
For hearing or speech impaired TTY users, TTY: 1-866-605-1277
Panasonic Services Company 20421 84th Avenue South, Kent, WA 98032
(Monday-Friday 6 am-5 pm; Saturday 6 am-10:30 am, PST)
(Visa, MasterCard, Discover Card, American Express, Check)
Product Repairs
Centralized Factory Servicenter
MAIL TO :
Panasonic Services Company
1705 N. Randall Road,
Elgin, IL 60123-7847
Attention: Camcorder Repair
Please carefully pack and ship, prepaid and insured, to the Elgin Centralized Factory Servicenter.
Customer's in Puerto Rico, please ship or carry in to location below ("Service in Puerto Rico").
Service in Puerto Rico
Matsushita Electric of Puerto Rico, Inc. Panasonic Sales Company/ Factory Servicenter:
Ave. 65 de Infanteria. Km. 9.5, San Gabriel Industrial Park, Carolina, Puerto Rico 00985
Phone (787) 750-4300 Fax (787) 768-2910
As of August 2002
Spanish Quick Use Guide/Guía Para Uso Rápido
natural_image
Illustration of a digital camera with labeled buttons and an open screen (no text or symbols present)4
Forassistance, please call: 1-800-211-PANA(7262)or sende-mail to: consumerproducts@panasonic.com
Spanish Quick Use Guide/Guía Para Uso Rápido
1 PROG. AE (p. 25) To select one of the 5 Program AE modes. Setting to OFF cancels the previously selected Program AE mode. 2 PROGRESSIVE (p. 21) When set to ON, still pictures taken with PhotoShot are recorded with a higher resolution than with normal PhotoShot.
3 D. ZOOM (p. 40)
To select 25X (from 10X to 25X) or 700X (from 10X to 700X).
Setting to OFF cancels the previously selected digital zoom.
4 CINEMA (p. 24)
When set to ON, you can record a picture compatible with a wide-screen TV equipped with an S2 picture terminal.
5 EFFECT (p. 43)
To select one of the 10 digital functions.
Setting to OFF cancels the previously selected digital function.
6 REC SPEED (pp. 6, 19)
SP: Normal recording speed mode.
LP: Recording time is 1.5 times as long as in the SP mode. For example, 120 minutes of recording is possible on a 80 minute tape.
7 AUDIO REC (p. 45)
12 bit: The sound is recorded in the 12 bit/32 kHz mode.
16 bit: The sound is recorded in the 16 bit/48 kHz high-quality mode.
8 SCENEINDEX
DAY: An index signal is recorded when recording is restarted after the date has changed since the last recording.
2 HOUR: An index signal is recorded when recording is restarted after a lapse of more than 2 hours.
9 WIND CUT (p. 31)
To reduce sound distortion caused by wind hitting the microphone.
10 ZOOM MIC (p. 22)
When set to ON, the microphone's directional angle and sensitivity vary according to the zoom operation.
MENU OSD


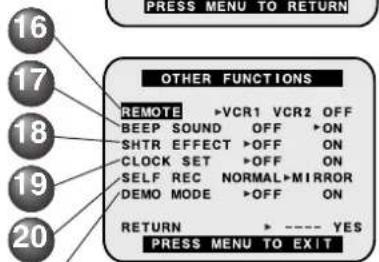
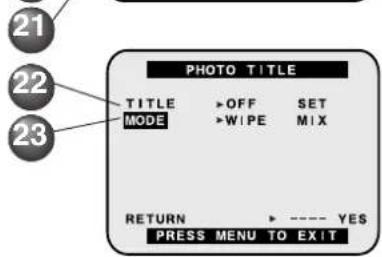
11 DATE/TIME (p. 113)
The date and time can be set and displayed on the screen.
12 C. DISPLAY (p. 114)
To select the desired type of counter indication displayed on the LCD Monitor or in the viewfinder.
13 C. RESET (p. 114)
Setting to ON resets the counter to zero.
14 DISPLAY (p. 114)
To select the desired type of display changes to all function display, Partial display, and Minimum display.
15 LCD/EVF SETUP (p. 20)
Setting to ON displays the menu for adjusting the LCD brightness, color level, and the EVF brightness.
16 REMOTE (p. 10)
VCR1: To receive signals from the Remote Control, set to VCR1.
VCR2: To receive signals from the Remote Control, set to VCR2.
OFF: To prevent reception of signals from the Remote Control.
17 BEEP SOUND
Set to ON to hear beep when starting and stopping camera recording or when unusual conditions occur. To cancel the beep, set to OFF.
Palmcorder will beep:
Once when you start recording
Twice when you stop recording
Repeatedly when warning of unusual conditions. (pp. 100, 101)
18 SHTR EFFECT (pp. 21, 49)
When set to ON, still pictures taken in the PhotoShot mode are recorded with a visual shutter effect and click sound.
19 CLOCK SET (p. 17)
When set to ON, the date and time can be set on the screen.
20 SELF REC (p. 23)
NORMAL: During self-recording, the picture on the LCD Monitor is the same as it will be recorded.
MIRROR: During self-recording, the picture on the LCD Monitor is horizontally reversed.
21 DEMO MODE (p. 11)
When set to ON, Self Demo starts.
22 TITLE (p. 27)
Photo Title is recorded.
23 MODE (p. 27)
To select one of the 2 Photo Title modes.
MENU OSD
VCR Mode Menu Screen

1 BLANK SEARCH (p. 33)
Select ON to go directly to a blank portion of the tape.
2 SEARCH (p. 37)
To select the desired Index Search function.
PHOTO: To search for Photo shot pictures.
SCENE: To search for scenes marked with Index signal.
3 12bit AUDIO (p. 46)
To select the desired audio playback mode after performing audio dubbing in the 12 bit mode (SP mode only).
ST1 : The original sound alone is played back.
ST2 : The dubbed sound alone is played back.
MIX : The original sound and the dubbed sound are played back together.
4 MULTI SPEED (p. 38)
In Strobe Multi mode, used to select the interval at which a succession of still screens are captured from the playback picture.
FAST : Every 0.3 seconds
NORMAL : Every 0.6 seconds
SLOW : Every 1.0 seconds
5 EFFECT1 (p. 43)
To select one of the 6 digital functions. Setting to OFF cancels the previously selected digital function.
6 EFFECT2 (p. 43)
To select one of the 2 digital picture effects for playback. Setting to OFF cancels the previously selected digital effect.
7 D. ZOOM (p. 41)
Set to ON to double the size of a playback image. Setting to OFF cancels the previously selected digital zoom.
8 REC SPEED (p. 6)
SP: Normal recording speed mode.
LP: Recording time is 1.5 times as long as in the SP mode. For example, 120 minutes of recording is possible on an 80 minute tape.
9 AUDIO DUB (p. 45)
Set to AUDIO DUB "ON" in the Menu OSD to use the Audio Dub feature.
MENU OSD
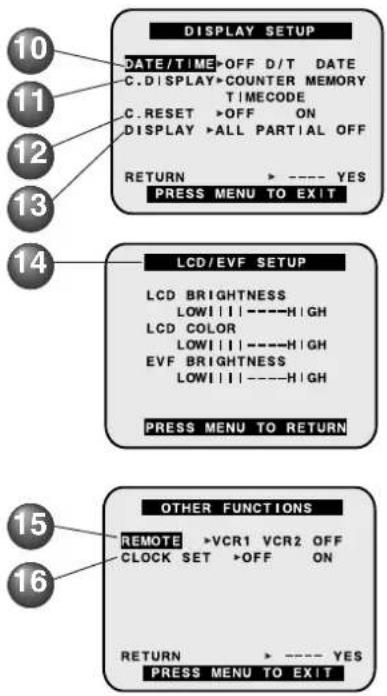
10 DATE/TIME (p. 113)
The date and time can be set and displayed on the screen.
11 C. DISPLAY (p. 114)
To select the desired type of counter indication displayed on the LCD Monitor or in the viewfinder.
12 C. RESET (p. 114)
Setting to ON resets the counter to zero.
13 DISPLAY (p. 114)
To select the desired type of display changes to all function display, Partial display, and Minimum display.
14 LCD/EVF SETUP (p. 20)
Setting to ON displays the menu for adjusting the LCD brightness, color level, and the EVF brightness.
15 REMOTE (p. 10)
VCR1 : To receive signals from the Remote Control, set to VCR1.
VCR2 : To receive signals from the Remote Control, set to VCR2.
OFF : To prevent reception of signals from the Remote Control.
16 CLOCK SET (p. 17)
When set to ON, the date and time can be set on the screen.
MENU OSD
M-CARD Mode Menu Screen
[ Photo Rec Mode Menu Screen ]

[ Photo Play Mode Menu Screen ]
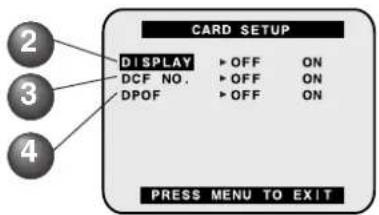
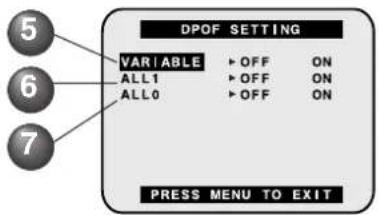
1 REC MODE (p. 49)
To select Photo Rec Mode.
2 DISPLAY (p. 116)
Select to OFF to cancel all Displays on the screen.
3 DCF NO. (pp. 51, 116)
Select to OFF to cancel DCF (Design rule for Camera File system) No. on the screen.
4 DPOF (pp. 55, 116)
When set to ON, information of the image to be printed and the number of prints desired (DPOF data) is written to the Memory Card.
5 VARIABLE (p. 55)
When set to ON, you can select images recorded on the Memory Card and set the number of prints desired.
6 ALL1 (p. 55)
When set to ON, the number of prints recorded on the Memory Card is collectively set to 1.
7 ALL0 (p. 55)
When set to ON, the currently set number of prints is set to 0.
Electronic Viewfinder/LCD Monitor Indications
Here are some of the basic indications which will appear on the Palmcorder EVF and LCD Monitor. Only Date and Time indications will be recorded onto the tape.
CAMERA/VCR Mode
![a b c d e f g h i LP 0h 00m00s00f PAUSE R0:12 CINEMA MNL700XEIS WARNING MF DZOOM ▶AWB 1/60 OP+0dB SEPIA MAGICPIX VOLUME [-]||||- - [+] 12:34:56AM JAN 2 2003 Z.MIC WIND CUT P](/content/2026/05/1048910/images/785b6c4e09d85a9f4656c1bea4cbae5ac92577840d21a3218f92041efb87d3b6.jpg)

Battery Remaining


Tape Remaining

- It will take several seconds for the tape remaining indicator to operate after the tape starts moving.

CINEMA Indication
(Menu OSD: p. 108)

Digital Zoom and other Digital
Functions (Menu OSD: p. 108) This display appears when the digital zoom function has been activated.

Playback Effect (Menu OSD: p. 110)
This display appears when SEPIA or B/W is selected in VCR menu.

Volume Display (p. 33)
The volume bar appears when the volume of the built-in speaker is being adjusted.

Date and Time Indication
(Menu OSD: pp. 109, 111)
As shown below, the date and time indication changes each time DATE/TIME is selected from the Palmcorder's MENU (Menu OSD: pp. 109, 111) or the DATE/TIME Button is pressed on the remote.
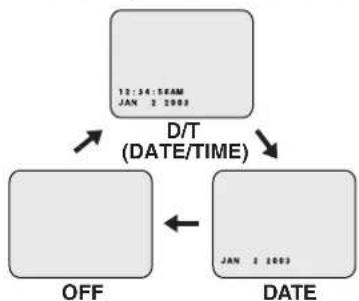
flowchart
graph TD
    A["12:34:56AM\nJAN 2:2003"] --> B["D/T (DATE/TIME)"]
    B --> C["OFF"]
    B --> D["DATE"]
    C <--> D

Tape Speed Indication
(Menu OSD: p. 108) Indicates the tape speed (SP or LP).

MNL Indication (pp. 28\~31) This display appears when AUTO/ MANUAL is pressed to MANUAL.
Electronic Viewfinder/LCD Monitor Indications
CAMERA/VCR Mode
![j k l LP 0 h 0 0 m 0 0 s 0 0 f PAUSE R0 : 12 CINEMA WARNING MNL700XEIS MF DZOOM ▶ AWB 1 / 60 OP + 0 dB MAGICPIX SEPIA VOLUME [-] | | | | - - - [+] 12 : 34 : 56 AM JAN 2 2003 Z.MIC WIND CUT P](/content/2026/05/1048910/images/c636a8d19756a0a01c5492c63da7fbcdc9452d02975cb449a80e916e01cc809d.jpg)
WARNING Indication (pp. 100, 101) The warning displays appear in the EVF and the LCD monitor.
Counter/Time Code The indication switches as shown below when the desired "C. DISPLAY" mode is selected from the menu. (Menu OSD: pp. 109, 111)
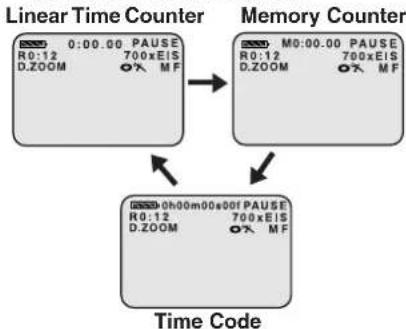
flowchart
graph TD
    A["Linear Time Counter"] --> B["Memory Counter"]
    B --> C["Time Code"]
    A -->|0:00.00 PAUSE\nR0:12 700xEIS\nD.ZOOM MF| A
    B -->|M0:00.00 PAUSE\nR0:12 700xEIS\nD.ZOOM MF| B
    C -->|0h00m00s00f PAUSE\nR0:12 700xEIS\nD.ZOOM MF| C
Memory Counter M 0:00.00
The Palmcorder will stop whenever it reaches the point where the counter was previously set to M 0:00.00 during audio dub, fast forward, or rewind.
Time Code 0h00m00s00f
The Palmcorder calculates and displays exactly where you are on any tape in terms of hours, minutes, seconds, and frames (30 frames = 1 second).
• This display cannot be reset.
114
IMPORTANT NOTE:
- Display must be set to ALL for MF, AE, W.BALANCE or BACK LIGHT indications to be displayed on the EVF or LCD Panel when selected. - C.RESET does not work when C. DISPLAY is set to T.CODE.
Tape Mode Indications REC Recording.
PHOTO PhotoShot recording.
PAUSE Paused during recording.
▷ Playback.
II Still.
Slow (forward).
Slow (reverse).
Frame Advance (forward).
Frame Advance (reverse).
R▷ Repeat Playback.
CHK Recording Check.
FF Fast forward.
REW Rewind.
FF Search.
REW Search.
BLANK Blank Search.
SEARCH Index Search.
m MAGICPIX Indication (p. 41)
This display appears when MAGIC PIX is pressed.
Forassistance, please call: 1-800-211-PANA(7262)or sende-mail to: consumerproducts@panasonic.com
Electronic Viewfinder/LCD Monitor Indications
CAMERA/VCR Mode
![LP 0h00m00s00f PAUSE R0:12 MNL700XEIS CINEMA WARNING MF D.ZOOM ▶AWB SEPIA 1/60 VOLUME [-] | | | | - - - [+] 12:34:56AM Z.MIC D JAN 2 2003 WIND CUT P n o p r s t u v w x y](/content/2026/05/1048910/images/6727aa546623aaf2058f2e89d3c8b9b0dffc63a30c42df3f252345681268ad05.jpg)
Zoom Magnification Level (p. 40)
Digital EIS Indications (p. 42)
This display appears when EIS is pressed.
Backlight Indication (p. 24)
This display appears when BACK LIGHT is pressed.
q PROGRAM-AE Indication (p. 25)
r Manual Focus Indication (p. 29)
S White Balance Indication (p. 28)
t Shutter Mode Indication (p. 30)
U Iris Indication (p. 31)
Z.MIC Indication (Menu OSD: p. 108)
This display appears when ZOOM MIC is set to ON.
W Light Indication (p. 8)
This display appears when LIGHT is set to ON.
X WIND CUT Indication
(Menu OSD: p. 108)
This display appears when WIND CUT is set to ON.
y Progressive Indication
(Menu OSD: p. 108)
This display appears when
PROGRESSIVE is set to ON.
Electronic Viewfinder/LCD Monitor Indications
PHOTO Mode
[ Photo Rec Mode ] [ Photo Play Mode ]

a Image Page Remaining Indication (p. 49)
- Image pages left in selected mode. "0" flashes when memory is full.
- Memory capacity provided all pictures are taken in the same mode: "NORMAL" mode
→ Approx. 70 images
(Supplied 8 MB Memory Card)
“FINE” mode
→ Approx. 30 images
(Supplied 8 MB Memory Card)
b REC MODE
• NORMAL or FINE mode.
- Image Size:
"NORMAL" mode
→ 640 x 480 pixels
“FINE” mode
→ 1280 x 960 pixels
Recording Mode POWER is set to M-CARD.
d Directory/Image Number
e DCF NO. (Design rule for Camera File system) Indication
(Menu OSD: p. 112)
f DPOF Indication (p. 55)
g Multi Image Playback page number
h Currently selected image is underlined in green
Index of Controls
Front View

Rear View
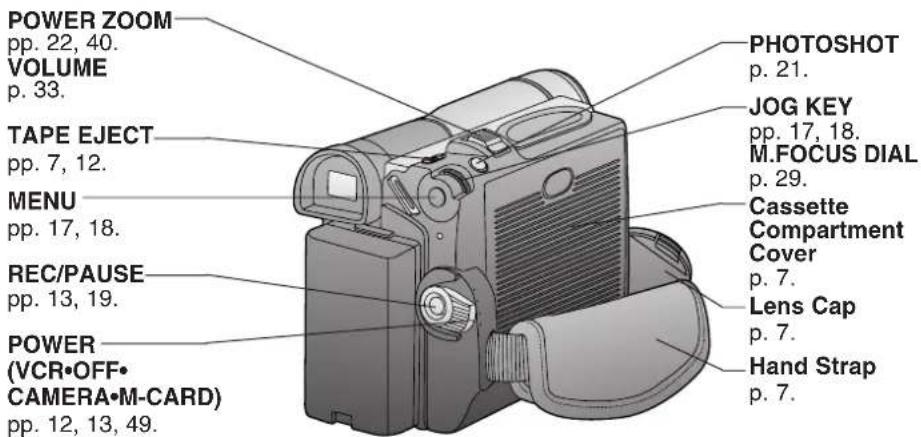
Side View

For Your Information
Index of Controls
Rear View
USB Terminal
pp. 60, 75, 81.
Clock Battery
Tray
p. 95
DV Input/Output
(i.LINK) Connector
pp. 48, 72.
A/V Output
Connector
pp. 39, 47.
PHONE
p. 32.

natural_image
Technical line drawing of a video camera with external camera module (no text or symbols)Card Slot
p. 14.
S-VIDEO Output
Connector
pp. 39, 47.
DC IN Terminal
p. 16.
Side View
MAGIC PIX
p. 41
LIGHT
p. 8.
REW
pp. 13, 32.
RECORDING CHECK
p. 23.
REC
p. 48
FOCUS
p. 29.
AUTO/MANUAL
pp. 28\~31.
EIS
p. 42.

BACK LIGHT
p. 24.
FADE
p. 26.
PLAY
pp. 13, 32.
M-PLAY
pp. 51, 52.
MULTI
p. 38.
FF
p. 34.
PAUSE
pp. 34, 46, 48
CAMERA STILL
p. 44.
STOP
pp. 13, 32.
M-STOP
pp. 51\~54.
Back View
Vision
Adjustment Control
pp. 13, 19.
Shoulder Strap
Attachment Ring
p. 7.
POWER Lamp
p. 19.
Shoulder Strap
Attachment Ring
p. 7.

natural_image
Technical line drawing of a vintage digital camera with no visible text or symbolsUnderside View
BATTERY RELEASE
pp. 15, 16.

natural_image
Illustration of a vintage camera with a strap and control panel (no text or symbols)Tripod
Receptacle
118
Forassistance, please call: 1-800-211-PANA(7262)orsende-mailto:consumerproducts@panasonic.com
Index of Controls
AC Adaptor
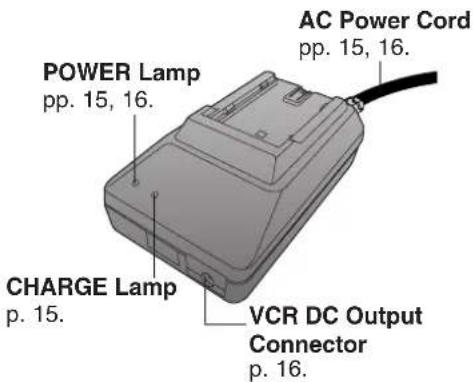
CAUTION:
This unit will operate on 110/120/220/240 V AC. An AC plug adaptor may be required for voltages other than 120 V AC. Please contact either a local or foreign electrical parts distributor for assistance in selecting an alternate AC plug.
We recommend using the accessory power plug adaptor (VJSS0070/KZDB4ZE00001) in an area which has special AC outlets.
Remote Control (Optional)

Index
A
About the Memory Card ..... 94
AC Adaptor ...... 6, 15, 16, 92
Accessories (Optional) ..... 92
Accessories (Supplied) ..... 6
A/V Cable 6,39
Approximate Brightness Values
96
Audio Dubbing 45, 46
Audio/Video Fade In/Out .... 26
B
Backlight 24
Battery Pack ..... 6, 12, 15, 92
Battery Remaining Indication
113
Battery Warning 100
Before Requesting Service
98, 99
Blank Search 33
C
Card PhotoShot 49
CD-ROM 6,57
CINEMA Mode 24
Cleaning Care for Video Heads
98
Clock Battery 95,100
Clock Set 17
Connecting Earphone ...... 32
Copying from Digital Equipmen
48
Copying your Tapes 47
Customer Services Directory
103
D
Date and Time Indication . 113
DC Power Cable ..... 6, 16, 92
Delete All Image Pages ..... 53
Delete Specific Images ..... 52
DEW Indication 100
Digital E.I.S. 42
Digital Functions 43
Digital PhotoShot™ Mode .. 21
Digital Video Cassette Tape . 6
Digital Zoom 40, 41
DV Interface Cable (i.LINK)
48,72,92
DPOF Setting 55
E
Easy Cassette Eject ...... 7
EfficiBright™ LED Light ..... 8
Erase Protection Tab ...... 6
EVF/LCD Monitor Indications
113\~116
F
Fast Forward/Rewind Check 34
Focus 29
Format the Memory Card ... 54
Frame by Frame Advance .. 36
H
Hand Strap 7
High Speed Shutter 30
|
Important Safeguards ...... 3
Index of Controls ..... 117\~119
Index Search 37
Iris 31
J
Jog Search 36
L
LCD/EVF Setting 20
Lens Cap 6,7,19
Lens Cap Strap 6,7
Limited Warranty 102
M
MagicPix™ Images 41
Memory Counter 114
Memory Stop Editing ...... 46
MENU OSD 108\~112
Memory Card 6, 14, 92
0
On-Screen Display (OSD)
100, 101
P
Palmcorder Accessory Order
Form 93
Palmcorder File Converter
78, 79
Palmcorder USB Device
Driver/SD Drive 75\~77
Photo Title 27
PHOTOVU/MPEG4 Movie
Messenger™ System . 60\~71
PHOTOVÚ/MPEG4 Movie
Messenger™ System
(i.LINK) 73, 74
Picture in Picture (PinP) ..... 44
Playback Still Images ..... 51
Playback using the LCD
Monitor 32
Precautions 4
Program AE 25
Progressive PhotoShot™
Mode 21
Q
Quick Guide 12, 13, 14
B
Rapid Visual Search ...... 34
Recording Check 23
Recording Images From a
Tape 50
Recording Still Pictures ..... 23
Remote Control (Optional)
9, 10, 92, 119
Remote Controlling Two
Palmcorders...... 10
Repeat Playback 33
Request for Service Notice 101
S
Safety Precautions ...... 2
Self Demo Mode 11
Self Recording 23
Shoulder Strap 6,7
Simple Recording 19
Slow Motion Playback ..... 35
Spanish Quick Use Guide
104\~107
Specifications 97
STILL Picture 34
Strobe Multi Mode .... 38
Supplying Power 15, 16
T
Table of Contents 5
Tape Remaining Indications
113
Tape Speed 6
Tape Warning 100
Transferring Your Images
(Macintosh) 90, 91
Transferring Your Images
(Windows) 56\~59
Transferring Your Images
(i.LINK) (Windows) ...... 72
U
USB Cable .... 6, 60, 75, 81, 90
Using the Palmcorder Menu .. 18
V
Variable Speed Search ..... 35
VHF Connecting Cable ..... 47
Volume Display 33, 113
W
Warning Indications 89
Web Camera 80\~88
White Balance 28
WIND CUT 31
Z
Zoom In/Out 22
Zoom Microphone 22
Panasonic Consumer Electronics Company,
Division of Matsushita Electric Corporation of America
One Panasonic Way Secaucus, New Jersey 07094
Panasonic Sales Company ("PSC"),
Division of Matsushita Electric of Puerto Rico, Inc.
Ave. 65 de Infanteria, Km. 9.5 San Gabriel Industrial Park Carolina,
Puerto Rico 00985

Printed in Japan
LSQT0653A
S1202A1013
- Panasonic®
- MultiMediaCard™
- Things You Should Know
- Thank you for choosing Panasonic!
- Safety Precautions
- WARNING: TO PREVENT FIRE OR SHOCK HAZARD, DO NOT EXPOSE THIS EQUIPMENT TO RAIN OR MOISTURE.
- CAUTION
- The above markings are located on the appliance bottom cover.
- Important Safeguards
- Precautions
- USE & LOCATION
- CARE
- 4
- Table of Contents
- Before Using
- Unpack your Palmcorder
- Record Speed/Playback Time
- Erase Protection
- Easy Cassette Eject/Insertion
- Note
- Attaching the Shoulder Strap
- Adjust the Length
- Before you begin
- Hand Strap
- Lens Cap
- Using EfficiBright™ LED Light
- Press LIGHT. (Mode 1)
- Press LIGHT. (Mode 2)
- Press LIGHT. (Mode 3)
- Remote Control (Optional)
- To operate Camera functions:
- To operate VCR functions:
- Controlled Functions
- Replace the Battery
- Optional
- Remote Controlling Two Palmcorders
- Self Demo Mode
- To turn Self Demo back on:
- Quick Guide
- Insert the Battery Pack
- Insert Cassette
- Camera Recording
- To Watch Playback in the LCD (Liquid Crystal Display)
- 2
- 3
- 5
- Insert Memory Card\*
- SD Memory Card write protection switch
- When inserting the Memory Card
- 14
- Supplying Power
- About the Flashing of the CHARGE Lamp
- Connect and plug in the Power Cord as shown.
- Attach the Battery as shown to charge.
- Remove the Battery. Slide the Battery out and then lift up.
- Battery Care
- Caution:
- Safety precautions:
- To avoid damage to the Battery:
- To ensure longer battery life:
- U.S.A. CONSUMERS: ATTENTION:
- Setting the Clock
- Set the Date and Time
- 1
- Using the Palmcorder Menu
- Displaying the MENU
- Setting the MENU Items (EX. VCR Mode menu)
- CAMERA Main menu
- VCR Main menu
- Simple Recording
- WARNING:
- Set POWER to CAMERA.
- With the Viewfinder Eye Cup held up against your eye, adjust the Vision Adjustment Control to your eyesight.
- Set to REC SPEED "SP" or "LP" in the RECORDING SETUP menu screen. (Menu OSD: p. 108)
- Press REC/PAUSE to start recording. • “REC” is displayed on the screen. Press REC/PAUSE again to pause recording.
- Set POWER to OFF when finished. • To remove the cassette, slide TAPE EJECT.
- To conserve power
- Using the LCD Monitor
- Digital PhotoShot™ Mode
- Camera
- Progressive PhotoShot™ Mode
- Zoom
- Zoom Microphone Function
- Recording Check
- Recording Still Pictures
- Self Recording
- Special Effect Features
- CINEMA Mode
- Backlight
- Program AE
- SPORTS mode
- PORTRAIT mode
- LOW-LIGHT mode
- SPOT-LIGHT mode
- SURF&SNOW mode
- Audio/Video Fade In/Out
- Fade In
- Fade Out
- Photo Title
- Press MENU to display the CAMERA FUNCTIONS menu screen. Then rotate and press JOG KEY to select PHOTO TITLE.
- Rotate and press JOG KEY to select and set MODE and then TITLE. 1st : Select and set MODE (WIPE or MIX). 2nd : Select and set TITLE to "SET".
- Rotate and press JOG KEY to select and set an image. - "PLEASE WAIT" is displayed while image is processed. Then, "PHOTO TITLE SET" is displayed for approx. 3 seconds, and the screen goes back to the Camera mode screen. - After Photo Title is performed, Digital Function turns off.
- Press REC/PAUSE to start recording with Photo Title. • WIPE or MIX screen is displayed at the beginning of the recording. Then the Photo Title setting will be cleared automatically.
- Advanced Settings
- White Balance
- Auto Focus
- Manual Focus
- Macro Focus (for close-ups)
- High Speed Shutter
- Adjusting the Iris Manually
- WIND CUT
- Playback Your Recordings
- Playback using the LCD Monitor
- Set the POWER to VCR.
- Use OPEN tab on underside of the LCD monitor to unlock and swing open.
- Press←(REWIND/SEARCH) to rewind the tape.
- Press▶(PLAY) to start playback.
- Press ■ (STOP) to stop playback.
- Blank Search
- Press PLAY for more than 5 seconds in STOP mode.
- Turn the Palmcorder OFF to exit the Repeat Playback mode.
- Slide VOLUME to adjust the volume of the built-in speaker in PLAY mode. The volume setting screen appears.
- Press "T" to increase the volume. Press "W" to decrease the volume.
- Slow Motion Playback (Optional Remote Control Only)
- Forward Slow:
- To return to normal playback:
- Frame by Frame Advance
- Index Search (Photo/Scene) (Optional Remote Control Only)
- Top Scan
- Strobe Multi Mode
- View Recording/Playback on your TV
- [ TV with S-VIDEO IN Jacks ]
- Set POWER to CAMERA or VCR.
- Turn your TV ON and set it to LINE INPUT or S-VIDEO.
- Start playback or begin a recording.
- (Optional Remote Control Only)
- Digital Features
- Digital Zoom
- CAMERA mode
- VCR mode
- MagicPix™ Images
- Dual Digital Electronic Image Stabilization System (D.E.I.S.)
- D.E.I.S. may not function when...
- Other Digital Functions
- Types of Digital Functions
- MIRROR
- STROBE
- MOSAIC
- SLIM
- TRAIL
- STRETCH
- To use the WIPE function
- To use the MIX function
- Picture in Picture (PinP)
- Editing Features
- Audio Dubbing using the Built-in Microphone
- Set POWER to VCR.
- Press▶(PLAY). Then press II (PAUSE) where you want dubbing to begin.
- When using the Palmcorder only
- Press MENU to display the VCR FUNCTIONS menu screen.
- When using the Optional Remote Control only
- Press A.DUB on the Remote Control.
- Memory-Stop Editing
- Copying your Tapes to S-VHS or VHS Cassette
- Monitor with your TV
- Insert a pre-recorded tape
- Press (PLAY) on the Palmcorder. When the tape reaches the point from which you want to start dubbing, press PAUSE.
- Place the VCR into REC/PAUSE mode. (See VCR manual.)
- Simultaneously, press PAUSE on both units to begin copying.
- Press STOP on both units when copying is completed.
- Copying from Digital Equipment (dubbing)
- Card Features
- Card PhotoShot
- Warning
- Set POWER to M-CARD.
- Cautions for the Memory Card
- Recording Images From a Tape
- Playback Still Images
- Delete Specific Images
- DELETE PAGE
- DELETE ALL
- FORMAT
- Set POWER to M-CARD.
- Delete All Image Pages
- Format the Memory Card
- Before you begin-
- DPOF Setting
- VARIABLE:
- ALL1:
- ALLO:
- Transferring Your Images (Windows)
- System Requirements (for Palmcorder USB Device Driver/PHOTOVU MPEG4 Movie Messenger™ System)
- Palmcorder USB Device Driver/Web Camera/SD Drive
- PHOTOVU/MPEG4 Movie Messenger™ System
- Palmcorder File Converter
- Software Installation (Windows 98SE/Me/2000/XP)
- 123
- Notes on PHOTOVU/MPEG4 Movie Messenger™ System operation
- Verifying the driver (Windows 98SE/Me/2000/XP)
- PHOTOVU/MPEG4 Movie Messenger™ System (VCR Mode)
- Palmcorder USB Device Driver/Web Camera (CAMERA Mode)
- Uninstalling Application Software
- For Windows XP users
- 60
- For Windows 98SE/Me/2000 users
- To disconnect USB Cable safely (Windows 2000/XP)
- Running the PHOTOVU/MPEG4 Movie Messenger™ System\*
- While PHOTOVU/MPEG4 Movie Messenger™ System is running, do not perform the following operations...
- Using Tape Image Data (USB)
- To capture Still images
- To capture Motion images
- Playing back the saved Motion and Still images
- All:
- Picture:
- Movie:
- Sound:
- For Internet:
- 64
- To view Motion images
- To view Still images
- VideoGift Screen
- Caution for Windows 2000 users
- Using a Motion Image on the VideoGift Screen
- Using a Still Image on the VideoGift Screen
- Setting the Mail Software
- Attaching captured Motion and Still images to your e-mail
- Attaching Motion images to e-mail
- Attaching Still images to e-mail
- Selecting a Frame from a Motion Image
- Transferring Your Images (i.LINK) (Windows)
- PC Connection with DV Interface Cable (i.LINK)
- 72
- PHOTOVU/MPEG4 Movie Messenger™ System (i.LINK)
- Using Tape Image Data
- How to insert the DV Interface Cable (i.LINK)
- How to remove the DV Interface Cable (i.LINK)
- [When selecting Normal]
- [When selecting Detail]
- Palmcorder USB Device Driver/SD Drive
- Connection (for Palmcorder USB Device Driver/SD Drive)
- To disconnect USB Cable safely (Windows Me/2000/XP)
- Using Memory Card Image Data
- Using Palmcorder File Converter
- Web Camera
- Before Using Web Camera\* Features
- Web Camera\*
- Please read this first.
- Conditions for Use
- Connection (for Web Camera)
- For Windows 2000 users
- For Windows 98SE/Me users
- Web Camera (For Windows XP users)
- For Windows Messenger (Windows XP only)
- Type in your e-mail address and password.
- Click on [Audio and Video Tuning Wizard] in the [Tools] menu.
- Select [File] -> [Add a Contact] to register the person you wish to access in Windows Messenger.
- 8
- The person calling (inviting) side
- 9
- The invited person side
- 10
- 11
- Web Camera (For Windows 98SE/Me/2000 users)
- For MSN Messenger Service and Windows NetMeeting (Windows 98SE/Me/2000)
- 6
- The person you wish to access needs to do settings 1\~6 also.
- 7
- You cannot call a person who is not signed-on to MSN Messenger Service.
- The NetMeeting screen is automatically opened.
- 12
- 13
- The invited person side The person calling (inviting) side
- Warning Indications
- Windows 2000
- Transferring Your Images (Macintosh)
- System Requirements (for Built-in SD Drive)
- Connection
- Using Built-in SD Drive
- Palmcorder Accessory System
- Palmcorder Accessory Order Form
- Notes On Operations
- Notice
- About the Memory Card (MultiMediaCard or SD Memory Card)
- Replacing Clock Battery
- Approximate Brightness Values
- Specifications
- Before Requesting Service
- Cleaning Care for Video Heads
- Tape Operations Caution
- Lens Hood Area Operation Caution
- Self Diagnostic System
- On-Screen Displays (OSD)
- Request for Service Notice
- Request for Service Notice:
- Limited Warranty
- Panasonic/Quasar Video Products Limited Warranty
- Limited Warranty Coverage
- Carry-In, Mail-in or In-Home Service
- Limited Warranty Limits And Exclusions
- Customer Services Directory
- Accessory Purchases:
- Product Repairs
- Centralized Factory Servicenter
- Service in Puerto Rico
- Spanish Quick Use Guide/Guía Para Uso Rápido
- MENU OSD
- BLANK SEARCH (p. 33)
- SEARCH (p. 37)
- 12bit AUDIO (p. 46)
- MULTI SPEED (p. 38)
- EFFECT1 (p. 43)
- EFFECT2 (p. 43)
- D. ZOOM (p. 41)
- REC SPEED (p. 6)
- AUDIO DUB (p. 45)
- M-CARD Mode Menu Screen
- Electronic Viewfinder/LCD Monitor Indications
- CAMERA/VCR Mode
- Memory Counter M 0:00.00
- Time Code 0h00m00s00f
- IMPORTANT NOTE:
- PHOTO Mode
- a Image Page Remaining Indication (p. 49)
- b REC MODE
- Index of Controls
- Rear View
- Side View
- Back View
- Underside View
- Index
- A
- B
- C
- D
- E
- F
- H
- |
- J
- L
- M
- 0
- P
- Q
- S
- T
- U
- V
- W
- Z
Brand : PANASONIC
Model : PV-DV203
Category : Camcorder