
DF-820 - Digital photo frame MAJESTIC - Free user manual and instructions
Find the device manual for free DF-820 MAJESTIC in PDF.


| Product Type | Digital Photo Frame |
| Brand | Majestic |
| Model | DF-820 |
| Screen Size | 8 inches (diagonal) |
| Display Resolution | 1024 x 768 pixels |
| Aspect Ratio | 4:3 |
| Supported Image Formats | JPEG, BMP, PNG |
| Supported Video Formats | MPEG4, MOV, AVI |
| Supported Audio Formats | MP3, WMA |
| Internal Memory | 2 GB |
| Memory Card Support | SD, SDHC, MMC (up to 32 GB) |
| USB Port | USB 2.0 for PC connection |
| Power Supply | DC 5V, 1A (adapter included) |
| Power Consumption | 5W (typical) |
| Clock/Calendar | Built-in |
| Slideshow Effects | Multiple transition effects, adjustable timing |
| Remote Control | Included |
| Dimensions (with stand) | 200 x 150 x 25 mm |
| Weight | Approx. 400 g |
| Color | Black |
| Certifications | CE, FCC |
| Operating Temperature | 0°C to 40°C |
| Cleaning Instructions | Use a soft, dry cloth. Do not use liquids or chemicals. |
| Safety Warnings | Do not expose to moisture or heat sources. Avoid direct sunlight. |
| Repairability | Not user-serviceable; contact Majestic support for spare parts. |
Frequently Asked Questions - DF-820 MAJESTIC
User questions about DF-820 MAJESTIC
0 question about this device. Answer the ones you know or ask your own.
Ask a new question about this device
Download the instructions for your Digital photo frame in PDF format for free! Find your manual DF-820 - MAJESTIC and take your electronic device back in hand. On this page are published all the documents necessary for the use of your device. DF-820 by MAJESTIC.
USER MANUAL DF-820 MAJESTIC
natural_image
Black-and-white photo of a family photo on a beach, no visible text or symbolsImportato da: New Majestic SPA via Rossi Martini 41, 26013 Crema (CR) www.newmajestic.com
MADE IN CHINA
CE
INDICE
flowchart
graph LR
    A["Top view"] --> B["Close-up of hand"]
    B --> C["Close-up of grip"]
    C --> D["Close-up of handle"]
    D --> E["Close-up of grip with handle"]
    E --> F["Close-up of handle with handle"]
natural_image
Simple line drawing of a device with a handle and control panel, no text or symbols present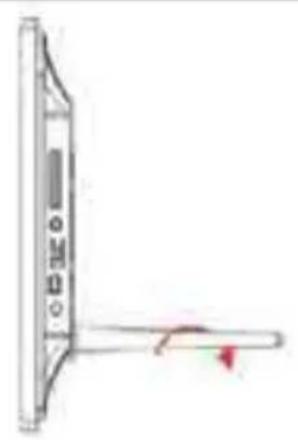
natural_image
Simple line drawing of a vertical panel with a handle and a small red arrow pointing to the right side (no text or symbols)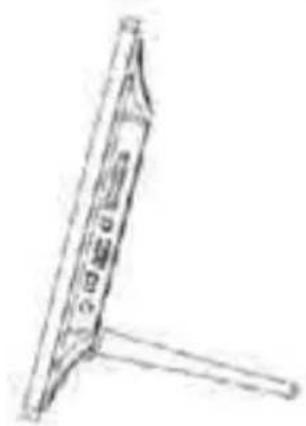
natural_image
Simple line drawing of a vertical object with a triangular base and internal structure (no text or symbols)natural_image
Three electronic devices with visible light beams emitting from a blue background (no text or symbols)4.2 Memoria
6. Musica
9. File
10. Impostazioni
natural_image
Black-framed tablet displaying a family photo outdoors in a grassy field (no text or symbols visible)Importer: New Majestic SPA via Rossi Martini 41, 26013 Crema (CR) www.newmajestic.com
MADE IN CHINA
CE
CONTENTS
- Product Diagram....4
1.1 Remote Control....4
1.2 Back side Buttons 5
1.3 Back side of the frame 5
-
Installing & Replacing the Battery 5
-
Getting Started 6
-
Operating Instruction....7
4.1 Main menu 7
4.2 Memory 8
-
Photo 8
-
Music 9
-
Video....9
-
Calendar....10
-
File....11
-
Setting....12
10.1 Photo setup....13
10.2 Calendar setup....13
10.3 Video setup....13
10.4 Music setup....13
10.5 System setup 14
- Screensaver....14
- PC Connection....15
- Technical Specifications....15
- Troubleshooting Guide....16
Cautions
Precautions and maintenance
- For indoor use only.
- To avoid risk of fire or electric shock, do not expose the unit to moisture or condensation.
- To avoid overheating, do not block the ventilation holes on the back of the Digital Photo Frame.
- Keep the Digital Photo Frame out of direct sunlight.
- Do not dismantle the Digital Photo Frame. There is a risk of electric shock and there are no user-serviceable parts inside. Dismantling the Digital Photo Frame will void your warranty.
Cleaning the LCD Screen
- Treat the screen carefully. Because the screen of the Digital Photo Frame is made of glass and it would easily be broken or scratched.
- If fingerprints or dust accumulate on the LCD screen, we recommend using a soft, non-abrasive cloth such as a camera lens cloth to clean the LCD screen.
- Moisten the cleaning cloth with the cleaning solution and apply the cloth to the screen.
WARNING:
To reduce the risk of electric shock, do not expose the unit to rain or excessive moisture. This device is intended for private use and not suitable for commercial use!
Introduction:
Thank you for the purchase of the Digital Photo Frame. It is designed to allow quick and easy view of photos taken from your digital camera, mobile phone, or from a memory storage card. Please read this User Manual carefully to learn the correct way to use the Digital Photo Frame.
Packaging Check List:
• 10.1 inch digital photo frame
- AC/DC adaptor
- User manual
- Bracket stand
- Remote control
- Warranty card
1.Product Diagram
1.1 Remote Control
 | 1 | → – Slide show with background music |
| 2 | → MUTE – Switch off the sound | |
| 3 | MOVIE – Movie playback mode | |
| 4 | PHOTO – Photo playback mode | |
| 5 | MUSIC – Music playback mode | |
| 6 | → – Play/Pause: During playing, press this button for pause, repress for play | |
| 7 | ← – Left Directional key | |
| 8 | ENTER – Press to confirm | |
| 9 | SETUP – Accessing the settings menu | |
| 10 | VOL+ –Turn up the volume | |
| 11 | VOL- – Turn down the volume | |
| 12 | → – Fast forward | |
| 13 | → – Move forward to next music or video file | |
| 14 | ← – Fast backward | |
| 15 | ← – Move back to previous music or video file | |
| 16 | ▼ – Down Directional key | |
| 17 | CALENDAR – Enter the calendar mode directly | |
| 18 | → – Right Directional key | |
| 19 | EXIT – Return to upper menu | |
| 20 | ▲ – Up Directional key | |
| 21 | (○) – Power on/off |
1.2 Back side Buttons
 | 1 | Power On/Off |
| 2 | Up/Previous | |
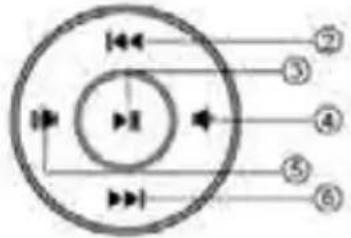 | 3 | Play/Pause/OK |
| 4 | Left/Volume- | |
 | 5 | Right /Volume+ |
| 6 | Down/Next | |
| 7 | Menu/Exit |
1.3 Back side of the frame
 | 1 | SD/MMC/SDHC Card Reader |
| 2 | Headphone Output | |
| 3 | USB 2.0 Port | |
| 4 | Mini USB Port | |
| 5 | DC Power Input |
2. Installing & Replacing the Battery
- Unscrew battery cover and remove.
• Properly dispose of exhausted batteries. - Insert 2 new AAA batteries.
- Be sure the positive (+) and negative (-) ends of the batteries are facing the correct direction.
- Replace the battery cover.
- Do not mix old and new batteries.
- Do not mix alkaline standard (carbon-zinc) or rechargeable (nickel-cadmium) batteries.

flowchart
graph LR
    A["Top view"] --> B["Close-up of hand"]
    B --> C["Close-up of grip"]
    C --> D["Close-up of handle"]
    D --> E["Close-up of grip"]
Using of Remote Control
Point the remote control towards the main unit when operating. The remote control works best at a distance less than 3 m and at an angle of up to 30 degrees to the front of the unit. No obstacles may stand in the way between remote control and infrared sensor and do not place the remote control in direct sunlight. If the remote control fails to work even when it is operated near the player, replace the battery.
Notes on batteries
If the remote control is not used for a long period of time, please remove the battery from the compartment.
Do not heat batteries or dispose of them in fires.
Do not dismantle, deform or modify batteries.
3. Getting Started
- Screw the support in the appropriate hole on the back of the unit:

natural_image
Three sequential line drawings showing a device with a handle and a red arrow indicating motion (no text or symbols)- Insert the power adaptor cable in the unit and connect to the power supply. The unit will turn on automatically.
- Insert a supported memory device (SD/SDHC/MMC card and USB device). Once a device is inserted pictures playback will start automatically.
- Press power on/off switch on the back of the unit to turn on/off.
4. Operating Instruction
4.1 Main menu
In main menu you can access all the functions of the unit (Photo/Music/Video/File/Calendar/Setup).
To navigate inside the menu press ◀▶ key and confirm with ENTER. Press EXIT during playback to go back to main menu.

In main menu you can select the storage to display by pressing EXIT. Only detected storage will be selectable (by using ◀▶ keys) and confirm with ENTER.

4.2 Memory
The Frame supports SD/SDHC/MMC Cards and USB 2.0. After inserting a card or USB device, the frame plays automatically the file format you selected in the Auto-start Menu.
Nota:
Make sure there are supported Picture files on the Card or USB device. The unit has a built-in memory (about 220kb) which allows to insert few pictures of small size which can be played and used as screensaver. It is possible to transfer file in the built-in memory by connecting the unit to PC through miniUSB port (the unit will be detected as removable device by Windows) or by using the option Copy available in the File mode (after having inserted a storage which contains compatible files). It is possible to remove files from the built-in memory by connecting the unit to PC or by using the option "Delete file" inside the function "File" (after having selected the built-in memory from the main menu).
5. Photo
Select Photo and confirm with ENTER or press Photo to start slideshow.
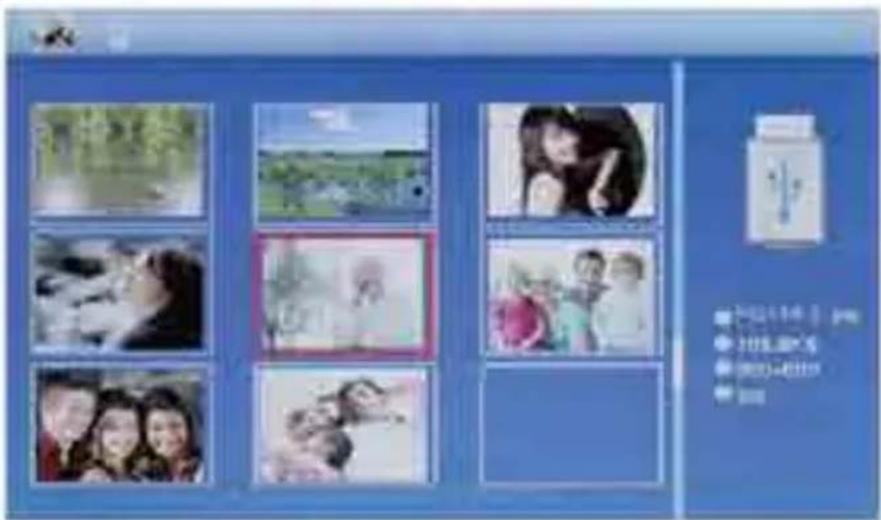
During playback press EXIT to view all the pictures available in the selected memory. Use navigation keys to select the image and press ENTER to display.
Use ▶ key to stop/resume slideshow. Pressing ◀ it is possible to use Zoom function. By using ▶ it is possible to rotate the picture. To switch between previous/next image use ▲▼ keys.
To play back the slideshow with background Music, (Music must be stored in the same memory device) press 📄. You can use ◀◀ ▶▶ to go to the previous/next background music.
6. Music
Select Music Icon and press ENTER to confirm, press Music key to start playback.
Press ▲▼ to select a track and confirm with ENTER. Press ▶II to stop/resume playback.
By using ◀◀ ▶▶ you can rewind or fast forward inside the track. With ◀◀ ▶▶I you can enter the previous or next track directly.
Press VOL+/- to turn up/ down the volume.

7. Video
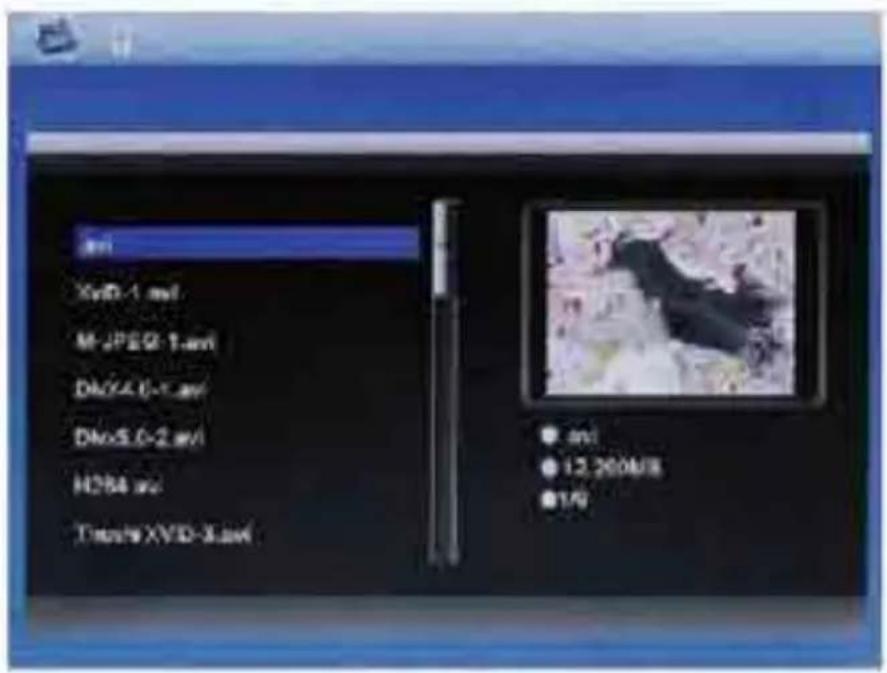
Select the Video Icon and press ENTER to display the list of video files available in the memory. By pressing Movie key it is possible to start automatically playback of video.
Press ▲▼ to select the video from the playlist, then press ENTER. Press VOL+/- to turn up/ down the volume.
During Video playback press ◀◀ ▶▶ for fast backward and fast forward. Press ◀◀ ▶▶ to switch to previous or next video.
Press ▶ to pause/Play. To go back to video list press EXIT.
8. Calendar
Select Calendar in the Main Menu, press ENTER to confirm or press Calendar key to display calendar. The calendar will be shown on the right side of the screen. On the left side a slideshow will start with the supported Picture files available in the selected storage device.
Adjust date with ▲▼◀▶.

9. File
Select File in the main menu and press ENTER. You can browse all files on your selected storage device.
Press ▲ or ▼ to choose the file and press ENTER to open the file or folder.
Press EXIT to go back to previous folder or main menu.
By pressing ▶ it is possible to copy (in the built-in memory) or delete the selected file.

10. Setting
Select Setting in the main menu and you can manage photo, calendar, video, music and system setup.
Choose Setting interface and press ▲▼ to highlight your selection. Press ENTER to access the sub-menu items.
Press ◀▶ to select the available options and confirm with ENTER. Press EXIT to go back.

10.1 Photo setup
| Display mode | Play/Thumbnail | Starts slideshow automatically or display thumbnail. |
| Music | Off/On | Background music |
| Display ratio | Full screen/Original size/Scale | |
| Slide speed | 3 Sec./5 Sec./15 Sec./30 Sec./1 Min./5 Min./15 Min./30 Min./1 hour | |
| Slideshow repeat | On/Off | |
| Slideshow effect | Random/Fly in/Chessboard/Cut/Erase/Louver/Random Line/Reverse/Cube/Rotate/Off | |
| Slide mode | Single window/Two windows/Triple windows/Four windows | Number of pictures to display during slideshow. |
| Photo random slideshow | Random/Sequence | You can choose to play slideshow in sequence or random. |
10.2 Calendar setup
| Date | YYYY-MM-DD |
| Clock time | HH:MM |
| Set time format | 24/12 |
| Alarm status | Off/On |
| Alarm time | HH:MM |
| Alarm frequency | Once/Every day/Workday/Weekend |
| Alarm volume | 1-10 |
10.3 Video setup
| Play mode | Repeat all/Random/Random repeat/Sequence/Repeat one |
| Display ratio | Scale/Full screen/Original size |
10.4 Music setup
| Play mode | Repeat all/Random/Random repeat/Sequence/Repeat one |
10.5 System setup
| Language | Italian/Slovenian/Spanish/Danish/Chinese/Japanese/French/German | |
| Grayscale | 1-100 | |
| Brightness | 1-100 | |
| Contrast | 1-100 | |
| Power off | Off/HH:MM | This function allows to turn off the unit at the set time. |
| Power on | Off/HH:MM | This function allows to turn on the unit at the set time. |
| Auto-Power frequency | Once/Every day/Workday/Weekend | This function allows to choose when the unit should turn on/off automatically. |
| Start up mode | Custom mode/Off/Photo/Music/Video/ Photo & Music/Calendar/ | This function allows to choose which functino should start automatically when inserting storage device. Custom mode will start video playback automatically and repeat(if available), if no video it will play photos (if available) or music files(if available). |
| Version | ||
| Reset setting | It allows to restore unit to factory default | |
11. Screensaver
If no storage device is inserted, after 5 minutes idle it will start slideshow with the pictures saved inside built-in memory (if there are files inside).
12. PC Connection
You can connect the unit to the external equipment by using mini USB Cable (not included) to manage contents (if the unit contains a USB device it will be visible from PC, otherwise it will display built-in memory and eventually SD card inserted).
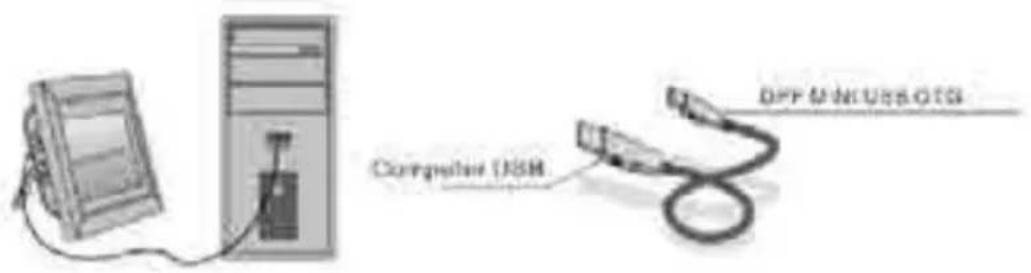
NOTE: Never disconnect the USB cable during any operational process. Doing so may damage your DPF. Press Safely Remove Hardware Icon on the computer to disconnect the PC-Connection. The unit supports Windows XP/Vista/7/8/10.
13. Technical Specifications
| Adapter | Input: AC 100/240V-50/60Hz.Output DC 5V / 1,5A. |
| Picture format | JPEG, PNG, GIF, BMP |
| Audio format | MP3, WMA |
| Video format (max resolution 720p, max bitrate 20Mbps) | MP4, WMV, 3GP, MOV, MPEG -1/2/4, H.263, H.264, XVID, AVI, MKV |
| Memory cards | SD/SDHC/MMC (fino a 32GB) |
| USB | USB 2.0/ miniUSB (cable not included) |
| Display | 10.1" TFT LCDResolution 1024x600 pixelsAspect Ratio 16:9 |
If you come across when using the photo frame on problems, consult the suggested solutions below, and the corresponding sections of this manual. If you need additional assistance, please contact technical support.
| No power: | Please check whether the AC-Adaptor is inserted correctly |
| Remote control has no function: | Please check whether the battery has power. Replace with a new battery if necessary. |
| Cannot read the Memory Card or USB-Device: | Please confirm there are supported files on your memory card or USB deviceEmpty devices cannot be read. |
| Cannot play the file: | Please confirm if the file format is compatible with the player. |
| Display too bright or too dark: | Please adjust the brightness or contrast in the setup menu. |
| No sound: | Please check whether the volume is correct and the player is not in Mute mode. |
| Copy file error (memory full) | The file you want to copy in the built-in memory is too big, free some space and try again. |

MAJESTIC
Modello: DF 820HD MP3
ALIMENTAZIONE: 5V
Consumo: 6.5Watt
NEW MAJESTIC S.P.A.
Via Rossi Martini, 41
26013 CREMA (CR)
ITALY

MADE IN CHINA

- INDICE
- Memoria
- Musica
- File
- Impostazioni
- CONTENTS
- Cautions
- Precautions and maintenance
- Cleaning the LCD Screen
- WARNING:
- Introduction:
- Packaging Check List:
- 1.Product Diagram
- Remote Control
- Back side Buttons
- Back side of the frame
- Installing & Replacing the Battery
- Using of Remote Control
- Notes on batteries
- Getting Started
- Operating Instruction
- Main menu
- Memory
- Nota:
- Photo
- Music
- Video
- Calendar
- Setting
- Photo setup
- Calendar setup
- Video setup
- Music setup
- Screensaver
- PC Connection
- Technical Specifications
- MAJESTIC
Brand : MAJESTIC
Model : DF-820
Category : Digital photo frame