TRENDNET TEW-432BRP - Router

TEW-432BRP - Router TRENDNET - Free user manual and instructions

Find the device manual for free TEW-432BRP TRENDNET in PDF.

📄 14 pages English EN Download 💬 AI Question 10 questions ⚙️ Specs
Notice TRENDNET TEW-432BRP - page 3
Pick your language and provide your email: we'll send you a specifically translated version.
Product Type Wireless Router
Wireless Standard 802.11g (54 Mbps)
Frequency Band 2.4 GHz
Number of LAN Ports 4 (10/100 Mbps)
WAN Port 1 (10/100 Mbps)
Dimensions (L x W x H) 7.5 x 5.5 x 1.2 inches
Weight 0.6 lbs (272 g)
Power Input 5V DC, 2.5A
NAT Support Yes
Firewall Features SPI, DoS prevention, MAC/IP/URL filtering
Wireless Security WEP 64/128-bit, WPA-PSK, WPA2-PSK
DHCP Server Built-in
VPN Passthrough PPTP, L2TP, IPSec
Antenna Type External detachable (1 x 2dBi)
Operating Temperature 0°C to 40°C
Humidity 10% to 90% non-condensing
LED Indicators Power, WAN, LAN (1-4), Wireless
Reset Button Yes (factory reset)
Configuration Interface Web-based (HTTP)

Frequently Asked Questions - TEW-432BRP TRENDNET

How do I reset the TRENDnet TEW-432BRP to factory defaults?
Press and hold the reset button on the back panel for at least 10 seconds using a paperclip. Release when the power LED blinks. The router will reboot to factory settings.
What is the default IP address to access the router's web interface?
The default IP address is 192.168.10.1. Enter this in your browser's address bar. Default username is admin and password is admin (or blank).
How do I set up wireless security on this router?
Log in to the web interface, go to Wireless > Security, select WPA2-PSK (recommended), enter a passphrase of at least 8 characters, then click Apply.
Can I use the TEW-432BRP as a wireless access point only?
Yes, disable the DHCP server and connect the WAN port to your main router via Ethernet. Then configure the LAN IP to a different subnet. Alternatively, some firmware may have an Access Point mode.
What should I do if I forgot the router's login password?
Perform a factory reset (see question 1) to restore the default username and password. This will erase all custom settings.
How can I improve the wireless range of my TEW-432BRP?
Place the router centrally, away from metal objects and electronics. Update the antenna to a higher gain model. Ensure the router is using channel 1, 6, or 11 for less interference.
Does this router support WPA3?
No, the TEW-432BRP only supports WEP, WPA, and WPA2. WPA3 is not available due to hardware limitations.
How do I block specific websites on the TEW-432BRP?
Go to Security > URL Filter, enable URL Filtering, and enter the website addresses you want to block. Click Apply to save.
Why is my internet connection dropping frequently?
Check for cable issues, try a different power adapter, update the firmware (if available), and disable unnecessary features like QoS. Interference from other devices may also cause drops.
Can I connect a USB printer to this router?
No, the TEW-432BRP does not have a USB port. Printers can only be connected via Ethernet or wirelessly if the printer supports it.

User questions about TEW-432BRP TRENDNET

0 question about this device. Answer the ones you know or ask your own.

Ask a new question about this device

The email remains private: it is only used to notify you if someone responds to your question.

No questions yet. Be the first to ask one.

Download the instructions for your Router in PDF format for free! Find your manual TEW-432BRP - TRENDNET and take your electronic device back in hand. On this page are published all the documents necessary for the use of your device. TEW-432BRP by TRENDNET.

USER MANUAL TEW-432BRP TRENDNET

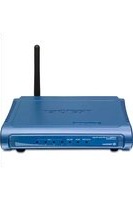
natural_image Blue Treadonet wireless router device with visible ports and control buttons (no readable text beyond branding)

Quick Installation Guide

TRENDNET TEW-432BRP - 1

TRENDNET TEW-432BRP - 2

TEW-432BRP

H/W: v.D1.0R

Table of Contents

English 1

  1. Before You Start 1
  2. Install Router 2
  3. Replacing an existing router 5
  4. Adding the router behind an existing router 7

Troubleshooting 9

1. Before You Start

TRENDNET TEW-432BRP - Before You Start - 1

natural_image Blue wireless router device with antenna and ports (no visible text or symbols)

Package Contents

• TEW-432BRP
• Easy Go CD-ROM
• Quick Installation Guide
• RJ-45 Cat.5 Cable
• AC Power Adapter (7.5V, 1A)

System Requirements

• Web Browser: Internet Explorer (5.0 or above)
• Computer with Network adapter installed
• Broadband Internet
• Installed Cable or DSL modem

Important! DO NOT connect the router until instructed to do so. Follow the steps below before you insert the Easy-Go CD-ROM into your computer's CD-ROM Drive.

  1. Verify that you have a direct connection from your Cable or DSL modem to your computer. Also verify that you are connected to the Internet by browsing to a website, such as http://www.trendnet.com.

Internet

TRENDNET TEW-432BRP - System Requirements - 1
Cable/DSL Modem

TRENDNET TEW-432BRP - System Requirements - 2

2. Install Router

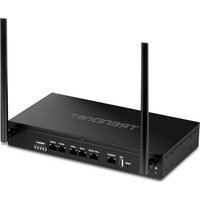
  1. Connect the antenna to the TEW-432BRP.

TRENDNET TEW-432BRP - Install Router - 1

natural_image Blue wireless router with network ports and a black antenna (no visible text or symbols)
  1. Insert the Easy Go CD-ROM in your computer's CD-ROM Drive and then click Install Router.

TREADNET Easy Go Setup Installed Router User's Guide Buses Link New! 1000 MHz, 32 Hz Rated

  1. Click Start Installation.

TRENDnet Easy Go Setup Install Router Before you start the installation, click to make sure you have all the needed components. Once you have gained these items click an "Start Installation" 100x45897 Direct Only Power adapter Start a setup Install Router User's Guide Browse Help

  1. Choose the desired language from the dropdown list. Click No, thanks. I already know how to connect my computers and devices and set up printer and file sharing and then click Next.
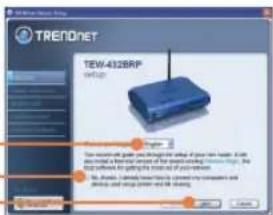
TRENDnet TEW-432BRIP setup To install a server and monitor the setup of your main server, then to install a desktop server or the networking device (e.g. the network). The setup is designed to get the installed system by the server. To install a server on the device, then to install a computer and/or the device's setup and access.

Note: If you do not check "No thanks, I already know how to connect my computers and devices and set up printer and file sharing", a third party software program, Network Magic will install. This program is not required to be installed in order to get onto the Internet.

  1. Click Next.

  2. If this screen appears, go to 3. Replacing an Existing Router or 4. Adding the Router Behind an Existing Router. If not, please continue to step 7.

  3. Turn off or unplug power to your cable or DSL modem. Then click Next.
  4. Unplug the existing Ethernet cable from your cable or DSL modem and plug it into yellow port number 1 on the TEW-432BRP. Then click Next.

TRENDNET Show options ✓ Show options enabled ✓ Show options enabled Add Back to continue

TRENDNET Offering Information Trendnet deliver the best document that you are already converted to a .0.125. They will continue to replace or update again with their own version. Are you're offering an existing model? • You can replace your existing model with new models • Do you want to convert your new model by adding a new model with new models. Add Options: No.

TRENDNET step 1/4 Description of adding network packet reader on WiFi server

TRENET step 26 This is not directly connected to any other device from the main device. The device is designed to be a network-based configuration tool, including a network switch or an Ethernet connection device. The device is designed to be a network switch or an Ethernet connection device. The device is designed to be a network switch or an Ethernet connection device. The device is designed to be a network switch or an Ethernet connection device. The device is designed to be a network switch or an Ethernet connection device. The device is designed to be a network switch or an Ethernet connection device. The device is designed to be a network switch or an Ethernet connection device. The device is designed to be a network switch or an Ethernet connection device.

Warning!!: DO NOT plug the cable or DSL modem power supply into the TEW-432BRP.

  1. Connect the included power supply from an available outlet to the TEW-432BRP.

TRENDNET step 3.6 Wireless network connection (user, port, and connection device, server, TRENNET) with 2. Sharing network

  1. If this window appears, your Internet connection requires a user name and password. Enter your DSL Account Name and Password. Then click Next.

TRENDET Enter Internet Account details To all your members of the Ireland, then access to a website or email. Email: https://www Ireland - e-mail (2011) Your account is currently available at http://www Ireland - e-mail Account Name: www Ireland - e-mail Password: password

  1. Please wait while the TEW-432BRP is being configured.

TRENDNET step 4/6 Your TRENDNet is a low-configuration Technique type: Wi-Fi 3D Linking System

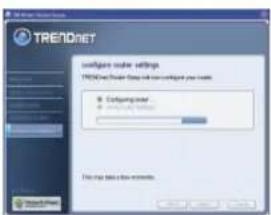
  1. Please wait while the TRENDnet Router Setup configures your router.

TRENET configure code TRENET User Help with configuration code • Computing code • 3.1.1.2.2.2.2.2.2.2.2.2.2.2.2.2.2.2.2.2.2.2.2.2.2.2.2.2.2.2.2.2.2.2.2.2.2.2.2.2.2.2.2.2.2.2.2.2.2.2.2.2.2.0 TRENET provides your own user based configuration code in the context of configuration: Please install.

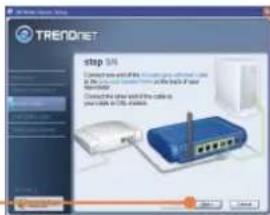
  1. Connect one end of the included grey Ethernet cable to the grey port labeled WAN on the back of your new router. Connect the other end of the cable to your cable or DSL modem. Then click Next.

TRENDNET step 5/4 Connect your own file to the Internet or other networks. It is currently connected to the Internet or other networks. It is also connected to the Internet or other networks. Connected via the network with the following: private files in the Internet.

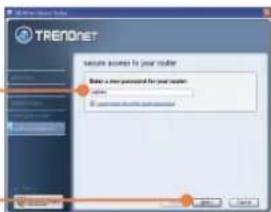
  1. Enter a password for your router. By default, the password is admin. Click Next.

TRENDNet Save access for your model Enter your password for your model OK Cancel

  1. Reconnect the power supply to your cable or DSL modem. Wait 30 seconds then click Next.

TRENDET step 5.0 TRENDET: 12.0 percent target to set cable or 3.0 percent. With all other options for the model to set cable configuration.

  1. Enter a unique network name (SSID) for your wireless network and then click Next. The network name (SSID) identifies your wireless network.

TRENDNET All any your network connections One year window contains a server (TCP) TCP/IP For instance, TCP/IP • All existing network connections

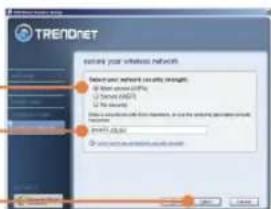
  1. Select the desired level of security, enter a security key or keep the randomly generated security key and then click Next. It is recommended that you use Most secure (WPA). If your wireless adapter does not support WPA, please select Secure (WEP) instead.

TRENDNET secure peer wireless network Select your network currently straighten: ● Select server (SIRF) ● Select CPU (CPU) ● Select Security Select a specific network network, which is selected to generate secure access SIRF: 61.80 SIRF: 61.80 Access: 61.80

  1. Click Next.

TRENDNET Configure settings Install: password: sdbdb Insert name (SDB): 100000000 Insert type: Web-based (WDF) Insert key: 2007.05.03 Active network settings include the following: provided on the site: C:\Users\My Documents\My Internet\My Internet\My Internet\My Internet\My Internet\My Internet\My Internet\My Internet\My Internet\My Internet\My Internet\My Internet\My Internet\My Internet\My Internet\My Internet\My Internet\My Internet\My Internet\My Internet\My Internet\My Internet\My Internet\My Internet\My Internet\My Internet\My Internet\My Internet\My Internet\My Internet\My Internet\My Internet\My Internet\My Internet

  1. Click OK.

TRENDNET TEW-432BRP - Install Router - 19

  1. Please wait while the TRENDnet Router Setup configures your router.

TRENDnet config your settings TRENDnet Config your settings will continue your settings. ● Config your settings This may be done for updates.

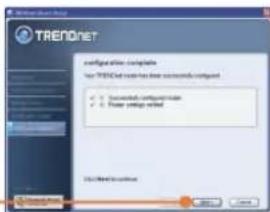
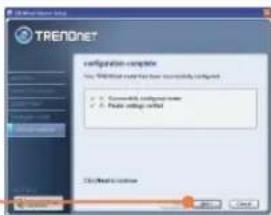
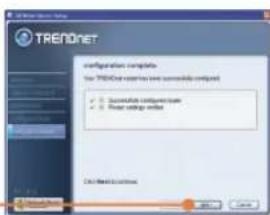
  1. Click Next.

TRENDNET configuration complete Your TRENDNet must have successful configuration ✓ Successful configuration ✓ Power setup required OK/Cancel OK/Cancel

  1. Click Next.

TRENDNET network configured C:\engrowthnet.vor-terp-las\new\configured © 2016/07/25/2016/07/25/2016/07/25/2016/07/25/2016/07/25/2016/07/25/2016/07/25/2016/07/25/2016/07/25/2016/07/25/07 © 2016/07/25/2016/07/25/2016/07/25/2016/07/25/2016/07/25/2016/07/25/2016/07/25/2016/07/25/2016/07/07 © 2016/07/25/2016/07/25/2016/07/25/2016/07/25/2016/07/25/2016/07/25/2016/07/25/2016/07/25/2016/1

  1. Select Exit TRENDnet Router Setup and then click Finish.

Trendnet configuration screen showing network settings and installation options

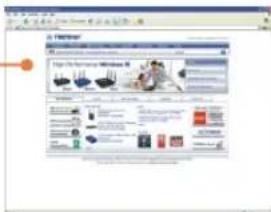
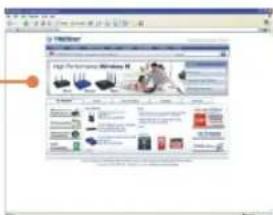
  1. Open up your browser and type in a URL (e.g. www.trendnet.com) to see if you are online.

High Performance Wireless 12.0000000000000000000000000000000000000000000000000000000000000000000000000000000000000000000000000000

Your installation is now complete.

For detailed information regarding the TEW-432BRP configuration and advanced settings, please refer to the User's Guide included on the Easy Go Installation CD-ROM or TRENDnet's website at www.trendnet.com

3. Replacing an existing router

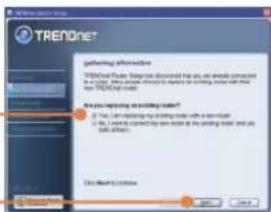
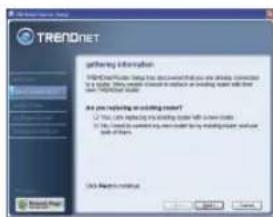
  1. Select Yes, I am replacing my existing router with a new router and then click Next.

TRENDNet gathering information TRENDNet Player: TRENDA installed for you, an already connected to a folder. You should not access to any other or any other user with any other user on TRENDNet material. Are you having the following items? • You can't switch your existing folder with a new folder • If you have changed your new folder in the existing folder and use it all files. This menu is currently

  1. Disconnect all remaining Ethernet cables from the back of your old router and plug them into the yellow ports on the TEW-432BRP.

TREADNET sbp-47 Description: http://treadnet.org/mbz.net How the link is closed, then, or waiting on the network. This is also closed. The network has been installed in GB2.018.000.000.000.000.000.000.000.000.000.000.000.000.000.000.000.000.000.000.000.000.000.

  1. Turn off or unplug power to your cable or DSL modem. Then click Next.

TRENET step 1.7 Windows will install your new user in your home with USB, Windows.

Warning! DO NOT plug the cable or DSL modem power supply into the TEW-432BRP.

  1. Unplug the power cable from your old router and remove its power supply from the outlet.

TRENDRe step 37 Windows will install the power drive from your own 硬件, and create a custom supply from the device.

  1. Connect the included power supply from an available outlet to the TEW-432BRP.

TRENDNET step 5/7 Available to switch to a network based on the software version in your TRENDNet system ✓ Status for change

  1. Please wait while the router is being configured.

TRENDNET stbp 6/7 This is a 3D network server in running configuration. This is also a 3D network device. © Configuring Index.

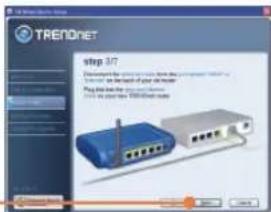
  1. Disconnect the Ethernet cable from the port labeled "WAN" or "Internet" on the back of your old router. Plug this cable into the grey port labeled "WAN" on the TEW-432BRP. Then click Next.

TRENDNet step 3/7 Description: the network switch. Any device component is used to or use the network of your own device. Play back and the next session will be used. This is a version of 100% of the system.

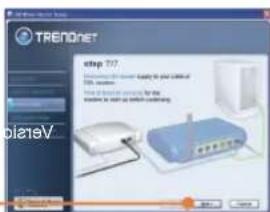
  1. Reconnect the power supply to your cable or DSL modem. Wait 30 seconds then click Next.

TRENDNET step 7/7. www.trendnet.com http://www.10.1234568/ onlinev TrendNet www.trendnet.com http://www.trendnet.com onlinev TrendNet

  1. Please wait while the TRENDnet Router Setup configures your router.

TRENET configure value TRENET feature value with the configuration value. ● Connecting values ● 100% or 100% or 100% ● 100% or 100% or 100% This is a version you can use the entire model to install a new file (e.g. a .com or .com). Please check then.

  1. Enter a unique network name (SSID) for your wireless network and then click Next. The network name (SSID) identifies your wireless network.

TRENDNET set up your network lifetime One pair update or network user (USB) Download Download to Web If necessary to access the system

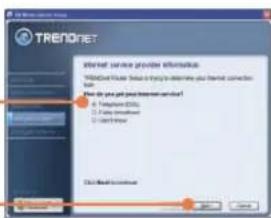
  1. Select the type of Internet Service, and then click Next. Follow the wizard instructions for configuring the Internet. Please verify your settings with your Internet Service Provider.

TRENDNET Internet service provider information. TreadNet Provider Select this key to determine your Internet connection. Use the your print your Internet service! A Telephone ID(s) B False Connection C Default D Mail Next Window

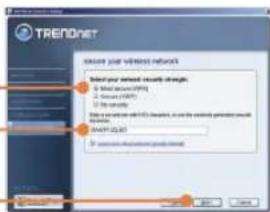
  1. Select the desired level of security, enter a security key or keep the randomly generated security key and then click Next. It is recommended that you use Most secure (WPA). If your wireless adapter does not support WPA, please select Secure (WEP) instead.

TRENDAT Observe your wireless network Select your network currently changed: ● Make secure WiFi ○ Security (WiFi) ○ Skip traffic Make a secure network with WiFi connections, or the security generates new connection. START: 0.03 Use virtual network to access OK Cancel

  1. Please wait while the TRENDnet Router Setup configures your router.

TRENDET configure server TRENDet User Help with an configure server tool. ● Configure server... ● Manage your system... Using this program, you can use the configuration to switch to a configuration. Please install it.

  1. Click Next.

TRENDNET configure settings train name: trendnet network settings (SIDS): TRENDnet network settings (SIDS): Network security SIDS Network settings: SIDS/ACOS All have been installed in the following: 1. All existing network settings are available to the system.

  1. Enter a password for your router. By default, the password is admin. Click Next

TRENDNET setto access to your router Enter your password for your user Yes No use your network or server

  1. Click OK.

TRENDNET TEW-432BRP - Replacing an existing router - 16

4. Adding the router behind an existing router

  1. Please wait while the TRENDnet Router Setup configures your router.

TRENDNET configure install settings TRENDNet Filter files on the configuration menu. ● Configuring menu ● Designing menu 3000 This is also displayed.

  1. Click Next.

TRENDNet configuration - compiler How TRNDNet is required for creating a new or modified file • New or modified file • New or modified file <|vision_start|> the following: continue

  1. Click Next.

TRENDNET network configured C:\Program Files\you.mai\test.txt\config\nt C:\Program Files\you.mai\test.txt\config\nt This file is confirmed

  1. Select Exit TRENDnet Router Setup and then click Finish.

TRENET config network TRENET strongly implemented the successful design tool of the system using TRENET. It is not to create a new or existing project on your network. • Install your network to ensure that you can access • Update your network to ensure that you can access • Update your network to ensure that you can access • Update your network to ensure that you can access • Update your network to ensure that you can access • Update your network to ensure that you can access • Update your network to ensure that you can access • Update your network to ensure that you can access • Update your network to ensure that you can access • Update your network to ensure that you can access • Update Your Network to ensure that you can access • Update Your Network to ensure that you can access • Update Your Network to ensure that you can access • Update Your Network to ensure that you can access • Update Your Network to ensure that you can access • Update Your Network to ensure that you can access • Update Your Network to ensure that you can access • Update Your Network to ensure that you can access • Update Your Network to ensure that you can access • Update Your Network To ensure that you can access • Update Your Network To ensure that you can access • Update Your Network To ensure that you can access • Update Your Network To ensure that you can access • Update Your Network To ensure that you can access • Update Your Network To ensure that you can access • Update Your Network To ensure that you can access • Update Your Network To ensure that you can access • Update Your Network To ensure that you can access • Update Your Network To include this work • Update Your Network To include this work • Update Your Network To include this work • Update Your Network To include this work • Update Your Network To include this work • Update Your Network To include this work • Update Your Network To include this work • Update Your Network To include this work • Update Your Network To include this work • Update Your Network To include this work • Update Your Network To include this work • Update Your Network To include this work

  1. Open up your browser and type in a URL (e.g. www.trendnet.com) to see if you are online.

Scanned screenshot of a product page interface with Chinese text, featuring product images and descriptive labels.

  1. Select No, I want to connect my new router to my existing router and use both of them and then click Next.

TRENDET gathering information TRENDET Player: This has been downloaded to you are already connected to a server. They always choose to replace an existing server with their own network server. Are you looking at any following order? • You can be downloading your following order with the server back • We can't check your own order to my following order and use the server.

  1. Find the Ethernet cable that goes from your computer to your old router. Unplug this cable from your old router and connect it to yellow port number 1 on your new TRENDnet router. Then click Next.

TREADNET step 1.2 Find the internet to get from your online in your website. Click the stop button on the website and download Stop/Down.

Warning! DO NOT plug the cable or DSL modem power supply into the TEW-432BRP.

  1. Connect the included power supply from an available outlet to the TEW-432BRP.

  2. Connect one end of the included grey Ethernet cable to the grey port labeled WAN on the back of your new router. Connect the other end of the cable to one of the LAN ports on your old router. Then click Next.

TRENDNET step 2.0 How connected to the network is required, then to access website as follows: TREAD Net model. © Making for User

TRENDNET Stop 3/2 Connect to all the network components: https://www.irenet.com/ <|vision_start|> user switch to the network switch in your user code. Connected to the server bus at www.irenet A network on the next router.

  1. Enter a password for your router. By default, password is admin. Click Next.

TRENDNet secure access to your router Better a new password for your router Yes No security access to your router

  1. When the wireless network screen appears, enter a unique network name and then click Next.

TRENDNET Set up your network names Best your internet network access (IHS) TRNDNET In millions networks If connected to the Internet

  1. Select the desired level of security, enter a security key or keep the randomly generated security key and then click Next. It is recommended that you use Most secure (WPA). If your wireless adapter does not support WPA, please select Secure (WEP) instead.
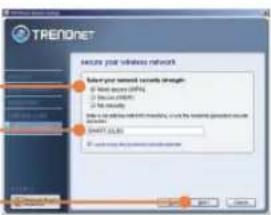
TRENDNET System your wireless networks Select your network security strength: - User access (40%) - Service (60%) - File access (100%) Select a network with three services, which are the following functions: - Privacy access - Security (20%) - Security (50%) - Security (100%) - Security (150%) - Security (200%) - Security (250%) - Security (300%) - Security (350%) - Security (400%) - Security (450%) - Security (500%) - Security (550%) - Security (600%) - Security (650%) - Security (700%) - Security (750%) - Security (800%) - Security (850%) - Security (900%) - Security (950%) - Security (1000%)

  1. Click Next.

TRENET config settings Initial (software) Initial <|vision_start|> Initial: 2002 (Model) Initial: 2003 (Model) Initial: 2004 (Model) Initial: 2005 (Model) Initial: 2006 (Model) Initial: 2007 (Model) Initial: 2008 (Model) Initial: 2009 (Model) Initial: 2010 (Model) Initial: 2011 (Model) Initial: 2012 (Model) Initial: 2013 (Model) Initial: 2014 (Model) Initial: 2015 (Model) Initial: 2016 (Model) Initial: 2017 (Model) Initial: 2018 (Model) Initial: 2019 (Model) Initial: 2020 (Model) Initial: 2021 (Model) Initial: 2022 (Model) Initial: 2023 (Model) Initial: 2024 (Model) Initial: 2025 (Model) Initial: 2026 (Model) Initial: 2027 (Model) Initial: 2028 (Model) Initial: 2029 (Model) Initial: 2030 (Model) Initial: 2031 (Model) Initial: 2032 (Model) Initial: 2033 (Model) Initial: 2034 (Model) Initial: 2035 (Model) Initial: 2036 (Model) Initial: 2037 (Model) Initial: 2038 (Model) Initial: 2039 (Model) Initial: 2040 (Model) Initial: 2041 (Model) Initial: 2042 (Model) Initial: 2043 (Model) Initial: 2044 (Model) Initial: 2045 (Model) Initial: 2046 (Model) Initial: 2047 (Model) Initial: 2048 (Model) Initial: 2049 (Model) Initial: 2050 (Model) Initial: 2051 (Model) Initial: 2052 (Model) Initial: 2053 (Model) Initial: 2054 (Model) Initial: 2055 (Model) Initial: 2056 (Model) Initial: 2057 (Model) Initial: 2058 (Model) Initial: 2059 (Model) Initial: 2060 (Model) Initial: 2061 (Model) Initial: 2062 (Model) Initial: 2063 (Model) Initial: 2064 (Model) Initial: 2065 (Model) Initial: 2066 (Model) Initial: 2067 (Model) Initial: 2068 (Model) Initial: 2069 (Model) Initial: 2070 (Model) Initial: 2071 (Model) Initial: 2072 (Model) Initial: 2073 (Model) Initial: 2074 (Model) Initial: 2075 (Model) Initial: 2076 (Model) Initial: 2077 (Model) Initial: 2078 (Model) Initial: 2079 (Model) Initial: 2080 (Model) Initial: 2081 (Model) Initial: 2082 (Model) Initial: 2083 (Model) Initial: 2084 (Model) Initial: 2085 (Model) Initial: 2086 (Model) Initial: 2087 (Model) Initial: 2088 (Model) Initial: 2089 (Model) Initial: 2090 (Model) Initial: 2091 (Model) Initial: 2092 (Model) Initial: 2093 (Model) Initial: 2094 (Model) Initial: 2095 (Model) Initial: 2096 (Model) Initial: 2097 (Model) Initial: 2098 (Model) Initial: 2099 (Model) Initial: 2100 (Model)

  1. Click OK.

TRENDNET TEW-432BRP - Adding the router behind an existing router - 14

  1. Click Next.

TRENDNet configuration complete for TRENDNet user to save accessible configed ✓ Secureable configuration ✓ Power setup filter OK Next Step Continue

  1. Click Finish.

TRENDNET network-configured Compression: your mode has been configured © 10.1.2007-2008 (http://www.trendnet.com) Can Please access to account

  1. Open up your browser and type in a URL (e.g. www.trendnet.com) to see if you are online.

Scanned screenshot of a Windows application interface showing product listings and menu options

Register Your Product

To ensure the highest level of customer service and support, please take a moment to register your product Online at:

www.trendnet.com/register

Thank you for choosing TRENDnet

Trouble Shooting

Q1: I inserted the Easy Go CD-ROM into my computer's CD-ROM drive and the installation menu does not appear automatically. What should I do?

A1: If the installation menu does not appear automatically, click Start, click Run, and type D:\Autorun.exe where "D" in "D:\Autorun.exe" is the letter assigned to your computer's CD-ROM Drive. Then click OK to start the installation.

Q2: How can I get into the TEW-432BRP web configuration page?

A2: After you install the TEW-432BRP Wireless Router, you can access the web configuration page by opening your web browser and entering http://192.168.10.1 into the web browser's address bar, where http://192.168.10.1 is the default IP address of the TEW-432BRP Wireless Router. The default user name and password is admin.

Q3: I am not sure what type of Internet Account Type I have for my Cable/DSL connection. How do I find out?

A3: Contact your Internet Service Provider's (ISP) Customer Service for the correct information.

Q4: I received an error message while running the Install Wizard. What should I do?

A4: Make sure that your computer's CD-ROM is in working condition. Also verify that all cable connections are secure and that you are able to connect to the Internet, and then retry installing the router. During setup, the Install Wizard will check the operation of your network adapter and Internet connection. If you get the following error codes try the corresponding troubleshooting steps:

Error 301/302: Internal Error

1) Click cancel to exit the program
2) Eject the CD
3) Restart your Computer
4) Reinsert the Router setup CD

Error 311/312: No Wired Adapter Detected

If your PC has a wired network adapter try the following:

1) Enable your wired network adapter
2) Click Retry to install your router again

If you PC do not have a wired network adapter, you must install a wired network adapter.

Error 313: Multiple Wired Adapters Detected

1) Identify the wired network adapter that you wish to use for setting up your router
2) Disable all other wired network adapters
3) Click Retry to install your router again

Error 321: Ethernet Cable Not Connected

1) Make sure the Ethernet cable from your PC is securely connected to a LAN port on the back of your router
2) Make sure the power cable on your new router is securely connected and the lights on the front of your router are flashing.
3) Click Retry to install your router again

Error 322: New Router Not Detected

1) Make sure that you are connecting your new router and not your old router (if applicable).
2) Make sure the Ethernet cable from your PC is securely connected to LAN
3) Click Retry to install your router again

Error 323: Could Not Access New Router

1) Restore your router to factory defaults. Take a pin or paperclip and press the reset button for 15 seconds, then let go.
2) Click Cancel to exit the program.
3) Eject the CD
4) Restart your computer.
5) Connect the Ethernet cable from your computer to the LAN port on your modem.
6) Reinsert the CD.

If you continue to have problems, you will need to log in to router and configure the your Internet connection settings manually:

1) Open up Internet Explorer, type into the address bar http://192.168.10.1 and then hit enter

2) Enter the user name and password. The default user name and password is Admin.

3) Click Main -> WAN. Select your connection type and configure your Internet connection settings. Contact your ISP for information regarding your Internet connection settings. Once you have configured your Internet connection settings, and then click Apply.

4) If you do not get onto the Internet right away, unplug the power to your modem and router. Wait 15 seconds, then plug your modem back in. Wait for your modem to boot up, then plug your modem back in. Once your modem has booted up, then plug your router back in. Then wait for your router to boot up.

Q5: I am trying to install the router on my Mac. What should I do?

A5: Follows steps 1-4 in question 4 to manually configure the router.

Q6: All the settings are correct, but I can not make a wireless connection to the Router. What should I do?

A6: First, double check that the WLAN light on the Router is lit. Second, power cycle the TEW-432BRP. Unplug the power to the TEW-432BRP. Wait 15 seconds, then plug the power back in to the TEW-432BRP. Third, log into the TEW-432BRP by entering into the web browser's address bar. Click on Wireless. Make sure Enabled is selected. Fourth, contact the manufacturer of your wireless network adapter and make sure the wireless network adapter is configured with the proper SSID.

Q7: What is Network Magic?

A7: Network Magic is an optional third party bonus program. It works with your router to setup, manage, repair and protect your home network. To install Network Magic, do not check "No, thanks. I already know how to connect my computers and devices and set up printer and file sharing". If you do not want to install Network Magic, check "No, thanks. I already know how to connect my computers and devices and set up printer and file sharing".

If you still encounter problems or have any questions regarding the TEW-432BRP, please refer to the User's Guide included on the Easy Go Setup CD-ROM or contact Trendnet's Technical Support Department.

Certifications

This equipment has been tested and found to comply with FCC and CE Rules. Operation is subject to the following two conditions:

(1) This device may not cause harmful interference.
(2) This device must accept any interference received. Including interference that may cause undesired operation.

TRENDNET TEW-432BRP - Certifications - 1

TRENDNET TEW-432BRP - Certifications - 2

TRENDNET TEW-432BRP - Certifications - 3

Waste electrical and electronic products must not be disposed of with household waste. Please recycle where facilities exist. Check with you Local Authority or Retailer for recycling advice.

TRENDNET TEW-432BRP - Certifications - 4

NOTE: THE MANUFACTURER IS NOT RESPONSIBLE FOR ANY RADIO OR TV INTERFERENCE CAUSED BY UNAUTHORIZED MODIFICATIONS TO THIS EQUIPMENT. SUCH MODIFICATIONS COULD VOID THE USER'S AUTHORITY TO OPERATE THE EQUIPMENT.

ADVERTENCIA

Product Warranty Registration

Please take a moment to register your product online. Go to TRENDnet's website at http://www.trendnet.com/register

TRENDNET®

20675 Manhattan Place

Torrance, CA 90501

USA
Manual assistant
Powered by Anthropic
Waiting for your message
Product information

Brand : TRENDNET

Model : TEW-432BRP

Category : Router