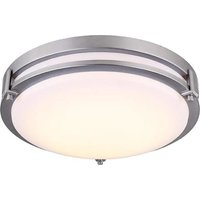
Gilda LFM112A13BN - Lighting Canarm - Free user manual and instructions
Find the device manual for free Gilda LFM112A13BN Canarm in PDF.


| Product Type | Ceiling Fan with Light |
| Brand | Canarm |
| Model | Gilda LFM112A13BN |
| Finish | Brushed Nickel |
| Blade Span | 52 inches |
| Blade Pitch | 12 degrees |
| Motor Size | 153mm x 15mm |
| Light Kit | Integrated LED |
| Bulb Type | Integrated LED (non-replaceable) |
| Color Temperature | 3000K (Warm White) |
| Light Output | 1800 lumens |
| Voltage | 120V AC |
| Frequency | 60 Hz |
| Wattage (Fan) | 50 W |
| Wattage (Light) | 18 W |
| Airflow | 5200 CFM (High Speed) |
| Weight | 8.5 kg (18.7 lbs) |
| Dimensions (Height) | 14.5 inches |
| Mounting Type | Downrod or Flush Mount |
| Control Method | Remote Control included |
| Reversible Motor | Yes (Summer/Winter modes) |
| Warranty | Lifetime Motor Warranty |
| Certifications | UL/cUL Listed, Energy Star |
| Cleaning | Wipe with soft, damp cloth; no abrasive cleaners |
| Repairability | LED module not replaceable, motor serviceable |
Frequently Asked Questions - Gilda LFM112A13BN Canarm
User questions about Gilda LFM112A13BN Canarm
0 question about this device. Answer the ones you know or ask your own.
Ask a new question about this device
Download the instructions for your Lighting in PDF format for free! Find your manual Gilda LFM112A13BN - Canarm and take your electronic device back in hand. On this page are published all the documents necessary for the use of your device. Gilda LFM112A13BN by Canarm.
USER MANUAL Gilda LFM112A13BN Canarm
Monday through Friday 8:00 AM to 5:00 PM E.S.T.

INSTRUCTIONS PERTAINING TO RISK OF FIRE OR INJURY TO PERSONS READ ALL INSTRUCTIONS
IMPORTANT SAFETY INSTRUCTIONS
SAVE THESE INSTRUCTIONS
TOOLS AND MATERIALS REQUIRED:

Phillips
Screwdriver
Wire Cutters

Pliers Wrench

Wiring supplies as required by local electrical code
SAFETY PRECAUTIONS:
- TURN OFF ELECTRICAL POWER BEFORE STARTING INSTALLATION OF LIGHT FIXTURE.
- THIS PRODUCT MUST BE INSTALLED IN ACCORDANCE WITH THE APPLICABLE INSTALLATION CODE BY A PERSON FAMILIAR WITH THE CONSTRUCTION AND OPERATION OF THE PRODUCT AND THE HAZARDS INVOLVED.
- CAUTION – RISK OF FIRE. CONSULT A QUALIFIED ELECTRICIAN TO ENSURE CORRECT BRANCH CIRCUIT CONDUCTOR.
- CONNECT THE GROUND WIRE (BARE COPPER OR GREEN) FROM YOUR FIXTURE TO THE GROUND WIRE (BARE COPPER OR GREEN) OR GROUND SCREW IN THE ELECTRICAL BOX.
- TO CLEAN THE FIXTURE, TURN OFF THE POWER, WAIT FOR IT TO COOL, AND WIPE THE FIXTURE WITH A CLEAN, SOFT CLOTH.
NOTE: Product may not look exactly as shown in figures.
INSTALLATION:
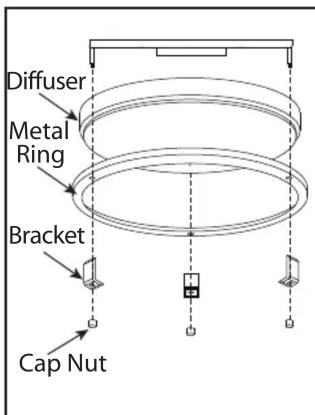
- Unscrew the 3 cap nuts as shown to remove the brackets, metal ring and diffuser.

Mounting screws
- Secure the mounting screws (only screwing on halfway) to electrical box.


- Connect the ground wire (bare copper or green) from your fixture to the ground wire (bare copper or green) or ground screw in the electrical box. Connect the black wire (or wire with marking) from the fixture to the black wire in the electrical box and connect the white wire from the fixture to the white wire in the electrical box.
NOTE: Do not disconnect any pre-wired connections.
-
Once wire connections are completed, carefully tuck wires and wire nuts into the outlet box making sure no bare wire (on the black and white) is visible at the wire nuts.
-
Attach the fixture to the mounting screws, turn fixture clockwise, and tighten screws.
-
Reverse the process of step #1 to install the fixture.
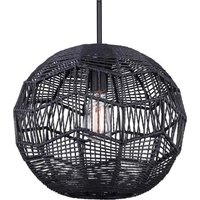

Brand : Canarm
Model : Gilda LFM112A13BN
Category : Lighting