
Norelco S9500 - Electric razor PHILIPS - Free user manual and instructions
Find the device manual for free Norelco S9500 PHILIPS in PDF.


| Product Type | Electric Razor |
| Brand | Philips |
| Model | Norelco S9500 |
| Color | Black/Gold |
| Dimensions (LxWxH) | 6.5 x 2.5 x 2.5 in (165 x 63 x 63 mm) |
| Weight | 0.55 lbs (250 g) |
| Power Source | Rechargeable lithium-ion battery |
| Charging Time | 1 hour (fast charge 5 min for one shave) |
| Runtime | 60 minutes cordless |
| Shaving System | MultiPrecision blades with 3D contour detection |
| Motor | Digital motor, 60,000 cutting actions per minute |
| Cleaning System | Wet & dry, fully washable, compatible with SmartClean system |
| Display | LED battery indicator, cleaning reminder, travel lock indicator |
| Travel Lock | Yes, slide switch |
| Pop-up Trimmer | Yes, ergonomic sliding switch |
| Wet/Dry Use | Yes, for dry shaving or with foam/gel |
| Voltage | 100-240V automatic |
| Replacement Heads | Philips SH90/91 series (recommended every 2 years) |
| Cleaning Cartridge | HQ200 (for SmartClean) |
| Accessories Included | SmartClean system, travel case, charging stand, cleaning brush |
| Warranty | 2 years (varies by region) |
| IP Rating | IPX7 waterproof (submersible up to 1m for 30 min) |
| Auto Shut-off | After 5 minutes of inactivity |
Frequently Asked Questions - Norelco S9500 PHILIPS
User questions about Norelco S9500 PHILIPS
0 question about this device. Answer the ones you know or ask your own.
Ask a new question about this device
Download the instructions for your Electric razor in PDF format for free! Find your manual Norelco S9500 - PHILIPS and take your electronic device back in hand. On this page are published all the documents necessary for the use of your device. Norelco S9500 by PHILIPS.
USER MANUAL Norelco S9500 PHILIPS
natural_image
Illustration of an open book with a grid pattern and a curved arrow pointing to it (no text or symbols)


natural_image
Line drawing of a closed, oval-shaped object with a labeled section marked '11' (no text or symbols on the object itself)
English 6
Español 56
Contents
IMPORTANT SAFETY INSTRUCTIONS 7
General description ____ 12
Introduction - Identify your shaver ____ 12
Fig. A 14
Fig. B 15
What do the icons on the display mean? (Fig. A) ____ 16
What do the icons on the display mean? (Fig. B) ____ 19
Main menu (Fig. A) 21
Main menu (Fig. B) ____ 22
How do I connect my shaver and smartphone? (Fig. A)____ 25
How do I connect my shaver and smartphone? (Fig. B)____ 28
What is my shaver telling me? (Fig. A) ____ 31
What is my shaver telling me? (Fig. B) 34
How do I charge my product? 36
How do I use my product? 38
How do I clean my shaver? 41
Storage 48
How do I replace the shaving heads? ____ 49
Accessories 51
Assistance 51
Further guidance ____ 51
Disposal 51
Full Two-Year Warranty 52
45-DAY MONEY-BACK GUARANTEE 53
Trademarks 55
IMPORTANT SAFETY INSTRUCTIONS
When using an electric product, basic precautions should always be followed, including the following:
Read all instructions before using this product.
DANGER
To reduce the risk of electric shock:
- Do not reach for a corded product or charging stand that has fallen into water. Unplug immediately from the power outlet.
- Keep the power cord dry.

natural_image
No sign depicting a faucet without a shower, enclosed in a circle (no text or symbols)- Do not place or store the product or charging stand where it can fall or be pulled into a tub or sink. Do not place or drop the product or charging stand into water or other liquid.
- This product does not work while it is connected to the power outlet. Except when charging, always unplug this product from the power outlet.
- Remove power cord from power outlet and product before cleaning.
WARNING
To reduce the risk of burns, fire, electric shock, or injury to persons:
- This appliance is not intended for use by persons (including children) with reduced physical, sensory or mental capabilities, or lack of experience and knowledge, unless they have been given supervision or instruction concerning use of the appliance by a person responsible for their safety. Children should be supervised to ensure that they do not play with the appliance.
- Use this product only for its intended household use as described in this manual. Do not use attachments not recommended by Philips North America LLC.
- Never operate this product if it has a damaged power cord, if it is not working properly, after it has been dropped or damaged, or after the product or power cord has been dropped into water. For assistance call 1-800-243-3050.
- Keep the power cord away from heated surfaces.
- Never drop or insert any object into any opening.
- Do not use the power cord in or near a power outlet that contains an electric air freshener to prevent damage to the power cord.
- Be careful when handling your smartphone near water and in moist environments.
- The shortwave radio frequency signals of a Bluetooth® product may impair the operation of pacemakers and other electronic and medical devices. Consult your phycisian for advice and keep the appliance at least 8 inches away.
- Do not charge or plug in product or charging stand outdoors or operate where aerosol (spray) products are being used or where oxygen is being administered.
-
Always check shaving heads (guards and cutters) before using the product. Do not use the product if cutters or guards are damaged, as injury may occur.
-
Always attach power cord to product or charging stand first, then to power outlet. To disconnect, set all controls to 'off' position. Then remove power cord from power outlet.
- Plug power cord directly into power outlet. Do not use an extension cord.
- Unplug power cord before plugging in or unplugging the product.
- Do not attempt to open the product to remove or replace the built-in rechargeable battery.
- The batteries used in this product may present a fire or chemical burn hazard if mistreated. Do not disassemble, heat above 100 °C (212 °F) or incinerate.
- Only use original Philips accessories or consumables. Only use detachable power cord HQ8505.
- Charge, use and store the product at a temperature between 41 °F / 5 °C and 95 °F / 35 °C.
- Keep product and batteries away from fire and do not expose them to direct sunlight or high temperatures.
- If the product becomes abnormally hot or smelly, changes color or if charging takes longer than usual, stop using and charging the product and contact Philips.
- Do not place products and their batteries in microwave ovens or on induction cookers.
- Do not open, modify, pierce, damage or dismantle the product or battery to prevent batteries from heating up or releasing toxic or hazardous substances. Do not short-circuit, overcharge or reverse charge batteries.
- If batteries are damaged or leaking, avoid contact with the skin or eyes. If this occurs, immediately rinse well with water and seek medical care.
- When you handle batteries, make sure that your hands, the product and the batteries are dry.
- To avoid accidental short-circuiting of batteries after removal, do not let battery terminals come into contact with metal objects (e.g. coins, hairpins, rings). Do not wrap batteries in aluminum foil. Tape battery terminals or put batteries in a plastic bag before you discard them.
IMPORTANT: The power plug contains a transformer. Do not cut off the power plug to replace it with another plug as this will cause a hazardous condition.
Philips Norelco Quick Clean Pod Cartridge fluid
- Do not take internally.
- Avoid contact with the eyes. In case of eye contact, thoroughly flush with cold water. If irritation persists, get medical attention.
- Keep out of reach of children.
Electromagnetic fields (EMF)
This Philips product complies with all applicable standards and regulations regarding exposure to electromagnetic fields.
FCC Compliance

- The frequency band in which the appliance operates is 2.4 GHz.
- This appliance is equipped with Bluetooth class 2.
- The maximum radio frequency power radiated in the frequency band in which the appliance operates is less than 20 dBm
- This device complies with the FCC RF exposure limits and has been evaluated in compliance with portable exposure condition.
Changes or modifications not expressly approved by Philips could void the users' authority to operate the equipment.
This device complies with Part 15 of the FCC Rules. Operation is subject to the following two conditions: (1) this device may not cause harmful interference, and (2) this device must accept any interference received, including interference that may cause undesired operation.
This equipment has been tested and found to comply with the limits for a Class B digital device, pursuant to Part 15 of the FCC Rules. These limits are designed to provide reasonable protection against harmful interference in a residential installation. This equipment generates, uses and can radiate radio frequency energy and, if not installed and used in accordance with the instructions, may cause harmful interference to radio communications. However, there is no guarantee that interference will not occur in a particular installation. If this equipment does cause harmful interference to radio or television reception, which can be determined by turning the equipment off and on, the user is encouraged to try to correct the interference by one or more of the following measures:
- Reorient or relocate the receiving antenna.
- Increase the separation between the equipment and receiver.
- Connect the equipment into an outlet on a circuit different from that to which the receiver is connected.
- Consult the dealer or an experienced radio/TV technician for help.
- There is no limitation as to which distance can be used from the human body.
The Bluetooth® wordmark and logos are registered trademarks owned by Bluetooth SIG, Inc. and any use of such marks by Koninklijke Philips N.V. is under license.
SAVE THESE INSTRUCTIONS
General description
1 Pop-up trimmer
2 Trimmer release slide
3 Shaving unit
4 Shaving unit release button
5 On/off button
6 Menu button
7 Socket for small plug
8 Charging stand
9 Power plug
10 Small plug
11 Pouch
12 Philips Quick Clean Pod Cartridge
13 Quick Clean Pod
14 Cleaning brush
The accessories supplied may vary for different products. The box shows the accessories that have been supplied with your product.
Introduction - Identify your shaver
Congratulations on your purchase and welcome to Philips Norelco! To fully benefit from the
support that Philips offers, register your product at www.philips.com/welcome or via the app.
This user manual contains information about two versions of S9000 Shaver. Fig. A and Fig. B help you identify which version you have.
Fig. A

Fig. B


- This shaver is waterproof. It is suitable for use in the bath or shower and for cleaning under the tap. For safety reasons, the shaver can therefore only be used without cord.
What do the icons on the display mean? (Fig. A)
- Main Menu
You can toggle through the menu items by pressing the menu button.
You can also activate or deactivate certain features with a long press.
Icon Meaning
 | The main menu shows the status of the battery in percentages. |
 | The Motion Control sensor menu icons tell you if the motion during your last shave was good or can be improved |
 | You can activate the travel lock in this menu (see 'Main menu (Fig. A)'). |
 | Here the display shows that your shaver is not paired to your smartphone (see 'Pair the shaver and smartphone'). |
 | The display shows that your shaver is paired to your smartphone (see 'Pair the shaver and smartphone'). |
- Switching the shaver on
Press the on/off button to switch on the shaver.
Icon Meaning

When you switch on the shaver, a short animation with these icons shows which pressure feedback setting you activated (see 'What is my shaver telling me? (Fig. A)'). You can toggle through the pressure feedback settings by pressing the menu button.
- Warnings and notifications
Icon Meaning
The battery is almost empty and you need to charge your shaver (see 'How do I charge my product?').

When the data storage is almost full, you receive a notification reminding you to synchronize your shaves. To prevent data loss, synchronize the shaver with the app (see 'How do I connect my shaver and smartphone? (Fig. A)').

The shaving unit is soiled or damaged to such an extent that the motor cannot run. Clean the shaving heads thoroughly.


You are using the wrong supply unit (see 'How do I charge my product?'). Only use the supply unit (HQ8505) that is supplied with the shaver.
- Cleaning the shaver
| Icon | Meaning |
 | A reminder: clean your shaver in the quick cleaning pod (see 'How do I use the Quick Clean Pod?'). |
 | A reminder: clean your shaver. |
 | The cleaning process is in progress and the display shows the remaining cleaning time as a clock, or in seconds, if you press the menu button. |
 | |
 | The cleaning process has been interrupted. |
- Unplug for use
| Icon | Meaning |
 | Unplug the shaver before you use it. |
What do the icons on the display mean? (Fig. B)
- Main Menu
You can toggle through the menu items by pressing the menu button.
You can also activate or deactivate certain features with a long press.
Icon Meaning
 | This menu shows the status of the battery in percentages. |
 | You can activate or deactivate the travel lock in this menu (see 'Travel lock'). |
 | You can deactivate or reactivate the light ring feedback in this menu (see 'Light ring feedback'). |
- Switching the shaver on

Press the on/off button to switch on the shaver.
- Bluetooth
Icon Meaning
This icon shows that your shaver is paired to your smartphone.

This icon will appear after you unpair your shaver from your smartphone.
- Warnings and notifications
| Icon | Meaning |
 | The battery is almost empty and you need to charge your shaver (see 'How do I charge my product?'). |
 | When the data storage is almost full, you receive a notification reminding you to synchronize your shaves. To prevent data loss, synchronize the shaver with the app (see 'How do I connect my shaver and smartphone? (Fig. A)'). |
 | The shaving unit is soiled or damaged to such an extent that the motor cannot run. Clean the shaving heads thoroughly (see 'Thorough cleaning'). |
 | |
 | You are using the wrong power cord (see 'How do I charge my product?'). Only use the power cord that is supplied with the shaver. |
- Cleaning the shaver
| Icon | Meaning |
 | A reminder: clean your shaver in the quick cleaning pod (see 'How do I use the Quick Clean Pod?'). |
 | A reminder: clean your shaver (see 'How do I clean my shaver?'). |


The cleaning process is in progress and the display shows the remaining cleaning time as a clock, or in seconds, if you press the menu button.

The cleaning process has been interrupted.
- Unplug for use
Icon Meaning
Unplug the shaver before you use it.
Main menu (Fig. A)
While your shaver is switched off, you can toggle through the four menu functions by pressing the menu button.
- Remaining battery charge
This menu item shows the remaining battery charge.
- Motion Control sensor
This menu item shows the motion feedback from your last shave.


natural_image
Three white icons on black background: checkmark, refresh arrow, and dot pattern (no text or symbols)
natural_image
Icon of a padlock inside a device (no text or symbols)
natural_image
Pure electrical circuit lines without any symbols- Travel lock
From this menu item, you can lock and unlock your shaver by pressing and holding the menu button for 3 seconds. When you are going to travel, you can lock the shaver to prevent it from accidentally switching on. When the travel lock is activated, Bluetooth will be switched off automatically and your shaver will be in energy saving mode.
- Bluetooth
From this menu item, you can unpair your shaver and smartphone.
For information about the benefits of pairing your shaver and smartphone, see 'Benefits of connecting your shaver to the app'.
Note: Make sure your smartphone is equipped with Bluetooth ^® 4.2 or higher.
This shaver is equipped with Bluetooth® 4.2 and higher to connect to the app. When you have paired your shaver and smartphone, Bluetooth on your shaver is switched on automatically, even when the shaver is switched off. This allows your shave data to be synced later so you don't need to take your smartphone with you when you shave.
Note: You can switch off Bluetooth on your shaver by activating the travel lock.
Main menu (Fig. B)
You can toggle through the menu functions by pressing the menu button.
Remaining battery charge

This menu item shows the remaining battery charge.
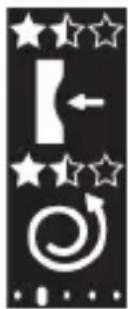
Post-shave feedback
natural_image
Abstract black-and-white graphic with star and arrow symbols (no text or readable labels)Note: This menu is displayed only after you activate this feature via the app settings (see 'How do I connect my shaver and smartphone? (Fig. B)').
You can optimize your shaving experience by applying the right motion and amount of pressure (see 'Shaving'). This item shows the star rating of your last shave. It tells whether the pressure and motion you applied during the shave was good, or could be improved.
Travel lock

natural_image
Simple icon of a padlock with an open shackle, set on a black background (no text or symbols)When you are going to travel, you can lock the shaver to prevent it from accidentally switching on. In this menu, press and hold the menu button for 3 seconds to lock or unlock your shaver. When the travel lock is activated, Bluetooth will be switched off automatically and your shaver will be in energy saving mode.
Light ring on/off
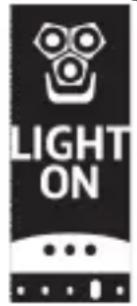
During your shave, you receive feedback on how much pressure you are applying via the light ring at the top of your shaver handle.
The light ring is active by default. You can deactivate or reactivate it.
To deactivate the light ring feedback,
1 Toggle through the menu items by pressing the menu button until you reach the 'Light on' menu.
2 While you are in the 'Light on' menu, press and hold the menu button for 3 seconds until you see 'Light off' on the display.
To reactivate the light ring feedback,
1 Toggle through the menu items by pressing the menu button until you reach the 'Light off' menu.
2 While you are in the 'Light off' menu, press and hold the menu button for 3 seconds until you see 'Light on' on the display.
Note: Light ring feedback is only available when the shaving unit is attached to the handle.
Bluetooth
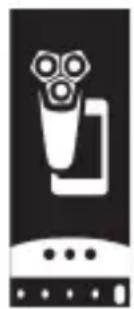
natural_image
Pure electrical circuit lines without any symbolsNote: The Bluetooth menu is displayed only when your shaver is paired to your smartphone.
Here you can unpair your shaver and smartphone. To learn the benefits of pairing your shaver and smartphone, see 'Benefits of connecting your shaver to the app'.
Note: Make sure your smartphone is equipped with Bluetooth ^® 4.2 or higher.
This shaver is equipped with Bluetooth ^® 4.2 and higher to connect to the app. When you have paired your shaver and smartphone, Bluetooth on your shaver is switched on automatically, even when the shaver is switched off. This allows your shave data to be synced later so you don't need to take your smartphone with you when you shave.
Note: You can switch off Bluetooth on your shaver by activating the travel lock.
How do I connect my shaver and smartphone? (Fig. A)
Benefits of connecting your shaver to the app
You can use the app to:
- Receive real-time motion and pressure feedback and guidance,
- Activate and customize post-shave feedback,
- Synchronize your shave data and track your shave history,
- Improve your shave routine and reduce shaving-related skin issues,
- Receive personalized advice and recommendations on style.
Pair the shaver and smartphone

The app is compatible with a wide range of iPhone and Android ^TM smartphones.
More information is available at www.philips.com/MyShaver9000-app

1 Download the app.
2 Make sure Bluetooth on your smartphone is switched on.
3 Switch on the shaver to activate Bluetooth.
4 Open the app and follow the instructions to start the pairing process.
5 Once paired, the shaver and app connect automatically when the app is open and Bluetooth on your phone is switched on.
Synchronize your shaves
This shaver stores your shave data so you don't need to take your smartphone with you when you shave or want to check your shave data at a later stage.
When the data storage is almost full, you receive a notification reminding you to synchronize your shaves. To prevent data loss, synchronize the
shaver with the app (see 'How do I connect my shaver and smartphone? (Fig. A)').
1 Make sure your phone is close to the shaver and open the app.
2 The app connects automatically and synchronizes your last shaves.
Unpair the shaver and smartphone
You can pair your shaver with only one smartphone at a time. To unpair your shaver from your smartphone (e.g. when you get a new smartphone), follow these steps:
- First, unpair your shaver.
1 Toggle through the menu items by pressing the menu button until you reach the Bluetooth menu.

2 Press and hold the menu button until you are presented with a cross and check mark selection.
3 Select the check mark by pressing the menu button again to unpair your shaver.
Note: When your shaver is successfully unpaired, you see the Bluetooth icon on your shaver handle shown to the left.
Note: When you want to pair your shaver and smartphone again, make sure that both are unpaired first.
- Then, unpair your smartphone.
1 Go to the settings on your smartphone and select Bluetooth.
2 Tap on the name of the shaver.
3 Tap 'forget' or 'unpair'.
Note: The unpairing procedure may vary by smartphone. Please check your smartphone manual for more information.
How do I connect my shaver and smartphone? (Fig. B)
Benefits of connecting your shaver to the app
You can use the app to:
- Receive real-time motion and pressure feedback and guidance,
- Activate and customize post-shave feedback,
- Synchronize your shave data and track your shave history,
- Improve your shave routine and reduce shaving-related skin issues,
- Receive personalized advice and recommendations on style.
Pair the shaver and smartphone

The app is compatible with a wide range of iPhone and Android ^TM smartphones.
More information is available at www.philips.com/MyShaver9000-app
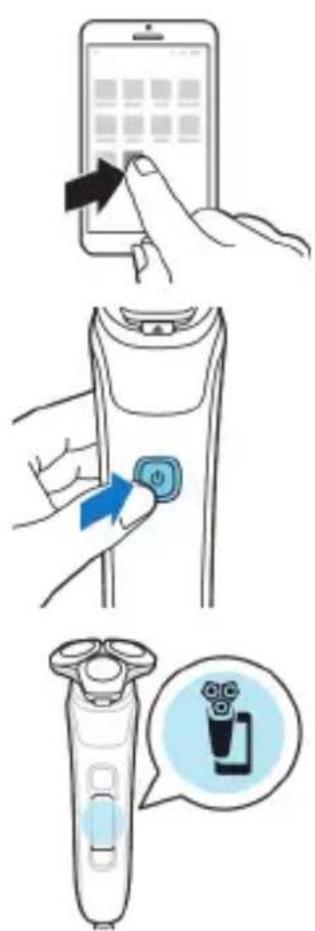
1 Download the app.
2 Make sure Bluetooth on your smartphone is switched on.
3 Switch on the shaver to activate Bluetooth.
4 Open the app and follow the instructions to start the pairing process.
5 Once paired, the shaver and app connect automatically when the app is open and Bluetooth on your phone is switched on.
Note: When your shaver is paired with a smartphone, the Bluetooth menu appears as a new item.
Synchronize your shaves
This shaver stores your shave data so you don't need to take your smartphone with you when you shave or want to check your shave data at a later stage.
When the data storage is almost full, you receive a notification reminding you to synchronize your
shaves. To prevent data loss, synchronize the shaver with the app (see 'How do I connect my shaver and smartphone? (Fig. B)').
1 Make sure your phone is close to the shaver and open the app.
2 The app connects automatically and synchronizes your last shaves.
Unpair the shaver and smartphone
You can pair your shaver with only one smartphone at a time. To unpair your shaver from your smartphone (e.g. when you get a new smartphone), follow these steps:
- First, unpair your shaver.
1 Toggle through the menu items by pressing the menu button until you reach the Bluetooth menu.
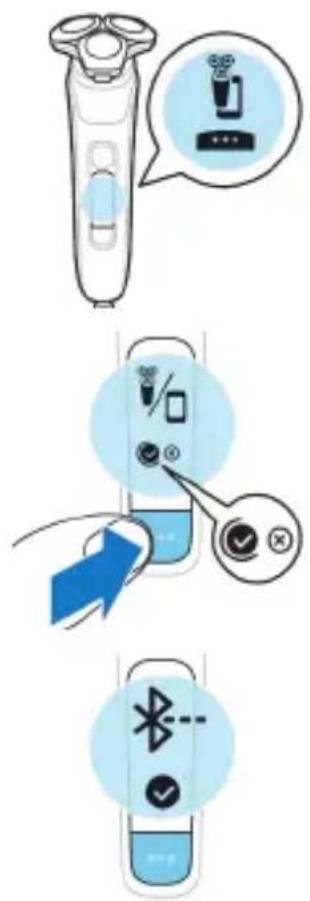
2 Press and hold the menu button until you are presented with a cross and check mark selection.
3 Select the check mark by pressing the menu button again to unpair your shaver.
Note: When your shaver is paired with a smartphone, the Bluetooth menu appears as a new item. When it is unpaired, this menu will disappear.
Note: When your shaver is successfully unpaired, Bluetooth icon will briefly appear on the shaver display.
Note: When you want to pair your shaver and smartphone again, make sure that both are unpaired first.
- Then, unpair your smartphone.
1 Go to the settings on your smartphone and select Bluetooth.
2 Tap on the name of the shaver.
3 Tap 'forget' or 'unpair'.
Note: The unpairing procedure may vary by smartphone. Please check your smartphone manual for more information.
What is my shaver telling me? (Fig. A)
Light ring feedback
During your shave, you receive feedback on how much pressure you are applying via the light ring at the top of your shaver handle.
The light ring on the handle lights up in various colors during your shave to give you feedback on how much pressure you are exerting. These are the default settings:

- When you don't apply enough pressure, the light ring lights up blue.
- When you apply the correct amount of pressure, the light ring lights up green.
- When you apply too much pressure, the light ring lights up orange.

natural_image
Two-step diagram showing hand pressing a button on a device, with no visible text or symbolsWhen your shaver is switched on, you can customize the type of pressure feedback you receive.
1 Switch on the shaver.
2 Press the menu button to toggle through the pressure feedback options. The table below shows what pressure feedback you receive with each option.
| Too little pressure is being applied | The right amount of pressure is being applied | Too much pressure is being applied | |
Full pressure feedback | The light ring lights up blue | The light ring lights up green | The light ring lights up orange |
Partial pressure feedback | No feedback | No feedback | The light ring lights up orange |
No pressure feedback

No feedback No feedback No feedback
Note: Pressure feedback is only available when the shaving head is attached to the handle.
Post-shave feedback
Note: This feature is activated via the app settings (see 'How do I connect my shaver and smartphone? (Fig. A)').
You can optimize your shaving experience by applying the right motion and amount of pressure (see 'Shaving'). Once this feature is activated, your shaver gives you feedback right after you shave and switch off your shaver.
Pressure Guard sensor feedback
When your shaving pressure can be improved, the Pressure Guard sensor icon displays with an exclamation mark.
- The pressure you applied during the shave was too high.
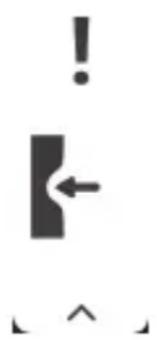

- The pressure you applied during the shave was too low.
Motion Control sensor feedback
- When your shaving motion can be improved, the Motion Control sensor icon displays with an exclamation mark.
- When both the pressure and the motion applied during the shave is perfect, both icons are displayed with a check mark.
What is my shaver telling me? (Fig. B)
Light ring feedback
During your shave, you receive feedback on how much pressure you are applying via the light ring at the top of your shaver handle.
The light ring on the handle lights up in various colors during your shave to give you feedback on how much pressure you are exerting. This feature is active by default.
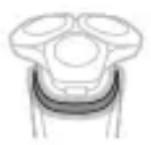
- When you don't apply enough pressure, the light ring lights up blue.
- When you apply the correct amount of pressure, the light ring lights up green.
- When you apply too much pressure, the light ring lights up orange.

natural_image
Hand holding a device with a black arrow pointing to the button (no text or symbols visible)You can deactivate or reactivate this feature in the Light ring on/off menu.
Note: Light ring feedback is only available when the shaving unit is attached to the handle.
Post-shave feedback
Note: This feature is activated via the app settings (see 'How do I connect my shaver and smartphone? (Fig. A)').
You can optimize your shaving experience by applying the right motion and amount of pressure (see 'Shaving'). Your shaver gives you a star rating on motion and pressure applied during your last shave. Once this feature is activated,
- A new menu item for post-shave feedback appears on your shaver.
- After each shave, once you switch off your shaver, you see instant feedback on pressure,

natural_image
Simple graphic with three stars above a black arrow pointing left, and an upward arrow below (no text or symbols)
- or motion,
- or both.
- When you navigate through the menu later, you see both the motion rating and pressure rating of your last shave in the new menu item (see 'Main menu (Fig. B)').
How do I charge my product?
Note: This product is waterproof. It is suitable for use in the bath or shower and for cleaning under the tap. This product can only be used without cord.
- Charge the product before you use it for the first time and when the remaining battery charge indicates that the battery is almost empty.
- Charging takes approx. 1 hour.
- Quick Charge: After approx. 5 minutes of charging, the battery contains enough energy for one full shave. When the battery is charged to 10% , you can complete one full shave.
- When the product is fully charged it has a cordless operating time of up to 60 minutes.
Note: You cannot use the product while it is charging.
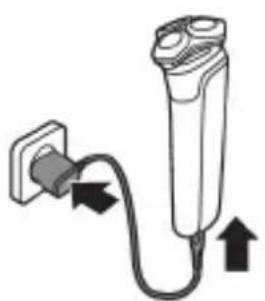
Charging with the power cord
natural_image
Diagram of a handheld device with a plug and cable, showing directional arrows (no text or symbols)1 Make sure that the product is switched off. 2 Insert the small plug into the product and put the power plug in the wall outlet.
- While the product is charging, an animation appears on the display showing the progress. - When the product is fully charged, the battery percentage shows 100 % and the battery icon shows the battery being full.
3 After charging, remove the power plug from the power outlet and pull the small plug out of the product.
'Unplug for use' symbol

natural_image
Illustration of a handheld electric shaver with a speech bubble containing a warning symbol (no text or labels)The 'unplug for use' symbol flashes to remind you to disconnect the power cord from the power outlet and remove the small plug from the product before you switch it on.
Charging in the charging stand

natural_image
Diagram showing a mechanical device interacting with a small component, no text or symbols present1 Make sure that the product is switched off.
2 Put the small plug in the charging stand and put the power cord in the power outlet.
3 Put the product in the charging stand.
Specific models only: The light ring on the bottom of the charging stand lights up and rotates quickly.
- After approximately 5 minutes, the light ring rotates slower.
- As the product continues to charge, the light ring becomes brighter and rotates slower.
- When the product is fully charged, the light ring lights up fully and stops rotating.
4 After charging, remove the power cord from the power outlet and pull the small plug out of the charging stand.
Always check the product and all accessories before using. Do not use the product or any accessory if it is damaged, as this may cause injury. Always replace a damaged part with one of the original type.
Note: This product is waterproof. It is suitable for use in the bath or shower and for cleaning under the tap with water. For safety reasons, this product can only be used without cord.
Use this product for its intended household use as described in this manual.
For hygienic reasons, the product should only be used by one person.
Always check the product and all accessories before using. Do not use the product or any accessory if it is damaged, as this may cause injury. Always replace a damaged part with one of the original type.
Note: This product is waterproof. It is suitable for use in the bath or shower and for cleaning under the tap with water. For safety reasons, this product can only be used without cord.
Use this product for its intended household use as described in this manual.
For hygienic reasons, the product should only be used by one person.
Shaving

natural_image
Illustration of a person using a hairdryer to apply facial contour (no text or symbols)
natural_image
Illustration of a medical procedure with tubing and a cap (no text or symbols)
natural_image
Diagram of a stylized face with three circular patterns and directional arrows, no text or symbols present.You can use this product either wet or dry, or even in the shower.
For a wet shave, apply some water and shaving foam or gel to your skin and rinse the shaving heads under the tap with warm water before following the steps below.
1 Switch on the product.
2 Move the shaving heads over your skin in circular movements to catch all hairs growing in different directions. Make sure each shaving head is fully in contact with the skin. Exert gentle pressure for a close, comfortable shave.
Note: Do not press too hard, as this can cause skin irritation. When you apply too much pressure, the orange light ring lights up (see 'What is my shaver telling me? (Fig. A)').
Note: If you are shaving with gel or foam, rinse the shaving unit regularly during your shave to ensure that it continues to glide smoothly over your skin.
3 Use the narrow sides of the shaving unit to shave in hard-to-reach areas such as along your jawline and under your nose.

natural_image
Illustration of a person using a device to interact with another person's ear (no text or symbols present)4 Switch off and clean the product after each use.
Note: Make sure you rinse all foam or shaving gel off the product.
21-Day adaptation process
- 21 Day Trial and Conversion Process. It is a fact that your skin and beard need time to adjust to a new grooming system.
- Use your new shaver exclusively for 3 weeks to fully enjoy the closeness of a Philips Norelco shave.
- At first you may not get as close a shave as you expect, or your face may even become slightly irritated. This is normal since your beard and skin will need time to adjust. Invest 3 weeks and you'll soon experience the full joy of your new shaver.
- Stick with it! If you alternate shaving methods during the adjustment period, it may make it more difficult to adapt to the Philips Norelco shaving system.
- If you are still not convinced after 21 days, Philips Norelco will refund you the full purchase price as long as the request is received within 45 days of purchase.
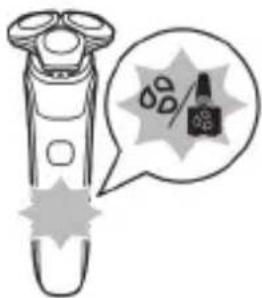
Cleaning reminder
natural_image
Illustration of a handbrush with a thought bubble showing product packaging (no text or symbols)When you switch off the product, the cleaning reminder flashes to remind you to clean the product (see 'How do I clean my shaver?').
Trimming
- Clean the product (see 'How do I use the Quick Clean Pod?') and attachments after each use (see 'How do I clean my shaver?') to prevent clogging and damage.
- Clean the shaving heads thoroughly once a month or when the product does not shave as well as it used to (see 'Thorough cleaning').
You can use the pop-up trimmer to groom your sideburns and moustache.

natural_image
Three-step illustration showing a person using a handheld device to interact with another person's face (no text or symbols present)1 Push the trimmer release slide downwards to open the trimmer.
2 Switch on the product.
3 Hold the trimmer perpendicular to the skin and move it downwards while exerting gentle pressure.
4 You can also use the trimmer under your nose.
5 Switch off the product and clean the trimmer after each use to prevent clogging and damage (see 'How do I clean my shaver?').
6 Close the trimmer.
How do I clean my shaver?
Clean the product and the attachments after each use for optimal performance.
Cleaning the shaver under the tap
Clean the shaver after each use to prevent clogging and damage.
Never dry the shaving unit with a towel or tissue, as this may damage the shaving heads.
While rinsing the shaving unit, water may drip out of the base of the shaver. This is a normal occurrence.
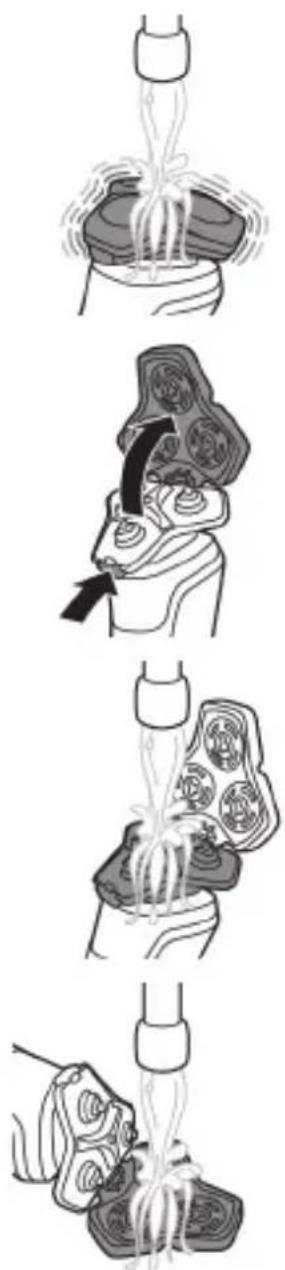
1 Switch on the shaver.
2 Rinse the shaving unit under a warm tap.
3 Switch off the shaver. Press the release button to open the shaving unit.
4 Rinse the hair chamber under a warm tap.
5 Rinse the shaving head holder under a warm tap.
6 Carefully shake off excess water and let the shaving head holder air-dry completely.

natural_image
Illustration of a person with three circular patterns emerging from their head, showing a curved arrow and motion lines (no text or symbols)7 Close the shaving unit.
Thorough cleaning
We advise you to clean the shaving heads thoroughly once a month or when the shaver does not shave as well as it used to.

natural_image
Illustration of a human head with internal organs and a bottle inserted into a container (no text or symbols)1 Make sure that the product is switched off and disconnected from the power outlet.
2 Press the release button on the shaving unit and pull the shaving head holder off the shaving unit.
3 Rinse the hair chamber and shaving head holder under the tap.
4 Remove the shaving heads. For detailed instructions, see 'How do I replace the shaving heads?'.
Note: Do not clean more than one cutter and guard at a time, since they are all matching sets. If you accidentally put a cutter in the wrong shaving guard, it may take several weeks before optimal shaving performance is restored.
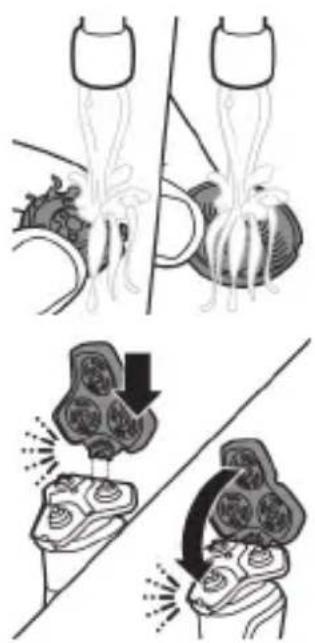
natural_image
Illustration showing two stages of a biological or chemical process: top section with plant-like structures and bottom section with circular structures (no text or symbols)5 Clean the cutter and guard under the tap.
6 Shake off excess water.
7 Put the shaving heads back into the shaving head holder. For detailed instructions, see 'How do I replace the shaving heads?'.
8 Insert the hinge of the shaving head holder into the slot in the top of the shaving unit and close the shaving unit.
Cleaning the pop-up trimmer
Clean the trimmer after each use to prevent clogging and damage.

natural_image
Two-step diagram showing a hand holding a device with directional arrows, and a close-up of the device's internal components (no text or symbols)Never dry the trimmer teeth with a towel or tissue, as this may damage the trimmer teeth.
1 Make sure that the product is switched off and disconnected from the power outlet.
2 Push the trimmer release slide down to open the pop-up trimmer.
3 Switch on the product and rinse the pop-up trimmer with warm water.
4 After cleaning, switch off the product.
5 Carefully shake off excess water and let the pop-up trimmer air dry.
6 Close the trimmer.

natural_image
Line drawing of a hand using a tool to adjust or install a mechanical component (no text or symbols visible)Tip: For optimal performance, lubricate the teeth of the pop-up trimmer with a drop of mineral oil every six months (oil not included).
How do I use the Quick Clean Pod?
Preparing the Quick Clean Pod for use

natural_image
Diagram showing two circular components with arrows indicating rotation or movement, no text or symbols present1 Twist and remove the top of the Quick Clean Pod.

2 Twist the lid off of the Quick Clean Pod Cartridge.

natural_image
Diagram showing two mechanical components with arrows indicating motion or force direction (no text or symbols)3 Lift the tab on the seal and pull it by the corner to remove the seal from the Quick Clean Pod Cartridge.
natural_image
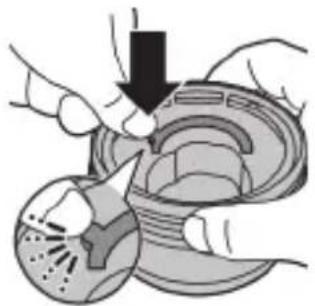
Illustration of hands assembling a mechanical component with a downward arrow (no text or symbols)4 Press the small circular piece on the handle of the Quick Clean Pod Cartridge to break the snap hook on the handle.
natural_image
Illustration of hands assembling a mechanical component with a downward arrow indicating motion (no text or symbols)
natural_image
Diagram showing two containers with internal compartments and arrows indicating movement or process (no text or symbols)
natural_image
Simple line drawing of a container with a black 'X' mark and splashing liquid (no text or symbols)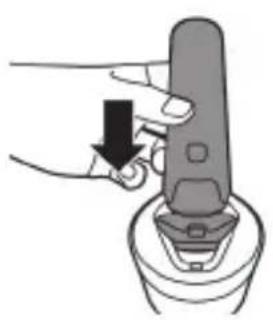
natural_image
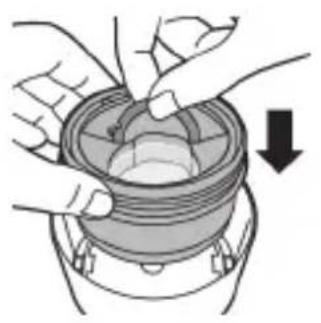
Illustration of a hand pressing down on a mechanical component with a black arrow indicating the downward motion (no text or symbols present)5 Place the Quick Clean Pod Cartridge into the Quick Clean Pod.
6 Put the top of the Quick Clean Pod back onto the base and turn it clockwise until you hear a click.
Do not tilt the Quick Clean Pod to prevent leakage.
Using the Quick Clean Pod
Note: If you use the shaver with shaving foam, shaving gel or pre-shave products, thoroughly rinse the shaving heads before you use the Quick Clean Pod (see 'How do I clean my shaver?').
Always shake excess water off the shaver before you place it in the Quick Clean Pod.
1 Place the shaver upside down into the Quick Clean Pod. While switched on, the shaver automatically detects that it is in the Quick Clean Pod.
2 Switch on the shaver to start the cleaning program. Each cleaning program takes approximately one minute. During the cleaning program the remaining time is displayed as a countdown clock on the handle.
3 Let the shaver air-dry completely in the Quick Clean Pod before storing it.
What does the icon on my Quick Clean Pod mean?
Icon Behavior Meaning

Becomes visible on the Quick Clean Pod
The Quick Clean Pod Cartridge needs to be replaced (see 'How do I use the Quick Clean Pod?').

Replacing the Quick Clean Pod Cartridge
Replace the Quick Clean Pod Cartridge immediately when the cartridge replacement icon on the Quick Clean Pod becomes visible or follow the table below.
Frequency of use Cycles When to replace
the Quick Clean Pod Cartridge
Every day About 30 Every month
A few times per week
About 20 Every 2 months
Every week About 13 Every 3 months
Every month About 3 Every 3 months
natural_image
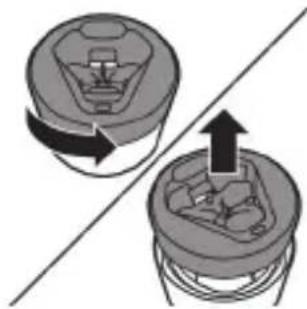
Diagram showing a mechanical component with a rotating top and a cross-sectional view of internal cavity (no text or symbols)1 Twist and remove the top of the Quick Clean Pod.

Storage
2 Lift the Quick Clean Pod Cartridge out of the Quick Clean Pod by the handle.
3 Pour any remaining fluid down a drain and recycle the empty cartridge in accordance with local waste regulations.
4 Place a new Quick Clean Pod Cartridge into the Quick Clean Pod.
Scan the QR code to the left or visit www.philips.com/cleaning-cartridge to order replacement Quick Clean Pod Cartridges.
- Be sure the product is switched off. Remove the power cord from power outlet and the product before storing it in a safe, dry location where it will not be crushed, banged, or subject to damage.
- Do not wrap cord around the product when storing.
- Store cord and other accessories in a safe location where these will not be cut or damaged.
- Do not place or store the product where it can fall or be pulled into a tub or sink, water or other liquid while plugged in.
Note: We advise you to let the product and its attachments dry completely before you store them for the next use.
- Store the product in the pouch (if supplied).
- Put the protection cap (if supplied) on the shaver to protect it from dirt accumulation.
- Alternatively, store the shaver on the charging stand (if supplied) or in the Philips Quick Clean Pod (if supplied).
How do I replace the shaving heads?

For maximum shaving performance, replace the shaving heads once a year. Replace damaged shaving heads immediately.
Always replace the shaving heads with original Philips Norelco shaving heads (see 'Accessories').
Replacing the shaving heads

natural_image
Illustration of a human head with arrows indicating upward movement or force (no text or symbols)1 Switch off the shaver.
2 Press the release button on the shaving unit and pull the shaving head holder off the shaving unit.

3 Turn the retaining rings counterclockwise and remove them. Place them aside in a safe place.

4 Remove the shaving heads from the shaving head holder.
Discard the used shaving heads immediately to avoid mixing them with the new shaving heads.
5 Place new shaving heads in the holder.
6 Place the retaining rings back onto the shaving heads and turn them clockwise to reattach the retaining rings.
- Each retaining ring has two recesses that fit exactly into the projections of the shaving head holder. Turn the ring clockwise until your hear a click to indicate that the ring is fixed.
7 Insert the hinge of the shaving head holder into the slot in the top of the shaving unit and close the shaving unit.
Accessories

Replacement parts and accessories may be purchased at a store near you or on our website www.philips.com/store.
The following accessories and spare parts are available:
- SH91 Philips Norelco replacement shaving heads
- CC12 Philips Norelco Quick Clean Pod Cartridge 2-pack
Assistance
For assistance, visit our website:
www.philips.com/support or call toll free 1-800-243-3050.
Online information is available 24 hours a day, 7 days a week.
Further guidance
For more guidance and videos on your S9000 shaver, scan the QR code below or visit www.philips.com/myS9000shaver

Disposal
- This product contains a rechargeable lithium-ion battery which must be disposed of properly.

- Contact your local town or city officials for battery disposal information. You can also call 1-800-822-8837 or visit www.call2recycle.org for battery drop-off locations.
- For assistance, visit our website www.philips.com/support or call 1-800-243-3050 toll free.
- Your product is designed and manufactured with high quality materials and components, which can be recycled and reused. For recycling information, please contact your local waste management facilities or visit www.recycle.philips.com.
Full Two-Year Warranty
Philips North America LLC warrants this new product (except shaving heads) against defects in materials or workmanship for a period of two years from the date of purchase, and agrees to repair or replace any defective product without charge.
IMPORTANT: This warranty does not cover damage resulting from accident, misuse or abuse, lack of reasonable care, the affixing of any attachment not provided with the product or loss of parts or subjecting the product to any but the specified voltage or batteries.*
NO RESPONSIBILITY IS ASSUMED FOR ANY SPECIAL, INCIDENTAL OR CONSEQUENTIAL DAMAGES.
In order to obtain warranty service, simply go to www.philips.com/support. It is suggested that for your protection you return shipments of product by insured mail, insurance prepaid. Damage occurring during shipment is not covered by this warranty.
NOTE: No other warranty, written or oral, is authorized by Philips North America LLC.
This warranty gives you specific legal rights, and you may also have other rights which vary from state to state. Some states do not allow the exclusion or limitation of incidental or consequential damages, so the above exclusion and limitations may not apply to you.
*Read enclosed instructions carefully.
45-DAY MONEY-BACK GUARANTEE
To enjoy the closest and most comfortable shave from your new Philips Norelco Men's Shaver, the shaver should be used exclusively for 3 weeks. This allows your hair and skin enough time to adapt to the Philips Norelco Shaving System. If, after that period of time, you are not fully satisfied with your Philips Norelco Men's Shaver, send the product back along with dated sales receipt and we'll refund you the full purchase price.
The product must be shipped prepaid by insured mail, insurance prepaid, have the original sales receipt, indicating purchase price and date of purchase, and the money-
back guarantee return authorization form enclosed.
We cannot be responsible for lost mail.
The product must be postmarked no later than 45 days after the date of purchase. Philips reserves the right to verify the purchase price of the product and limit refunds not to exceed suggested retail price.
To obtain money-back guarantee service, please go to www.PhilipsMoneyBack.com.
Delivery of refund check will occur 6–8 weeks after receipt of returned product.
Supplier's Declaration of Conformity
FC
This device complies with part 15 of the FCC Rules. Operation is subject to the following two conditions: (1) This device may not cause harmful interference, and (2) this device must accept any interference received, including interference that may cause undesired operation.
We, PHILIPS CONSUMER LIFESTYLE B.V., hereby declare that the equipment bearing the model name specified below was tested conforming to the applicable FCC Rules under the most accurate measurement standards possible, and that all the necessary steps have been taken and are in force to assure that production units of the same equipment will continue to comply with the Commissions requirements.
Unique Identifier: PHILIPS, NORELCO S9987, S9985
Responsible Party – U.S. Contact Information
Philips North America LLC P.O. Box 10313 Stamford | CT 06904 1-800-243-3050
Trademarks
Apple, the Apple logo, iPad, and iPhone are trademarks of Apple Inc., registered in the U.S. and other countries. App Store is a service mark of Apple Inc.
Android is a trademark of Google Inc. Google Play and the Google Play logo are trademarks of Google Inc.
The Bluetooth® word mark and logos are registered trademarks owned by the Bluetooth SIG, Inc. and any use of such marks by Philips Personal Care is under license.
Contenido
natural_image
No sign depicting a faucet crossed out by a diagonal line, indicating no pollution or leakage (no text present)natural_image
Pure black-and-white icons showing a checkmark and a circular arrow symbol (no text or labels)
natural_image
Icon of a padlock with open shackle, set on a black background (no text or symbols)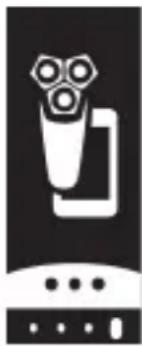
natural_image
Icon of a stylized device resembling a remote or camera, with no visible text or symbols.natural_image
Abstract black-and-white graphic with star and arrow symbols (no text or numbers)natural_image
Simple icon of a padlock with an open lid, set against a dark background (no text or symbols)natural_image
Pure electrical circuit lines without any symbolsnatural_image
Illustration of a hand interacting with a smartphone displaying a grid interface (no text or symbols visible)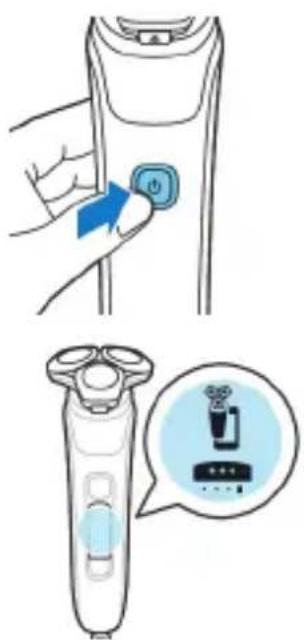
natural_image
Hand holding a device with a circular button and arrow pointing to it (no text or symbols visible)natural_image
Illustration of a handheld device with a plug and cable, showing directional arrows (no text or symbols)natural_image
Illustration of a handheld electric shaver with a speech bubble containing a warning symbol (no text or labels)natural_image
Diagram of a mechanical device with a lever and base component, no text or symbols presentnatural_image
Illustration of a person using a handheld device to apply facial contour or contouring (no text or symbols present)
natural_image
Three-panel illustration showing a hairdryer, a circular brush head with concentric rings, and a close-up of a person's ear and neck (no text or symbols)natural_image
Illustration of a handbrush with a speech bubble containing product symbols (no text or labels)natural_image
Three-step illustration showing a hand holding a device, head down, and face with a magnifying glass (no text or symbols)natural_image
Three-step illustration showing a person performing a medical procedure: head, hand, and torso (no text or symbols)natural_image
Illustration of a medical procedure involving a tool and tubing (no text or symbols)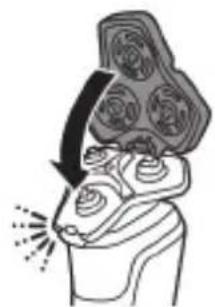
natural_image
Illustration of a human head with a brain and brainstem, showing a highlighted region with arrows (no text or symbols)natural_image
Illustration of a human head with internal organs and an arrow indicating direction (no text or symbols)natural_image
Illustration of a hand holding a plant with roots and a container filled with circular patterns (no text or symbols)natural_image
Diagram of two anatomical structures with no visible text or labelsnatural_image
Illustration of two human head models with arrows indicating motion or force, no text or symbols presentnatural_image
Illustration of a hand holding a device with arrows indicating motion (no text or symbols)natural_image
Diagram of a mechanical device with a spring and lever mechanism, showing internal components (no text or symbols)natural_image
Line drawing of a hand using a tool to adjust or install a mechanical component (no text or symbols visible)natural_image
Diagram showing two mechanical components with arrows indicating rotation or movement, no text or symbols presentnatural_image
Illustration of two hands performing a mechanical operation on a cylindrical component (no text or symbols visible)
natural_image
Simple line drawing of a container with a black 'X' mark and splashing lines, no text or symbols present.
natural_image
Hand holding a cylindrical device with a black arrow pointing to the handle (no text or symbols visible)natural_image
Diagram showing two mechanical components with directional arrows, no text or symbols present1 Gire y retire la parte superior del Quick Clean Pod.

natural_image
Diagram of a hand pressing down on a mechanical component with an arrow indicating motion (no text or symbols present)flowchart
graph TD
    A["Initial Procedure"] --> B{Step ①}
    B --> C["Close-up of circular component"]
    C --> D{Step ②}
    D --> E["Close-up of circular component"]
    E --> F["Final Treatment"]
    F --> G["End"]
Accesorios

Philips North America LLC.
Apartado postal 10313
Stamford | CT 06904
1-800-243-3050
Marcas registradas
This symbol on the product's nameplate means it is listed by Underwriters' Laboratories, Inc.
Norelco and Tripleheader are registered trademarks of Philips North America LLC.
PHILIPS and Philips shield are registered trademarks of Koninklijke Philips N.V.
©2022 Philips North America LLC. All rights reserved.
3000.057.1984.1 (01/19/2022)
- Contents
- IMPORTANT SAFETY INSTRUCTIONS
- DANGER
- To reduce the risk of electric shock:
- WARNING
- Philips Norelco Quick Clean Pod Cartridge fluid
- Electromagnetic fields (EMF)
- FCC Compliance
- SAVE THESE INSTRUCTIONS
- General description
- Introduction - Identify your shaver
- What do the icons on the display mean? (Fig. A)
- - Switching the shaver on
- Icon Meaning
- - Warnings and notifications
- What do the icons on the display mean? (Fig. B)
- Main menu (Fig. A)
- - Remaining battery charge
- - Motion Control sensor
- - Travel lock
- - Bluetooth
- Main menu (Fig. B)
- Remaining battery charge
- Post-shave feedback
- Travel lock
- Light ring on/off
- Bluetooth
- How do I connect my shaver and smartphone? (Fig. A)
- Benefits of connecting your shaver to the app
- Pair the shaver and smartphone
- Synchronize your shaves
- Unpair the shaver and smartphone
- - First, unpair your shaver.
- How do I connect my shaver and smartphone? (Fig. B)
- - Then, unpair your smartphone.
- What is my shaver telling me? (Fig. A)
- Light ring feedback
- Pressure Guard sensor feedback
- Motion Control sensor feedback
- What is my shaver telling me? (Fig. B)
- How do I charge my product?
- Charging with the power cord
- 'Unplug for use' symbol
- Charging in the charging stand
- Shaving
- 21-Day adaptation process
- Cleaning reminder
- Trimming
- How do I clean my shaver?
- Cleaning the shaver under the tap
- Thorough cleaning
- Cleaning the pop-up trimmer
- Never dry the trimmer teeth with a towel or tissue, as this may damage the trimmer teeth.
- How do I use the Quick Clean Pod?
- Preparing the Quick Clean Pod for use
- Do not tilt the Quick Clean Pod to prevent leakage.
- Using the Quick Clean Pod
- Always shake excess water off the shaver before you place it in the Quick Clean Pod.
- Icon Behavior Meaning
- Replacing the Quick Clean Pod Cartridge
- Frequency of use Cycles When to replace
- Storage
- How do I replace the shaving heads?
- Replacing the shaving heads
- Accessories
- Assistance
- Further guidance
- Disposal
- Full Two-Year Warranty
- 45-DAY MONEY-BACK GUARANTEE
- back guarantee return authorization form enclosed.
- We cannot be responsible for lost mail.
- To obtain money-back guarantee service, please go to www.PhilipsMoneyBack.com.
- Supplier's Declaration of Conformity
- FC
- Trademarks
- Contenido
- Marcas registradas
Brand : PHILIPS
Model : Norelco S9500
Category : Electric razor