KA8LDZNMIDA - Deep fryer Kogan - Free user manual and instructions
Find the device manual for free KA8LDZNMIDA Kogan in PDF.


| Product Type | Deep Fryer |
| Brand | Kogan |
| Model | KA8LDZNMIDA |
| Power Consumption | 1800 W |
| Oil Capacity | 2.5 L |
| Food Capacity | 1.2 kg (approx.) |
| Temperature Range | 150–190 °C |
| Adjustable Thermostat | Yes |
| Material | Stainless Steel Body, Non-Stick Coated Basket |
| Dimensions (W x D x H) | 30 x 30 x 25 cm (approx.) |
| Weight | 2.5 kg (approx.) |
| Cool Touch Handle | Yes |
| Safety Features | Overheat Protection, Cool Touch Handle, Safety Switch |
| Indicator Light | Yes (Power and Ready) |
| Non-Slip Feet | Yes |
| Cleaning | Removable oil tank, Dishwasher-safe basket (recommended hand wash) |
| Spare Parts Available | Replacement basket, oil tank, and filters (contact Kogan support) |
| Warranty | 1 Year (check Kogan.com for details) |
| Manual Included | Yes (PDF download available) |
Frequently Asked Questions - KA8LDZNMIDA Kogan
User questions about KA8LDZNMIDA Kogan
0 question about this device. Answer the ones you know or ask your own.
Ask a new question about this device
Download the instructions for your Deep fryer in PDF format for free! Find your manual KA8LDZNMIDA - Kogan and take your electronic device back in hand. On this page are published all the documents necessary for the use of your device. KA8LDZNMIDA by Kogan.
USER MANUAL KA8LDZNMIDA Kogan
natural_image
Exterior view of a modern kogan appliance with two side panels (no text or symbols visible)8L XXL DUAL ZONE AIR FRYER
KA8LDZNMIDA
Safety & Warnings 3
Overview 5
Operation 7
Cleaning & Care 18
Specifications 20
Troubleshooting 21
SAFETY & WARNINGS
Read all instructions carefully before use and retain this user guide for future reference.
Intended Use
- The following safety guidelines are provided to prevent potential risks or damage from improper or unsafe operation of the appliance.
- Upon receipt, inspect the packaging and appliance to ensure everything is intact for safe operation. If you notice any damage, contact help.Kogan.com for support.
- For your safety, modifications or alterations to the appliance are strictly prohibited. Misuse may result in hazardous conditions.
Explanation of Symbols
 | DangerThis symbol indicates that there are dangers to the life and health of persons due to extremely flammable gas. |
 | Warning of Electrical VoltageThis symbol indicates that there is a danger to life and health of persons due to voltage. |
 | WarningThe signal word indicates a hazard with a medium level of risk which, if not avoided, may result in death or serious injury. |
 | CautionThe signal word indicates a hazard with a low degree of risk which, if not avoided, may result in minor or moderate injury. |
 | AttentionThe signal word indicates important information (e.g. damage to property), but not danger. |
 | Observe instructionsThis symbol indicates that a service technician should only operate and maintain this appliance in accordance with the operating instructions. |
Safety Instructions
- If the power cord is damaged, cease use immediately and contact help.Kogan.com for support.
- Do not immerse any part of the appliance in water or other liquids.
- Warning: Avoid spilling any liquids on the connector.
- Do not use the appliance outdoors.
- This appliance is intended for household and similar applications such as:
o Staff kitchen areas in shops, offices, and other working environments.
o Farmhouses.
- By clients in hotels, motels, and other residential-type environments.
- In bed and breakfast-type environments.
- This appliance can be used by children aged 8 years and above, and by persons with reduced physical, sensory, or mental capabilities, or lack of experience and knowledge, provided they are supervised or instructed on the safe use of the appliance and understand the hazards involved.
• Children must not play with the appliance.
- Cleaning and maintenance should not be performed by children unless they are older than 8 years and under supervision.
- Keep the appliance and its power cord out of reach of children under 8 years old.
- Warning: Misuse of the appliance may cause injury.
- The appliance is not intended to be operated by means of an external timer or separate remote-control system.
- Warning: If the surface is cracked, turn off the appliance immediately to prevent the risk of electric shock.
• Always place ingredients in the basket to prevent contact with the heating elements.
- Do not cover the air inlet and outlet openings while the appliance is in operation.
- Do not fill the pan with oil, as this could cause a fire hazard.
- Never touch the interior of the appliance while it is operating.
- During hot air frying, hot steam is released through the air outlet openings. Keep your hands and face at a safe distance from the steam and the air outlet openings.
- Be cautious of hot steam and air when removing the basket from the appliance.
- If you notice dark smoke emitting from the appliance, unplug it immediately. Wait for the smoke to cease before removing the basket.
- The surface of the appliance may become hot during use.
OVERVIEW
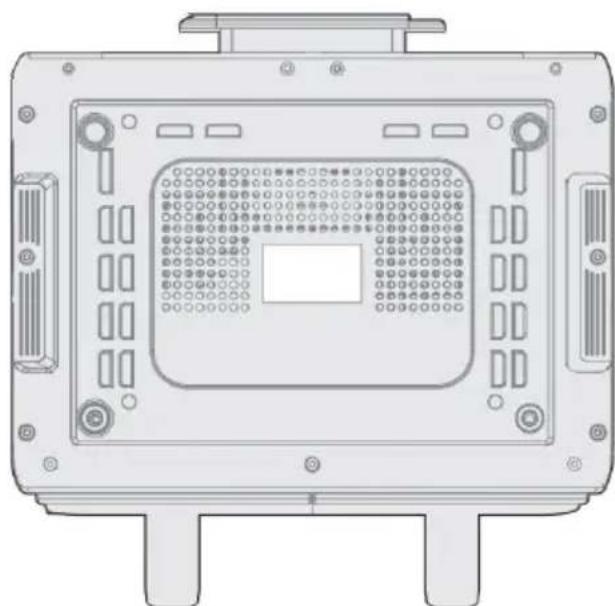
Rating Label
Both the model and serial number can be found on the rating label that is located on the bottom of the air fryer.
natural_image
Top-down view of a device rear panel with internal grid and mounting holes (no text or symbols visible)Front View
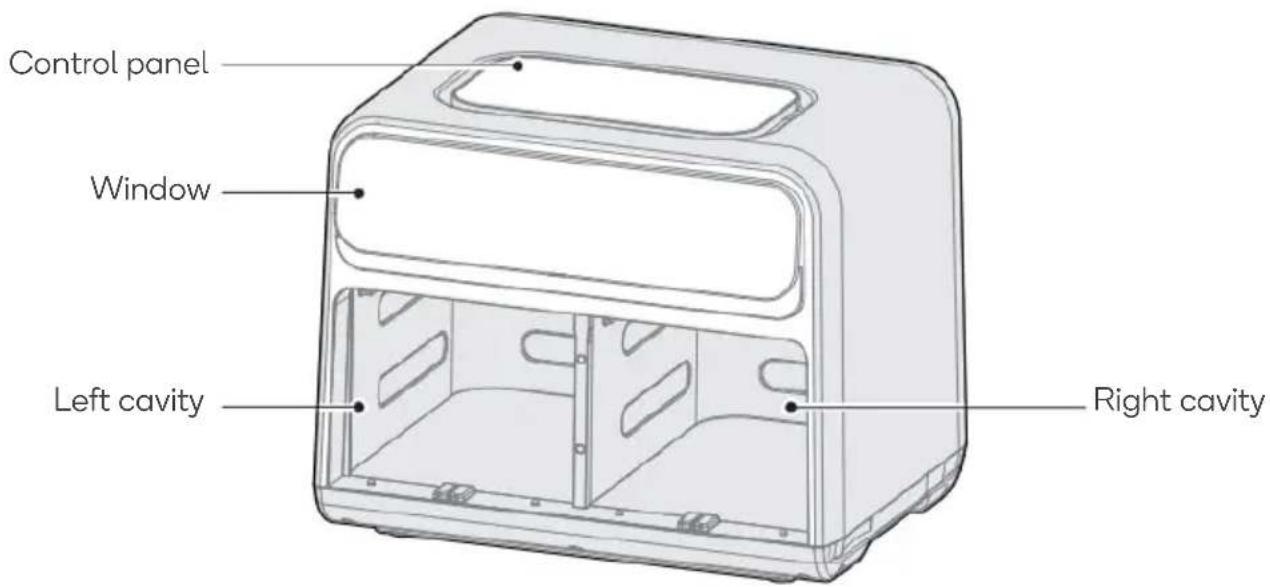
Rear View
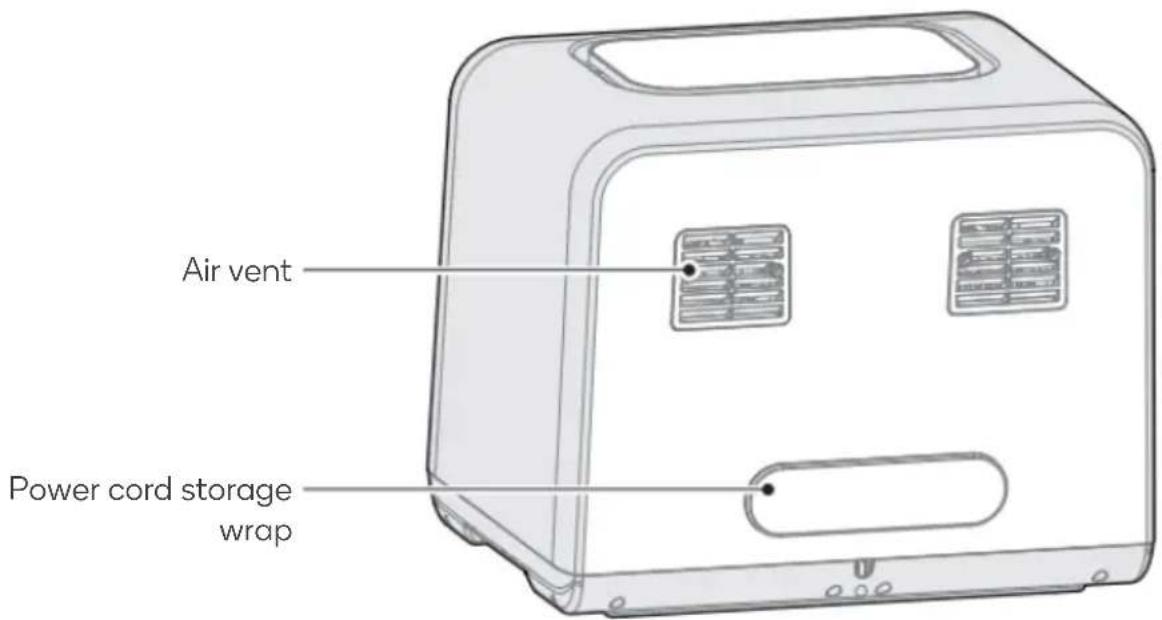
Basket
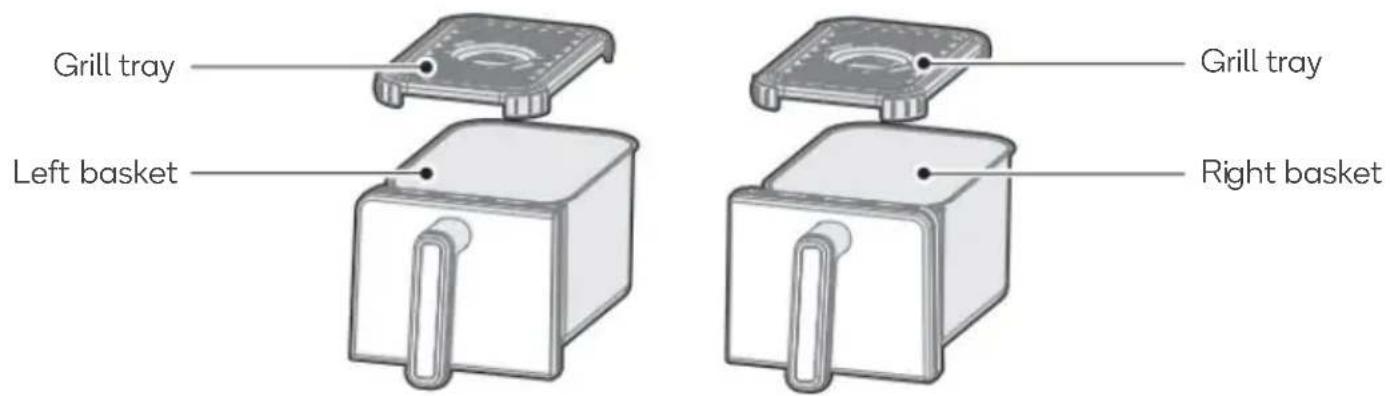
OPERATION
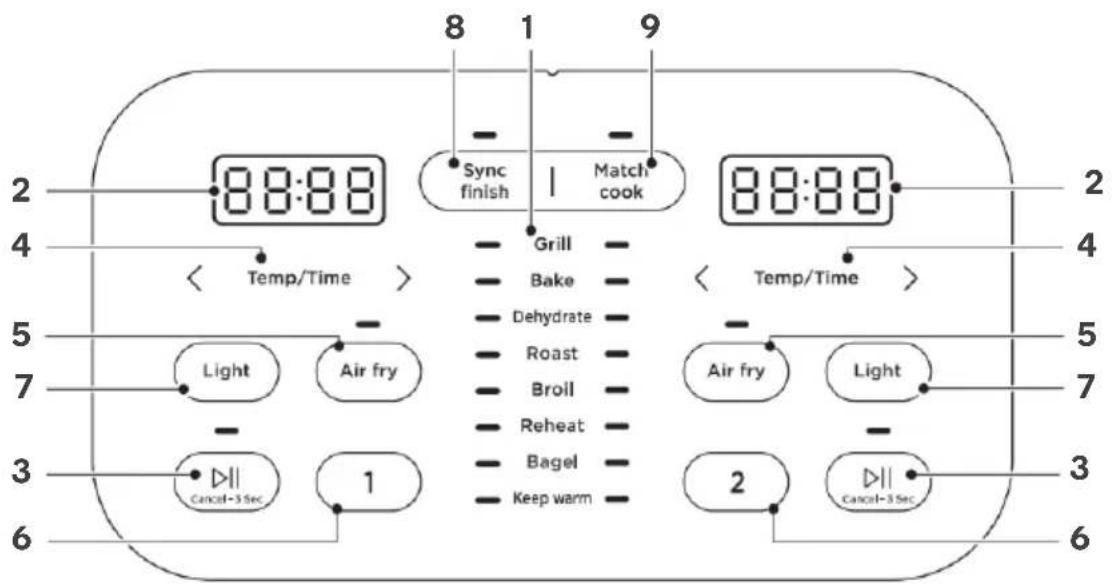
| Name | Description | |
| 1 | Functions | Any of the 9 functions can be used in either the left or right basket to cook a wide variety of meals. The temperature and time settings can be adjusted individually for each function. |
| 2 | Display | Displays the cook time, set temperature, reminder messages, and error messages. |
| 3 | Start/Stop | Press the to start or pause the cooking process.Press and hold to cancel. |
| 4 | Temp/Time | Press the ‘Temp/Time’ to select the time or temperature, then press the arrow buttons to adjust the value. |
| 5 | Air Fry | Press the ‘Air Fry’ button to enter the quick menu for air frying. |
| 6 | Function Selection | Press one of the ‘Function Selection’ button to select the desired function for the corresponding basket, then press the ‘Start/Stop’ button to begin cooking. |
| 7 | Light | Press the ‘Light’ button to turn the interior light on. |
| 8 | Sync Finish | The Sync Finish function ensures both baskets complete cooking simultaneously. After programming both baskets, press ‘Sync Finish’ to start cooking. The basket with less time will display ‘Hold’ until both have the same remaining cook time. |
| 9 | Match Cook | Press the ‘Start/Stop’ button for the other basket, then press ‘Match Cook’ to replicate the same program. |
Display Messages
| Message Description | |
| 00:15 | While programming, the display shows the set cook time. During cooking, it displays the remaining cook time. |
| 150°C | The display indicates the set temperature. |
| End | Cooking is complete, and the left or right basket can be removed. |
| OPEN | The left or right basket has been removed. Note: No buttons for that cavity can be used while it is open. |
| Hold | While the Sync Finish function is activated, the cavity with less cook time will display ‘Hold’ until both cavities have the same remaining cook time. |
| EU | Communication exception: Both the left and right displays show ‘EU’. The buzzer will enter fault mode after 10 rings. Once normal communication is restored, you can press any button to return to standby mode. |
| H or L | In standby mode, the high temperature zone displays ‘H’ and the low temperature zone displays ‘L’. |
Left Cavity Cooking
- Place the grill tray into the basket and evenly distribute the food onto the tray.
- Insert the left basket into the left cavity.
- Plug the air fryer into a suitable electrical outlet. The air fryer will enter standby mode.
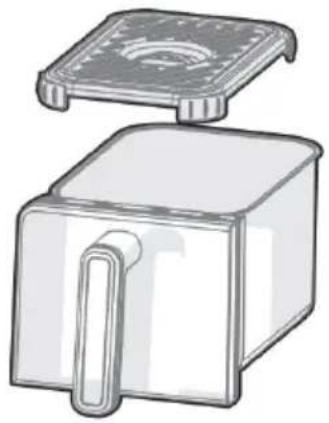
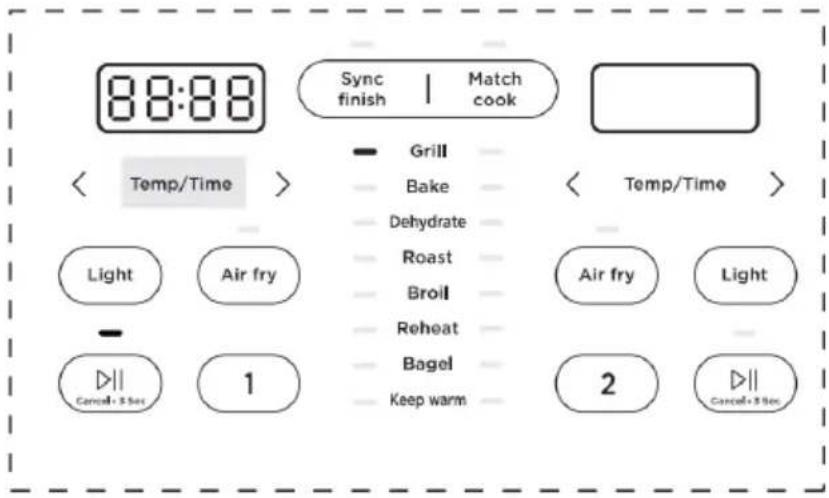
- Press the left basket 'Function Selection' button to choose a function or press the 'Air Fry' button to select the air fry function.
natural_image
Illustration of a square container with a lid and handle, no text or symbols present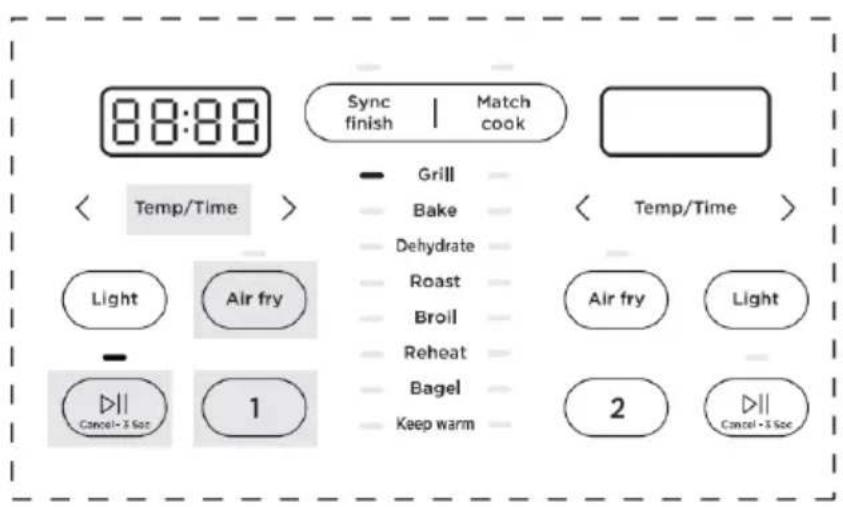
- After selecting a function, press the 'Temp/Time' button on the left to set the time. Use the arrows to adjust the value, then press the 'Temp/Time' button again to set the temperature. Once adjustments are complete, press the 'Start/Stop' button to begin the cooking cycle.
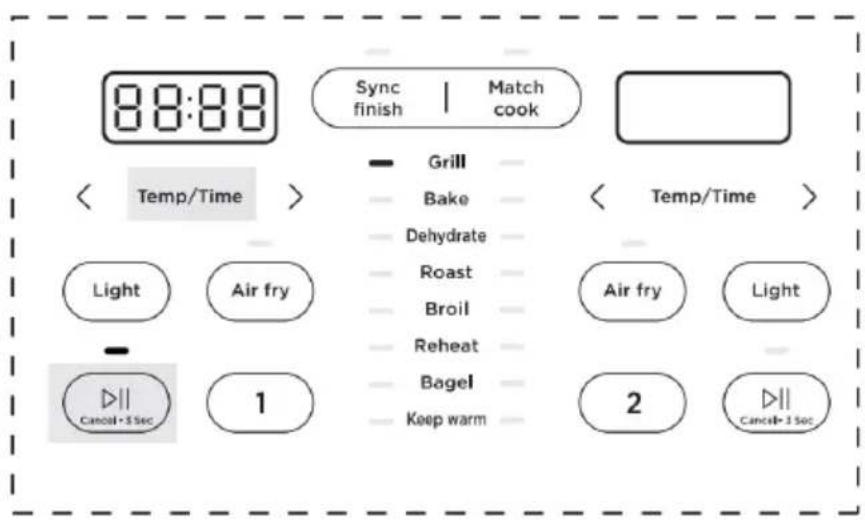
- If you need to adjust the temperature or time during cooking, press the 'Temp/Time' button first, then use the arrows to make adjustments.
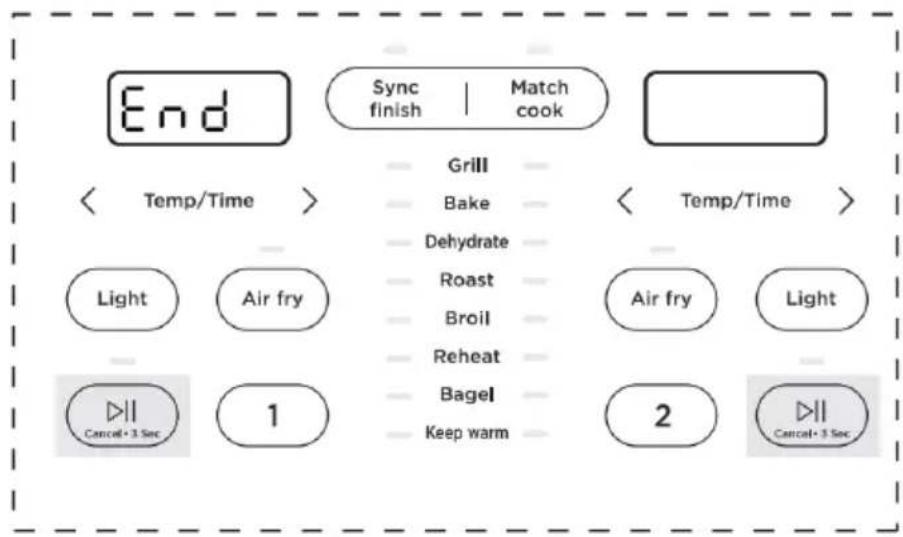
- When the cooking cycle is complete, the left display screen will show 'END', the air fryer will beep 5 times, and all other indicators will turn off. Press the 'Start/Stop' button to return to standby mode. Removing and replacing the basket will also return the unit to standby mode.
Note:
No buttons for the left cavity can be used while the basket is removed.
Right Cavity Cooking
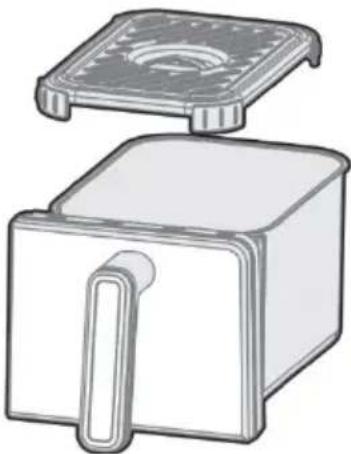
- Place the grill tray into the basket and evenly distribute the food onto the tray.
- Insert the right basket into the right cavity.
- Plug the air fryer into a suitable electrical outlet. The air fryer will enter standby mode.
- Press the right basket 'Function Selection' button to choose a function or press the 'Air Fry' button to select the air fry function.
natural_image
Illustration of a small rectangular device with a lid and handle, no text or symbols present.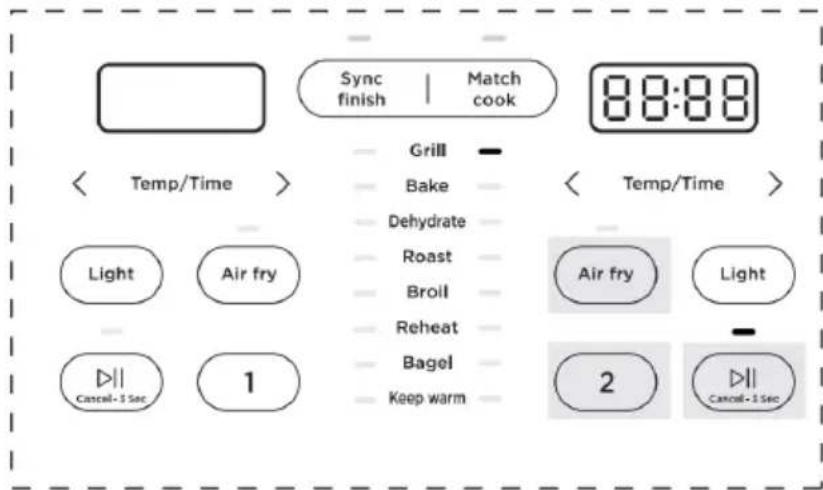
- After selecting a function, press the 'Temp/Time' button on the right to set the time. Use the arrows to adjust the value, then press the 'Temp/Time' button again to set the temperature. Once adjustments are complete, press the 'Start/Stop' button to begin the cooking cycle.
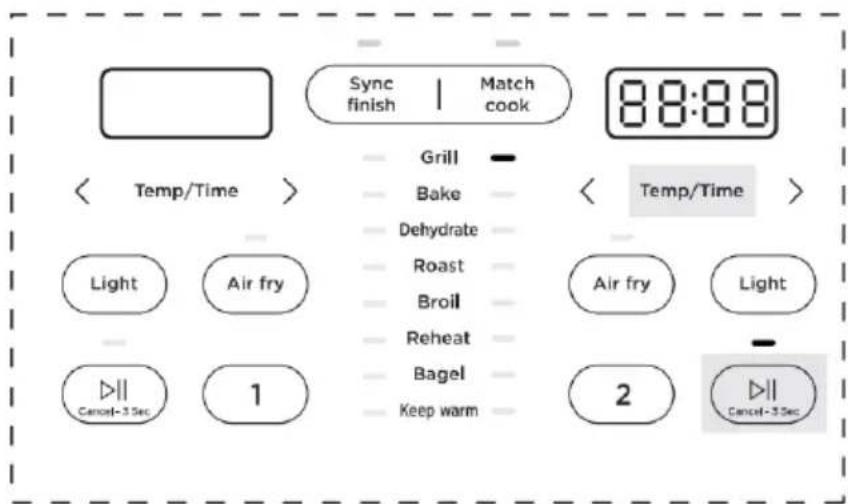
- If you need to adjust the temperature or time during cooking, press the 'Temp/Time' button first, then use the arrows to make adjustments.
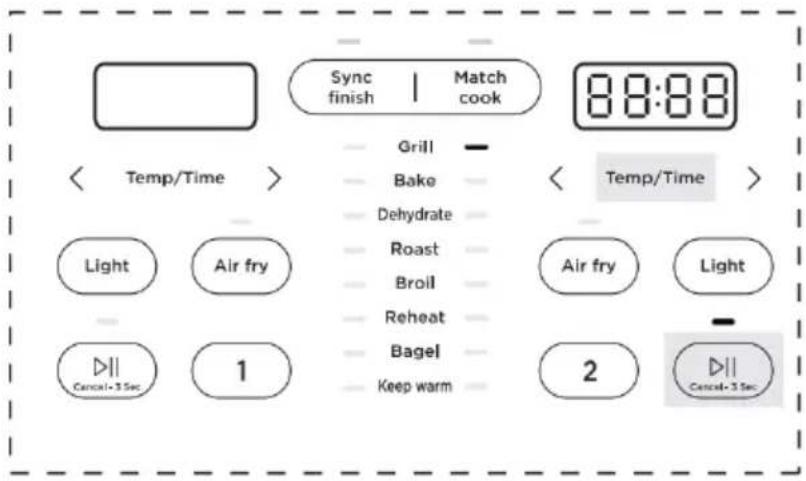
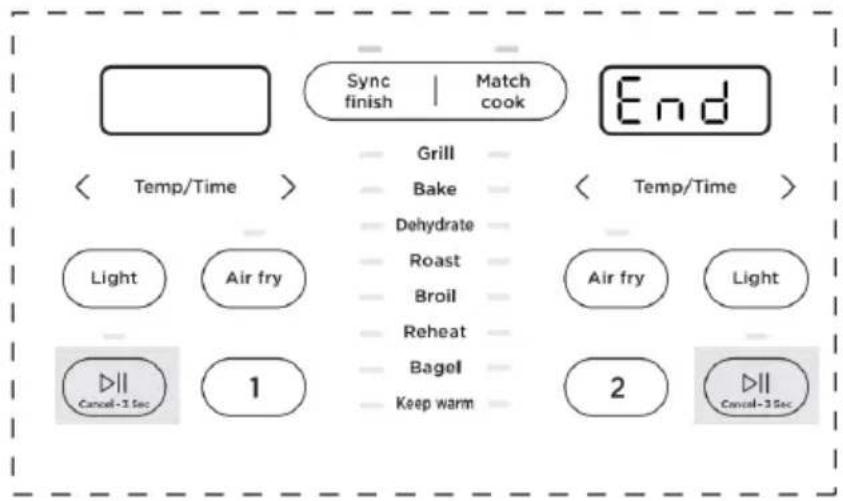
- When the cooking cycle is complete, the right display screen will show 'END', the air fryer will beep 5 times, and all other indicators will turn off. Press the 'Start/Stop' button to return to standby mode. Removing and replacing the basket will also return the unit to standby mode.
flowchart
graph TD
    A[" "] --> B["Sync finish"]
    B --> C["Match cook"]
    C --> D["End"]
    D --> E["Grill"]
    E --> F["Bake"]
    F --> G["Dehydrate"]
    G --> H["Roast"]
    H --> I["Broil"]
    I --> J["Reheat"]
    J --> K["Bagel"]
    K --> L["Keep warm"]
    L --> M["2"]
    M --> N["End"]
    style A fill:#fff,stroke:#000
    style D fill:#fff,stroke:#000
    style E fill:#fff,stroke:#000
    style F fill:#fff,stroke:#000
    style G fill:#fff,stroke:#000
    style H fill:#fff,stroke:#000
    style I fill:#fff,stroke:#000
    style J fill:#fff,stroke:#000
    style K fill:#fff,stroke:#000
    style L fill:#fff,stroke:#000
    style M fill:#fff,stroke:#000
    style N fill:#fff,stroke:#000
Note:
No buttons for the right cavity can be used while the basket is removed.
Dual Zone Cavity Cooking
-
Place the grill tray into the basket and evenly distribute the food onto the tray.
-
Insert the left and right basket into their respective cavities.
-
Plug the air fryer into a suitable electrical outlet. The air fryer will enter standby mode.
-
Press the left basket 'Function Selection' button or the 'Air Fry' button to select a function, then set the temperature and time. Repeat the process by pressing the right basket 'Function Selection' button or the 'Air Fry' button to select a function and set the temperature and time. To run each cavity independently, press the 'Start/Stop' button on each cavity to begin cooking. To start both cavities simultaneously and have them finish cooking at the same time, press 'Sync Finish.' The cavity with less cook time will display 'Hold' until both cavities have the same remaining cook time.
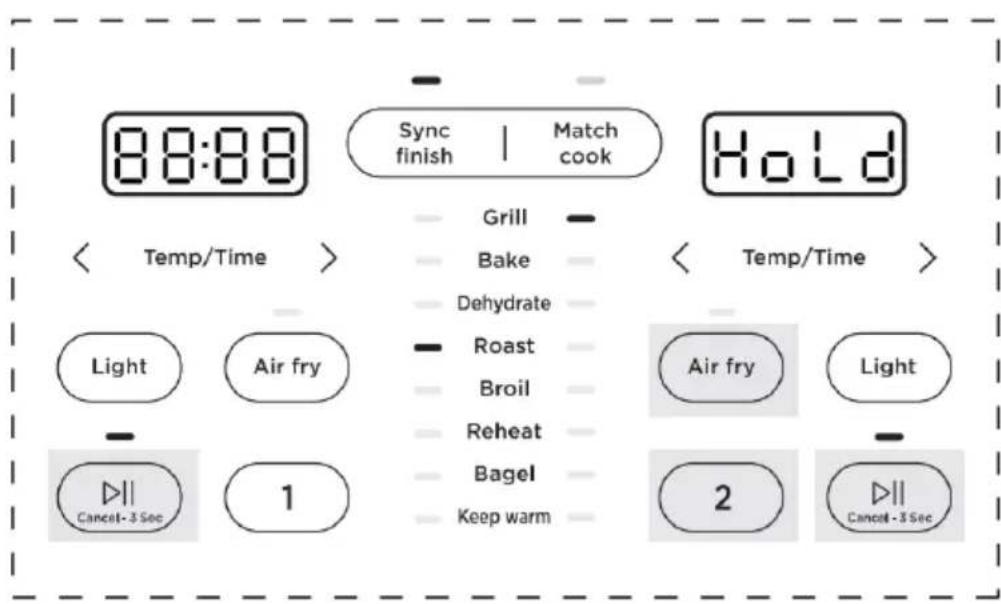
- During the cooking process, if you want to adjust the temperature or time, first press the 'Temp/Time' button. This action will cancel the Sync Finish function. Then, use the arrows to adjust the temperature or time. Once set, cooking will continue without interruption. If you press the 'Start/Stop' button to adjust the temperature and time, press the 'Start/Stop' button again to resume cooking after making the adjustments.
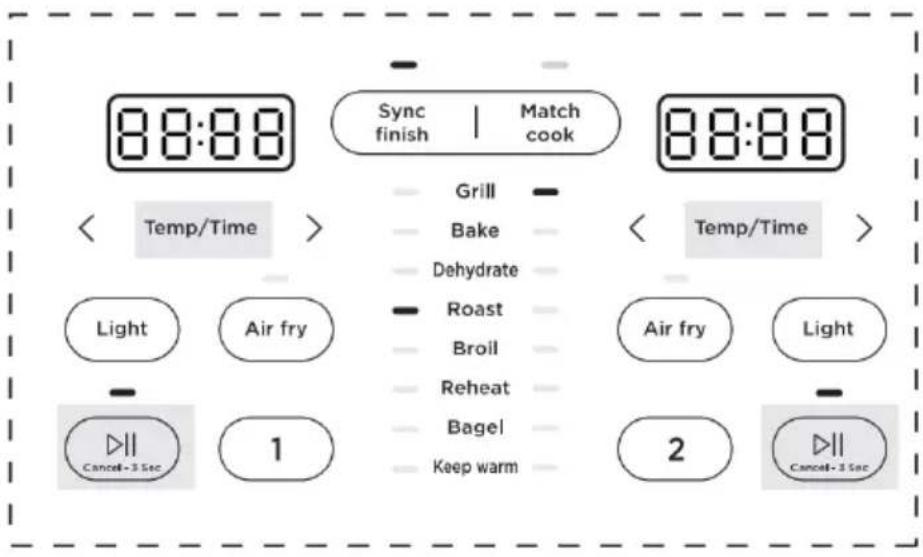
- To synchronise cooking settings for both cavities:
Step 1: Set the first cavity to your desired cooking settings. Do not press 'Start/Stop' for this cavity yet.
Step 2: Press 'Match Cook' to copy the cooking settings to the other cavity.
Step 3: Press the 'Start/Stop' button on either cavity to start an individual cavity cycle, or press 'Sync Finish' to start both cavities simultaneously.
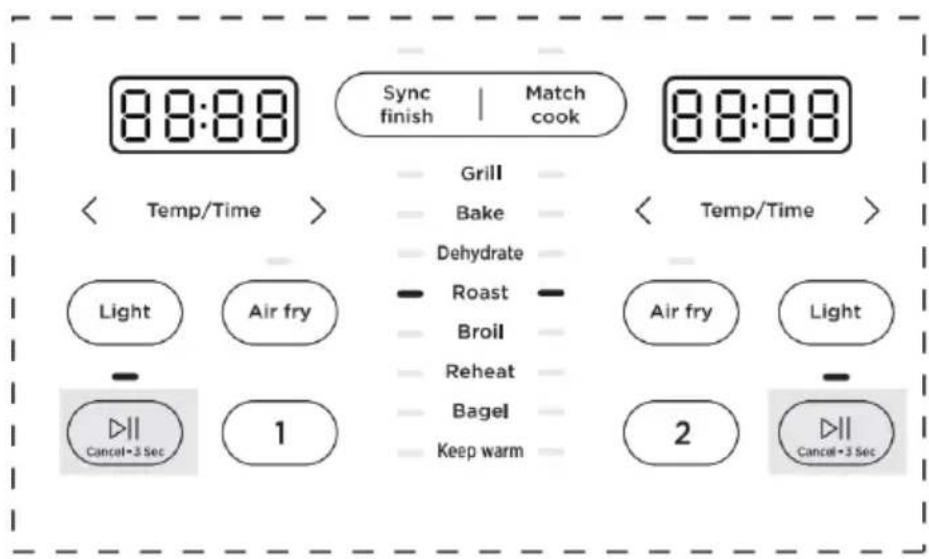
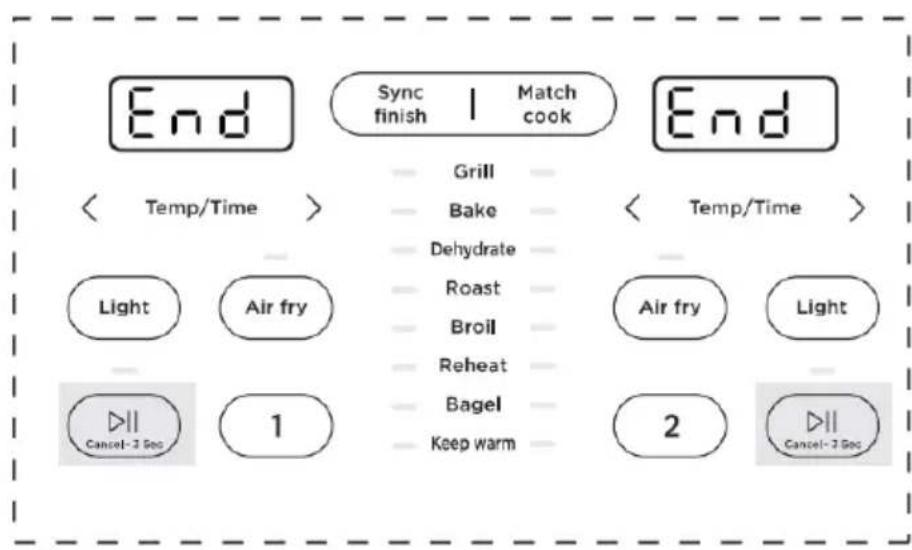
- When the cooking cycle is complete, both display screens will display 'END,' the unit will beep 5 times, and all other indicators will turn off. Press the 'Start/Stop' button to enter standby mode. Removing and replacing the basket will also put the unit into standby mode.
Note:
No buttons for that cavity can be used while the basket is removed.
If a basket is removed while 'Sync Finish' is active, both cavities will pause cooking. Once the basket is reinserted, both cavities will resume cooking simultaneously.
Note:
If the unit remains paused for an extended period, it may be necessary to add more cooking time at the end of the cycle to ensure proper results.

Caution
- To avoid the risk of fire, property damage, and personal injury, do not spray cooking oil into the cooking cavity.
- Do not place any objects on top of the air fryer at any time.
Cooking
- These cooking options give your meals the rich and crispy flavour of deep frying with little to no oil.
- The default time and temperature are a starting point that you can experiment with to get the results you like best.
- The function listed for each food is a recommendation for optimal cooking. Any function can be used in either cavity.
| Ingredient | Recommended Function | Setting | ||
| Amount | Cooking Temp | Time | ||
| Frozen French fries | Air fry | 300g | 180°C | 27min |
| Chicken wings | Air fry | 250g | 190°C | 16min |
| Steak Grill 150g 200°C 12min | ||||
| Chicken leg | Broil | 350g | 190°C | 20min |
| Fish | Grill | 150g | 180°C | 12min |
| Shrimp | Broil 250g 180°C 14min | |||
| Sausage | Broil | 250g | 180°C | 10min |
| Cake | Bake | 6 pieces | 170°C | 13min |
| Pizza | Broil | 100g | 180°C | 8min |
| Bread slice | Roast | 70g | 170°C | 10min |
| Thaw | Air fry | 150g | 80°C | 9min |
| Dried apple | Dehydrate | 45g | 80°C | 120min |
| Reheat | Reheat | 150g | 170°C | 8min |
| Keep warm | Keep warm | / | 75°C | 20min |
Tips
- Always place food evenly on the grill tray for optimal cooking results. Overlapping food may lead to uneven cooking performance.
- For increased crispiness, lightly spray or brush small amounts of oil onto the food before cooking.
- If the air fryer has been paused for more than 10 minutes, it will return to standby mode and clear all existing settings.
- For most foods, turning, shaking, or flipping halfway through cooking will yield the best results.
- Time and temperature can be adjusted at any point during the cooking process.
CLEANING & CARE
Warning
- Without proper cleaning, food and grease splatter may build up around the heating element, potentially causing smoke, fire, and personal injury.
- If you see or smell smoke, press 'Start/Stop,' unplug the appliance, and allow it to cool. Remove food residue or grease with a soft cloth and dish soap.
- DO NOT remove the silicone pad from the grill tray to avoid scratching the coating.
Cleaning
- Clean the basket, crisper plate, and grill tray after each use.
- Always unplug the air fryer and allow it to cool to room temperature before cleaning. Never use harsh chemical detergents, scouring pads, or powders on any of the parts or components.
- Ensure all surfaces are thoroughly dry before use and storage.
| Part or Accessory | Cleaning Method |
| Left/Right Basket | Clean the air fryer basket with a sponge or cloth and warm water and dish soap. Then rinse well. Ensure that all grease and food debris are removed.DO NOT immerse the basket in water or any other liquid.DO NOT clean in the dishwasher. |
| Grill Tray | Clean the grill tray with a cloth or sponge and warm water with dish soap.The grill tray has non-stick coating. To avoid damage to the non-stick coating, DO NOT use metal cleaning utensils.DO NOT clean in the dishwasher. |
| Left Cavity/Right Cavity | Clean the cooking cavity with a sponge or soft cloth and warm water and dish soap.To remove baked-on grease and food residue from the cooking cavity, spray with a mixture of baking soda and vinegar and wipe clean with a damp cloth.For stubborn residue, allow the mixture to sit on the affected area for several minutes before scrubbing clean.Check the heating element for oil spatter and food debris.Clean the heating element with a damp cloth as needed.Ensure the heating element is completely dry before next use.DO NOT clean in the dishwasher. |
| Exterior | Clean with a soft and damp cloth or sponge and wipe dry. |
| Window | Clean the internal and external side of the windows with a cloth or sponge and warm water with dish soap. DO NOT use metal cleaning utensils. |
SPECIFICATIONS
Voltage 220-240V\~
Frequency 50/60Hz
Rated Power 2400W
Capacity 8L
TROUBLESHOOTING
This section summarises the most common problems you may encounter while operating the air fryer. If the solution listed does not resolve the issue, contact help.Kogan.com for support.
| Problem | Possible Cause | Solution |
| ‘OPEN’ displayed. | Crisper basket isn’t assembled correctly. | Remove the crisper basket and firmly push it back into the cavity to ensure it is properly assembled. |
| The fan does not run. | Power isn’t connected. | Contact help.Kogan.com. |
| The motor is damaged or other components are short-circuited. | Contact help.Kogan.com. | |
| Fan noise. | Fan blade deformed. | Contact help.Kogan.com. |
| Unable to push the basket into the unit smoothly. | Fryer edge deformed. | Contact help.Kogan.com. |
| White smoke. | Greasy food is being cooked. | White smoke emitted from the cavity while cooking greasy food is normal. Ensure the air fryer is cleaned after each use to reduce smoke. |
| Grease residue from previous cooking. | Clean the air fryer thoroughly after each use. | |
| No power. | Improper power cord and outlet connection. | Ensure the power cord is firmly plugged into the outlet. If this does not resolve the issue, contact help.Kogan.com. |
| Cannot activate Sync Finish. | Both the left basket and right cavities have not been programmed. | Sync Finish will only activate once both cavities have been set to a cooking function. |
| Cannot pause. Sync | Finish is activated. | Press 'Temp/Time' or the 'Start/Stop' button to cancel the Sync Finish function and perform a single cavity operation. |
| Food undercooked. | Food not placed in an even layer. | For best cooking results, arrange food in an even layer without overlapping. Refer to the cooking instructions for guidance. |
| Difficult to see through windows. | Improper window cleaning. | Clean the interior and exterior of the windows after each use. Refer to 'Cleaning & Care'. |
| Light not activated. | Before looking through the window, activate the lights by touching the 'Light' button. | |
| Difficult to remove or insert basket. | Too much food in the basket. | Avoid piling food too high, as it may contact the top, making it difficult to insert or remove the basket and potentially causing the food to burn. |
| Debris on the basket exterior. | Remove all debris from the exterior of the basket. Refer to 'Cleaning & Care'. |
Error Codes
 | Left cavity upper sensor open circuit protection: The unit has entered fault mode. Disconnect the plug from the electrical outlet, wait 30 seconds, then reconnect the power to reset the unit. If the issue persists, contact help.Kogan.com for support. |
 | Right cavity upper sensor open circuit protection: The unit has entered fault mode. Disconnect the plug from the electrical outlet, wait 30 seconds, then reconnect the power to reset the unit. If the issue persists, contact help.Kogan.com for support. |
 | Left cavity upper sensor short circuit protection: The unit has entered fault mode. Disconnect the plug from the electrical outlet, wait 30 seconds, then reconnect the power to reset the unit. If the issue persists, contact help.Kogan.com for support. |
 | Right cavity upper sensor short circuit protection: The unit has entered fault mode. Disconnect the plug from the electrical outlet, wait 30 seconds, then reconnect the power to reset the unit. If the issue persists, contact help.Kogan.com for support. |
Disposal
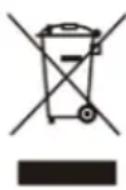
This marking indicates that this appliance should not be disposed with other household wastes. To prevent possible harm to the environment or human health from uncontrolled waste disposal, recycle it responsibly to promote the sustainable reuse of material resources.
Need more information?
We hope that this user guide has given you the assistance needed for a simple set-up.
For the most up-to-date guide for your product, as well as any additional assistance you may require, head online to help.kogan.com
kogan.com
- 8L XXL DUAL ZONE AIR FRYER
- SAFETY & WARNINGS
- Intended Use
- Safety Instructions
- OVERVIEW
- Rating Label
- Rear View
- Basket
- OPERATION
- Left Cavity Cooking
- Note:
- Right Cavity Cooking
- Dual Zone Cavity Cooking
- Caution
- Cooking
- Tips
- CLEANING & CARE
- Warning
- Cleaning
- SPECIFICATIONS
- TROUBLESHOOTING
- Error Codes
- Disposal
- Need more information?
Brand : Kogan
Model : KA8LDZNMIDA
Category : Deep fryer