ES3-80LS - Electric meter ENTES - Free user manual and instructions
Find the device manual for free ES3-80LS ENTES in PDF.


| Product Type | Load Break Switch / Disconnector |
| Model | ENTES ES3-80LS |
| Rated Current | 80 A |
| Rated Voltage | 230/400 V AC |
| Number of Poles | 3 |
| Dimensions (H x W x D) | 85 mm x 70 mm x 50 mm |
| Weight | 0.3 kg |
| Degree of Protection | IP20 |
| Electrical Endurance | 1000 cycles at rated load |
| Mechanical Endurance | 10,000 cycles |
| Mounting Type | DIN rail (EN 60715) |
| Terminal Capacity | Up to 25 mm² (solid/stranded) |
| Operating Temperature | -25°C to +55°C |
| Main Functions | On/off switching, isolation, emergency stop |
| Overload Protection | External fuse or circuit breaker required |
| Maintenance | Clean with dry cloth; no lubrication required |
| Safety Features | Padlockable handle in OFF position |
| Standards Compliance | IEC 60947-3, EN 60947-3 |
| Spare Parts Availability | Contact ENTES service |
| Warranty | 2 years (manufacturer defects) |
Frequently Asked Questions - ES3-80LS ENTES
User questions about ES3-80LS ENTES
0 question about this device. Answer the ones you know or ask your own.
Ask a new question about this device
Download the instructions for your Electric meter in PDF format for free! Find your manual ES3-80LS - ENTES and take your electronic device back in hand. On this page are published all the documents necessary for the use of your device. ES3-80LS by ENTES.
USER MANUAL ES3-80LS ENTES
Safety Warnings.... 3
- Introduction...... 4
1.1 General Specifications 4
1.2 Mechanical and Environmental Conditions.... 5
1.3 Standards.... 5
1.4 Technical Specifications: 5
1.5 Technical Drawing 7
1.6 Connection Diagram 7
1.7 Terminal Structure 7
1.8 Display and GUI design 8
1.8.1 Front Panel View 8
1.8.2 Key Functions 8
1.9 Icons 9
- Usage of Device 9
2.1 Device Opening 9
- Menus 10
3.1 Menu Functions 10
3.1.3.3 Import Inductive Energy 16
3.1.3.4 Export Inductive Energy 17
3.1.3.5 Import Capacitive Energy 17
3.1.3.6 Capacitive Export Energy 17
3.1.3.7 Import Apparent Energy 17
3.1.3.8 Export Apparent Energy 18
3.1.3.9 Generator Active Energy 18
3.1.3.10 Generator Apparent Energy 18
3.1.4 Settings.... 18
3.1.4.1 User Settings 18
3.1.4.3 SETLOG 22
3.1.4.4 SET SCROLL.... 23
3.1.4.5 RS485 24
3.1.4.6 Ethernet Settings 25
3.1.4.7 I/O 27
3.1.4.8 Alarms 28
3.1.4.9 Time 30
Failure to follow the instructions below may result in serious injuries or even death..
- Disconnect all power when installing the device.
- Do not remove the front panel while the device is connected to the mains.
- Do not clean the device with solvent or similar material. Use only a dry cloth.
- Check that the connections are correct before operating the device.
- Contact your authorized dealer if you have any questions about your device.
- The device is for panel mounting only.
- The fuse to be used must be type F and the current limit value must be 1A.
The manufacturer cannot be held responsible for unwanted situations that may emerge due to failure to follow the measures above.
Security
Read the entire operating manual before using the device.
- Connect a switch or a circuit breaker between supply inlets of the product and the mains.
- This switch or circuit breaker must be close to the product.
- Place a mark to indicate that this switch or circuit breaker will be used to separate the product from the mains.
Warranty
The warranty period of the device is 2 (two) years. In case of a malfunction, the product should be repaired by the manufacturing company only. Otherwise, the warranty will be void.
1. Introduction
1.1 General Specifications
- Wide supply range
• 3-Phase Voltage 3-Phase Current measurement
• Active, Reactive, Apparent Energy Measurement
• Alarm options (8 pieces)
• Power Measurement
• 2 Digital input-output - Auto Scroll Mode
- Seal cap
• 8+1 programmable tariffs
• DIN4 Top entry, bottom exit rail mounting - Segment LCD display
- Notification LED
- kWh/kWAh impulse LED
• RS-485 / Ethernet / M BUS communication options
ES Series ENTES is a new generation 3-phase electricity meter. It is designed to measure active, reactive and apparent energy in 3 phase and 1 neutral connected system. It also shows the energy produced and supplied to the network together with the energy consumed in separate endexes. There are also resettable endexes besides the main ones.
It has a real time clock and a battery to protect the clock from power cuts.
There are 8 different tariff indexes. Each day of the week can be divided into 48 parts in 30-minute segments and assigned to that segment from these 8 tariffs. 8 different special tariffs can be defined within 1 year. Special days can be a public or religious holiday. By entering the starting date and time and the ending date and time, it is ensured that the tariff assigned in this interval is valid. When a tariff is active, active and apparent import energies are written into that tariff along with the main endex.
- In addition to energy measurement, it can be monitored on the display and through communication by measuring current, voltage, frequency and power.
- There are demand and max demand function for currents and powers. Demand time can be adjusted. It keeps max demand value in permanent memory.
- It can take all or the desired ones from Energy, Power, Voltage, Current and Pulse logs in adjustable periods. It also keeps event records in permanent memory.
- There are 2 pulse LEDs for active and reactive energy on the front panel. It has 500 pulses per kWh and kVArh.
- It has 2 digital inputs. One of them can be used as generator input. When it is active, the counter writes the measured energy to the generator endexes. Digital inputs can also be set as pulse input. In this case, in addition to the counter, different counters such as water and natural gas counters with pulse output circuits can be connected to provide remote access to such counters. If the function of digital inputs is selected as remote, their status is only read over communication.
- It has 2 digital outputs. It can be selected as remote, alarm or pulse. When Remote is selected, their positions are changed through communication. If the alarm function is selected, they can be assigned as output to any user alarm. If the pulse function is activated, it can be provided to generate pulses according to the selected energy type and pulse rate.
- User alarms can be defined for demands.
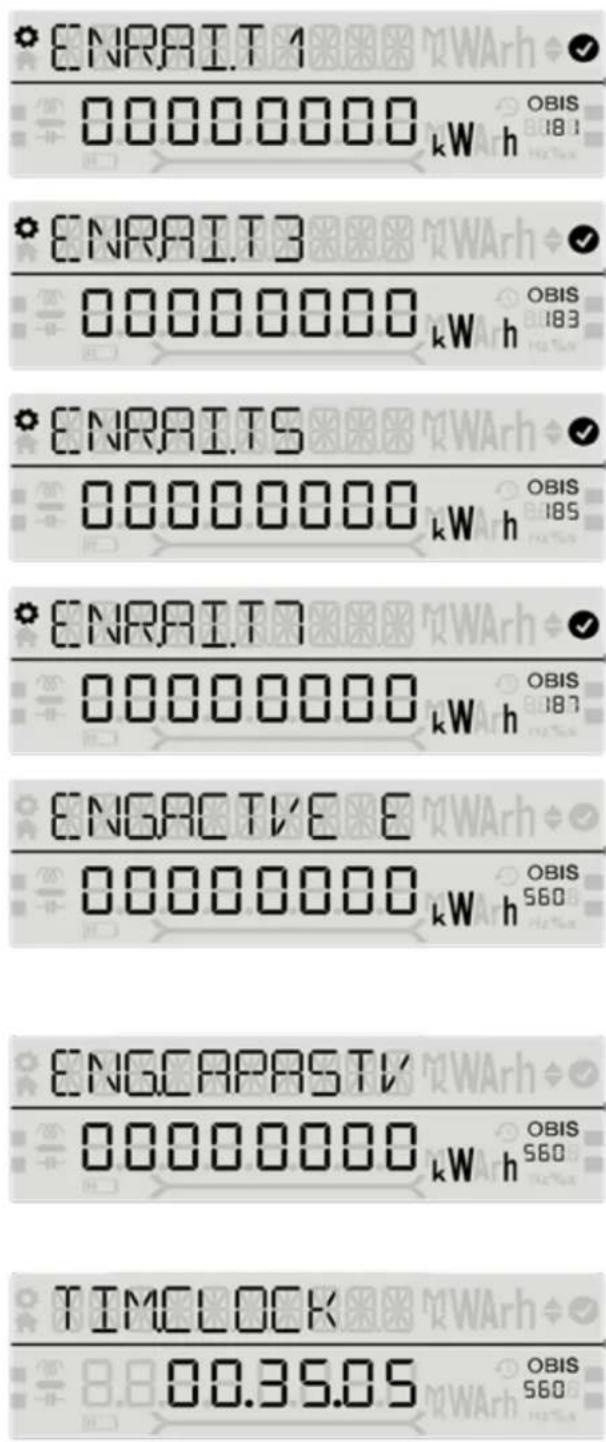
- The parameters shown on the screen start to scroll after the last button use, if activated. Respectively; Total Active Import Energy, T1 - T8 tariff energy indexes, total active export energy, total inductive import energy, total capacitive import energy, date and time are displayed. Display duration of the pages can be adjusted.
1.2 Mechanical and Environmental Conditions
| Operating Conditions Value Range | |
| Dimensions DIN4 | |
| Installation Rail | |
| IP protection IP51 | |
| Display Segment LCD | |
| Button 4 x Universal Interface | |
| Storage Temperature -25/+55 °C | |
| Operating Temperature -30/+80 °C | |
| Maximum Humidity 95% (noncondensing) | |
1.3 Standards
EN 50470-1
EN 50470-3
EN 62053-23
EN 62053-61
EN 62054-21
1.4 Technical Specifications:
| ES3-63LS ES3-80LS ES3-63LE ES3-80LSE | ||||
| Supply Voltage From the measurement input | ||||
| Power Consumption <2W | ||||
| Voltage Range 85 – 265V | ||||
| Current Range | 0,02-63A | 0,02-80A | 0,02-63A | 0,02-80A |
| Active Energy Measurement Class | B(EN-50470-3) | |||
| Reactive Energy Measurement Class | 2(EN-62053-23) | |||
| Current Measurement Class | ± 0.5% | |||
| Voltage Measurement Class | ± 0.5% | |||
| Power Measurement Class | ± 1% | |||
| Starting Current Ist | 0,02A | |||
| Minimum Current | 0,25A | |||
| Transitional Current ltr | 0,5A | |||
| Reference Current Iref | 5A | |||
| Maximum Current | 63A | 80A | 63A | 80A |
| Active Energy Counter Constant | 500imp/kWh | |||
| Reactive Energy Counter Constant | 500imp/kVArh | |||
| Active Energy Pulse Inducator | RED LED | |||
| Reactive Energy Pulse Inducator | RED LED | |||
| Energy Display | 7+1 | |||
| Baud Rate Adjustable 2400/ 48 | 00/ 9600/19200/38400/57600/115200 | |||
| Adress Adjustable 1-247 | ||||
| Parity Adjustable Single / Double / None | ||||
| Internal Memory 16 MB | ||||
| Demand Time Adjustable 1-60 minute(s) | ||||
| Log Time Adjustable 1/2/5/10/15 | 5/20/30/60 minute(s) | |||
| Backlight Duration 30s | ||||
| Autoscroll Time 45s | ||||
| Autoscroll Window Transition Time | Adjustable 1-60s | |||
| Dimensions 35mm rail installation DIN-4 | ||||
| Button 4 x Universal Interface | ||||
| Number of Digital Input 2 | ||||
| Digital Input Voltage Range 5-24VDC 30Vmax | ||||
| Number of Digital Output 2 | ||||
| Digital Output Voltage Range 5-24VDC 30Vmax | ||||
| Digital Output Open Collector Max Current | 30mA | |||
| Time Clock Accuracy | ±0.5 s/day | |||
| Pulse Output Parameter | Adjustable Active Import/Active Export/Capasitive Import/Capasitive Export/Inductive Import/Inductive Export/Apparent Import/Apparent Export/Active Generator/Apparent Generator Energy | |||
| Pulse Rate | Adjustable 1/10/100/1000/10000/100000/1000000 W/VA/Var h/imp | |||
| Battery (for RTC) | Replaceable CR 2032 | |||
| Battery Life | 10 years | |||
1.5 Technical Drawing
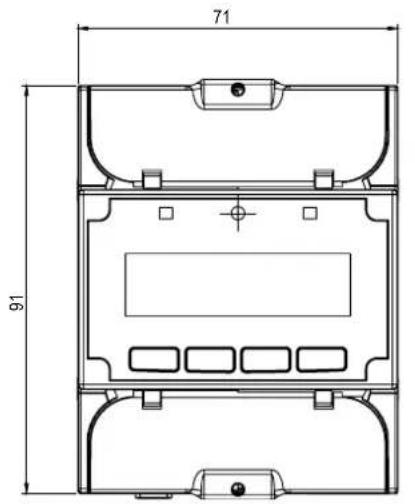
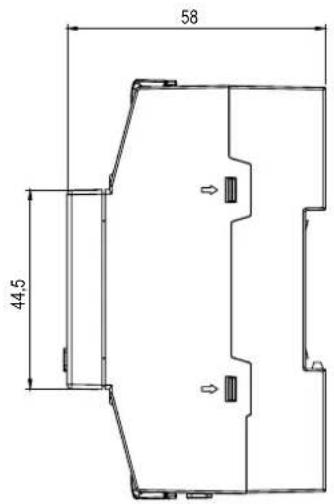
1.6 Connection Diagram


1.7 Terminal Structure
| Modbus Ethernet | ||
| Main Terminal Cable Section 2,5 – 25mm | ^2 | 2,5 – 25mm ^2 |
| Digital Input Cable Section 1,5mm | ^2 | 1,5mm ^2 |
| Digital Output Cable Section 1mm | ^2 | 1mm ^2 |
| Communication Cable Section 1,5mm | ^2 | RJ45 |
1.8 Display and GUI design
1.8.1 Front Panel View
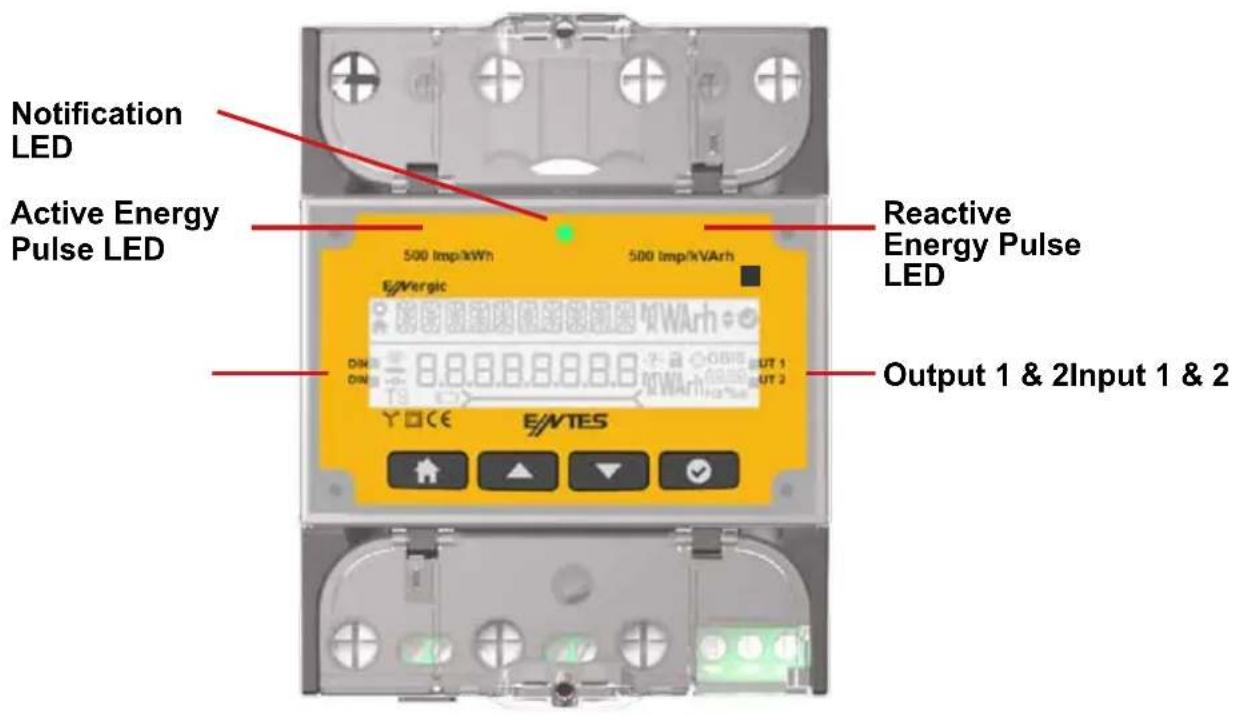
1.8.2 Key Functions
| Button |  |  |  |  |
| Description Home Up Down OK | ||||
1.9 Icons
| Icon Description Icon Picture | |
| Settings |  |
| Home |  |
| Up and down |  |
| Capacitive |  |
| Inductive |  |
| OK |  |
| Tariff |  |
| Battery Level(When the battery runs out, the icon lights up) |  |
| Critical Connection Error |  |
| Seal Cover |  |
| Auto Scroll |  |
| Obis Codes |   |
Total Active Import Energy= "1.8.0"
T1 Active Import Energy = "1.8.1"
T2 Active Import Energy = "1.8.2"
T3 Active Import Energy = "1.8.3"
T4 Active Import Energy = "1.8.4"
T5 Active Import Energy = "1.8.5"
T6 Active Import Energy = "1.8.6"
T7 Active Import Energy = "1.8.7"
T8 Active Import Energy = "1.8.8"
Generator Active Import Energy = "1.8.9"
Total Active Export Energy = "2.8.0"
Inductive Import Energy = "5.8.0"
Inductive Export Energy = "7.8.0"
Capacitive Import Energy = "8.8.0"
Capacitive Export Energy = "6.8.0"
L1 Voltage = "32.7.0"
L2 Voltage = "52.7.0"
L3 Voltage = "72.7.0"
L1 Current = "31.7.0"
L2 Current = "51.7.0"
L3 Current = "71.7.0"
Frequency = "14.7.0"
Date = "0.9.2"
Clock = "0.9.1"
2. Usage of Device
2.1 Device Opening
At the first start of your device, the language selection menu will appear and Tutorial Mode will be active. After the tutorial mode screens, you can see the Region Selection, (Hour Setting, Minute Setting, Second Setting), Date Setting, (Enter Year, Enter Month, Enter Day), Nominal Hz, Nominal Voltage, Counter Type configuration screens. If the power is cut off without saving the settings, these setting selections will be displayed again at the next startup.
3. Menus
Your device has 4 main menus. These main menus are as follows;
• Measurements
Power
- Energy
- Settings
3.1 Menu Functions
You can see the menu related functions in this section.
3.1.1 Measurement
Measurement menus appear on this screen. You can enter the detail menu by pressing the OK button.

3.1.1.1 Voltage
Phase-Neutral 1 voltage values of the phases are displayed in this menu. Pressing the OK button, you can switch between the Minimum Voltage (Phase-Neutral) and Maximum Voltage (Phase-Neutral) menus with the up&down buttons.
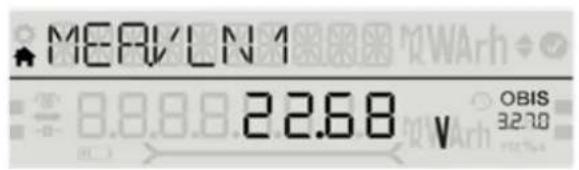
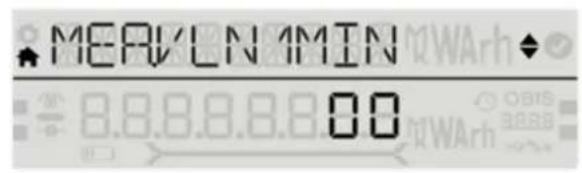

Phase-Neutral 2 voltage values of the phases are displayed in this menu. Pressing the OK button, you can switch between the Minimum Voltage (Phase-Neutral) and Maximum Voltage (Phase-Neutral) menus with the up&down buttons.


Phase-Neutral 3 voltage values of the phases are displayed in this menu. Pressing the OK button, you can switch between the Minimum Voltage (Phase-Neutral) and Maximum Voltage (Phase-Neutral) menus with the up&down buttons.


Phase-Phase 1-2 voltage values are displayed in this menu. You can switch between the Minimum Voltage (Phase-Phase) and Maximum Voltage (Phase-Phase) menus with the up&down buttons by pressing the OK button.


Phase-Phase 2-3 voltage values are displayed in this menu. You can switch between the Minimum Voltage (Phase-Phase) and Maximum Voltage (Phase-Phase) menus with the up&down buttons by pressing the OK button.
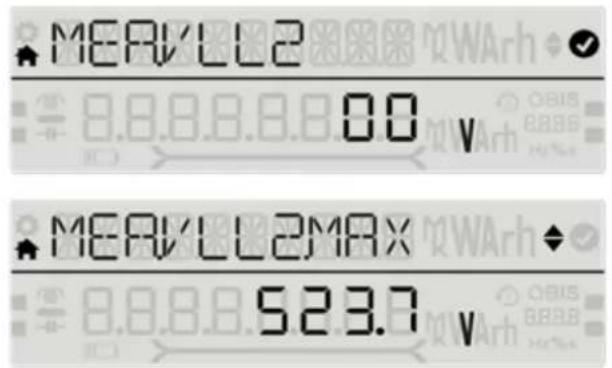
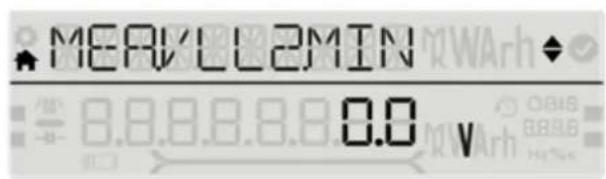
Phase-Phase 3-1 voltage values are displayed in this menu. You can switch between the Minimum Voltage (Phase-Phase) and Maximum Voltage (Phase-Phase) menus with the up&down buttons by pressing the OK button.


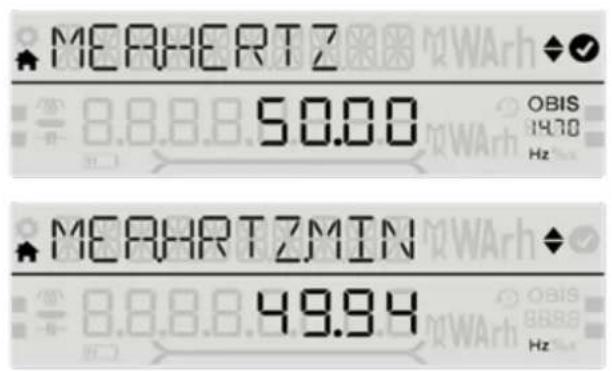
3.1.1.2 Frequency
You can view the Frequency menu by pressing the up&down buttons. You can switch between the minimum and maximum menus with the up&down buttons by pressing the OK button.

3.1.1.3 Current
This screen displays the current values measured instantaneously for each Phase. You can see the values of Min Current (Phase-Neutral), Max Current (Phase-Neutral), Demand (Phase-Neutral) and Max Demand (Phase-Neutral) by pressing the OK button.
Below you can see the current value in phase L 1.
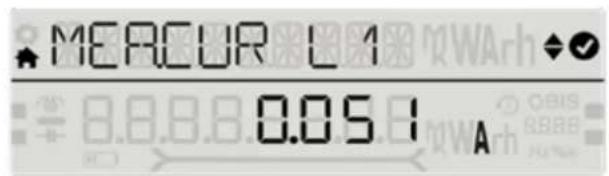
You can switch between the Minimum, Maximum, Demand and Maximum Demand menus with the up&down buttons by pressing the OK button.


Below you can see the current value in phase L 2.
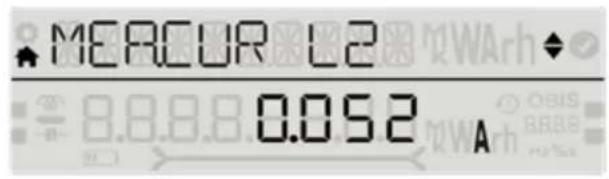
You can switch between the Minimum, Maximum, Demand and Maximum Demand menus with the up&down buttons by pressing the OK button.


Below you can see the current value in phase L 3.
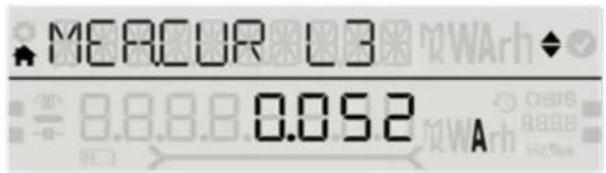
You can switch between the minimum, maximum, demand and maximum demand menus with the up&down buttons by pressing the OK button.


3.1.2 Power Menu
Power menus appear on this screen. You can enter the detail menu by pressing the OK button.

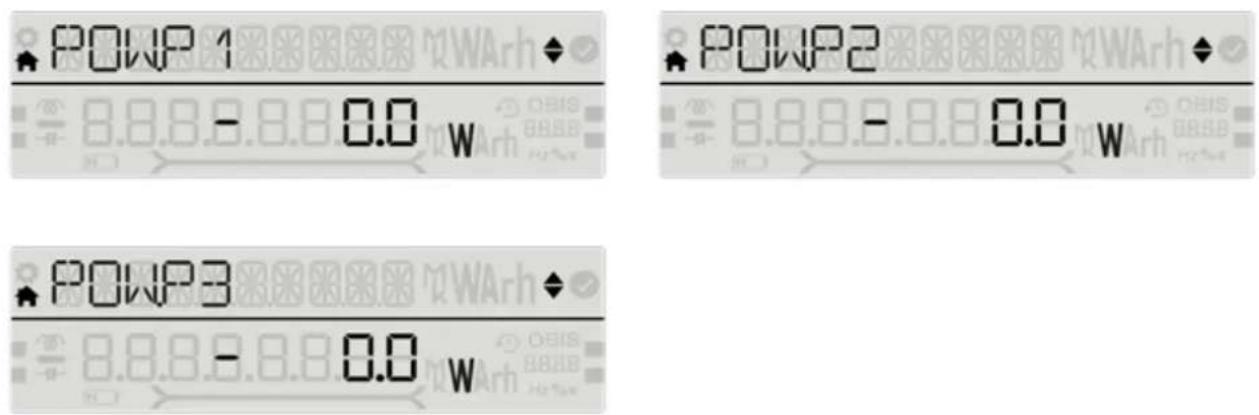
3.1.2.1 Active Power
You can access Active Power menu with up&down buttons in the power menu.
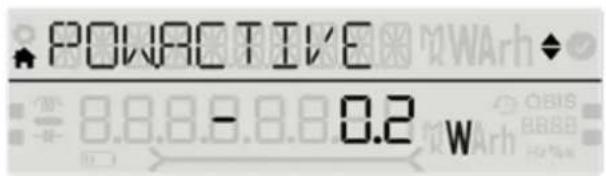
You can switch between the Minimum, Maximum, Demand and Max Demand menus with the up& down buttons by pressing the OK button.

You can switch between active powers belonging to phases with up&down buttons.
3.1.2.2 Reactive Power
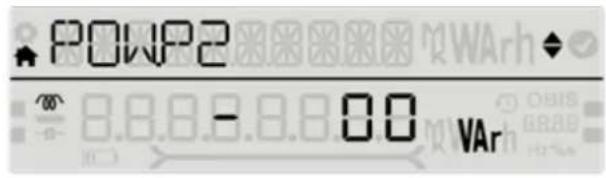
You can access Reactive Power menu with up&down buttons in the power menu.

You can switch between the Minimum, Maximum, Demand and Max Demand menus with the up&down buttons by pressing the OK button.

You can switch between reactive powers belonging to phases with up&down buttons.


3.1.2.3 Apparent Power
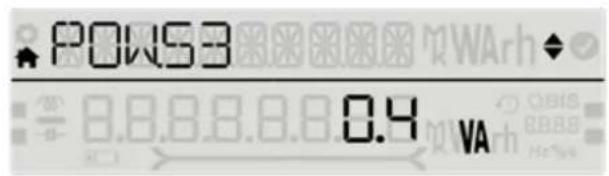
You can access the Apparent Power menu with the up&down buttons in the power menu.

You can switch between the Minimum, Maximum, Demand and Max Demand menus with the up& down buttons by pressing the OK button.


You can switch between apparent powers belonging to phases with up&down buttons.


3.1.3 Energy Menu
Energy menus can be seen on this screen. You can enter the detail menu by pressing the OK button.

3.1.3.1 Active Import Energy
You can view the Active Import Energy screen by pressing the OK button.
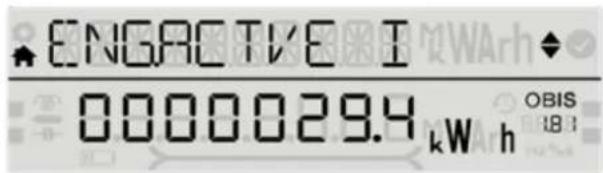
You can switch between tariffs by pressing the OK button.

3.1.3.2 Active Export Energy
You can access Active Export Energy menu with up&down buttons in the energy menu.

3.1.3.3 Import Inductive Energy
You can access the Generator Inductive Energy menu with the up&down buttons in the energy menu
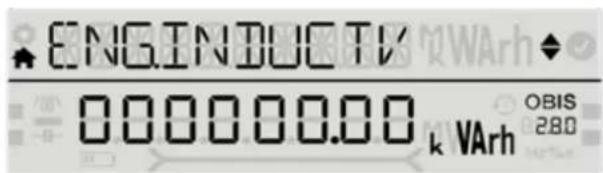
3.1.3.4 Export Inductive Energy
You can access the Generator Export Energy menu with the up&down buttons in the energy menu.

3.1.3.5 Import Capacitive Energy
You can access the Capacitive Energy menu with up&down buttons in the energy menu.
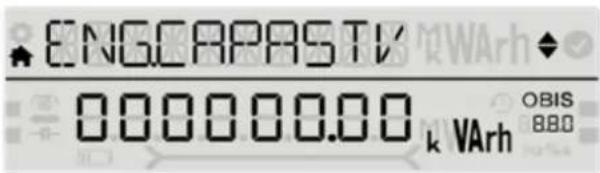
3.1.3.6 Capacitive Export Energy
You can access the Capacitive Export Energy menu with up&down buttons in the energy menu.

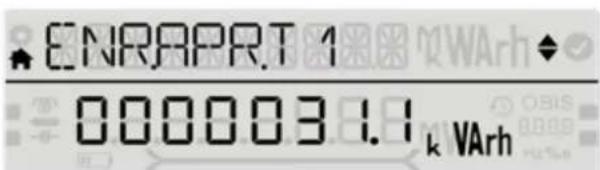
3.1.3.7 Import Apparent Energy
You can access the Apparent Energy menu with up&down buttons in the energy menu.

You can switch between tariffs by pressing the OK button
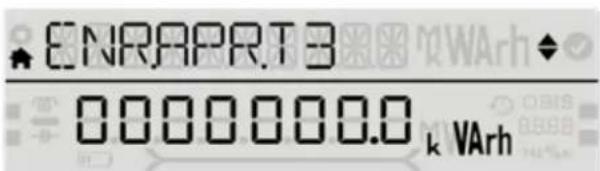
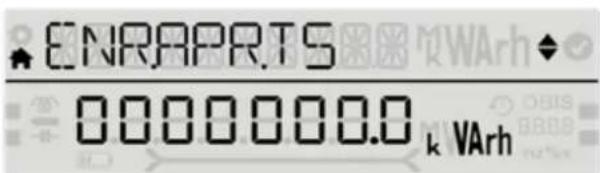


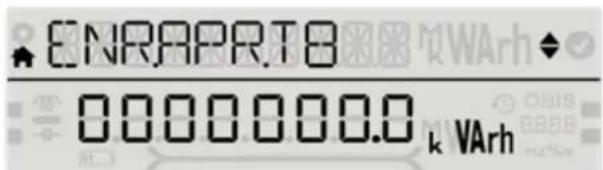
3.1.3.8 Export Apparent Energy
You can see the Export Apparent Energy menu with up&down buttons in the energy menu.
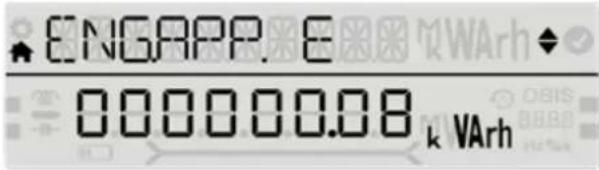
3.1.3.9 Generator Active Energy
You can access the Generator Active Energy menu with up&down buttons in the energy menu.

3.1.3.10 Generator Apparent Energy
You can access the Generator Apparent Energy menu with the up&down buttons in the energy menu.

3.1.4 Settings
You can configure the setting parameters of the device by entering the settings menu. If you want to make an operation in the settings menu or make changes in the current settings, you can enter the menu detail with the help of the OK button and change the device or user settings in the Settings menu.

3.1.4.1 User Settings
You can configure user settings by pressing the OK button.

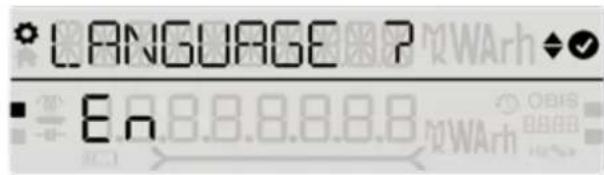
3.1.4.1.1 User Language Setting
This is the menu where you can set the language for your device. After pressing the OK button, you can choose between Turkish, French, German and English language options with the up and down buttons.




3.1.4.1.2 Screen Light Setting
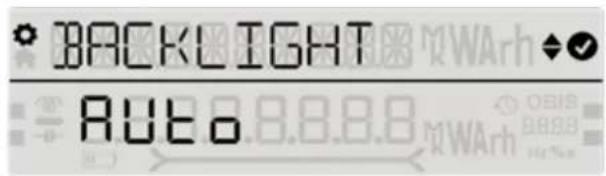
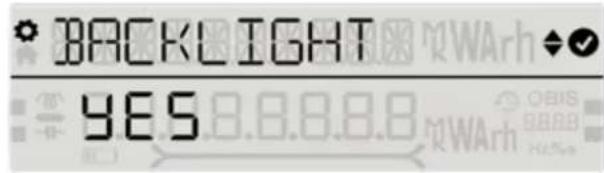
This is a sub-menu where you can adjust the Display Light for your device. You can make the changes you want to make regarding the device screen light in Settings- User Settings- BACKLIGHT submenu. When you enter the menu, the device will offer you the Yes, No and Automatic options. If you want the background light to be lit continuously, select Yes, if you want the background to be turned off No, if you want the background light to flash for a certain time and then turn off the automatic option.


3.1.4.1.3 User Security Settings
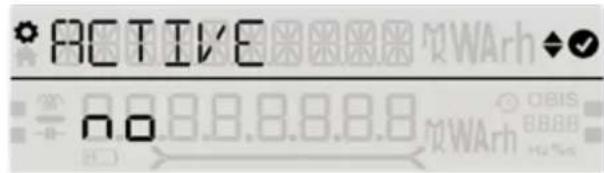
If you want the password option to be active or inactive on your device, you can change this setting in the Settings-User Settings-USER SECURITY submenu. By choosing Yes or No, you can turn the security on or off.


3.1.4.1.4 User Password Settings
You can make changes to your current password by entering Settings- User Settings- USER PASSWORD submenu. On this screen, you can create the password you will use for the security of the device. On the first screen, the current password is entered. If it is entered correctly, the ENTER NEW PASSWORD screen appears. The ENTER AGAIN screen appears to confirm the new password. In order for the new password to be active, the save confirmation must be selected as YES when exiting the settings, as in all settings.

3.1.4.1.5 User Face Setting (Smiley Mode)
You can change the settings related to the smiley mode in the Settings- User Settings- USR.SMILEY menu. You can save the change by selecting one of the options yes (smiley mode is active) or no (smiley mode is disabled).

3.1.4.1.6 User Mode Settings
It is the screen where the user mode is selected. User mode can be selected as simple or advanced. Some parameters below are active in advanced user mode (changes on the basis of parameters). The menus active in the advanced user mode are: Log settings, Baud rate setting and Parity setting.

3.1.4.2 Installation Settings
It is the screen where the setup settings are selected. You can operate in the menu with up&down buttons.

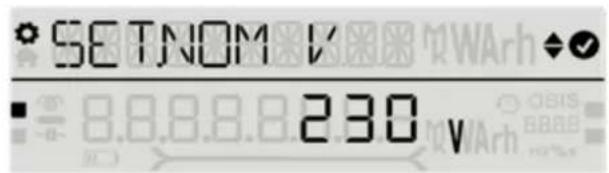
3.1.4.2.1 Nominal Voltage Setting
In this menu you can configure the Nominal Voltage setup settings.

3.1.4.2.2 Nominal Frequency Setting
In this menu you can configure the Nominal Frequency settings.


You can set the demand time in this menu.

3.1.4.3 SETLOG
In this menu, you can adjust the log time.

After pressing the OK button, you can set the period minutes from this menu.
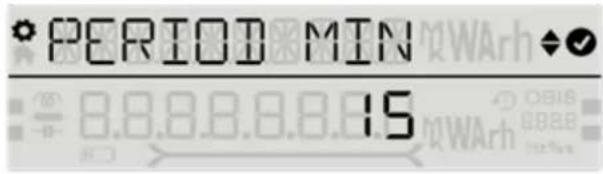
After pressing the OK button, you can configure the settings of the Energy, Power, Voltage, Current and Pulse logs and get the desired values in adjustable periods.

3.1.4.4 SET SCROLL
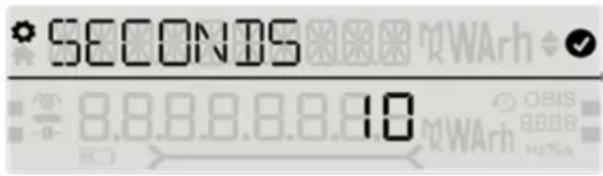
You can set the Auto Scroll mode in this menu. After pressing the OK button, you can make adjustments with the ON / OFF options. If you select ON, the device will switch to Auto Scroll mode after the seal cap is closed. In this mode, the following screens will be shown sequentially. If Off is selected, the device Smiley mode will be activated. Smiley will appear on the screen. The device is manufactured with the Scroll setting On as factory.


Please select the seconds between screens and press the OK button to set the scroll time.
When you activate the Auto Scroll mode, the screens you will see after 45 seconds are shown below.

3.1.4.5 RS485
This menu is the section where RS485 communication protocol settings are made. Communication settings of the device are made through this menu. Modbus address, bit rate, parity (parity rate) settings of the device are made through this menu.

You can view RS 485 screen by pressing the OK button.

You can enter the modbus address of your device on this screen.
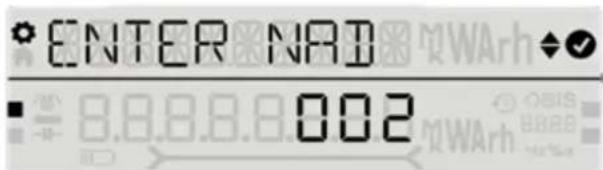
You can view the data transfer rate per second by pressing the OK button. This parameter can be set as one of 2.4, 4.8, 9.6,19.2, 38.4,115.2 kbps values. The value of this parameter and the value in the software you use to communicate with the device must be the same. Otherwise, you cannot communicate with the device.

You can set your device's parity bit as None, Odd and Even. The value of this parameter and the value in the software you use to communicate with the device must be the same. Otherwise, you cannot communicate with the device.


You can view the status of your communication protocol on this screen. It indicates whether communication has been made with the device within 60 seconds.
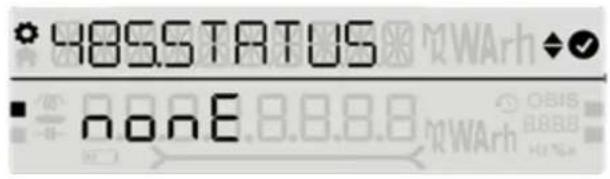
3.1.4.6 Ethernet Settings
You can configure the Ethernet settings of your device in this menu. You can set the Ethernet addresses received by your device in this menu.

3.1.4.6.1 Ethernet Mode
On this screen, you can set your device's Ethernet mode as Automatic, Client or Server. You can set the Ethernet mode by pressing the OK button.

When Ethernet setting is selected as Server, you can use your device in server mode.

When the Ethernet setting is selected as client, you can use your device in Client mode.

This mode is the mode in which your device automatically connects to the energy doctor. (While your device is in this mode, DHCP and Port settings cannot be viewed from the Ethernet settings.)

3.1.4.6.2 DHCP Setting
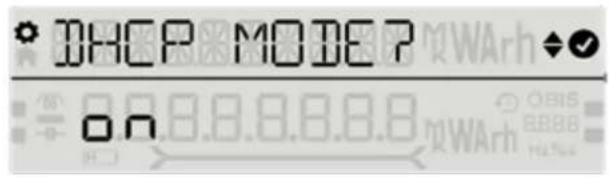
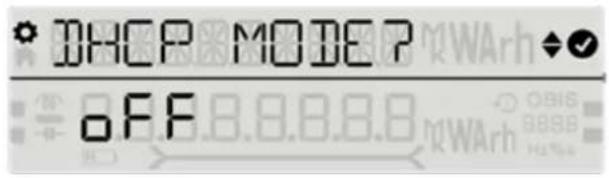
While the Client or Server mode is selected, you can configure your device's DHCP settings as ON and OFF as follows.

You can proceed by pressing the OK button.
3.1.4.6.3 IP Setting
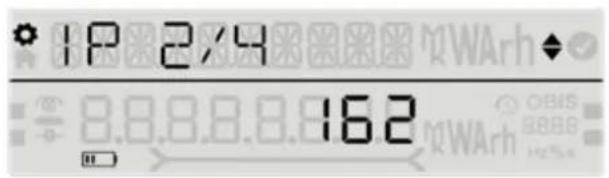
On this screen, you can view your device's Ethernet IP information in 4 octets alternately.

You can proceed by pressing the OK button.



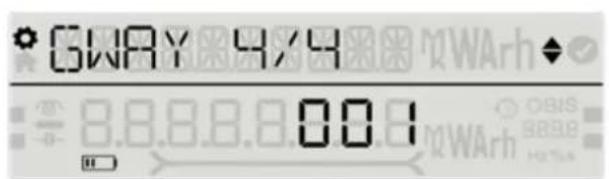
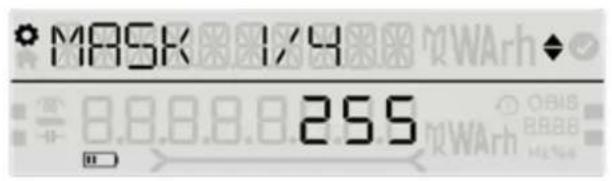


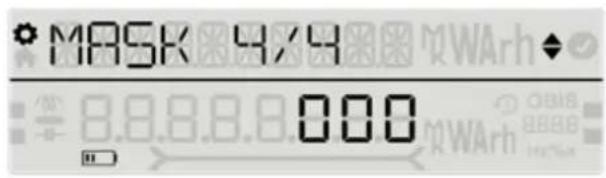
3.1.4.6.4 DNS Setting
You can view the Ethernet DNS information on this screen.

You can proceed by pressing the OK button.
3.1.4.6.5 Port Setting
You can configure the port settings of your device in this menu. Click the OK button to configure your port settings.


3.1.4.7 I/O
In this menu, you can set input and output. You can see the input 1&input 2 settings with the up&down buttons on this screen..

3.1.4.7.1 Input 1
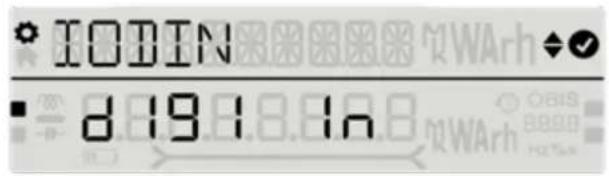
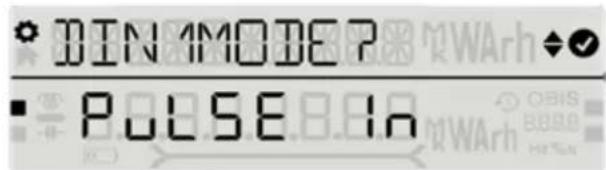
After pressing the OK button, you can change the settings of the inputs in Input 1 as follows. In this option it is set to digital Input.

This option is set as generator input.

This option is set as pulse input.
3.1.4.7.2 Output 1
You can see the Output 1&Output 2 settings with the up&down buttons on this screen.
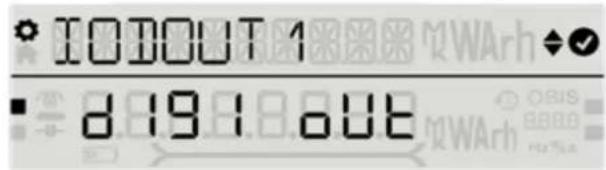
After pressing the OK button, you can adjust the settings of the Output 1 inputs as follows.
You can view the digital output status on this screen. You can connect to any alarm on your device and have it output when an alarm occurs.
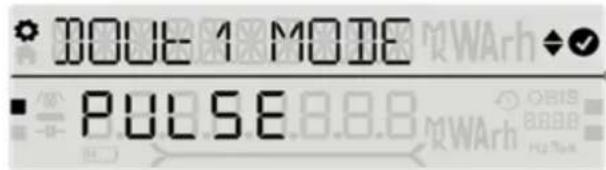
Pulse Output:
After selecting Pulse Output, counter type, pulse rate, pulse width, pulse gap can be selected from the menus that appear.
When remote mode is selected, the output is programmed so that it can be switched on and off remotely.

3.1.4.8 Alarms
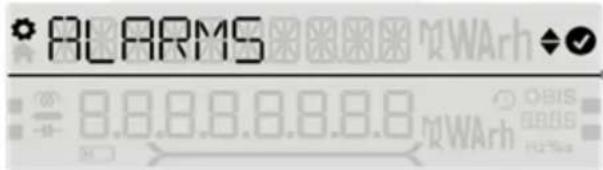
In this menu, you can set your device's alarm.
3.1.4.8.1 Alarm Snoozing
Press the OK button to set the delay time.

You can specify how many hours you would like to snooze your alarm on this screen.

3.1.4.8.2 Custom Alarm Setting
Please press the OK button to program a special alarm.

You can define your custom alarms in 8 sub-menus below.


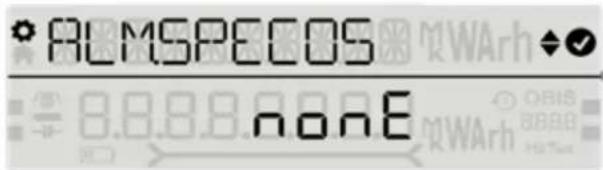


You can specify whether to activate or not by using up&down buttons.

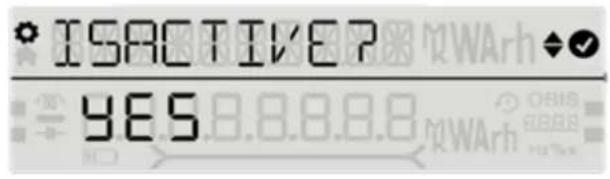
After you press the Yes option, you can see the screen where you can make P demand or S demand choices.


You can enter the Limit value in this menu.

In this menu, you can specify which output you want to use with up&down buttons.

If you choose this option, when an alarm occurs, the device will activate the related digital output.


3.1.4.9 Time

It consists of screens where time zone, date and time values are set. If your user security setting is active, you must first enter the password to enter the sub-menus.
3.1.4.9.1 Time Zone
The user can change the time zone of the device on this screen. The time range can be selected between -12:00 and 14:00 in half-hour intervals.

3.1.4.9.2 Select Region
The user enters the region information from this screen.

3.1.4.9.3 DST Settings
User can change DST Setting from this screen.


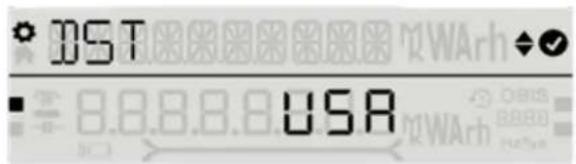

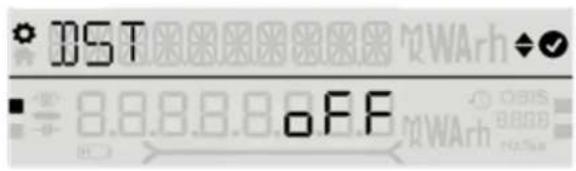
DST setting can be set to "OFF, EUROPE, USA, MANUAL" by pressing the "OK" button.
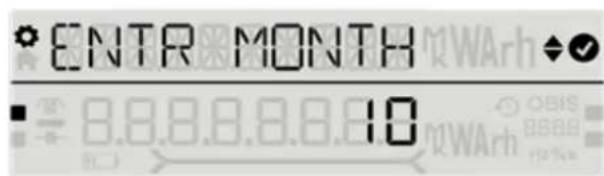
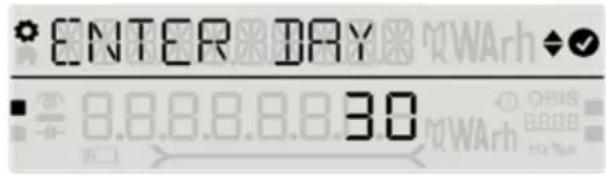
3.1.4.9.4 Date Setting
The user sets the current date from these screens.

After pressing the OK button, you can enter the current year, month and day values.

3.1.4.9.5 Clock Settings
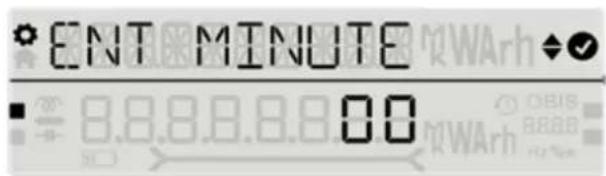
The user sets the time of day from these screens.

After pressing the OK button, you can enter the current hour, minute and second values.

3.1.4.10 System
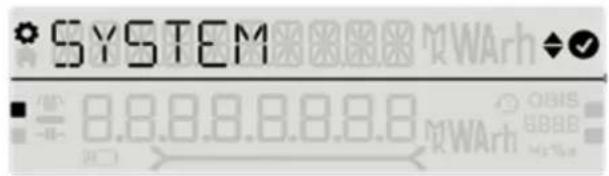
In the System Settings menu, you can view the software, hardware, serial number information of your device.
3.1.4.10.1 System Software
It is the menu where you can view the software version of your device.

3.1.4.10.2 System Hardware
This is the menu where you can view the hardware version of your device.
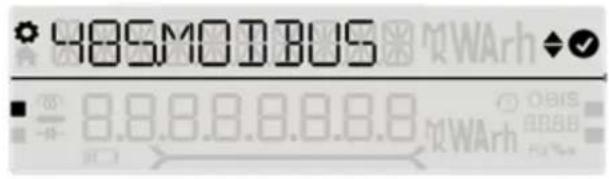
3.1.4.10.3 System Model No
This is the menu where you will view the model no of your device.

3.1.4.11 Reset
If your user security setting is active, you must first enter the password to enter the sub-menus. If you have entered a password before entering one of the sub-menus in the Reset menu, the device will not ask you for a password when entering other sub-menus.

3.1.4.11.1 Reset Factory
You can reset the factory settings of your device by using the OK button and up&down buttons from this menu. Indexes that you cannot reset will not be deleted.

After pressing "Yes" to the question "Are You Sure?" on your screen, please wait.

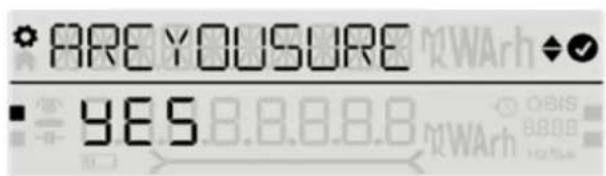
On this screen, you can reset the meter of your device by using the OK button and the up&down buttons. Indexes that you cannot reset will not be deleted.

After pressing "Yes" to the question "Are You Sure?" on your screen, you can complete your transaction by receiving the "DELETED" screen notification.


3.1.4.11.3 Reset Alarm
In this screen, you can reset your alarm of device.


After pressing "Yes" to the question "Are You Sure?" on your screen, you can perform your transaction.

ENTES Elektronik Cihazlar Imalat ve Ticaret A.S.
Adr: Dudullu OSB; 1. Cadde; No:23 34776
Umraniye - ISTANBUL / TURKIYE
Tel: +90 216 313 01 10 Fax: +90 216 314 16 15
E-mail: contact@entes.eu Web: www.entes.eu
Call Center Technical Support: 0850 888 84 25

- Security
- Warranty
- Introduction
- General Specifications
- Mechanical and Environmental Conditions
- Standards
- Technical Specifications:
- Technical Drawing
- Connection Diagram
- Terminal Structure
- Display and GUI design
- Front Panel View
- Key Functions
- Icons
- Usage of Device
- Device Opening
- Menus
- Menu Functions
- Measurement
- Voltage
- Frequency
- Current
- Power Menu
- Active Power
- Reactive Power
- Apparent Power
- Energy Menu
- Active Import Energy
- Active Export Energy
- Import Inductive Energy
- Export Inductive Energy
- Import Capacitive Energy
- Capacitive Export Energy
- Import Apparent Energy
- Export Apparent Energy
- Generator Active Energy
- Generator Apparent Energy
- Settings
- User Settings
- User Language Setting
- Screen Light Setting
- User Security Settings
- User Password Settings
- User Face Setting (Smiley Mode)
- User Mode Settings
- Installation Settings
- Nominal Voltage Setting
- Nominal Frequency Setting
- SETLOG
- SET SCROLL
- RS485
- Ethernet Settings
- Ethernet Mode
- DHCP Setting
- IP Setting
- DNS Setting
- Port Setting
- I/O
- Input 1
- Output 1
- Pulse Output:
- Alarms
- Alarm Snoozing
- Custom Alarm Setting
- Time
- Time Zone
- Select Region
- DST Settings
- Date Setting
- Clock Settings
- System
- System Software
- System Hardware
- System Model No
- Reset
- Reset Factory
- Reset Alarm
Brand : ENTES
Model : ES3-80LS
Category : Electric meter