
F-MU44R - Household Fan PANASONIC - Free user manual and instructions
Find the device manual for free F-MU44R PANASONIC in PDF.


| Product Type | Domestic Fan |
| Brand | Panasonic |
| Model | F-MU44R |
| Power Supply | 120V ~ 60Hz |
| Power Consumption | 50 W |
| Fan Speeds | 3 (Low, Medium, High) |
| Oscillation | Yes (Wide 75°, Pivot 90°) |
| Timer | 1-7 hours |
| Remote Control | Included |
| Height Adjustment | Yes (via extension pole) |
| Blade Diameter | 40 cm (16 inch) |
| Overall Height | 130 cm (51.2 in) |
| Net Weight | 6.5 kg (14.3 lbs) |
| Noise Level | ≤ 55 dB (A) |
| Airflow Rate | ~ 65 m³/min |
| Safety Features | Tip-over switch, Overheat protection |
| Material | ABS plastic, Metal stand |
| Color | White/Silver |
| Cleaning Instructions | Wipe with soft damp cloth; do not immerse |
| Spare Parts Available | Blades, motor, remote, base |
| Warranty | 1 year (limited) |
Frequently Asked Questions - F-MU44R PANASONIC
User questions about F-MU44R PANASONIC
0 question about this device. Answer the ones you know or ask your own.
Ask a new question about this device
Download the instructions for your Household Fan in PDF format for free! Find your manual F-MU44R - PANASONIC and take your electronic device back in hand. On this page are published all the documents necessary for the use of your device. F-MU44R by PANASONIC.
USER MANUAL F-MU44R PANASONIC
Kipas Elektrik (Kipas Dinding)
Electric Fan (Wall Fan)
电风扇 (壁置式风扇)
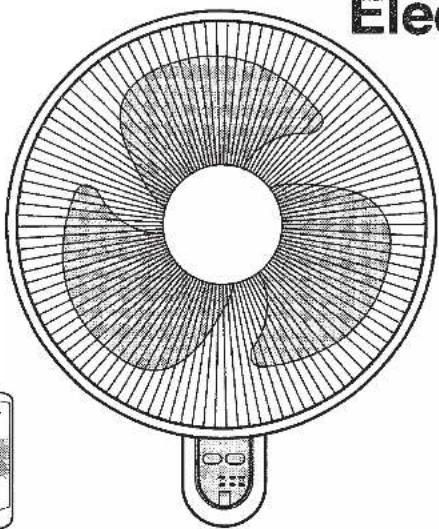
natural_image
Line drawing of a standard electric fan with visible blades and central hub (no text or symbols)No. Model / Model No. / 种类
F-MU44R
Buku Panduan
Operating Instructions
使用说明书
SPESIFIKASI / SPECIFICATION / 规格
| NO. MODEL /MODEL NO. /型号 | VOLTAN/VOLTAGE /电压 (V) | FREKUENSI/FREQ. /频率 (Hz) | KUASA/POWER /电力 (W) |
| F-MU44R | 240 | 50 | 59 |
| NO. MODEL /MODEL NO. /型号 | PUTARAN (RPM) /ROTATION (RPM) /转动 (RPM) | HALAJU ANGIN (m/min) /AIR VELOCITY (m/min) /风速 (m/min) | SEBARAN ANGIN ( m^3/min ) /AIR DELIVERY ( m^3/min ) /传输率 ( m^3/min ) | |
| F-MU44R | LOW | HIGH | 251 | 85 |
| 851~1040 | 1094~1337 | |||

Sebelum menggunakan set ini, sila baca arahan ini dengan teliti. Before operating this set, please read these instructions completely. 使用前务请详细阅读本书所载事项。

Guna hanya dengan voltan yang ditetapkan. Use only with rated voltage. 只能使用额定电压。

ADJUSTMENT OF WIND DIRECTION
风向调节
Pergerakan Mendatar
Horizontal Adjustment
Move it right and left.
左右调节
向左右移动。

Pergerakan Menegak
Vertical Adjustment Move it up and down, holding the fan stand.
上下调节
抹著风扇向上、下移动。

Ketatkan bolt
menggunakan
screwdriver
Tighten the bolt with
a screwdriver
用螺丝起子拧紧螺栓
BAGAIMANA MEMASUKAN BATERI (lampiran)
HOW TO INSERT BATTERIES (enclosed)
电池装入方法(包括电池)
① Buka penutup
① Open lid
① 打开电池盒盖
③ Tutup penutup
③ Close the lid
③ 装回电池盒盖
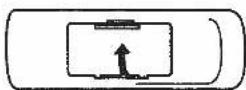
② Masukan bateri
② Insert batteries
② 装入电池
In order to prevent leaking or combustion of the batteries
- Do not use rechargeable (Ni-Cd) batteries.
- Do not mix different kinds of batteries.
- Do not mix new and old batteries.
- If the fan is not going to be used for a long time, remove batteries.
警告
Be sure to observe the following safety precautions carefully in order to avoid possible injury to yourself or others and damage to your belongings.
This indication shows the possibility of causing death or serious injury. 此项目警告您错误操作此产品可能会导致死亡或严重受伤。
PERINGATAN CAUTION 注意
This indication shows the possibility of causing injury or damage to properties. 此项目警告您错误操作此产品可能会导致受伤或对财物造成物理性损坏。
Precautions are classified using the following symbols.
This symbol denotes actions that are COMPULSORY.
此标记表示有关行为是强制性的。

AMARAN WARNING 警告
Dilarang membuka, memperbaiki atau melakukan modifikasi ke atas produk. Never try to take apart, repair or modify this product. 切勿擅自拆散、修理或改造。

Dilarang membuka Do not take apart 禁止拆散
| 1 | PENGHADANG HADAPAN | FRONT GUARD | 前防护罩 |
| 2 | LINGKARAN PENGHADANG | GUARD RING | 罩环 |
| 3 | PENGETAT | SPINNER | 头罩 |
| 4 | BILAH | BLADE | 扇叶 |
| 5 | NAT PENGETAT PENGHADANG | GUARD SET NUT | 防护罩锁紧螺母 |
| 6 | PENGHADANG BELAKANG | REAR GUARD | 后防护罩 |
| 7 | MOTOR | MOTOR | 马达 |
| 8 | PENYANGGA | STAND | 支架 |
| 9 | PENERIMA | RECEIVER | 受讯部 |
| 10 | ALAT KAWALAN JAUH | REMOTE CONTROL UNIT | 遥控器 |
* Panel kawalan akan menghasilkan sedikit haba apabila plag disambungkan. (Terdapat sedikit arus yang mengalir ke litar kawalan.)
* Control panel is slightly heated with power plug connected. (A slight amount of current flows is control circuit.)
* 当插头接上电源时,面板会轻微发热。(有少量的电流流入控制电路。)
AKSESORI/ACCESSORIES/附件
Set Pemegang Alat Kawalan Jauh / Remocon Holder Set / 遥控器固定器组件
Pemegang Alat Kawalan Jauh / Remocon Holder / 遥控器固定器
Skru / Screw / 螺丝
Palam Dinding / Wall Plug / 壁式插座

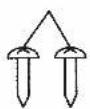

Set Penyangkut Dinding / Wall Bracket Set / 墙壁托架组件
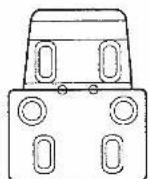
Penyangkut Dinding Wall Bracket 墙壁托架
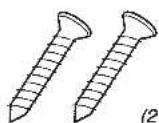
Skru "wood"
Wood Screws
木螺丝
(2 Batang) (2 PCS) (2枚)

Skru Dawai Wire Screw 线螺丝
Alat Kawalan Jauh Remote Control Unit 遥控器
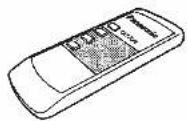
AA, R6P, R6, LR6 (2 BIJI) (2 PCS) (2枚)

Bateri Battery 电池
PEMASANGAN/INSTALLATION/
安装
*
Penyangkut Dinding
Wall Bracket
墙上托架
"Wall Plug" (hanya gunakan "Wall Plug" yang betul)
Wall Plug (Proper Wall Plug to be used)
墙塞(使用合适的墙塞)
Dinding (konkrit atau bata)
Wall (Concrete or Brick Wall)
墙壁(水泥墙或砖墙)

Ruang di mana penyangkut dinding diletak
Opening through which the wall bracket is put
在墙壁托处开一个通孔

For the installation of the wall bracket, choose a wall which is thicker than half an inch or a part of the wall covering a pillar or a crosspiece. For wooden wall no need to use wall plug.
- If lighting equipment generating high frequency such as one with an inverter is used in a room where you intend to install this electric fan, keep the fan some distance away from the lighting equipment as the remote controller of the fan may not function.
Firmly install the fan stand vertically onto the wall bracket. At this time, moving the fan stand sideways slightly may make installation easier and ensuring it is fully hooked onto wall bracket.
KAEDAH PEMASANGAN DAWAI KESELAMATAN /
SAFETY WIRE INSTALLATION GUIDE /
保险丝安装指南
Alas plat
Bottom plate 底盘
"Metal caulking"
Metal caulking 填隙合金


②

Screw in one end of the safety wire as in illustration ②. 将保险丝的其中一段锁上。
Bend and screw the safety wire to wooden wall or to wall plug for concrete wall as illustrated. 如图所示将保险丝折弯然后锁入木墙壁或混凝土墙壁的墙壁插座。
NOTA /NOTE / 注意
Pastikan "metal caulking" dawai keselamatan tidak bertindih dengan alas plat semasa pemasangan.
Ensure the safety metal caulking does not overlap onto bottom plate while fixing.
Fix the Remocon Holder to wall as shown.
The Wail Plugs are not needed for
wooden walls.
如图所示将遥控器固定器安装在墙壁上。
*木墙不需使用墙壁插座。
Pemegang Alat Kawalan Jauh / Remocon Holder / 遥控器固定器

flowchart
graph LR
    A["SKRU / Screw"] --> B["螺丝"]
    B --> C["Pemegang Alat Kawalan Jauh Remocon Holder 遥控器固定器"]
    C --> D["30 mm 30 毫米"]
    D --> E["Palam Dinding Wall Plug 墙壁插座"]
    E --> F["Dinding BATA BRICKS WALL 砖墙"]
    F --> G["Diameter Lubang Ø 6 mm Hole Diameter Ø 6 mm 洞孔直径 6 毫米"]
    H["LANGKAH 1 STEP 1 步骤 1"] --> I["20 mm"]
    I --> J["20 mm"]
    J --> K["20 mm"]
    K --> L["20 mm"]
    L --> M["20 mm"]
CARA MEMASANG /
HOW TO ASSEMBLE /
组装方法
Before you start assembling Blade and Guard
开始装配扇叶和保护罩之前


* Pastikan nat diikat ketat.
* Make sure that the nut are secured tightly.
* 请把螺栓上紧

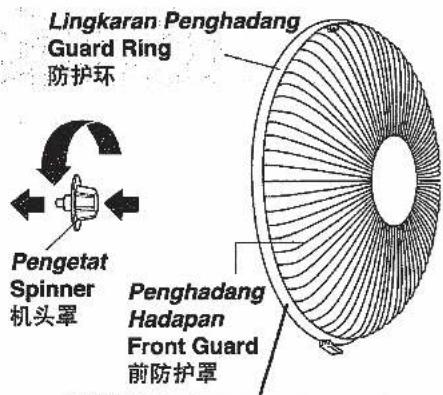
① Masukan unjuran bilah ke dalam pin shaf. Set the blade boss projection onto the shaft pin. 将扇叶轴凹口设至轴销。
Pin shaf Shaft pin 轴销
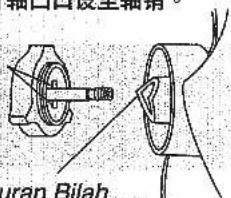
Unjuran Bilah Blade Projection 扇叶轴凹口
① Pasangkan penghadang belakang dan hadapan bersama. Put rear and front guards together. 与前后防护罩对合。

② Tekankan penghadang depan dan belakang bersama. Snap together the front and rear guards. 两手将前后防护罩嵌合。

③ Tekan pada klip Press on the clip. 将夹扣向上按紧。 Kunci ke atas untuk memegang penghadang. Lock clip upwards to hold guard. 夹扣向上按把防护罩锁紧。

Check to confirm that the fan is correctly installed!
确认风扇是否已被正确安装!
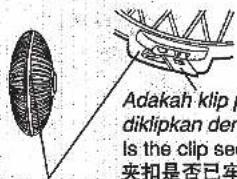
Adakah penghadang depan dan belakang tidak bersambung? Is the front guard detached? 前导风罩是否脱开?
* Ketatkan penghadang depan dan belakang dengan menekan klip. Jika tidak penghadang mungkin jatuh ke arah anda.
* Securely snap together the front and rear guards by pressing on the clip. Otherwise the front guard may fall off onto you.
* 务必扣住夹扣、将前、后防护风罩牢牢地固定在一起。否则、前防护罩可能会掉落到你的身上。

BUTANG OFF/ON
OFF/ON BUTTON
开 / 关的按钮
- Operasi dan berhenti adalah ditetapkan setiap kali butang ditekan. (Masukkan plag ke dalam soket, setelah butang ditekan kelajuan ditetapkan pada tahap rendah.)
Operation and stop modes are alternately selected each time the button is pressed. (Plug in the power cord and press the button, then the mode selected is "Low Speed" operation.)
● 每回的按入、在运转合停止位置变换。 (如和万能插座连接时、最初的按入后处于弱转运。
* Keluarkan plag apabila kipas tidak digunakan dalam jangka masa panjang. (Walaupun suis berada dalam keadaan "OFF", 1 W kuasa akan digunakan oleh litar kawalan.
* Disconnect the power cord plug when the fan is not used for long time. (Even with the switch set at "OFF", about 1 W will be consumed by the control circuit.)
* 长时期不使用的时候,请拔出电源插头。 (因为即使处于停止位置中、仍将消费1W的电力。)
It is recommended to use this fan with an air conditioner so that the cooling or heating effects will be enhanced.
● The speed can be changed by pressing this button.
● 每一次按下按钮时、会改变风量。
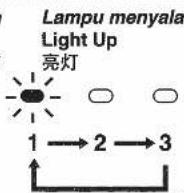

BUTANG AYUNAN (PANEL KAWALAN)
● Memory function is provided.
When the operation OFF/ON button is pressed, it operate previous set mode.
* Timer is not stored in the memory.
* The memory is cleared when the power cord plug is disconnected.
- 具有记忆功能。


- Kipas Elektrik (Kipas Dinding)
- Electric Fan (Wall Fan)
- 电风扇 (壁置式风扇)
- Buku Panduan
- Operating Instructions
- 使用说明书
- ADJUSTMENT OF WIND DIRECTION
- 风向调节
- Pergerakan Mendatar
- Horizontal Adjustment
- Pergerakan Menegak
- BAGAIMANA MEMASUKAN BATERI (lampiran)
- HOW TO INSERT BATTERIES (enclosed)
- 电池装入方法(包括电池)
- 警告
- AMARAN WARNING 警告
- AKSESORI/ACCESSORIES/附件
- PEMASANGAN/INSTALLATION/
- 安装
- KAEDAH PEMASANGAN DAWAI KESELAMATAN /
- SAFETY WIRE INSTALLATION GUIDE /
- 保险丝安装指南
- NOTA /NOTE / 注意
- CARA MEMASANG /
- HOW TO ASSEMBLE /
- 组装方法
- Before you start assembling Blade and Guard
- Check to confirm that the fan is correctly installed!
- BUTANG OFF/ON
- OFF/ON BUTTON
- 开 / 关的按钮
- BUTANG AYUNAN (PANEL KAWALAN)
- ● Memory function is provided.
- - 具有记忆功能。
Brand : PANASONIC
Model : F-MU44R
Category : Household Fan