MWG9111SL - Microwaves Emerson - Free user manual and instructions
Find the device manual for free MWG9111SL Emerson in PDF.


| Product Type | Countertop Microwave Oven |
| Brand | Emerson |
| Model | MWG9111SL |
| Capacity | 0.9 cu. ft. |
| Power Output | 900 Watts |
| Power Consumption | 1350 Watts |
| Voltage | 120 V ~ 60 Hz |
| Dimensions (W x D x H) | 20.5 x 16.5 x 12.2 inches |
| Interior Dimensions (W x D x H) | 13.5 x 12.5 x 9.5 inches |
| Weight | 33 lbs |
| Control Type | Digital Touchpad with LED Display |
| Functions | Defrost, Reheat, Popcorn, Potato, Pizza, Beverage, Dinner Plate, Timer, Clock |
| Turntable Diameter | 12 inches |
| Child Lock | Yes |
| Material | Stainless Steel Exterior, Ceramic Interior |
| Cleaning | Wipe with damp cloth; mild detergent; avoid abrasives |
| Safety Features | Automatic shut-off, door interlock, overheat protection |
| Spare Parts Availability | Glass turntable, roller ring, fuse, door switches available online |
| Repairability Index | 7/10 (common parts replaceable) |
| Energy Efficiency | ENERGY STAR certified |
Frequently Asked Questions - MWG9111SL Emerson
User questions about MWG9111SL Emerson
0 question about this device. Answer the ones you know or ask your own.
Ask a new question about this device
Download the instructions for your Microwaves in PDF format for free! Find your manual MWG9111SL - Emerson and take your electronic device back in hand. On this page are published all the documents necessary for the use of your device. MWG9111SL by Emerson.
USER MANUAL MWG9111SL Emerson
natural_image
Black and white musical note symbol (no text or numbers present)Emerson®
(a) Do not attempt to operate this oven with the door open since open-door operation can result in harmful exposure to microwave energy.
It is important not to defeat or tamper with the safety interlocks.
(b) Do not place any object between the oven front face and the door or allow soil or cleaner residue to accumulate on sealing surfaces.
(c) Do not operate the oven if it is damaged.
It is particularly important that the oven door closes properly and that there is no damage to the following: (1) door (bent), (2) hinges and latches (broken or loosened), (3) door seals and sealing surfaces.
(d) The oven should not be adjusted or repaired by anyone except properly qualified service personnel.
CONTENTS
Precautions to Avoid Possible Exposure to
Excessive Microwave Energy....1
Important Safety Instructions....2
Safety Precautions ....3
Grounding Instructions ....4
Installation 4
Care of Your Microwave Oven ....5
How to Use Your Microwave Oven Safely .....5
Location of Controls 6
Operation....7
Setting the Clock ....7
Weight Defrost....7
Time Defrost....8
Microwave Cooking 8
Quick Start....9
Grill Cooking....9
Grill/Microwave Combination Cooking .....10
Preset Cooking....1
Multi-Stage Cooking ....11
Potato Quick Cook Pad ....12
Pizza Quick Cook Pad....12
Popcorn Quick Cook Pad ....13
Chicken Quick Cook Pad ....13
Pork Quick Cook Pad 14
Reheat Quick Cook Pad....14
Vegetable (Fresh) Quick Cook Pad......15
Beef Quick Cook Pad 15
Beverage Quick Cook Pad ....16
Sausage Quick Cook Pad ....16
Dinner Entree Quick Cook Pad ....17
Child Lock....17
To Stop the Oven While it is Operating......17
Cooking Guide....18
The Principles of Microwave Cooking .....18
Food Characteristics ......18
Microwave Techniques....18
Hot Snacks and Appetizers ....19
Specifications 20
Before You Call for Service....20
Limited Warranty 21
IMPORTANT SAFETY INSTRUCTIONS
When using electrical appliances, basic safety precautions should be followed, including the following:
WARNING - To reduce the risk of burns, electric shock, fire, and injury to persons or exposure to excessive microwave energy:
1 Read all instructions before using this appliance.
2 Read and follow the specific "PRECAUTIONS TO AVOID POSSIBLE EXPOSURE TO EXCESSIVE MICROWAVE ENERGY" found on page 1.
3 This appliance must be grounded. Connect only to a properly grounded outlet. See "GROUNDING
INSTRUCTIONS" found on page 5.
4 Install or locate this appliance only in accordance with the provided installation instructions.
5 Some products such as whole eggs and sealed containers, for example, closed glass jars, may explode and should not be heated in this oven.
6 Use this appliance only for its intended use as described in this manual. Do not use corrosive chemicals or vapors in this appliance. This type of oven is specifically designed to heat, cook, or dry food. It is not designed for industrial or laboratory use.
7 As with any appliance, close supervision is necessary when used by children.
8 Do not operate this appliance if it has a damaged cord or plug, if it is not working properly, or if it has been damaged or dropped.
9 This appliance should be serviced only by qualified service personnel. Contact the nearest authorized service facility for examination, repair or adjustment.
10 Do not cover or block any openings on this appliance.
11 Do not store or use this appliance outdoors. Do not use this product near water, for example, near a kitchen sink, in a wet basement, or near a swimming pool, and the like.
12 Do not immerse cord or plug in water.
13 Keep cord away from heated surfaces.
14 Do not let cord hang over edge of table or counter.
15 When cleaning surfaces of door and oven that come together when closing the door, use only mild, non-abrasive soaps or detergents applied with a sponge or soft cloth.
16 To reduce the risk of fire in the oven cavity:
(a) Do not overcook food. Carefully attend appliance if paper, plastic, or other combustible materials are placed inside the oven to facilitate cooking.
(b) Remove wire twist-ties from paper or plastic bags before placing bag in oven.
(c) If materials inside the oven should ignite, keep oven door closed, turn oven off, and disconnect the power cord, or shut off power at the fuse or circuit breaker panel.
(d) Do not use the cavity for storage purposes. Do not leave paper products, cooking utensils, or food in the cavity when not in use.
17 Do not use this microwave oven to heat corrosive chemicals (for example, sulfides and chlorides). Vapors from such corrosive chemicals may interact with the contact and springs of the safety interlock switches thereby rendering them inoperable.
18 Keep the waveguide cover clean at all times. Wipe the oven interior with a soft damp cloth after each use. If you leave grease or fat anywhere in the cavity it may lead to overheating and fire.
19 Never heat oil or fat for deep frying as you cannot control the temperature and doing so may lead to overheating and fire.
20 Liquids, such as water, coffee, or tea are able to be overheated beyond the boiling point without appearing to be boiling due to surface tension of the liquid. Visible bubbling or boiling when container is removed from the over is not always present. THIS COULD RESULT IN VERY HOT LIQUIDS SUDDENLY BOILING OVER WHEN A SPOON OR OTHER UTENSIL IS INSERTED INTO THE LIQUID. To reduce the risk of injury to persons:
- Do not overheat the liquid.
- Stir the liquid both before and halfway through heating it.
- Do not use straight-sided containers with narrow necks.
- After heating, allow the container to stand in the microwave oven for a short time before removing the container.
- Use extreme care when inserting a spoon or other utensil into the container.
SAFETY PRECAUTIONS
General Use
1 Do NOT attempt to tamper with or make any adjustments or repairs to door, control panel or any other part of the oven. Do NOT remove outer panel from oven. Repairs should only be done by qualified service personnel.
2 Do NOT operate the oven empty. The microwave energy will reflect continuously throughout the oven if no food or water is present to absorb energy.
3 If a fire occurs in the oven, touch the Start/Stop pad and LEAVE THE DOOR CLOSED. Disconnect the power cord, or shut off power at the fuse or circuit breaker panel.
4 Do NOT attempt to dry clothes, newspapers or other materials in the oven. They may catch on fire.
5 Do NOT use recycled paper products. Recycled paper towels, napkins and waxed paper can contain metal flecks which may cause arcing or ignite. Paper products containing nylon or nylon filaments should be avoided, as they may ignite.
6 Some styrofoam trays (like those that meat is packaged on) have a thin strip of metal embedded on the bottom. When microwaved, the metal can burn the floor of the oven or ignite a paper towel.
7 Avoid inserting nails, wire, etc. through any holes in the unit during operation. Never insert a wire, nail or any other metal objects through the holes on the cavity or any other holes or gaps, because such objects may cause electric shock and microwave leakage.
Utensils
1 METAL CONTAINERS or dishes with metallic rims should not be used. Arcing may occur.
2 METAL TWIST-TIES may not be used in the microwave oven.
3 Do NOT use SEALED JARS or NARROW NECK bottles for cooking or reheating. They may shatter.
4 Do NOT use CONVENTIONAL THERMO-METERS in the microwave oven. They may cause arcing.
5 Remove PLASTIC STORE WRAPS before cooking or defrosting foods in the oven.
6 For FURTHER INFORMATION on proper cooking utensils, refer to the COOKING GUIDE on page 16.
Food
1 Never use your microwave oven for HOME CANNING. The oven is not designed to permit proper canning. Improperly canned food may spoil and be dangerous to consume.
2 COOKING TIMES given in the cooking guide are approximate. Factors that may affect cooking are starting temperature, altitude, volume, size and shape of food and utensils used. As you become familiar with the oven, you will be able to adjust for these factors.
3 It is better to UNDERCOOK RATHER THAN OVERCOOK foods. If food is undercooked, it can always be returned to the oven for further cooking. If food is overcooked, nothing can be done. Always start with minimum cooking times.
4 SMALL QUANTITIES of food or foods with LOW MOISTURE content can burn, dry out or catch on fire if cooked too long.
5 Do NOT boil eggs in their shell. Pressure may build up and the eggs may explode.
6 Potatoes, apples, egg yolks, whole acorn squash and sausage are some examples of food with NONPOROUS SKINS. These must be pierced before cooking to prevent bursting.
7 POPCORN must be popped in a microwave corn popper. Microwave popped corn produces a lower yield than conventional popping. Do not use oven for popcorn unless popped in a microwave approved popcorn utensil or unless it's commercially packaged and recommended especially for microwave ovens. Do not use oil unless specified by the manufacturer.
8 Do NOT attempt to deep fat fry in your oven.
9 HEATED LIQUIDS can ERUPT if not mixed with air. Do not heat liquids in your microwave oven without first stirring.
GROUNDING INSTRUCTIONS
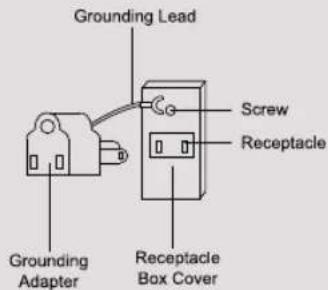
This appliance must be grounded. In the event of an electrical short circuit, grounding reduces the risk of electric shock by providing an escape wire for the electric current. This appliance is equipped with a cord having a grounding wire with a grounding plug. The plug must be inserted into an outlet that is properly installed and grounded.
WARNING:
Improper use of the grounding plug can result in a risk of electric shock. Consult a qualified electrician or service person if the grounding instructions are not completely understood, or if doubt exists as to whether the appliance is properly grounded.
If it is necessary to use an extension cord, use only a three wire extension cord that has a three blade grounding plug, and a three slot receptacle that will accept the plug on the appliance. The marked rating of the extension cord should be equal to or greater than the electrical rating of the appliance.
INSTALLATION
- Steady, flat location: When positioning the microwave oven, it should be set on a steady, flat surface.
- Ventilation: Do not block air vents. If they are blocked during operation, the oven may overheat and eventually cause oven failure. For proper ventilation, keep three inches of space between the oven's top, sides, rear and the area where the unit is to be installed.
- Radio and TV reception: Poor television reception and radio interference may result if the oven is located close to a TV, radio, antenna, or antenna wire. Position the oven as far from them as possible.
- Temperature and moisture: Keep the oven away from hot air, steam or splashing liquids when choosing a place to locate it, otherwise, the unit's operation may be adversely affected, causing it to break down.
-
Power supply:
-
Check your local power source. This microwave oven requires a 120V, 60Hz power supply.
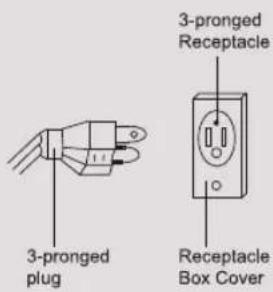
- Use a receptacle that will accept the ground prong.
A. A short power supply cord is provided to reduce the risks resulting from becoming entangled in or tripping over a longer cord.
B. Longer cord sets or extension cords are available and may be used if care is exercised in their use.
C. If a long cord or extension cord is used, (1) the marked electrical rating of the cord set or extension cord should be at least as great as the electrical rating of the appliance, (2) the extension cord must be a grounding-type 3-wire cord, and (3) the longer cord should be arranged so that it will not drape over the counter top or tabletop where it can be pulled on by children or tripped over unintentionally.
- Examine the oven for any damage such as: Dents, a misaligned door, broken door or a dent in the cavity. If any of the above are visible, DO NOT INSTALL THE UNIT. Notify the dealer immediately.
When using a 3-pronged plug
When using a grounding adapter, make sure the receptacle box is fully grounded.
1 Disconnect the AC plug from the outlet before cleaning.
2 Keep the inside of the oven clean. When food spatters or spilled liquids adhere to oven walls, wipe with a damp cloth. Mild detergent may be used if the oven gets very dirty. The use of harsh detergent or abrasives is not recommended.
3 The outside oven surface should be cleaned with soap and water, rinsed and dried with a soft cloth. To prevent damage to the operating parts inside the oven, water should not be allowed to seep into the ventilation slots.
4 If the Control Panel becomes dirty or wet, clean with a soft, dry cloth. Do not use harsh detergents or abrasives on Control Panel.
5 If steam accumulates on both sides of the oven door, wipe with a soft cloth. This may occur when the microwave oven is operated under high humidity conditions and this is not an indication of a malfunction in the unit.
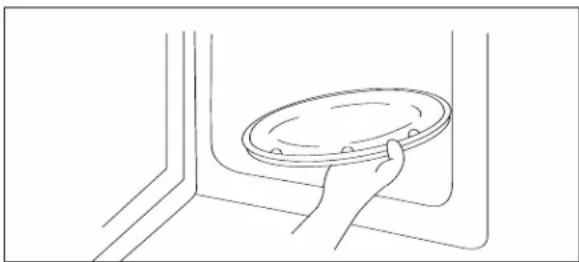
6 It is occasionally necessary to remove the glass tray for cleaning. Wash the tray in warm, sudsy water or in a dishwasher.
natural_image
Line drawing of a hand holding a circular object inside a container (no text or symbols)7 The roller guide and oven cavity floor should be cleaned regularly to avoid excessive noise. Simply wipe the bottom surface of the oven with mild detergent water or window cleaner and dry. The roller guide may be washed in mild, sudsy water or the dishwater.
Roller Guide
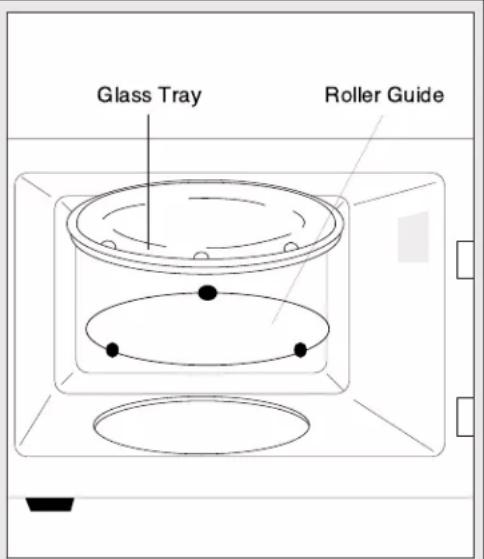
1 The ROLLER GUIDE and oven floor should be cleaned frequently to prevent excessive noise.
2 The ROLLER GUIDE MUST ALWAYS be used for cooking together with the Glass Tray.
Glass Tray
1 Do NOT operate the oven without the Glass Tray in place.
2 Do NOT use any other Glass Tray with this oven.
3 If the Glass Tray is hot, ALLOW IT TO COOL before cleaning it or placing it in water.
4 Do NOT cook directly on the Glass Tray.
HOW TO USE YOUR MICROWAVE OVEN SAFELY
Although your oven is provided with safety features, it is important to observe the following:
a) It is important not to defeat or tamper with safety interlocks.
b) Do not place any object between the oven face and the door or allow residue to accumulate on sealing surfaces. Wipe the sealing area frequently with a mild detergent, rinse and wipe dry. Never use abrasive powders or pads.
c) When opened, the door must not be subjected to strain; for example, a child hanging on an open door or any load which could cause the oven to fall forward and cause injury and damage to the door. Do not operate the oven if it is damaged, until it has been repaired by a qualified person. It is particularly important that the oven door close properly and that there is no damage to the following: i) Door (bent), ii) Hinges and Latches (broken or loosened), iii) Door seals and sealing surfaces.
d) The oven should not be adjusted or repaired by anyone except properly qualified service personnel.
LOCATION OF CONTROLS
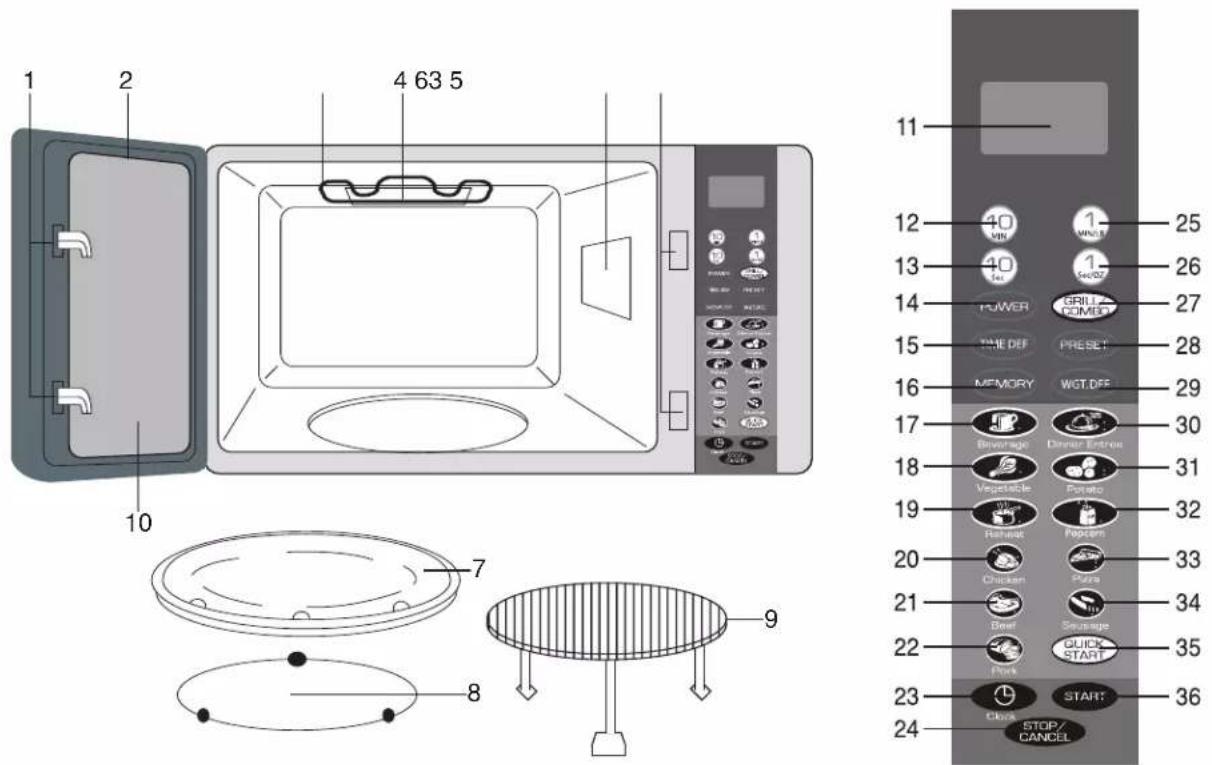
-
DOOR LATCH: When the door is closed, it will automatically lock shut. If the door is opened while the oven is operating, the magnetron will automatically shut off.
-
DOOR SEAL: The door seal maintains the microwaves within the oven cavity and prevents microwave leakage.
-
OVEN CAVITY
-
GRILL HEATER: Used to grill foods with the GRILL/COMBO pad.
-
SPATTER SHIELD: Protects the microwave outlet from splashes of cooking foods.
-
SAFETY INTERLOCK SYSTEM: Prevents the oven from operating while the door is opened.
-
GLASS COOKING TRAY: Made of special heat resistant glass. The tray must always be in proper position before operating the oven. Do not cook food directly on the tray.
-
ROLLER GUIDE: Supports the glass cooking tray. Must always be in proper position before operating the oven.
-
GRILL RACK: Used with Grill cooking.
-
DOOR SCREEN: Allows viewing of food. The screen is designed so that light can pass through, but not the microwaves.
-
DISPLAY: Cooking time, power level, function indicators and the present time are displayed.
-
10MIN PAD: Used to set the desired cooking time.
-
10SEC/OZ PAD: Used to set the desired cooking time, weight (OZ), etc.
-
POWER PAD: Used to set the desired cooking power level.
-
TIME DEFROST PAD: Automatically divides the defrosting times into periods of alternating defrost and standing times for even defrosting.
-
MEMORY PAD: Used to set a multistage cooking program.
-
BEVERAGE PAD: Used to microwave beverages.
-
VEGETABLE PAD: Used to microwave fresh vegetables.
-
REHEAT PAD: Used to reheat plated foods.
-
CHICKEN PAD: Used to microwave and grill chicken.
-
BEEF PAD: Used to microwave and grill beef.
-
PORK PAD: Used to microwave and grill pork.
-
CLOCK PAD: Touch to set the present time.
-
STOP/CANCEL PAD: Touch once to stop a cooking procedure. Touch again to clear cooking data.
-
1MIN/LB PAD: Used to set the desired cooking time, weight (LB), etc.
-
1SEC/OZ PAD: Used to set the desired cooking time, weight (OZ), etc.
-
GRILL/COMBO PAD: Used to grill or grill/microwave foods.
-
PRESET PAD: Used for delay cooking. After setting a cooking program, touch this pad, then enter the desired time to start cooking and then touch the START pad.
-
WEIGHT DEFROST PAD: Used to set the oven to estimate the defrosting time by weight entered.
-
DINNER ENTREE PAD: Used to reheat a dinner entree.
-
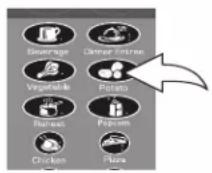
POTATO PAD: Used to microwave potatoes.
-
POPCORN: Used to microwave popcorn.
-
PIZZA PAD: Used to microwave and cook pizza.
-
SAUSAGE PAD: Used to microwave and cook sausage.
-
QUICK START PAD: Touch to automatically start cooking at high power in 30 second intervals.
-
START PAD: Touch to start oven operation.
OPERATION
SETTING THE CLOCK
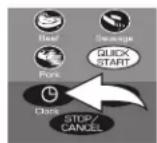
- Touch the CLOCK pad. Touch the CLOCK pad repeatedly to select AM or PM.
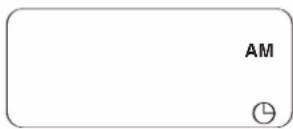
- Enter the correct time of day. EXAMPLE: To set the time to "12:42PM", touch 10 MIN pad once, the 10 SEC pad four times and the 1 SEC pad twice.
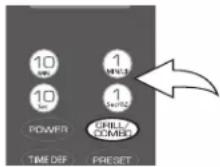
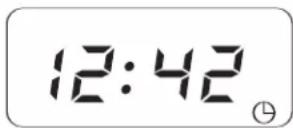
- Touch the CLOCK pad. The display will show the present time and the colon will stop blinking. After the clock has been set, the time will appear unless the oven is cooking or defrosting.
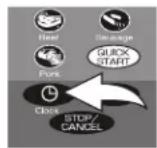
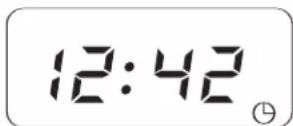
NOTES:
- To reset present time in the display window when the oven is off, touch the CLOCK pad and reset.
- A pad must be touched within 15 seconds when setting the clock, or entering cooking information.
- If you make a mistake when setting the time, touch the STOP/CANCEL pad.
- To recall the actual time while the oven is cooking or defrosting, simply touch the CLOCK pad and the display will show the actual time for three seconds.
WEIGHT DEFROST
WEIGHT DEFROST lets you easily defrost foods by eliminating guesswork in determining defrosting time. Follow the steps below for easy defrosting.
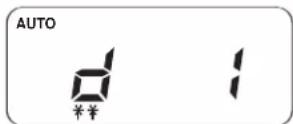
- Touch the WEIGHT DEFROST pad. The display will show "d 1". Repeatedly press the WEIGHT DEFROST pad to select a desired defrost category as per chart below.
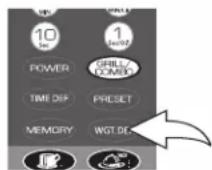
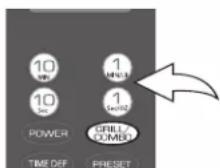
- Enter the pounds. For example, for 2 pounds, 10 ounces, touch the 1MIN/LB pad twice and the 10SEC/OZ pad once.
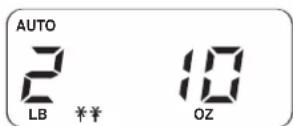
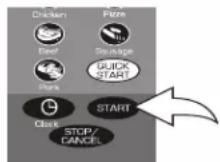
- Touch the START pad. The display will count down the remaining defrosting time in minutes and seconds. It will beep four times and show "End" when defrosting is completed. Touch the STOP/CANCEL pad or open the door to clear before starting another operation.
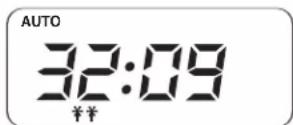
IMPORTANT NOTE: After partial defrosting, the oven will beep three times. This is to remind you to, if desired, turn and rearrange the food for even defrosting.
| Display Food Max. Weight | ||
| d 1 | Meat | 5lb, 16oz |
| d 2 Poultry 5lb, 16oz | ||
| d 3 Seafood 5lb, 16oz | ||
OPERATION (CONTINUED)
TIME DEFROST
TIME DEFROST will automatically set the oven to defrost at a time set by the user. This method provides the quickest thawing of small to medium size foods.
- Touch the TIME DEFROST pad.
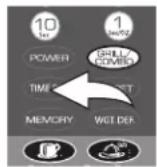
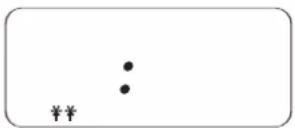
- Enter the desired defrosting time (up to 99 minutes, 99 seconds). For example, for 4 minutes and 30 seconds, press the 1MIN pad four times and the 10SEC pad three times.
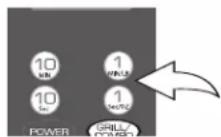
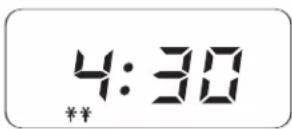
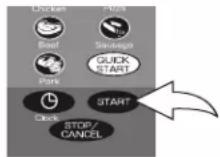
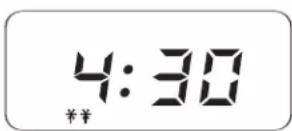
- Touch the START pad. The display and count down the remaining defrosting time in minutes and seconds. It will beep four times and show "End" when defrosting is completed. (Touch the STOP/CANCEL pad or open the door to clear before starting another operation.)
MICROWAVE COOKING
Set a cooking or other operational time/power as follows:
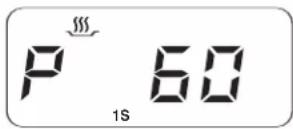
- Touch the POWER pad repeatedly to select a cooking power (skip if cooking at 100%). The display will show the power you chose.
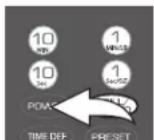
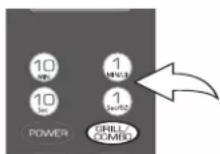
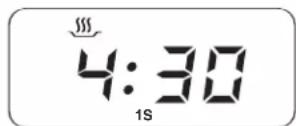
- Enter the desired cooking time (up to 99 minutes, 99 seconds). For example, for 4 minutes and 30 seconds, press the 1MIN pad four times and the 10SEC pad three times.
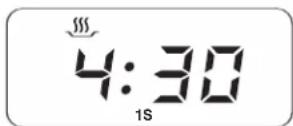
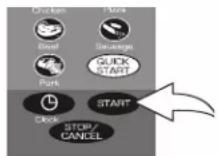
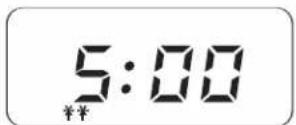
- Touch the START pad. The display will count down the remaining cooking time in minutes and seconds. It will beep four times and show "End" when cooking is completed. (Touch the STOP/CANCEL pad or open the door to clear before starting another operation.)
OPERATION (CONTINUED)
QUICK START
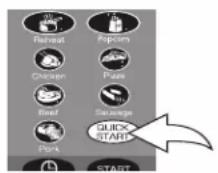
QUICK START allows you to start the oven immediately and have it cook in 30 second intervals.
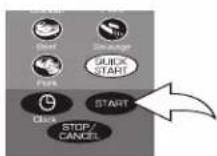
- Touch the QUICK START pad once and the oven will start cooking for 30 seconds.
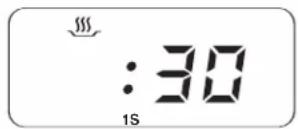
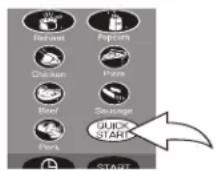
- Repeatedly touch the QUICK START pad to increase the cooking time in 30 second intervals.
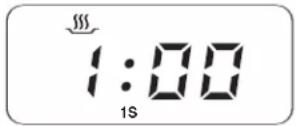
GRILL COOKING
GRILL COOKING allows you to grill in your oven. Grill cooking is particularly useful for thin slices of meat, steaks, chops, kebabs, sausages, pieces of chicken or sandwiches.
NOTES:
- Foods may be placed directly on the Grill Rack for faster cooking.
- Do not remove turntable when using the grill function.
-
For best results, turn food over halfway through cooking.
-
Touch the GRILL/COMBO pad once.
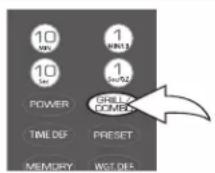
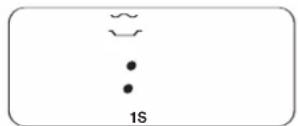
- Enter the desired grilling time (up to 99 minutes, 99 seconds). For example, for 4 minutes and 30 seconds, press the 1MIN pad four times and the 10SEC pad three times.
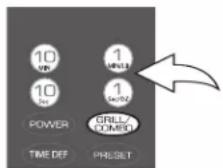
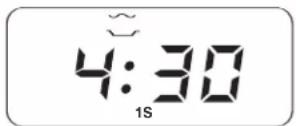
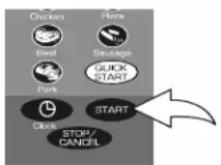
- Touch the START pad. The display will count down the remaining grilling time in minutes and seconds. It will beep four times and show "End" when cooking is completed. (Touch the STOP/CANCEL pad or open the door to clear before starting another operation.)
OPERATION (CONTINUED)
GRILL/MICROWAVE COMBINATION COOKING allows you to use the microwave and the grill in conjunction with each other to cook your food. Combination 1 uses 30% microwave and 70% grill in intervals of 10 seconds microwaves/23 seconds grilling (great for fish and potatoes). Combination 2 uses 55% microwave and 45% grill in intervals of 18 seconds microwaves/15 seconds grilling (great for omelets, baked potatoes and poultry).
NOTES:
- Foods may be placed directly on the Grill Rack for faster cooking.
- Do not remove turntable when using the grill function.
-
For best results, turn food over halfway through cooking.
-
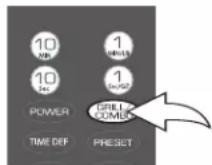
Touch the GRILL/COMBO pad twice for combination 1 or three times for combination 2 (see descriptions above).
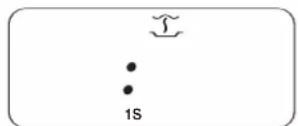
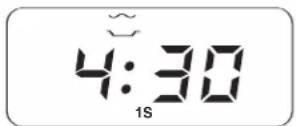
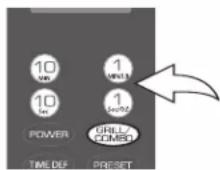
- Enter the desired grilling/microwave time (up to 99 minutes, 99 seconds). For example, for 4 minutes and 30 seconds, press the 1MIN pad four times and the 10SEC pad three times.
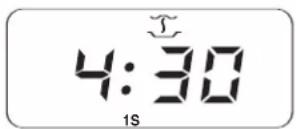
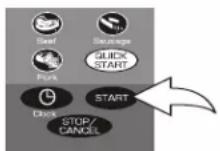
- Touch the START pad. The display will count down the remaining time in minutes and seconds. It will beep four times and show "End" when cooking is completed. (Touch the STOP/CANCEL pad or open the door to clear before starting another operation.)
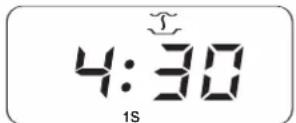
PRESET COOKING
Set a cooking program, insert food and then preset a time for it to start as follows:
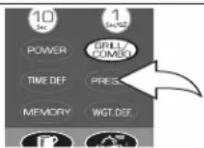
- Set up a cooking program as described previously. Touch the PRESET pad.
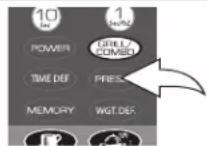
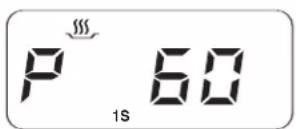
- Enter the desired time to start the program. EXAMPLE: To set the start time to "12:30PM", touch the PRESET pad until "AM" disappears from the display. Touch 1MIN pad until "12:00" appears in the display and then touch the 10SEC pad three times.
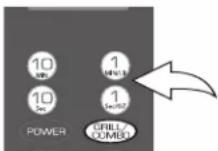
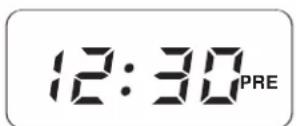
- Touch the START pad. When the actual time matches the preset start time, the oven will cook as per your program.
NOTES:
- Make sure to insert food before any cooking starts.
- Do not insert items that will spoil before cooking starts (i.e. chicken, etc.).
- Preset cooking cannot be used with Quick Start.
- The actual time must be set before the Preset Cooking function can be used.
OPERATION (CONTINUED)
MULTI-STAGE COOKING
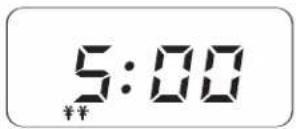
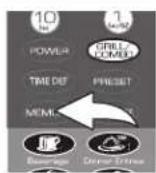
MULTI-STAGE COOKING allows you set the oven for consecutive cooking programs. This example will set the unit to Time Defrost, Microwave cooking and then Grill cooking, each for five minutes, but can be set for Grill/Combination, Time Defrost, Microwave cooking or Weight Defrost.
- Touch the TIME DEFROST pad and enter the desired defrosting time (up to 99 minutes, 99 seconds). (In this example, press the 1MIN pad five times.) NOTE: Perform the defrosting function before the cooking and/or grilling functions.
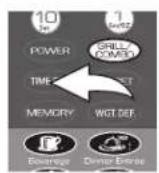
- Touch the MEMORY pad.
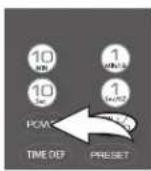
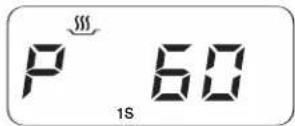
- Touch the POWER pad repeatedly to select a cooking power (skip if cooking at 100%). Enter the desired cooking time (up to 99 minutes, 99 seconds). (In this example, touch the 1MIN pad six times.)
- Touch the MEMORY pad.
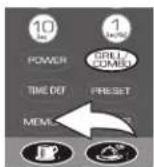
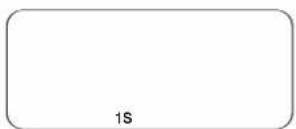
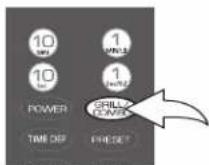
- Touch the GRILL/COMBO pad once and enter the desired grilling time (up to 99 minutes, 99 seconds). (In this example, press the 1MIN pad five times.)
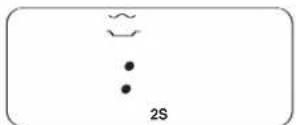
- Touch the START pad. The respective indicators will light to indicate the stage. It will beep four times and show "End" when cooking is completed. (Touch the STOP/CANCEL pad or open the door to clear before starting another operation.)
OPERATION (CONTINUED)
POTATO QUICK COOK PAD
Use this feature and the oven will automatically set the cooking (microwaving) time based on the quantity of potatoes. A built-in standing time will help equalize the temperature. Cook potatoes as follows:
- Touch the POTATO pad to microwave one to four 3 to 4 ounce potatoes. (Please see chart below for more details.)
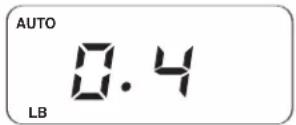
- Touch the START pad. The display will count down the remaining cooking time in minutes and seconds and will beep four times when cooking is completed.
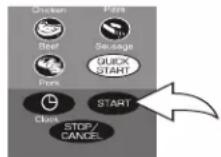
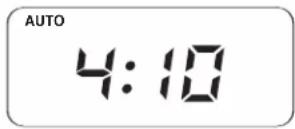
NOTE: Up to four potatoes can be cooked as follows:
Qty Total Weight
1 Potato 0.4lb
2 Potatoes 0.7lb
3 Potatoes 1lb
4 Potatoes 1.3lb
PIZZA QUICK COOK PAD
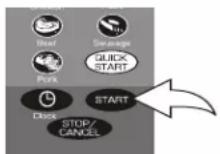
Use this feature and the oven will automatically set the cooking (microwaving and grilling) time based on the amount of reheated pizza. Cook pizza as follows:
- Touch the PIZZA pad to microwave one to three slices of pizza. (Please see chart below for more details.)
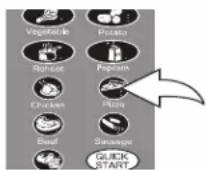
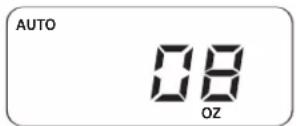
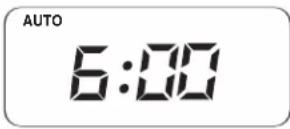
- Touch the START pad. The display will count down the remaining cooking time in minutes and seconds and will beep four times when cooking is completed.
NOTE: Up to three slices of pizza can be cooked as follows:
Qty Total Weight
1 Slice 4oz
2 Slices
3 Slices 16oz
8oz
OPERATION (CONTINUED)
POPCORN QUICK COOK PAD
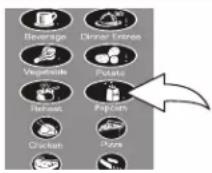
Use this feature and the oven will automatically set the cooking (microwaving) time. Cook popcorn as follows:
- To cook a standard 3 to 3-1/2 oz bag, touch the POPCORN pad.
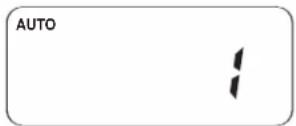
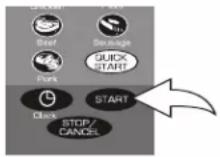
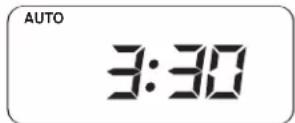
- Touch the START pad. The display will count down the remaining cooking time in minutes and seconds and will beep four times when cooking is completed.
CHICKEN QUICK COOK PAD
Use this feature and the oven will automatically set the cooking (microwaving and grilling) time based on the quantity of chicken. A built-in standing time will help equalize the temperature. Cook chicken as follows:
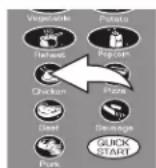
- Touch the CHICKEN pad to microwave one to six pieces of chicken. (Please see chart below for more details.)
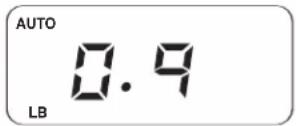
- Touch the START pad. The display will count down the remaining cooking time in minutes and seconds and will beep four times when cooking is completed.
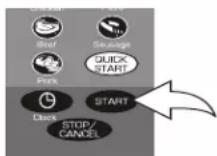
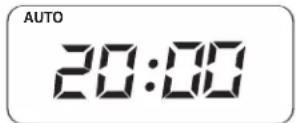
NOTE: Up to six pieces of chicken can be cooked as follows:
Qty Total Weight
1 0.9lb
2 1.3lb
3 1.8lb
4 2.2lb
5 2.6lb
6
2.9lb
OPERATION (CONTINUED)
PORK QUICK COOK PAD
Use this feature and the oven will automatically set the cooking (microwaving and grilling) time based on the quantity of pork. A built-in standing time will help equalize the temperature. Cook pork as follows:
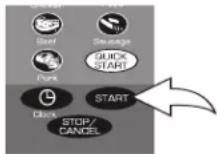
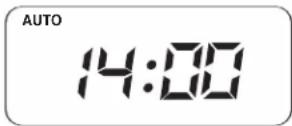
- Touch the PORK pad to microwave one to six pieces of pork. (Please see chart below for more details.)
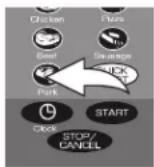
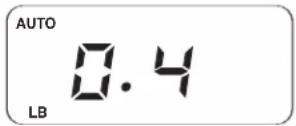
- Touch the START pad. The display will count down the remaining cooking time in minutes and seconds and will beep four times when cooking is completed.
NOTE: Up to six pieces of pork can be cooked as follows:
Qty Total Weight
1 0.4lb
20.7lb
3 0.9lb
4 1.1lb
5 1.3lb
6 1.5lb
REHEAT QUICK COOK PAD
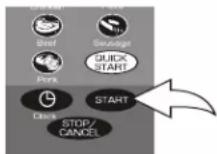
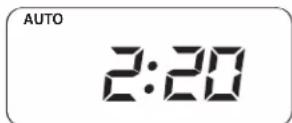
Use this feature and the oven will automatically set the cooking (microwaving) time. Reheat as follows:
- Touch the REHEAT pad to microwave one to five standard plates. (Please see chart below for more details.)
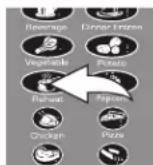
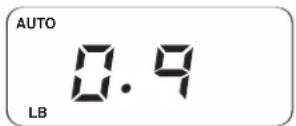
- Touch the START pad. The display will count down the remaining cooking time in minutes and seconds and will beep four times when cooking is completed.
Arranging the foods on the plate will determine how evenly they cook. Dense foods (such as meat) and compact vegetables (such as mashed potatoes) should be placed around the edges and spread out as much as possible to expose them to the microwave energy. Large amounts of food should be spread out to receive more energy than smaller ones. Covering dry meat slices with gravy will help speed the heating. Light, airy foods (such as rice, delicate seafood, etc.) absorb energy quickly. Place them in the center of the plate.
NOTE: Up to five plates can be cooked as follows:
Qty Total Weight
1 0.7lb
2 0.9lb
3 1.1lb
4 1.3lb
5 1.5lb
OPERATION (CONTINUED)
VEGETABLE (FRESH) QUICK COOK PAD
Use this feature and the oven will automatically set the cooking (microwaving) time based on the quantity of fresh vegetables. A built-in standing time will help equalize the temperature. Cook vegetables as follows:
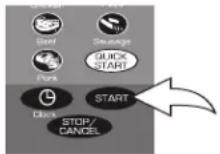
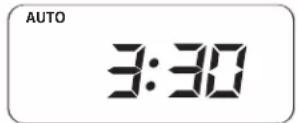
- Touch the VEGETABLE pad to microwave one to five servings of fresh vegetables. (Please see chart below for more details.)
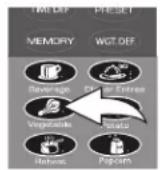
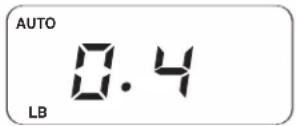
- Touch the START pad. The display will count down the remaining cooking time in minutes and seconds and will beep four times when cooking is completed.
NOTE: Up to five servings of fresh vegetables can be cooked as follows:
Qty Total Weight
1 0.2lb
2 0.4lb
3 0.7lb
4 0.9lb
5 1.1lb
BEEF QUICK COOK PAD
Use this feature and the oven will automatically set the cooking (microwaving and grilling) time based on the quantity of beef. A built-in standing time will help equalize the temperature. Cook beef as follows:
- Touch the BEEF pad to microwave one to five servings of beef. (Please see chart below for more details.)
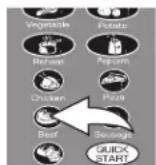
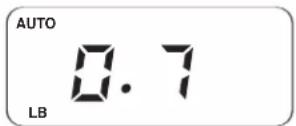
- Touch the START pad. The display will count down the remaining cooking time in minutes and seconds and will beep four times when cooking is completed.
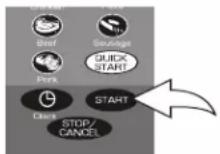
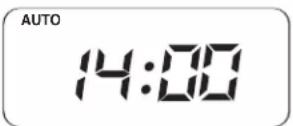
NOTE: Up to five servings can be cooked as follows:
| Qty | Total Weight |
| 1 0.7lb | |
| 2 1.1lb | |
| 3 1.8lb | |
| 4 | 2.2lb |
| 5 2.6lb |
OPERATION (CONTINUED)
BEVERAGE QUICK COOK PAD
Use this feature and the oven will automatically set the cooking (microwaving) time based on the size and quantity of the beverage. Cook beverage as follows:
- Touch the BEVERAGE pad to microwave one to three 200ml (approx. 9/10 of a cup) of beverage.
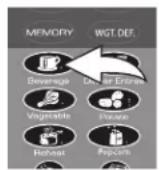
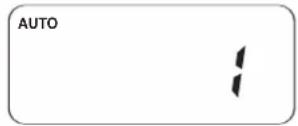
- Touch the START pad. The display will count down the remaining cooking time in minutes and seconds and will beep four times when cooking is completed.
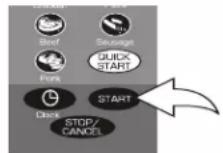
SAUSAGE QUICK COOK PAD
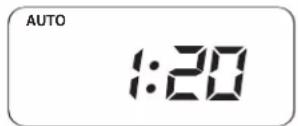
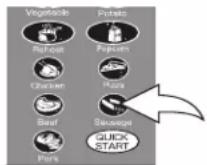
Use this feature and the oven will automatically set the cooking (microwaving and grilling) time based on the quantity of sausages. A built-in standing time will help equalize the temperature. Cook sausages as follows:
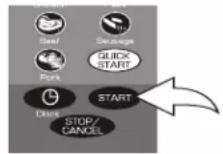
- Touch the SAUSAGE pad to microwave one to five sausages. (Please see chart below for more details.)
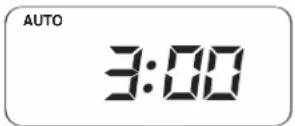
- Touch the START pad. The display will count down the remaining cooking time in minutes and seconds and will beep four times when cooking is completed.
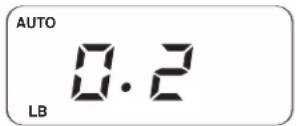
NOTE: Up to five sausages can be cooked as follows:
Qty Total Weight
1 0.2lb
2 0.4lb
3 0.7lb
4 0.9lb
5 1.1lb
OPERATION (CONTINUED)
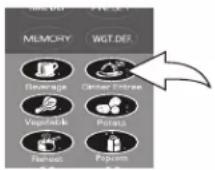
DINNER ENTREE QUICK COOK PAD
Use this feature and the oven will automatically set the cooking (microwaving) time based on the quantity of entrees. A built-in standing time will help equalize the temperature. Cook dinner entrees as follows:
- Touch the DINNER ENTREE pad to microwave one to two 0.5 to 0.7lb dinner entrees.
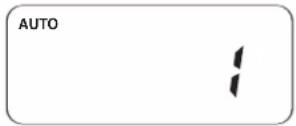
- Touch the START pad. The display will count down the remaining cooking time in minutes and seconds and will beep four times when cooking is completed.
CHILD LOCK
The Child Lock prevents unwanted oven operation by small children. The oven can be set so that the control panel is deactivated or locked.
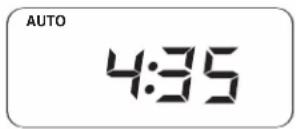
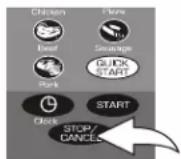
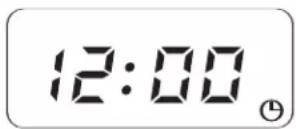
- To activate, press and hold the STOP/CANCEL pad for three seconds, "LOCK" will appear and no buttons can be pressed.
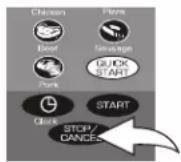
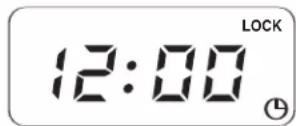
- To deactivate, press and hold the STOP/CANCEL pad for three seconds, "LOCK" will disappear.
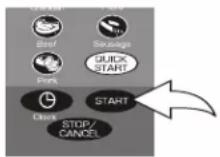
• The oven can be restarted by pressing the START pad.
- Touch the STOP/CANCEL pad to erase all instructions.
- You must then enter new instructions if needed.
- Open the door.
COOKING GUIDE
THE PRINCIPLES OF MICROWAVE COOKING
Microwaves are a form of high frequency radio waves similar to those used by a radio including AM, FM and CB. Electricity is converted into microwave energy by the magnetron tube. From the magnetron tube, microwave energy is transmitted to the oven where it is reflected, transmitted, and absorbed by the food.
Reflection
Microwaves are reflected by metal just as a ball is bounced off of a wall. For this reason, metal utensils are not suitable for use in the microwave. A combination of stationary interior walls and a rotating metal turntable or stirrer fan helps assure that the microwaves are well distributed within the oven cavity to produce even cooking.
Transmission
Microwaves pass through some materials such as paper, glass and plastic much like sunlight shining through a window. Because these substances do not absorb or reflect the microwave energy, they are ideal materials for microwave oven cooking containers.
Absorption
During cooking, microwaves will be absorbed by food. They penetrate to a depth of about 3/4 to 1 1/2 inches. Microwave energy activates the molecules in the food (especially water, fat and sugar), and heat is produced. If you vigorously rub your hands together, you will feel heat produced by friction. The internal cooking of larger foods is done by conduction as the heat which is produced by friction is conducted to the middle of the food. Foods also continue to cook by conduction during standing time.
FOOD CHARACTERISTICS
Quantity: The amount of food placed in a microwave oven has a direct effect on the cooking time. Small amounts of food or liquid require less cooking time than larger amounts of the same substance. As quantity increases, concentration decreases.
Size: Small pieces cook faster than large ones. To speed cooking, cut pieces smaller than two inches (5 cm), so microwaves can penetrate to the middle from all sides. Pieces which are similar in size and shape cook more evenly.
Shape: Many foods are uneven, like a chicken, ribs or broccoli. The thin parts will cook faster than the thick parts, while uniformly thick foods cook evenly. To compensate for irregular shapes, place thin pieces toward the center of the dish and thicker pieces toward the edge of the dish.
Starting Temperature: Frozen or refrigerated foods take longer to cook than foods at room temperature.
Bone and Fat: Because bones conduct heat, the side of the meat the bone is on will cook first, while boneless cuts cook slower but more evenly. Fat attracts microwaves. The middle of these foods are cooked by heat conduction.
Moisture Content: Microwaves are attracted by moisture. Naturally moist foods absorb microwaves better than dry ones. Add a minimum of liquid to moist foods, as excess water slows cooking.
Density: The density of food determines how easily the microwaves can penetrate and how quickly it will cook. Porous foods, like chopped beef or mashed potatoes, microwave faster than dense ones like steak or whole potatoes.
Piercing: Steam builds up pressure in foods which are tightly covered by a skin or membrane. Pierce potatoes, egg yolks and chicken livers to prevent bursting.
MICROWAVE TECHNIQUES
Stirring: Stir foods from outside to center of dish once or twice during cooking to equalize heat and speed microwaving. Foods will not burn or stick, so there's no need to stir constantly as you do in conventional cooking.
Arrangement: Arrange foods with thin or delicate ends, like drumsticks or asparagus spears with the thick or tougher portions to the outside of the dish. The parts which need more cooking will receive more energy, so food will microwave evenly.
Spacing: Individual foods, such as baked potatoes and cupcakes will cook more evenly if placed in the oven an equal distance apart. When possible, arrange foods in a circular pattern. Similarly, when placing foods in a baking dish, arrange around the outside of dish, not lined up next to each other. Food should not be stacked on top of each other.
Rearrangement: Rearrange overlapping areas, like tails of long fish fillets, from top to bottom, and closely packed pieces, like meatballs, from the outside to the center of the dish.
COOKING GUIDE (CONTINUED)
Standing Time: Standing time is especially important in microwave cooking. Microwave energy creates heat in the outer layers of the food. As a result of normal conduction, the food continues to cook for a few minutes after removal from the oven. Letting roasts, large whole vegetables, casseroles and cakes stand to finish cooking allows the middles to cook completely without overcooking, drying or toughening the outsides.
Covering: Covering speeds cooking time, retains moisture, tenderizes, insures even cooking and prevents spattering. Casserole lids or plastic wrap are used for a tighter seal. Vent plastic by turning back one edge at the side of dish to form a narrow slot where excess steam can escape. Various degrees of moisture retention are also obtained by using wax paper or paper towels.
Browning: Microwave energy cooks some foods so quickly that the fats and sugars within the food do not have time to caramelize and give a "browned" appearance. Browning agents do not affect the quality of microwaved foods, but can add color and flavor. For meats and poultry, use bouquet sauce diluted with water or melted butter, soy, Worcestershire, barbecue or steak sauce, a sprinkling of paprika or dry gravy mix; jelly glaze or crumb coating. Frosting and topping finish cakes and breads. Top casseroles at the end of microwaving with grated cheese or crumbs.
Some Foods do not Microwave Well
Eggs in Shells and hard boiled eggs can burst.
Pancakes do not crust, but they reheat well. Fully-prepared, frozen pancakes are available for microwaving.
Deep Fat Frying can cause burns.
Bottles with narrow necks may shatter if heated.
Pop Popcorn only in special microwave poppers. Do not use oil unless specified by the manufacturer, or heat longer than recommended. Never pop popcorn in paper bags or glass utensils or directly on the glass tray.
HOT SNACKS AND APPETIZERS
Hot hors d'oeuvres and appetizers can be prepared very quickly in the oven by the hostess, or individual servings may be prepared by guests.
Many appetizers may be cooked on the serving platter, provided the platter does not have metal trim. A time saver tip—prepare these foods ahead of time, refrigerate or freeze and refresh in the oven at serving time. A plate of appetizers will take only seconds to prepare or refresh.
Cheese melts very rapidly and will toughen if overcooked, so watch foods combined with cheese closely so that overcooking will not occur. As soon as cheese starts to bubble, cooking is completed.
Appetizers that have a crisp pastry exterior are best prepared in a conventional oven.
To prepare appetizers wrapped in bacon, it will be necessary to precook the bacon and then wrap around the foods.
Oysters wrapped in bacon are easier to prepare in the broiler of your conventional range.
Seafood mixtures can be prepared in serving shells as microwave energy will pass through the seafood shells without heating. Aluminum foil should not be used for shells.
If spreads are placed on crackers, care should be taken not to overcook as moisture from the food will cause crackers to become soggy. Crackers used for spreads should be very dry and crisp. This helps avoid sogginess. Heat only until spread is at serving temperature.
The time required to heat all appetizers will depend on the amount of food, and the number and the type of dish selected. Remember the food will become very hot even if the dish is cool. Cheese mixtures retain heat longer when heated with microwave energy.
SPECIFICATIONS
Item Rating Specification
Power Supply 120V 20A single phase with grounding 60Hz AC
Microwave/Grill Output Power 1000W
Microwave Frequency 2450MHz
Outside Dimensions 21.2 (W) x 17.3 (D) x 11.8 (H) inches (539 mm x 440 mm x 300 mm)
Cavity Dimensions 13.9 (W) x 14.1 (D) x 9.4 (H) inches (354 mm x 358 mm x 240 mm)
Weight 36.1 Lbs (16.4 kgs) (Approx)
Timer Digital 99 minutes, 99 seconds
BEFORE YOU CALL FOR SERVICE
Refer to the following checklist before you call for service:
The oven does not work:
- Check that the power cord is securely plugged in.
- Check that the door is firmly closed.
- Check that the cooking time is set.
- Check for a blown circuit fuse or tripped main circuit breaker in your house.
- Check that the Child Lock feature is not engaged.
Sparking in the cavity:
- Check the containers, dishes or utensils in the oven and make sure they are not metal or have metal trim.

Emerson®
SERVICE
TO FIND THE LOCATION AND PHONE NUMBER OF YOUR NEAREST SERVICE CENTER PERMITTED TO PERFORM WARRANTY...
CALL TOLL FREE: 1-800-695-0098
FOR ADDITIONAL SET-UP OR OPERATING ASSISTANCE
PLEASE CALL:
1-800-898-9020
FOR CUSTOMER SERVICE, PLEASE WRITE TO:
Emerson Radio Corp.,
Consumer Affairs Dept.,
5101 Statesman Drive,
Irving, TX 75063.
LIMITED WARRANTY MICROWAVE OVENS
Emerson Radio Corp. Warrants this product to be free from manufacturing defects in original material, including original parts, and workmanship under normal use and conditions (“manufacturing defect”) for a period of one (1) year from date of original purchase in, and if used in, the United States (“warranty”). Should service be necessary under this warranty, Emerson will provide the following at an Independent Service Center or Regional Repair Facility permitted by Emerson to perform repairs, provided the manufacturing defect is verified along with the date of purchase:
* Repair service for one (1) year from date of original purchase at no charge for labor and parts.
* Replacement of a defective magnetron for seven (7) years from date of original purchase (labor not included after initial twelve (12) months).
There are Independent Service Center and Regional Repair Facilities located through out the country. For one nearest you, DIAL TOLL FREE: 1-800-695-0098. In the event the product must be mailed to a Regional Repair Facility which is permitted by Emerson to perform repairs:
* Pack the unit in a well-padded heavy corrugated box.
* Enclose your check or money order payable to the REGIONAL REPAIR FACILITY in the amount of \$ 15.00 to cover return shipping and handling costs.
* Enclose a copy of your proof of purchase (warranty service will not be provided without dated proof of purchase).
* Ship the unit prepaid via UPS or parcel post (insured).
NOTE: This warranty does not cover:
(a) Damage to equipment not properly connected to the product.
(b) Cost incurred in the shipping of the product to and from a Regional Repair Facility permitted by Emerson to perform warranty repairs.
(c) Damage or improper operation of unit caused by customer abuse, misuse, negligence, or failure to follow operating instructions provided with the product.
(d) Ordinary adjustments to the product which can be performed by customer as outlined in the owner's manual.
(e) Signal reception problems caused by external antenna or cable systems.
(f) Products not purchased in the United States.
(g) Damage to product if used outside the United States.
THIS WARRANTY IS NON-TRANSFERABLE AND APPLIES ONLY TO THE ORIGINAL PURCHASER AND DOES NOT EXTEND TO SUBSEQUENT OWNERS OF THE PRODUCT. ANY APPLICABLE IMPLIED WARRANTIES, INCLUDING THE WARRANTY OF MERCHANTABILITY, ARE LIMITED IN DURATION TO A PERIOD OF THE EXPRESSED WARRANTY AS PROVIDED HEREIN BEGINNING WITH THE DATE OF ORIGINAL PURCHASE AT RETAIL AND NO WARRANTIES, WHETHER EXPRESSED OR IMPLIED, SHALL APPLY TO THE PRODUCT THEREAFTER. EMERSON MAKES NO WARRANTY AS TO THE FITNESS OF THE PRODUCT FOR ANY PARTICULAR PURPOSE OR USE.
THE EXTENT OF EMERSON RADIO CORP'S LIABILITY UNDER THIS LIMITED WARRANTY IS THE REPAIR OR REPLACEMENT PROVIDED ABOVE AND, IN NO EVENT, SHALL EMERSON RADIO CORP'S LIABILITY EXCEED THE PURCHASE PRICE PAID BY THE PURCHASER OF THE PRODUCT. UNDER NO CIRCUMSTANCES SHALL EMERSON RADIO CORP. BE LIABLE FOR ANY LOSS, DIRECT, INDIRECT, INCIDENTAL, SPECIAL, OR CONSEQUENTIAL DAMAGE ARISING OUT OF OR IN CONNECTION WITH THE USE OF THIS PRODUCT. THIS WARRANTY IS VALID ONLY IN THE UNITED STATES OF AMERICA.
THIS WARRANTY GIVES YOU SPECIFIC LEGAL RIGHTS. HOWEVER, YOU MAY HAVE OTHER RIGHTS WHICH MAY VARY FROM STATE TO STATE. SOME STATES DO NOT ALLOW LIMITATION ON IMPLIED WARRANTIES OR EXCLUSION OF CONSEQUENTIAL DAMAGE, THEREFORE THESE RESTRICTIONS MAY NOT APPLY TO YOU. MV1094F
Emerson®
EMERSON
PART NO. 01092007 Printed in China
- Emerson®
- CONTENTS
- IMPORTANT SAFETY INSTRUCTIONS
- WARNING - To reduce the risk of burns, electric shock, fire, and injury to persons or exposure to excessive microwave energy:
- SAFETY PRECAUTIONS
- General Use
- Utensils
- Food
- GROUNDING INSTRUCTIONS
- WARNING:
- INSTALLATION
- Roller Guide
- Glass Tray
- HOW TO USE YOUR MICROWAVE OVEN SAFELY
- LOCATION OF CONTROLS
- OPERATION
- SETTING THE CLOCK
- NOTES:
- WEIGHT DEFROST
- OPERATION (CONTINUED)
- TIME DEFROST
- MICROWAVE COOKING
- QUICK START
- GRILL COOKING
- PRESET COOKING
- MULTI-STAGE COOKING
- POTATO QUICK COOK PAD
- PIZZA QUICK COOK PAD
- POPCORN QUICK COOK PAD
- CHICKEN QUICK COOK PAD
- PORK QUICK COOK PAD
- REHEAT QUICK COOK PAD
- VEGETABLE (FRESH) QUICK COOK PAD
- BEEF QUICK COOK PAD
- BEVERAGE QUICK COOK PAD
- SAUSAGE QUICK COOK PAD
- DINNER ENTREE QUICK COOK PAD
- CHILD LOCK
- COOKING GUIDE
- THE PRINCIPLES OF MICROWAVE COOKING
- Reflection
- Transmission
- Absorption
- FOOD CHARACTERISTICS
- MICROWAVE TECHNIQUES
- COOKING GUIDE (CONTINUED)
- Some Foods do not Microwave Well
- HOT SNACKS AND APPETIZERS
- SPECIFICATIONS
- BEFORE YOU CALL FOR SERVICE
- The oven does not work:
- Sparking in the cavity:
- LIMITED WARRANTY MICROWAVE OVENS
Brand : Emerson
Model : MWG9111SL
Category : Microwaves