SZB-20 - Sorbet maker SPT - Free user manual and instructions
Find the device manual for free SZB-20 SPT in PDF.


| Product Type | Automatic Flake Ice Maker |
| Model | SZB-20 |
| Ice Making Capacity | 66 lbs per 24 hours (at 50°F water, 59°F ambient) |
| Ice Storage Capacity | 7 lbs |
| Rated Voltage | 110-120V / 60Hz |
| Power Consumption | 270W |
| Dimensions (W x D x H) | 13 x 19.8 x 23.8 inches |
| Front Panel Material | Stainless Steel |
| Control Panel | LED indicators (RUN, FAULT, WATER LOW, ICE FULL) |
| Water Supply | Internal water storage tank; requires connection to drinkable water supply |
| Drainage | Gravity based draining via rear drain outlet |
| Auto-Cleaning Function | Automatic cleaning cycle runs when unit is turned on (about 1 minute) |
| Overheat Protection | Shuts off automatically if internal temperature exceeds 164°F; resumes below 158°F |
| Installation Type | Free-standing only; requires 3 ft clearance on sides, 6 inches behind |
| Power Cord | 3-prong grounded plug; do not use adapters |
| Compressor | Wait 5 minutes before restarting after any stop |
| Water Pressure Requirement | 1.5 to 3 bar (22 to 44 PSI) |
| Included Accessories | Water inlet tube, drain tube, squeeze hose clamp, ice shovel |
| Maintenance | Regularly check hoses; drain internal tank if unused for long period |
| Safety | Do not tilt over 45°; do not place near flammable materials; supervised use |
Frequently Asked Questions - SZB-20 SPT
User questions about SZB-20 SPT
0 question about this device. Answer the ones you know or ask your own.
Ask a new question about this device
Download the instructions for your Sorbet maker in PDF format for free! Find your manual SZB-20 - SPT and take your electronic device back in hand. On this page are published all the documents necessary for the use of your device. SZB-20 by SPT.
USER MANUAL SZB-20 SPT
natural_image
Line drawing of a desktop computer tower with ventilation slots and ventilation grilles (no text or labels)SZB-20
SZB-40
Thank you for selecng SPT Automac Flake Ice Maker. Please follow and save this instrucon manual.
Content
Features......1
Before First Use....1
Structure....2
Accessories......2
Installaon Instrucons....3
Maintenance....3
Specicaons....3
Troubleshoong......4
Circuit Diagram....5
Warranty
Features:
• Stainless Steel front panel and at door
• LED indicators on operaon board
- Internal water storage tank for water preservaon
• Insulated ice storage cabinet
• Gravity based draining
- Auto-cleaning funcon: Every me the unit is turned on, it will go through an auto-cleaning process. During this process, the 3 indicator lights ("RUN", "FAULT" and "WATER LOW") will ash at the same me. This process takes about one minute
- Overheat protecon: If the internal temperature is above 164^ F, the unit will shut-o automacally with “FAULT” and “WATER LOW” lights ashing and the “RUN” light staying solid. The unit will resume operaon when the internal temperature drops below 158^ F.
Before First Use:
- The unit should not be lted more than 45^ during transportaon and unpacking. Do not turn the ice maker upside-down as this may damage the compressor or refrigeraon system.
- The ake ice maker should be placed on a at, level and rm surface away from any heat sources or corrosive gas.
- This unit is for Free-Standing use only. It vents from the sides. Do no place anything above the unit or install under-counter. There must be at least 3 feet of clearance on each side and at least 6-inches behind the unit.
- Wait 12 hours aer installaon before turning on the ice maker.
- Unit is designed for use in a 3-prong grounded outlet. Do not use adapters to bypass this feature.
- If the power cord is damage, it must be replaced by a qualified person to avoid electrical hazards.
- Flake ice maker should be connected to a drinkable water supply only.
- This appliance is not intended for use by children or other persons without assistance or supervision if their physical, sensory or mental capabilities prevent them from using it safely. Children should be supervised to ensure that they do not play with the appliance.
- Please do not place the machine near ammable materials.
- Use only new hose sets with the appliance. Do not use previously used hoses.
Structure:
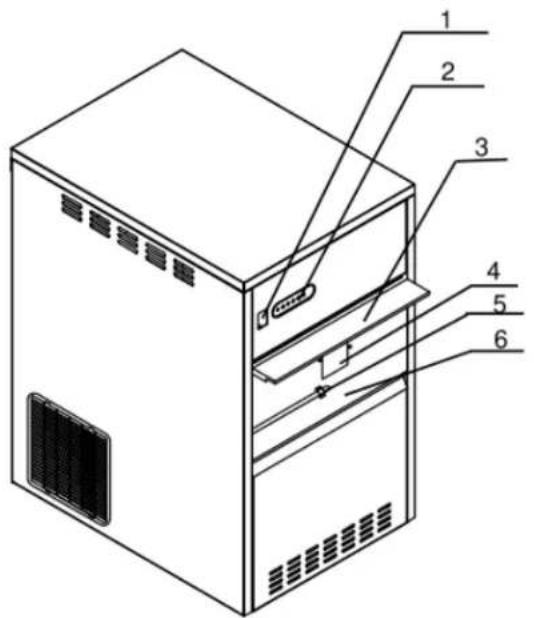
- Power Switch
- Ice Outlet
- Power Cord
-
Drain Outlet
-
Display Panel
- Ice Full Sensor
- Water Inlet
- Foot
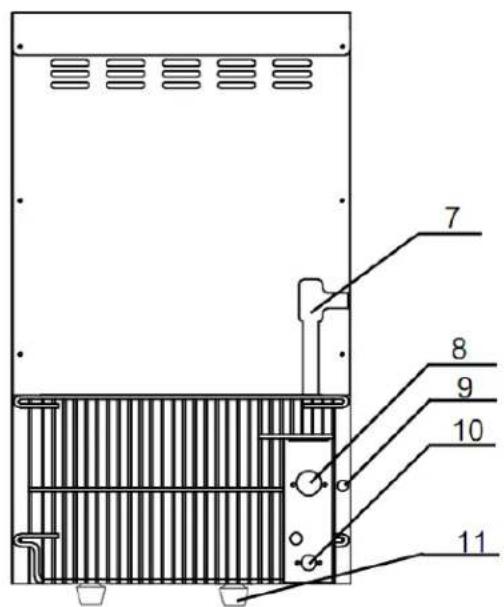
- Ice Maker Door
- Ice Storage Cabinet
- Drain Spout
Accessories :
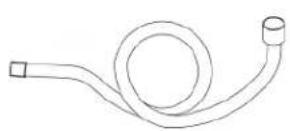
Water Inlet Tube
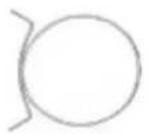
Squeeze Hose Clamp
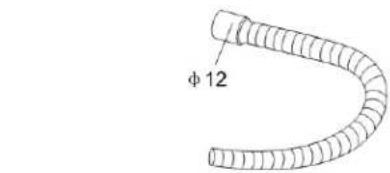
Water Drainage Tube
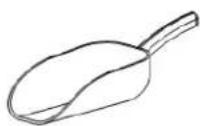
Ice Shovel
Installaon Instrucons:
- Unpack the ice maker and take out the aached documents and included parts, such as the water inlet and drain tubes, ice shovel and gaskets.
- Install in the proper free-standing locaon. (See Before First Use)
- Connect one end of the drain tube to the water outlet connector on the ice maker. Connect the other side to your drain or external condensaon pump. (purchased separately from most hardware or plumbing stores)
- Connect one end of the water inlet tube to the ice maker with the 34 " screw type connector. Connect the other end to your water supply. The water pressure of the water supply pipe is 1.5 to 3 bar. (22 to 44 PSI)
- Insert the plug into the power supply socket.
Maintenance:
1: If the compressor stops for any reason like water shortage, ice full, power o or loss of power; do not restart it right away. Please wait about 5-minutes.
2: Check the water inlet and drain line connectors regularly for any signs of cracks or wear.
3: If the ice maker will be unused for a long period of me, please switch o the power switch and wipe the inner liner of the ice storage container. Also, drain the internal water tank via Drain Spout. (Part No. 9)
4: Unplug the unit by holding the plug, not the cord wire.
Specicaons:
| Model Ice | Making Capacity* (Ibs/24hrs) | Rated Voltage | Power Consumpon (W) | Ice Storage Capacity (Ibs) | Dimensions (in) |
| SZB-20 66 | 110-120V / | 60Hz | 270 | 7 13 X 19 | 9.8 X 23.8 |
| SZB-40 | 88 | 380 | 12 | 15.7 X 21.4 X27.6 |
* Based on water temperature at 50°F and ambient temperature at 59°F.
Troubleshoong:
| Trouble Causes Soluons | ||
| The ice maker does not work. 1. | The voltage is too low.2. The ambient temperature is too low (lower than 41°F) | 1. Turn o the ice maker and restart it when the voltage is normal.2. Use it when the ambient temperature is higher than 41°F. |
| “WATER LOW” indicator light is on. | 1. Water shortage from the water supply.2. Water valve is damaged.3. Water pressure is too low. | 1. Check the water supply.2. Check the water valve.3. Water pressure should be higher than 1.5 bar. |
| Compressor does not work. 1. | Water shortage.2. Ice is full. | 1. Check the water supply system, including water valve and water tubes.2. Remove the ice from the ice bucket. |
| Compressor works, but no ice is made. | 1. Refrigerant leakage.2. The refrigeration system is blocked. | 1. Contact refrigerator repair shops for recharging refrigerant.2. Check whether the venlaon fan is working. |
| “FAULT” indicator light stays on. | 1. Flake ice motor is damaged.2. Fan motor is damaged. | Contact Sunpentown. |
| “ICE FULL” indicator light ashes. | The ice full sensor is loose or damaged. | Replace the ice full sensor. |
| “WATER LOW” and “ICE FULL” indicator lights ashes at the same me. | 1. Water inlet is clogged.2. Ambient temperature is too low. | Turn o the unit and turn it back on when the ambient temperature is high than 41°F. |
| “FAULT” and “WATER LOW” lights ash and the “RUN” light stays solid. | The unit is overheated. The internal temperature is above 164°F. The unit will resume operaon when the internal temperature drops below 158°F. | |
Please contact Sunpentown if the troublesomeong doesn't work
Circuit Diagram
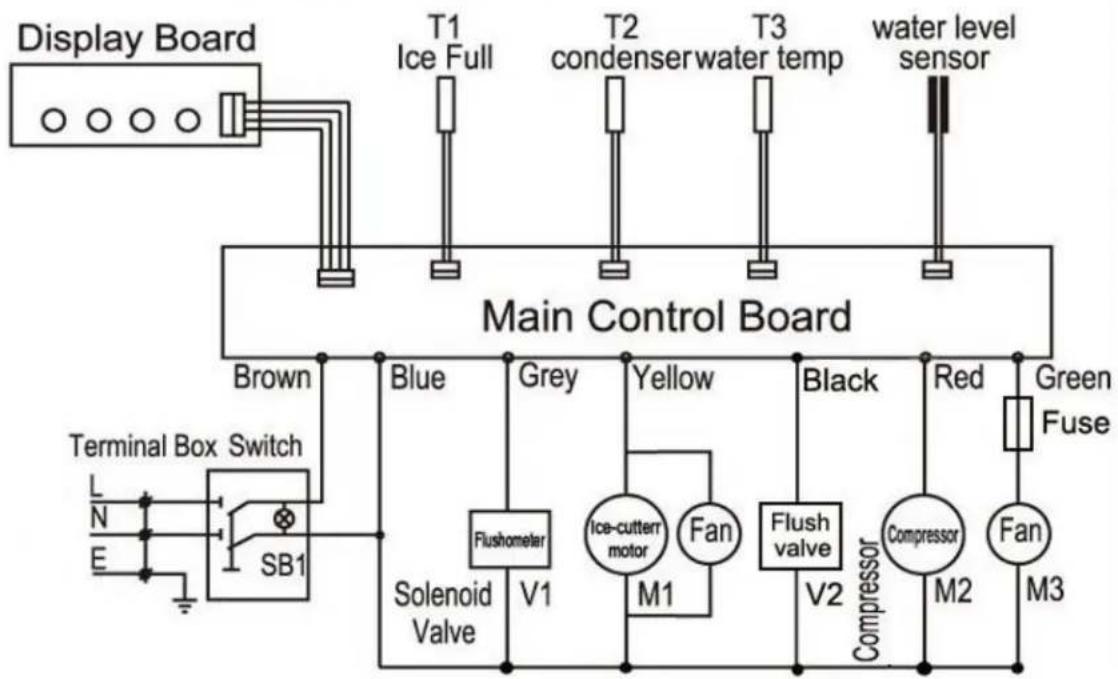
flowchart
graph TD
    A["Display Board"] --> B["Main Control Board"]
    B --> C["T1 Ice Full"]
    B --> D["T2 condenser water temp"]
    B --> E["T3 water level sensor"]
    B --> F["Terminal Box Switch"]
    F --> G["Solenoid Valve"]
    G --> H["Flushometer V1"]
    H --> I["Green Fuse M3"]
    G --> J["Compressor M2"]
    J --> K["Black"]
    K --> L["Flush valve V2"]
    L --> M["Fan"]
    M --> N["Ice-cutter motor M1"]
    N --> O["Yellow"]
    O --> P["Grey"]
    P --> Q["Blue"]
    Q --> R["Brown"]
    R --> S["SB1"]
SPT®
Your Guarantee
If this product is found to be faulty as a result of faulty materials or workmanship within one year from date of purchase, it will be repaired free of charge.
This guarantee is subject to the following terms:
• Sunpentown must be notified of the fault.
- Proof of purchase must be presented to Sunpentown's nominated representative.
- The warranty will be void if the product if modified, misused or repaired by an unauthorized person.
- The warranty after repair will not be extended beyond the original one-year period.
- All replacement parts will be new or reconditioned.
- Parts, which are replaced, become the property of Sunpentown.
- The warranty applies for the use of the product in the USA only.
What is NOT COVERED:
• Warranty does not include freight charges.
- Incidental or consequential damage caused by possible defects with this product.
- Damage to product caused by improper power supply voltage, accident, fire, floods or acts of nature.
This GUARANTEE is in addition to your Statutory Rights
SUNPENTOWN INTERNATIONAL INC.
Tel: 800-330-0388 Fax: 626-336-7116
14625 Clark Ave., City of Industry CA 91745
service@sunpentown.com
www.sunpentown.com
Brand : SPT
Model : SZB-20
Category : Sorbet maker