DPS1200 - To scan COBRA - Free user manual and instructions
Find the device manual for free DPS1200 COBRA in PDF.

| Brand | Cobra |
| Model | DPS1200 |
| Product Type | Radar/Laser Detector |
| Power Source | 12V DC (cigarette lighter adapter) |
| Detection Bands | X, K, Ka, Laser |
| Display Type | LED Alphanumeric |
| Audio Alerts | Yes, with adjustable volume |
| Dimensions (W x H x D) | 4.7 x 2.9 x 1.2 inches |
| Weight | 5.0 oz |
| Operating Temperature | -20°C to 70°C |
| Warranty | 1 Year Limited |
| Mounting | Windshield suction cup or dashboard |
| Filter Modes | City, Highway, Auto |
| VG-2 Immunity | Yes |
| Maintenance | Clean with soft, dry cloth; avoid solvents |
| Safety | Do not operate while driving; mount securely |
| Spare Parts Available | Power cord, mounting bracket, suction cups |
| Repairability | Not user-serviceable; contact Cobra support |
| Country of Origin | China |
| Certification | FCC, CE |
| Included Accessories | Power cord, suction cups, user manual |
| Power Consumption | < 2W |
| False Alert Filtering | Yes |
Frequently Asked Questions - DPS1200 COBRA
User questions about DPS1200 COBRA
0 question about this device. Answer the ones you know or ask your own.
Ask a new question about this device
Download the instructions for your To scan in PDF format for free! Find your manual DPS1200 - COBRA and take your electronic device back in hand. On this page are published all the documents necessary for the use of your device. DPS1200 by COBRA.
USER MANUAL DPS1200 COBRA
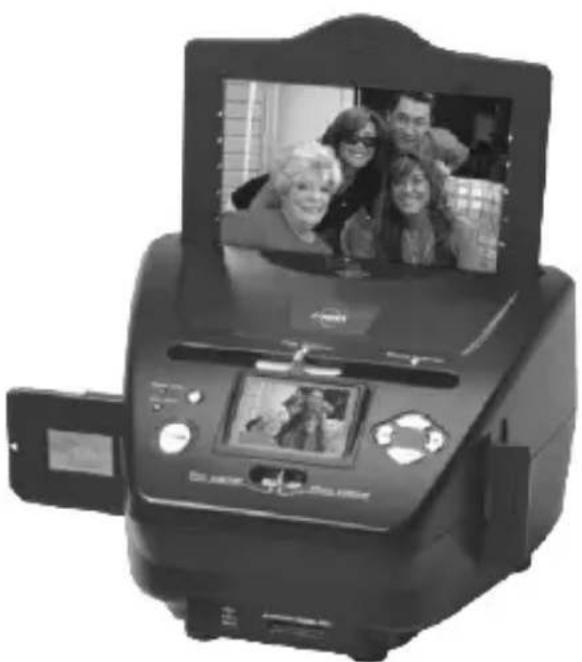
Film & photo scanner

natural_image
Black-and-white photo of a CMWAN printer with a family photo displayed on its screen (no visible text or symbols)For correct usage please read these instructions carefully and keep in a safe place for future reference!
CONTENTS
Safety Precautions....1
Package contents....2
Description of parts....3
Loading Slides.... 4
Loading Negatives....5
Loading Photo....7
General operations....8
Technical Specifications....28
1. Safety precautions
Important: Do not expose this product to rain or moisture to preserve the life of your product.
Caution: Do not disassemble this unit. To prevent this risk of electric shock, do not remove cover.
Ventilation: The device should be situated so that its location or position does not interfere with its proper ventilation. For example, the unit should not be situated on a bed, sofa, rug or similar surface that may block the ventilation openings.
Heat: The device should be situated away from sources of high heat such as radiators or stoves.
Cleaning: We strongly suggest using a clean, dry, non-alcohol cotton swab to clean the glass surface periodically to produce a clear image.
Non use period: The USB cord for the device should be unplugged from the computer when the unit is left unused for a long period of time.
USB overloading: Do not overload the USB connections on your computer. If you have too many devices connected to your computer such as a wireless mouse, Media player, mobile phone or other USB powered devices. There may not be enough power for the film & photo scanner to operate properly.
Servicing: The user should not attempt to service the device beyond those means described in the operating instructions. All other servicing should be referred to qualified person.
Film Holder: The design of film holder is follow ISO standard. In some cases the holes on the film will not match exactly to alignment of the holder. This is caused by a non-standard camera. In this case there will be a small black line on the edge of the frame that can easily be cropped out using photo editing software.
ISO-- International Organization for Standardization
2: Package contents
◆Film & photo scanner
◆USB cable
◆Negative Film Holder
◆ Positive Slide Holder
◆Photo Tray (5"x7", 4"x6", 3"x5")
◆AC/DC adapter
◆User's Manual
3.Description of parts
natural_image
Black-and-white photo of a digital scanner with a family photo displayed on its screen (no visible text or symbols)
natural_image
Abstract geometric shape with three squares arranged in a grid (no text or symbols)Positive slide Holder

natural_image
Black rectangular object with grid pattern, no visible text or symbolsNegative film Holder
natural_image
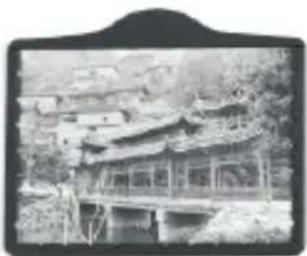
Black-and-white photo of a traditional Chinese pavilion with curved roof and wooden bridge, surrounded by trees (no visible text or symbols)
natural_image
Black-and-white photo of a vintage car with two people sitting on the roof, no visible text or symbols
natural_image
Black-and-white photo of a traditional Chinese archway with visible shop signs and figures (no readable text or symbols)4. Loading Slides
natural_image
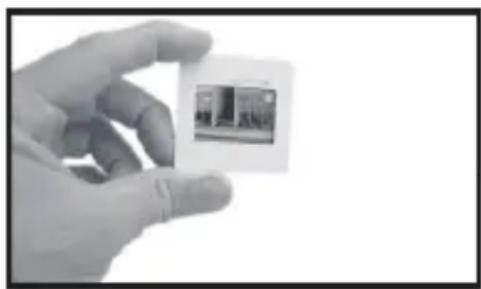
Hand holding a small card with a small embedded image (no visible text or symbols)Hold up the slide toward the light. Face the trademark side of the slide away from you. Look through the slide and it should appear normally (not a mirror image).
Now turn the slide so the image is upside down while looking at the same side.

natural_image
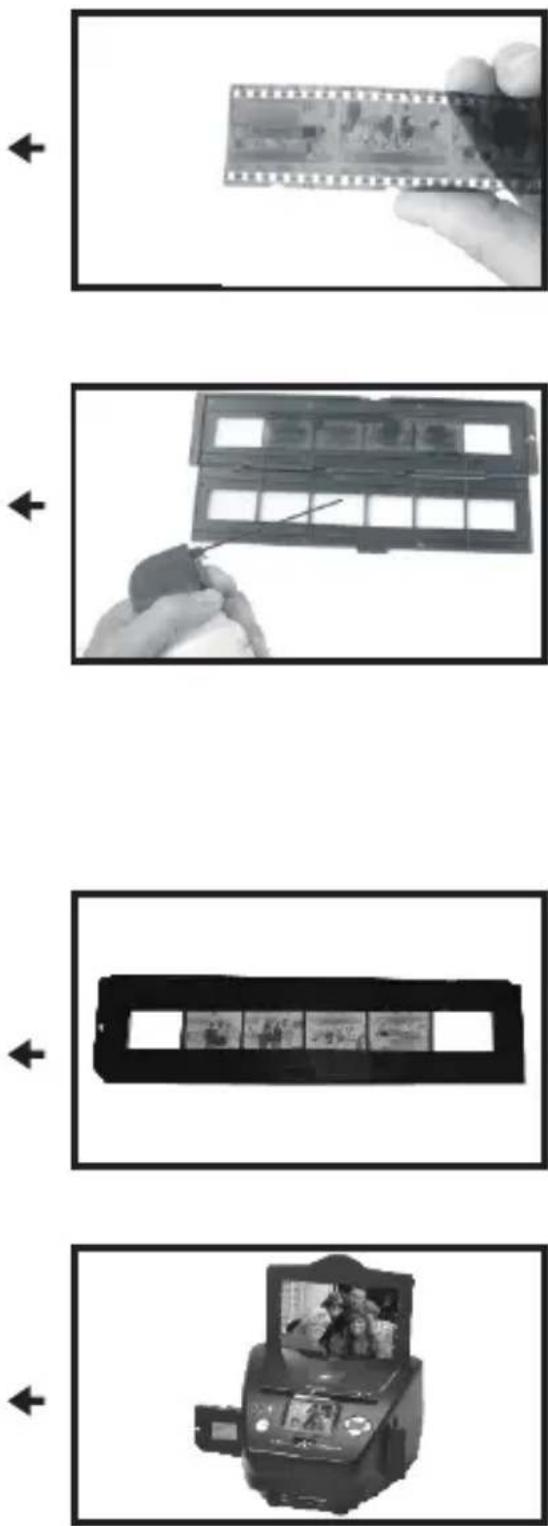
Hand holding a device with a cable inserted into a grid of rectangular blocks (no visible text or symbols)Open the slide holder at the marked spot on the top.
With the slide holder laid open place the slide into recessed area in the holder-the slide should fit perfectly.
Note: Handle slides with care. Any dust scratches or fingerprints will show up on your saved images. If possible use cotton gloves when handling slides. It is recommended to use compressed air to remove any dust on the slides. This is not included with the film & photo scanner but can be purchased from an office supply or electronics retailer.

natural_image
Black rectangular object with two square cutouts, no visible text or symbolsClose the slide holder and press the edges so that it locks in place.

natural_image
Black-and-white photo of a printer with a screen displaying two people, no visible text or symbols.Hold it in the position as shown in the film & photo scanner.
Insert the Slide Holder into the slot on the right side of the film & photo scanner as shown.
5. Loading Negatives
Hold up the negative toward the light. As you look through the negative you should be able to read the small negative numbers normally (not a mirror image).
Now turn the negative so the image is upside down while looking at the same side.
Open the negative holder at the marked spot on the top.
With the negative holder laid open place the negative into holder so the notches line up with the notches on the holder.
Note: Handle negatives with care. Any dust, scratches or fingerprints will show up on your saved images. If possible use cotton gloves when handling negatives. It is recommended to use compressed air to remove any dust on the negatives. This is not included with the film & photo scanner but can be purchased from an office supply or electronics retailer..
Close the negative holder and press the edges so that it locks in place
Hold it in the position as shown in the film & photo scanner.
Insert the negative holder into the slot on the right side of the film & photo scanner as shown.
Film Holder: The design of film holder is follow ISO standard. In some cases the holes on the film will not match exactly to alignment of the holder. This is caused by a non-standard camera. In this case there will be a small black line on the edge of the frame that can easily be cropped out using photo editing software. ISO- International Organization for Standardization
6: Loading photo
First insert the photo into appropriately sized photo tray (5"x7", 4"x6", 3"x5")
Note: Handle photo with care. Any dust scratches or fingerprints will show up on your saved images.
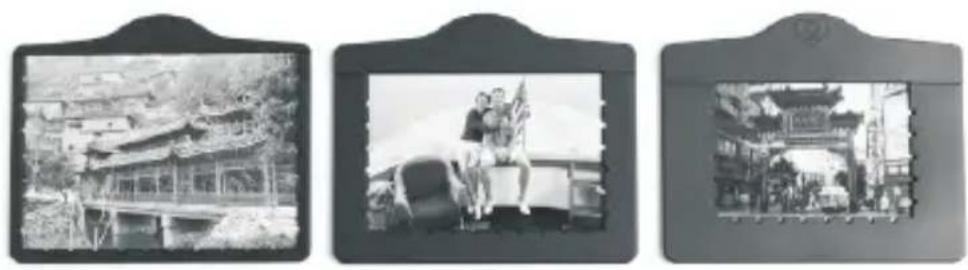
natural_image
Three black-and-white photos showing traditional Chinese architecture: a village with pavilions, a roller coaster ride, and a historic gate (no visible text or symbols)Insert the photo tray into the photo tray slot from the top of the film & photo scanner as shown.

natural_image
Black-and-white photo of a digital printer with a group photo on its screen (no visible text or symbols)7: General operations
◆Quick Start
1: If you want to scan the films, please switch two switches on the top of the device to the left side. Otherwise if you want to scan the photos, please switch to the right side.
2: Put Slide/Negative onto the Slide/Negative Holder or insert photo into appropriately sized photo tray (5"x7", 4"x6", 3"x5").
3: Insert the Slide/Negative Holder into the slot on the right of the device or insert photo tray into photo tray slot from the top of the device.
4: Apply the power to the film & photo scanner by two ways:
(1)USB: Connect the film & photo scanner to PC with USB cable
(2)5V adapter: Connect the adapter to the device with USB cable
5: Press POWER button to turn on the film & photo scanner.
Note: (1) When the Film scanner mode is selected, the Film scan indication LED is on.
(2) When the Photo scanner mode is selected, the Photo scan indication LED is on.
6: Follow the menu on screen for scanning.
7: After finished the scanning, take out the memory card.
Note: The film & photo scanner has a 32MB built-in memory for recording, when there is a memory card inserted, it will be the top priority for saving data
8: Or read pictures from PC by USB mode
◆Operation Guide Home/MODE: Main menu
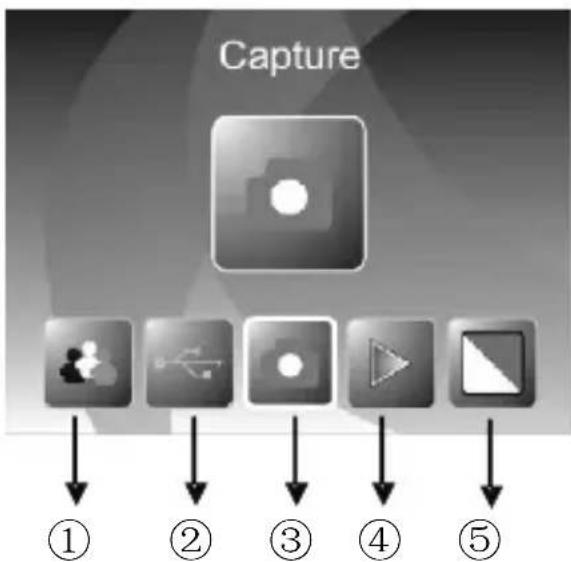
When the Film scanner mode is selected, the following main menu will be appeared:

flowchart
graph TD
    A["Capture"] --> B["Step 1"]
    A --> C["Step 2"]
    A --> D["Step 3"]
    A --> E["Step 4"]
    A --> F["Step 5"]

flowchart
graph TD
    A["Resolution"] --> B["Square Grid"]
    C["Play"] --> D["Monitor Icon"]
    E["Pattern Icon"] --> F["Person Icon"]
    G["USB Icon"] --> H["USB Icon"]
    I["⑥"] --> J["Output Step"]
①Language mode
②USB mode
③Capture mode
④Playback mode
⑤Film Type
⑥Resolution
When the Photo scanner mode is selected, the following main menu will be appeared:
flowchart
graph TD
    A["Capture"] --> B["Step 1"]
    B --> C["Step 2"]
    C --> D["Step 3"]
    D --> E["Step 4"]
    E --> F["Step 5"]

flowchart
graph TD
    A["Crop"] --> B["1"]
    B --> C["2"]
    C --> D["3"]
    D --> E["4"]
    E --> F["5"]
    F --> G["6"]
    G --> H["7"]
①Language mode
②USB mode
③Capture mode
④Playback mode
⑤Effect: multicolor, B&W
⑥Crop proportion: 5X7, 4X6, 3X5
⑦Resolution
Home/MODE: No memory card

text_image
No card ? No memory card indicatorIf there is no memory card been inserted to device, a warning icon will be shown on screen when enter main menu
1: Capture

text_image
Capture Resolution or Capture CropAfter welcome page, above menu will be appeared. User can press LEFT/RIGHT button for desired menu, then press ENTER button to confirm the selection.
1.1 Capture: Mirror/Flip(Hard Key)
If any image requires for Mirror or Flip before capture, press LEFT/RIGHT button for Mirror/Flip function, the live view will be adjusted accordingly(This step is to correct user misplaced the film/photo either upside down or flip). Mirror and Flip function can only be used while in the live view mode.

text_image
MirrorPress LEFT button to change image left to right

natural_image
Two grayscale images of a small dog with fluffy fur, one being rotated by a 'Flip' arrow (no text or symbols on the dog itself)Press RIGHT button to upside down image
1.2 Capture mode
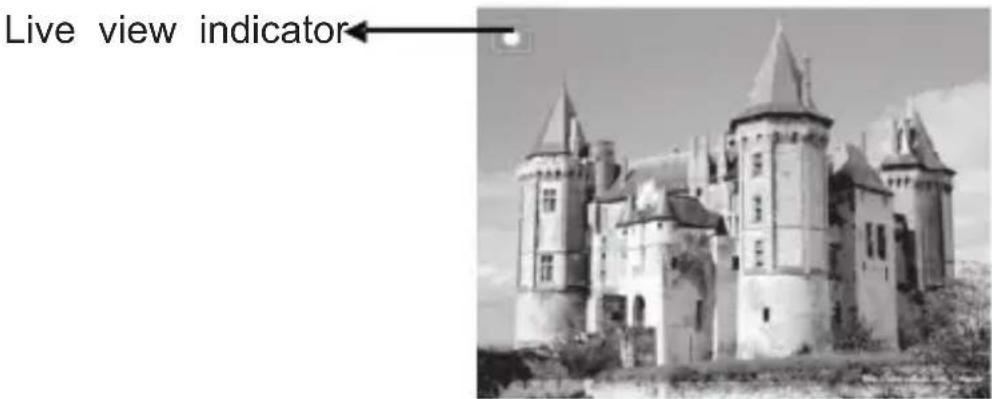
text_image
Live view indicator←Once enter capture mode, there will be an indicator on left top corner to indicate it is in live view mode.
User can also press ENTER button, then press LEFT/RIGHT button to adjust EV value, press ENTER button again to confirm and back to live view mode.
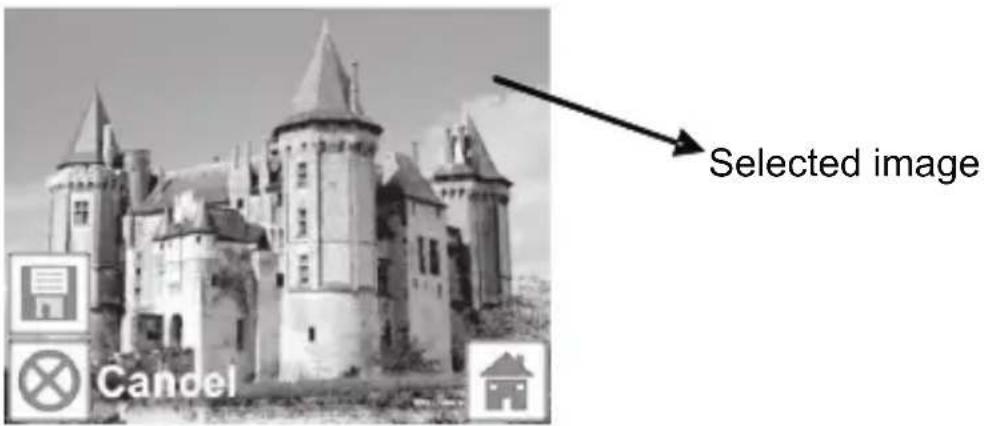
1.3 Capture: Edit Menu
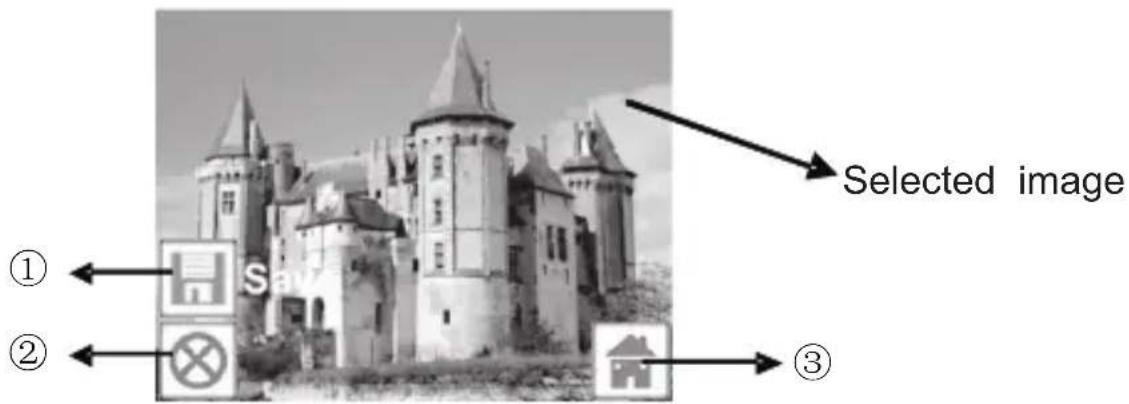
text_image
Selected image ① ② ③①Save: save captured image
②Cancel: cancel any editing with this image
③Home: back to main menu
1.4 Live view — Capture/Edit menu

text_image
Scan EnterOnce press SCAN button in live view, the edit menu will be appeared. When user press ENTER button, the current image will be saved to internal memory or memory card when there is a memory card inserted, the display will return to live view again.
1.5 Capture: Save
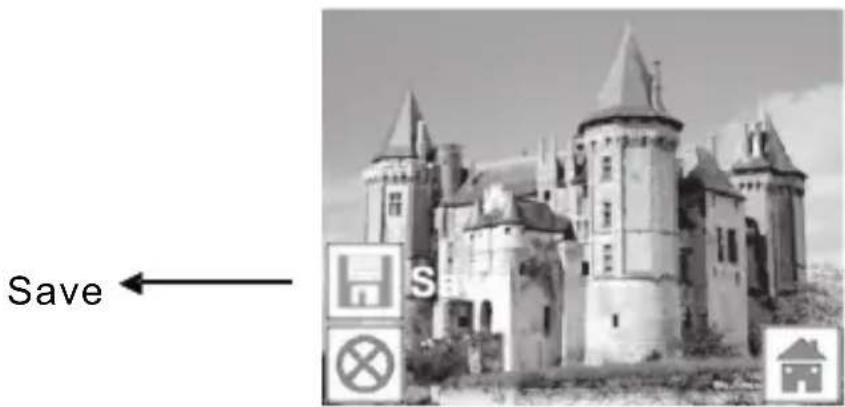
text_image
Save ←Once user press SCAN button, preview (live view) image will be selected and shown on the TFT which will take between 1\~2 second with 2 icons shown on the left side of the screen. Save icon will be highlighted for user to confirm by ENTER button, after the above step, the display will go back to live view mode (preview)
1.6 Capture: Cancel
text_image
Selected image CancelSelect Cancel icon with LEFT/RIGHT button and press ENTER button to cancel any of editing step with present selected image and the display will return to live view mode (nothing will be saved)
1.7 Capture: Home

natural_image
Black-and-white exterior view of a historic castle with towers and a gate sign (no readable text or symbols)Select Home icon with LEFT/RIGHT button, then press ENTER button or press MODE button on top of the device anytime to back to main menu
1.8 Exit from Edit mode back to Capture mode (live view)
Once user press ENTER button for save or cancel option, the display will return to capture mode/live view. Then user can move the film holder to next target film or change another photo to capture.
1.9 Memory full
Once the images in internal memory or memory card is full, a memory full icon will be shown on screen when press SCAN button. User has to download the images to PC or replace another memory card for continue capture.
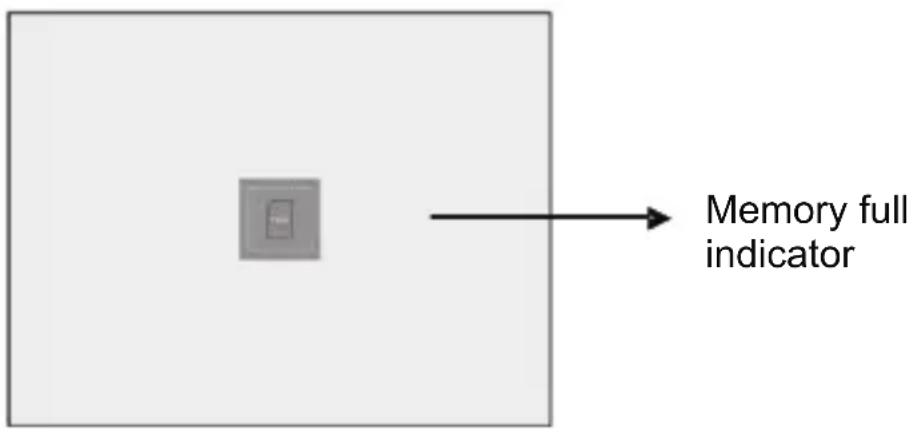
text_image
Memory full indicator2: Playback

text_image
Playback Or PlaybackPress LEFT/RIGHT button to playback mode when power on the device or access the main menu by Home icon/MODE button anytime. Press ENTER button to confirm the selection.
2.1 Playback: Auto Slide Show

text_image
Slide show modeOnce user enter playback mode (default to slide show), TFT will auto display all images stored in internal memory or memory card with 2 seconds interval from previous captured image. User can also stop the slide show by press ENTER button (Only the images captured by the film & photo scanner are available in playback mode)
2.2 Playback: Edit Menu
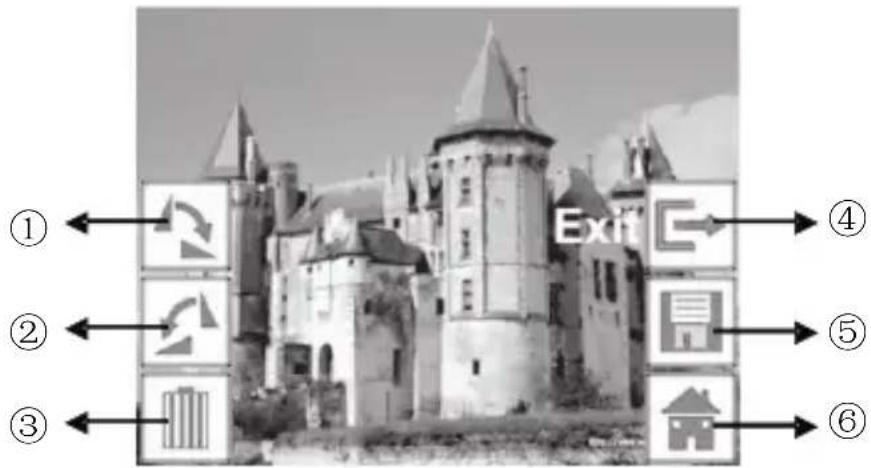
text_image
① ← ② ← ③ ← ④ → ⑤ → ⑥ → Exit C①Rotate +90: captured image rotate +90 degrees
②Rotate -90: captured image rotate -90 degrees
③Delete: delete this picture stored in internal memory or memory card
④Exit: return to Slide show mode
⑤Save: save the modified image to internal memory or memory card
⑥Home: return to main menu
2.3 Playback: Slide show → Single picture → Edit mode
User can interrupt (stop) slide show mode to stand alone playback mode (single picture playback) by press ENTER button. (Pause slide show) Then user is able to scroll each picture by LEFT/RIGHT button. Once user select the picture stored in internal memory or memory card which intended to be modified, press ENTER button again to bring out the edit mode for modification.
If there is no memory card inserted or no image in internal memory, TFT will auto display 20 frames stored in internal memory when enter playback mode, but they will not be edited anytime.
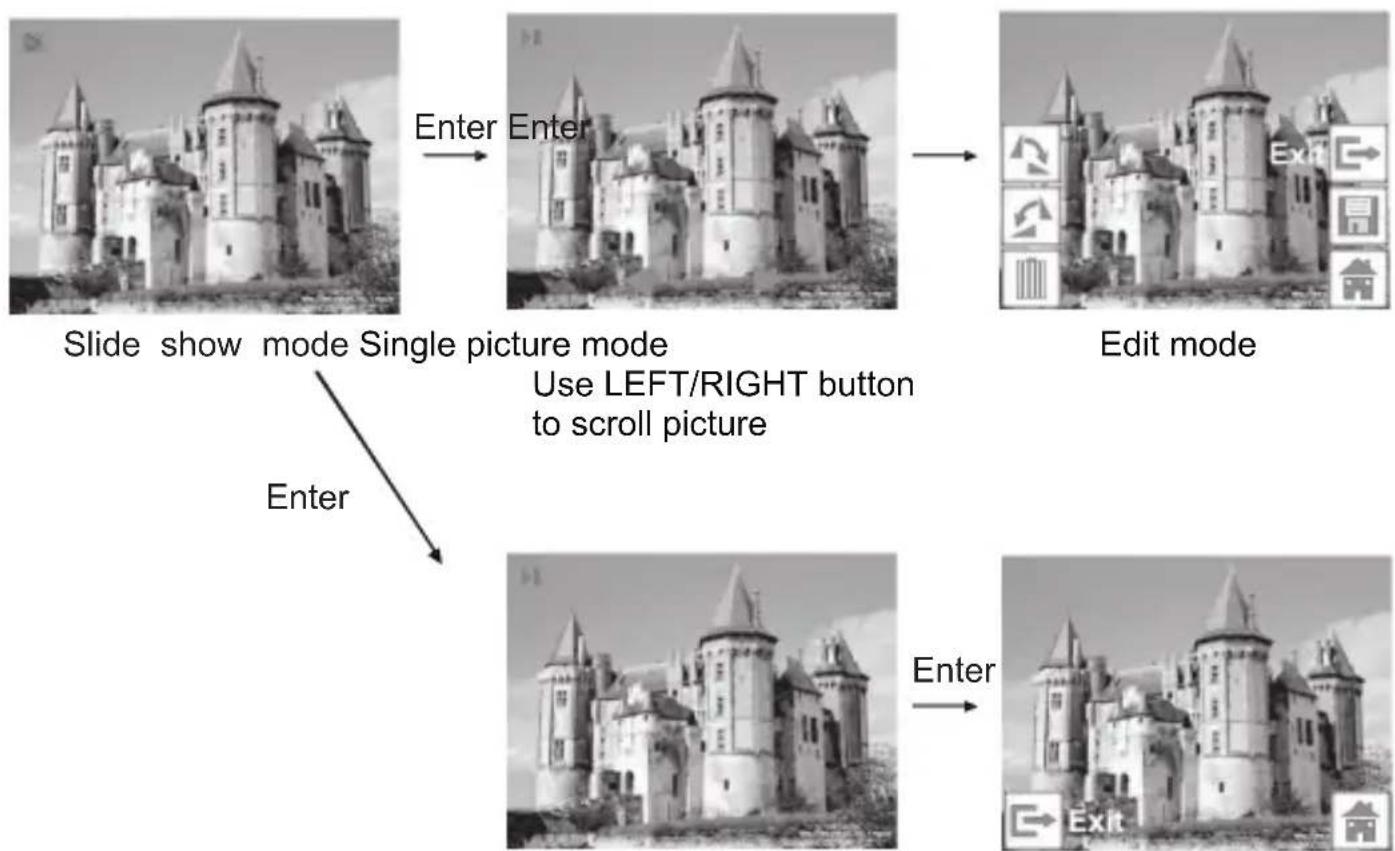
flowchart
graph TD
    A["Slide show mode Single picture mode\nUse LEFT/RIGHT button to scroll picture"] --> B["Edit mode"]
    B --> C["Enter"]
    A --> D["Enter"]
2.4 Playback: Rotate/Save

text_image
Rotate 90 Enter SaveIf user wants to rotate +90 degrees by ENTER button, the image will be rotated +90 degrees and cursor will remain at Save. Press ENTER button again to save modified result and next picture will be shown. For continuously rotate +90 degrees, move cursor to rotate again and press ENTER button. (Same for Rotate -90 function)
2.5 Playback: Exit

text_image
EnterOnce user select Exit function in edit menu, the display will go back to slide show starting with the current picture without any change
2.6 Playback: Delete
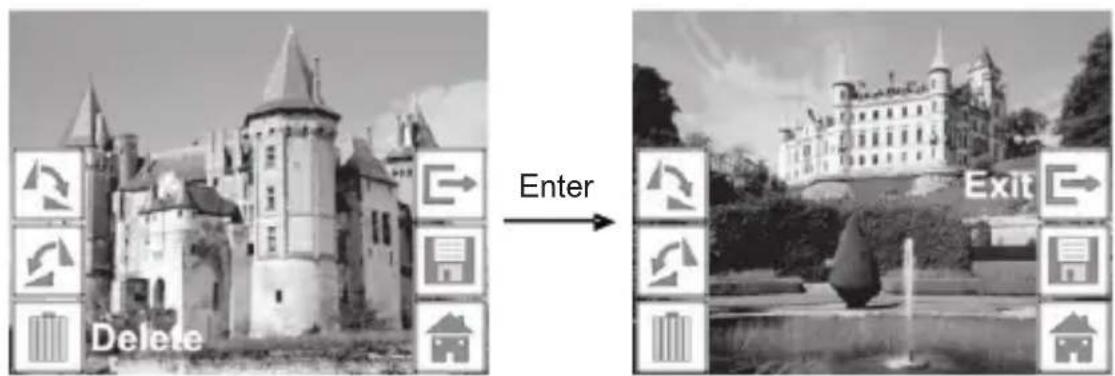
text_image
Delete Enter ExitSelect delete icon with LEFT/RIGHT button then press ENTER button, that will delete the present selected picture and next picture will be shown. Cursor will remain at Exit icon. If user intend to process continuously delete, just move cursor to delete icon again and press ENTER button to confirm.
2.7 Playback: Home

natural_image
Black-and-white exterior view of a historic castle with towers and spires, featuring directional arrows and a 'Home' label (no other text or symbols)Select Home icon with LEFT/RIGHT button, then press ENTER button or press MODE button on top of the device anytime to back to main menu
2.8 Playback: No Picture

natural_image
Simple gray icon of a folder inside a square frame on a white background (no text or symbols)If there is no picture when enter playback mode, a No picture symbol will show on screen
3: Film Type
When the Film scanner mode is selected, user can change film type by enter Film Type menu when power on the device or access the main menu by Home icon/MODE button anytime. Press LEFT/RIGHT button for Film Type and press ENTER button to confirm.

flowchart
graph LR
    A["Film"] --> B["Negatives Film"]
    B --> C1["①"]
    B --> C2["②"]
    B --> C3["③"]
① Negatives Film: select Negatives film when load color negative film in holder
②Slides: select Slides when load slide in holder
③B&W: select B&W when load B&W negative film in holder
User can press LEFT/RIGHT button to select film type, then press ENTER button to confirm
4: Effect
When the Photo scanner mode is selected, user can change color effect by enter Effect menu when power on the device or access the main menu by Home icon/MODE button anytime. Press LEFT/RIGHT button for Effect and press ENTER button to confirm
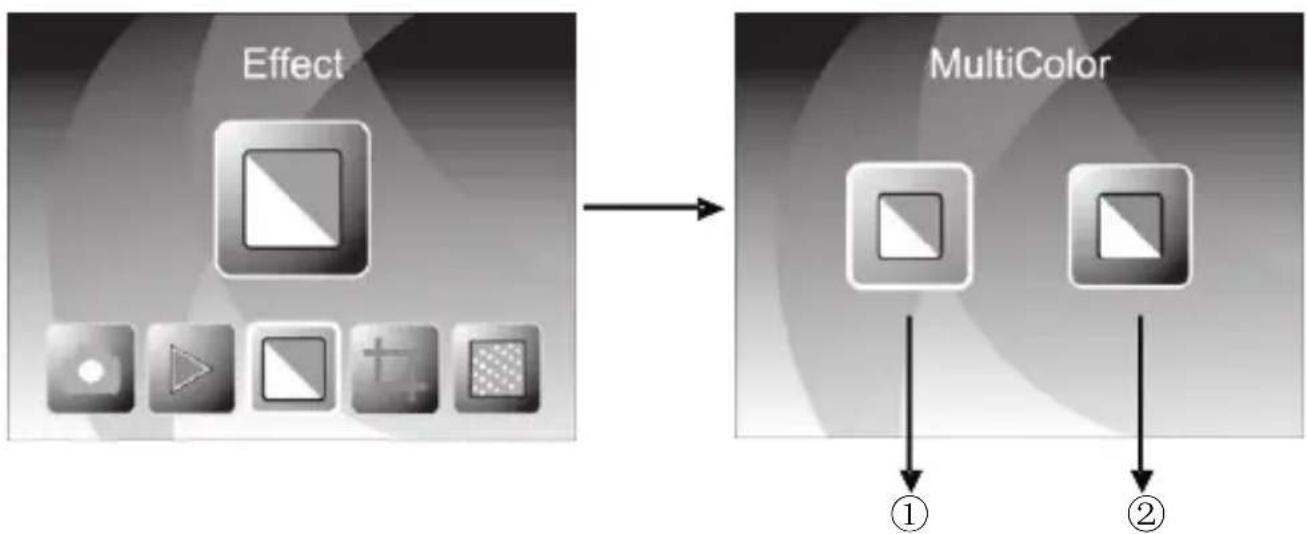
flowchart
graph LR
    A["Effect"] --> B["MultiColor"]
    style A fill:#f9f,stroke:#333
    style B fill:#bbf,stroke:#333
①Multicolor effect
②B&W effect
User can press LEFT/RIGHT button to select color effect, then press ENTER button to confirm
5: Crop proportion
When the Photo scanner mode is selected, user can change crop proportion by enter Crop menu when power on the device or access the main menu by Home icon/MODE button during operation. Press LEFT/RIGHT button for Crop and press ENTER button to confirm

flowchart
graph LR
    A["Crop Icon"] --> B["5×7"]
    B --> C["4×6"]
    B --> D["3×5"]
    style A fill:#f9f,stroke:#333
    style B fill:#ccf,stroke:#333
    style C fill:#cfc,stroke:#333
    style D fill:#fcc,stroke:#333
①5X7 crop proportion
②4X6 crop proportion
③3X5 crop proportion
User can press LEFT/RIGHT button to select crop proportion, then press ENTER button to confirm
6: Resolution
Change resolution by enter Resolution menu when power on the device or access the main menu by Home icon/MODE button anytime. Press LEFT/RIGHT button for Resolution and press ENTER button to confirm
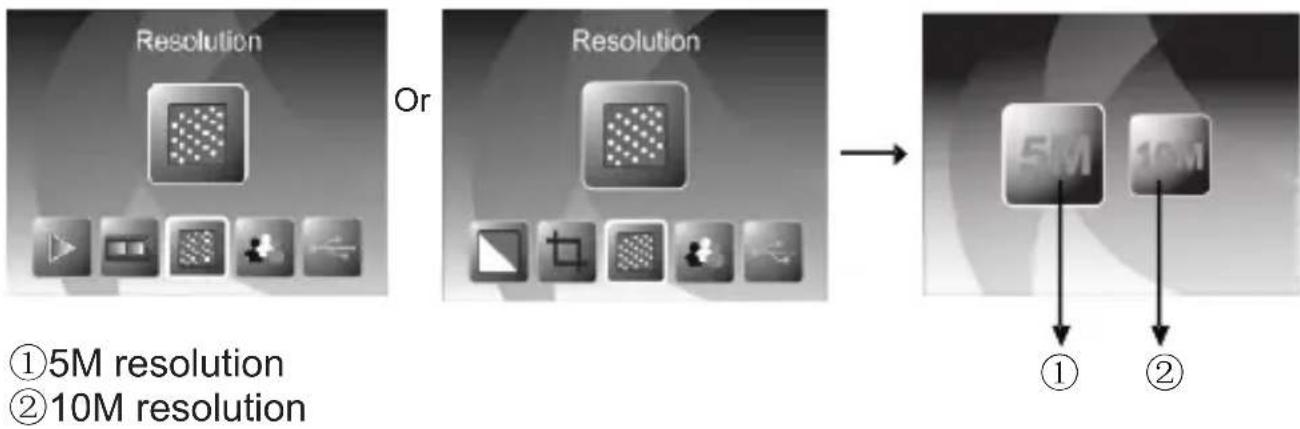
flowchart
graph LR
    A["Resolution"] --> B["Or"]
    B --> C["Resolution"]
    C --> D["5M"]
    C --> E["10M"]
    style A fill:#f9f,stroke:#333
    style B fill:#f9f,stroke:#333
    style C fill:#f9f,stroke:#333
    style D fill:#ccf,stroke:#333
    style E fill:#ccf,stroke:#333
User can press LEFT/RIGHT button to select resolution, then press ENTER button to confirm
7: Language
Change language definition by enter language menu when power on the device or access the main menu by Home icon/MODE button anytime. Press LEFT/RIGHT button for language and press ENTER button to confirm.

text_image
Language On Language → Language English Español Francia 铁腊中文 Deutsch 简体中文 Italiano JapaneseUser can press LEFT/RIGHT button to select language, then press ENTER button to confirm
8: USB mode
After finished capture, please take out the memory card from the film & photo scanner to download the stored images from the memory card.
When the device is connected with USB cable to PC, User can also press MODE button to main menu, then press LEFT/RIGHT button to select USB mode, then press ENTER button to confirm, the film & photo scanner will become a mass storage device and user can review or edit images on PC.
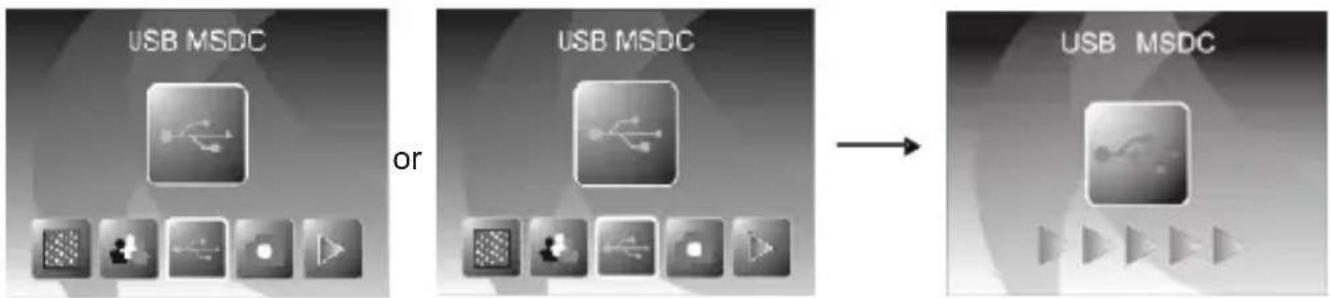
text_image
USB MSDC or USB MSDC → USB MSDCUser can also press MODE button to back to main menu.
8: Technical Specifications
◆ Lens : F/3.6, f=4.83
◆ Sensor : 5.1 mega pixels CMOS sensor
◆ LCD: 2.4 inch LTPS LCD Display
◆ External memory: SD/MMC/MS/XD/MS-PRO card
◆ Exposure : Auto
◆ Color balance : Auto
◆ Scan high resolution : 3,600 dpi interpolation resolution
◆ Data conversion : 12 bits per color channel
◆ Scan Method : Single pass
◆ Light source : 7*2 white LED/Backlight (3 white LED)
◆ Power : Powered from USB/5V adapter
◆ Interface: USB 2.0
◆ Dimension: 220 x 208 x 147mm
◆ Weight: 1200G
◆ Language: English, French, German, Italian,
Spanish, Traditional Chinese,
Simplified Chinese, Japanese
Caution
This device complies with part 15 of the FCC Rules. Operation is subject to the following two conditions: (1) This device may not cause harmful interference, and (2) this device must accept any interference received, including interference that may cause undesired operation. Changes of modifications not expressly approved by the party responsible for compliance could void the user's authority to operate the equipment.
◆FCC statement
Note: This equipment has been tested and found to comply with the limits for a Class B digital device, pursuant to part 15 of the FCC Rules. These limits are designed to provide reasonable protection against harmful interference in a residential installation. This equipment generates, uses and can radiate radio frequency energy and, if not installed and used in accordance with the instructions, may cause harmful interference to radio communications.
However, there is no guarantee that interference will not occur in a particular installation.
If this equipment does cause harmful interference to radio or television reception, which can be determined by turning the equipment off and on, the user is encouraged to try to correct the interference by one or more of the following measures:
--Reorient or relocate the receiving antenna.
--Increase the separation between the equipment and receiver.
--Connect the equipment into an outlet on a circuit different from that to which the receiver is connected.
--Consult the dealer or an experienced radio/TV technician for help.