KBVVC4113 - Vacuum Cleaner Kubo - Free user manual and instructions
Find the device manual for free KBVVC4113 Kubo in PDF.

| Product Type | Vacuum Cleaner |
| Brand | Kubo |
| Model | KBVVC4113 |
| Dust Bag Capacity | 1.5 L |
| Motor Power | 1200 W |
| Suction Power | 350 AW |
| Filtration System | HEPA Filter |
| Noise Level | 78 dB |
| Weight | 5.5 kg |
| Dimensions (HxWxD) | 40 x 30 x 30 cm |
| Power Cord Length | 6 m |
| Operating Radius | 8 m |
| Vacuum Type | Bagged Canister |
| Suitable Floor Types | Hardwood, Carpet, Tile |
| Included Accessories | Crevice Tool, Upholstery Brush, Floor Nozzle |
| Functions | Dry Vacuuming Only |
| Maintenance | Clean filters monthly; replace dust bag when full |
| Safety Precautions | Do not vacuum liquids; unplug before cleaning |
| Spare Parts Available | Dust bags, HEPA filters, brush roll |
| Reparability | Model-specific parts available |
| Warranty | 2 years |
Frequently Asked Questions - KBVVC4113 Kubo
User questions about KBVVC4113 Kubo
0 question about this device. Answer the ones you know or ask your own.
Ask a new question about this device
Download the instructions for your Vacuum Cleaner in PDF format for free! Find your manual KBVVC4113 - Kubo and take your electronic device back in hand. On this page are published all the documents necessary for the use of your device. KBVVC4113 by Kubo.
USER MANUAL KBVVC4113 Kubo
natural_image
White and black KURO vacuum cleaner with green handle and control panel (no visible text or symbols)Dear client,
Thank you for purchasing this product.
The quality of this appliance has been certified by several laboratory tests. This instructions manual is provided to simplify the use of the appliance as well as to guarantee a safe use.
Please read carefully the instructions and safety measures described in this manual.
We sincerely hope you will be satisfied when using your new appliance.
INDEX
1. SAFETY INSTRUCTIONS 4
1.1. Power Supply 5
1.2. Power Cord and Other Cables 5
1.3. Humidity and Water 6
1.4. Cleaning 6
1.5. General Precautions 6
2. OPERATING INSTRUCTIONS 10
2.1. Product Description 10
2.2. Product Usage 11
2.3. Maintenance 14
3. TECHNICAL SPECIFICATIONS 16
4. POST-SALE SERVICE 17
5. ENVIRONMENTAL PROTECTION 17
1. SAFETY INSTRUCTIONS
 | WARNING |  |
| RISK OF ELECTRIC SHOCKDO NOT OPEN | ||
| Warning: to avoid the risk of electric shock, do not remove the cover. The interior does not contain any parts that can be repaired by the user. Ask for assistance from the Customer Support Service. | ||
Important Warnings
Before using your appliance read this instructions manual carefully and keep it in a safe place as you may need to consult it in the future.
Before turning on your appliance, and to ensure a safe and correct operation, do not use if:
• It has fallen to the ground;
- You notice any evidence of damage;
- Any anomaly occurs during its operation.
To avoid hazards or deterioration of your appliance through incorrect use it is advisable to read these instructions thoroughly.
Your appliance may not be used for other purposes than the ones intended and solely for household use. Any damage resulting from using
the appliance outside this scope, any incorrect use, as well as any manual modifications to the product will not be covered and automatically voids the warranty.
Assistance
In case of malfunction, take your appliance to the Customer Support Service for assistance.
This appliance can be used by children from the age of 8 and by people with reduced physical, sensorial or mental capabilities and/or lack of experience and knowledge if they have been given instructions on using the appliance safely and if they understand the hazards involved. Children may not play with the appliance. Cleaning and maintenance must not be carried out by children without supervision.
These instructions are also available at www.suporteworten.pt
1.1. Power Supply
Make sure the main voltage is compatible with the appliance's. If this is not the case please consult the Customer Support Service.
1.2. Power Cord and Other Cables
Do not tangle the cord or pull it to disconnect the appliance. Also, keep the cord away from warm surfaces.
Never use the appliance if it has a damaged cable or socket.
Take it to the Technical Support Service for replacement.
1.3. Humidity and Water
Do not use your appliance in humid places. Do not allow the appliance to become wet under any circumstances as this may be dangerous. To avoid fire hazard or electric shock do not expose your appliance to humidity or water. Furthermore, do not place your appliance under water (e.g. for cleaning).
1.4. Cleaning
Before cleaning, be sure to switch off the appliance and remove the plug from the main power supply. Always allow the unit to cool down before cleaning.
To clean the exterior of the product, use a dry soft cloth only.
1.5. General Precautions
- Please follow the instructions in the user manual which will help you to properly install and operate this product and enjoy its advanced features. Please keep the instructions for future reference.
- Read all instructions before using the product.
- Maintenance and service operations are only to be carried out by authorized professionals.
- Any damage caused by manual modifications to the product is not covered by the warranty.
- If this product is used for other purposes than the ones originally intended, or if it is not correctly connected, the product may become damaged and the warranty will be voided.
- Do not use outdoor.
- Do not leave the appliance unattended when it is switched on, as this may be pose danger.
- Stand the appliance on a table or flat surface.
- The following objects are strictly banned, otherwise the vacuum cleaner will be damaged or a fire calamity will be caused, which could result in accidents like wounds and injuries:
- Do not pick up large or sharp broken objects such as glasses, harming or erodent liquids (solvent, corrosive, detergent...), inflammable or explosive substance like gasoline or alcohol.
- Never attempt to open the device or the mains charger yourself nor to replace the connecting cable.
- Do not trap the mains charger cable and pay attention to where the cable is when using the charger, to prevent any danger of tripping over it. Keep the cable away from heated surfaces (e.g. cooker surfaces).
- Do not touch the mains charger and cable with your hands wet.
- Do not point the vacuum cleaner at people or animals when in operation.
- Use only the mains charger on dry surfaces in buildings.
- Use only the device with the supplied accessories.
- Use only with the provided charger.
- The appliance must only be supplied at safety extra low voltage corresponding to its marking plate.
- This appliance includes Li-ion batteries; do not incinerate the batteries or expose them to high temperatures, as they may explode.
- This appliance is only charged with the supplied charger.
- The appliance is only to be used with the provided power supply unit.
- The battery must be removed from the appliance before it is scrapped;
- The appliance must be disconnected from the supply mains when removing the battery;
- The battery is to be disposed of safely.
2. OPERATING INSTRUCTIONS
2.1. Product Description

text_image
Labeled diagram of a cleaning or cleaning device with numbered parts for identification1 Switch button on handle
2 Handle assembly
3 Handy vac release button
4 Accessories
5 Switch button on handy vac
6 VC Body assembly
7 Dust cup
8 Front decorative block on handy vac
9 Electrical brush assembly
10 Charging base
11 Charger
2.2. Product usage
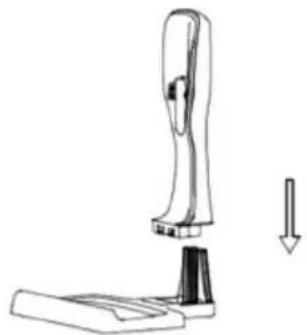
Unpacking and Assembling
Check if you have all below parts as shown in the box.
- Install the charging station closely
natural_image
Line drawing of a cleaning or cleaning device with a downward arrow indicating compression (no text or symbols)
natural_image
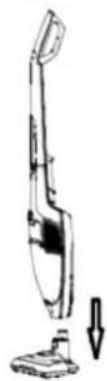
Line drawing of a stapler or stapler with a handle and base (no text or symbols)- Install the electrical brush by carefully inserting it into the vacuum compartment.
natural_image
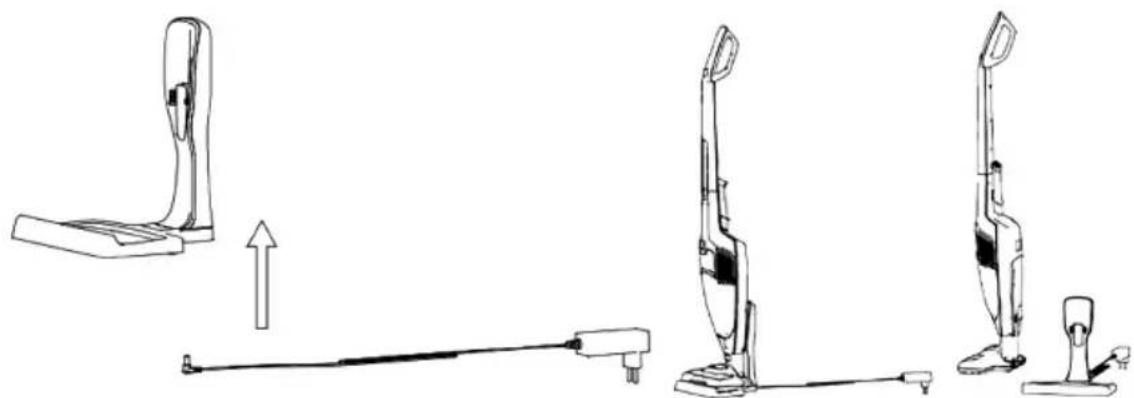
Line drawing of a vacuum cleaner with a downward arrow indicating motion (no text or symbols)- Position the charging station close to a mains socket (well away from heat sources or wet places). Insert the adaptor into the mains socket and connect the charging station.

natural_image
Line drawing of a vacuum cleaner with a side-mounted device (no text or symbols)Charging the Vacuum Cleaner
Notes: before using your vacuum cleaner for first time, charge it for approximately 5 hours. A fully charged battery will last for approximately 30 \~ 50 min of continuous vacuum cleaning.
- Put the base on a flat, horizontal, stable surface that is not exposed to direct sunlight or humidity, and far from any heat source.
natural_image
Line drawings of a three-step vacuum cleaner assembly with no text or symbols-
Make sure the appliance is set to off, put the charger into its base, then plug it into a wall socket.
-
The LED light on the handy vac will start blinking to show that the battery is charging. When the battery is fully charged, the LED indicator light should stay white (no longer blink)
Notes and tips
- The Charger might warm up during charging, which is normal. It will cool down as soon as the charging process is over.
- When you notice the motor is turning less quick, it means that the battery needs to be charged completely.
- From time to time it may be useful (once a month) to completely discharge the battery, and then completely recharge it, to maintain optimal performance.
• Recharge after every use
Notice About Charging
When battery starts to charge, the LED light starts flashing. When it is full, the three lights will keep lit for 50 seconds, afterwards they will turn off automatically.
During charging, if the battery surface temperature is beyond 55 °C or lower than 0 °C, the battery will enter into self-protection procedure. It will stop charging until the battery surface temperature goes back to 0\~45 °C (during charging, the battery's surface temperature is not beyond 55 °C; so when you need to recharge the battery, the battery's surface temperature shall drop to 45 °C at lower).
Notice About Discharging
There are two colour lights to show high and low speed running states. Usually, the white lights show high speed, the green light shows low speed.
The lights will stay on when the unit is fully charged. When the battery is discharged, the lights will turn off gradually until the last one finally goes out.
Notice: the last light will blink around 60 \~ 90 s. to remind you that the battery is fully discharged. This means you need to finish the cleaning job quickly and charge the battery again. If the light is red, it means the brush or dust cup is blocked, so you will need to clean the brush or dust cup.
During discharging, if the battery's surface temperature exceeds 70 °C, the light will keep blinking for 5 seconds, afterwards the battery will enter into self-protection mode, cutting off power to the main vacuum cleaner. When the battery's surface temperature goes back to 65 °C, the battery can work again.
Using the Vacuum Cleaner
Once your appliance is fully charged, remove it from the base and hold it by its handle.
Switch it on by pressing the Switch button on the handle or handy vac to start cleaning.
After completing the cleaning job, press the switch button on the handle or handy vac to switch off the appliance, before putting it back into the charging base.
Notes: there are two working speeds for this appliance. By pressing the switch button once, the unit will run at low speed. By pressing it twice, the appliance will run at high speed.
Using the Accessories
Use the motorized brush to clean floors and carpets.
There is a crevice nozzle and a small brush as accessories on the back of the handle. Install the nozzle first, then install the small brush into the crevice nozzle as below picture for cleaning narrow, hard to reach places, etc.
You should regularly check that the brush and accessories are cleaning every time the appliance is being used.

natural_image
Technical line drawing of a two-step cleaning or disassembly process of a vacuum cleaner (no text or symbols present)Notes: remove any accessories before placing the vacuum cleaner back into its base. You can store them in their storage positions at the back of the body.
2.3. Maintenance
Cleaning the dust container, filters and brush after each use is extremely important as it allows for optimal use of your appliance and eliminates unpleasant odours.
Cleaning the dust container and filters
- Remove the whole dust container by pressing the release button.
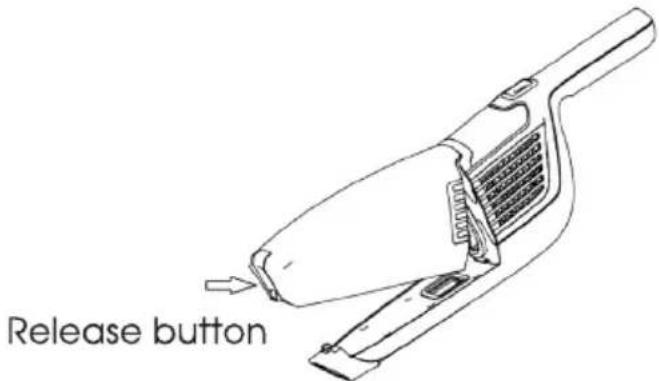
text_image
Release button- Pull out the filters and empty the contents of the dust container into a dust bin. (Filters can be rinsed in warm water if necessary. Make sure that filters are completely dry before assembling them again.)

natural_image
Simple line drawing of a rectangular object with a notch, resembling a stylized letter or symbol (no text or symbols present)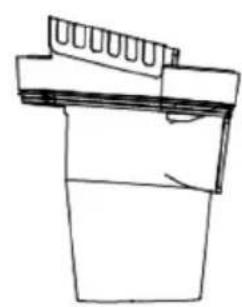
natural_image
Simple line drawing of a mechanical component or bracket (no text or symbols)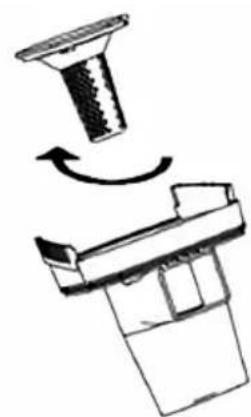
natural_image
Diagram showing a mechanical component with a rotating shaft and base, no text or symbols present- Re-install the components as follows:
First, place the cyclone cover into the dust cup then re-stall the filters (centrum filter, combed cotton) into the cyclone cover as below picture. Second, install the dust container following up the opposite procedures as detaching the dust container.
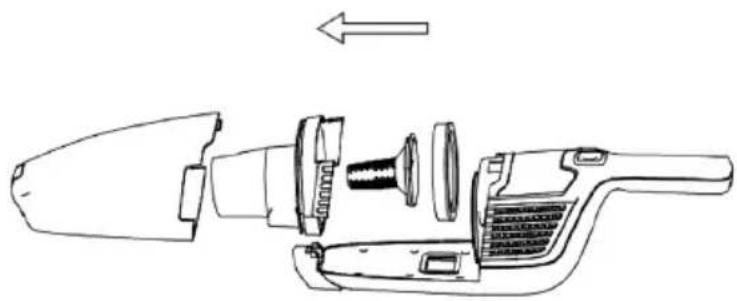
natural_image
Exploded view diagram of a hand cleaner's internal components (no text or labels)Cleaning the roller brush
If the roller brush becomes blocked or jammed for any reason, the vacuum pressure will lower down. The roller brush may then need to be cleaned.
First turn off the appliance, then disconnect the brush from the whole unit. Below you can see the bottom of brush. Use a small tool like a pair of scissors or a sharp knife to remove any items such as threads that may have become entangled.
If the roller brush needs to be taken out for cleaning, push the slip button on the bottom of the brush with your finger or using a coin. Remove the slip button as below picture and take out the roller brush for cleaning afterwards. Place the slip button back on the roller brush and lock it with your finger.
Reminder: Keep the range button within your eye sight and keep it out of reach of children.

natural_image
Technical line drawings of three mechanical components: a housing, a valve, and a tool (no text or symbols present)SERVICE AND REPAIRS
In case of breakdown or faults, the device must be taken to an authorized service centre for repairing or replacement.
3. TECHNICAL SPECIFICATIONS
Vacuum cleaner's model: KBVVC4113
Cleaner's working voltage: 25.2 V DC
Motorized cleaning head's model: 25.2 V
Cleaning head's working voltage: 25.2 V DC
Charger input: 100-240 AC 50/60 Hz
Charger output: 32 V 400 mA
Battery pack: 3.6 V / 7 pcs
4. POST-SALE SERVICE
KUBO has designed this appliance in order to guarantee maximum reliability. However, if a problem occurs do not attempt to open the appliance - there is a risk of electrical shock. If you are not able to solve the problem, please contact the Customer Support Service of any Worten, Modelo or Continente store in order to be assisted. Worten Equipamentos para o Lar provides a 2-year warranty for manufacturing defects from the date of purchase of the appliance.
WARNING: any attempt to repair the appliance without contacting the manufacturer or seller will void the warranty.
All users must be familiar with these instructions. Knowing what could go wrong can help prevent problems from occurring.
In order to protect the environment, we strive to reduce the volume of packaging used, limiting it to three easily sorted materials: cardboard, paper and plastic. The appliance is manufactured using recyclable materials after disassembled by a specialized company. Please comply with local regulations concerning the recycling of all materials.
5. ENVIRONMENTAL PROTECTION
In order to protect the environment, we strive to reduce the volume of packaging used, limiting it to three easily sorted materials: cardboard, paper and plastic.
The appliance is manufactured using recyclable materials after disassembled by a specialized company. Please comply with local regulations concerning the recycling of all materials.

natural_image
Simple line drawing of a trash bin with crossed x-axis lines and a blank rectangular base (no text or symbols)Estimado cliente:
text_image
Labeled diagram of a vacuum cleaner with numbered parts for identificationnatural_image
Line drawing showing a device being adjusted to form a base, with no text or symbols present.natural_image
Line drawing of a vacuum cleaner with a downward arrow indicating motion (no text or symbols)natural_image
Line drawing of a vacuum cleaner with a side-mounted device (no text or symbols)natural_image
Line drawings of three different vacuum cleaner designs, showing front, side, and side views with no text or symbols.natural_image
Technical line drawing of a two-step cleaning or disassembly process of a vacuum cleaner (no text or symbols present)natural_image
Simple line drawing of a rectangular object with a notch, resembling a stylized container or bracket (no text or symbols)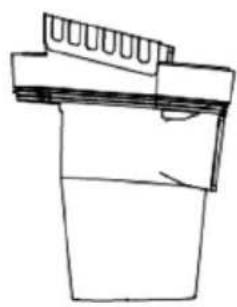
natural_image
Simple line drawing of a mechanical component or bracket (no text or symbols)
natural_image
Diagram showing a mechanical component with a rotating shaft and base, no text or symbols presentnatural_image
Exploded view diagram of a handheld device showing internal components and a directional arrow (no text or symbols)natural_image
Technical line drawings of three mechanical components: a housing, a valve, and a tool holder (no text or symbols present)SERVICIO Y REPARACIONES
natural_image
Simple line drawing of a trash bin with crossed lines indicating no waste or discharge (no text or symbols)Caro(a) cliente,
text_image
Labeled diagram of a vacuum cleaner with numbered parts for identificationnatural_image
Line drawing of a cleaning or cleaning device with a downward arrow indicating compression (no text or symbols)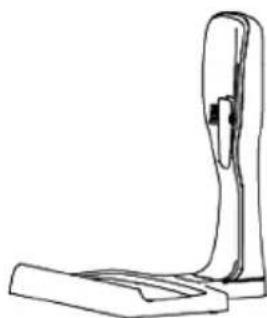
natural_image
Line drawing of a mechanical device with a vertical support and base plate (no text or symbols)natural_image
Line drawing of a vacuum cleaner with a side-mounted device (no text or symbols)Carregar o Aspirador
natural_image
Line drawings of a three-step vacuum cleaner assembly with no text or symbolsnatural_image
Technical line drawing of a two-step cleaning or disassembly process of a vacuum cleaner (no text or symbols present)natural_image
Exploded view diagram of a hand cleaner's internal components (no text or labels)natural_image
Technical line drawings of three mechanical components: a housing, a valve, and a tool holder (no text or symbols present)SERVIÇO E REPARAÇÕES
natural_image
Simple line drawing of a trash bin with crossed lines indicating no waste or restriction, and a solid black rectangle below (no text or symbols)KUBO
Imported, produced and distributed by 1 Importado, producido y distribuido por Importado, produzido e distribuido por