Edimax ES-5160G+ V3 - Network switch

ES-5160G+ V3 - Network switch Edimax - Free user manual and instructions

Find the device manual for free ES-5160G+ V3 Edimax in PDF.

📄 28 pages English EN Download 💬 AI Question 10 questions ⚙️ Specs
Notice Edimax ES-5160G+ V3 - page 2
Pick your language and provide your email: we'll send you a specifically translated version.
Product Type Unmanaged Gigabit Ethernet Switch
Model Number ES-5160G+ V3
Ports 16 x 10/100/1000 Mbps Gigabit Ethernet
Dimensions (W x D x H) 17.3 x 7.2 x 1.7 inches (44 x 18.3 x 4.3 cm)
Weight 3.3 lbs (1.5 kg)
Power Supply 100-240V AC, 50-60Hz, internal power supply
Mounting 19-inch rackmount or desktop
Switching Capacity 32 Gbps
Forwarding Rate 23.8 Mpps
MAC Address Table 8K entries
Jumbo Frame Support Up to 9K bytes
Flow Control IEEE 802.3x full-duplex, back pressure half-duplex
Auto MDI/MDIX Yes, on all ports
LED Indicators Power, Link/Act per port
Operating Temperature 0°C to 50°C (32°F to 122°F)
Storage Temperature -10°C to 70°C (14°F to 158°F)
Humidity 10% to 90% (non-condensing)
Safety Compliance CE, FCC Class A
Warranty 2 years limited
Maintenance Clean with dry cloth; avoid liquids and solvents.
Spare Parts Availability Contact Edimax support for replacement parts.
Repair Service Refer to authorized service center; not user-serviceable.
Power Consumption Max 15W

Frequently Asked Questions - ES-5160G+ V3 Edimax

How do I set up my Edimax ES-5160G+ V3 switch?
Connect the switch to a power outlet using the included power cord. Then, use Ethernet cables to connect your devices (computers, printers, etc.) to any of the 16 ports. The switch automatically configures itself; no software installation is needed.
Does this switch support VLANs?
No, the ES-5160G+ V3 is an unmanaged switch, so it does not support VLAN configuration. It forwards all traffic across all ports.
What is the maximum cable length for Ethernet ports?
The switch supports standard Ethernet cable lengths up to 100 meters (328 feet) on each port using Cat5e or higher cabling.
How do I update the firmware of this switch?
As an unmanaged switch, the ES-5160G+ V3 does not have user-upgradable firmware. It operates with factory firmware.
Why are the link LEDs not lighting up on my switch?
Check that the connected device is powered on and the Ethernet cable is properly inserted. Try a different cable or port. The LED should light green when a valid link is established.
Can I mount this switch on a wall?
The switch is designed for desktop placement or 19-inch rackmount (rackmount ears included). Wall mounting is not recommended due to ventilation.
Does this switch support PoE (Power over Ethernet)?
No, the ES-5160G+ V3 is a non-PoE switch. It does not provide power over Ethernet cables.
What should I do if my switch gets hot?
Ensure the switch is in a well-ventilated area, not stacked on other devices, and that the cooling vents are not blocked. Operating temperature is 0°C to 50°C.
Can I use this switch with a patch panel?
Yes, you can connect a patch panel to the switch using standard Ethernet cables. The switch supports auto MDI/MDIX, so crossover cables are not required.
What is the warranty period for this product?
Edimax provides a 2-year limited warranty for the ES-5160G+ V3. For warranty service, contact Edimax support or your point of purchase.

User questions about ES-5160G+ V3 Edimax

0 question about this device. Answer the ones you know or ask your own.

Ask a new question about this device

The email remains private: it is only used to notify you if someone responds to your question.

No questions yet. Be the first to ask one.

Download the instructions for your Network switch in PDF format for free! Find your manual ES-5160G+ V3 - Edimax and take your electronic device back in hand. On this page are published all the documents necessary for the use of your device. ES-5160G+ V3 by Edimax.

USER MANUAL ES-5160G+ V3 Edimax

ΣDIMAX NETWORKING PEOPLE TOGETHER

User's Manual

ES-5160G+ V3
Edimax ES-5160G+ V3 - ΣDIMAX NETWORKING PEOPLE TOGETHER - 1

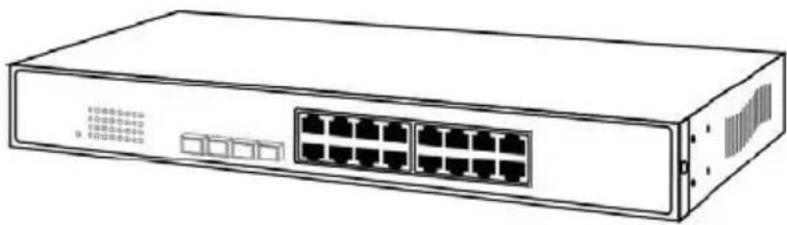
natural_image Line drawing of a network switch device with ports and ventilation slots (no text or symbols on the device itself)

16 Port Gigabit Ethernet Web Smart Switch

Web Smart Switch

I. Features Overview

■ Supports real-time status (link, speed, duplex) of each port
Supports port setting for enable or disable operation (the 1st port can't be disabled)
■ Supports Bandwidth Control on transmission and reception
Supports Broadcast Storm Protection
Supports Port-bases VLAN
■ Supports two priority queues for CoS
■ Supports weighted round robin scheduling for queues.
Supports Port-bases / 802.1p / DiffServ. priority three types of CoS

II. Configure

Please follow the steps to configure this Web Smart switch.

Step 1:

Use a twisted pair cable to connect this switch to your PC.

Step 2:

Set your PC's IP to 192.168.2.xx.
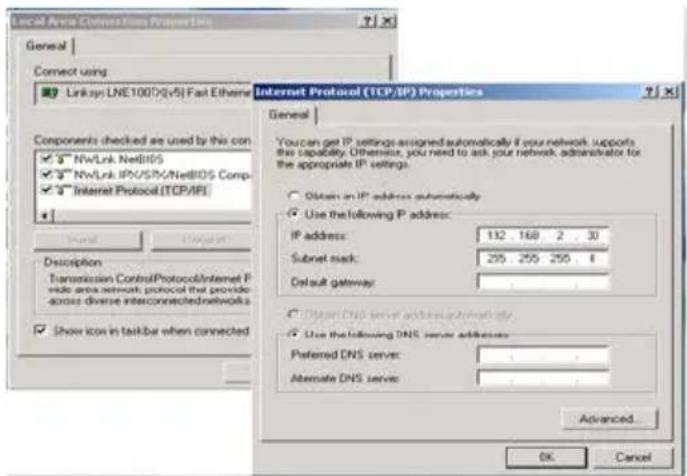
Local Area Connection Times Properties General Connect using Link(s): LNE100(D)(v5) Fail Ethernet Internet Protocol (TCP/IP) Properties General You can get IP settings assigned automatically if you network supports this capability. Otherwise, you need to ask your network administrator for the appropriate IP settings. Obtain an IP address automatically Use the following IP address: IP address: 132 168 2 30 Subset mask: 255 255 255 6 Default gateway: Obtain DNS server address automatically Use the following DNS server addresses: Preferred DNS server: Alternate DNS server: Show icon in taskbar when connected Advanced... OK Cancel

Step 3:

Open the web browser (like IE...), and go to 192.168.2.1 site, and then you will see the login screen.
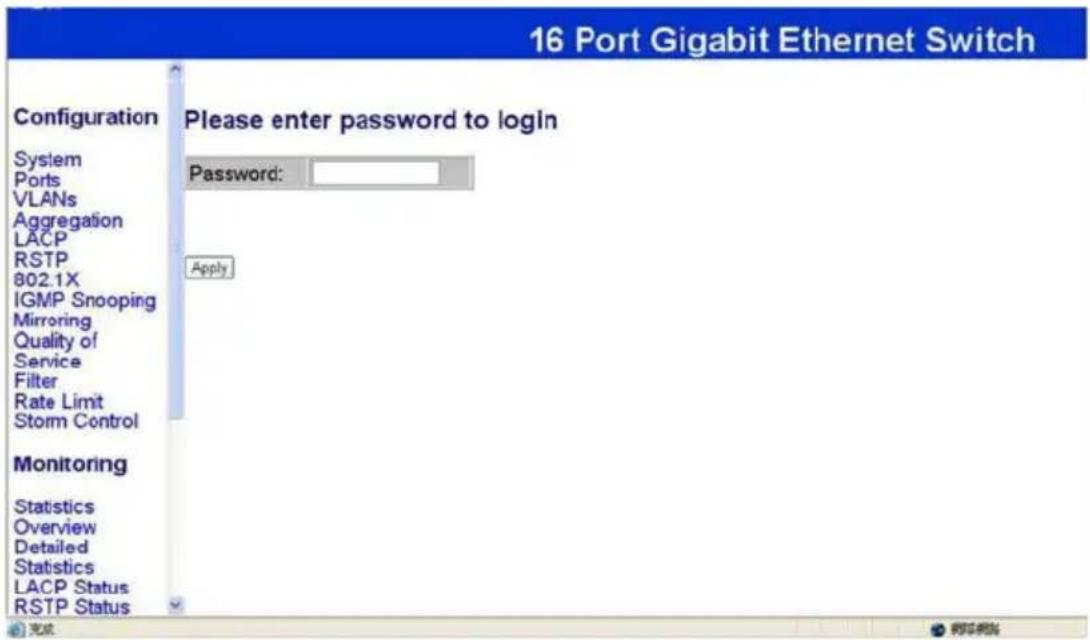
16 Port Gigabit Ethernet Switch Configuration Please enter password to login System Ports VLANs Aggregation LACP RSTP 802.1X IGMP Snooping Mirroring Quality of Service Filter Rate Limit Storm Control Monitoring Statistics Overview Detailed Statistics LACP Status RSTP Status Password: Apply

Key in the password to pass the authentication and the password is “admin”.

User name: admin

Password: 1234

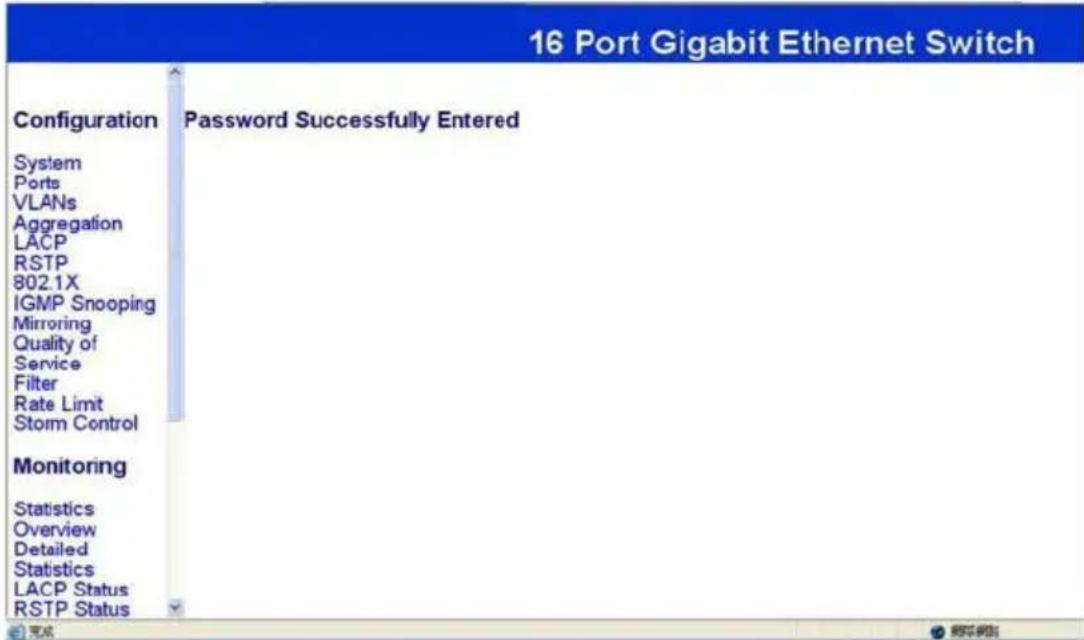
After the authentication procedure, the home page shows up.

Step 4:

On the following home page, select the configuration by clicking the icon. It includes,

  • Configuration
  • Monitoring
  • Maintenance
  • Logout

16 Port Gigabit Ethernet Switch Configuration Password Successfully Entered System Ports VLANs Aggregation LACP RSTP 802.1X IGMP Snooping Mirroring Quality of Service Filter Rate Limit Storm Control Monitoring Statistics Overview Detailed Statistics LACP Status RSTP Status

Configuration: System Configuration

16 Port Gigabit Ethernet Switch

Configuration

SystemMAC Address00-03-cd-08-00-00
Ports
VLANsS/W VersionLuton16 2.29
AggregationH/W Version1.0
LACP
RSTPTemperature0 °C
802.1XActive IP Address192.168.2.1
IGMP Snooping MirroringActive Subnet Mask255.255.255.0
Quality of Service FilterActive Gateway0.0.0.0
DHCP Server0.0.0.0
Rate Limit Storm ControlLease Time Left0 secs

Monitoring

StatisticsDHCP Enabled
OverviewFallback IP Address192.160.2.1
Detailed StatisticsFallback Subnet Mask255.255.255.0
LACP Status
RSTP Status

的黑板

2

16 Port Gigabit Ethernet Switch

Configuration

SystemEnabled
PortsManagement VLAN1
VLANs
AggregationName
LACP
RSTPPassword
802.1XInactivity Timeout(secs)0
IGMP Snooping
Mirroring
Quality of ServiceSNMP enabled
FilterSNMP Trapdestination0.0.03
Rate Limit
Storm ControlSNMP ReadCommunitypublic
MonitoringSNMP WriteCommunityprivate
StatisticsSNMP TrapCommunitypublic
Overview
Detailed
Statistics
LACP Status
RSTP Status

(四) 完成

  1. 群华股份

It shows MAC address, system firmware version and so on of the switch.

You can change the user name, the password and IP address, and click “Apply” to confirm the new change. After that, you can reset the switch to take the new user name, the password and IP address effectively.

Configuration: Port Configuration
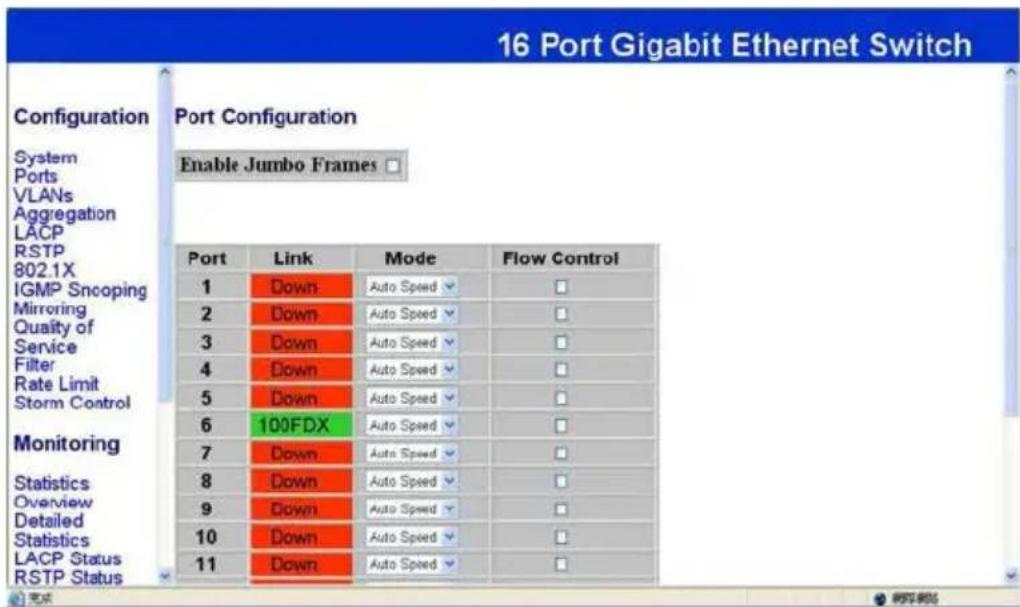
16 Port Gigabit Ethernet Switch Configuration System Ports VLANs Aggregation LACP RSTP 802.1X IGMP Sncoping Mirroring Quality of Service Filter Rate Limit Storm Control Monitoring Statistics Overview Detailed Statistics LACP Status RSTP Status Port Configuration Enable Jumbo Frames Port Link Mode Flow Control 1 Down Auto Speed 2 Down Auto Speed 3 Down Auto Speed 4 Down Auto Speed 5 Down Auto Speed 6 100FDX Auto Speed 7 Down Auto Speed 8 Down Auto Speed 9 Down Auto Speed 10 Down Auto Speed 11 Down Auto Speed © 2016 Port Gigabit Ethernet Switch

You can enable or disable Jumbo Frames by clicking the checking box.

Select the "Port no." which you want to configure the mode below,

  • Auto speed
  • enable/disable the port
  • 10M/100M/1000M
  • full/half-duplex
  • enable/disable flow control

Configuration: VLAN Configuration
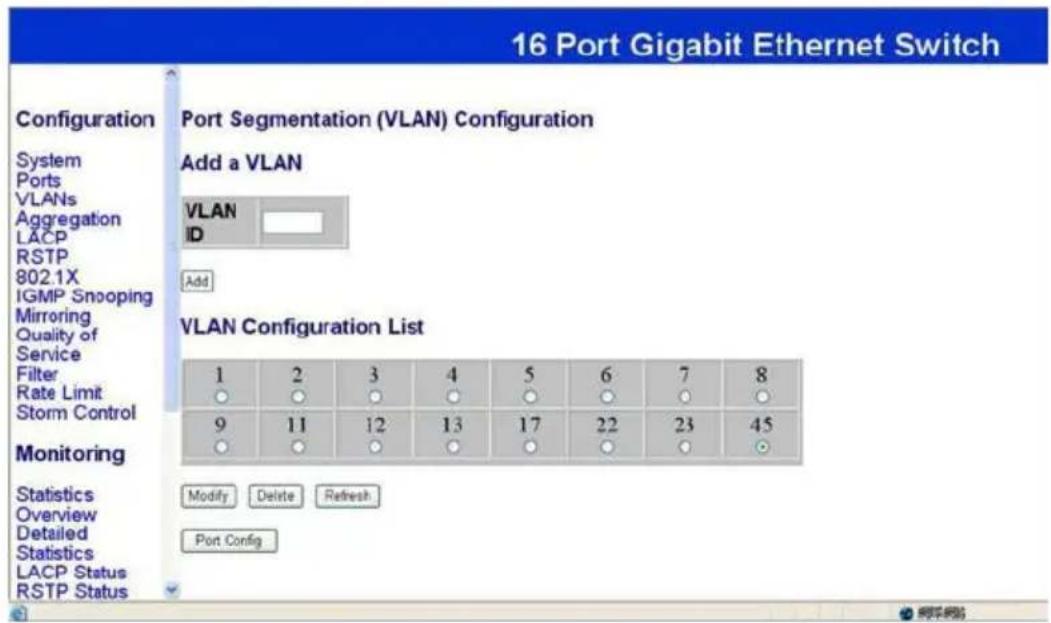
16 Port Gigabit Ethernet Switch Configuration System Ports VLANs Aggregation LACP RSTP 802.1X IGMP Snooping Mirroring Quality of Service Filter Rate Limit Storm Control Monitoring Statistics Overview Detailed Statistics LACP Status RSTP Status Port Segmentation (VLAN) Configuration Add a VLAN VLAN ID Add VLAN Configuration List 1 2 3 4 5 6 7 8 ○ ○ ○ ○ ○ ○ ○ ○ 9 11 12 13 17 22 23 45 ○ ○ ○ ○ ○ ○ ○ ○ Modify Delete Refresh Port Config

There are 16 VLAN groups, 01 to 16, can be used.

Select and add a group into "VLAN ID" and then click the port number which you want to put into the selected VLAN group.

Configuration: Aggregation/Trunk Configuration
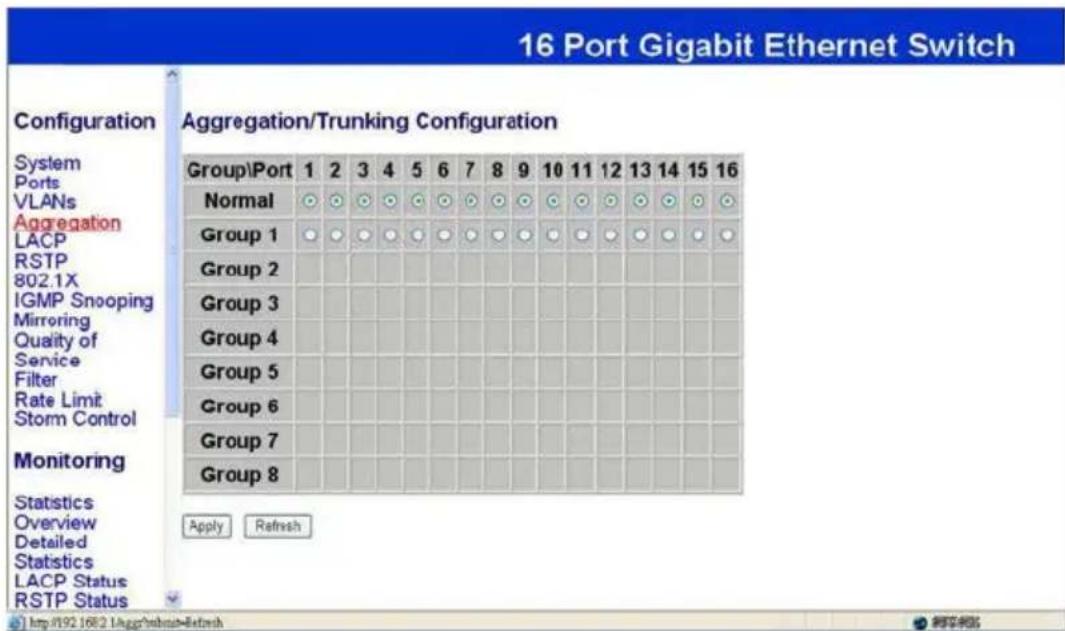
16 Port Gigabit Ethernet Switch Configuration Aggregation/Trunking Configuration System Ports VLANs Aggregation LACP RSTP 802.1X IGMP Snooping Mirroring Quality of Service Filter Rate Limit Storm Control Monitoring Statistics Overview Detailed Statistics LACP Status RSTP Status Group\Port 1 2 3 4 5 6 7 8 9 10 11 12 13 14 15 16 Normal Group 1 Group 2 Group 3 Group 4 Group 5 Group 6 Group 7 Group 8 Apply Refresh

Set up port trunk groups and then click the port number you want to include into the same group.

There are eight groups to choose and the maximum of ports for one group is 16.

Configuration: LACP Port configuration
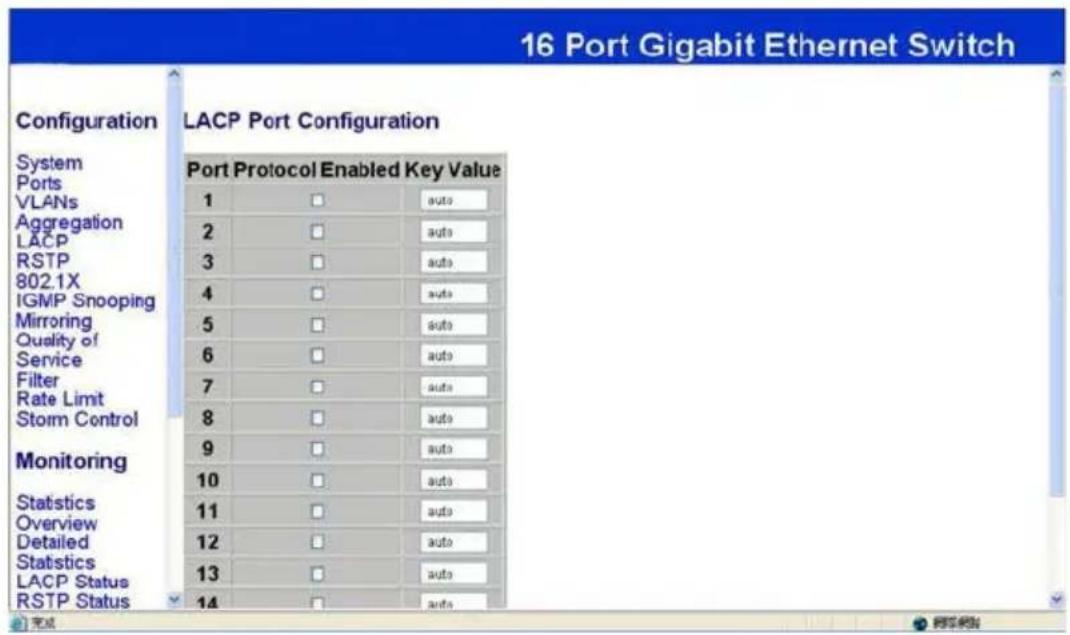
16 Port Gigabit Ethernet Switch Configuration LACP Port Configuration System Ports VLANs Aggregation LACP RSTP 802.1X IGMP Snooping Mirroring Quality of Service Filter Rate Limit Storm Control Monitoring Statistics Overview Detailed Statistics LACP Status RSTP Status Port Protocol Enabled Key Value 1 □ auto 2 □ auto 3 □ auto 4 □ auto 5 □ auto 6 □ auto 7 □ auto 8 □ auto 9 □ auto 10 □ auto 11 □ auto 12 □ auto 13 □ auto 14 □ auto

Select the port number which you want to enable/disable the protocol.

Configuration: RSTP Configuration
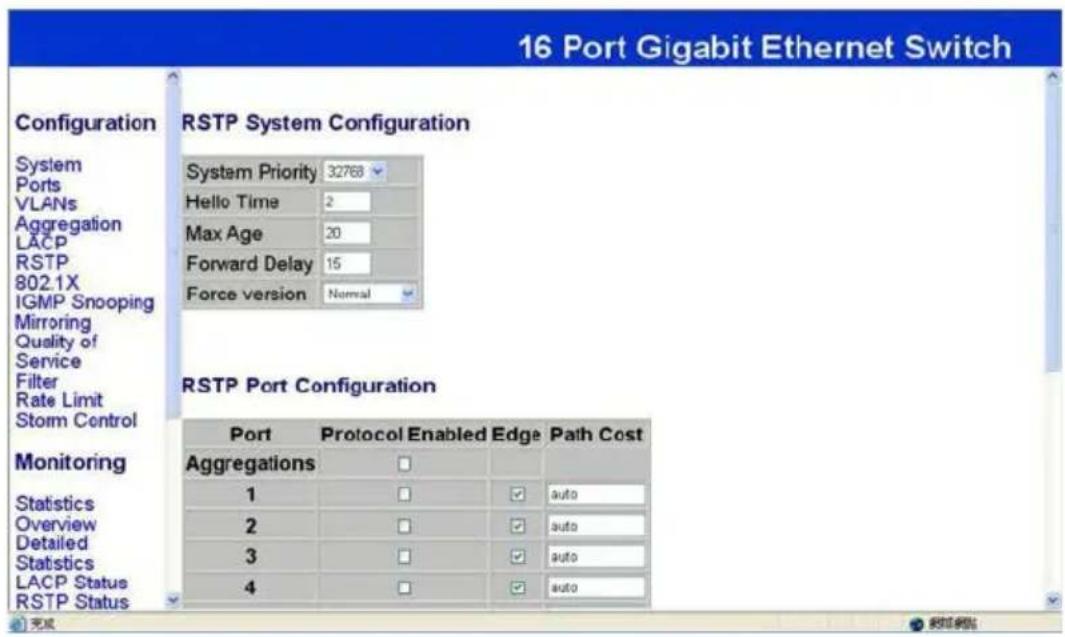
16 Port Gigabit Ethernet Switch Configuration RSTP System Configuration System Priority 32768 Hello Time 2 Max Age 20 Forward Delay 15 Force version Normal RSTP Port Configuration Port Protocol Enabled Edge Path Cost Aggregations □ 1 □ auto 2 □ auto 3 □ auto 4 □ auto Monitoring Statistics Overview Detailed Statistics LACP Status RSTP Status 完成

Select the port number which you want to enable/disable the protocol.

Configuration: 802.1x Configuration
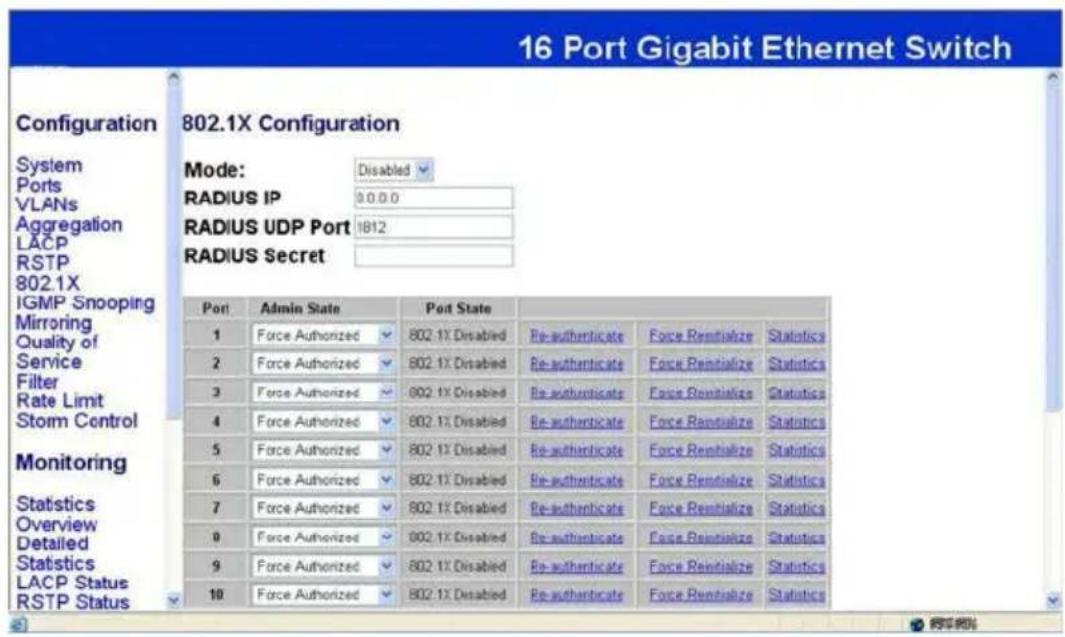
16 Port Gigabit Ethernet Switch Configuration 802.1X Configuration System Ports VLANs Aggregation LACP RSTP 802.1X IGMP Snooping Mirroring Quality of Service Filter Rate Limit Storm Control Monitoring Statistics Overview Detailed Statistics LACP Status RSTP Status Mode: Disabled RADIUS IP 0.0.0.0 RADIUS UDP Port 1812 RADIUS Secret Port Admin State Port State 1 Force Authorized 802.1X Disabled Re-authenticate Force Rentialize Statistics 2 Force Authorized 802.1X Disabled Re-authenticate Force Rentialize Statistics 3 Force Authorized 802.1X Disabled Re-authenticate Force Rentialize Statistics 4 Force Authorized 802.1X Disabled Re-authenticate Force Rentialize Statistics 5 Force Authorized 802.1X Disabled Re-authenticate Force Rentialize Statistics 6 Force Authorized 802.1X Disabled Re-authenticate Force Rentialize Statistics 7 Force Authorized 802.1X Disabled Re-authenticate Force Rentialize Statistics 9 Force Authorized 802.1X Disabled Re-authenticate Force Rentialize Statistics 9 Force Authorized 802.1X Disabled Re-authenticate Force Rentialize Statistics 10 Force Authorized 802.1X Disabled Re-authenticate Force Rentialize Statistics

Select the "Port no." which you want to configure the mode below,

  • Auto
  • Force Authorized
  • Force Unauthorized

Configuration: IGMP Configuration
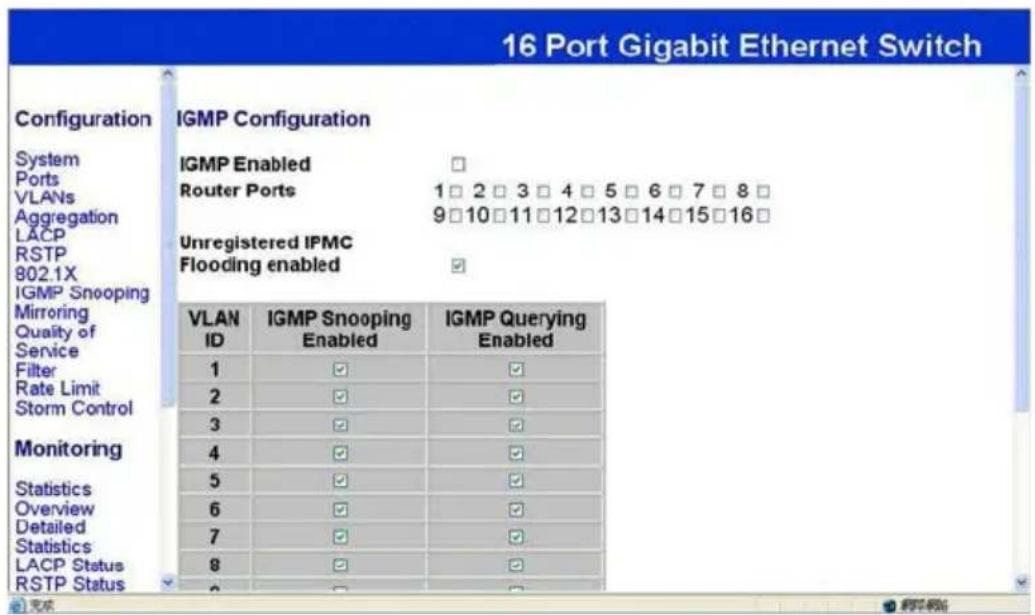
16 Port Gigabit Ethernet Switch Configuration IGMP Configuration System Ports VLANs Aggregation LACP RSTP 802.1X IGMP Snooping Mirroring Quality of Service Filter Rate Limit Storm Control Monitoring Statistics Overview Detailed Statistics LACP Status RSTP Status IGMP Enabled Router Ports Unregistered IPMC Flooding enabled VLAN ID IGMP Snooping Enabled IGMP Querying Enabled 1 ✓ ✓ 2 ✓ ✓ 3 ✓ ✓ 4 ✓ ✓ 5 ✓ ✓ 6 ✓ ✓ 7 ✓ ✓ 8 ✓ ✓ 9 ✓ ✓

You can enable or disable IGMP by clicking the checking box.

Select the "Port no." which you want to configure the mode.

Configuration: Port Mirror configuration
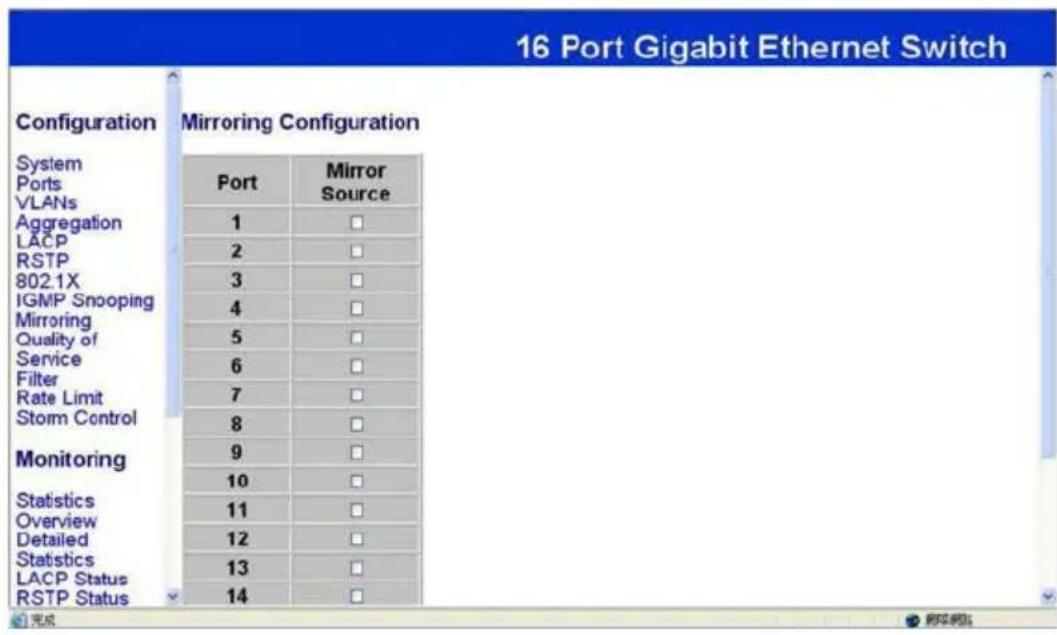
16 Port Gigabit Ethernet Switch Configuration Mirroring Configuration System Ports VLANs Aggregation LACP RSTP 802.1X IGMP Snooping Mirroring Quality of Service Filter Rate Limit Storm Control Monitoring Statistics Overview Detailed Statistics LACP Status RSTP Status Port Mirror Source 1 □ 2 □ 3 □ 4 □ 5 □ 6 □ 7 □ 8 □ 9 □ 10 □ 11 □ 12 □ 13 □ 14 □

Port Mirroring is used to mirror traffic from Source port to Destination port for analysis.

Select the Destination port from port 1 to port 16, and then select the Source port by clicking the checking box of the port.

Configuration: QoS Configuration
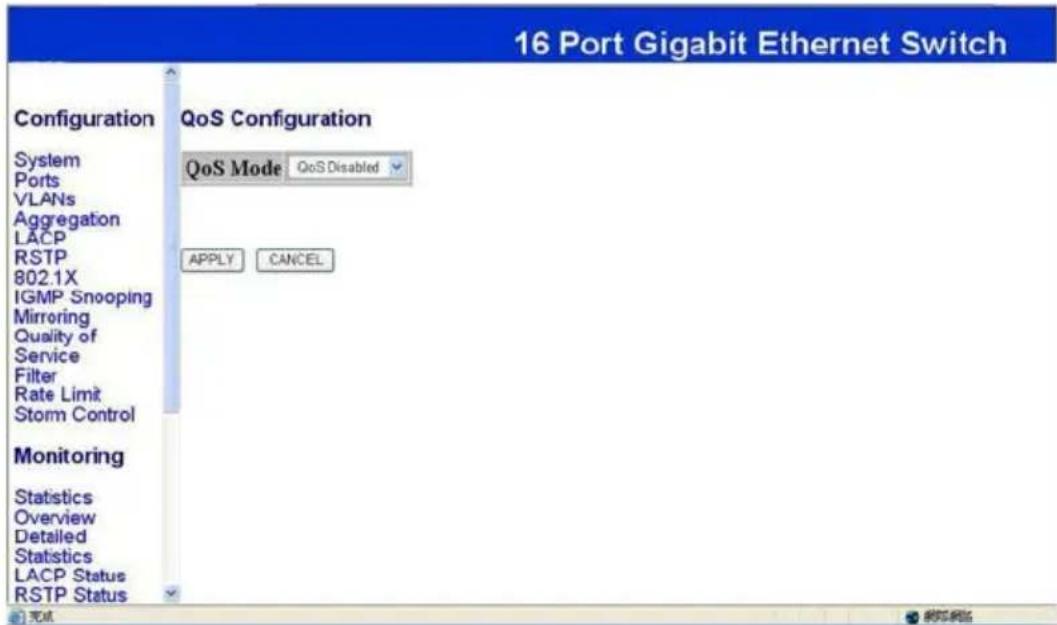
16 Port Gigabit Ethernet Switch Configuration System Ports VLANs Aggregation LACP RSTP 802.1X IGMP Snooping Mirroring Quality of Service Filter Rate Limit Storm Control Monitoring Statistics Overview Detailed Statistics LACP Status RSTP Status QoS Configuration QoS Mode QoS Disabled APPLY CANCEL

You can enable or disable QoS by clicking the checking box. If you enable QoS, you can select the class of service for each port.

Configuration: Filter Configuration
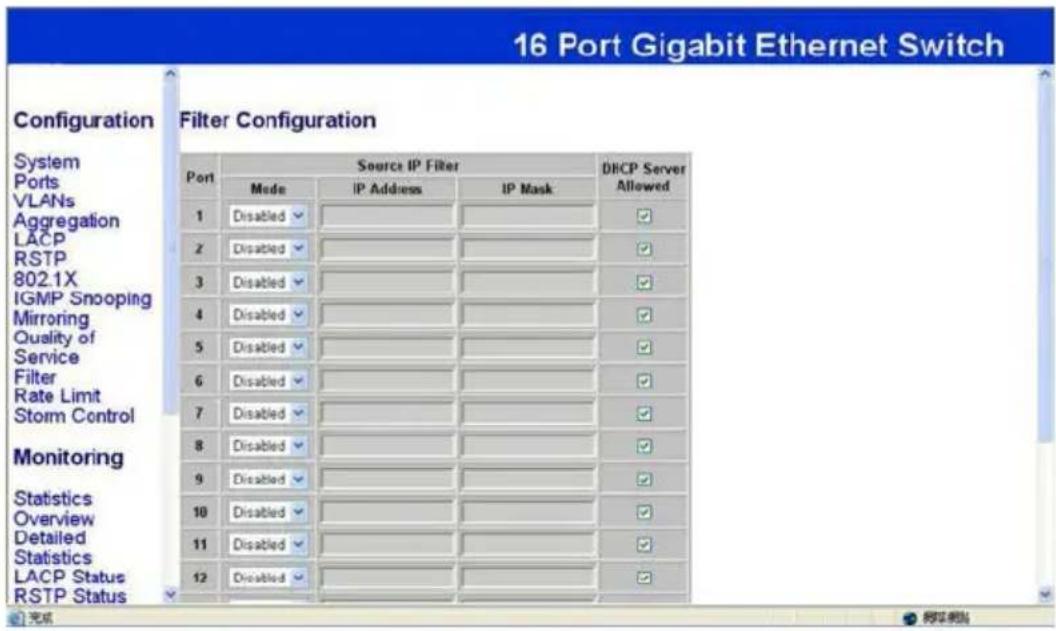
16 Port Gigabit Ethernet Switch Configuration Filter Configuration System Ports VLANs Aggregation LACP RSTP 802.1X IGMP Snooping Mirroring Quality of Service Filter Rate Limit Storm Control Monitoring Statistics Overview Detailed Statistics LACP Status RSTP Status Port Source IP Filter Mode IP Address IP Mask DHCP Server Allowed 1 Disabled 2 Disabled 3 Disabled 4 Disabled 5 Disabled 6 Disabled 7 Disabled 8 Disabled 9 Disabled 10 Disabled 11 Disabled 12 Disabled 完成

Select the "Port no." which you want to configure the mode to enable/disable filtering IP address.

Configuration: Rate Limit Configuration
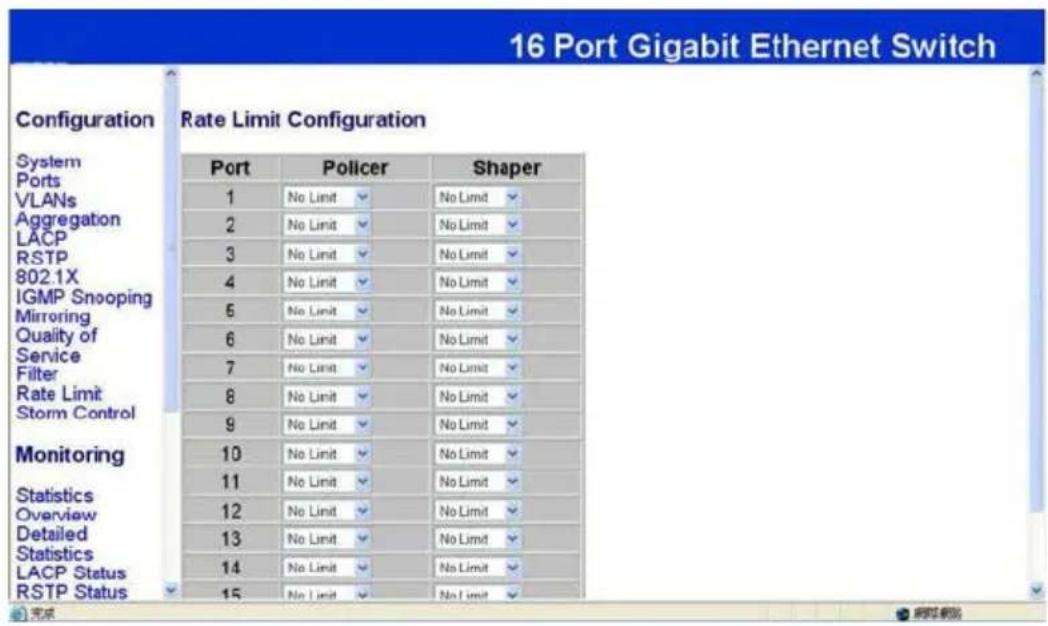
16 Port Gigabit Ethernet Switch Configuration Rate Limit Configuration System Port Policer Shaper VLANs No Limit No Limit Aggregation No Limit No Limit LACP No Limit No Limit RSTP No Limit No Limit 802.1X IGMP Snooping No Limit Mimroring No Limit Quality of No Limit No Limit Service No Limit No Limit Filter No Limit No Limit Rate Limit No Limit Storm Control No Limit Monitoring No Limit Statistics No Limit No Limit Overview No Limit No Limit Detailed No Limit No Limit Statistics No Limit No Limit LACP Status No Limit RSTP Status No Limit

Select the "Port no." which you want to configure the mode of the speed.

Configuration: Storm Control configuration
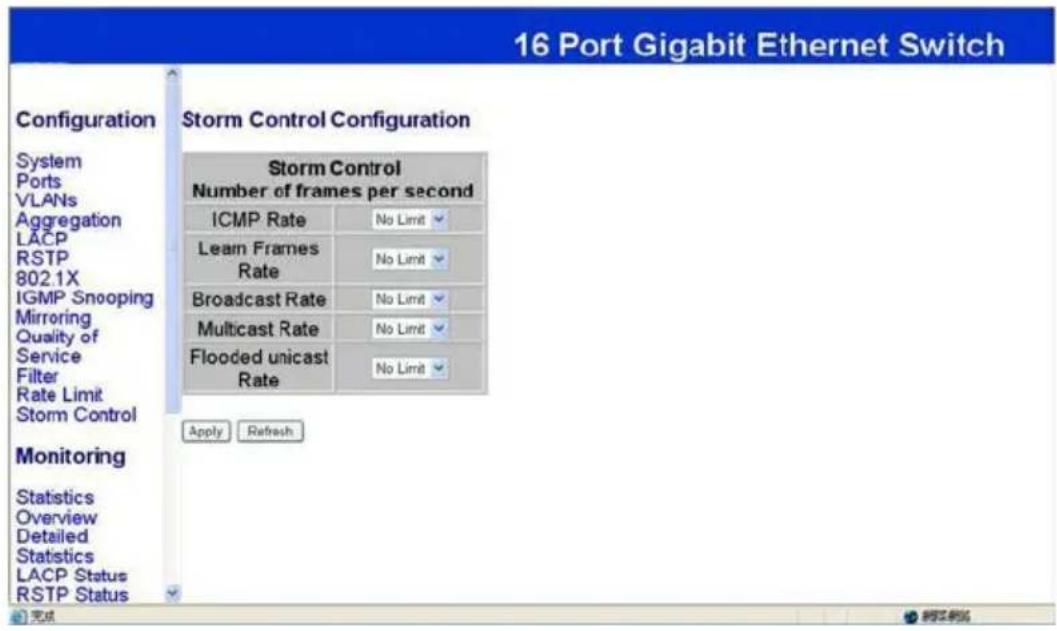
16 Port Gigabit Ethernet Switch Configuration Storm Control Configuration System Ports VLANs Aggregation LACP RSTP 802.1X IGMP Snooping Mirroring Quality of Service Filter Rate Limit Storm Control Monitoring Statistics Overview Detailed Statistics LACP Status RSTP Status Storm Control Number of frames per second ICMP Rate No Limit Learn Frames Rate No Limit Broadcast Rate No Limit Multicast Rate No Limit Flooded unicast Rate No Limit Apply Refresh

You can set up storm control by configuring the modes.

Monitoring: Statistics Overview for All Ports
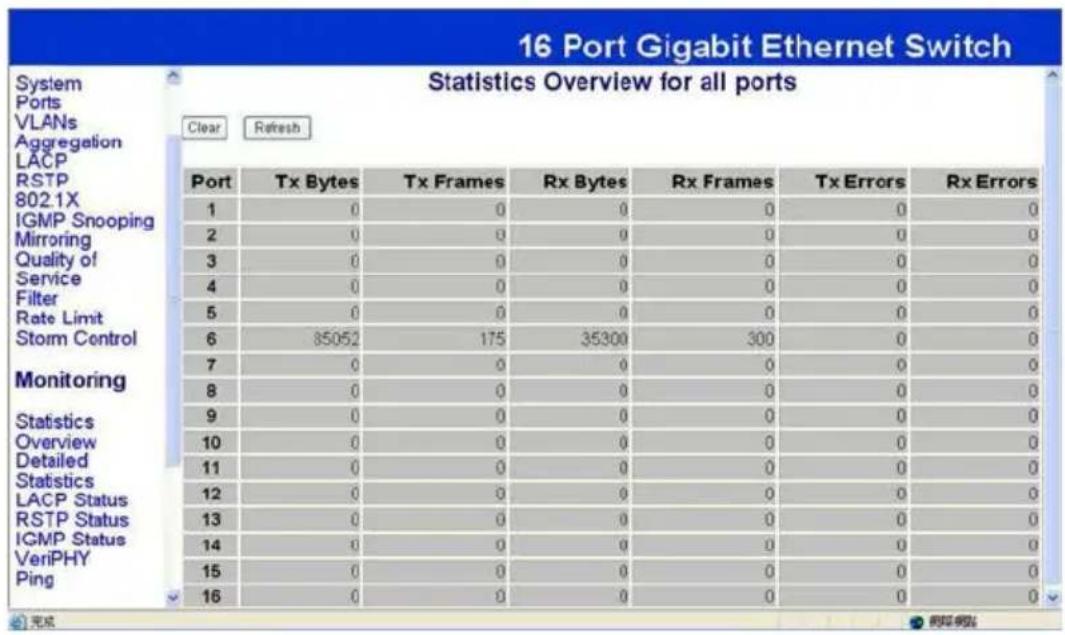
16 Port Gigabit Ethernet Switch System Ports VLANs Aggregation LACP RSTP 802.1X IGMP Snooping Mirroring Quality of Service Filter Rate Limit Storm Control Monitoring Statistics Overview Detailed Statistics LACP Status RSTP Status IGMP Status VeriPHY Ping Clear Refresh Port Tx Bytes Tx Frames Rx Bytes Rx Frames Tx Errors Rx Errors 1 0 0 0 0 0 0 2 0 0 0 0 0 0 3 0 0 0 0 0 0 4 0 0 0 0 0 0 5 0 0 0 0 0 0 6 85052 175 35300 300 0 0 7 0 0 0 0 0 0 8 0 0 0 0 0 0 9 0 0 0 0 0 0 10 0 0 0 0 0 0 11 0 0 0 0 0 0 12 0 0 0 0 0 0 13 0 0 0 0 0 0 14 0 0 0 0 0 0 15 0 0 0 0 0 0 16 0 0 0 0 0 0

You can read statistics for all ports.

Monitoring: Detailed Statistics
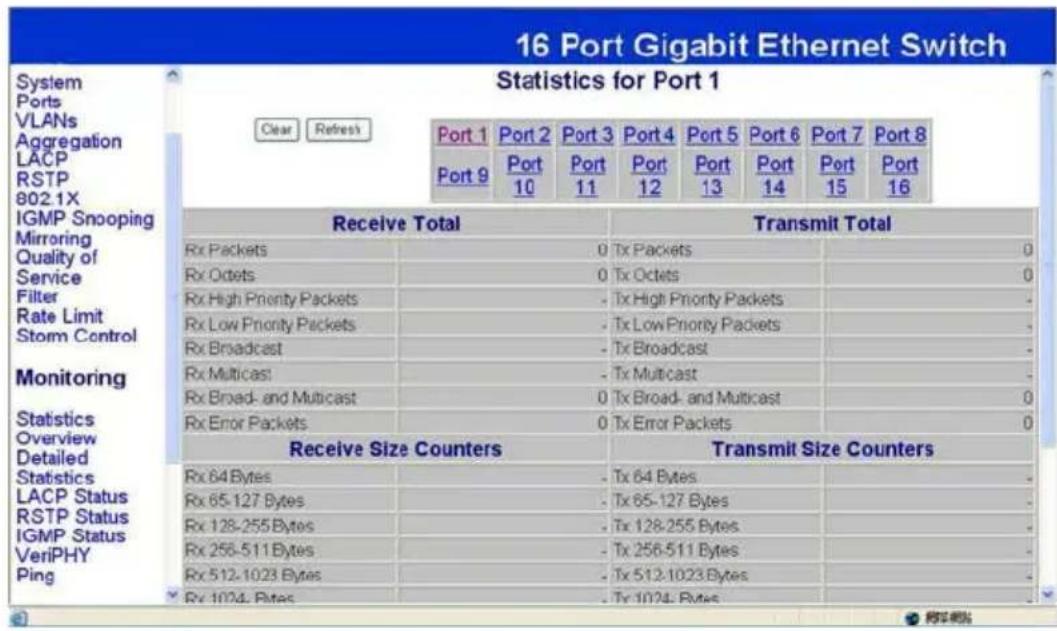
16 Port Gigabit Ethernet Switch Statistics for Port 1 Clear Refresh Port 1 Port 2 Port 3 Port 4 Port 5 Port 6 Port 7 Port 8 Port 9 Port 10 Port 11 Port 12 Port 13 Port 14 Port 15 Port 16 Receive Total Transmit Total Rx Packets 0 Tx Packets 0 Rx Octets 0 Tx Octets 0 Rx High Priority Packets - Tx High Priority Packets - Rx Low Priority Packets - Tx Low Priority Packets - Rx Broadcast - Tx Broadcast - Rx Multicast - Tx Multicast - Rx Broad- and Multicast 0 Tx Broad- and Multicast 0 Rx Error Packets 0 Tx Error Packets 0 Receive Size Counters Transmit Size Counters Rx 64 Bytes - Tx 64 Bytes - Rx 65-127 Bytes - Tx 65-127 Bytes - Rx 128-255 Bytes - Tx 128-255 Bytes - Rx 256-511 Bytes - Tx 256-511 Bytes - Rx 512-1023 Bytes - Tx 512-1023 Bytes - Rx 1024 Bytes - Tx 1024 Bytes -

You can have detailed statistics of all ports which you want to read by clicking the port number.

Monitoring: LACP Status
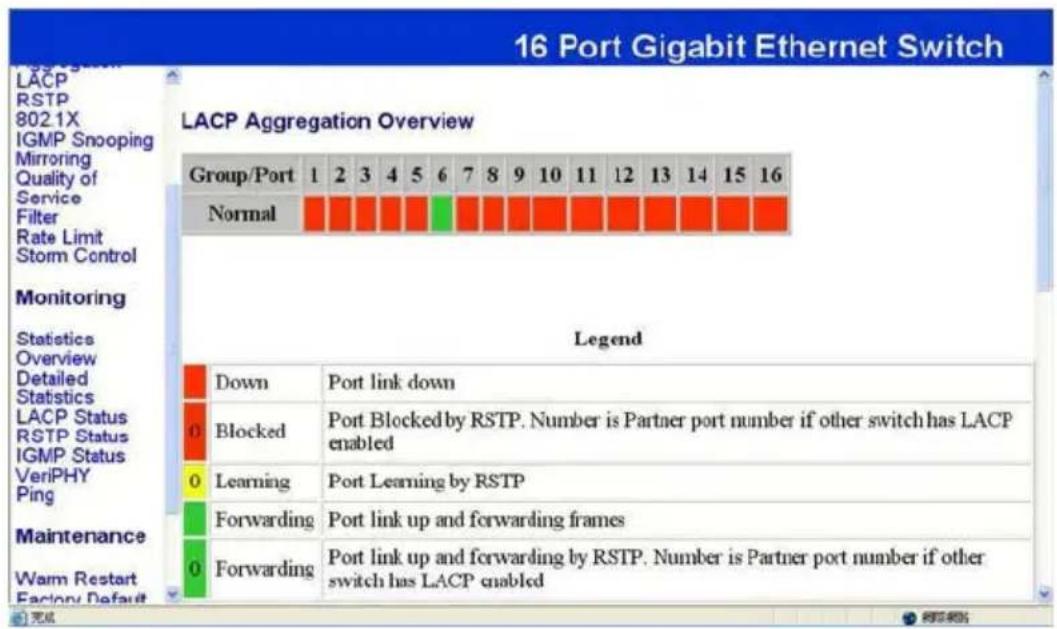
16 Port Gigabit Ethernet Switch LACP Aggregation Overview Group/Port 1 2 3 4 5 6 7 8 9 10 11 12 13 14 15 16 Normal Monitoring Statistics Overview Detailed Statistics LACP Status RSTP Status IGMP Status VeriPHY Ping Maintenance Warm Restart Factory Default Legend Down Port link down 0 Blocked Port Blocked by RSTP. Number is Partner port number if other switch has LACP enabled 0 Learning Port Learning by RSTP Forwarding Port link up and forwarding frames 0 Forwarding Port link up and forwarding by RSTP. Number is Partner port number if other switch has LACP enabled

You can read LACP status for LACP ports.

Monitoring: RSTP Status
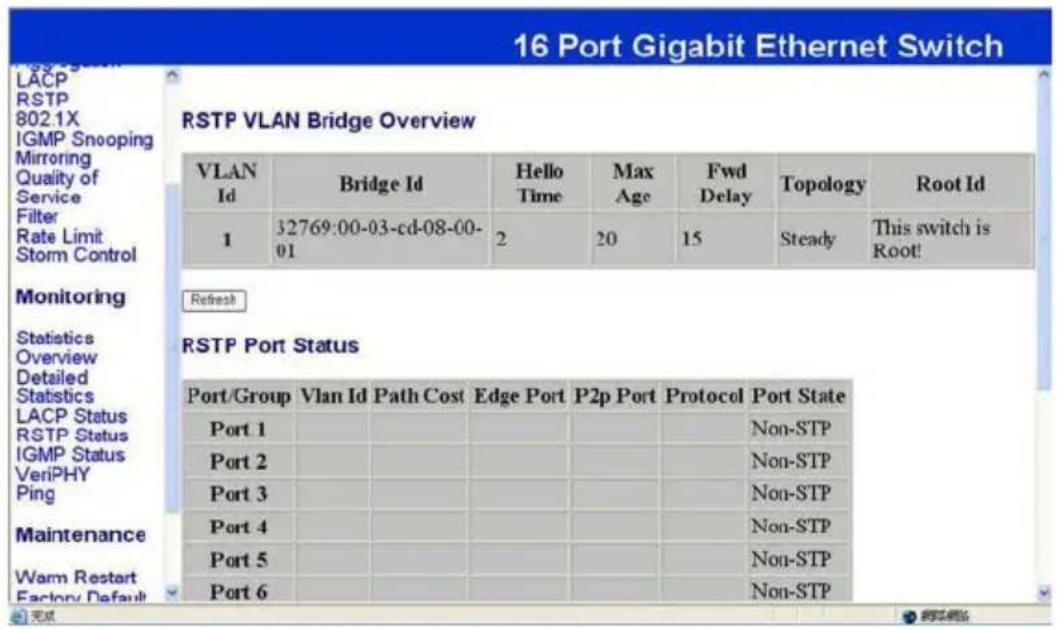
16 Port Gigabit Ethernet Switch LACP RSTP 802.1X IGMP Snooping Mittoring Quality of Service Filter Rate Limit Storm Control Monitoring Statistics Overview Detailed Statistics LACP Status RSTP Status IGMP Status VeriPHY Ping Maintenance Warm Restart Factory Default Port/Group Vlan Id Path Cost Edge Port P2p Port Protocol Port State Port 1 Port 2 Port 3 Port 4 Port 5 Port 6 2769:00-03-cd-08-00- 01 20 15 Steady This switch is Root! Refresh RSTP Port Status Port/Group Vlan Id Path Cost Edge Port P2p Port Protocol Port State Non-STP Non-STP Non-STP Non-STP Non-STP Non-STP

You can read RSTP status for RSTP ports.

Monitoring: IGMP Status
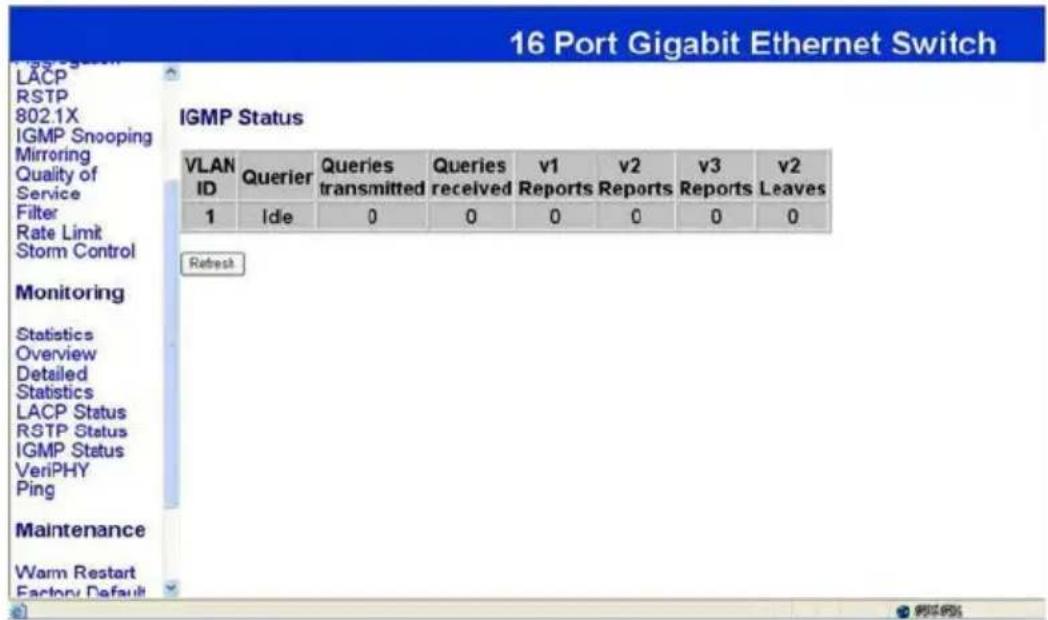
16 Port Gigabit Ethernet Switch LACP RSTP 802.1X IGMP Snooping Mirroring Quality of Service Filter Rate Limit Storm Control Monitoring Statistics Overview Detailed Statistics LACP Status RSTP Status IGMP Status VeriPHY Ping Maintenance Warm Restart Factory Default IGMP Status VLAN ID Querier Queries transmitted Queries received v1 Reports v2 Reports v3 Reports v2 Leaves 1 Idle 0 0 0 0 0 0 0 Refresh

You can read IGMP status for IGMP ports.

Monitoring: VeriPHY Cable Diagnostics

16 Port Gigabit Ethernet Switch LACP RSTP 802.1X IGMP Snooping Mirroring Quality of Service Filter Rate Limit Storm Control Monitoring Statistics Overview Detailed Statistics LACP Status RSTP Status IGMP Status VeriPHY Ping Maintenance Warm Restart Factory Default 完成 VeriPHY Cable Diagnostics Port Port 1 Mode Full Apply Cable Status Pair Length [m] Status A - - B - - C - - D - - *

You can read VeriPHY cable status for all ports which you want to check by clicking the port number and the mode.

Monitoring: Ping Parameters
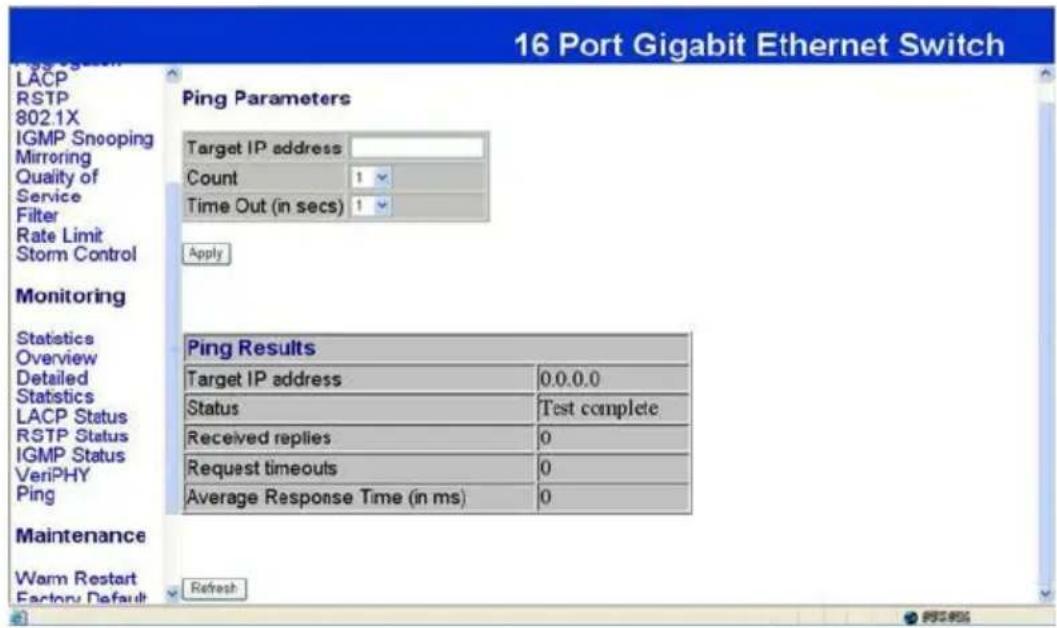
16 Port Gigabit Ethernet Switch LACP RSTP 802.1X IGMP Snooping Mirroring Quality of Service Filter Rate Limit Storm Control Monitoring Statistics Overview Detailed Statistics LACP Status RSTP Status IGMP Status VeriPHY Ping Maintenance Warm Restart Factory Default Peng Parameters Target IP address: Count 1 Time Out (in secs) 1 Apply Ping Results Target IP address 0.0.0.0 Status Test complete Received replies 0 Request timeouts 0 Average Response Time (in ms) 0 Refresh

You can set target IP address by setting the mode which you want.

Monitoring: Warm Restart
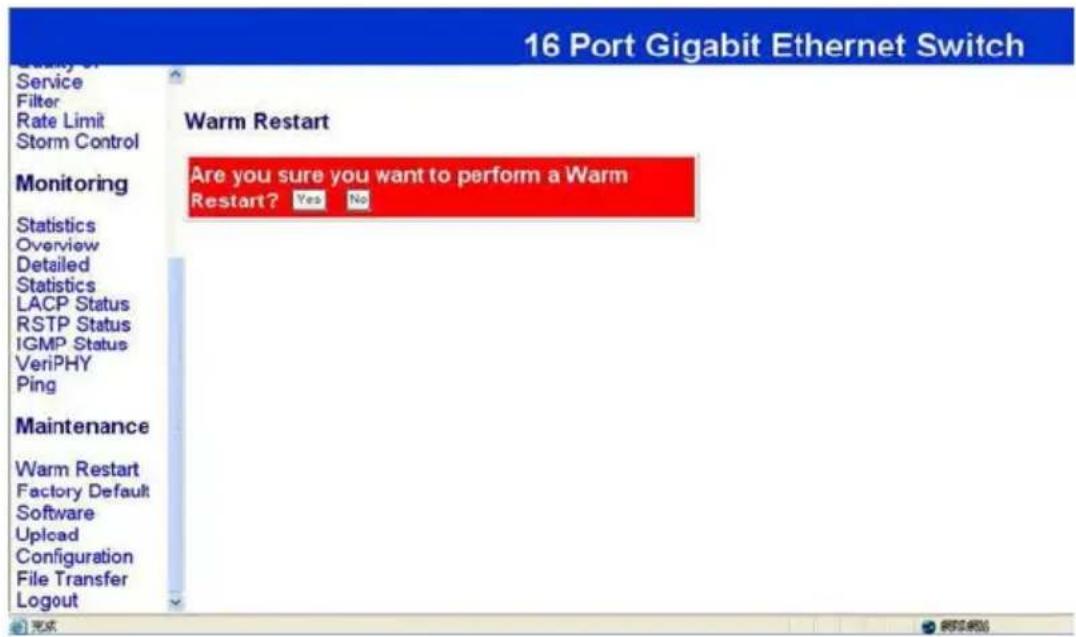
16 Port Gigabit Ethernet Switch Service Filter Rate Limit Storm Control Monitoring Statistics Overview Detailed Statistics LACP Status RSTP Status IGMP Status VeriPHY Ping Maintenance Warm Restart Factory Default Software Upload Configuration File Transfer Logout Warm Restart Are you sure you want to perform a Warm Restart? Yes No

You can select yes/no to do the warm restart, and then the new settings will change according to your selection.

Maintenance: Factory Default
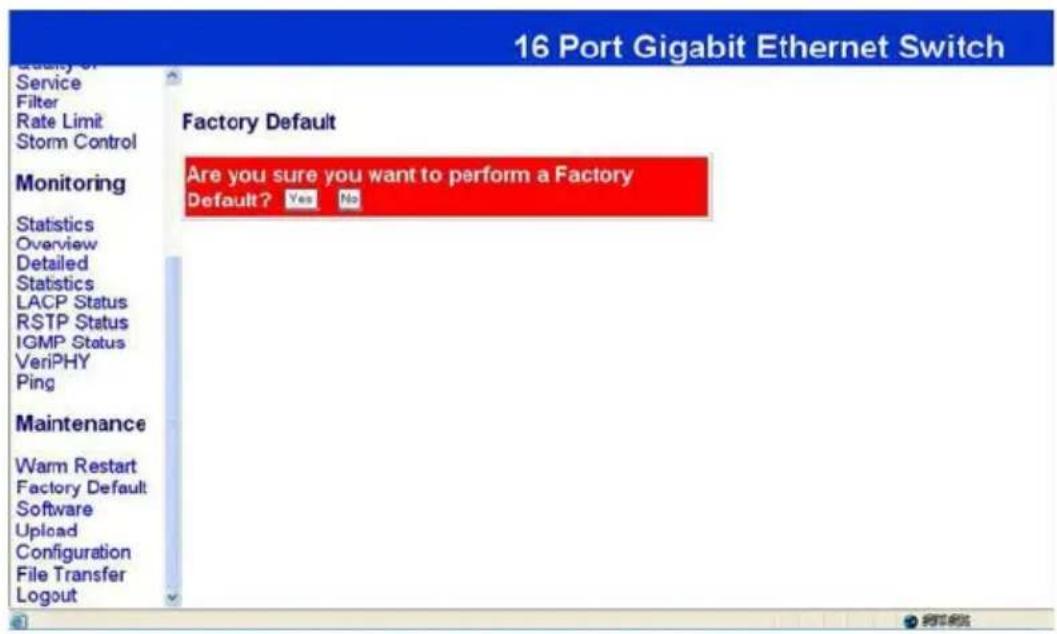
16 Port Gigabit Ethernet Switch Service Filter Rate Limit Storm Control Monitoring Statistics Overview Detailed Statistics LACP Status RSTP Status IGMP Status VeriPHY Ping Maintenance Warm Restart Factory Default Software Upload Configuration File Transfer Logout Factory Default Are you sure you want to perform a Factory Default? Yes No

You can select yes/no to perform a Factory Default, and then the new settings will change according to your selection.

Maintenance: Software Upload
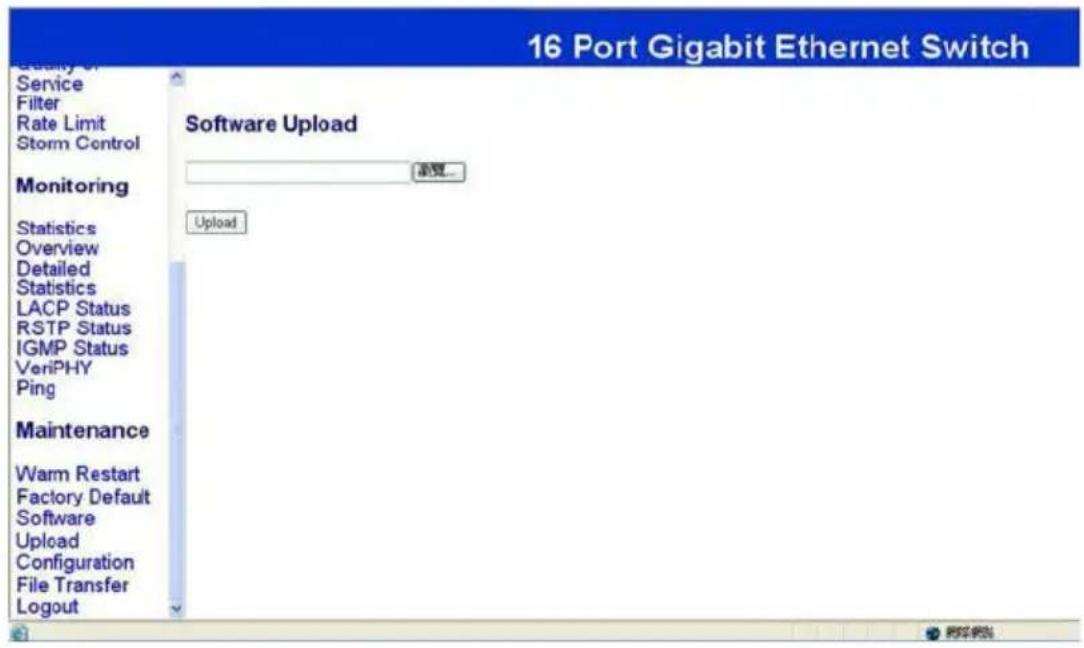
16 Port Gigabit Ethernet Switch Quality Of Service Filter Rate Limit Storm Control Monitoring Statistics Overview Detailed Statistics LACP Status RSTP Status IGMP Status VeriPHY Ping Maintenance Warm Restart Factory Default Software Upload Configuration File Transfer Logout Software Upload 浏览... Upload

Follow the instruction on the screen to upload new software.

Maintenance: Configuration Upload
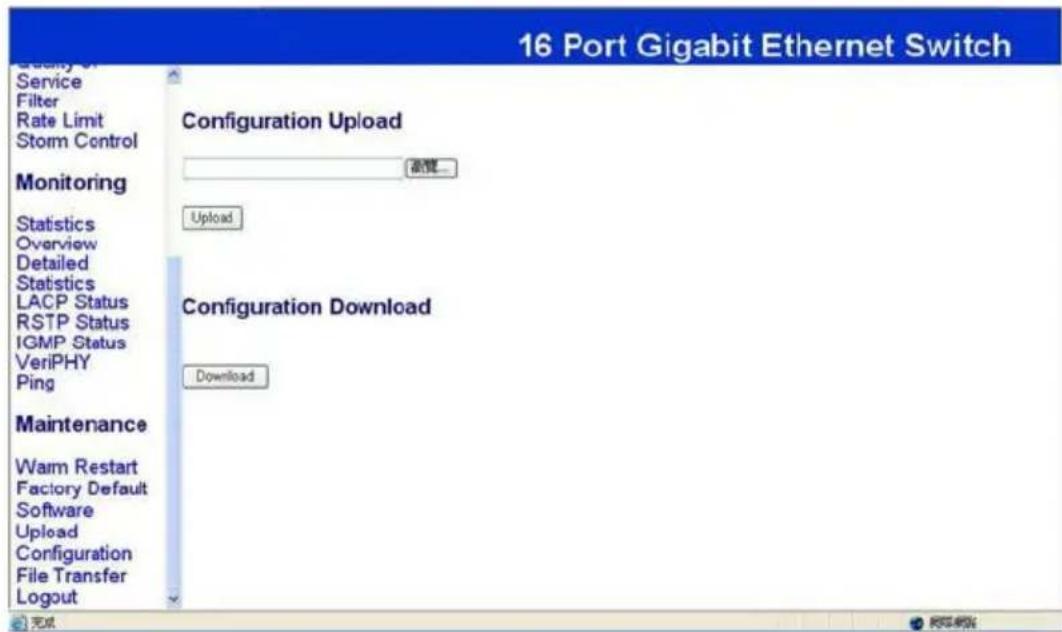
16 Port Gigabit Ethernet Switch Service Filter Rate Limit Storm Control Monitoring Statistics Overview Detailed Statistics LACP Status RSTP Status IGMP Status VeriPHY Ping Maintenance Warm Restart Factory Default Software Upload Configuration File Transfer Logout Configuration Upload 下载... Upload Configuration Download Download 完成

Follow the instruction on the screen to upload and download the configuration.

Logout

Manual assistant
Powered by Anthropic
Waiting for your message
Product information

Brand : Edimax

Model : ES-5160G+ V3

Category : Network switch